Introduction
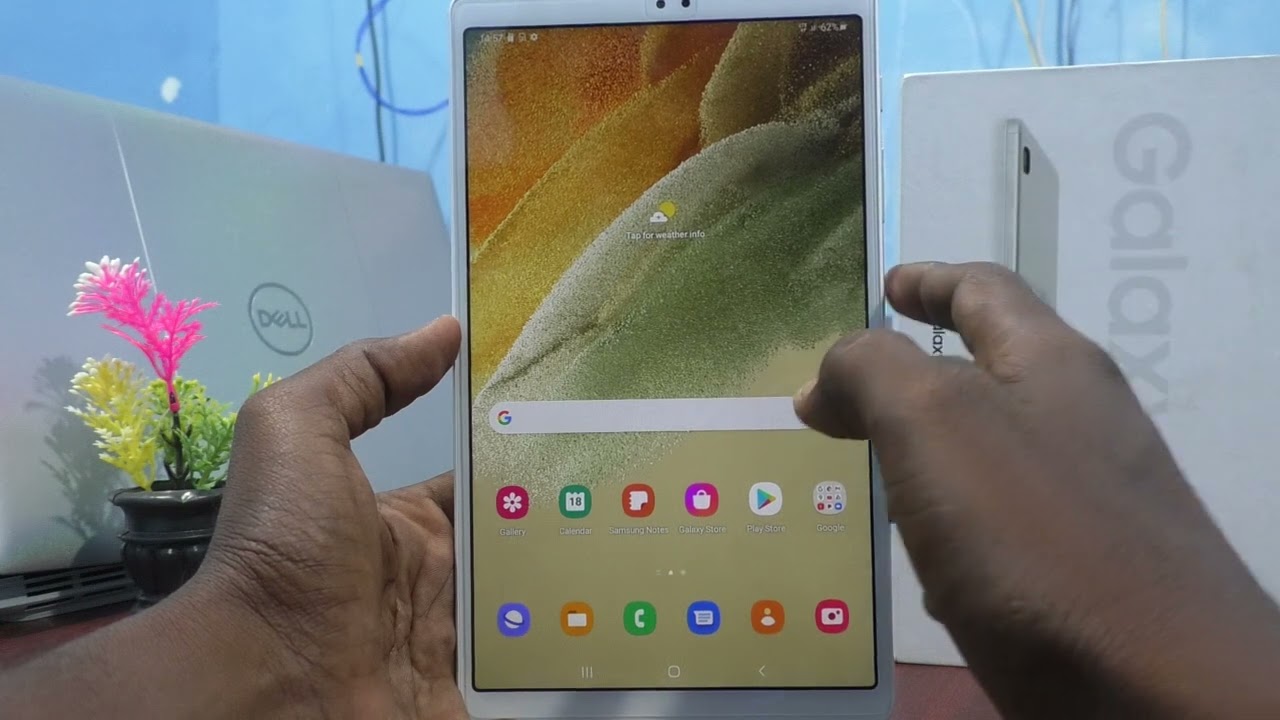
Adding a SIM card to your Galaxy Tab A7 Lite can significantly enhance its functionality, allowing you to stay connected while on the go. Whether you're using your tablet for work, staying in touch with loved ones, or simply browsing the web, a SIM card enables seamless access to mobile networks and data services. By following a few simple steps, you can easily install a SIM card and unlock the full potential of your device.
In this comprehensive guide, we will walk you through the process of adding a SIM card to your Galaxy Tab A7 Lite, providing detailed instructions and helpful tips at each stage. From locating the SIM card tray to ensuring proper recognition of the SIM card by your device, we've got you covered. By the end of this tutorial, you'll have a clear understanding of how to insert a SIM card into your Galaxy Tab A7 Lite with ease.
Let's dive in and explore the step-by-step process of adding a SIM card to your Galaxy Tab A7 Lite, empowering you to make the most of your device's mobile capabilities.
Step 1: Locate the SIM Card Tray
The first step in adding a SIM card to your Galaxy Tab A7 Lite is to locate the SIM card tray. This essential component is designed to securely hold the SIM card and ensure proper connectivity with the device's mobile network. To begin, you'll need to identify the precise location of the SIM card tray on your tablet.
The SIM card tray is typically situated on the side of the device. Start by examining the edges of your Galaxy Tab A7 Lite, looking for a small slot or compartment that is designed to accommodate the SIM card tray. Depending on the specific model of your tablet, the SIM card tray may be located on the left or right side. It's important to handle your device with care and attention during this process to avoid any accidental damage.
Once you've located the SIM card tray, take a moment to familiarize yourself with its appearance and positioning. The tray is usually a small, rectangular component with a tiny pinhole or notch for inserting the SIM ejector tool. This tool is essential for safely removing the SIM card tray without causing any damage to the device or the tray itself.
By identifying the SIM card tray and understanding its physical characteristics, you'll be well-prepared to proceed with the next steps of the SIM card installation process. With the SIM card tray now located, you're ready to move on to the next stage of adding a SIM card to your Galaxy Tab A7 Lite.
Stay tuned for the following steps as we guide you through the complete process of inserting a SIM card into your Galaxy Tab A7 Lite, ensuring that you can seamlessly harness the power of mobile connectivity on your device.
Step 2: Insert the SIM Ejector Tool
With the SIM card tray located, the next crucial step in adding a SIM card to your Galaxy Tab A7 Lite is to insert the SIM ejector tool. This tool is specifically designed to safely and effectively remove the SIM card tray from the device, allowing for seamless access to the SIM card slot.
The SIM ejector tool, often provided by the device manufacturer, is a small, pointed instrument that facilitates the extraction of the SIM card tray without causing any damage to the device or the tray itself. It is important to use the designated SIM ejector tool to ensure a smooth and hassle-free removal process.
To insert the SIM ejector tool, carefully align the pointed end of the tool with the tiny pinhole or notch located near the SIM card tray. Apply gentle pressure as you insert the tool into the pinhole, ensuring that it fits snugly and securely. Take care to maintain a steady hand and avoid using excessive force, as this could potentially cause damage to the device.
As the SIM ejector tool is inserted, you may feel a slight resistance before the tool engages with the internal mechanism of the SIM card tray. This is normal and indicates that the tool is positioned correctly for the next step of the process.
By inserting the SIM ejector tool with precision and care, you are preparing to safely remove the SIM card tray from your Galaxy Tab A7 Lite, setting the stage for the subsequent steps of inserting the SIM card and reassembling the tray within the device.
With the SIM ejector tool securely in place, you are now ready to proceed to the next stage of removing the SIM card tray from your Galaxy Tab A7 Lite, bringing you one step closer to fully integrating the SIM card with your device's mobile capabilities.
Stay tuned for the upcoming steps as we guide you through the complete process of adding a SIM card to your Galaxy Tab A7 Lite, ensuring that you can effortlessly harness the power of mobile connectivity on your device.
Step 3: Remove the SIM Card Tray
After successfully inserting the SIM ejector tool into the designated pinhole or notch, it's time to carefully remove the SIM card tray from your Galaxy Tab A7 Lite. This step is crucial in preparing the tray for the insertion of the SIM card and ensuring a seamless integration with your device's mobile network.
With the SIM ejector tool securely in place, gently apply consistent pressure to the tool, following the specific instructions provided by the device manufacturer. As you do so, you'll notice the SIM card tray gradually disengaging from its position within the device. It's important to exercise caution and avoid any abrupt or forceful movements to prevent any potential damage to the tray or the tablet itself.
As the SIM card tray begins to emerge, continue to guide its movement with steady and controlled actions. The tray should smoothly slide out of the device, revealing the designated slot where the SIM card will be installed. Take note of the orientation of the tray and the position of the SIM card slot to ensure a seamless reinsertion process in the subsequent steps.
Upon successfully removing the SIM card tray, set it aside in a secure and easily accessible location. This will facilitate the next stage of the process, allowing you to prepare the SIM card for insertion without any unnecessary interruptions or delays.
By carefully removing the SIM card tray from your Galaxy Tab A7 Lite, you've completed a crucial step in the process of adding a SIM card to your device. With the tray now accessible and ready for the SIM card, you're well on your way to fully leveraging the mobile capabilities of your tablet.
As we continue through the remaining steps, you'll gain a comprehensive understanding of how to seamlessly integrate the SIM card with your Galaxy Tab A7 Lite, empowering you to stay connected and productive while on the go.
Stay tuned for the upcoming steps as we guide you through the complete process of adding a SIM card to your Galaxy Tab A7 Lite, ensuring that you can effortlessly harness the power of mobile connectivity on your device.
Step 4: Insert the SIM Card
With the SIM card tray successfully removed from your Galaxy Tab A7 Lite, it's time to proceed with the pivotal step of inserting the SIM card. This process involves carefully placing the SIM card into the designated slot within the tray, ensuring proper alignment and orientation for seamless integration with your device's mobile network.
Begin by locating the SIM card slot within the SIM card tray. The slot is specifically designed to accommodate the SIM card, providing a secure and stable connection once inserted. Take a moment to inspect the slot, noting any guiding markers or indicators that may assist in aligning the SIM card correctly.
Next, retrieve the SIM card from its packaging or storage, handling it with care to avoid any damage to the delicate components. Before proceeding, it's essential to identify the correct orientation of the SIM card. Most SIM cards are designed with a notched corner or specific markings that correspond to the alignment requirements of the slot.
Carefully position the SIM card above the designated slot, ensuring that the notched corner or designated markings are aligned with the corresponding indicators within the slot. With steady and controlled movements, gently lower the SIM card into the slot, allowing it to fit snugly and securely within the tray.
As the SIM card is inserted, you may feel a subtle click or resistance, indicating that it has been properly seated within the slot. Take a moment to verify that the SIM card is flush with the surface of the tray, with no protruding edges or misalignment that could hinder the reinsertion process.
With the SIM card now securely in place within the tray, you have successfully completed the crucial step of inserting the SIM card into your Galaxy Tab A7 Lite. This milestone brings you one step closer to fully integrating the SIM card with your device's mobile capabilities, enabling seamless access to mobile networks and data services.
As we progress to the next stage, you'll gain valuable insights into reinserting the SIM card tray and ensuring proper recognition of the SIM card by your Galaxy Tab A7 Lite. By following these detailed steps, you'll be well-equipped to make the most of your device's mobile connectivity, staying connected and productive wherever your journey takes you.
Step 5: Reinsert the SIM Card Tray
With the SIM card securely inserted into the tray, the next crucial step is to reinsert the SIM card tray back into your Galaxy Tab A7 Lite. This step is essential to ensure that the SIM card is properly aligned with the device's internal components, allowing for seamless recognition and connectivity with the mobile network.
Begin by carefully aligning the SIM card tray with the corresponding slot on your tablet. Take note of the orientation of the tray to ensure that it is positioned correctly for reinsertion. It's important to handle the tray with care, avoiding any abrupt movements that could potentially dislodge the SIM card or cause damage to the device.
Once the tray is aligned with the slot, gently guide it back into the device, ensuring a smooth and steady insertion. Take care to maintain a firm yet gentle pressure as you reinsert the tray, allowing it to seamlessly integrate with the tablet's framework. You may feel a subtle resistance as the tray returns to its original position, indicating that it is securely in place.
As the SIM card tray is reinserted, take a moment to verify that it sits flush with the device's surface, with no protruding edges or misalignment. This visual inspection ensures that the tray is properly seated within the device, setting the stage for the final step of the SIM card installation process.
By successfully reinserting the SIM card tray, you have completed a crucial stage in the process of adding a SIM card to your Galaxy Tab A7 Lite. With the tray securely back in place, you're now ready to proceed to the final step of checking for SIM card recognition and ensuring seamless connectivity with the mobile network.
As we approach the culmination of the SIM card installation process, you're on the brink of fully integrating the SIM card with your Galaxy Tab A7 Lite, unlocking its complete potential for mobile connectivity and data services. Stay tuned for the upcoming step, where we'll guide you through the final verification process, ensuring that your device recognizes the SIM card and enables seamless access to mobile networks.
Step 6: Check for SIM Card Recognition
After reinserting the SIM card tray into your Galaxy Tab A7 Lite, it's crucial to verify that your device recognizes the newly added SIM card. This step ensures that your tablet can seamlessly connect to the mobile network, enabling you to make calls, send messages, and access mobile data without any issues. Checking for SIM card recognition is a vital part of the SIM card installation process, as it validates the successful integration of the SIM card with your device's internal components.
To begin the verification process, power on your Galaxy Tab A7 Lite and allow it to initialize. Once the device is fully powered up, navigate to the settings menu, typically represented by a gear icon, and select the "Network & Internet" or "Connections" option, depending on your device's specific interface. Within the network settings, you should find the "SIM card" or "Mobile network" section, which provides essential information about the status of your SIM card and its connectivity.
Upon accessing the SIM card settings, your device should display relevant details such as the network operator, signal strength, and mobile data status associated with the inserted SIM card. Take a moment to review this information, ensuring that the network operator corresponds to your SIM card provider and that the signal strength indicates a stable and reliable connection to the mobile network.
In addition to reviewing the network settings, you can also test the functionality of the SIM card by placing a test call or sending a text message. Initiating these basic communication activities allows you to confirm that the SIM card is fully recognized by your device and capable of facilitating voice calls and messaging services. Furthermore, you can verify the availability of mobile data by attempting to access websites or online services using the mobile network connection.
By actively engaging with the SIM card's functionalities and reviewing the associated network settings, you can confidently ascertain whether your Galaxy Tab A7 Lite recognizes the newly added SIM card. This verification process is essential for ensuring that your device seamlessly integrates with the mobile network, enabling you to stay connected and productive while on the go.
As you complete the final step of checking for SIM card recognition, you've successfully navigated through the comprehensive process of adding a SIM card to your Galaxy Tab A7 Lite. With the SIM card fully recognized and seamlessly integrated with your device, you're now empowered to harness the complete potential of mobile connectivity, staying connected and productive wherever your journey takes you.
Conclusion
Congratulations! You have successfully completed the process of adding a SIM card to your Galaxy Tab A7 Lite, unlocking its full potential for mobile connectivity and data services. By following the step-by-step instructions provided in this comprehensive guide, you've gained valuable insights into seamlessly integrating a SIM card with your device, empowering you to stay connected and productive while on the go.
As you've navigated through the process, you've located the SIM card tray, safely inserted the SIM ejector tool, removed the tray, inserted the SIM card, reinserted the tray, and verified the SIM card recognition. Each step has been meticulously outlined to ensure a smooth and hassle-free experience, allowing you to make the most of your tablet's mobile capabilities.
With the SIM card now seamlessly integrated with your Galaxy Tab A7 Lite, you can enjoy a wide range of benefits, including making voice calls, sending text messages, and accessing mobile data services. Whether you're using your tablet for work, staying in touch with friends and family, or browsing the web, the added SIM card expands the versatility of your device, enabling you to stay connected wherever you are.
It's important to note that the successful addition of a SIM card to your Galaxy Tab A7 Lite opens up opportunities for enhanced productivity and convenience. You can take advantage of mobile data to access online resources, stay updated with the latest information, and engage in seamless communication while on the move. This level of connectivity empowers you to maintain your workflow and stay connected with the world around you, all from the convenience of your tablet.
As you continue to explore the capabilities of your Galaxy Tab A7 Lite with the newly added SIM card, remember to leverage the diverse range of mobile applications and services available to enhance your experience. Whether it's accessing email on the go, participating in video calls, or staying updated with social media, your tablet becomes a powerful tool for staying connected and informed.
By following the detailed steps outlined in this guide, you've not only added a SIM card to your Galaxy Tab A7 Lite but also gained valuable knowledge about the process, empowering you to confidently manage your device's mobile connectivity in the future. With this newfound expertise, you're well-equipped to make the most of your tablet's capabilities and seamlessly integrate it into your mobile lifestyle.
As you embark on your journey with the enhanced mobile connectivity of your Galaxy Tab A7 Lite, embrace the convenience and flexibility that come with staying connected on your terms. Whether you're working, exploring, or simply staying in touch, your tablet is now a reliable companion for all your mobile needs.
Enjoy the seamless connectivity and productivity that your Galaxy Tab A7 Lite offers, and make the most of every moment with the power of mobile connectivity at your fingertips.


