Introduction
When using the Zelle feature on your Chase account, you might want to manage your list of recipients by removing individuals you no longer need to send money to. Deleting a Zelle recipient on Chase is a straightforward process that can be completed through your online banking account. Whether you want to declutter your recipient list or ensure the security of your transactions, removing a recipient is a simple task. In this guide, we will walk you through the step-by-step process of deleting a Zelle recipient from your Chase account.
Zelle is a popular peer-to-peer payment service that allows you to send and receive money quickly and securely. By linking your Chase account with Zelle, you can easily transfer funds to family, friends, and businesses without the need for cash or checks. However, as your list of recipients grows over time, you may find it necessary to trim down the number of people listed in order to keep things organized and reduce any potential confusion.
Whether you are removing a recipient due to a change in personal circumstances, a business relationship ending, or simply decluttering your list, Chase provides a user-friendly interface to manage your Zelle recipients. So, let’s dive into the simple steps to delete a Zelle recipient from your Chase account.
Step 1: Log in to your Chase account
The first step in deleting a Zelle recipient from your Chase account is to log in to your online banking account. Open your preferred web browser and visit the Chase website. On the homepage, you will find the login area where you can enter your username and password. If you don’t have an account yet, you will need to sign up for online banking with Chase before proceeding.
Once you have entered your login credentials, click on the “Sign In” button. This will securely authenticate your account and grant you access to your Chase online banking dashboard. It’s important to ensure that you have a stable internet connection to avoid any interruptions during the login process.
If you prefer to manage your Zelle recipients using the Chase mobile app, you will need to download and install the app on your smartphone or tablet. Once installed, launch the app and enter your login details. The procedure for deleting a Zelle recipient is similar on both the website and app interfaces.
Logging in to your Chase account is crucial as it provides you with the necessary access to navigate to the specific section where you can manage your Zelle recipients. Now that you have successfully logged in to your account, you are ready to proceed to the next step.
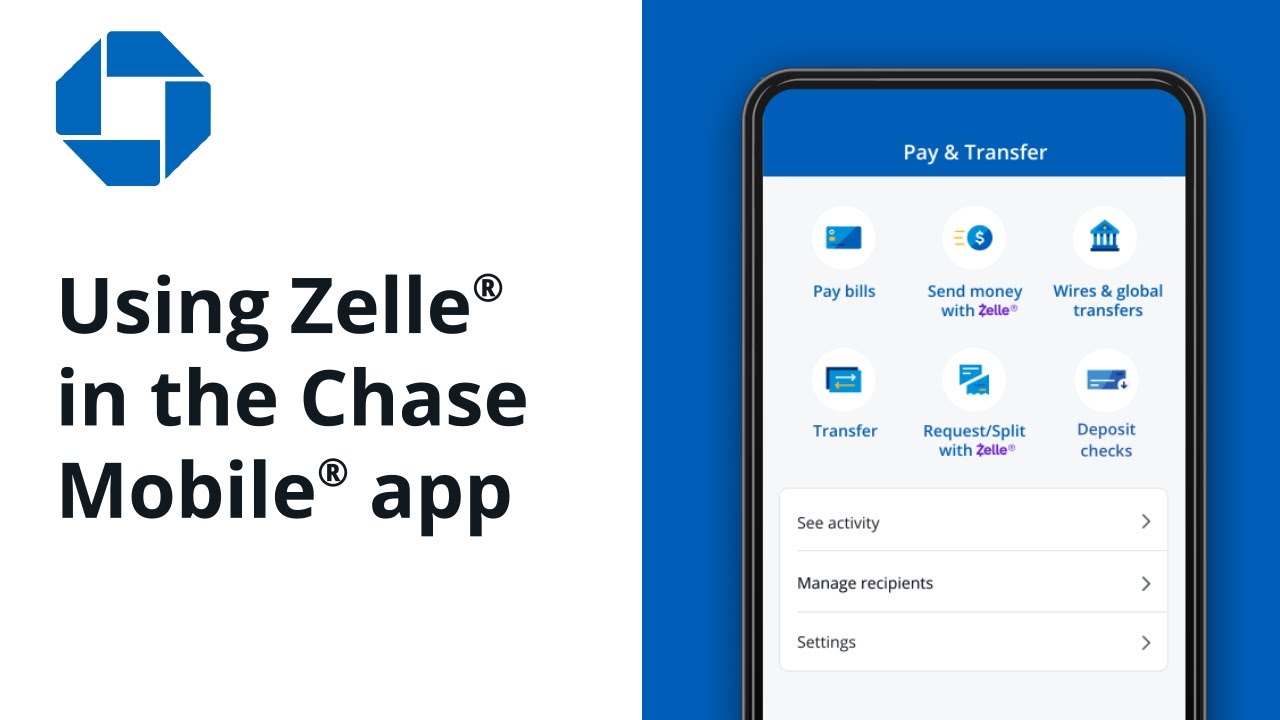
Step 2: Navigate to the “Pay & Transfer” section
After logging in to your Chase account, the next step in deleting a Zelle recipient is to navigate to the “Pay & Transfer” section. This section contains all the tools and features related to transferring money and managing your recipients.
On the Chase website, you can find the “Pay & Transfer” section in the main navigation menu. Simply hover over the “Pay & Transfer” option or click on it directly, and a dropdown menu will appear. The dropdown menu will display various options such as “Pay Bills,” “Transfer Money,” and “Manage Recipients.” Click on the “Manage Recipients” option in the dropdown menu to proceed.
If you are using the Chase mobile app, you can find the “Pay & Transfer” section on the bottom navigation bar. Tap on the “Pay & Transfer” icon, and it will open a new screen with different options. Look for the “Manage Recipients” option among the available choices, and tap on it to proceed.
Navigating to the “Pay & Transfer” section is a crucial step as it brings you closer to the specific area where you can manage your Zelle recipients. Now that you have successfully reached the “Manage Recipients” page, you are ready to move on to the next step and delete the recipient you no longer need.
Step 3: Select the “Zelle” option
Once you have reached the “Manage Recipients” page, the next step is to select the “Zelle” option. This will allow you to view and manage all the recipients you have set up for Zelle payments on your Chase account.
On the Chase website, after navigating to the “Manage Recipients” page, you will see a list of different options for managing recipients. Look for the option labeled “Zelle” and click on it. This will display a list of all the recipients you have added for Zelle payments.
If you are using the Chase mobile app, after tapping on the “Manage Recipients” option in the “Pay & Transfer” section, you will be taken to a new screen. Look for the “Zelle” option among the available choices and tap on it. This will show you a list of your Zelle recipients.
By selecting the “Zelle” option, you are specifically choosing to manage the recipients you have added for Zelle transactions. This step ensures that you are in the right section to proceed with the deletion process. Now that you have selected the “Zelle” option, you can move on to the next step and locate the recipient you wish to delete.
Step 4: Choose “Send Money with Zelle” from the dropdown menu
After selecting the “Zelle” option, the next step in deleting a Zelle recipient from your Chase account is to choose “Send Money with Zelle” from the dropdown menu. This will redirect you to the page where you can manage your Zelle recipients.
On the Chase website, upon selecting the “Zelle” option, you may see a dropdown menu or a new page that displays different Zelle-related features. Look for the option labeled “Send Money with Zelle” and click on it to proceed.
If you are using the Chase mobile app, after selecting the “Zelle” option, you may be taken directly to a new screen that shows your Zelle recipients. Look for the option labeled “Send Money with Zelle” and tap on it to continue.
Choosing “Send Money with Zelle” from the dropdown menu is an important step as it takes you to the specific page where you can manage your Zelle recipients. This page provides you with the necessary tools and options to delete the recipient you no longer need. Now that you have successfully chosen “Send Money with Zelle” from the dropdown menu, you can proceed to the next step and locate the recipient you wish to delete.
Step 5: Locate the recipient you want to delete
Once you have reached the page where you can manage your Zelle recipients, the next step is to locate the specific recipient that you want to delete. This allows you to focus on removing the intended recipient from your list.
On the Chase website, you will see a list of your Zelle recipients. Scroll through the list or use the search bar provided to locate the recipient you wish to delete. You can search by the recipient’s name, email address, or phone number to quickly find the person you want to remove.
If you are using the Chase mobile app, you will also see a list of your Zelle recipients. Swipe up or down to scroll through the list, or use the search function at the top of the screen to find the recipient by name, email address, or phone number.
Take your time to locate the recipient you want to delete and ensure that you have identified the correct person. It’s important to verify the recipient’s information to avoid accidentally deleting the wrong entry. Once you have successfully located the recipient you wish to remove, you can proceed to the next step and initiate the deletion process.
Step 6: Click on the recipient’s name
After locating the recipient you want to delete from your Zelle recipients list, the next step is to click on the recipient’s name. This will allow you to access the recipient’s details and proceed with deleting them from your Chase account.
On the Chase website, you will see the recipient’s name displayed in the list of Zelle recipients. Simply click on the recipient’s name to proceed to the next step. This will open a new page or a pop-up window where you can view and manage the recipient’s information.
If you are using the Chase mobile app, similarly, you will need to tap on the recipient’s name in the list of Zelle recipients. Tapping on the name will take you to a new screen where you can access the recipient’s details and make changes.
By clicking on the recipient’s name, you ensure that you are selecting the correct entry for deletion. This step allows you to review the recipient’s information and confirm your decision before finalizing the deletion. Now that you have successfully clicked on the recipient’s name, you can proceed to the next step and confirm the recipient’s details.
Step 7: Confirm the recipient’s details
Once you have clicked on the recipient’s name, the next step in deleting a Zelle recipient from your Chase account is to confirm the recipient’s details. This allows you to double-check that you have selected the correct entry for deletion.
On the Chase website, you will be taken to a new page or a pop-up window where you can view the recipient’s information. Take a moment to review the details such as the recipient’s name, email address, or phone number to ensure that it matches the person you intend to delete.
If you are using the Chase mobile app, you will also be directed to a screen that displays the recipient’s information. Scroll through the details and verify that they correspond to the correct recipient you wish to remove.
Confirming the recipient’s details is an important step to prevent any accidental deletions. It ensures that you are taking the correct action and removing the intended recipient from your Zelle list. Once you have verified the recipient’s information for accuracy, you can proceed to the next step and initiate the deletion process.
Step 8: Delete the recipient
After confirming the recipient’s details, the final step in deleting a Zelle recipient from your Chase account is to initiate the deletion process. With just a few clicks, you can remove the recipient from your list and ensure that they no longer appear as an option for sending money with Zelle.
On the Chase website, look for the option or button that allows you to delete the recipient. It may be labeled as “Delete,” “Remove,” or a similar term. Click on this option to proceed with deleting the recipient. You may be asked to confirm your action, so make sure to read any prompts or messages that appear on the screen.
If you are using the Chase mobile app, look for the delete button or icon next to the recipient’s details. It is usually represented by a trash bin or a similar symbol. Tap on this icon to initiate the deletion process. Like on the website, you may be prompted to confirm your action before the recipient is permanently removed.
Deleting the recipient is the final step in the process, and once completed, the chosen recipient will no longer be listed as an option for sending money with Zelle. This action provides a cleaner and more organized recipient list for your future transactions. Congratulations! You have successfully deleted the Zelle recipient from your Chase account.
Conclusion
Deleting a Zelle recipient from your Chase account is a simple and straightforward process that can be done through your online banking account. By following the step-by-step instructions outlined in this guide, you can easily remove recipients you no longer need or want to send money to.
Zelle provides a convenient way to send and receive money quickly and securely, and managing your recipient list can help keep things organized and efficient. Whether you’re decluttering your list, ensuring the security of your transactions, or ending a business relationship, deleting a Zelle recipient on Chase is a breeze.
Remember to log in to your Chase account, navigate to the “Pay & Transfer” section, select “Zelle,” and choose “Send Money with Zelle.” Locate the recipient you want to delete, click on their name, confirm their details, and finally initiate the deletion process. Double-check that you have chosen the correct recipient before proceeding with the deletion to avoid any unintended removals.
By following these steps, you will have a streamlined Zelle recipient list that reflects your current needs and preferences. Deleting recipients you no longer require ensures that your transactions are smoother and that you have an up-to-date record of your active contacts.
We hope this guide has been helpful in guiding you through the process of deleting a Zelle recipient from your Chase account. Enjoy the ease and flexibility of managing your money with Zelle and Chase!