Introduction
Welcome to the world of Ethereum! If you’re new to the cryptocurrency scene, you may be wondering what Ethereum is and why you need an Ethereum address. In this article, we will explore the basics of Ethereum and guide you through the process of creating your own Ethereum address.
Ethereum is not just a cryptocurrency like Bitcoin; it is also a platform that enables the creation of decentralized applications (DApps) and the execution of smart contracts. It was created by Vitalik Buterin in 2015 and has gained immense popularity due to its advanced features and potential for innovation.
Now, you may be wondering why you need an Ethereum address. Well, an Ethereum address serves as your unique identifier on the Ethereum network. It allows you to send and receive Ether (the native cryptocurrency of Ethereum) and interact with DApps and smart contracts.
Whether you’re looking to participate in ICOs (Initial Coin Offerings), trade cryptocurrencies, or simply utilize Ethereum-based services, having an Ethereum address is essential.
In the following sections, we will guide you through the process of creating an Ethereum wallet and generating your Ethereum address. But before we dive into that, it’s important to choose a reputable Ethereum wallet provider that suits your needs. Let’s get started!
What is Ethereum?
Ethereum is a decentralized, open-source blockchain platform that allows developers to build and deploy smart contracts and decentralized applications (DApps). It was conceptualized by Vitalik Buterin in late 2013 and officially released in 2015.
While Bitcoin revolutionized the concept of digital currency, Ethereum took it a step further by introducing a programmable blockchain. It enables developers to create and execute smart contracts, which are self-executing contracts with the terms and conditions directly written into the code.
Ethereum’s native cryptocurrency is called Ether (ETH). It is used as fuel to power the network and execute smart contracts. Ether can also be transferred between accounts and used as a store of value.
What sets Ethereum apart from Bitcoin and other cryptocurrencies is its ability to facilitate the development of decentralized applications. These applications operate on the Ethereum blockchain, providing users with unique functionalities, such as decentralized finance (DeFi), gaming, decentralized exchanges (DEXs), and more.
The Ethereum Virtual Machine (EVM) is the runtime environment for smart contracts on the Ethereum network. It allows developers to write code in several programming languages and deploy it as a smart contract on the blockchain. The EVM ensures that the code runs in a secure and predictable manner, guaranteeing the integrity of the decentralized applications.
One of the key advantages of Ethereum is its flexibility and scalability. Developers can customize their decentralized applications according to their specific needs and deploy them quickly. The Ethereum network also has plans to transition from a proof-of-work (PoW) consensus algorithm to a proof-of-stake (PoS) algorithm, known as Ethereum 2.0. This upgrade aims to increase scalability, security, and energy efficiency.
Ethereum has had a significant impact on the blockchain industry, paving the way for the development of innovative and disruptive applications. Its capabilities extend far beyond simple financial transactions, offering a decentralized platform for various industries and use cases.
In the next section, we will explore the reasons why you need an Ethereum address and the steps involved in creating one.
Why do I need an Ethereum address?
If you want to engage with the Ethereum blockchain and take advantage of its features, you need an Ethereum address. Here are a few reasons why having an Ethereum address is essential:
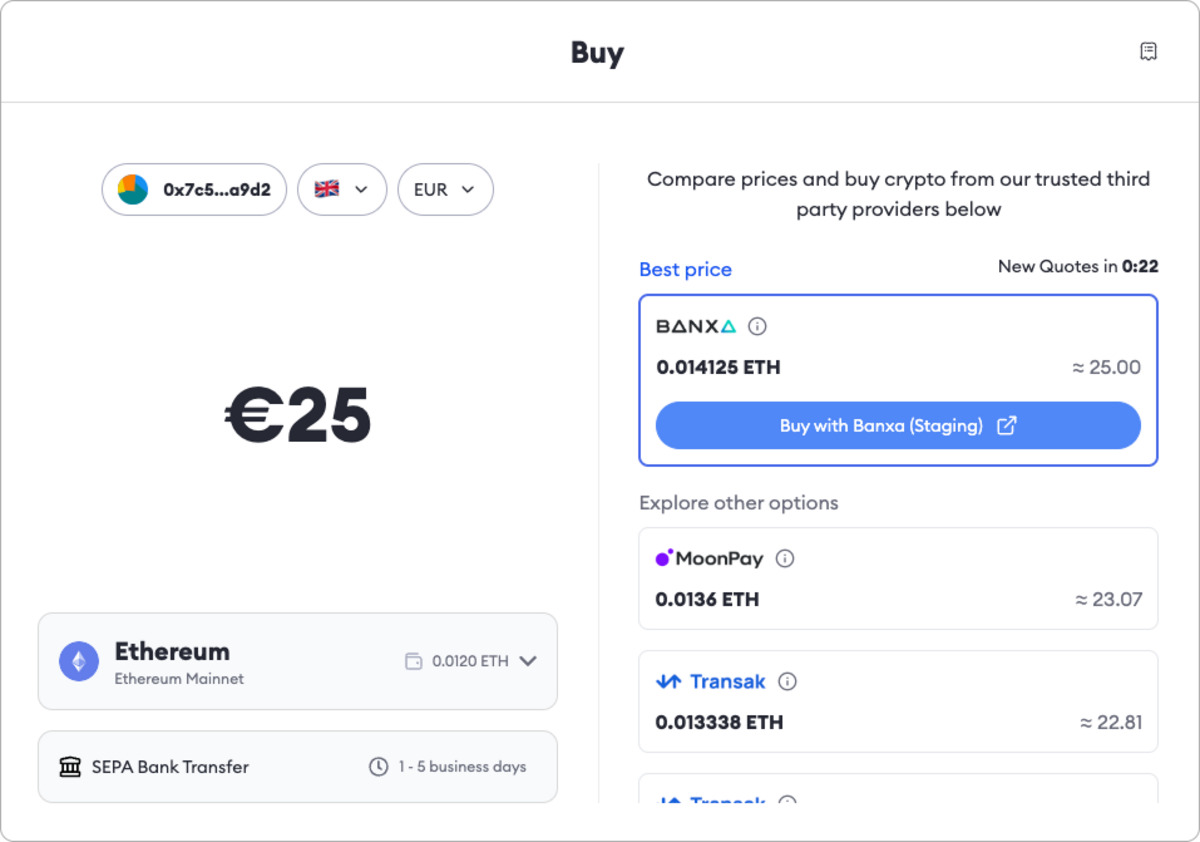
1. Send and receive Ether (ETH): An Ethereum address allows you to send and receive Ether, the native cryptocurrency of the Ethereum network. Whether you’re buying and selling Ether, participating in ICOs, or receiving payments, you’ll need an Ethereum address to facilitate these transactions.
2. Interact with decentralized applications (DApps): Ethereum is known for its extensive ecosystem of decentralized applications. DApps are applications that run on the Ethereum blockchain, offering unique functionalities like decentralized finance (DeFi), gaming, decentralized exchanges (DEXs), and more. To access and interact with these applications, you’ll need an Ethereum address.
3. Execute smart contracts: Smart contracts are self-executing contracts with predefined conditions written into the code. They automatically execute transactions and actions when specific conditions are met. By having an Ethereum address, you can execute smart contracts on the Ethereum network, enabling programmable automation and decentralized workflows.
4. Participate in token sales and ICOs: Many projects and startups launch their tokens through Initial Coin Offerings (ICOs) on the Ethereum blockchain. If you’re interested in investing in these tokens or participating in ICOs, you’ll need an Ethereum address to receive the newly minted tokens in exchange for Ether.
5. Store and manage cryptocurrencies: If you’re a cryptocurrency enthusiast, having an Ethereum address allows you to store and manage your Ether and other Ethereum-based tokens. By using a reputable Ethereum wallet, you can securely store your assets and easily access them whenever needed.
6. Access decentralized finance (DeFi) services: DeFi has gained significant traction in recent years, providing various financial services like lending, borrowing, yield farming, and decentralized exchanges. To benefit from these decentralized finance services, you need an Ethereum address to interact with the DeFi protocols and platforms.
These are just a few examples of why having an Ethereum address is essential. Whether you’re a developer, investor, or simply curious about the possibilities of blockchain technology, creating an Ethereum address opens up a world of opportunities.
In the following sections, we will guide you through the process of creating an Ethereum address, step by step.
How to create an Ethereum wallet
Creating an Ethereum wallet is a straightforward process that involves a few simple steps. Here’s a step-by-step guide to help you create your own Ethereum wallet:
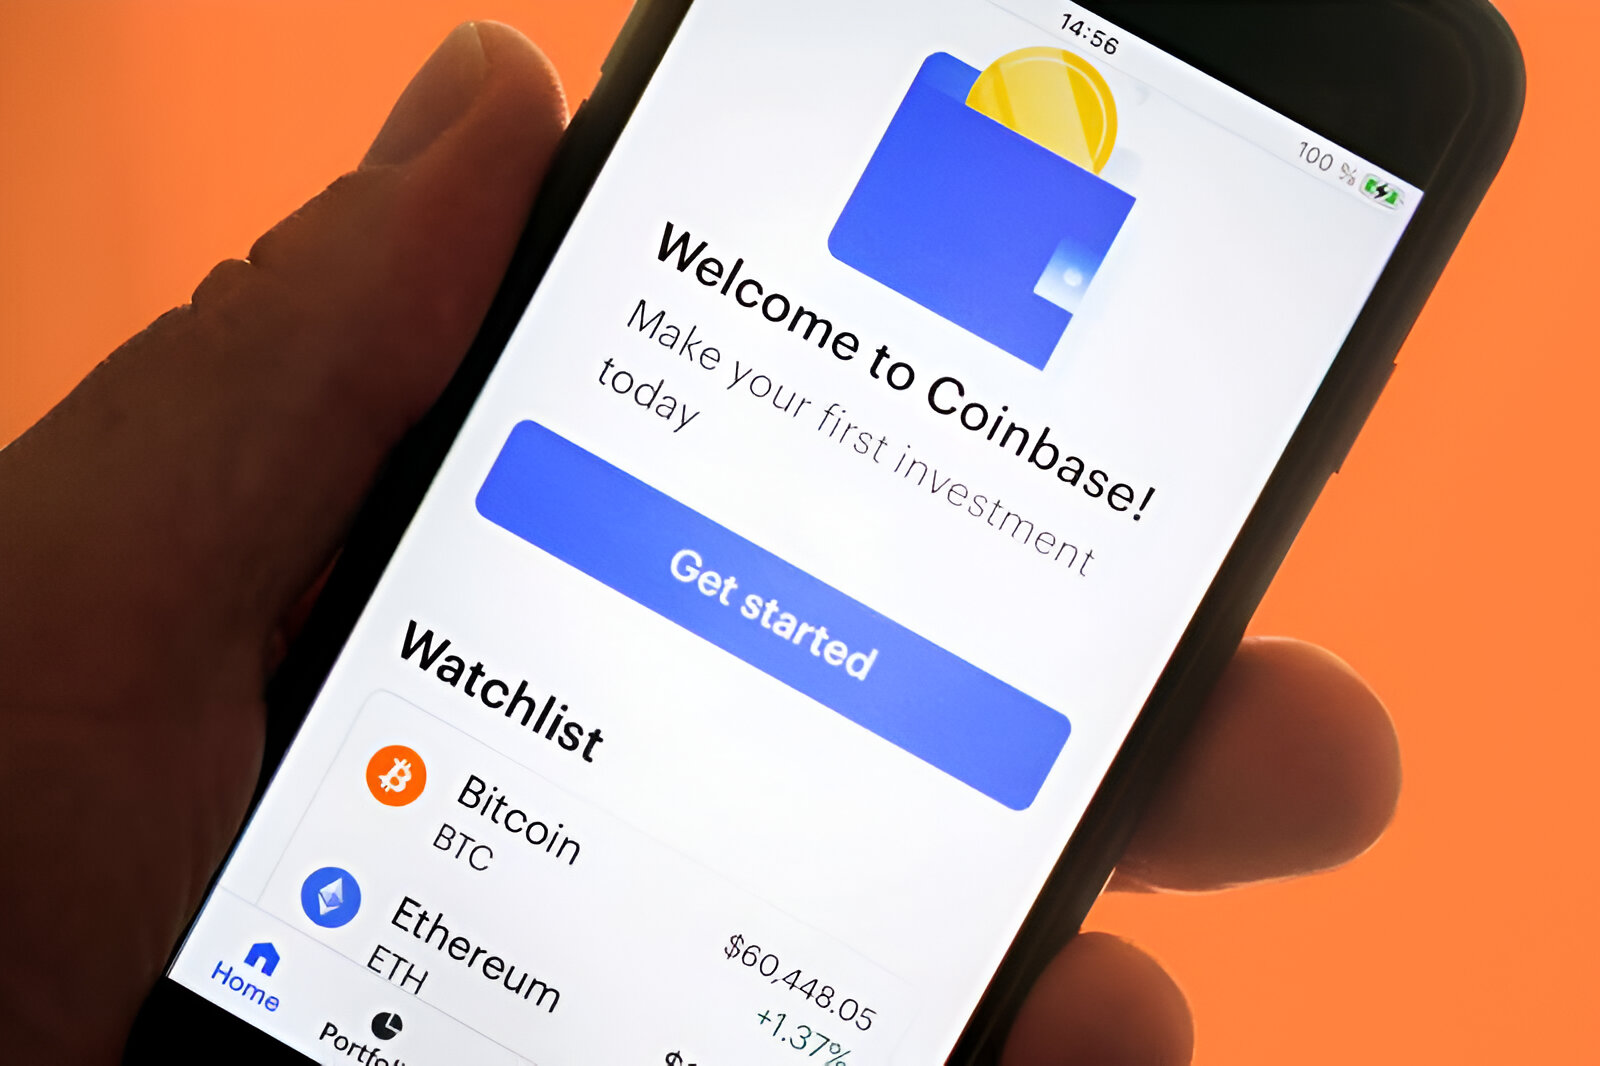
Step 1: Choose a reputable Ethereum wallet provider: There are several Ethereum wallet providers available, each with its own features and security protocols. It’s important to choose a reputable provider that prioritizes security and has a user-friendly interface. Popular options include MetaMask, MyEtherWallet, and Trust Wallet.
Step 2: Set up your wallet: Once you’ve chosen a wallet provider, visit their website or download the mobile application. Follow the instructions to set up your wallet, which may involve creating a strong password and storing a recovery phrase. Make sure to carefully read and understand the instructions provided by the wallet provider.
Step 3: Create your Ethereum address: After setting up your wallet, you’ll have the option to create your Ethereum address. In most cases, this can be done by navigating to the “Create Wallet” or “Generate Address” section within the wallet interface. The wallet provider will generate a unique Ethereum address for you, consisting of a combination of alphanumeric characters.
Step 4: Secure your private key and backup your wallet: Once your Ethereum address is generated, it’s crucial to keep your private key secure. The private key is a long string of characters that grants access to your Ethereum wallet. Never share your private key with anyone and store it in a safe place, preferably offline. Additionally, most wallet providers offer the option to back up your wallet, allowing you to restore your funds if you lose access to your wallet.
Step 5: Test your Ethereum address: To ensure that your Ethereum address is functioning correctly, you can send a small amount of Ether to your address and verify its receipt. This step will help you become familiar with the process of sending and receiving Ether.
By following these steps, you can create your own Ethereum wallet and obtain your unique Ethereum address. Remember to always prioritize the security of your wallet and never share your private key with anyone.
In the next section, we’ll discuss the importance of securing your private key and backing up your wallet.
Step 1: Choose a reputable Ethereum wallet provider
When it comes to creating an Ethereum wallet, the first step is to choose a reputable wallet provider. With so many options available, it’s essential to select a wallet provider that meets your needs in terms of security, features, and user-friendliness. Here are some factors to consider when choosing an Ethereum wallet provider:
1. Security: Security should be your top priority when choosing a wallet provider. Look for wallets that implement robust security measures such as two-factor authentication (2FA), encryption of private keys, and hierarchical deterministic (HD) wallets that generate a new address for each transaction. Additionally, consider wallets that allow you to remain in control of your private keys, ensuring that you have full ownership and control over your funds.
2. User interface: A user-friendly interface can greatly enhance your wallet experience. Look for wallets that have a clean and intuitive interface, making it easy to navigate and manage your funds. Some wallets offer additional features like transaction history, token balances, and built-in decentralized applications, providing a seamless and convenient user experience.
3. Compatibility: Make sure the wallet is compatible with your desired platform or device. Some wallets are available as desktop applications, browser extensions, or mobile apps. Consider your preferred method of access and verify that the wallet provider supports it.
4. Reputation: It’s important to choose a wallet provider with a good reputation and positive reviews from the community. Look for feedback from other users, check forums and social media platforms for recommendations, and consider the longevity and track record of the wallet provider. A well-established and trusted provider is more likely to have robust security measures and reliable customer support.
5. Additional features: Consider the additional features offered by the wallet provider. Some wallets support multiple cryptocurrencies, allowing you to manage various digital assets within a single wallet. Others may offer integration with decentralized exchanges, enabling you to easily trade and swap tokens without leaving the wallet interface. Assess your needs and choose a wallet provider that offers the features you prioritize.
6. Community support and development: Take into account the level of community support and the active development of the wallet. A strong and engaged community often indicates an active and evolving product, with regular updates, bug fixes, and new feature implementations. Additionally, an active community can provide valuable support and resources in case you encounter any issues or need assistance.
By considering these factors, you can choose a reputable Ethereum wallet provider that aligns with your preferences and requirements. Take your time to research and compare different wallet options before making a decision. Remember, selecting a reliable wallet provider is crucial for the security and ease of use of your Ethereum address and funds.
In the next section, we will move on to step 2, which is setting up your Ethereum wallet.
Step 2: Set up your wallet
Once you have chosen a reputable Ethereum wallet provider, it’s time to set up your wallet. The process may vary slightly depending on the wallet you have selected, but here are some general steps to help you set up your Ethereum wallet:
1. Visit the wallet provider’s website or download the mobile app: Start by visiting the official website of your chosen wallet provider or downloading the mobile application from a trusted source, such as the app store.
2. Create a strong, unique password: During the setup process, you will be prompted to create a password for your wallet. Ensure that it is a strong password that combines uppercase and lowercase letters, numbers, and special characters. This will help protect your wallet from unauthorized access.
3. Enable two-factor authentication (2FA): Two-factor authentication adds an extra layer of security to your wallet. It typically involves linking your wallet to a mobile app or receiving verification codes via SMS or email. Enable this feature if your wallet provider offers it.
4. Write down the recovery phrase: Most Ethereum wallets generate a recovery phrase, also known as a seed phrase, during the setup process. This phrase consists of a series of words that can be used to recover your wallet in case of loss or device failure. Write down the recovery phrase and store it in a safe place. Keep it separate from your wallet access information to ensure maximum security.
5. Confirm your recovery phrase: Some wallets will ask you to confirm your recovery phrase by selecting the words in the correct order. This process helps ensure that you have accurately recorded and retained your recovery phrase.
6. Set up additional security measures: Explore the security settings provided by your wallet and enable any additional measures that are available. This may include setting a secondary password for transactions or enabling biometric authentication if your device supports it.
7. Familiarize yourself with the wallet interface: Take some time to explore the wallet interface and familiarize yourself with its features. Look for options to view your Ethereum address, check your balance, and send or receive Ether. Understanding the wallet’s functionalities will help you navigate and manage your funds more effectively.
8. Keep your wallet software up to date: Wallet providers often release updates to improve security and add new features. Regularly update your wallet software to benefit from these enhancements and stay protected against any potential vulnerabilities.
By following these steps, you can properly set up your Ethereum wallet. Remember to take the necessary precautions to keep your wallet and recovery phrase secure. Safeguarding your wallet access information is crucial to ensuring your funds remain safe and accessible.
In the next section, we will move on to step 3, which is the process of creating your Ethereum address.
Step 3: Create your Ethereum address
After setting up your Ethereum wallet, the next step is to create your Ethereum address. Your Ethereum address acts as a unique identifier on the Ethereum network and allows you to send and receive Ether and interact with decentralized applications (DApps). Here’s how you can generate your Ethereum address:
1. Access your wallet: Open your Ethereum wallet software or app and log in using your password or any other authentication method you set up during the setup process.
2. Navigate to the “Receive” or “Create Address” section: Depending on your wallet provider, you may find the option to create your Ethereum address under the “Receive” section or in a specifically dedicated “Create Address” area. Look for these options within your wallet interface.
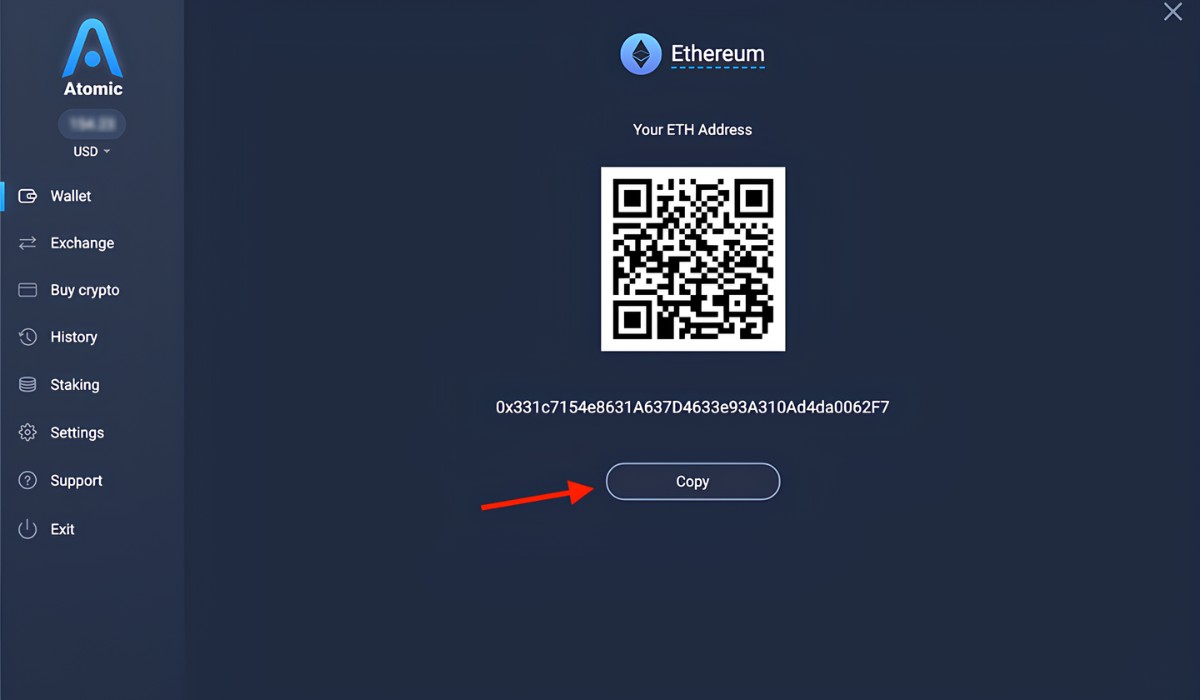
3. Generate your Ethereum address: Click on the “Generate Address” or similar button to create your Ethereum address. Your wallet will generate a unique address consisting of a combination of alphanumeric characters. This address serves as your public key and can be shared with others to receive Ether or interact with DApps.
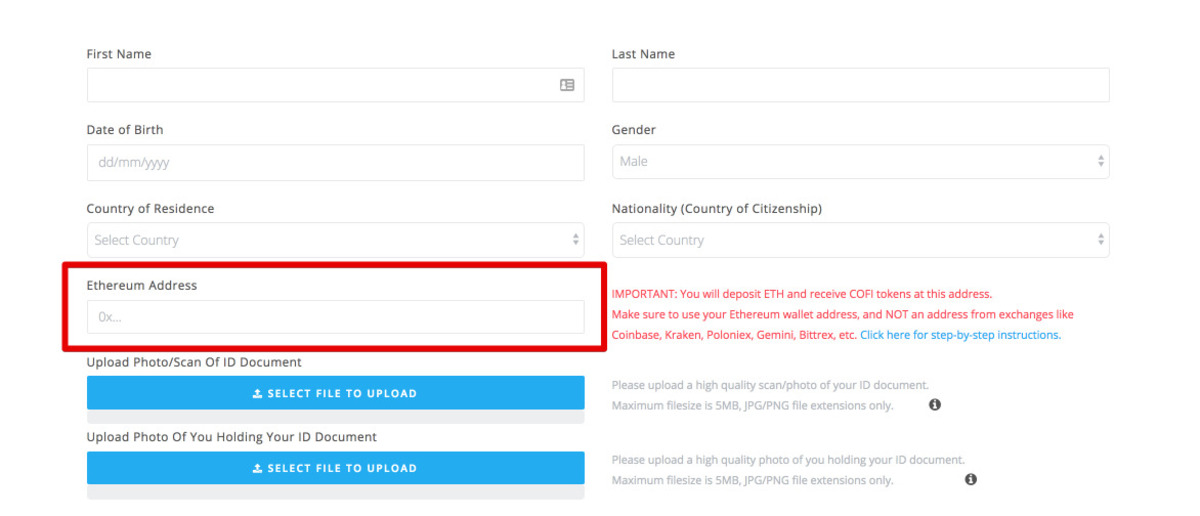
4. Confirm and save your Ethereum address: Once the address is generated, double-check it to ensure its accuracy. Make sure to save your Ethereum address in a secure location or write it down. It’s a good practice to copy and paste it to avoid any typing errors that could lead to sending funds to the wrong address.
5. Share your Ethereum address: Now that you have your Ethereum address, you can freely share it with others. This is how people can send you Ether or tokens and interact with you on the Ethereum network. Additionally, you can use your Ethereum address to interact with decentralized applications and participate in various activities within the Ethereum ecosystem.
It’s important to note that your Ethereum address is public information and can be viewed by anyone on the blockchain. However, your private key is what grants you access to your funds and should be kept confidential and securely stored.
Congratulations! You have successfully created your Ethereum address. In the next step, we will discuss the importance of securing your private key and backing up your wallet.
Step 4: Secure your private key and backup your wallet
Securing your private key and backing up your wallet are crucial steps to ensure the safety and accessibility of your Ethereum funds. Here’s what you need to do:
1. Protect your private key: Your private key is a long string of characters that provides access to your Ethereum wallet. It’s essential to keep your private key secure and confidential. Never share your private key with anyone and be cautious of phishing attempts or scams that may try to trick you into revealing it.
2. Store your private key offline: Consider storing your private key offline, such as on a hardware wallet or a piece of paper. Hardware wallets are physical devices that securely store your private keys offline, providing an extra layer of protection. If you choose to write down your private key, make sure to keep it in a safe and secure place, preferably in multiple locations.
3. Use strong passwords and additional security measures: Set strong and unique passwords for your wallet and enable any additional security measures offered by your wallet provider, such as two-factor authentication (2FA) or biometric authentication. These measures add an extra layer of protection to your wallet and reduce the risk of unauthorized access.
4. Regularly update your wallet software: Wallet providers regularly release updates to improve security and address any potential vulnerabilities. Stay vigilant and ensure that your wallet software is up to date. Updating your wallet software will keep it in line with the latest security protocols and protect your funds from potential threats.
5. Backup your wallet: Most wallet providers offer the option to backup your wallet. This involves creating a copy of your wallet information, including your private key and recovery phrase, and storing it in a safe place. In case of loss, damage, or theft of your primary wallet, having a backup will allow you to restore your wallet and regain access to your funds.
6. Test your backups: After creating a backup, it’s crucial to test its functionality. Attempt to restore your wallet using the backup and verify that the process is successful. By doing so, you can ensure that your backup is accurate, valid, and can be relied upon if the need arises.
7. Be cautious of phishing attempts: Be wary of phishing attempts or fraudulent websites and applications that may try to trick you into revealing your private key or recovery phrase. Always double-check the authenticity of the website or application before entering any sensitive information. Ensure that you are using official and trusted sources for wallet downloads and updates.
Taking these steps to secure your private key and backup your wallet is essential for the protection of your Ethereum funds. By being proactive and prioritizing security measures, you can have peace of mind knowing that your funds are stored safely and can be accessed when needed.
Next, we will conclude our guide on creating an Ethereum address and wallet.
Conclusion
Creating an Ethereum address and wallet is a fundamental step for anyone looking to participate in the Ethereum ecosystem. By following the steps outlined in this guide, you can successfully create your own Ethereum address and start engaging with the Ethereum network.
We began by understanding what Ethereum is and why having an Ethereum address is important. Ethereum is not only a cryptocurrency but also a platform for decentralized applications and smart contracts. An Ethereum address serves as your unique identifier on the Ethereum network, enabling you to send and receive Ether, interact with DApps, and execute smart contracts.
We then discussed the step-by-step process of creating an Ethereum wallet. It starts with choosing a reputable wallet provider that prioritizes security and offers a user-friendly interface. Set up your wallet by creating a strong password, enabling additional security measures like two-factor authentication, and saving your recovery phrase in a secure location.
The next step involved generating your Ethereum address within your wallet. This address serves as your public key, allowing others to send you Ether and enabling your interaction with DApps. Remember to confirm and save your Ethereum address accurately to avoid any mistakes in transactions.
Finally, we emphasized the importance of securing your private key and backing up your wallet. Safeguard your private key, store it offline or on a hardware wallet, and use strong passwords. Take advantage of backup options provided by wallet providers to ensure you can restore your wallet in case of any unforeseen circumstances.
By taking these steps, you can create an Ethereum address and wallet that is secure, easy to use, and allows you to fully participate in the Ethereum network. Remember to stay vigilant and exercise caution to protect your funds against potential threats or scams.
Now that you have a solid understanding of how to create an Ethereum address and wallet, you can begin exploring the vast world of decentralized finance, decentralized applications, and smart contracts on the Ethereum network.