How to Troubleshoot a Non-Connecting Smart TV
Having trouble connecting your smart TV to the internet? Don’t worry, it’s a common issue that can be resolved with a few simple troubleshooting steps. In this section, we’ll guide you through the process of troubleshooting a non-connecting smart TV, helping you get back to streaming your favorite shows and movies in no time.
Before diving into the troubleshooting steps, it’s important to ensure that your Wi-Fi connection is stable. Check if other devices in your home are able to connect to the internet without any issues. If they’re not, you may need to reset your router or contact your internet service provider for assistance.
Once you’ve confirmed that your Wi-Fi connection is working properly, it’s time to check the network settings on your smart TV. Navigate to the settings menu and select the network option. Make sure that the correct Wi-Fi network is selected and that the password is entered correctly. Sometimes, a simple network reset on your smart TV can also solve the connectivity problem.
Another important factor to consider is whether your smart TV is up to date with the latest firmware. Manufacturers frequently release updates to improve performance and fix bugs. Check for any available updates in the settings menu of your TV and install them if necessary. Updating the firmware may resolve any compatibility issues that are preventing your smart TV from connecting to the internet.
If the previous steps didn’t resolve the issue, try restarting your smart TV. Sometimes, a simple reboot can fix temporary glitches and restore connectivity. Simply power off your TV, unplug it from the power source, wait for a few minutes, and then plug it back in. Turn your TV back on and check if it’s able to connect to the internet.
If a restart doesn’t solve the problem, you can try resetting your smart TV to its factory settings. Keep in mind that this will erase all personalized settings, so be sure to take note of any important configurations before proceeding. Look for the reset option in the settings menu and follow the on-screen instructions to perform a factory reset. After the reset is complete, set up your TV again and check if the internet connectivity issue is resolved.
If none of the above steps work, it may be time to contact your internet service provider for further assistance. They can help troubleshoot any network-related issues or check if there are any connection problems from their end. They may also provide specific instructions tailored to your smart TV model.
Lastly, consider using an Ethernet connection instead of Wi-Fi. If your smart TV has an Ethernet port, connecting it directly to the router with an Ethernet cable can ensure a more stable and reliable connection.
If all else fails, it may be worthwhile to seek professional help. Contact the manufacturer’s customer support or a certified technician who can diagnose and fix any hardware or software issues that are preventing your smart TV from connecting to the internet.
Check Your Wi-Fi Connection
One of the first steps in troubleshooting a non-connecting smart TV is to ensure that your Wi-Fi connection is stable. A weak or unstable Wi-Fi signal can cause connection issues, preventing your smart TV from accessing the internet. Here are some steps to check and improve your Wi-Fi connection:
- Check other devices: Confirm if other devices in your home, such as smartphones, tablets, or laptops, are able to connect to the internet without any problems. If they are also experiencing connectivity issues, it’s likely that the problem lies with your Wi-Fi network rather than the smart TV.
- Reset your router: Sometimes, a simple router reset can help resolve temporary glitches that may be affecting the Wi-Fi signal. Locate the power source of your router and disconnect it for about 30 seconds. Then, plug it back in and wait for the router to restart. Once it’s back online, check if your smart TV can now connect to the internet.
- Move closer to the router: If your smart TV is located far away from the Wi-Fi router, the signal strength may be weak. Try moving your TV closer to the router to improve the Wi-Fi signal. This can be particularly helpful if there are physical obstacles, such as walls or furniture, obstructing the Wi-Fi signal.
- Reduce interference: Wi-Fi signals can be affected by interference from other devices operating on the same frequency range. Cordless phones, microwave ovens, and other electronic devices can disrupt the Wi-Fi signal. Keep your smart TV and Wi-Fi router away from such devices to minimize interference.
- Update router firmware: Outdated router firmware can sometimes cause connectivity issues. Check if there are any firmware updates available for your router model. Refer to the manufacturer’s website or the router’s documentation for instructions on how to update the firmware. Updating the firmware can improve performance and fix bugs.
- Consider a Wi-Fi range extender: If your smart TV is located in an area with poor Wi-Fi coverage, you can consider using a Wi-Fi range extender or repeater. These devices amplify the Wi-Fi signal, extending the coverage area and improving connectivity for devices located far from the router.
By checking and optimizing your Wi-Fi connection, you can ensure that your smart TV receives a stable and reliable internet connection. If the issue persists after following these steps, proceed to the next troubleshooting steps to identify and resolve any other underlying issues.
Check Your Network Settings
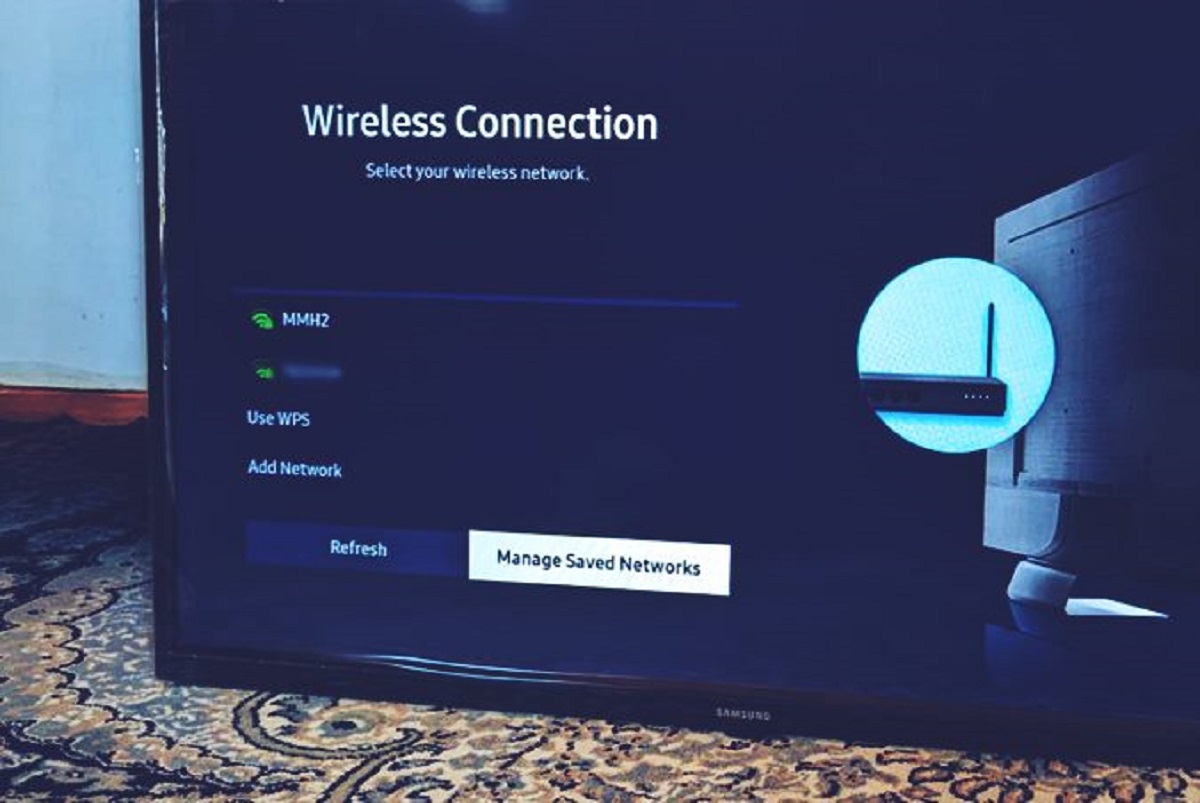
If your smart TV is not connecting to the internet, it’s essential to check your network settings to ensure everything is configured correctly. Here are some steps to follow when checking your network settings:
- Navigate to the settings menu: Using your TV’s remote control, go to the settings menu. The exact location may vary depending on your smart TV model, but it is typically represented by a gear or wrench icon.
- Select the network option: Look for the network or internet settings within the settings menu. Once you find it, enter the submenu to access the network settings.
- Confirm Wi-Fi network: Check if the correct Wi-Fi network is selected. If the network name does not match your home Wi-Fi network, select the appropriate one from the list of available networks.
- Enter the correct password: If a password is required to connect to your Wi-Fi network, make sure that you have entered it correctly. Pay attention to uppercase and lowercase letters, as well as any special characters. A single incorrect character can prevent your smart TV from connecting to the network.
- Perform a network reset: If the previous steps did not solve the issue, you can try performing a network reset on your smart TV. Look for the network reset option within the network settings menu and follow the on-screen instructions. This will reset the network settings to their default values, allowing you to set up the Wi-Fi connection from scratch.
- Check DNS settings: Advanced network settings may include DNS (Domain Name System) configuration. Ensure that the DNS settings are correctly set to the values provided by your internet service provider or use the default settings provided by your router.
By checking and adjusting your network settings, you can ensure that your smart TV is configured properly to connect to your Wi-Fi network. If the issue persists, continue troubleshooting by exploring other possible causes such as firmware updates, restarts, or even contacting your internet service provider for assistance.
Ensure Your Smart TV is Up to Date
Keeping your smart TV firmware up to date is crucial for optimal performance and compatibility with various applications and services. If your smart TV is not connecting to the internet, it’s important to check if it’s running the latest firmware. Here’s how to ensure your smart TV is up to date:
- Go to the settings menu: Using your TV’s remote control, navigate to the settings menu. This is typically represented by a gear or wrench icon.
- Look for the system or about option: Look for the system or about option within the settings menu. This is where you’ll find information about your smart TV, including the current firmware version.
- Check for firmware updates: Once you’re in the system or about section, look for an option to check for firmware updates. Depending on your smart TV’s manufacturer and model, the wording may vary, but it’s usually labeled as “Software Update” or something similar.
- Start the firmware update: If a new firmware version is available, follow the on-screen instructions to start the update process. This may involve downloading the firmware file and installing it on your smart TV. It’s important not to interrupt the update process by turning off your TV or disconnecting it from the internet.
- Wait for the update to complete: The update process may take a few minutes to complete. During this time, your smart TV may restart multiple times. Allow the update to finish and let your TV boot up normally.
Updating your smart TV’s firmware can resolve compatibility issues, security vulnerabilities, and other software-related problems that might be preventing it from connecting to the internet. It’s a good practice to regularly check for firmware updates and install them as they become available.
If the issue persists even after updating the firmware, continue troubleshooting by trying other solutions, such as restarting your smart TV, resetting it to factory settings, or contacting your internet service provider for further assistance.
Restart Your Smart TV
If your smart TV is experiencing connectivity issues and is unable to connect to the internet, a simple restart can often resolve the problem. Restarting your smart TV can help clear temporary glitches or errors that may be interfering with its ability to connect. Here’s how you can restart your smart TV:
- Power off your smart TV: Locate the power button on your TV or use the remote control to turn off your smart TV. It’s important to completely power it off rather than just putting it on standby mode.
- Unplug your TV from the power source: After powering off, unplug the power cord from the wall outlet or the back of your TV. Wait for at least 30 seconds to ensure that the TV’s internal components fully discharge.
- Plug your TV back in: Reconnect the power cord to the wall outlet or the back of your TV. Make sure it’s securely plugged in.
- Power on your smart TV: Use the power button on your TV or the remote control to turn it back on. Wait for your TV to fully boot up and for the home screen or the initial setup screen to appear.
By restarting your smart TV, you’re essentially giving it a fresh start and allowing it to establish a new connection to your Wi-Fi network. This can help resolve any temporary issues that may have been causing the connectivity problem.
After the restart, check if your smart TV is now able to connect to the internet. If the issue persists, you may need to try other troubleshooting steps such as checking your network settings or updating the firmware. Restarting your smart TV should be one of the initial steps in troubleshooting connectivity issues, as it’s quick and easy to do, and often resolves minor issues without any further intervention.
If restarting your smart TV doesn’t solve the problem, continue exploring other potential solutions or consider resetting your TV back to factory settings. In some cases, you may need to seek assistance from the manufacturer’s customer support or a professional technician.
Reset Your Smart TV
If you’re still unable to connect your smart TV to the internet after trying other troubleshooting steps, performing a reset may help resolve the issue. Resetting your smart TV will restore it to its factory settings, erasing any personalizations or customizations you’ve made. Here’s how you can reset your smart TV:
- Access the settings menu: Using your TV’s remote control, navigate to the settings menu. Look for the gear or wrench icon, which is typically the symbol for settings.
- Find the reset option: Once in the settings menu, locate the option for resetting your smart TV. Depending on the manufacturer and model, this may be labeled as “Reset,” “Factory Reset,” or something similar.
- Confirm the reset: Before proceeding with the reset, you’ll usually be prompted to confirm your decision. This is to ensure that you don’t accidentally reset your TV. Read the on-screen instructions carefully and confirm the reset process.
- Wait for the reset to complete: The reset process may take a few minutes. During this time, your smart TV will revert to its original factory settings. Any personalized configurations, settings, or installed apps will be removed.
- Set up your smart TV again: After the reset is completed, you’ll need to go through the initial setup process for your smart TV. Follow the on-screen instructions to connect to your Wi-Fi network, sign in to your accounts, and customize your settings.
Performing a reset on your smart TV can help resolve persistent issues that may be causing connectivity problems. By restoring it to its factory settings, you eliminate any potential software conflicts or misconfigurations that might have been affecting the TV’s ability to connect to the internet.
Remember, resetting your smart TV will remove all personalizations and settings, so it’s important to take note of any important information or configurations before proceeding with the reset. You may need to reinstall any apps or customize your settings according to your preferences again.
If the issue still persists even after resetting your smart TV, it’s recommended to contact the manufacturer’s customer support for further assistance. They can provide specific troubleshooting steps or recommend a service technician if necessary.
Contact Your Internet Service Provider
If you’ve tried troubleshooting your smart TV’s connectivity issues without success, it may be time to reach out to your internet service provider (ISP) for assistance. Your ISP can help determine whether the problem lies with your network connection or if there are any issues on their end. Here’s what you can do:
- Gather relevant information: Before contacting your ISP, it’s helpful to have some information ready. This may include your account details, the type of internet connection you have (e.g., cable, DSL, fiber), and any specific error messages or issues you’re experiencing with your smart TV.
- Call or visit your ISP’s customer support: Look up the contact information for your ISP’s customer support. You can typically find a phone number or online chat option on their website. Explain the problem you’re facing with your smart TV’s internet connection and provide the requested information.
- Follow their instructions: Once connected to a representative, they will guide you through troubleshooting steps specific to your ISP and network setup. This may involve verifying your account details, performing tests on your internet connection, or adjusting router settings.
- Be patient and cooperative: The customer support representative may need to investigate further or escalate the issue to a technician. It’s important to remain patient and cooperative, providing any additional information or performing any requested tasks during the troubleshooting process.
- Ask about known network outages or issues: Inquire with your ISP if there are any reported network outages or known issues in your area that may be affecting your smart TV’s internet connection. It’s possible that there may be a larger network problem that requires resolution from their end.
Contacting your ISP can help pinpoint the root cause of the connectivity problem. They have resources and knowledge to assist you in troubleshooting network-related issues and ensuring that your internet connection is stable and reliable.
If your ISP identifies any issues or makes changes to your network settings, make sure to test your smart TV’s internet connection afterward to see if the issue has been resolved. If not, inform your ISP of the continued problem.
Keep in mind that your ISP’s support hours may be limited, so it’s advisable to contact them during their operating hours for the best chance of receiving immediate assistance.
If contacting your ISP doesn’t resolve the issue, consider exploring other options such as using an Ethernet connection or seeking professional help from a certified technician to further diagnose and resolve the connectivity problem.
Consider Using an Ethernet Connection
If your smart TV is consistently experiencing connectivity issues over Wi-Fi, you might want to consider using an Ethernet connection instead. Connecting your smart TV directly to your router using an Ethernet cable can provide a more stable and reliable internet connection. Here are the steps to consider:
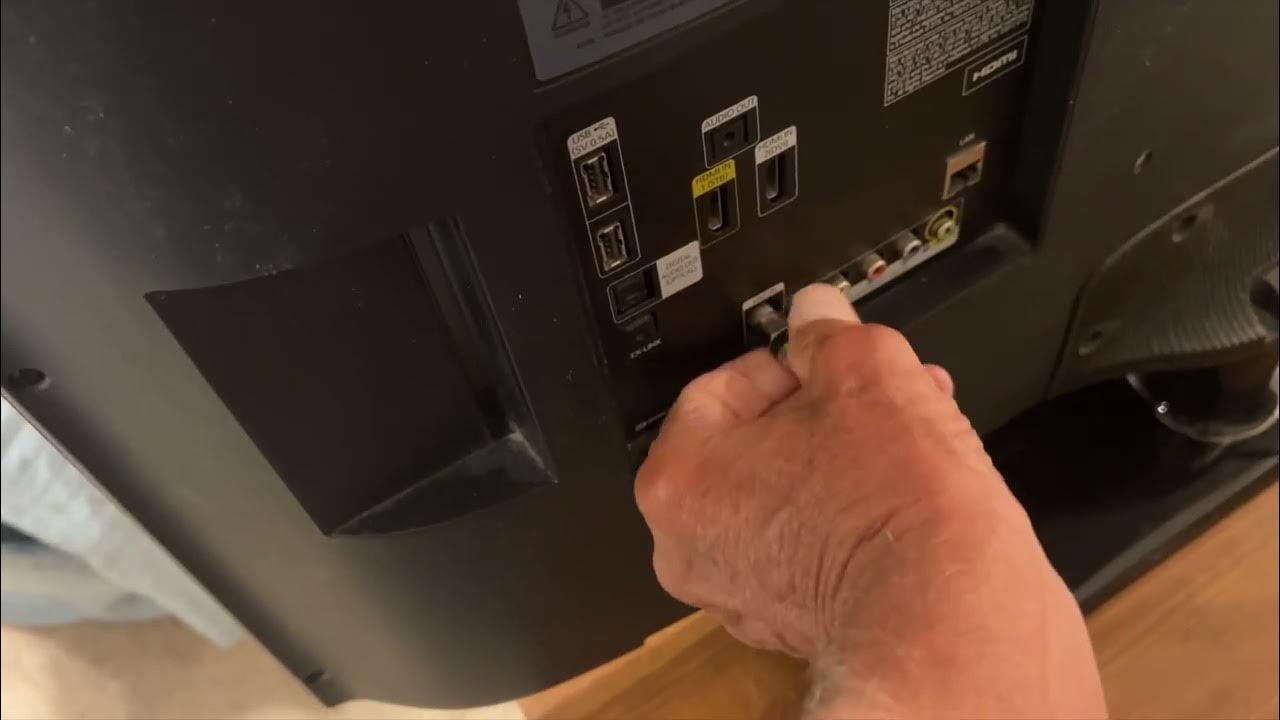
- Check your smart TV for an Ethernet port: Look for an Ethernet port on the back or side of your smart TV. Not all smart TVs have an Ethernet port, so check the specifications or user manual of your TV to confirm.
- Connect one end of the Ethernet cable to your smart TV: Plug one end of the Ethernet cable into the Ethernet port on your smart TV. Ensure that it is securely inserted.
- Connect the other end of the Ethernet cable to your router: Take the other end of the Ethernet cable and connect it to an available Ethernet port on your Wi-Fi router. Again, ensure it is securely inserted.
- Verify the connection: Once connected, your smart TV should detect the Ethernet connection automatically. You can check the network settings on your TV to confirm that it is now using the wired connection.
An Ethernet connection offers several advantages over Wi-Fi. It tends to be more stable, with less chance of interference or signal disruptions. This can result in smoother streaming, faster download speeds, and fewer instances of buffering or connection drops.
However, it’s important to note that utilizing an Ethernet connection requires your smart TV and Wi-Fi router to be within close proximity. If your TV is located far away from your router, you may need to consider other options like using a longer Ethernet cable or installing a wired network extender.
By using an Ethernet connection, you can bypass potential issues with your Wi-Fi network and enjoy a more reliable internet connection for your smart TV. This can be particularly beneficial if you frequently stream high-definition content or if you have multiple devices connected to your network.
If using an Ethernet connection resolves the connectivity issues with your smart TV, it’s recommended to disable the Wi-Fi connection in the TV’s settings menu to avoid any potential conflicts between the two connection methods.
Remember to test your smart TV’s internet connection after implementing the Ethernet connection to ensure that the issue has been resolved. If you’re still experiencing problems, consider reaching out to the manufacturer’s customer support or seeking professional assistance.
Seek Professional Help if All Else Fails
If you’ve exhausted all troubleshooting steps and are still unable to connect your smart TV to the internet, it may be time to seek professional help. A certified technician or the manufacturer’s customer support team can offer specialized expertise and assistance in resolving complex issues. Here are some options to consider:
- Contact the manufacturer’s customer support: Reach out to the customer support team of your smart TV’s manufacturer. They can provide guidance specific to your TV model and troubleshoot any technical issues that may be causing the connectivity problem. Make sure to have your TV’s model and serial number on hand when contacting support.
- Consult a professional technician: If your smart TV is still under warranty or if you prefer hands-on assistance, consider contacting a professional technician. Look for authorized service centers in your area or contact the manufacturer for a list of certified technicians. They can diagnose and repair any hardware or software issues that may be affecting your smart TV’s internet connectivity.
- Consider on-site support: Some manufacturers or third-party service providers offer on-site support where a technician can visit your home to troubleshoot and fix the connectivity issue. This can be a convenient option if you prefer personalized assistance for your smart TV.
- Seek assistance from a networking specialist: If the connectivity problem seems to be related to your home network setup or router configuration, consider reaching out to a networking specialist. They can analyze your network infrastructure, optimize router settings, and ensure that your smart TV is properly connected and configured for internet access.
Professional help should be sought when all other troubleshooting steps have been attempted without success. They can provide advanced diagnostics and solutions that may not be easily accessible or feasible for an average user.
Remember to keep all necessary documentation, such as your TV’s warranty information and proof of purchase, readily available when seeking professional assistance. This can help expedite the process and ensure that you receive the appropriate level of support.
While seeking professional help may involve additional costs or waiting time, it can be a worthwhile investment to have your smart TV functioning optimally and enjoying uninterrupted content streaming.
If all else fails and professional assistance does not resolve the issue, you may need to consider alternative options such as using a streaming device or connecting your smart TV to a different network to ensure continued access to your favorite content.