Introduction
Having trouble connecting your Samsung Smart TV to the internet can be quite frustrating. In today’s digital age, where endless entertainment options are available at the touch of a button, a stable internet connection is essential for streaming movies, accessing online content, and enjoying your favorite apps on your Smart TV.
If you’re facing connectivity issues with your Samsung Smart TV, fear not, as there are several troubleshooting steps you can take to resolve the problem and get back to enjoying your favorite shows and movies. In this article, we’ll explore some common reasons why your Samsung Smart TV may not be connecting to the internet and provide practical solutions to get you back online in no time.
Before we dive into the troubleshooting steps, it’s important to ensure that you have a reliable and stable network connection. Check if other devices connected to the same network are experiencing internet connectivity issues. If so, the problem may not be with your Smart TV but with your network provider or router. It’s always a good idea to rule out any external factors before troubleshooting specifically for your Smart TV.
Now, let’s delve into the troubleshooting steps that can help you address the connectivity issues with your Samsung Smart TV. By following these steps, you can determine the root cause of the problem and apply the appropriate solution to get your Smart TV back online and running smoothly.
Remember, it’s crucial to perform these steps in the given order and test your Smart TV’s connectivity after each step. This way, you can identify which solution works best for your specific situation and save time in the troubleshooting process.
Check Network Connection
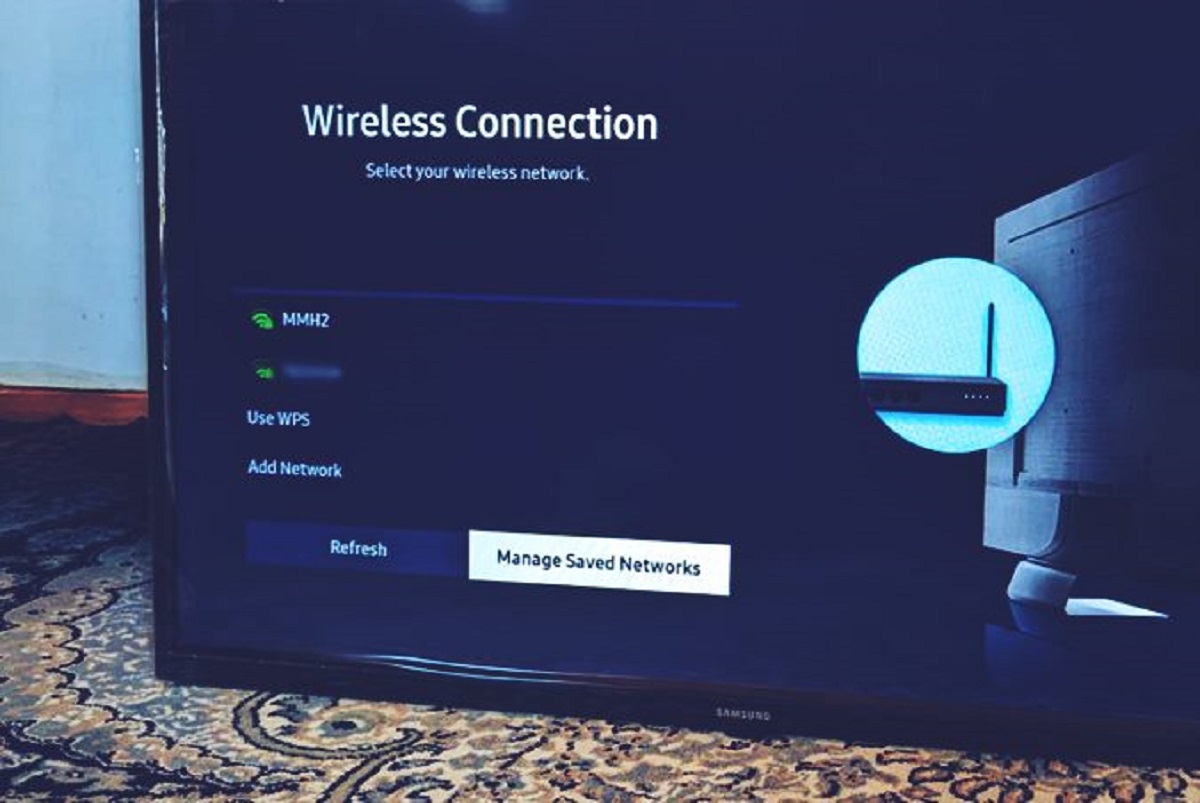
The first step in troubleshooting connection issues with your Samsung Smart TV is to check the network connection. Make sure that your TV is properly connected to the internet by following these steps:
- Verify that your Wi-Fi network is working by connecting another device, such as a laptop or smartphone, to the same network.
- If other devices are able to connect to the internet, move on to checking the network settings on your Smart TV.
- On your Smart TV, go to the Settings menu and select “Network.”
- Choose “Network Status” or a similar option to view the current network connection status.
- Ensure that the network status shows a successful connection. If it does not, try reconnecting to your Wi-Fi network.
- If reconnecting doesn’t resolve the issue, try restarting your router and modem.
Sometimes, network settings can be saved incorrectly or become corrupted, causing connectivity problems. Restarting your router and modem can refresh the network connection and potentially resolve any issues.
Once you have restarted your router and modem, wait for a few minutes to allow them to fully reset. Then, return to your Smart TV and check the network connection again. If the problem persists, proceed to the next troubleshooting step.
Restart the TV and Router
If you’re still experiencing connection issues with your Samsung Smart TV, restarting both the TV and the router can often help resolve the problem. Here’s how you can do it:
- Start by turning off your Smart TV. Unplug it from the power source and wait for about 1-2 minutes.
- While the TV is off, locate your router and unplug it from the power source as well.
- Wait for a couple of minutes to ensure that both the TV and router have completely powered down.
- After the waiting period, plug the router back into the power source and allow it to fully reboot.
- Once the router is back online and all the lights are stable, plug your Smart TV back into the power source and turn it on.
By restarting both the TV and the router, you are essentially clearing any temporary glitches or network congestion that may be causing the connectivity issue. This simple step can often resolve various network-related problems.
After the restart, check the network connection settings on your Smart TV to see if it has reconnected to the internet. If the issue persists, continue to the next troubleshooting step to further investigate the problem.
Update Firmware
Outdated firmware can sometimes lead to connectivity issues on your Samsung Smart TV. It’s important to ensure that your TV’s firmware is up to date to ensure optimal performance and compatibility with the latest network protocols. Here’s how you can update the firmware on your Samsung Smart TV:
- Start by accessing the Settings menu on your Smart TV. Look for an option like “Support” or “System”.
- Once you’ve entered the Support or System menu, navigate to the “Software Update” option.
- Select “Update Now” or a similar prompt to initiate the firmware update process.
- If an update is available, your Smart TV will begin downloading and installing the latest firmware version.
- Ensure that your TV remains connected to the internet throughout the update process.
- Once the update is complete, your Smart TV will restart automatically.
It’s important to note that the update process may vary slightly based on your specific Samsung Smart TV model. If you’re unsure about the steps or unable to find the firmware update option, you can refer to the user manual or visit the official Samsung support website for detailed instructions relevant to your TV model.
After updating the firmware, check the network connection to see if the connectivity issue is resolved. If the problem persists, proceed to the next troubleshooting step to continue troubleshooting the issue.
Reset Network Settings
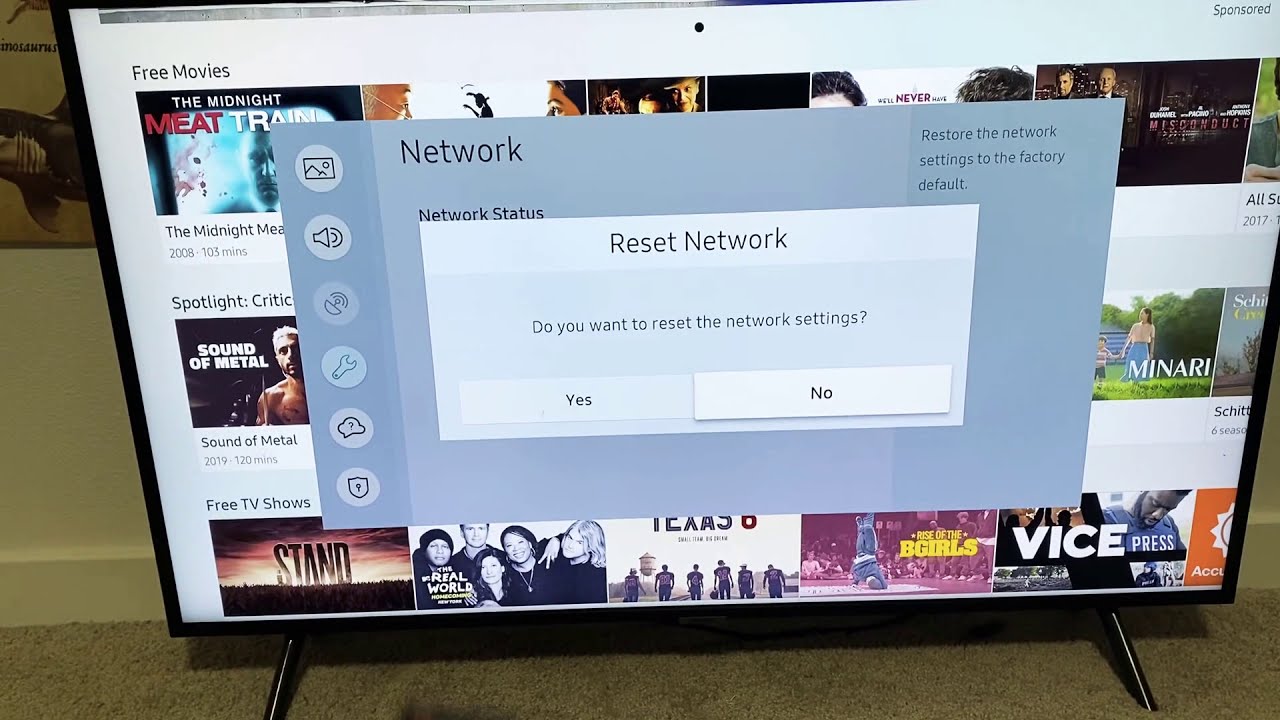
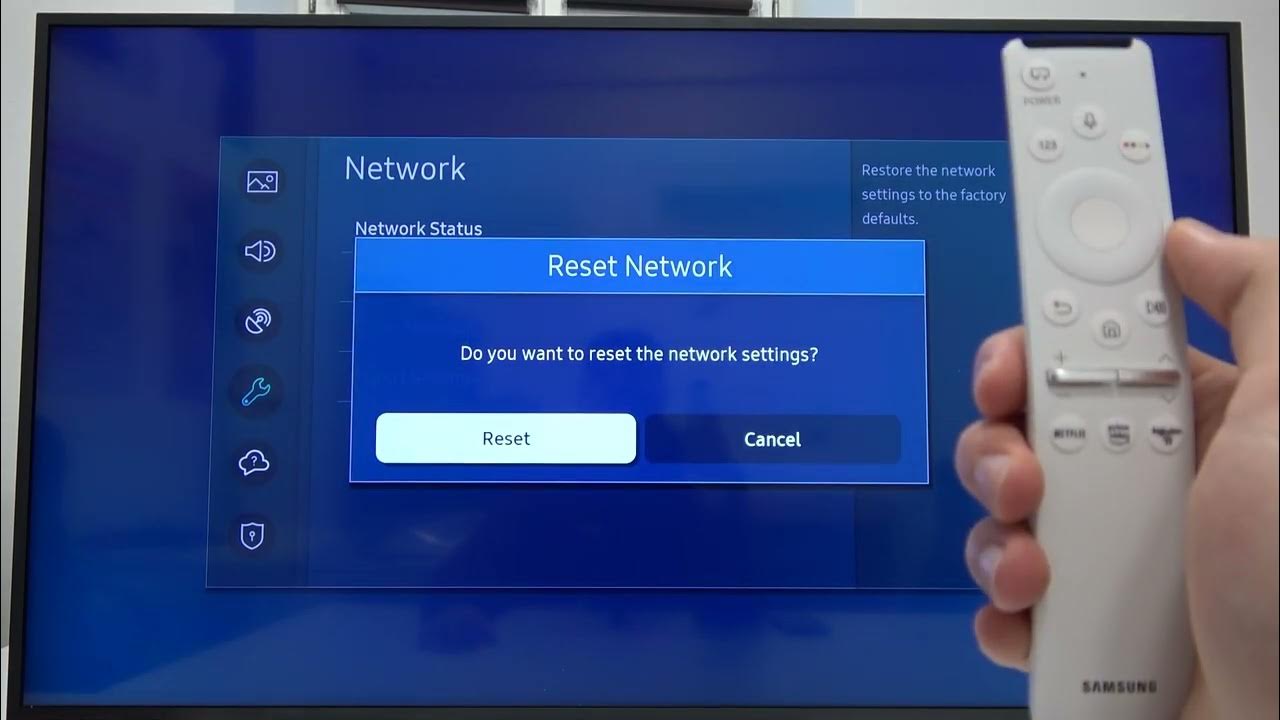
If updating the firmware didn’t resolve the connectivity issue on your Samsung Smart TV, the next step is to reset the network settings. Resetting the network settings can help clear any network configuration conflicts or settings that may be causing the problem. Here’s how you can reset the network settings on your Smart TV:
- Go to the Settings menu on your Smart TV and navigate to the “Network” or “General” section.
- Look for an option called “Network reset” or “Reset network settings.”
- Select the option and confirm your choice when prompted.
- Your Smart TV will now reset all network settings to their default values.
- Once the reset is complete, reconnect your Smart TV to your Wi-Fi network by following the on-screen instructions.
After resetting the network settings, check the network connection on your Smart TV to see if the problem has been resolved. If the issue persists, continue troubleshooting using the next available steps.
Check Router Settings
If you’re still facing connectivity issues with your Samsung Smart TV, it’s time to check the router settings. Sometimes, certain router settings can interfere with the connection to your TV. Here’s what you can do to ensure the router settings are not causing the problem:
- Access your router’s settings by entering the router’s IP address in a web browser. The IP address is typically printed on the router itself or can be found in the user manual.
- Login to your router using the administrator credentials. If you haven’t changed the defaults, the username and password can usually be found on the router or in the user manual.
- Once you’ve accessed the router settings, check for any specific settings or configurations that could be blocking the connection to your Samsung Smart TV.
- Ensure that your router’s firmware is up to date. Check the manufacturer’s website for any available updates and install them if necessary.
- Disable any firewall or security features temporarily to see if they are causing the connectivity problem. Remember to re-enable them afterwards for security purposes.
- Check if your router is using any MAC address filtering or access control lists. Ensure that your Smart TV’s MAC address is allowed or whitelisted in the settings.
By checking and adjusting the router settings, you can eliminate any potential configuration issues that may be causing the connectivity problem. After making any changes, restart your router and Smart TV, then test the network connection on your TV to see if the issue is resolved.
If the problem persists, proceed to the next troubleshooting step to continue diagnosing the issue with your Samsung Smart TV’s internet connection.
Disable VPN or Proxy
If you’re using a VPN (Virtual Private Network) or proxy service on your network, it can sometimes interfere with the connection between your Samsung Smart TV and the internet. Disabling the VPN or proxy can help resolve the connectivity issue. Here’s how you can do it:
- If you have a VPN or proxy service enabled on your network router, access the router settings and disable it from there.
- If you’re using a VPN or proxy service on your Smart TV directly, go to the network settings on your TV and disable the VPN or proxy.
- Additionally, if you’re using a VPN or proxy app on your Smart TV, exit the app or uninstall it.
- Once you have disabled or removed the VPN or proxy, restart your Smart TV and check the network connection again.
By disabling the VPN or proxy, you are ensuring that your Smart TV is connecting directly to your network without any intermediary services. This can help resolve any conflicts or compatibility issues that may have been causing the connectivity problem.
After disabling the VPN or proxy, check the network connection on your Samsung Smart TV to see if the issue has been resolved. If the problem persists, proceed to the next troubleshooting step to further investigate and resolve the connectivity issue.
Disable Smart Hub Terms and Conditions Pop-up
One common issue that can prevent your Samsung Smart TV from connecting to the internet is the Terms and Conditions pop-up that appears when you first set up the Smart Hub. If you haven’t accepted the terms or if the pop-up keeps appearing repeatedly, it can hinder your TV’s internet connectivity. Here’s what you can do to disable the Smart Hub Terms and Conditions pop-up:
- On your Samsung Smart TV remote, press the Home button to open the Smart Hub menu.
- Navigate to the Settings icon and select it.
- Scroll down and choose “Smart Features.”
- Look for the “Terms & Policy” option and select it.
- A pop-up will appear with the Terms and Conditions. Scroll through the agreement and accept the terms if you haven’t done so already.
- After accepting the terms, navigate to the “Usage Information” option.
- Toggle the switch to disable the “Interest-Based Advertisement” and “Viewing Information Services” options.
Disabling these options can prevent the Terms and Conditions pop-up from appearing repeatedly, which can potentially resolve the connectivity issue affecting your Samsung Smart TV.
After disabling the Smart Hub Terms and Conditions pop-up, check the network connection on your TV to see if the issue has been resolved. If the problem persists, proceed to the next troubleshooting step to continue diagnosing and resolving the connectivity issue.
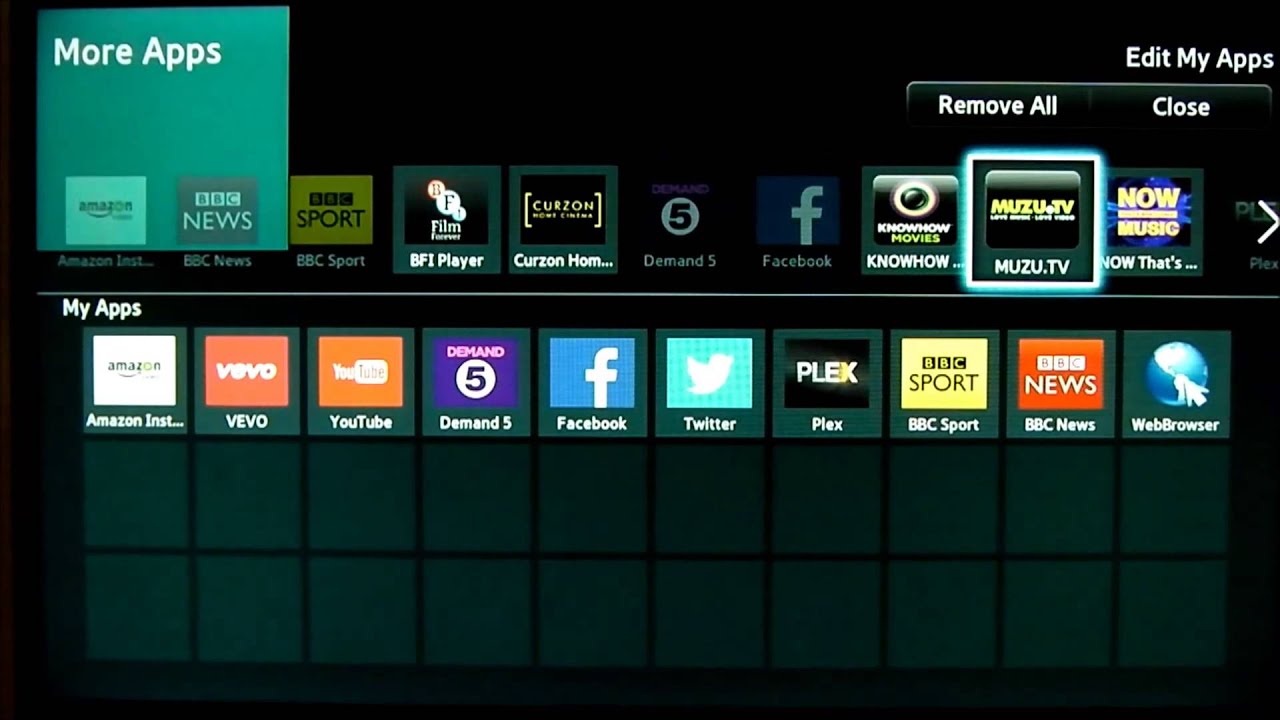
Update Apps
Outdated or corrupted apps on your Samsung Smart TV can sometimes cause connectivity issues. It’s important to ensure that all the apps installed on your TV are up to date. Here’s how you can update the apps on your Smart TV:
- Press the Home button on your Samsung Smart TV remote to access the Smart Hub menu.
- Navigate to the Apps section and select it.
- In the Apps menu, find the app that is experiencing connectivity issues or that you suspect may be causing the problem.
- Highlight the app and press the Options or More button on your remote.
- From the available options, select “Update” or “Reinstall” to update the app to the latest version.
- If there are multiple apps that you suspect may be causing the connectivity issue, it’s recommended to update all the apps on your Smart TV.
Updating the apps on your Smart TV ensures that you have the latest bug fixes and improvements, which can potentially resolve any connectivity issues. It’s also a good practice to periodically check for app updates to ensure optimal performance on your Smart TV.
After updating the apps, check the network connection on your Samsung Smart TV to see if the connectivity issue has been resolved. If the problem persists, it may be necessary to contact Samsung support for further assistance.
Contact Samsung Support
If you have tried all the troubleshooting steps mentioned earlier and your Samsung Smart TV still won’t connect to the internet, it’s time to reach out to Samsung support for further assistance. Here’s how you can contact Samsung support:
- Visit the official Samsung support website or use the support app on your Smart TV to explore self-help resources and troubleshooting guides.
- If you’re unable to find a solution on your own, look for the “Contact Us” or “Support” section on the Samsung website or in the support app.
- Choose the contact option that best suits your needs, such as live chat, email support, or phone support.
- Provide the necessary information about your TV model, the issue you’re facing, and the troubleshooting steps you have already tried.
- Follow the instructions provided by the Samsung support representative and communicate any relevant details or error messages you encounter.
Samsung’s support team is well-equipped to handle various technical issues and can provide personalized assistance to help get your Smart TV back online. They may walk you through additional troubleshooting steps or guide you through more advanced solutions to resolve the connectivity problem.
Remember to be patient and provide as much information as possible to help the support team better understand and diagnose the issue. With their expertise and knowledge, they can assist you in finding a resolution to your Samsung Smart TV’s internet connectivity problem.