Introduction
Welcome to the digital age, where staying connected has become a necessity for most people. Whether it’s for work, entertainment, or staying connected with loved ones, a reliable internet connection has become an integral part of our daily lives. This is why it can be frustrating when your Verizon 4G service suddenly stops working.
Verizon Wireless, one of the leading telecommunications companies in the United States, offers a robust 4G network that provides fast and reliable internet access on compatible devices. However, like any technology, there may be instances when you experience issues with your Verizon 4G connection.
But don’t worry, as we’re here to shed some light on the possible causes of your Verizon 4G not working and help you troubleshoot the issue. This article will guide you through the nitty-gritty details of 4G technology, the potential reasons behind your 4G connection problems, and the steps you can take to troubleshoot the issue.
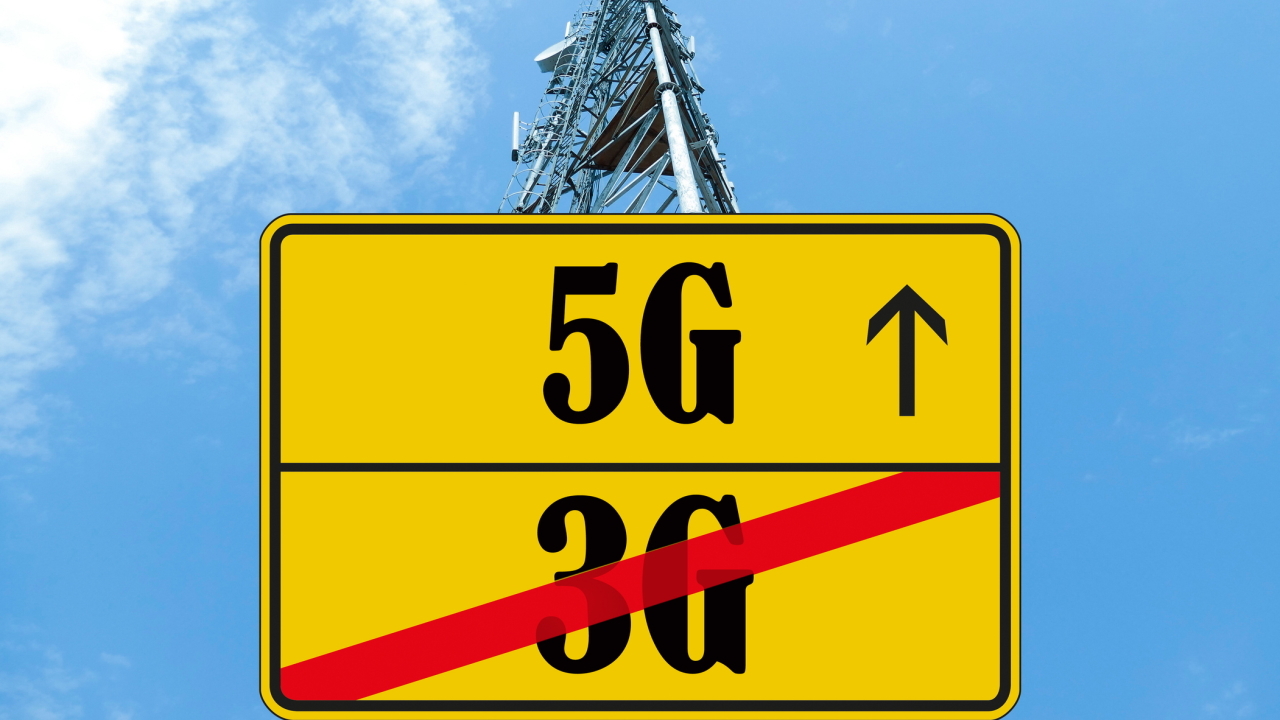
Before we dive into the troubleshooting steps, it’s helpful to have a basic understanding of 4G technology. 4G, also known as fourth generation wireless communication, is the latest standard in mobile network technology. It offers faster internet speeds, improved connectivity, and better quality voice and video calls compared to its predecessors like 3G.
Verizon’s 4G network utilizes advanced technologies such as LTE (Long Term Evolution) to ensure seamless internet browsing, faster downloads, and smooth streaming experiences for its customers. With Verizon’s extensive 4G coverage across the country, you can enjoy a reliable internet connection regardless of your location.
However, even with a robust network infrastructure, there can be various factors that may cause your Verizon 4G connection to stop working. This could range from network congestion and signal interference to issues with your device’s software or even a temporary service outage in your area.
Now that we have an overview of the importance of a stable 4G connection and the potential reasons behind your Verizon 4G not working, let’s dive deeper into the troubleshooting steps you can take to resolve the issue.
Understanding 4G Technology
To comprehend why your Verizon 4G connection may not be working, it’s essential to have a basic understanding of 4G technology. Fourth Generation (4G) is the latest standard in mobile network technology, enabling faster internet speeds and improved network connectivity.
Verizon’s 4G network operates on the Long Term Evolution (LTE) technology, which allows for seamless data transfer and enhanced voice and video calling capabilities. This technology utilizes different frequency bands to transmit data between your device and Verizon’s network towers.
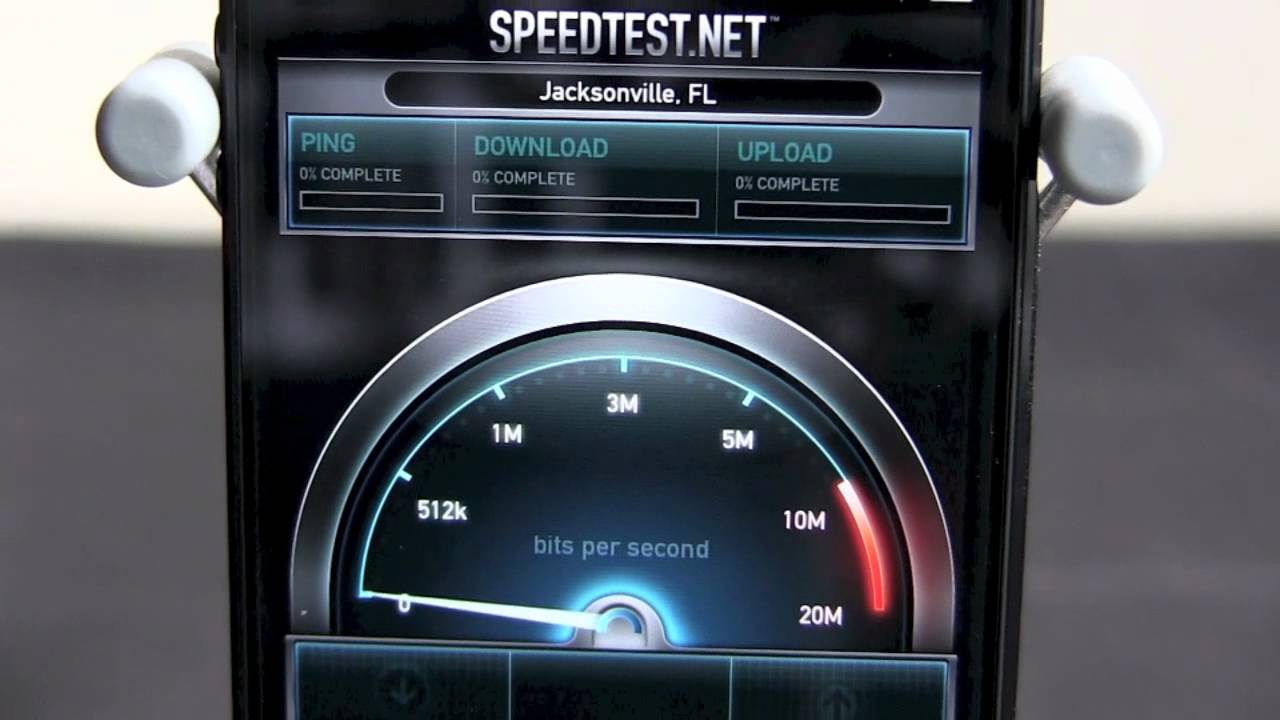
One of the key features of 4G technology is its ability to deliver high-speed internet access. With download speeds ranging from 5 to 12 megabits per second (Mbps) and upload speeds between 2 and 5 Mbps, 4G networks can handle bandwidth-demanding tasks like video streaming, online gaming, and large file downloads with ease.
4G technology also offers improved network reliability and stability compared to its predecessors. It utilizes multiple antennas to establish a strong and stable connection, reducing the chances of dropped calls or interrupted data transmissions. These antennas are strategically placed in Verizon’s network towers to provide coverage over large areas, ensuring a consistent 4G signal strength.
Another significant advantage of 4G technology is its reduced latency or the time it takes for data to travel from your device to the network and vice versa. Low latency is essential for real-time applications like video calls and online gaming, ensuring minimal delays and a smooth user experience.
Besides offering faster internet speeds and enhanced connectivity, 4G technology also supports advanced features such as Voice over LTE (VoLTE) and Voice over Wi-Fi (VoWiFi). These features allow for high-quality voice calls over the 4G network, providing crisp audio and better call quality compared to traditional voice calls.
It’s important to note that in order to enjoy the benefits of 4G technology, your device needs to be compatible with Verizon’s 4G network. Typically, newer smartphones, tablets, and other connected devices come with built-in 4G capabilities. However, it’s essential to check your device specifications to ensure it supports Verizon’s 4G bands.
Now that we have a grasp of the fundamentals of 4G technology, let’s explore the potential causes behind your Verizon 4G not working and the steps you can take to troubleshoot the issue.
Possible Causes of Verizon 4G Not Working
When your Verizon 4G connection stops working, it can be frustrating and inconvenient. Understanding the possible causes behind this issue can help you troubleshoot and resolve the problem effectively. Here are some potential reasons why your Verizon 4G may not be working:
1. Network Congestion: During peak usage hours or in densely populated areas, the 4G network may become congested, resulting in slower speeds or intermittent connectivity. When numerous users are simultaneously accessing the network, it can strain the network’s capacity and affect the performance of your 4G connection.
2. Signal Interference: Signal interference from physical obstructions or electronic devices can weaken the 4G signal. Thick walls, concrete structures, or even dense foliage can obstruct the signal, leading to poor reception and potential connectivity issues. Additionally, electronic devices such as microwaves, cordless phones, and baby monitors operating on similar frequencies can interfere with the 4G signal.
3. Outdated Device Software: If your device’s software is outdated, it can cause compatibility issues with Verizon’s 4G network. Software updates often include bug fixes, security patches, and improvements to network compatibility. Neglecting to update your device’s software can affect its ability to connect to and utilize the 4G network effectively.
4. Service Outage: Despite Verizon’s robust network infrastructure, occasional service outages can occur. These outages may be caused by network maintenance, severe weather conditions, or technical issues. If there is a service outage in your area, it can disrupt your 4G connection temporarily.
5. Physical Obstacles: The physical location of your device can impact the strength and reliability of your 4G connection. If you are in a remote or rural area, far away from Verizon’s network towers, your signal strength may be weaker. Similarly, being indoors or underground can also interfere with the signal, resulting in a poor 4G connection.
Understanding these potential causes can help you identify and address the issue with your Verizon 4G connection. In the next section, we will provide troubleshooting steps to help you resolve these issues and restore your 4G connectivity.
#1: Network Congestion
Network congestion is a common culprit behind connectivity issues on the Verizon 4G network. During peak hours or in densely populated areas, the increased number of users accessing the network can strain its capacity, resulting in slower speeds or intermittent connectivity.
When the network is congested, the available bandwidth is shared among all the connected devices, leading to reduced speeds for individual users. This can be particularly noticeable when streaming videos, downloading large files, or using bandwidth-intensive applications.
To determine if network congestion is the cause of your Verizon 4G not working, try the following steps:
1. Check Network Coverage: Verify that you are in an area with proper Verizon 4G coverage. You can use the Verizon coverage map or the Verizon Wireless website to check coverage availability in your location. If you are in a remote or rural area, it is possible that the network infrastructure may be limited, resulting in slower speeds or weak signal strength.
2. Time of Usage: Take note of the time when you experience connectivity issues. If the problems primarily occur during peak hours, such as during lunch breaks or after-work hours, it is likely that network congestion is the cause. During these times, a large number of users are simultaneously accessing the network, putting a strain on its capacity.
3. Off-Peak Usage: Alternatively, try using your Verizon 4G connection during non-peak hours, such as late at night or early in the morning. If you notice an improvement in speeds and connectivity during these times, it further indicates that network congestion is the issue.
4. Switch to Wi-Fi: If you have access to a stable Wi-Fi connection, consider connecting your device to Wi-Fi instead of relying solely on the Verizon 4G network. By using Wi-Fi, you can bypass the potential congestion on the cellular network and enjoy faster speeds.
In situations where network congestion is causing your Verizon 4G not to work as expected, there are a few things you can do:
Patience: During peak hours, it may be necessary to exercise patience and wait for the network load to decrease. As users start to disconnect or decrease their usage, network speeds should improve.
Alternate Promotion Data: Some mobile service providers offer promotions or data add-ons that provide access to less congested networks during peak hours. Check with Verizon to determine if any such options are available.
Network Optimization: Verizon employs techniques to optimize network traffic and prioritize certain types of data, such as streaming or downloading. These optimizations aim to deliver a better user experience even during times of congestion. However, it is important to keep in mind that speeds may still be slower than usual during congested periods.
By understanding the role of network congestion and following these suggestions, you can better manage and cope with connectivity issues related to high network demand.
#2: Signal Interference
Signal interference can be another reason why your Verizon 4G connection is not working properly. Interference can occur due to physical obstacles or electronic devices that disrupt the 4G signal, leading to poor reception and potential connectivity issues.
Here are a few factors that can cause signal interference:
Physical Obstructions: Thick walls, concrete structures, and even dense foliage can obstruct the 4G signal, resulting in a weaker connection. If you are indoors or in an area with significant physical obstacles between your device and the nearest Verizon network tower, it can impact the signal strength and overall connectivity.
Distance from Network Tower: The proximity to a Verizon network tower significantly impacts signal strength. If you are located far away from the tower, especially in remote or rural areas, the 4G signal may be weaker, leading to slower speeds or intermittent connectivity.
Electronic Device Interference: Various electronic devices operating on similar frequencies as Verizon’s 4G network can cause signal interference. Common devices that can disrupt the 4G signal include microwaves, cordless phones, baby monitors, and other wireless devices. These devices emit signals that can interfere with the 4G signal, resulting in a degraded or unstable connection.
To troubleshoot signal interference issues on your Verizon 4G connection, follow these steps:
1. Check Signal Strength: Start by checking the signal strength displayed on your device. If you are experiencing connectivity issues, the signal strength might be weak or fluctuating. Move to an area with better signal reception, such as near a window or away from any physical obstacles, to see if the signal improves.
2. Remove Physical Obstructions: If you are indoors, try moving closer to a window or an open area to minimize physical obstructions that could interfere with the 4G signal. Clear away any clutter or objects that might be blocking the signal path between your device and the nearest Verizon network tower.
3. Modify Device Location: If you are in a problematic area with weak signal reception, experiment with different locations to find the spot with the best signal strength. Sometimes, a slight change in position can make a significant difference in signal quality.
4. Eliminate Electronic Device Interference: Identify and turn off any electronic devices operating on similar frequencies as the Verizon 4G network. If you suspect interference from a particular device, temporarily turn it off or move it away from your device to see if the 4G signal improves.
5. Enable Wi-Fi Calling: If your device supports Wi-Fi calling, consider enabling it as an alternative option. Wi-Fi calling allows you to make and receive calls over a Wi-Fi connection instead of relying solely on the cellular network. By using Wi-Fi for voice calls, you can mitigate any signal interference issues caused by the 4G network.
By addressing potential signal interference issues, you can improve the reception and overall performance of your Verizon 4G connection. If signal interference persists despite these steps, it may indicate a different underlying issue that requires further troubleshooting or assistance from Verizon’s technical support team.
#3: Outdated Device Software
Outdated device software can be a significant factor behind your Verizon 4G connection not working as expected. Software updates are essential for maintaining compatibility with the latest network technologies and resolving bugs or performance issues. Neglecting to update your device’s software can result in connectivity problems and hinder the optimal functioning of your 4G connection.
Here are some key points to consider regarding device software:
Compatibility: Your device’s software must be compatible with Verizon’s 4G network. As technology advances, changes and enhancements are made to the network infrastructure, requiring devices to have up-to-date software to ensure seamless communication and connectivity.
Bug Fixes and Performance Improvements: Software updates often include bug fixes and performance improvements. These updates address known issues that may cause connectivity problems or impact the overall performance of your device on the Verizon 4G network.
Network Compatibility Updates: Cellular networks, including 4G, undergo optimizations and improvements that might require updates to your device’s software to ensure proper compatibility. Failing to install these updates can lead to issues with your device’s ability to connect to and utilize the 4G network effectively.
Troubleshooting steps to address issues related to outdated device software:
1. Check for Updates: Go to your device’s settings menu and check for any available software updates. If an update is available, download and install it. These updates can include important fixes and optimizations that can improve the performance of your device on the Verizon 4G network.
2. Enable Automatic Updates: To ensure that your device’s software remains up to date, enable automatic updates if available. This way, your device will automatically download and install the latest software updates released by the manufacturer or Verizon.
3. Factory Reset: If you are still experiencing network issues after updating your device’s software, performing a factory reset may help. Please note that a factory reset will erase all data on your device, so make sure to back up any important information before proceeding. This process will restore your device’s software to its original state, potentially resolving any software-related issues affecting your Verizon 4G connection.
4. Contact Device Manufacturer: If you have followed the above steps and are still experiencing connectivity issues, reach out to your device manufacturer’s support team. They can provide further assistance and guidance on resolving software-related issues that may be impacting your device’s compatibility with the Verizon 4G network.
Keeping your device’s software up to date is crucial for optimizing its performance and ensuring compatibility with Verizon’s 4G network. By regularly checking for updates and promptly installing them, you can mitigate potential software-related issues and maintain a reliable connection on the Verizon 4G network.
#4: Service Outage
Despite having a robust network infrastructure, occasional service outages can occur with Verizon’s 4G network. These outages may result from scheduled network maintenance, severe weather conditions, or unforeseen technical issues. When a service outage happens, it can temporarily disrupt your Verizon 4G connection.
Here are some key points to consider regarding service outages:
Scheduled Network Maintenance: To ensure optimal network performance and make necessary upgrades, Verizon occasionally schedules maintenance activities. During these periods, specific areas or even the entire network may experience temporary service disruptions. Resolving the issue often requires time for the maintenance to be completed.
Severe Weather Conditions: Extreme weather events, such as storms, hurricanes, or heavy snowfall, can impact cellular networks, including Verizon’s 4G network. Strong winds, power outages, or physical damage to network infrastructure can lead to service disruptions. Once the weather conditions improve and repairs are made, the network service is restored.
Technical Issues: Unforeseen technical problems, such as hardware malfunctions or software glitches, can also cause service outages. These issues can arise without any prior notice and may affect specific regions or the network as a whole. Resolving technical problems promptly requires the expertise of Verizon’s technical support team.
Although you may not have control over service outages, you can take a few steps to troubleshoot the issue:
1. Check Service Alerts: Visit the Verizon Wireless website or contact customer support to check for any service alerts or notifications regarding outages in your area. Verizon often provides updates on ongoing issues and estimated resolution times to keep customers informed.
2. Power Cycle Your Device: Power cycling your device can sometimes resolve minor connectivity issues. Turn off your device, wait a few seconds, and then turn it back on. This simple action can help reestablish network connections and restore your Verizon 4G service.
3. Reset Network Settings: If power cycling your device does not resolve the issue, try resetting your network settings. This action will clear any saved network configurations on your device and can help eliminate any misconfigurations that may be causing the problem.
4. Contact Verizon Support: If you have followed the above troubleshooting steps and are still experiencing a service outage, reach out to Verizon’s support team for further assistance. They can verify if there is an ongoing issue in your area and provide you with the necessary guidance or updates regarding the resolution of the outage.
Remember, service outages are temporary and generally resolved as quickly as possible by Verizon’s network technicians. Staying informed and contacting Verizon support for assistance will help you navigate these situations and stay connected once the outage is resolved.
#5: Physical Obstacles
Physical obstacles can be a significant hindrance to your Verizon 4G connection, causing weak signals or even complete signal loss. Various factors, such as distance from network towers and physical obstructions, can impact the strength and reliability of your connection.
Here are some key points to consider regarding physical obstacles:
Distance from Network Towers: The proximity of your device to the nearest Verizon network tower plays a crucial role in determining the strength of your 4G signal. If you are located far away from the tower, particularly in remote or rural areas, the signal strength may be weaker, resulting in reduced speeds and connectivity issues.
Building Construction: The materials used in the construction of buildings can significantly impact the penetration of cellular signals. Thick walls made of concrete or reinforced metal can obstruct the 4G signal, leading to poor reception. If you are indoors, the signal may be weakened or even lost entirely, especially in basements or heavily insulated areas.
Landscapes and Natural Structures: Natural structures like hills, mountains, and dense foliage can interfere with the cellular signal. If you are in an area with significant geographical features or surrounded by tall trees, the signal may be obstructed, resulting in weaker connectivity.
To address physical obstacles impacting your Verizon 4G connection, follow these steps:
1. Change Location: If you are experiencing weak signal reception, try moving to a different location. By changing your position, you may be able to find a spot with stronger signal strength. Moving closer to windows or going outdoors can help improve your chances of getting a better signal.
2. Use Signal Boosters: Consider using signal boosters or amplifiers to enhance the strength of the 4G signal. Signal boosters are devices that capture the weak signal and amplify it, boosting your connection’s performance. These devices can be especially useful if you are in an area with weak signal reception or experiencing frequent drops in connectivity.
3. Wi-Fi Calling: If you have access to a stable Wi-Fi connection, consider using Wi-Fi calling as an alternative. Wi-Fi calling allows you to make and receive calls over a Wi-Fi network instead of relying solely on the cellular network. By utilizing Wi-Fi for voice calls, you can bypass any signal issues and ensure clear and reliable communication.
4. External Antennas: Some devices, especially routers or mobile hotspots, allow for the connection of external antennas. These antennas can be positioned near windows or outdoors to maximize signal reception. External antennas are particularly useful in areas with weak signal coverage, offering improved connectivity and faster speeds.
By taking these steps to address physical obstacles, you can optimize your Verizon 4G connection and ensure reliable performance, even in challenging environments. However, if you consistently experience weak signal strength or connectivity issues despite these efforts, it may be necessary to contact Verizon’s support team for additional assistance.
Troubleshooting Steps for Verizon 4G Issues
If you are experiencing issues with your Verizon 4G connection, there are several troubleshooting steps you can take to identify and resolve the problem. By following these steps, you can increase the chances of restoring your 4G connectivity and enjoying a seamless internet experience.
Here are some troubleshooting steps for Verizon 4G issues:
1. Check Network Coverage: Ensure that you are in an area with proper Verizon 4G coverage. Visit the Verizon coverage map on their website or use their coverage checker tool to verify the availability of 4G service in your location. If you are in an area with weak or no coverage, consider moving to a different location or contacting Verizon for assistance.
2. Restart Your Device: Sometimes, a simple device restart can resolve connectivity issues. Turn off your device completely and then turn it back on after a few seconds. This action can refresh network settings and potentially restore your 4G connection.
3. Update Device Software: Check for any available software updates for your device. Outdated software can cause compatibility issues with Verizon’s 4G network. Go to your device’s settings and look for the software update option. If an update is available, download and install it to ensure your device’s compatibility with the network.
4. Reset Network Settings: Resetting network settings can help resolve network-related issues on your device. Go to the settings menu, find the network settings, and look for the option to reset them. Be aware that resetting network settings will remove saved Wi-Fi passwords and other network-related configurations, so make sure to have those details handy.
5. Remove SIM Card and Reinsert: In some cases, removing and reinserting the SIM card can help establish a better connection with the network. Turn off your device, carefully remove the SIM card, wait for a few seconds, and then reinsert it. Turn the device back on and check if your 4G connection is restored.
6. Contact Verizon Support: If the above troubleshooting steps do not resolve your Verizon 4G issues, it is recommended to reach out to Verizon’s support team for further assistance. They have the expertise to diagnose the problem and provide you with specific solutions based on your device, location, and network conditions.
By following these troubleshooting steps, you can increase the likelihood of resolving Verizon 4G issues and restoring your connection. Remember to perform these steps in the order given and test your 4G connection after each step to evaluate the effectiveness of the troubleshooting process.
#1: Check Network Coverage
When experiencing issues with your Verizon 4G connection, the first step is to check the network coverage in your area. Network coverage can vary depending on your location, and being in an area with weak or no coverage can impact your 4G connection’s performance.
To check the Verizon network coverage in your area, you have a couple of options:
1. Verizon Coverage Map: Visit the Verizon Wireless website and navigate to their coverage map section. Enter your address or ZIP code to view the network coverage in your specific location. The map will display areas with 4G coverage, as well as areas with limited or no coverage.
2. Verizon Coverage Checker: Use Verizon’s coverage checker tool to verify the availability of 4G service in your area. This tool allows you to enter your address or ZIP code and provides you with detailed information about the network coverage in your specific location. It can give you a more accurate assessment of the coverage quality you can expect.
When checking the network coverage, consider the following:
Signal Strength: Look for areas with strong signal strength, as they are more likely to provide faster and more reliable 4G connectivity. Keep in mind that coverage may vary within a specific location, so it’s essential to consider factors such as the proximity to nearby network towers or potential obstructions.
Indoor vs. Outdoor Coverage: Network coverage may differ when you are indoors compared to when you are outdoors. It is common for signal strength to be slightly weaker indoors due to physical obstructions like walls and structures. Checking the coverage in both indoor and outdoor settings can help you determine if there is any significant difference.
Roaming Coverage: If you are in an area where Verizon does not have coverage, your device may roam on another carrier’s network. Verizon has partnerships with various carriers, allowing you to connect to their networks when there is no Verizon coverage available. However, keep in mind that roaming may incur additional charges or have limited access to Verizon’s network features.
By checking the network coverage in your area, you can determine if the connectivity issues you are experiencing are related to Verizon’s network coverage. If you find that there is weak or no coverage in your area, consider moving to a location with better coverage or reaching out to Verizon’s customer support for potential solutions or alternatives.
#2: Restart Your Device
When you encounter connectivity issues with your Verizon 4G connection, one of the simplest and most effective troubleshooting steps is to restart your device. Restarting your device can resolve minor glitches and refresh network settings, potentially restoring your 4G connection to its optimal performance.
Here’s how you can restart your device:
1. Turn Off Your Device: Locate the power button on your device and press and hold it until a power menu appears. Depending on the device, you may need to select the “Power Off” option from the menu or simply continue holding the power button until the device powers off.
2. Wait for a Few Seconds: Once your device is powered off, wait for about 10-15 seconds before proceeding to the next step. This short interval gives your device’s components enough time to fully shut down.
3. Turn On Your Device: Press and hold the power button again until the device powers back on. Depending on your device, it may take a few moments to boot up and establish the connection with the Verizon network.
After restarting your device, check if your 4G connection is restored. Here are a few considerations regarding the benefits of restarting your device:
Refresh Network Settings: Restarting your device can reset network settings and help resolve any temporary glitches or conflicts that may arise. It clears the device’s cache, initiates a clean start, and re-establishes the network connection with Verizon’s 4G network.
Fix Minor Software Issues: Sometimes, minor software issues can affect the performance of your device, including its ability to connect to the 4G network. A restart can fix these issues as it typically terminates any background processes or services that may be causing problems.
Reconnect to the Network: When you restart your device, it re-establishes its connection with the network towers in your area. This can help improve the signal strength and stability of your Verizon 4G connection.
If restarting your device resolves the connectivity issue, it is likely that it was caused by a temporary software or network glitch. However, if the problem persists, additional troubleshooting steps may be required.
Keep in mind that regularly restarting your device can also be beneficial for overall performance and can help keep your device running smoothly. It is a simple yet effective step to troubleshoot various issues and ensure that your Verizon 4G connection remains stable and reliable.
#3: Update Device Software
Ensuring that your device software is up to date is crucial for maintaining a smooth and reliable Verizon 4G connection. Software updates often include bug fixes, security enhancements, and improvements to network compatibility, making them essential for optimal device performance on the 4G network.
To update your device software, follow these steps:
1. Check for Updates: Go to your device’s settings menu and look for the “Software Update” or “System Update” option. The exact location may vary depending on your device and operating system. Tap on the option to check for any available updates.
2. Download and Install Updates: If an update is available, follow the prompts to download and install it. Depending on the size of the update and your internet connection speed, this process may take several minutes or longer.
3. Keep Connected: Ensure that you have a stable internet connection throughout the update process. Using a Wi-Fi connection is recommended to minimize data usage and potentially speed up the download and installation of updates.
4. Restart Your Device: After the update is successfully installed, restart your device. This step helps ensure that all new software changes take effect properly and can help resolve any lingering issues or conflicts.
Here are a few important points to consider concerning the benefits of updating your device software:
Address Software Bugs: Software updates often include bug fixes that address known issues or vulnerabilities. Updating your device software can resolve connectivity bugs that may be affecting your Verizon 4G connection, allowing for a smoother and more stable user experience.
Improve Network Compatibility: Cellular networks, including Verizon’s 4G network, undergo regular optimizations and improvements. Updates to your device software often include these enhancements, ensuring compatibility with the latest network technologies and protocols, and potentially enhancing your 4G connection performance.
Enhance Security: Software updates typically include security patches that safeguard your device from potential threats and vulnerabilities. Keeping your device software up to date helps protect your personal information and ensures a safer browsing experience on the Verizon 4G network.
By regularly updating your device software, you can maximize the performance of your device on Verizon’s 4G network and minimize potential connectivity issues or complications. It is a straightforward and crucial step in maintaining a reliable and efficient 4G connection.
#4: Reset Network Settings
If you’re experiencing persistent connectivity issues with your Verizon 4G connection, resetting your device’s network settings can help resolve network-related conflicts or misconfigurations. By resetting the network settings, you essentially restore the default network configurations, which can help establish a more stable and reliable connection.
To reset network settings on your device, follow these steps:
1. Go to Settings: Open the settings menu on your device. The location of the network settings may vary depending on your device and operating system.
2. Find Network Settings: Look for the option named “Network Settings,” “Wireless & Networks,” “Connections,” or a similar alternative. Tap on the option to access the network settings menu.
3. Reset Network Settings: Within the network settings menu, locate the option to reset or restore network settings. It may be named “Reset Network Settings,” “Reset Wi-Fi, Mobile & Bluetooth,” or something similar. Tap on the option to proceed with the reset.
4. Confirm Reset: A warning message may appear, informing you that resetting network settings will remove saved Wi-Fi passwords and clear other network-related configurations. Confirm that you understand the consequences and proceed with the reset.
5. Restart Your Device: After the network settings reset is complete, restart your device. This step helps ensure that all changes take effect properly and establish a fresh connection with the Verizon 4G network.
Here are a few key points to consider regarding the benefits of resetting network settings:
Clear Misconfigurations: Over time, your device’s network settings may accumulate misconfigurations or conflicts that can interfere with the Verizon 4G connection. Resetting network settings removes these potential issues and allows you to start fresh with default network configurations.
Resolve Connectivity Issues: Network-related conflicts or misconfigurations can lead to connectivity problems. By resetting network settings, you eliminate these potential culprits and provide a clean slate for your device to establish a stable connection with the Verizon 4G network.
Reconnect to Networks: After the network settings reset, your device will prompt you to reconnect to Wi-Fi networks and mobile networks. This step ensures that your device establishes a fresh connection and allows you to input the necessary network information to connect to Verizon’s 4G network.
Resetting network settings can be an effective troubleshooting step for various connectivity issues on your device. While it may require re-entering network credentials and adjusting some settings, it can often resolve problems related to misconfigurations or conflicts and restore your Verizon 4G connection to its optimal performance.
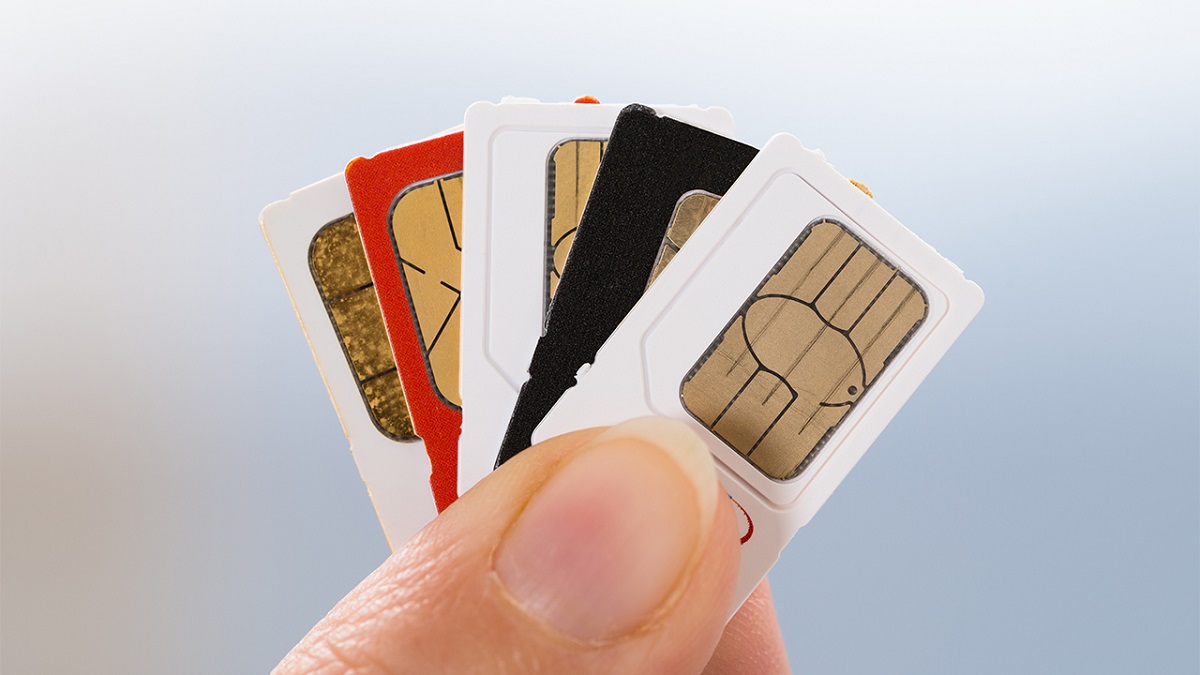
#5: Remove SIM Card and Reinsert
If you’re encountering issues with your Verizon 4G connection, removing and reinserting the SIM card can help establish a better connection with the network. A SIM card, or Subscriber Identity Module, is a small chip that stores your device’s network information and allows it to connect to the Verizon network.
Here’s how you can remove and reinsert the SIM card:
1. Power Off Your Device: Before removing the SIM card, turn off your device completely. This ensures that you won’t accidentally damage the SIM card or disrupt any ongoing processes.
2. Locate the SIM Card Tray: Most devices have a SIM card tray located on the side or the top of the device. You will usually find a small pinhole or a small tray ejection slot near it.
3. Eject the SIM Card Tray: Insert the SIM card ejector tool or a small paperclip into the pinhole or ejection slot to release the SIM card tray. Gently apply pressure until the tray pops out.
4. Remove the SIM Card: Carefully remove the SIM card from the tray. Take note of the orientation of the SIM card, as you will need to insert it with the correct side facing up.
5. Inspect the SIM Card: Take a moment to inspect the SIM card for any visible damage, such as scratches or bent contacts. If you notice any damage, contact your service provider for a replacement SIM card.
6. Reinsert the SIM Card: Align the SIM card with the tray, ensuring that the notched corner or the gold contacts match the tray’s groove. Gently push the tray back into the device until it clicks into place.
7. Power On Your Device: After reinserting the SIM card, turn on your device. Give it a few moments to establish a connection with the Verizon network.
Here are a few important points to consider regarding removing and reinserting the SIM card:
Poor Contact: Sometimes, the SIM card may not make proper contact with the device’s SIM card slot, leading to connectivity issues. Removing and reinserting the SIM card ensures a firm and reliable connection.
Network Authentication: When you reinsert the SIM card, your device goes through a brief process to authenticate itself on the Verizon network. This helps establish a secure connection and ensure that your device can communicate and access the 4G network efficiently.
Hardware Troubleshooting: If you’ve encountered other troubleshooting steps but the issue persists, removing and reinserting the SIM card can serve as a hardware troubleshooting step. It helps eliminate the possibility of a loose or faulty SIM connection.
By removing and reinserting the SIM card, you give your device a fresh start and ensure a secure and reliable connection with Verizon’s 4G network. If the problem persists after trying this step, it may indicate an issue beyond the SIM card, and further technical support may be required from Verizon or the device manufacturer.
#6: Contact Verizon Support
If you’ve exhausted all troubleshooting steps and are still experiencing issues with your Verizon 4G connection, it’s time to reach out to Verizon’s support team for further assistance. Their dedicated support representatives have the knowledge and tools to help diagnose and resolve more complex network-related problems.
Here’s how you can get in touch with Verizon support:
1. Customer Service Hotline: Dial Verizon’s customer service hotline to speak with a representative directly. The hotline number can usually be found on their website or on your billing statement. Explain your issue and provide any necessary information they may require, such as your account details or device information.
2. Online Support: Visit Verizon’s support website and explore their online resources. They often have helpful articles, FAQs, and troubleshooting guides tailored to address common connectivity issues. If you can’t find a solution, look for options to chat with a support representative online.
3. Social Media: Reach out to Verizon’s support team through their social media channels, such as Twitter or Facebook. Many companies, including Verizon, have dedicated support teams that respond to customer inquiries via social media platforms. Send them a direct message describing your issue, and they will guide you through the troubleshooting or escalate the matter if necessary.
4. In-Person Support: If your issue requires hands-on assistance, locate a nearby Verizon store or authorized retailer. Representatives at these locations can provide in-person support, including troubleshooting your device or potentially replacing faulty equipment.
When contacting Verizon support, here are some recommendations to ensure a productive conversation:
Provide Detailed Information: Clearly explain the issue you’re experiencing and any troubleshooting steps you’ve already taken. Include relevant details such as error messages, device model, and software version to help the support team understand and assess the situation more effectively.
Follow Instructions: Be attentive and follow the instructions provided by the support representative. They may guide you through additional troubleshooting steps or ask you to provide specific information or perform tests to narrow down the root cause of the issue.
Document Reference Numbers: If the support representative assigns a reference number to your case or provides you with any other documentation, make sure to jot it down. This reference number can be useful for future follow-ups or if you need to escalate the issue.
Remember, Verizon’s support team is there to assist you, and they have the expertise to handle a wide range of network-related concerns. By contacting them, you can get personalized assistance specific to your situation and work towards resolving the issues affecting your Verizon 4G connection.
Conclusion
In this guide, we have explored various troubleshooting steps to help resolve issues with your Verizon 4G connection. We began by understanding the fundamentals of 4G technology and the potential causes behind connectivity problems. We then discussed methods to troubleshoot and resolve these issues, including checking network coverage, restarting your device, updating device software, resetting network settings, removing and reinserting the SIM card, and contacting Verizon support.
Verizon’s 4G network offers fast and reliable connectivity, but occasional disruptions can occur due to network congestion, signal interference, outdated device software, service outages, or physical obstacles. By following the troubleshooting steps outlined in this guide, you can address these issues and restore your Verizon 4G connection to its optimal performance.
Remember to be patient and thorough when troubleshooting. Start by checking your network coverage and device settings, and then proceed with the recommended troubleshooting steps. If the issue persists, don’t hesitate to contact Verizon support for assistance.
Ultimately, maintaining a stable and reliable 4G connection is important in the digital age. Whether you rely on it for work, entertainment, or staying connected with loved ones, a functional 4G connection enables seamless internet access. By understanding the potential causes of connectivity issues and utilizing the troubleshooting steps provided, you can overcome these challenges and ensure a smooth experience on the Verizon 4G network.