Introduction
Creating a home lab is a popular choice for many tech enthusiasts and professionals who want to experiment, learn, and hone their skills. Whether you’re setting up a small lab for personal projects or building a comprehensive testing environment, one essential component you’ll need is a server rack. A server rack provides organized and secure storage for your networking equipment, servers, and other hardware. However, with so many options available in the market, it can be overwhelming to choose the right server rack for your home lab.
Fortunately, by considering a few key factors, you can find a server rack that suits your specific needs. This article will guide you through the decision-making process, helping you understand the important considerations and providing recommendations for various budgets and requirements.
When choosing a server rack for your home lab, it’s crucial to assess the size and space available as well as the equipment you plan to house. This includes considering rack mount sizes, whether you need a 2-post or 4-post rack, and the adequate rack depth to accommodate your hardware. Additionally, you should think about cooling and ventilation options to ensure optimal performance and prevent overheating. Cable management features and security considerations are also important aspects to think about when selecting a server rack.
Moreover, as a home lab is typically located in a residential area, it’s essential to address noise reduction solutions to maintain a quiet environment. Finally, budget-friendly options will be discussed, ensuring that you can find a suitable server rack without breaking the bank.
By the end of this article, you’ll have a solid understanding of the factors to consider when choosing a server rack for your home lab, empowering you to make an informed decision that meets your needs and budget. So, let’s dive in and explore the world of server racks!
Factors to Consider When Choosing a Server Rack for a Home Lab
When selecting a server rack for your home lab, several important factors should be taken into consideration. These factors will help you make an informed decision and ensure that the rack meets your specific requirements. Let’s explore these factors in detail:
- Size and Space: Assess the available space in your home lab and choose a server rack that fits comfortably. Consider the height, width, and depth of the rack and ensure it can hold all your equipment without overcrowding the area.
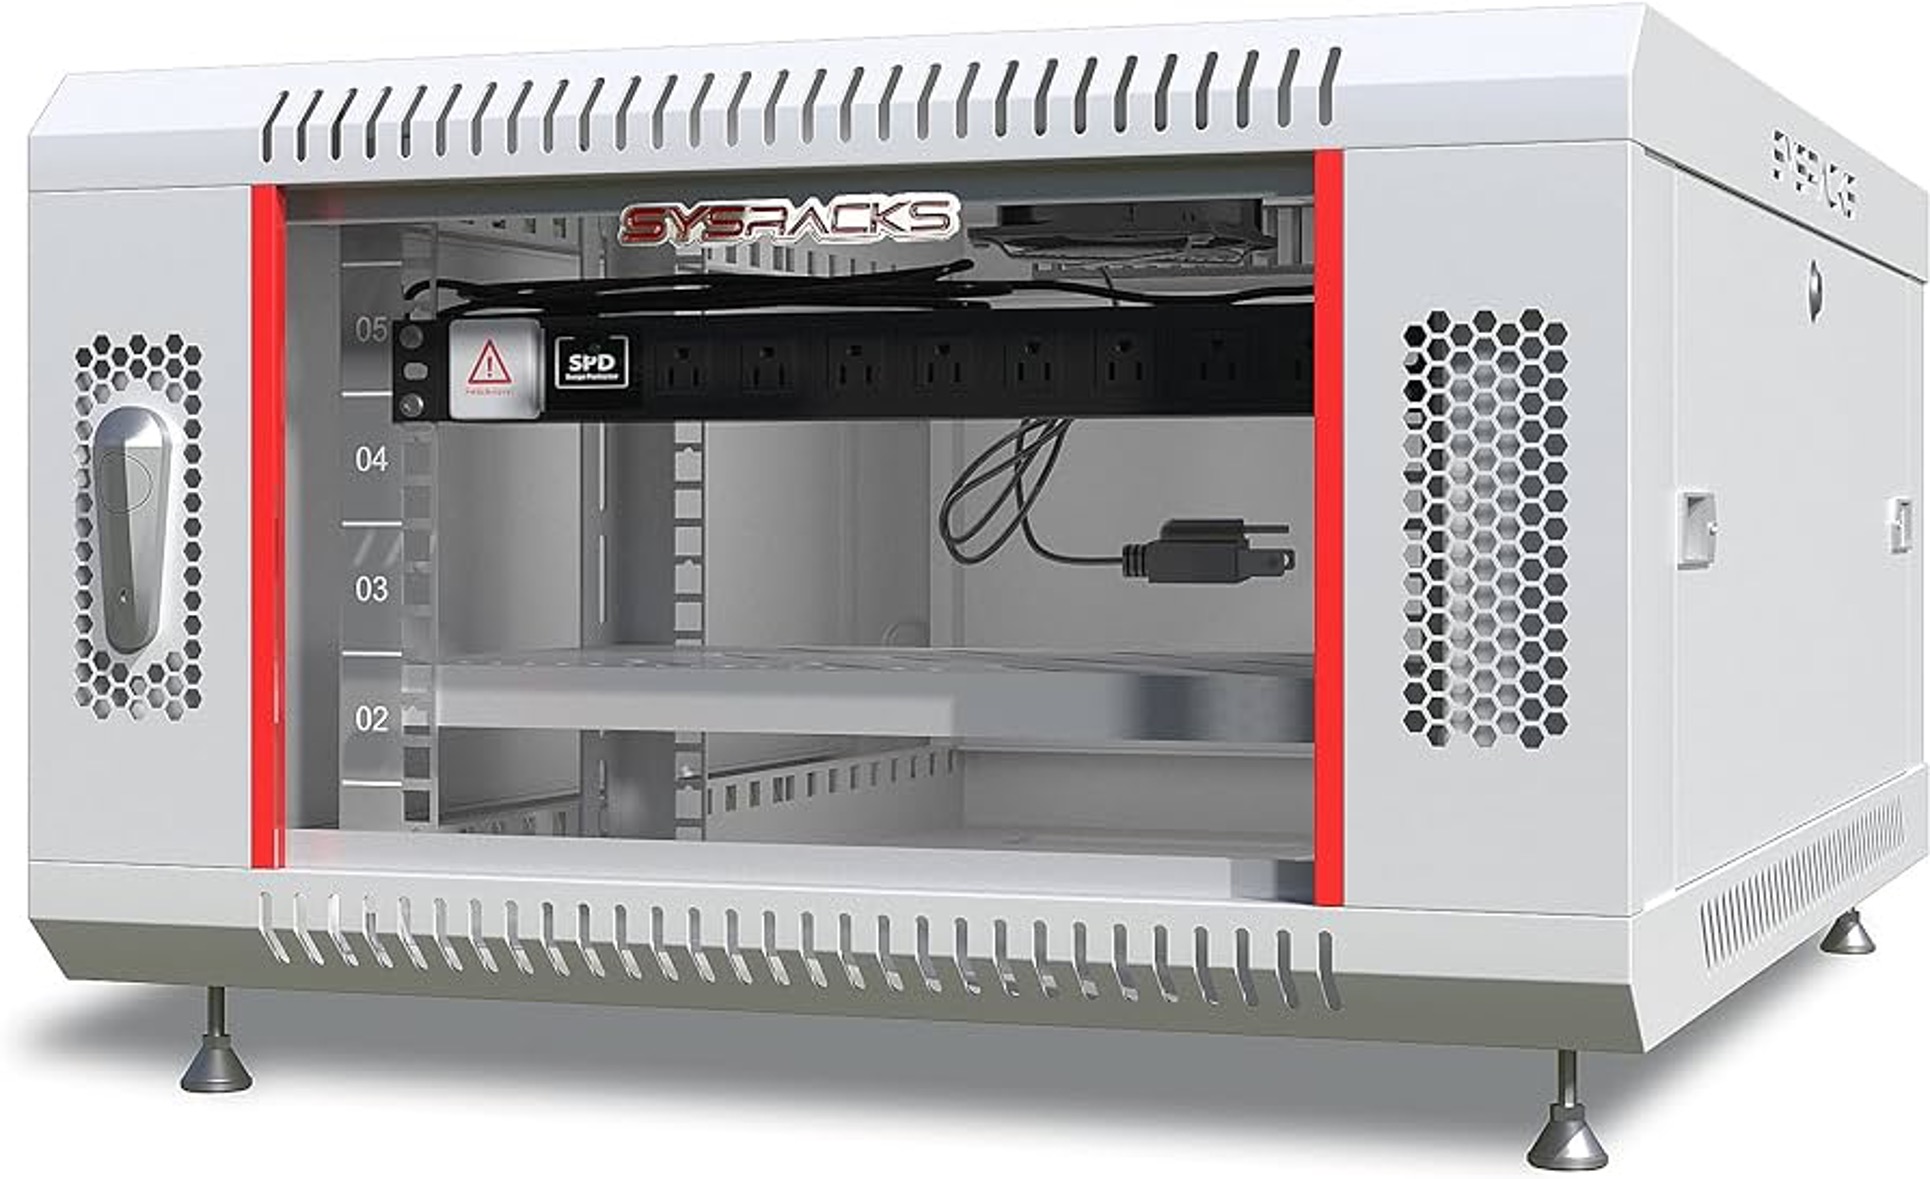
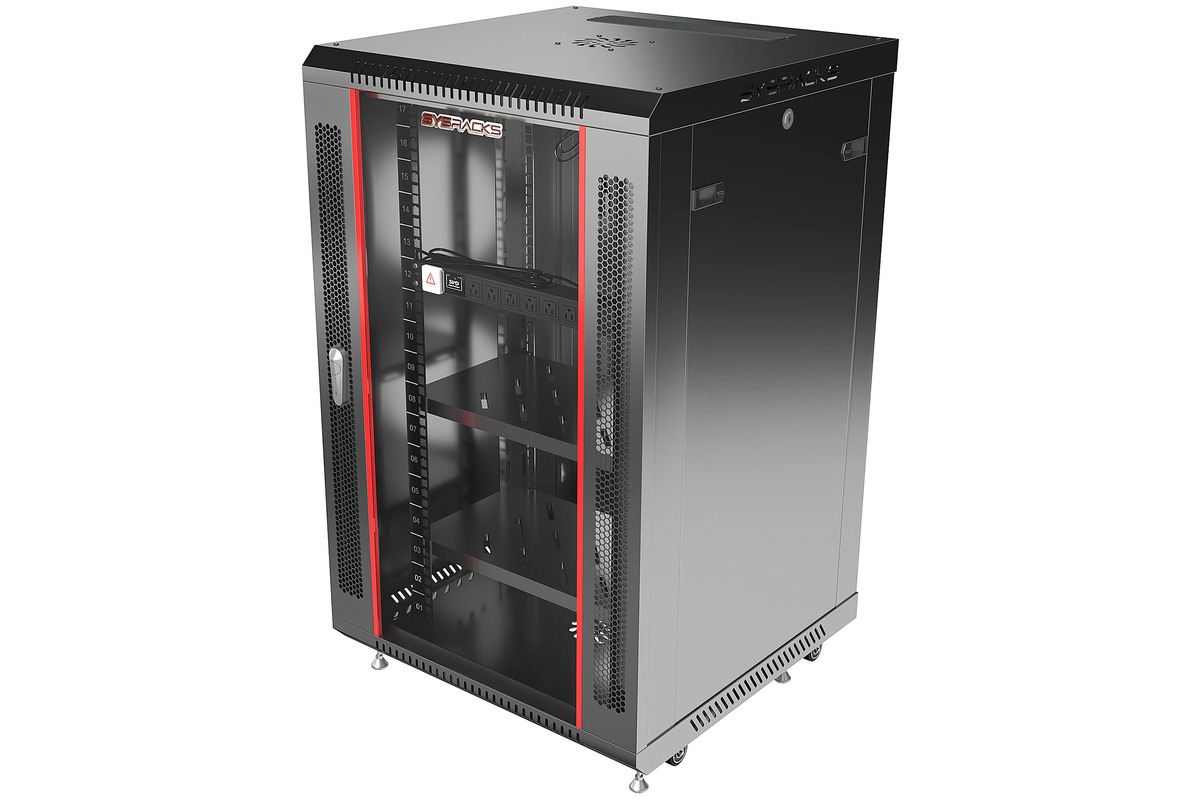
- Rack Mount Sizes: Familiarize yourself with the various rack mount sizes, such as 1U, 2U, and 4U, and determine the size that suits your hardware. Ensure that the chosen rack can accommodate the number and size of servers, switches, and other devices you plan to install.
- 2-Post Racks vs. 4-Post Racks: Decide whether you need a 2-post or 4-post rack. 2-post racks are suitable for lightweight equipment and cost-effective solutions, whereas 4-post racks offer more stability and are ideal for heavier equipment.
- Rack Depth and Equipment Compatibility: Consider the depth of the rack to ensure compatibility with your equipment. Rack depth is particularly important if you plan to install servers or networking devices with longer depths. The rack should have ample space for cables and provide easy accessibility to the mounted equipment.
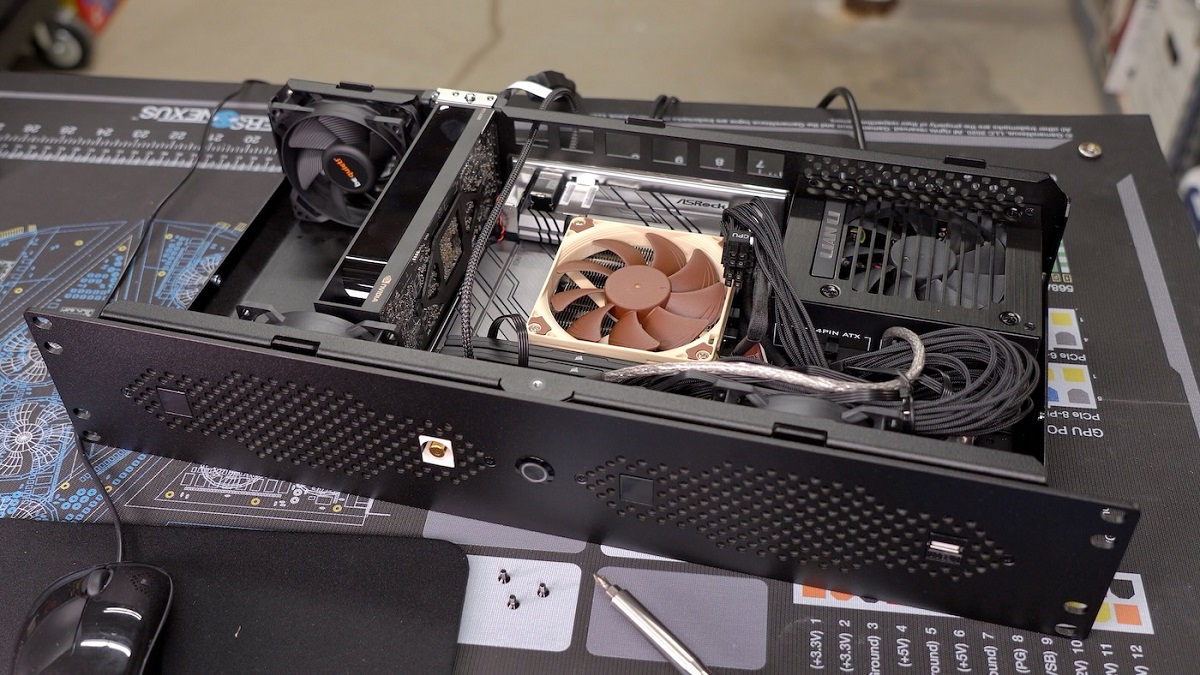
- Cooling and Ventilation Options: Proper airflow and cooling are crucial for maintaining optimal performance and preventing overheating. Look for server racks with built-in cooling features like fans, ventilation panels, and cable management options that facilitate proper airflow and temperature regulation.
- Cable Management Features: Effective cable management is essential for creating a neat and organized home lab. Look for server racks that offer cable management features such as cable routing panels, cable trays, and cable management rings. These features will help you keep your cables organized and easily accessible for maintenance and troubleshooting.
- Security Considerations: Home labs often contain sensitive and valuable equipment. Ensure that the server rack you choose offers adequate security features such as lockable doors, side panels, and lockable cabinets. This will help protect your equipment from theft or unauthorized access.
- Noise Reduction Solutions: As home labs are typically located in residential areas, it’s important to consider noise reduction solutions. Look for server racks with sound-dampening materials, vibration dampeners, or racks designed specifically for quiet operation. These measures will help minimize noise and maintain a peaceful environment.
- Budget-Friendly Options: Server racks come in a wide range of prices. Set a budget and explore options that meet your requirements without exceeding your financial limitations. Keep in mind that some lower-priced racks may lack certain features, so prioritize the ones that are most important to your home lab setup.
By considering these factors, you can make an informed decision and choose a server rack that meets your specific needs and requirements. Each factor plays a crucial role in creating a functional and efficient home lab setup. So, take the time to evaluate your needs and explore the available options to find the perfect server rack.
Understanding Rack Mount Sizes
When choosing a server rack for your home lab, it’s important to understand rack mount sizes and how they impact your equipment’s compatibility. Rack mount sizes refer to the standard unit of measurement used to determine the height of networking equipment and servers that can be mounted in a server rack.
The most common rack mount sizes are 1U (one unit), 2U (two units), and 4U (four units). These sizes allow for easy stacking and organization of equipment within the rack. Each unit size corresponds to a specific height measurement, typically around 1.75 inches or 44.45 millimeters. So, a server or device that is 1U tall will occupy a space that is 1.75 inches or 44.45 millimeters in height within the rack.
When planning your home lab setup, it’s important to consider the rack mount sizes of your equipment to ensure compatibility with the chosen server rack. Evaluate the number and size of servers, switches, and other devices you plan to install, and choose a rack that can accommodate them.
For smaller setups with limited equipment, a server rack with a few 1U or 2U spaces might suffice. However, if you have more substantial hardware requirements, you may need to opt for a rack with greater height capacity, such as a 4U rack. Keep in mind that while 4U racks offer more space for equipment, they also require more vertical clearance in your home lab.
It’s worth noting that some equipment, such as servers or networking devices, may have non-standard heights, such as half-rack or third-rack sizes. In such cases, you’ll need to consider specialized racks or rack-mounting kits designed for that specific equipment.
Understanding rack mount sizes will help you plan and organize your home lab more efficiently. By selecting a server rack with the appropriate number and sizes of rack mount units, you can ensure that all your equipment fits securely and functions optimally within the rack.
Take the time to assess your equipment’s rack mount sizes and choose a server rack that can accommodate them. This will simplify the installation process and help keep your home lab space neat and organized.
2-Post Racks vs. 4-Post Racks
When selecting a server rack for your home lab, one crucial decision to make is whether to opt for a 2-post rack or a 4-post rack. Both options have their advantages and considerations, and understanding the differences will help you make the right choice for your specific needs.
2-Post Racks:
2-post racks, also known as relay racks or telco racks, are a cost-effective solution for small home labs or environments where space is limited. As the name suggests, these racks have two vertical posts at the front and rear which support the equipment. They are designed to primarily accommodate lightweight networking equipment, patch panels, and telecommunication equipment.
The main advantage of 2-post racks is their simplicity and open design, which allows for easy access to the equipment from both the front and rear. This makes it convenient to install and maintain your devices. They also take up less floor space compared to 4-post racks, making them ideal for home labs with limited room.
However, it’s important to note that 2-post racks may lack the stability and load-bearing capacity of 4-post racks. They may not be suitable for heavy and deep servers that require more support. If you plan to house substantial equipment or anticipate future expansion, a 4-post rack may be a better choice.
4-Post Racks:
4-post racks are more robust and stable compared to 2-post racks. They are designed to support heavier and deeper equipment, making them suitable for larger home labs or environments where equipment density is high. These racks provide additional support and rigidity through the use of four vertical posts at the front and rear.
The advantage of 4-post racks is their superior weight capacity, making them suitable for accommodating servers, storage devices, networking equipment, and other heavy hardware. They also provide better cable management options with dedicated channels and holes for routing cables.
One thing to consider when selecting a 4-post rack is that they occupy more floor space compared to 2-post racks. Additionally, their design may restrict access to the rear of the equipment. However, many 4-post racks offer adjustable mounting depths and sliding rails, which allow for easier installation and maintenance from the rear.
Ultimately, the choice between a 2-post rack and a 4-post rack depends on your home lab requirements and future expansion plans. If you have lightweight equipment and limited space, a 2-post rack may suffice. However, if you have heavier or deeper equipment, and anticipate future growth, a 4-post rack offers greater stability and scalability.
Evaluate your equipment needs and consider the long-term goals of your home lab before making a decision. This will ensure that you choose a rack that can adequately support and accommodate your hardware configuration.
Rack Depth and Equipment Compatibility
When choosing a server rack for your home lab, it’s essential to consider the rack depth and its compatibility with your equipment. Rack depth refers to the distance from the front to the back of the rack and determines how much space you have to accommodate your hardware.
Understanding the depth requirements of your equipment is crucial to ensure a proper fit and allow for easy installation and maintenance. Most server racks offer adjustable mounting depths, allowing you to customize the configuration to suit your specific needs. Here are a few considerations regarding rack depth and equipment compatibility:
Evaluating Equipment Depth:
Measure the depth of your equipment, including servers, networking devices, and any other hardware you plan to install in the rack. Check the manufacturer’s specifications or measure from the front panel to the deepest part of the equipment to get an accurate measurement. Keep in mind that some equipment may have additional cables or protruding components that need to be accounted for when determining the required rack depth.
Choosing the Right Rack Depth:
Based on your equipment’s depth, select a server rack that offers sufficient space to accommodate all the components. You want to ensure that there is enough clearance between the front and rear posts of the rack to comfortably house your hardware. It’s advisable to go for a rack with a few extra inches of depth to allow for future expansion or the addition of larger equipment.
Consider Airflow and Access:
Proper ventilation and easy access to the equipment are essential for maintaining optimal performance and facilitating maintenance. Ensure that the chosen rack depth provides adequate space for airflow and does not obstruct the rear of the equipment, making it difficult to connect cables or perform maintenance tasks. Look for racks with open designs or removable panels for better airflow and accessibility.
Adjustable Mounting Depths:
Flexibility is vital when it comes to accommodating different equipment sizes and configurations. Opt for a server rack that offers adjustable mounting depths, allowing you to modify the spacing between the front and rear posts as needed. This will enable you to accommodate a variety of equipment sizes in your home lab setup.
Consider Cable Management:
Effective cable management is crucial to maintain a neat and organized home lab. Look for server racks that offer built-in cable management features such as cable routing panels, cable trays, or vertical cable managers. These features will help you keep your cables organized and prevent them from obstructing airflow or becoming tangled.
By considering rack depth and equipment compatibility, you can ensure that your home lab setup is efficient, organized, and capable of accommodating your hardware. Take the time to evaluate your equipment’s depth and choose a server rack that offers sufficient space and adjustable mounting options. Doing so will simplify installation, maintenance, and future expansion of your home lab.
Cooling and Ventilation Options
Proper cooling and ventilation are essential for maintaining optimal performance and preventing overheating of your home lab equipment. When choosing a server rack for your setup, it’s important to consider the cooling and ventilation options available to ensure that your hardware operates efficiently and reliably.
Passive Cooling:
In a server rack, passive cooling refers to the natural airflow generated by the ventilation panels and the arrangement of equipment within the rack. The design of the rack should allow for proper airflow, with ventilation panels strategically placed to facilitate the movement of cool air from the front of the rack to the rear, where it is expelled. Ensure that the server rack you choose has adequate ventilation and that the layout of your equipment allows for optimal airflow.
Active Cooling:
Active cooling options, such as fans, can be used in conjunction with passive cooling to enhance airflow within the server rack. Fans help in circulating air, preventing hot spots, and expelling hot air more efficiently. Look for server racks that have built-in fans or fan mounting options, allowing you to install fans at strategic positions for improved cooling. Additionally, consider the noise level of the fans if noise reduction is a concern for your home lab setup.
Cable Management and Airflow:
Effective cable management plays a crucial role in maintaining proper airflow within the server rack. Poor cable management can obstruct ventilation and obstruct the flow of cool air, leading to increased temperatures. Look for server racks that offer cable management features such as cable routing panels, cable trays, or vertical cable managers. These features will help you keep your cables organized and ensure that they don’t impede the airflow within the rack.
Additional Cooling Measures:
In addition to passive and active cooling, other measures can be taken to improve cooling efficiency. For example, consider the positioning of your home lab – placing it in a well-ventilated area of your home will aid in overall cooling. Additionally, you can use blanking panels to cover empty spaces in the rack, preventing hot air from recirculating and optimizing airflow. Installing temperature monitoring systems can also help you keep an eye on the internal temperatures of your equipment and address any potential cooling issues promptly.
Consider Environmental Factors:
Remember to consider the environmental factors of the room where your home lab is located. Factors such as room temperature, humidity levels, and dust accumulation can all impact the cooling requirements of your equipment. Ensure that your server rack’s cooling and ventilation options are suitable for the specific conditions in your home lab environment.
By considering the cooling and ventilation options available in server racks, you can ensure that your home lab equipment remains cool, reducing the risk of overheating and optimizing performance. Proper airflow and cooling will help prolong the lifespan of your hardware and create a stable environment for your home lab experiments and projects.
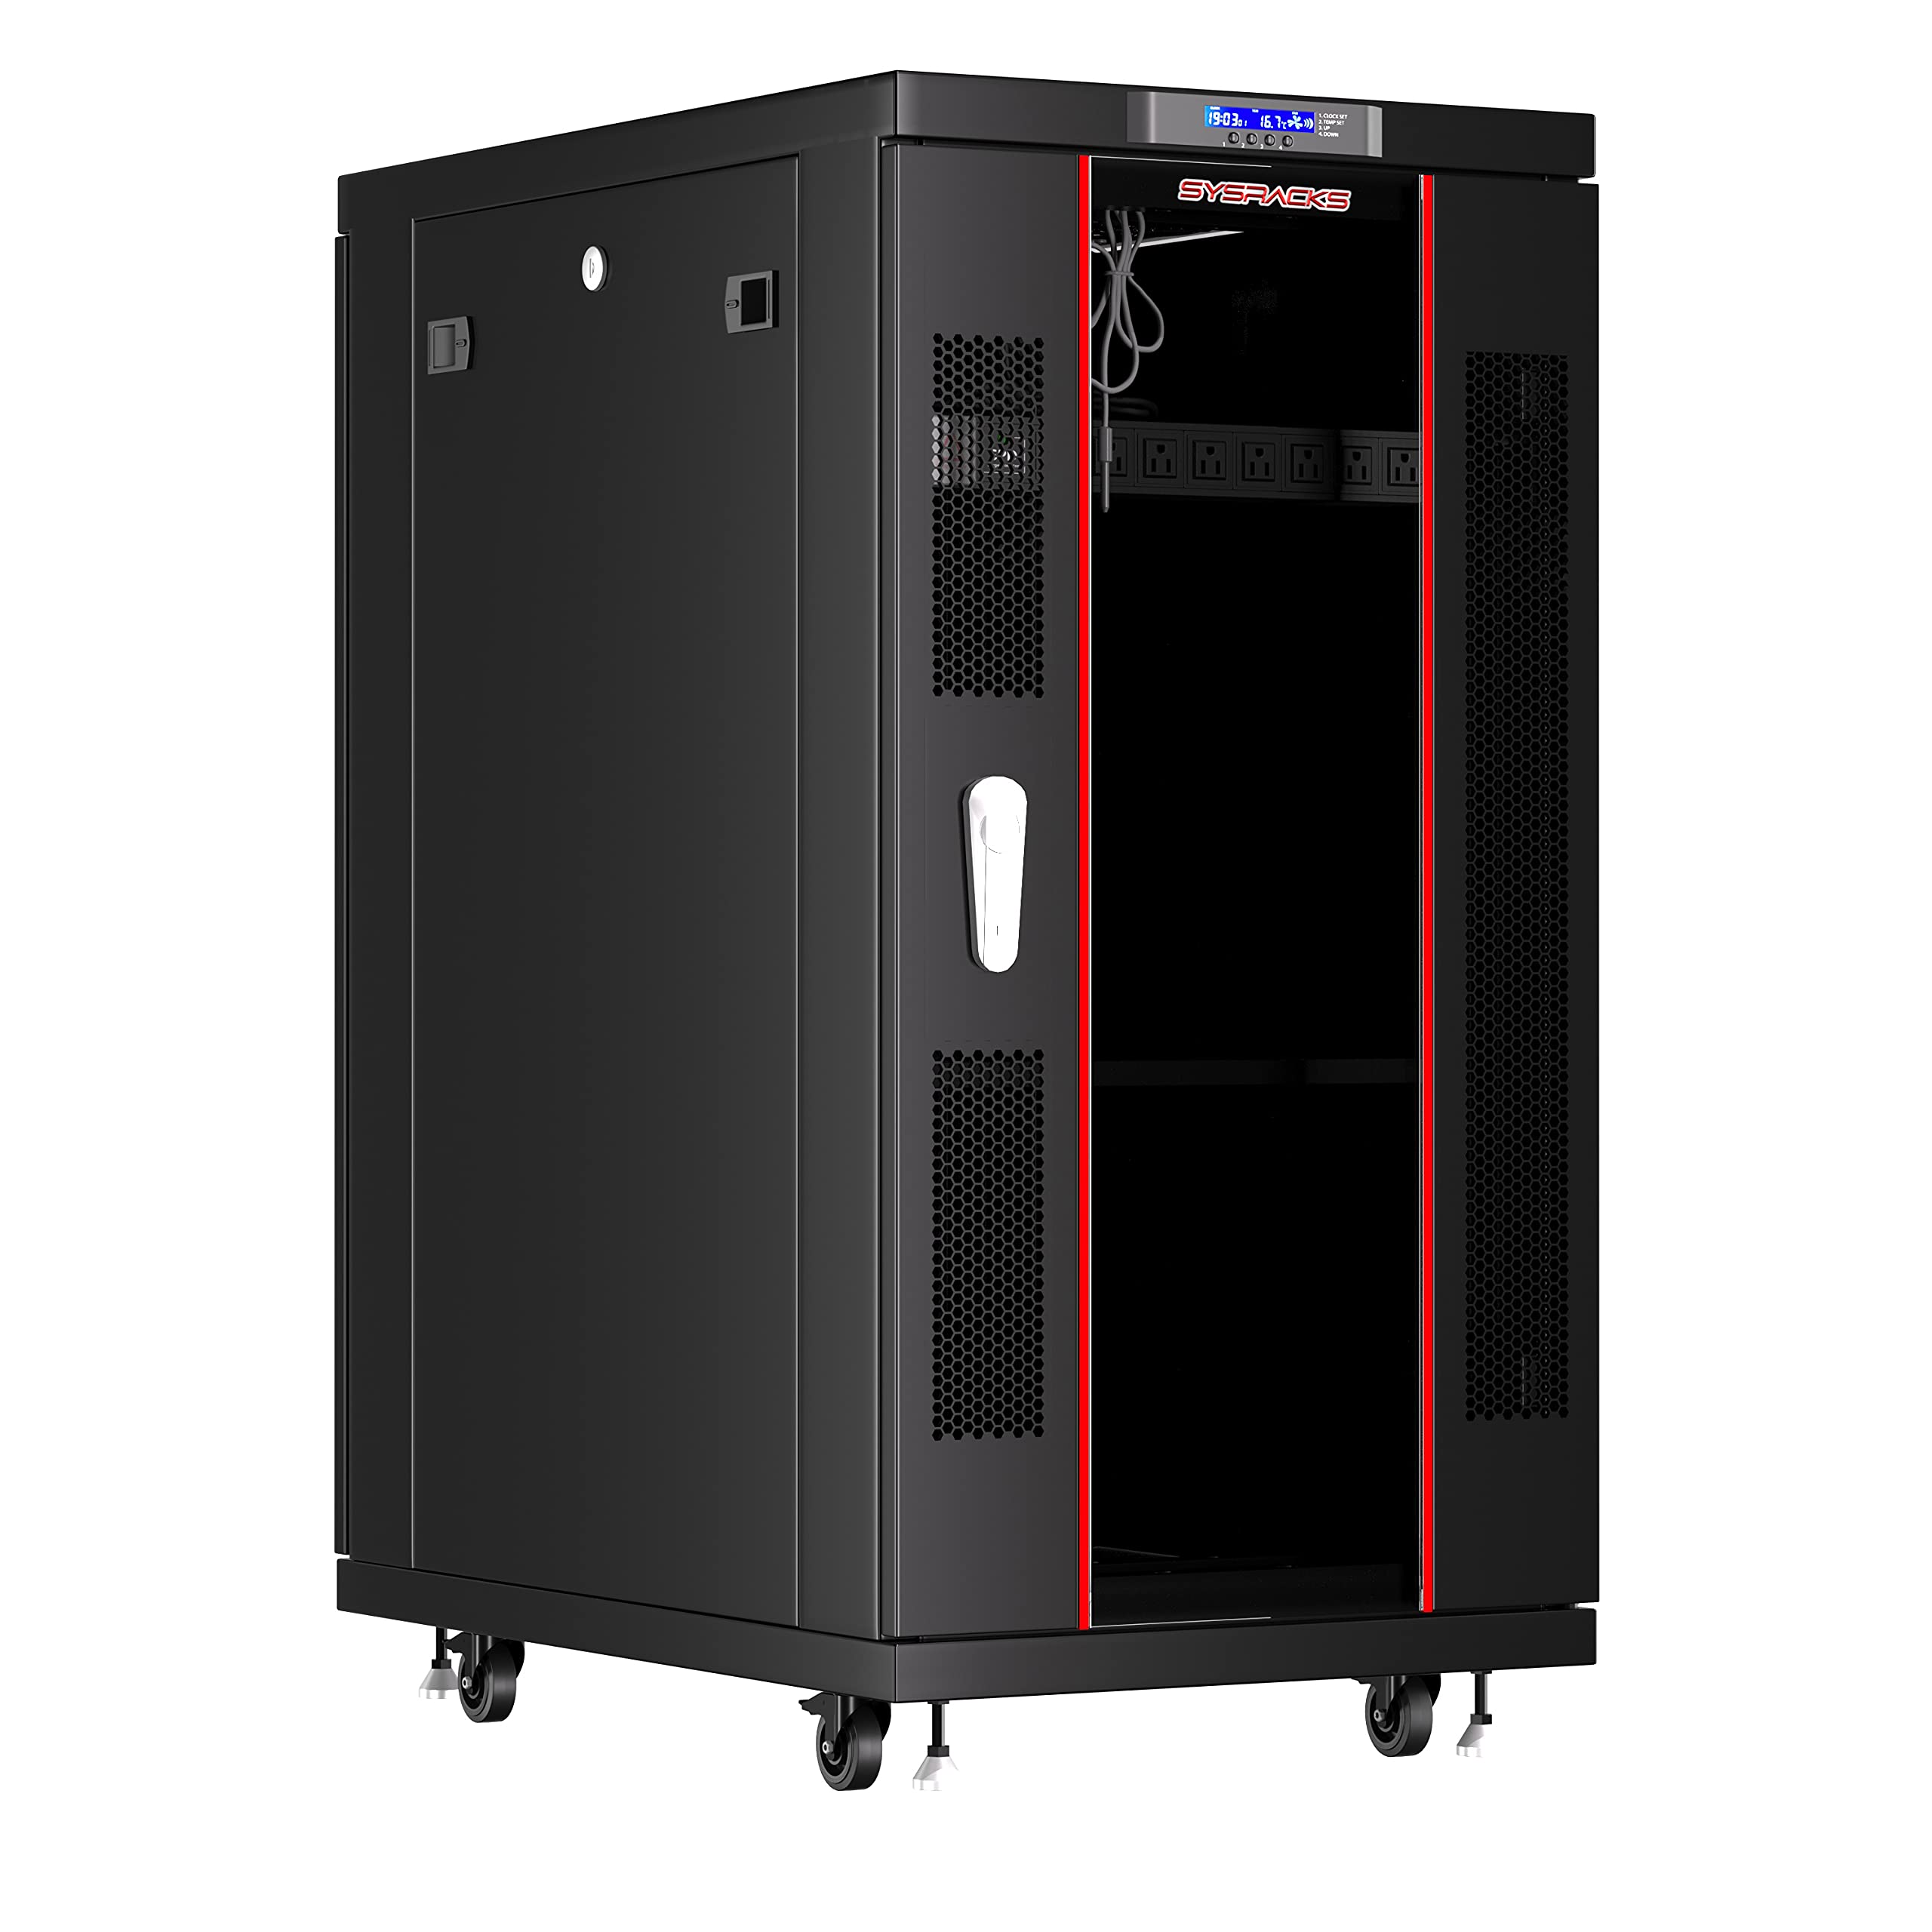
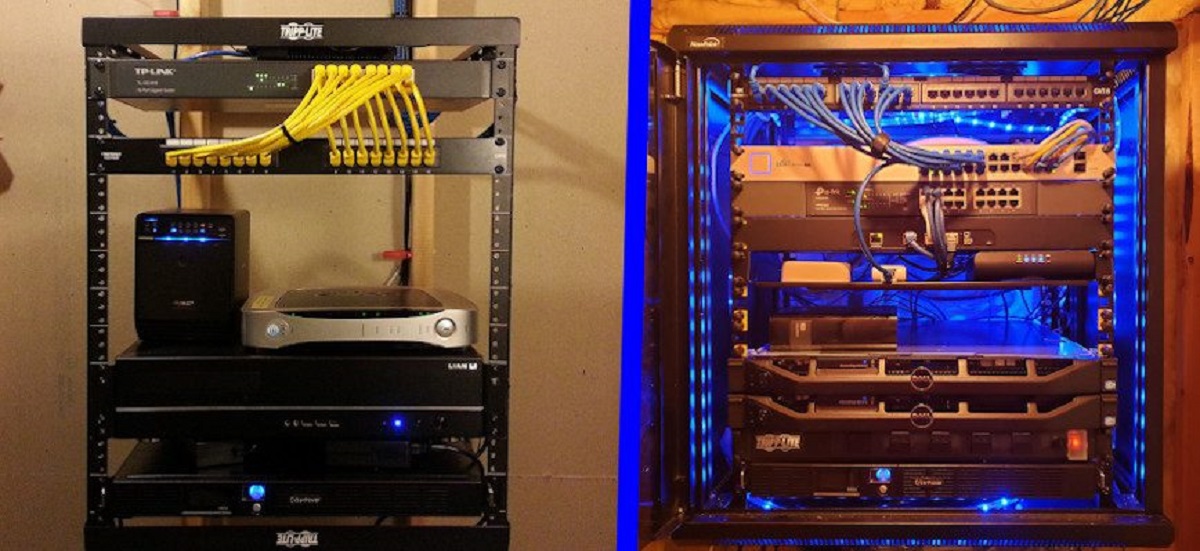
Cable Management Features
Effective cable management is essential for a well-organized and efficient home lab setup. With numerous cables connecting your servers, switches, and other equipment, it’s important to choose a server rack that offers robust cable management features. These features not only keep your cables organized and secure but also contribute to better airflow, easier maintenance, and a tidier overall appearance.
Cable Routing Panels:
Look for server racks that include built-in cable routing panels. These panels provide dedicated spaces for routing and organizing cables, keeping them separate from the front and rear of the rack. Cable routing panels ensure that cables are neatly arranged, preventing tangled cables and facilitating easier identification and management when making changes or troubleshooting.
Cable Trays:
Cable trays are a popular cable management solution in server racks. These trays provide a dedicated space for routing and organizing cables, keeping them elevated and out of the way. Cable trays help manage a large volume of cables and ensure they don’t obstruct airflow. They are particularly useful for longer cables or cables that need to travel from one point in the rack to another.
Cable Management Rings:
Cable management rings, also known as cable management fingers or D-rings, are another useful feature to look for in a server rack. These rings are typically mounted vertically along the sides or rear of the rack and provide anchor points for securing and organizing cables. By using cable management rings, you can maintain the proper bending radius of your cables and prevent them from becoming tangled or damaged.
Cable Channels and Channels:
Many modern server racks include integrated cable channels or channels that help separate and organize cables at the sides or rear of the rack. These channels keep cables in place, preventing them from mixing or tangling with each other. By utilizing these channels, you can achieve a clean and organized look, making maintenance and future changes easier.
Labeling and Documentation:
While not a physical cable management feature, it’s essential to consider labeling and documentation options offered by the server rack. Look for racks that provide label holders or other labeling solutions where you can easily identify and document cable connections. Proper labeling helps save time during maintenance and troubleshooting, allowing you to quickly identify and locate specific cables or equipment.
Consider Future Scalability:
When selecting a server rack, consider the potential for future expansion and the number of cables required to accommodate additional equipment. Choose a rack that offers ample cable management options, ensuring that you have space for future cable additions without compromising airflow or organization.
By choosing a server rack with robust cable management features, you can maintain a well-organized and efficient home lab setup. Proper cable management not only enhances the appearance of your rack but also improves airflow, facilitates easier maintenance, and reduces the risk of accidental disconnections or cable damage. Invest in a server rack that prioritizes cable management to enjoy a tidy and functional home lab environment.
Security Considerations
Security is a critical aspect to consider when choosing a server rack for your home lab. Your lab may contain valuable and sensitive equipment, data, or projects that need protection from unauthorized access, theft, or physical damage. Here are some security considerations to keep in mind:
Lockable Doors and Side Panels:
Look for server racks that feature lockable doors and side panels. These security features prevent unauthorized access to your equipment, ensuring that only authorized individuals can open the rack and make changes or perform maintenance tasks. Lockable doors and side panels provide an extra layer of physical security for your home lab.
Lockable Cabinets and Drawers:
Consider a server rack that includes lockable cabinets or drawers. These provide a secure space for storing equipment, tools, or sensitive data that shouldn’t be easily accessible. Lockable cabinets and drawers help prevent theft and ensure that only approved personnel can access the contents.
Security Cameras and Alarms:
If security is a top concern, consider integrating security cameras or alarms into your home lab setup. Surveillance cameras can be strategically positioned to monitor the server rack and the area surrounding it. Alarms can provide an additional layer of security by alerting you or security personnel in case of unauthorized access attempts or physical tampering.
Physical Location and Access Control:
Consider the physical location of your home lab and its accessibility to others. If it’s located in a shared space or a room accessible by multiple people, it’s important to establish policies and access control measures. Limiting access to authorized individuals helps protect your equipment and data from theft or accidental damage.
Rack Bolt-down Kits:
In environments where theft or physical tampering is a concern, using rack bolt-down kits can provide additional security. These kits allow you to bolt the server rack to the floor or wall, making it more challenging for unauthorized individuals to remove or tamper with the entire rack.
Secure Network Connections:
Ensure that your server rack is connected to a secure network. Use encryption protocols and strong passwords to protect your equipment from remote attacks. Access to the network port of your rack should also be secured, limiting access to authorized devices only.
Equipment Tracking and Documentation:
Keeping track of your equipment inventory and documenting your home lab setup can aid in security measures. Maintain an up-to-date inventory list to easily identify any missing or misplaced equipment. Documenting the rack’s configuration, cable connections, and any changes will help make troubleshooting and maintenance more efficient.
Considering the security aspects while choosing a server rack for your home lab ensures that your equipment and data remain protected. By investing in proper security features, you can have peace of mind knowing that your home lab is safe and secure from physical threats.
Noise Reduction Solutions for Home Labs
Noise can be a significant concern when setting up a home lab, especially if it is located in a residential area. The constant hum of fans and the whirring of equipment can disrupt daily activities and cause annoyance. Fortunately, there are several noise reduction solutions available to create a quieter and more peaceful home lab environment.
Choose Quiet Equipment:
When selecting equipment for your home lab, prioritize models that are designed for quiet operation. Look for servers, networking devices, and cooling fans that are specifically marketed as low-noise or silent. These components are engineered with noise reduction in mind and are designed to minimize fan noise while maintaining optimal performance.
Vibration Dampening:
Vibrations produced by equipment can contribute to noise levels in your home lab. Consider using vibration dampening solutions to minimize or eliminate these vibrations. Anti-vibration pads or mounts can be placed under servers or other equipment to reduce noise caused by contact with the rack or other surfaces.
Soundproofing:
Soundproofing materials can be used to absorb or block noise from escaping your home lab. Acoustic panels, foam, or specialized sound-dampening materials can be applied to the walls, ceiling, or floor of the lab to reduce sound transmission. This helps to create a quieter environment within the lab itself and prevents noise from disturbing other areas of your home.
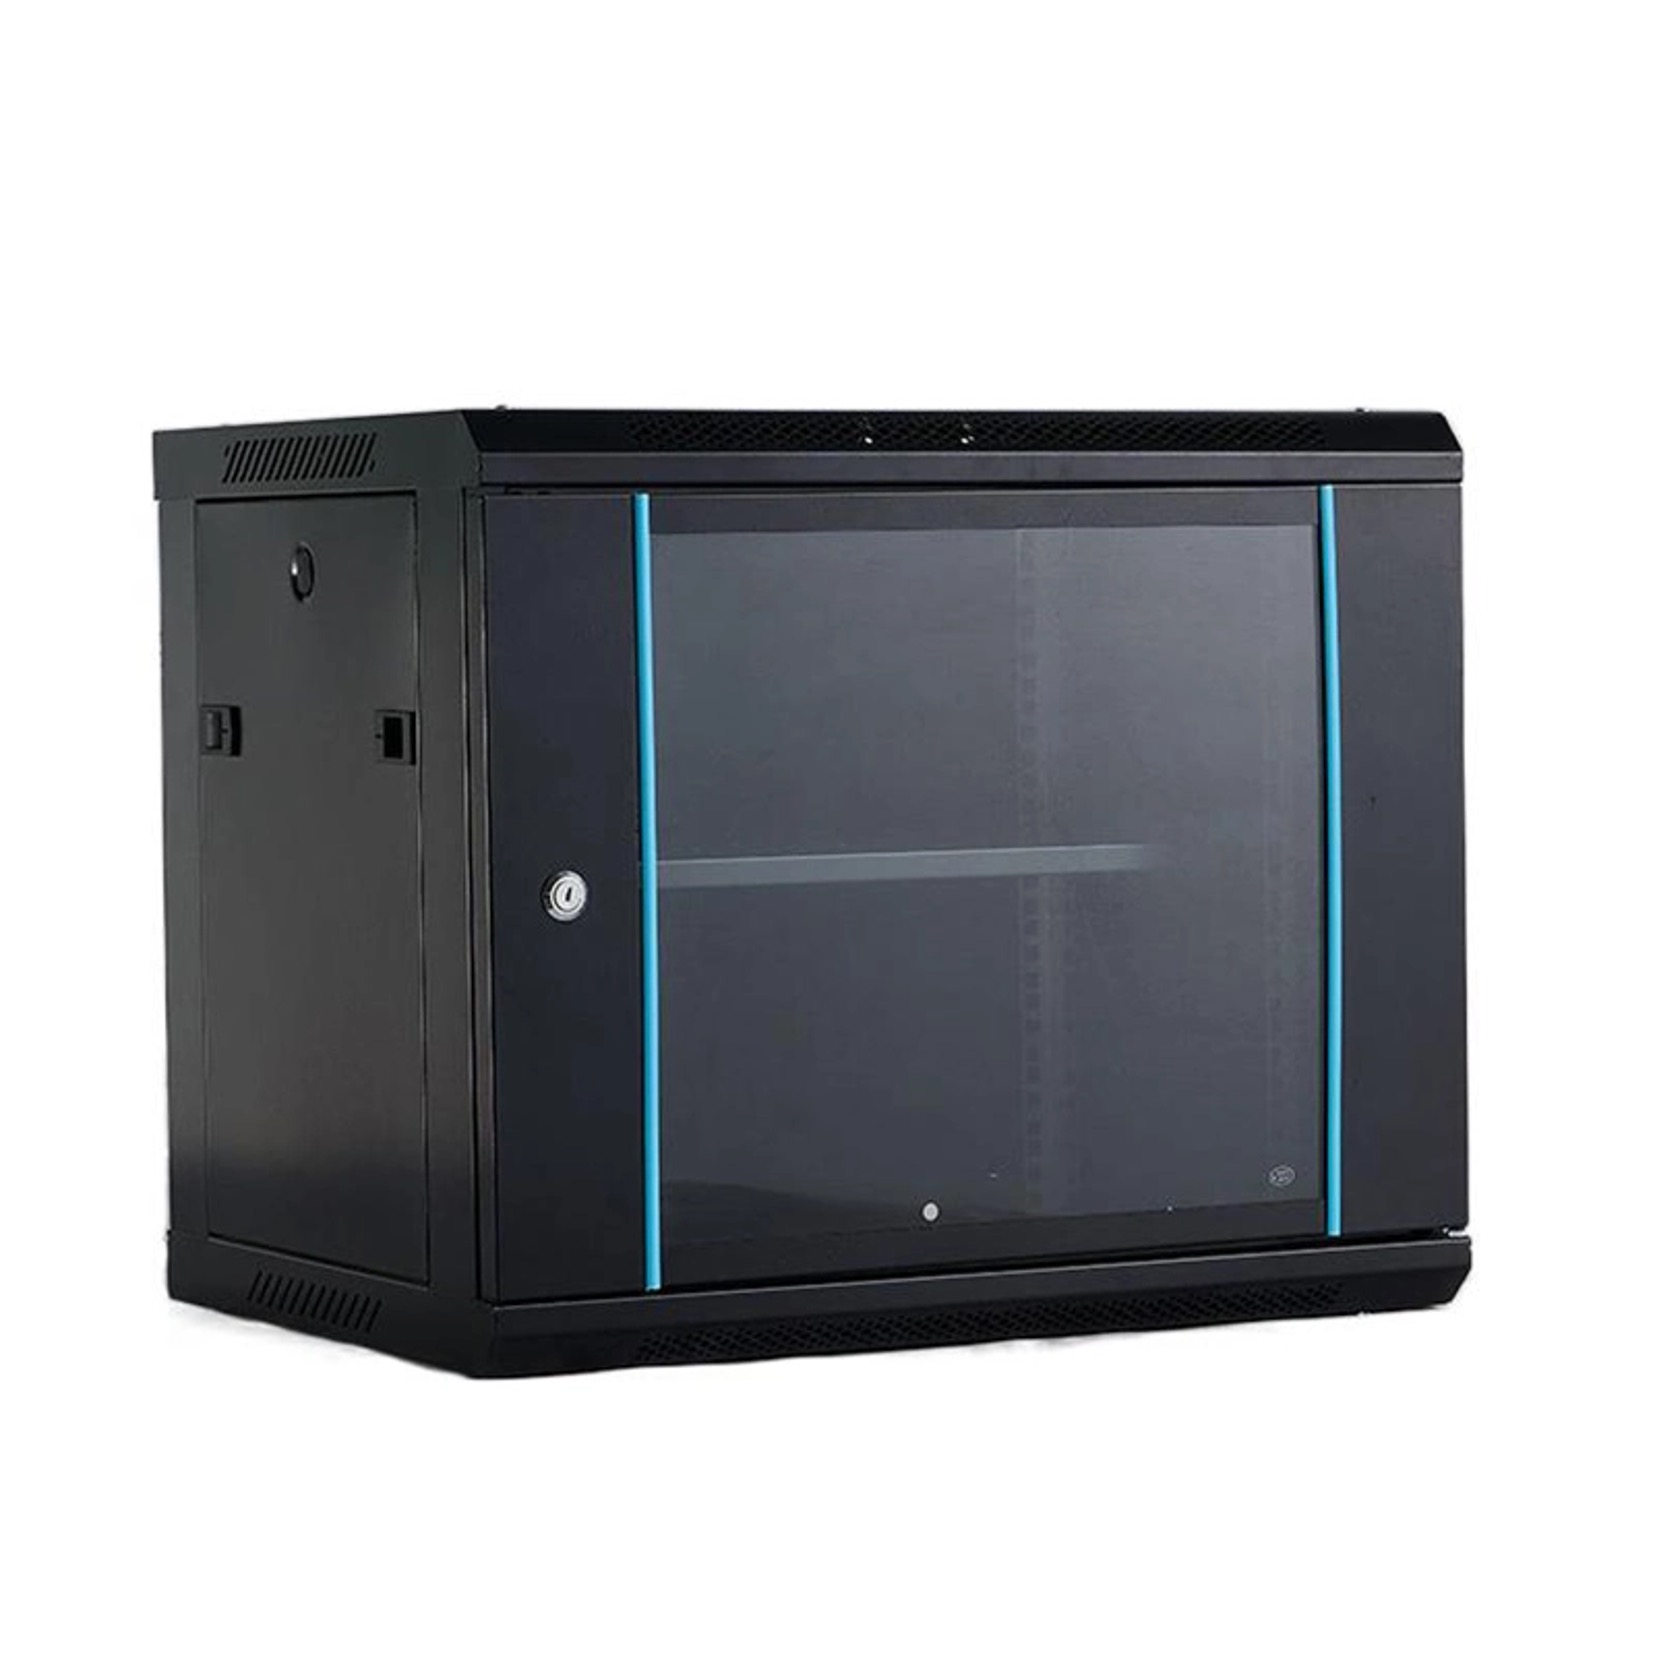
Cabinet Enclosures:
Enclosing your server rack in a cabinet can contribute to noise reduction. Cabinets designed for noise reduction are equipped with soundproofing materials and insulation that reduce the noise emitted by the equipment. Enclosures with ventilation systems ensure proper airflow while minimizing noise levels. Additionally, cabinet doors and side panels provide an additional barrier to contain the noise within the enclosure.
Adjust Fan Speeds:
If your equipment allows it, adjusting the fan speeds can help reduce noise levels. Many servers and networking devices offer fan speed control options, allowing you to strike a balance between noise reduction and cooling efficiency. By lowering the fan speeds to the minimum required for adequate cooling, you can significantly reduce noise levels in your home lab.
Proper Ventilation:
Inadequate ventilation can cause equipment fans to work harder, resulting in increased noise levels. Ensure that your home lab is well-ventilated with proper airflow. Allow sufficient space around the equipment for air to circulate freely. Additionally, keep the lab’s temperature within the optimal range to prevent the equipment fans from running at higher speeds, which can contribute to increased noise.
Noise-Reducing Enclosures:
If noise reduction is a top priority, consider investing in noise-reducing server rack enclosures designed specifically for home lab use. These enclosures are equipped with sound-dampening materials and advanced ventilation systems to create a quiet and controlled environment for your equipment. Noise-reducing enclosures offer a comprehensive solution for anyone seeking a significant reduction in noise levels.
By implementing noise reduction solutions in your home lab, you can create a more peaceful and enjoyable environment. Consider the different options available and choose the strategies that best suit your needs and budget. A quieter home lab allows you to focus on your projects without the distraction and annoyance of excessive noise.
Budget-Friendly Server Rack Options
Setting up a home lab doesn’t have to break the bank, and there are budget-friendly server rack options available that provide reliable storage and organization for your equipment. Here are some cost-effective solutions to consider:
Rack Shelves:
If you’re on a tight budget or have limited space, rack shelves can be a practical and affordable option. These shelves can be installed in existing cabinets or wall-mounted, providing a platform to place your equipment. While rack shelves may not provide as much organization as a dedicated server rack, they offer a cost-effective solution for smaller home labs or those with lighter equipment.
Open Frame Racks:
Open frame racks, also known as rack frames or skeleton racks, are a cost-effective alternative to fully enclosed server racks. These racks consist of a frame that provides the necessary structure and mounting options while reducing material and manufacturing costs. Open frame racks offer good airflow and easy access to the installed equipment. They are an ideal option for budget-conscious individuals looking for a simple and practical solution.
Used or Refurbished Server Racks:
Consider purchasing a used or refurbished server rack from reputable sources. Many companies and data centers upgrade their equipment regularly, and their older server racks can often be purchased at a significant discount. While they may have some signs of wear, used or refurbished racks can still provide reliable storage and organization for your home lab at a fraction of the cost of a brand-new rack.
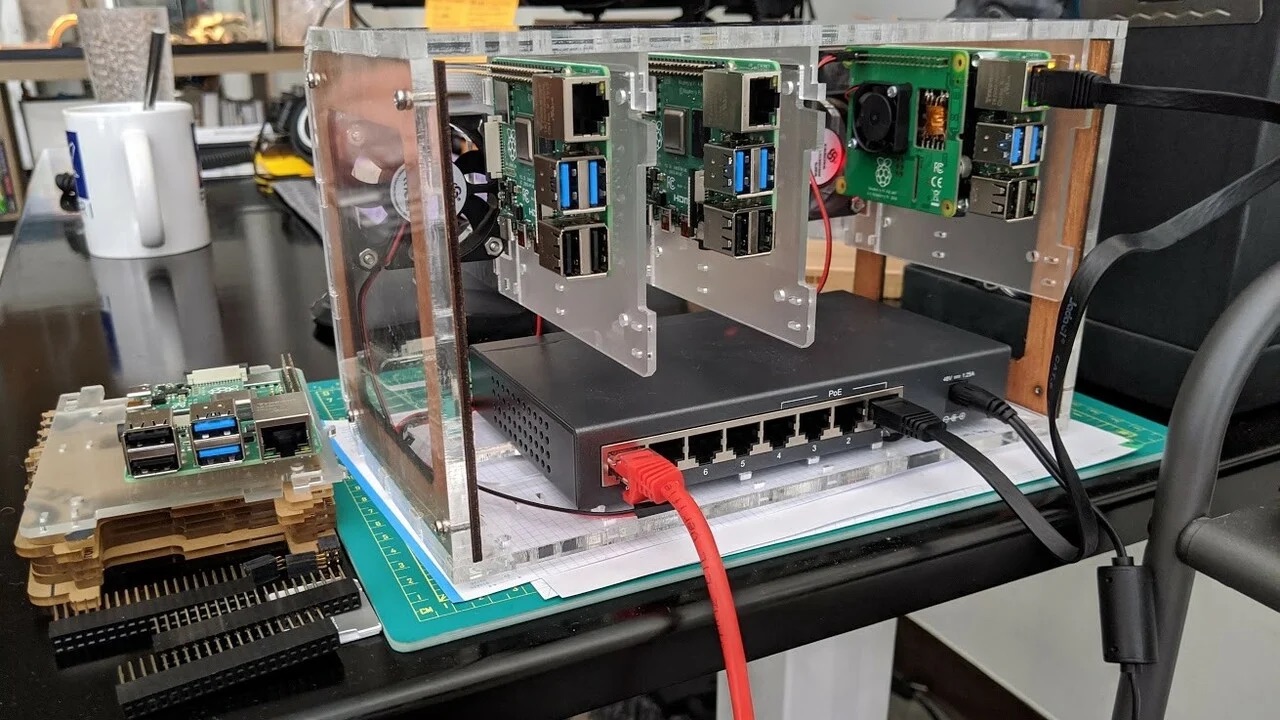
DIY Server Racks:
For those who are handy and willing to put in some effort, building your own server rack can be a budget-friendly option. Various online resources provide step-by-step guides and plans for constructing DIY racks using readily available materials such as wood or metal. Building your own rack allows for customization to meet your specific needs and budget, but keep in mind the importance of stability, proper ventilation, and cable management when constructing your DIY server rack.
Online Marketplaces and Auctions:
Check online marketplaces and auction websites for discounted server racks. Many sellers offer new or slightly used racks at reduced prices to clear inventory or attract buyers. Be sure to research the seller’s reputation and read customer reviews before making a purchase. Additionally, consider local classifieds or community forums where individuals might be selling their used server racks at affordable prices.
Seize Sales and Promotions:
Keep an eye out for sales, promotions, or discounts from hardware or networking equipment retailers. They occasionally offer discounted server racks to attract customers. Sign up for newsletters or follow these retailers on social media to stay informed about any upcoming sales or special offers.
By exploring these budget-friendly options, you can find a server rack that suits your needs without stretching your budget. Remember to prioritize stability, ventilation, and cable management within your chosen rack, as these are essential factors for the efficient and safe operation of your home lab equipment.
Conclusion
Choosing the right server rack for your home lab is crucial for efficient organization, equipment compatibility, and overall functionality. By considering various factors such as size and space, rack mount sizes, cooling and ventilation options, cable management features, security considerations, noise reduction solutions, and budget-friendly options, you can make an informed decision that meets your specific needs.
Evaluating the available space, equipment depth, and the number of devices you plan to install will help you determine the right size and type of server rack. Understanding rack mount sizes and choosing a rack that can accommodate your equipment is essential for proper installation and organization.
Cooling and ventilation options play a significant role in maintaining optimal equipment performance, and cable management features help create a tidy and efficient home lab. Additionally, security considerations ensure the protection of your valuable equipment and data.
Noise reduction solutions, such as choosing quiet equipment, soundproofing measures, and cabinet enclosures, can help create a peaceful home lab environment. For those on a budget, exploring options like rack shelves, open frame racks, used/refurbished racks, DIY solutions, and taking advantage of sales and promotions can provide cost-effective alternatives.
In conclusion, selecting a server rack for your home lab requires careful consideration of your specific needs, available space, equipment requirements, and budget. By combining these factors and making an informed decision, you can create a well-organized, efficient, and functional home lab environment that supports your technical pursuits and allows you to gain valuable hands-on experience.