Introduction
Welcome to the world of PC cases, where form meets function in an essential component of every gaming setup, office workstation, or home computer. A PC case, also known as a computer chassis, is the protective enclosure that houses all the vital components of a computer, including the motherboard, CPU, graphics card, storage devices, and power supply.
While some may consider a PC case as a mere container for the inner workings of a computer, it plays a crucial role in maintaining the performance and longevity of your system. A well-designed PC case not only protects your components from dust, heat, and physical damage but also provides efficient cooling and optimal airflow to keep your machine running smoothly.
In this article, we will delve into the world of PC cases, exploring their different types, the importance of choosing the right one, and the various considerations to keep in mind when selecting a PC case that fits your needs and preferences. We will also discuss the installation of components, cooling and airflow management, cable management, and even touch on the exciting possibilities of modifying and customizing your PC case.
Whether you are a seasoned PC enthusiast or a newcomer to the world of computers, this article will serve as a helpful guide to understanding the significance of a PC case and how it can impact the overall performance and aesthetics of your system.
What Is a PC Case?
A PC case, also referred to as a computer chassis or tower, is the enclosure that houses all the essential components of a personal computer. It serves as a protective shell, safeguarding the delicate internal parts of the computer from external factors such as dust, moisture, and physical damage.
A PC case is typically made of metal or plastic and is designed to accommodate the various hardware components of a computer, including the motherboard, CPU, RAM, storage drives, graphics card, power supply, and cooling systems.
Furthermore, a PC case provides the necessary structure and organization for these components, ensuring proper alignment and secure installation. It consists of a framework that includes mounting points, screw holes, and bays to securely hold each component in place.
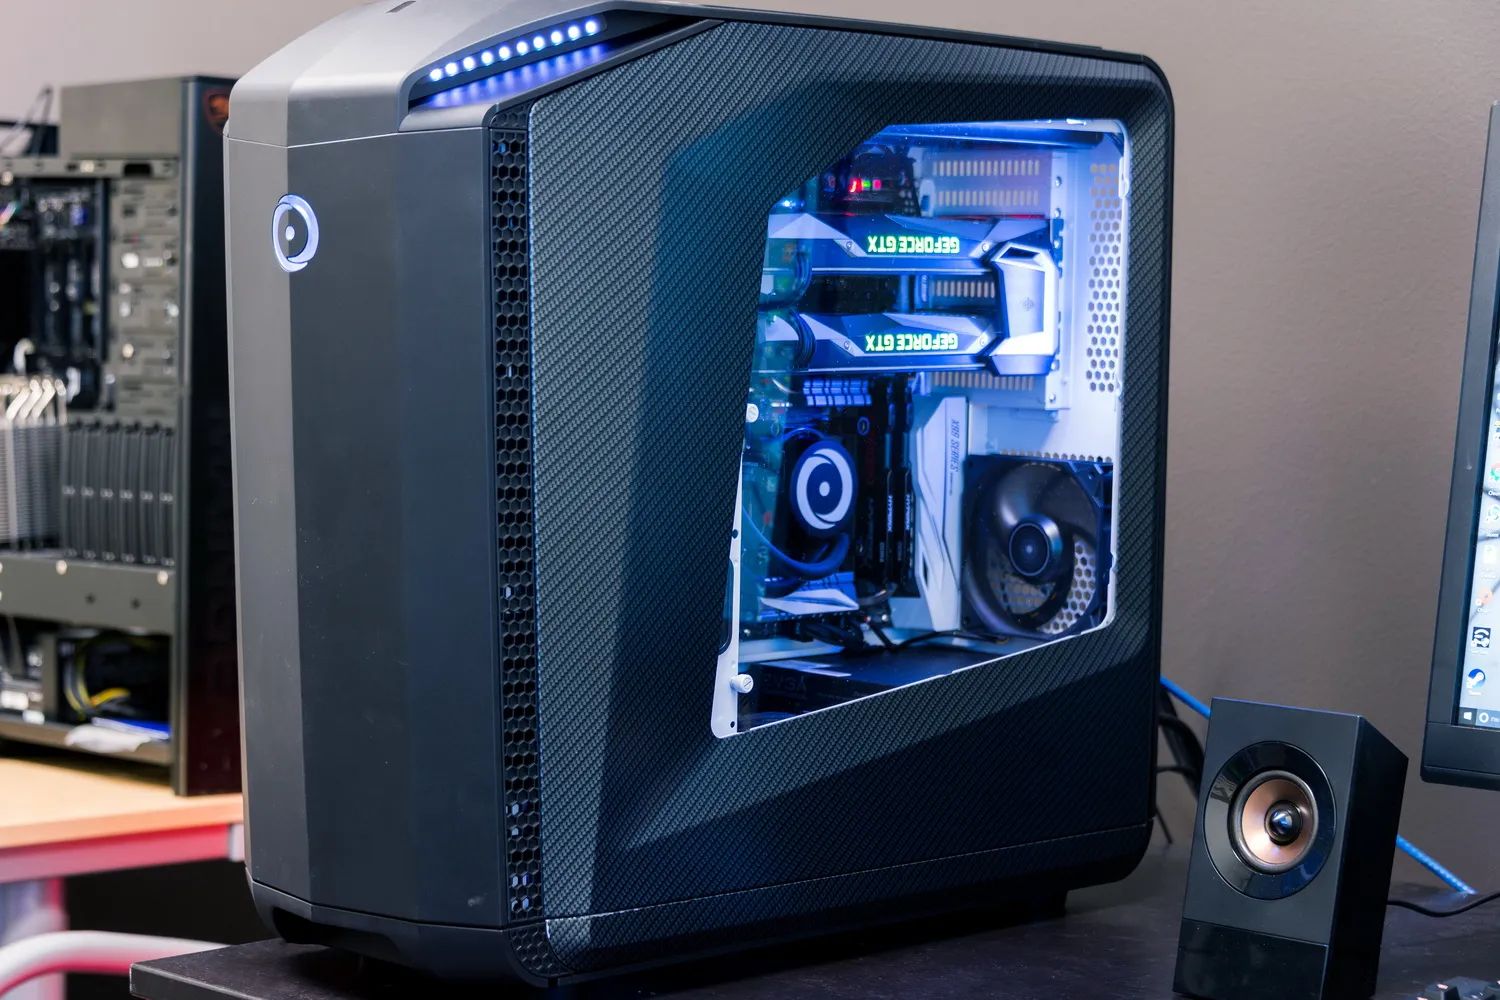
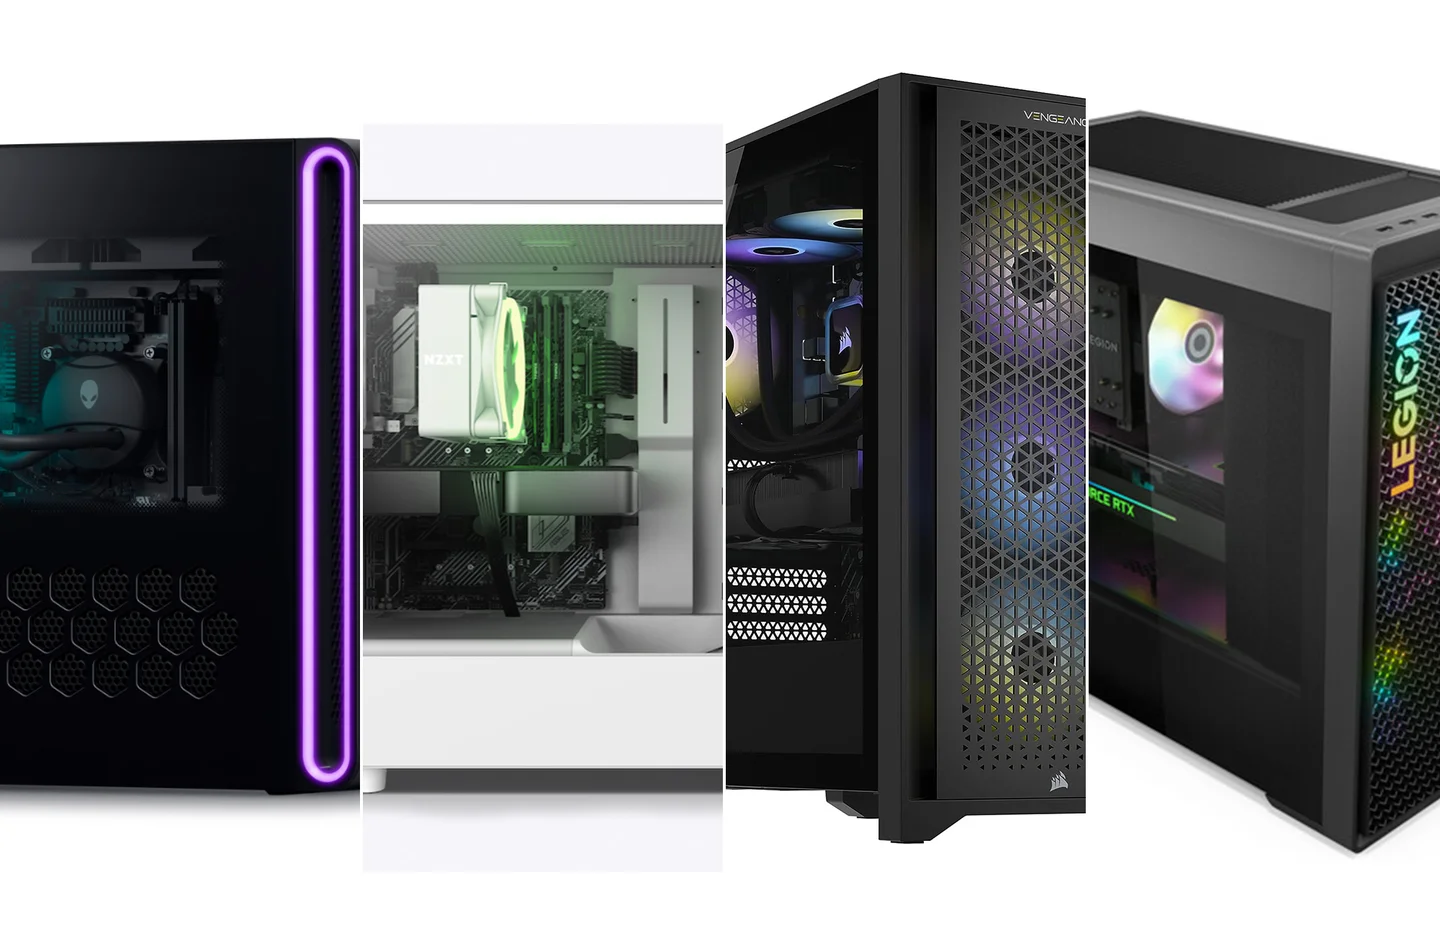
In addition to functionality, PC cases come in a wide variety of designs, sizes, and styles to cater to different needs and preferences. From sleek and minimalist cases to bold and visually striking designs, there is a PC case available to suit every individual’s taste and aesthetic preferences.
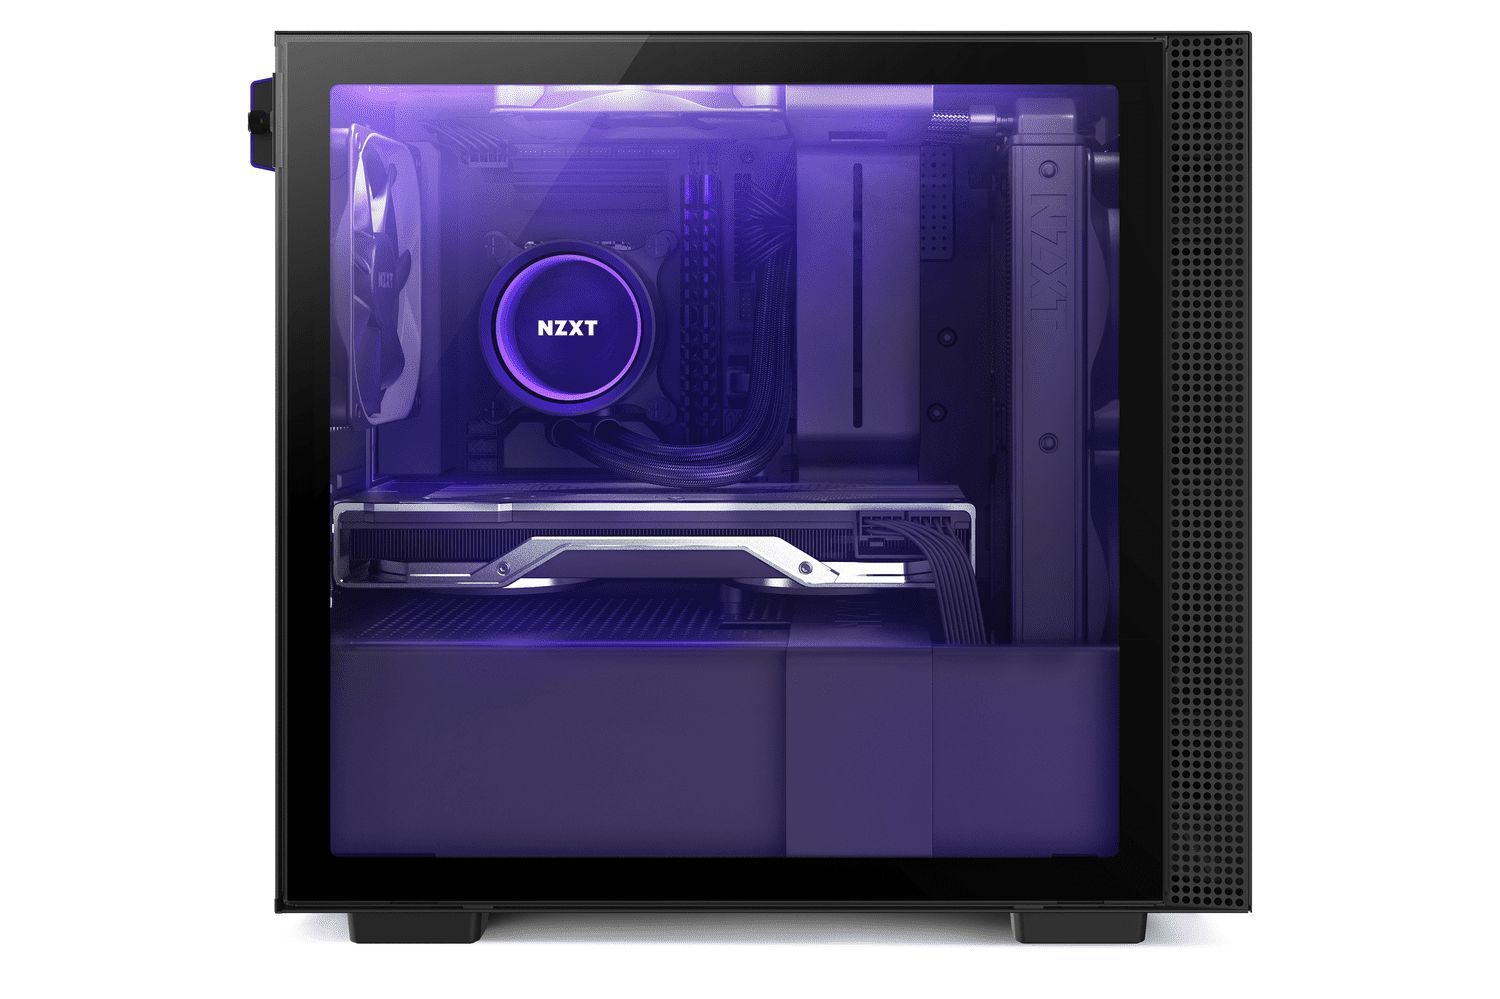
Some PC cases also offer additional features such as built-in cable management systems, RGB lighting options, tempered glass side panels for showcasing the internal components, and easy accessibility to USB ports and audio jacks on the front panel.
It is important to note that the size and form factor of a PC case can impact the compatibility of the components you choose. Different case sizes, such as full-tower, mid-tower, and mini-tower, have varying dimensions and internal space, which may limit or determine the size of the motherboard, the number of storage drives, or the length of the graphics card that can be installed.
In summary, a PC case is a fundamental component of any computer system, providing both protection and organization for the internal hardware components. It not only ensures the proper functioning of the computer but also contributes to the overall aesthetics and customization options available to PC enthusiasts.
Why Is a PC Case Important?
A PC case may seem like a mere external shell, but its importance goes beyond aesthetics. Here are several key reasons why a PC case is an essential component of any computer system:
1. Protection and Security
A PC case provides vital protection for your computer’s internal components. It shields them from dust, dirt, moisture, accidental spills, and other potentially damaging elements. Additionally, the sturdy construction of a PC case helps to safeguard against physical impacts or knocks that could harm the delicate electronics inside.
2. Efficient Cooling
Heat is a significant enemy of computer components, and a PC case helps manage and dissipate heat effectively. Most PC cases feature specially designed ventilation systems, including fans, air vents, and mesh panels, to promote airflow and prevent overheating. Proper cooling is crucial for maintaining optimal performance and extending the lifespan of your components.
3. Noise Reduction
Modern PC cases often come equipped with noise-dampening materials and optimized airflow designs to minimize operational noise. This is especially important for gaming or media PCs where silence is desired. A well-designed PC case can effectively reduce the noise generated by cooling fans, hard drives, and other components, providing a quieter computing experience.
4. Expansion and Upgradability
A good PC case offers ample space and flexibility to accommodate future hardware upgrades. It should provide sufficient drive bays, expansion slots, and cable routing options to make component installation and upgrades easier. This allows you to adapt your system to meet your evolving needs and take advantage of the latest technologies without having to purchase a new case.
5. Cable Management
Proper cable management is essential for both aesthetics and functionality. A well-designed PC case will have built-in cable routing features like grommets, tie-down points, and cable channels to help organize and hide the multitude of cables that connect your components. This not only improves airflow but also makes maintenance and troubleshooting much easier.
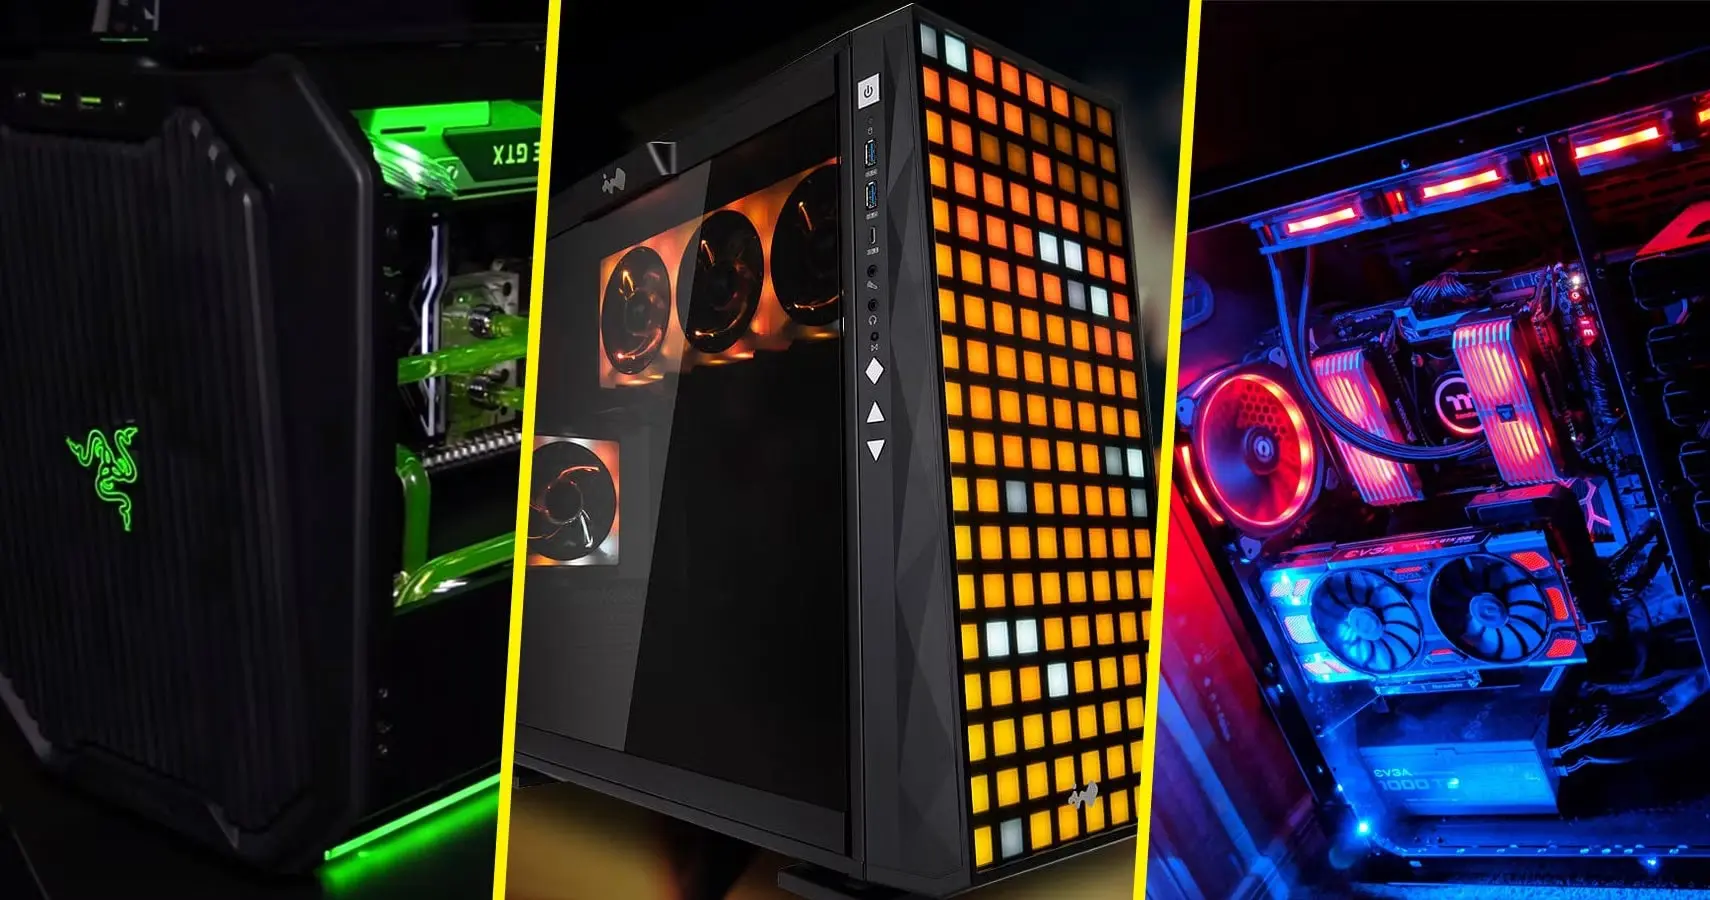
6. Aesthetics and Personalization
PC cases come in a wide range of designs, colors, and sizes, allowing you to choose one that reflects your personal style and preferences. With transparent side panels, RGB lighting options, and customizable features, a PC case can showcase your hardware and create a visually appealing system that fits your unique taste.
To summarize, a PC case is not just a protective shell but an integral part of your computer system. It ensures the safety and longevity of your components, optimizes cooling and airflow, reduces noise levels, facilitates future upgrades, simplifies cable management, and provides an opportunity for personalization and customization.
Different Types of PC Cases
When it comes to PC cases, there is a wide variety of options available, each catering to different needs, preferences, and form factors. Here, we will explore some of the most common types of PC cases:
1. Full-tower
Full-tower cases are the largest and most spacious options available. They offer extensive room for multiple graphics cards, multiple storage drives, liquid cooling systems, and other high-performance components. Full-tower cases are perfect for enthusiasts who require maximum expandability and airflow, as well as those who want to showcase their hardware.
2. Mid-tower
Mid-tower cases strike a balance between size, functionality, and affordability. They are more compact than full-tower cases, making them suitable for most gaming setups and workstations. Mid-tower cases typically offer sufficient space for high-end components, multiple storage drives, and proper cooling. Their versatile design and reasonable price make them a popular choice among PC builders.
3. Mini-tower
Mini-tower cases, also known as compact cases, are the smallest form factor available for PC cases. These cases are ideal for space-constrained environments or for those who prefer a more minimalistic setup. While mini-tower cases may have limited internal space, they still provide enough room for standard components and can handle moderate gaming or office tasks.
4. Micro-ATX and Mini-ITX
Micro-ATX and Mini-ITX are form factors for motherboards that are smaller than the traditional ATX motherboard. Micro-ATX cases and Mini-ITX cases are specifically designed to house these smaller motherboards, providing a compact and efficient build. These cases are perfect for those who prioritize space-saving options and portability without sacrificing performance.
5. Cube and Small Form Factor
Cube cases and other small form factor cases offer a unique and compact design that combines excellent airflow with a stylish appearance. These cases often feature a space-saving layout that allows for efficient component placement and easy access to internal hardware. Cube cases are popular among gamers and enthusiasts looking for a balance between size and performance.
6. HTPC (Home Theater PC) Cases
HTPC cases are designed to blend seamlessly with home theater setups. They typically feature a slim, sleek design that resembles audiovisual equipment, allowing for integration into living room media centers. HTPC cases are optimized for quiet operation and offer additional features such as built-in multimedia controls or the ability to be placed horizontally.
These are just a few examples of the different types of PC cases available. Regardless of the type you choose, it is essential to ensure compatibility with your components and consider factors such as cooling capability, expansion potential, aesthetics, and convenience of installation and cable management.
Factors to Consider When Choosing a PC Case
Choosing the right PC case is crucial for building a system that meets your needs and preferences. Here are some essential factors to consider before making your decision:
1. Size and Compatibility
Determine the size of the case that can accommodate your components. Consider the form factor of your motherboard, the length of your graphics card, the number of storage drives you plan to install, and the cooling solutions you intend to use. Ensure that the case you choose is compatible with your chosen components and offers enough room for future upgrades.
2. Cooling and Airflow
Adequate cooling is vital for the longevity and performance of your PC components. Look for a case with efficient airflow features, such as mesh panels, vents, and fan mounting points. Additionally, consider the availability of liquid cooling support, the number and size of fans that can be installed, and the inclusion of dust filters to maintain optimal cooling performance.
3. Expandability and Customization
Consider your future needs for expansion and customization. Look for a case that provides enough drive bays, expansion slots, and cable management options to accommodate additional components. Additionally, check for features like modular drive cages or customizable interior layouts that make it easier to adapt your system as your needs evolve.
4. Cable Management
Good cable management is essential for a clean and organized build. Look for a case with ample space behind the motherboard tray, grommets or rubber grommets for routing cables, and cable tie-down points. Well-managed cables not only improve the aesthetics of your system but also contribute to better airflow and easier maintenance.
5. Build Quality and Durability
Ensure that the case is well-built and made of high-quality materials. A sturdy case will protect your components and provide a solid foundation for your system. Look for features like reinforced corners, durable panels, and sturdy construction that can withstand the test of time.
6. Aesthetics and Style
Consider the visual appeal and style of the case. Look for a design that matches your personal preferences and complements your overall setup. Different cases offer varying aesthetics, from sleek and minimalist designs to bold and gaming-oriented styles. Choose a case that reflects your taste and enhances the overall look of your computer.
7. Budget
Set a budget for your PC case. Cases come in a wide price range, so it’s important to find a balance between your budget and the features you require. Evaluate your priorities and allocate your budget accordingly to ensure you get a case that meets your needs without overspending.
By considering these factors, you can choose a PC case that offers the right combination of functionality, compatibility, cooling, expandability, and style to create your ideal computer system.
Installing Components in a PC Case
Once you have chosen the right PC case, the next step is to install the components into the case. Here is a step-by-step guide on how to install the major components:
1. Prepare the Case
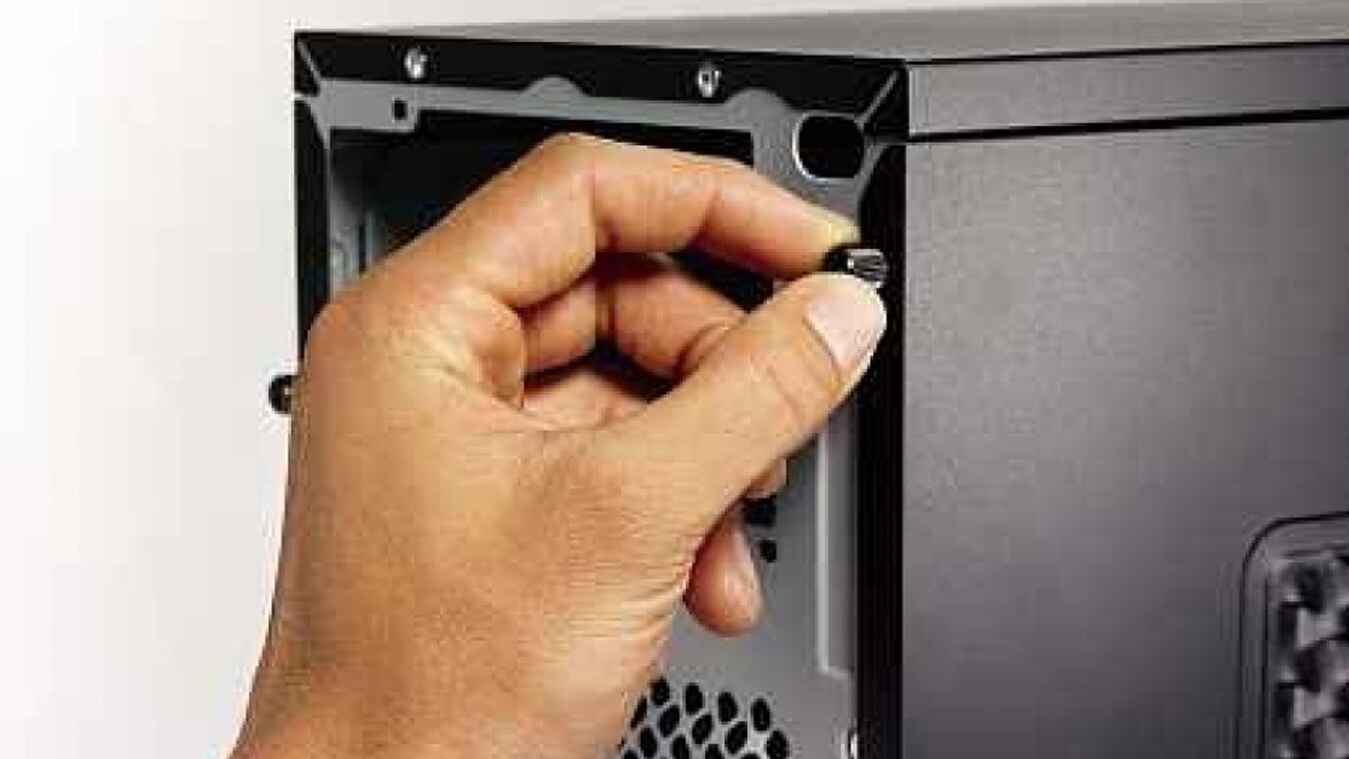
Start by opening the side panel of the PC case. Some cases have a removable panel secured with thumb screws, while others may require sliding or lifting to remove. Lay the case on its side to provide easy access to the internal components.
2. Install the Power Supply
Begin by installing the power supply (PSU) in the designated area at the rear bottom of the case. Secure it with screws provided by the case manufacturer. Ensure the PSU fan is facing the correct direction for proper ventilation.
3. Mount the Motherboard
Position the motherboard on the standoffs inside the case to align the mounting holes. Use the screws provided with the case to secure the motherboard. Ensure that the motherboard is level and firmly attached to prevent any potential grounding or connectivity issues.
4. Install the CPU
If you haven’t already installed the CPU onto the motherboard, do so now. Follow the manufacturer’s instructions carefully, ensuring correct alignment and applying thermal paste if required. Attach and secure the CPU cooler according to the provided instructions.
5. Attach the Storage Drives
Install your storage drives, such as SSDs or HDDs, into the drive bays or cages provided in the case. Use screws or tools specific to the case to secure the drives. Connect the necessary cables to the drives and the motherboard, ensuring proper alignment and secure connections.
6. Install the Graphics Card
Carefully insert the graphics card into the appropriate PCIe slot on the motherboard. Secure it using the screws or locking mechanisms provided. Ensure that the card is properly seated and aligned before tightening it.
7. Connect the Cables
Connect the necessary cables, such as power cables from the PSU to the motherboard, CPU, and graphics card. Route and organize the cables neatly, using the cable management features of the case to ensure proper airflow and a clean look.
8. Install Additional Components
If you have additional components, such as additional fans, liquid cooling systems, or expansion cards, install them following the manufacturer’s instructions. Ensure proper positioning, secure connections, and ample space for airflow and compatibility.
9. Close the Case
Once all the components are installed and cables are connected, carefully close the case by replacing the side panel. Ensure that it is properly aligned and secured with screws or other fastening mechanisms provided by the case manufacturer.
By following these steps, you can successfully install the major components into your PC case. However, it’s important to refer to the specific instructions provided by the case and component manufacturers to ensure proper installation and compatibility with your particular hardware.
Cooling and Airflow in a PC Case
Proper cooling and airflow management are crucial for maintaining the optimal performance and longevity of your PC components. Inadequate cooling can lead to overheating, reduced lifespan of components, and even system instability. Here are some key considerations for cooling and airflow in a PC case:
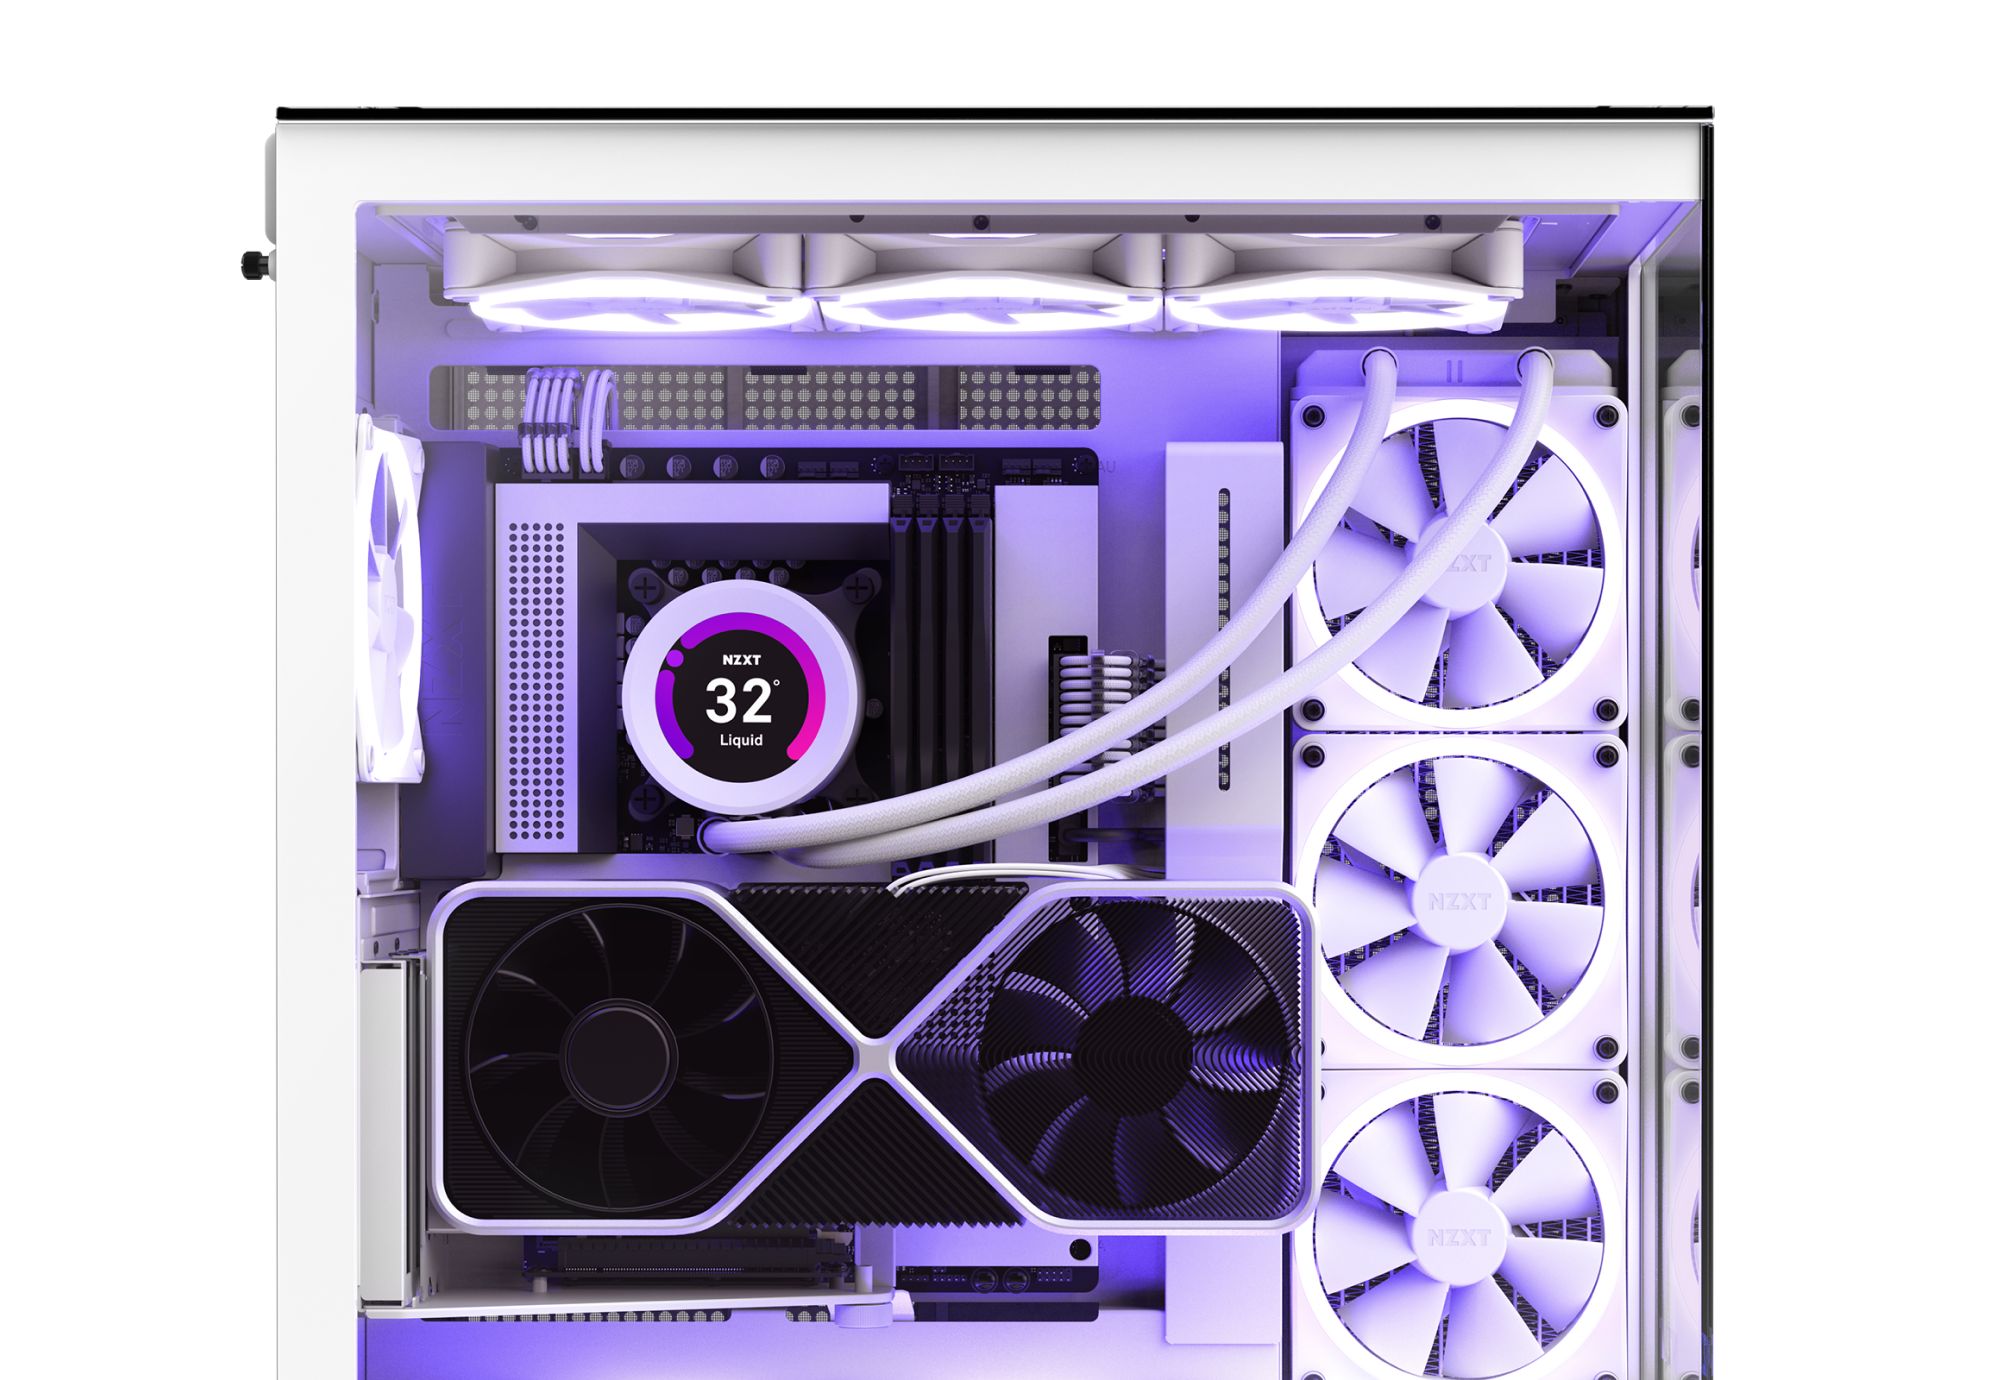
1. Fans and Ventilation
Most PC cases come with pre-installed fans or fan mounts to facilitate airflow. Strategically placing fans in the front, rear, and top of the case helps create a proper airflow path. The front fans bring in cool air, which is then expelled by the rear or top fans. Ensuring a balance between intake and exhaust fans is essential for efficient cooling.
2. Fan Orientation
When installing fans, pay attention to the orientation. In general, fans placed at the front of the case should be intake fans, pulling in cool air, while fans at the rear or top should be exhaust fans, expelling hot air. This setup promotes a steady flow of air through the case, keeping temperatures in check.
3. Positive and Negative Pressure
Consider whether you want to achieve positive pressure or negative pressure inside the case. Positive pressure means that the intake airflow exceeds the exhaust airflow, which helps prevent dust from entering through unfiltered gaps. Negative pressure means that the exhaust airflow exceeds the intake airflow, which may result in more dust accumulation but can help remove heat more efficiently.
4. Dust Filters
Dust filters play a significant role in maintaining clean airflow inside the case. Most modern cases feature removable dust filters at the intake areas, such as the front panel or bottom of the case. Regularly cleaning or replacing these filters prevents dust from compromising cooling performance and clogging up components.
5. Cable Management
Efficient cable management not only enhances the aesthetics of your build but also improves airflow. Well-organized cables allow for better routing and prevent obstruction of the fans or blocking of airflow pathways. Use cable ties, Velcro straps, or dedicated cable management features in the case to keep cables neatly arranged and out of the way.
6. Liquid Cooling
For more advanced cooling requirements, consider liquid cooling solutions. Liquid cooling involves using a pump, reservoir, radiator, and water block to transfer heat away from the components. This method offers superior cooling performance and can be particularly beneficial for overclocking or high-performance systems.
7. Testing and Monitoring
Once your system is set up, it’s important to monitor temperatures and ensure that cooling is functioning as intended. Use software utilities or BIOS monitoring tools to keep an eye on component temperatures. If you notice overheating, consider adjusting fan speeds, reconfiguring fan orientation, or adding additional cooling components if necessary.
By paying attention to cooling and airflow, you can create a well-ventilated and efficient system that runs smoothly and reliably. Each case and component combination may have specific airflow requirements, so it’s essential to refer to the manufacturer’s recommendations and guidelines for optimal cooling.
Cable Management in a PC Case
A well-managed cable setup not only improves the overall aesthetics of your PC build but also contributes to better airflow, easier maintenance, and optimal performance. Proper cable management in a PC case involves organizing and routing cables in a way that keeps them neat, tidy, and out of the way. Here are some key considerations for effective cable management:
1. Plan Ahead
Before building your system, take some time to plan your cable management strategy. Consider the length of your cables, the placement of your components, and the cable routing options provided by the case. Planning ahead will help you anticipate any potential issues and ensure a smoother installation process.
2. Use Cable Ties and Velcro Straps
Cable ties or Velcro straps are invaluable tools for bundling and securing cables. Grouping cables together that are going to the same area or component can keep them organized and prevent tangling. Use these ties or straps to fasten cables together and make them easier to manage.
3. Utilize Cable Management Features
Most modern PC cases come with built-in features designed to assist with cable management. These features may include rubber grommets or cutouts for routing cables behind the motherboard tray, channeling for cables along the sides of the case, or tie-down points for securing cables in place. Utilize these features to keep cables neatly organized and hidden from view.
4. Route Cables Strategically
When routing cables, try to follow a logical and strategic path. Keep power cables separate from data cables to avoid interference, and route them away from fans or components that generate a lot of heat. Aim to have cables run along the edges or corners of the case to keep them out of the way of airflow pathways.
5. Use Cable Extensions
If you find that your cables are too short to reach their respective components without excess slack, consider using cable extensions. Cable extensions are longer cables that attach to the existing cables and allow for more flexibility in cable routing. They can help to reduce cable clutter and improve the overall appearance of your build.
6. Consider Custom Sleeved Cables
For an even cleaner and more customized look, you may want to consider using custom sleeved cables. These cables have a fabric or plastic sleeve covering them, providing a sleek and uniform appearance. Custom sleeved cables come in various colors and patterns, allowing you to match your build’s theme or create a unique look for your system.
7. Regularly Check and Maintain Cables
Once your PC build is complete, periodically check your cables to ensure they remain secure and properly routed. Over time, vibrations or adjustments to components may cause cables to loosen or shift. Performing regular cable maintenance will help prevent any potential issues and ensure your cables continue to be managed effectively.
By following these tips, you can achieve clean and organized cable management in your PC case. Neatly arranged cables not only improve airflow and maintenance but also enhance the overall aesthetic appeal of your system. Take the time to invest in proper cable management, and your PC build will benefit in the long run.
Modifying and Customizing a PC Case
Modifying and customizing your PC case is an exciting way to personalize your computer build and make it stand out from the crowd. With a wide range of options available, you can unleash your creativity and transform your PC case into a unique masterpiece. Here are some popular ways to modify and customize a PC case:
1. Case Lighting
One of the most common ways to customize a PC case is by adding lighting effects. LED light strips, case fans with RGB lighting, or even custom-designed lighting setups can create a vibrant and visually stunning look. You can choose from a variety of colors, patterns, and effects to match your desired theme or create eye-catching accents.
2. Windowed Side Panels
Adding a windowed side panel to your PC case allows you to showcase the internal components and create a visually striking display. Windowed panels are usually made of tempered glass or acrylic, providing a clear view of the components inside. This customization option is particularly popular among gamers and PC enthusiasts who want to display their high-end graphics cards, sleek CPU coolers, or intricate cable management.
3. Custom Paint Jobs
Give your PC case a unique look by applying a custom paint job. Whether you prefer solid colors, gradients, or intricate designs, painting your case allows you to personalize it to your taste. Be sure to use paint specifically designed for use on computer cases and follow proper preparation and application techniques for a professional finish.
4. Case Decals and Stickers
Add personality to your case by applying decals or stickers. These can range from small logos and symbols to larger designs that cover an entire side panel. Decals and stickers are an affordable and easy way to customize your case without the need for painting or extensive modifications.
5. Cable Sleeving
Elevate your cable management game by sleeving your cables. Cable sleeving involves wrapping the individual cables or cable bundles with protective and aesthetically pleasing coverings. Sleeved cables come in various colors and patterns and can add a clean and organized look to your build.
6. Component Covers and Shrouds
Add a touch of style and elegance to your PC case by using component covers and shrouds. These covers are designed to hide unsightly cables, power supply units, or storage drives, providing a clean and sleek appearance. Additionally, they can help improve airflow and cable management by keeping the interior of the case tidy.
7. Case Modding and Custom Panels
For those with advanced DIY skills, case modding involves more extensive modifications to achieve a completely unique design. This can include cutting holes for additional fans or water cooling systems, creating custom panels, integrating custom reservoirs or pumps, or even building entirely original case designs from scratch.
Modifying and customizing a PC case allows you to showcase your creativity and make a statement. However, it’s important to ensure that any modifications you undertake do not compromise the functionality, cooling, or structural integrity of your case. Take your time, plan your modifications carefully, and enjoy the process of creating a custom PC case that truly reflects your style and personality.
Conclusion
A PC case is more than just a housing for your computer components; it is a critical component that plays a significant role in the performance, aesthetics, and functionality of your system. By understanding the importance of a PC case and considering factors such as size, cooling, cable management, and customization, you can make informed decisions that result in a well-built and visually appealing computer.
Choosing the right PC case involves finding the balance between form and function. Consider the size and compatibility of the case with your components, ensuring proper cooling and airflow to maintain optimal temperatures. Take advantage of cable management features to keep your build clean and organized, not only for ease of maintenance but also to improve airflow and overall aesthetics.
Remember that personalization is key, and there are numerous ways to customize your PC case. From lighting effects and windowed side panels to custom paint jobs and cable sleeves, you can make your build truly unique and reflective of your style and personality.
Lastly, always prioritize the quality and durability of a PC case. Investing in a well-built case ensures the protection of your components and provides a solid foundation for your system. Choose reputable brands, consider customer reviews, and carefully evaluate the build quality before making your purchase.
In conclusion, a PC case is not just a mere enclosure but a vital component that affects the performance, aesthetics, and longevity of your computer system. By making informed choices, considering the various factors mentioned in this article, and utilizing customization options, you can create a well-organized, efficient, and visually stunning PC build.