Reasons to Zoom Out on a PC
Zooming out on a PC can be a useful technique for various reasons. Whether you’re working on a project, reading a document, or browsing the web, sometimes it becomes necessary to view more content on your screen. Here are a few common scenarios where zooming out can come in handy:
- Viewing large documents: When working with lengthy documents, such as spreadsheets or PDF files, zooming out allows you to see more of the content on a single screen. This can help improve productivity by reducing the need to scroll or click through pages.
- Comparing multiple windows: If you have multiple windows open, zooming out can provide a better overview of your tasks. By reducing the size of each window, you can easily compare and switch between different applications or documents.
- Browsing websites with wide content: Some websites have content that is optimized for larger screens or higher resolutions. When viewing these sites on a smaller screen, zooming out can ensure that the entire page fits within your viewport, avoiding the need for horizontal scrolling.
- Collaborating on shared screens: During video conferences or remote collaborations, zooming out can be beneficial. By reducing the zoom level, you can display more content to other participants, making it easier for them to follow along with your presentation or demonstration.
- Improving readability: Zooming out can also improve the legibility of certain documents or web pages. For example, if the text appears too large or crowded, zooming out can provide a better reading experience by reducing the font size and increasing the visible content on the screen.
These are just a few examples of why you might need to zoom out on a PC. The next section will explore some common methods for zooming out on different platforms, allowing you to choose the approach that best suits your needs.
Common Methods to Zoom Out on a PC
Zooming out on a PC can be accomplished through various methods depending on the operating system and application you are using. Here are some common techniques to zoom out on a PC:
- Using keyboard shortcuts: Many applications and web browsers have built-in keyboard shortcuts for zooming in and out. For example, in most web browsers, you can press “Ctrl” and the minus “-” key simultaneously to zoom out. Similarly, in applications like Microsoft Office Suite, pressing “Ctrl” and the minus “-” key will also decrease the zoom level.
- Using mouse gestures: Some web browsers, such as Google Chrome, support mouse gestures for zooming. By holding down the “Ctrl” key and scrolling the mouse wheel downward, you can zoom out gradually. This method provides a quick and intuitive way to adjust the zoom level.
- Using the browser’s zoom feature: Most modern web browsers offer a built-in zoom feature that allows you to adjust the zoom level of a webpage. You can usually find this feature under the browser’s “View” or “Settings” menu. By selecting a lower zoom percentage, you can effectively zoom out and view more content on the screen.
- Adjusting screen resolution: Another method to zoom out on a PC is by adjusting the screen resolution. Right-click on the desktop and select “Display settings” or “Screen resolution.” From there, you can decrease the resolution, which will effectively make everything appear smaller, giving you a zoomed-out view.
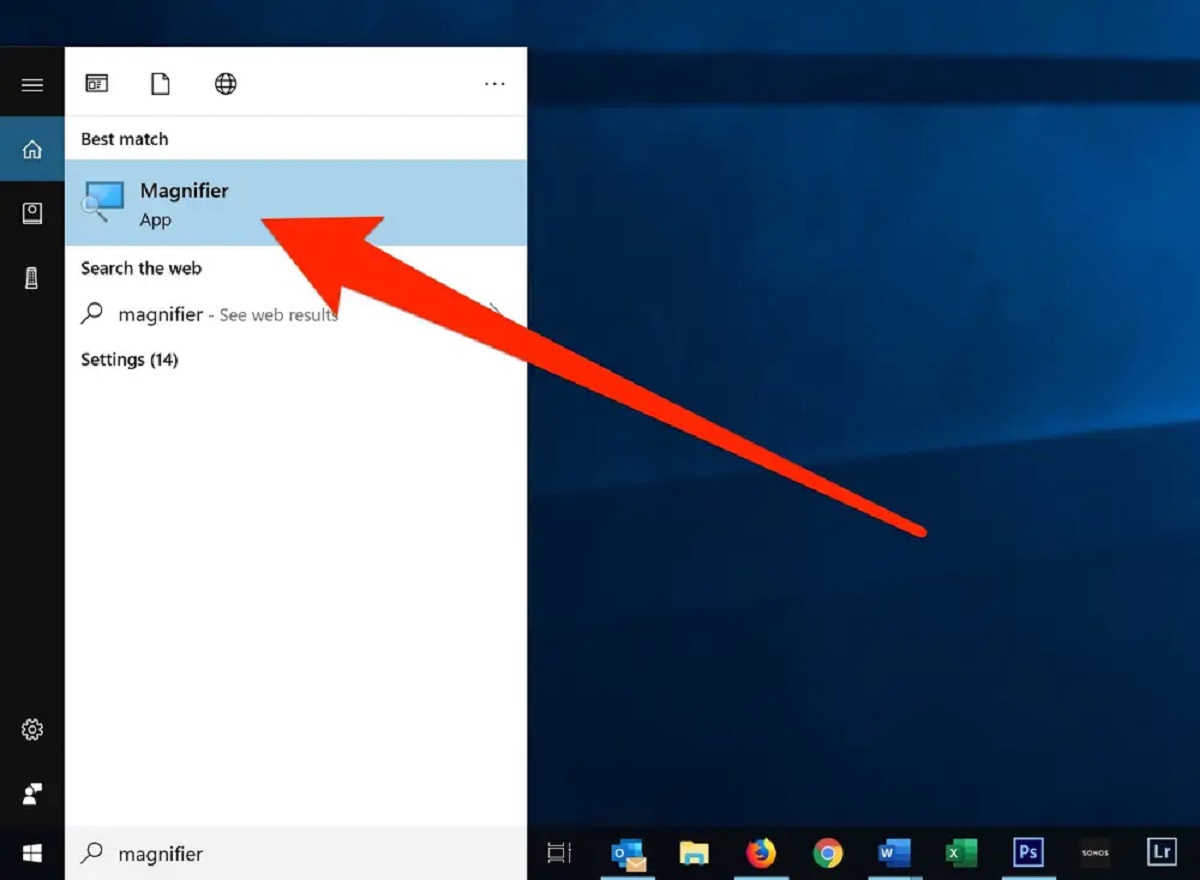
- Changing display settings: Some operating systems allow you to change the display settings to achieve a zoomed-out effect. For example, in Windows, you can go to the “Ease of Access” settings and enable the “Make everything bigger” option. This will reduce the size of everything on the screen, effectively zooming out.
These are just a few of the common methods to zoom out on a PC. Depending on your specific needs and the applications you are using, you can choose the most convenient method that suits your workflow. In the next sections, we will explore specific methods for zooming out in popular web browsers, Microsoft Office applications, and Adobe Acrobat.
Using the Zoom Feature in Browsers
Modern web browsers offer a built-in zoom feature that allows you to adjust the zoom level of a webpage. This feature is particularly useful when you want to zoom out and view more content on the screen. Here’s how you can use the zoom feature in popular web browsers:
- Google Chrome: To zoom out in Google Chrome, you have several options. You can use the keyboard shortcut “Ctrl” and the minus “-” key to decrease the zoom level. Alternatively, you can go to the “Settings” menu, select “Zoom,” and choose a lower percentage to zoom out.
- Mozilla Firefox: In Mozilla Firefox, you can use the keyboard shortcut “Ctrl” and the minus “-” key to zoom out. You can also go to the “View” menu, select “Zoom,” and choose a lower percentage to zoom out. Additionally, you can press the “Ctrl” key and scroll the mouse wheel downward to zoom out gradually.
- Microsoft Edge: Microsoft Edge offers similar zoom options as other web browsers. You can use the keyboard shortcut “Ctrl” and the minus “-” key to zoom out. Alternatively, you can go to the “Settings and more” menu, select “Zoom,” and choose a lower percentage to zoom out.
- Safari: For Safari users on macOS, you can use the keyboard shortcut “Command” and the minus “-” key to zoom out. You can also go to the “View” menu, select “Zoom Out,” or press “Option” and scroll the mouse wheel downward to zoom out gradually.
It’s worth noting that the zoom feature in browsers is typically temporary and applies only to the current webpage. If you want to maintain the zoom setting for all webpages, you may need to adjust the browser’s default zoom level in the settings.
Using the zoom feature in web browsers is a convenient way to quickly adjust the zoom level and view more content on the screen. Whether you’re reading an article, working on a web application, or navigating a complex webpage, you can easily zoom out to make the content more accessible and readable.
Adjusting Screen Resolution to Zoom Out
Another method to zoom out on a PC is by adjusting the screen resolution. By decreasing the screen resolution, everything on the screen will appear smaller, effectively providing a zoomed-out view. Here’s how you can adjust the screen resolution to zoom out:
- Right-click on the desktop and select “Display settings” or “Screen resolution.”
- In the display settings menu, you will find a section titled “Resolution” or “Screen resolution.”
- Drag the slider to the left to decrease the resolution. As you decrease the resolution, the content on the screen will become smaller, giving you a zoomed-out view.
- Click on “Apply” or “OK” to save the changes. Your screen will temporarily flash as the resolution is adjusted.
- If you are satisfied with the zoomed-out view, click on “Keep changes.” If not, click on “Revert” to revert back to the previous resolution.
It’s important to note that adjusting the screen resolution affects the entire display, not just a specific application or browser window. This means that everything on your screen, including icons, text, and images, will appear smaller after decreasing the resolution. It’s recommended to find a balance between a zoomed-out view and maintaining readability and usability.
Keep in mind that changing the screen resolution is a system-wide setting, and it will persist even when you restart your PC. If you prefer to temporarily zoom out for a specific task, using the browser’s zoom feature or application-specific zoom options might be more suitable.
Adjusting the screen resolution is a powerful technique to zoom out on a PC and view more content on the screen. It can be particularly useful when working with multiple windows or large documents, as it allows you to have a broader view of your tasks. However, it’s crucial to find a balance that suits your preferences and doesn’t compromise the overall usability of your PC.
Changing Display Settings to Zoom Out
If adjusting the screen resolution to zoom out doesn’t provide the desired result, you can also change the display settings on your PC to achieve a zoomed-out effect. Here’s how you can change the display settings to zoom out:
- Right-click on the desktop and select “Display settings” or “Screen resolution.”
- In the display settings menu, look for options related to display scaling or DPI (dots per inch).
- Adjust the scaling or DPI settings to make everything appear smaller. By reducing the scaling percentage or DPI value, you can effectively zoom out and view more content on the screen.
- Click on “Apply” or “OK” to save the changes. Your screen may temporarily flicker as the new settings are applied.
- If you are satisfied with the zoomed-out view, click on “Keep changes.” If not, click on “Revert” to revert back to the previous settings.
Changing the display settings can be particularly useful when you want a system-wide zoomed-out view rather than zooming out on a specific application or browser window. It allows you to make everything, including icons, text, and images, appear smaller, creating a more spacious and panoramic view of your desktop.
However, it’s essential to consider the limitations of changing display settings. Decreasing the scaling or DPI percentage too much may lead to reduced legibility and usability. Some applications and elements may not scale properly, resulting in distorted or blurry visuals. Experimenting with different settings and finding the right balance is key to achieving a comfortable zoomed-out view while maintaining usability.
Keep in mind that changing the display settings will affect all applications and windows on your PC. If you prefer to temporarily zoom out on a specific application, using the application’s built-in zoom feature or other available methods might be more suitable.
Changing the display settings to zoom out can provide a broader view of your computer screen, allowing you to see more content and work more efficiently. However, it’s important to carefully adjust the settings and consider the impact on overall usability and readability.
Zooming Out in Microsoft Office Applications
Microsoft Office applications, such as Word, Excel, and PowerPoint, provide built-in features to easily zoom in or out on your documents. Whether you’re editing a lengthy document, analyzing data in a spreadsheet, or creating a presentation, you can adjust the zoom level to fit more content on the screen. Here’s how you can zoom out in Microsoft Office applications:
- Word: To zoom out in Microsoft Word, you can use the keyboard shortcut “Ctrl” and the minus “-” key to decrease the zoom level. Alternatively, you can click on the “View” tab in the ribbon, go to the “Zoom” group, and select a lower zoom percentage from the options provided. This will reduce the size of the document, allowing you to view more content on the screen.
- Excel: In Microsoft Excel, you can zoom out to get a bird’s-eye view of your spreadsheet. You can use the keyboard shortcut “Ctrl” and the minus “-” key to decrease the zoom level. Additionally, you can go to the “View” tab in the ribbon, click on the “Zoom” button in the “Zoom” group, and choose a lower zoom percentage from the drop-down menu.
- PowerPoint: When working with presentations in Microsoft PowerPoint, zooming out can help you get an overall view of your slides. By using the keyboard shortcut “Ctrl” and the minus “-” key, you can decrease the zoom level. You can also go to the “View” tab, click on the “Zoom” button in the “Zoom to Fit” group, and select a lower zoom percentage to fit more slides on the screen.
Zooming out in Microsoft Office applications allows you to see more content at once, which can be useful when you need to navigate through lengthy documents, compare data in spreadsheets, or get a better overview of your presentation. It’s worth noting that changing the zoom level in these applications only affects the view on your screen and does not impact the actual document or its formatting.
Additionally, if you need to return to the default zoom level at any time, you can use the keyboard shortcut “Ctrl” and the zero “0” key to reset the zoom in all Microsoft Office applications.
Using the built-in zoom features in Microsoft Office applications provides flexibility and convenience when working with documents, spreadsheets, and presentations. By zooming out, you can optimize the viewing experience and efficiently navigate through your files.
Zooming Out in Adobe Acrobat
Adobe Acrobat, a popular PDF reader and editor, offers various zoom options to help you view and navigate through your PDF documents. Whether you’re reviewing a lengthy report, studying a research paper, or annotating a document, you can easily zoom out to see more content on the screen. Here’s how you can zoom out in Adobe Acrobat:
- Using the Zoom tools: In the toolbar at the top of Adobe Acrobat, you will find the Zoom tools. Click on the “-” (minus) button to zoom out. Each click will reduce the zoom level and display more content on the screen.
- Using keyboard shortcuts: Adobe Acrobat provides keyboard shortcuts for zooming in and out. Press “Ctrl” and the minus “-” key simultaneously to zoom out and decrease the zoom level. Repeat the shortcut as needed to zoom out further.
- Using the Zoom dropdown menu: Go to the “View” menu in Adobe Acrobat and select “Zoom.” From the dropdown menu, you can choose different options to zoom out, such as “Zoom Out” or specific percentages like “Fit Page” or “Fit Width.”
- Using the Hand tool: Alternatively, you can use the Hand tool to navigate through the document while zoomed out. Select the Hand tool from the toolbar or press “H” on your keyboard. This allows you to click and drag the document as needed to explore different sections.
Zooming out in Adobe Acrobat enables you to get a broader view of your PDF document, making it easier to read, analyze, and navigate through its content. It’s particularly helpful when working with documents that contain detailed graphics, tables, or long paragraphs that may require scrolling.
In addition to zooming out, Adobe Acrobat also provides options to customize your zoom preferences. You can access these settings by going to the “Edit” menu, selecting “Preferences,” and then choosing “Page Display.” Here, you can set the default zoom level or choose to automatically fit the page width or height when opening a PDF.
Take advantage of Adobe Acrobat’s zooming features to efficiently view and interact with your PDF documents. Whether you need to review, study, or annotate, zooming out can enhance your reading experience and make it easier to work with complex or lengthy PDF files.
How to Reset Zoom Settings on a PC
If you have adjusted the zoom settings on your PC and want to reset them back to the default settings, you can do so easily. Here’s how you can reset the zoom settings on a PC:
- Web Browsers: To reset the zoom settings in web browsers such as Google Chrome, Mozilla Firefox, or Microsoft Edge, you can use the keyboard shortcut “Ctrl” and the zero “0” key. This will revert the zoom level back to its default setting. Alternatively, you can go to the browser’s “Settings” or “View” menu and select the default zoom option.
- Microsoft Office Applications: In Microsoft Office applications like Word, Excel, and PowerPoint, you can reset the zoom settings by using the keyboard shortcut “Ctrl” and the zero “0” key. This will restore the zoom level to its default setting. You can also go to the “View” tab in the ribbon, click on the “Zoom” button, and select the default zoom percentage.
- Adobe Acrobat: To reset the zoom settings in Adobe Acrobat, you can go to the “View” menu and select “Zoom” followed by “Reset Zoom.” This will reset the zoom level to the default settings established by Adobe Acrobat.
- Screen Resolution and Display Settings: If you have adjusted the screen resolution or display settings to zoom out, you can reset them to their original state. Right-click on the desktop, select “Display settings” or “Screen resolution,” and then adjust the slider to the recommended or native resolution. Click on “Apply” or “OK” to save the changes and reset the zoom levels back to default.
By following these steps, you can reset the zoom settings on your PC, whether you have adjusted them in web browsers, Microsoft Office applications, Adobe Acrobat, or screen resolution and display settings. Resetting the zoom settings will restore them to their default values, allowing you to start fresh and view content in its original size.
It’s important to note that some applications may have specific zoom settings or features that may differ from the default settings. Therefore, it’s always a good idea to check the preferences or settings within the specific application if you are experiencing any difficulties in resetting the zoom levels.
By knowing how to reset your zoom settings, you can easily return to the default view, ensuring a consistent and comfortable user experience on your PC.