Introduction
Welcome to the world of PC modding! If you’re looking to add a personal touch to your computer setup, wiring a PC case fan via a switch can give you the ability to manually control its speed and airflow. This can be particularly useful if you want to optimize cooling performance or reduce noise levels.
In this guide, we will walk you through the process of wiring a PC case fan to a switch. We’ll cover everything from gathering the necessary components to securing and testing the connections. By the end of this tutorial, you’ll have a better understanding of how to customize your computer’s cooling system to suit your specific needs.
Before we dive into the details, it’s important to note that this guide assumes you have a basic understanding of computer hardware and are comfortable working with electrical connections. If you’re new to PC building or lack experience in handling electrical components, we recommend seeking assistance from a knowledgeable friend or qualified professional.
Now that we have set the expectations, let’s gather the components needed to wire a PC case fan via a switch.
What You Will Need
Before you begin wiring a PC case fan via a switch, make sure you have the following tools and components:
- A PC case fan: Choose a fan that matches the specifications and size requirements of your computer case.
- A fan switch: Select a switch that can handle the voltage and current required by the fan. You can choose a toggle switch, rocker switch, or any other suitable switch.
- Wire strippers: These will help you remove the insulation from the wires without damaging them.
- Electrical tape: Use this to insulate and secure the electrical connections.
- Soldering iron and solder: If you prefer a more permanent and secure connection, soldering the wires together is recommended.
- Heat shrink tubing (optional): This can provide an additional layer of insulation and protection for the wires.
It’s important to ensure that the fan and switch are compatible with each other and the power supply of your computer. Check the fan’s specifications and the switch’s rating to confirm they can handle the required voltage and current.
Before starting the wiring process, ensure that you have a clean and organized work area. Keep in mind that any modifications made to your computer hardware could void the warranty, so proceed with caution and at your own risk.
Now that you have all the necessary tools and components, let’s move on to the next step: understanding the fan wiring.
Step 1: Gathering the Necessary Components
Before you begin the actual wiring process, it’s important to gather all the necessary components. Here’s a list of what you’ll need:
- A PC case fan: Choose a fan that is compatible with your computer case and meets your cooling requirements. Consider the size, airflow, and noise levels of the fan.
- A fan switch: Select a switch that can handle the voltage and current required by the fan. You can choose from various types of switches such as toggle switches, rocker switches, or even a simple push-button switch.
- Wire strippers: These tools will help you remove the insulation from the wires without causing any damage.
- Electrical tape: Use this to insulate and secure the electrical connections.
- Soldering iron and solder (optional): If you prefer a more secure and permanent connection, you can use a soldering iron and solder to join the wires.
- Heat shrink tubing (optional): This tubing can provide an additional layer of insulation and protection for the wires, especially if you choose to solder the connections.
It’s important to make sure that the fan and switch you choose are compatible with each other and the power supply of your computer. Check the specifications of the fan and the ratings of the switch to ensure they can handle the required voltage and current.
Before you start the wiring process, create a clean and organized working space. Make sure you have all the tools and components within reach.
Now that you have gathered all the necessary components, you can proceed to the next step: understanding the fan wiring.
Step 2: Understanding the Fan Wiring
Before you can wire a PC case fan to a switch, it’s crucial to have a clear understanding of the fan’s wiring. This will help you properly connect the fan to the switch and ensure it functions as intended.
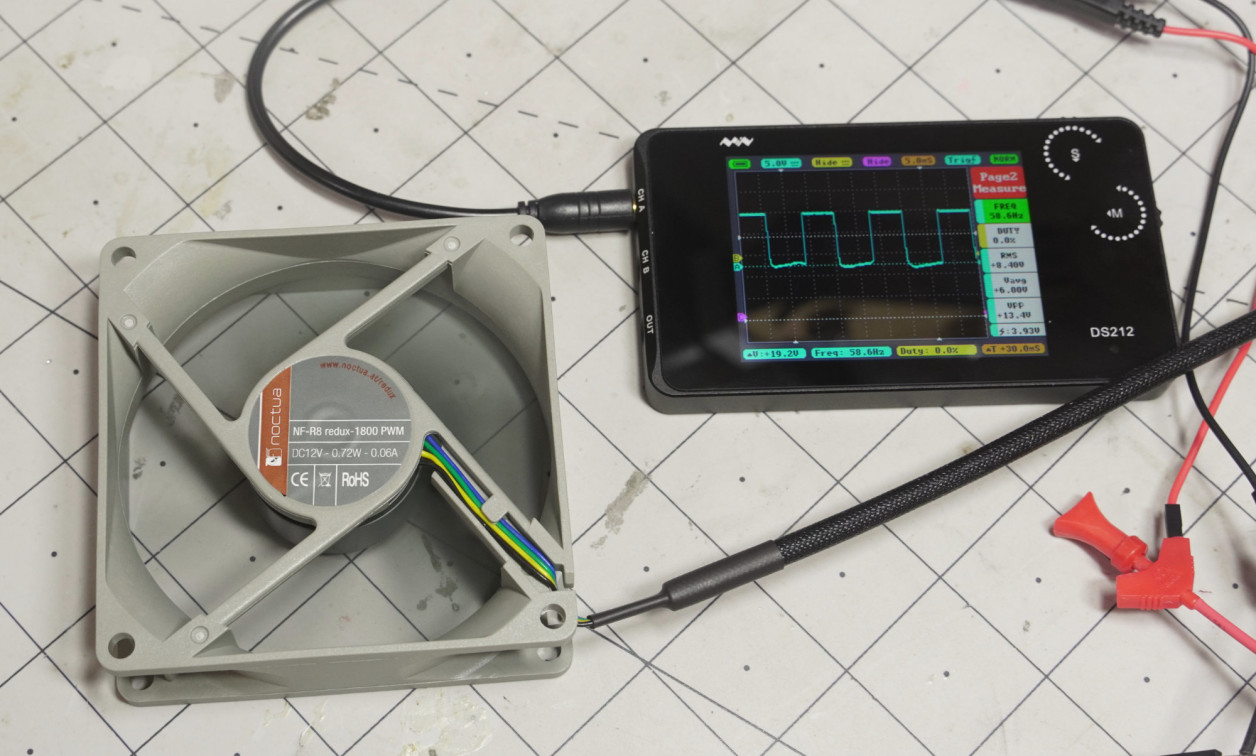
A typical PC case fan has three wires: a red wire, a black wire, and a yellow or blue wire. Each wire serves a different purpose:
- The red wire is the power wire and carries the positive voltage (+12V) from the power supply to the fan.
- The black wire is the ground wire and provides the fan with a reference point for electrical flow.
- The yellow or blue wire is the control wire and is responsible for regulating the fan speed. This wire receives a variable voltage signal from the motherboard or controller to adjust the fan’s speed accordingly.
When wiring the fan to a switch, the control wire becomes the key component. By connecting the control wire to the switch, you can manually control the fan speed by toggling the switch on or off.
Before proceeding further, determine the proper voltage rating of the fan you have. Most PC fans operate at +12V, but it’s essential to verify this information to avoid damaging the fan or other components.
Now that you understand the basic wiring of a PC case fan, you can move on to the next step: installing the fan switch.
Step 3: Installing the Fan Switch
Now that you have a clear understanding of the fan wiring, it’s time to install the fan switch. The switch will provide you with the ability to control the fan speed manually.
Start by selecting a suitable location for the switch on your computer case. Ideally, choose a spot that is easily accessible and doesn’t interfere with other components. You can mount the switch using a pre-existing opening or create a new one if necessary.
Once you have chosen the location, mark it on the case using a pencil or marker. Then, carefully drill a hole that matches the size of the switch. Be mindful of any sensitive components or cables behind the panel and take necessary precautions to avoid damaging them.
With the hole drilled, insert the switch through the opening from the outside of the case. Ensure that the switch is secure and fits snugly. You may need to use nuts, washers, or other securing mechanisms provided with the switch to hold it in place.
After the switch is installed, wire it to the fan control wire. Take one end of the control wire and strip off a small portion of the insulation. Then, attach the exposed wire to one terminal of the switch. Use appropriate connectors or soldering techniques to create a secure connection. Repeat this process for the other end of the control wire, connecting it to the remaining terminal of the switch.
Once the connections are made, use electrical tape or heat shrink tubing to insulate and protect the exposed wires. This will ensure the connections remain secure and prevent any short circuits.
At this point, the fan switch should be successfully installed on your computer case. In the next step, we will move on to wiring the fan to the switch.
Step 4: Wiring the Fan to the Switch
Now that you have successfully installed the fan switch, it’s time to wire the PC case fan to the switch. By doing this, you’ll be able to control the fan’s speed manually.
Start by identifying the red wire on the fan, which is the power wire. Cut the red wire, leaving enough length to work with. Strip the insulation from the ends of the cut wires using wire strippers, exposing a small portion of the bare wire.
Take one end of the red wire and connect it to one of the terminals on the switch. If necessary, use connectors or soldering techniques to create a secure and reliable connection. Then, take the other end of the red wire and connect it to the power source, such as the +12V line of your power supply or a molex connector. Again, make sure the connection is secure and well-insulated.
Next, locate the black wire on the fan, which is the ground wire. Cut the black wire, leaving enough length to work with. Strip the ends of the cut wires and connect one end to the other terminal on the switch. This will complete the circuit and allow for manual control of the fan speed. Secure the connection using connectors or soldering techniques.
If desired, you can also connect the ground wire to a common ground point on your computer case. This can help ensure a stable and reliable ground connection for the fan.
With the fan properly wired to the switch, it’s important to insulate and secure the connections. Use electrical tape or heat shrink tubing to cover the exposed wires, making sure to provide a tight seal. This will prevent any short circuits and ensure the connections remain intact.
Once you have completed the wiring process and secured the connections, double-check all the connections to ensure they are correct and well-insulated. This is an important step to guarantee the safety and functionality of the setup.
In the next step, we will move on to securing and testing the connections to ensure everything is working as expected.
Step 5: Securing and Testing the Connections
Now that you have completed the wiring process, it’s essential to secure and test the connections to ensure everything is functioning correctly. Follow these steps to finalize the installation:
Start by checking all the connections you made. Make sure they are secure and properly insulated. Take a moment to review the wiring and confirm that no loose wires or exposed connections are visible.
Once you are confident in the connections, use zip ties or cable management techniques to secure the wires and prevent them from interfering with other components or obstructing airflow within the case. This will help maintain a clean and organized setup.
With the connections secured, it’s time to test the fan and switch. Start by turning on your computer and flipping the switch to the “On” position. You should notice the fan spinning at its default speed, which indicates the power is successfully reaching the fan. If the fan does not spin or if you encounter any issues, double-check the wiring connections and troubleshoot any potential problems.
Now, flip the switch to the “Off” position. The fan should stop spinning, indicating that the power supply to the fan has been cut off. This demonstrates that the switch is functioning as intended, enabling you to control the fan speed manually.
If your fan has multiple speed settings, test each setting by toggling the switch between the “On” and “Off” positions. Observe the changes in fan speed to ensure that the switch is adjusting the fan speed accordingly.
During the testing phase, listen for any unusual noises or vibrations coming from the fan. If you notice anything out of the ordinary, inspect the connections and make necessary adjustments to resolve the issue.
After confirming that the fan and switch are working correctly, close up your computer case and admire your newly wired fan setup. Enjoy the ability to control the fan speed and optimize your computer’s cooling performance according to your preferences.
Remember, if you ever need to make changes or adjustments to the wiring, ensure that your computer is powered off and unplugged from the electrical source before proceeding.
Congratulations! You have successfully wired a PC case fan via a switch. With the knowledge gained from this guide, you can now confidently customize your computer’s cooling system to best suit your needs.
Conclusion
Wiring a PC case fan via a switch provides you with the flexibility to control the fan speed and optimize the cooling performance of your computer system. By following the steps outlined in this guide, you have learned how to gather the necessary components, understand the fan wiring, install the fan switch, wire the fan to the switch, secure and test the connections, and ensure everything is functioning as intended.
It’s important to remember that working with electrical components carries a level of risk, and you should exercise caution throughout the process. If you are unsure or uncomfortable with any step, seek guidance from a knowledgeable individual or professional.
By wiring a PC case fan via a switch, you have taken a step towards customizing and enhancing your computer setup. The ability to manually control the fan speed can help optimize cooling efficiency or reduce noise levels, providing you with a more pleasant and efficient computing experience.
Continue exploring and experimenting with different fan configurations to find the optimal balance between cooling performance and noise levels for your specific needs. Remember to always prioritize the safety and reliability of your computer system.
We hope this guide has been helpful and informative for you. Enjoy the benefits of your newly wired fan setup and the improved control over your computer’s cooling system.


