Introduction
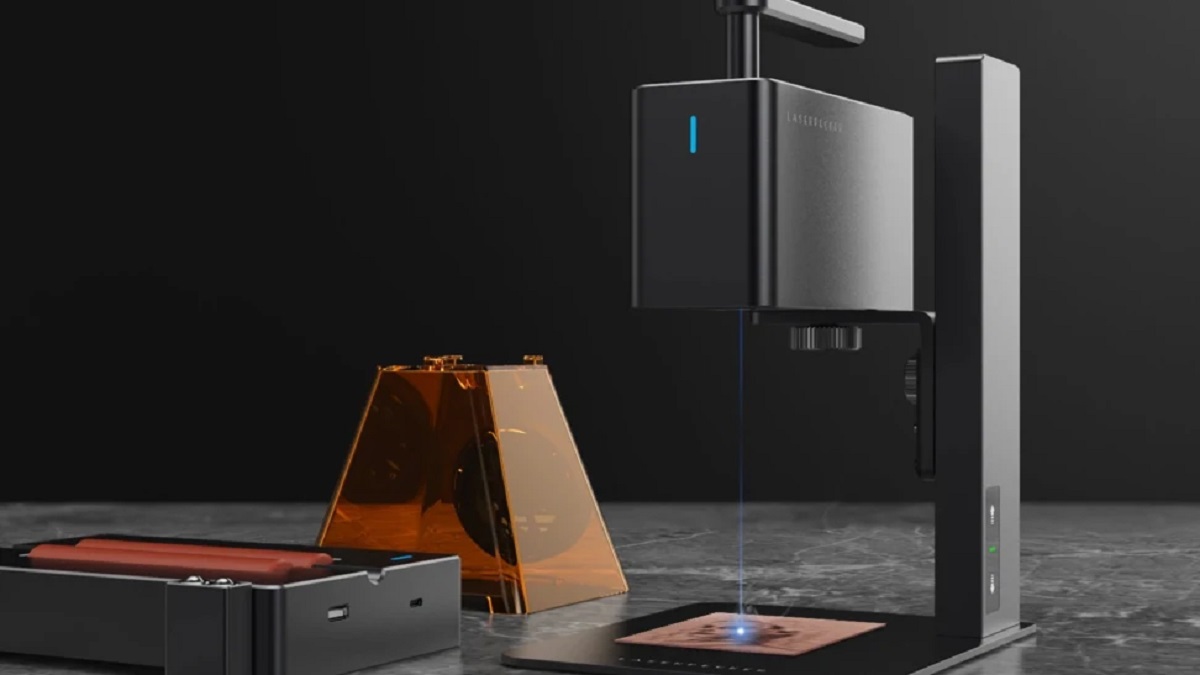
Welcome to the exciting world of laser engraving with the Spirit LS Laser Engraver. This remarkable machine is designed to bring your creative visions to life with precision and ease. Whether you’re an artist, a small business owner, or simply someone with a passion for personalization, the Spirit LS Laser Engraver is the perfect tool to unlock your limitless potential.
With its advanced technology and user-friendly interface, the Spirit LS Laser Engraver allows you to etch beautiful designs, text, and images onto a wide range of materials, including wood, leather, acrylic, and more. Whether you want to customize products, create unique gifts, or add a professional touch to your artwork, this versatile machine has got you covered.
What sets the Spirit LS Laser Engraver apart is its exceptional precision and speed. Its powerful laser beam ensures sharp and accurate results, while its high-speed engraving capabilities make quick work of even the most intricate designs. Plus, with its user-friendly software and control panel, operating the Spirit LS Laser Engraver is a breeze, whether you’re a seasoned professional or a beginner.
Safety is also a top priority with the Spirit LS Laser Engraver. Its enclosed design and safety features ensure that you can work with peace of mind, knowing that both you and your surroundings are protected. Additionally, the Spirit LS Laser Engraver complies with industry safety standards, providing you with a reliable and secure engraving experience.
In this comprehensive guide, we will take you through every step of using the Spirit LS Laser Engraver, from unboxing and setup to engraving on different materials. We will provide you with valuable tips, tricks, and troubleshooting advice to help you make the most of this incredible machine. So, let’s dive right in and unlock the limitless possibilities of laser engraving with the Spirit LS Laser Engraver.
Getting Started
Before you begin using your Spirit LS Laser Engraver, it’s important to familiarize yourself with the machine and its components. This will ensure a smooth and successful engraving experience right from the start.
The first step is to find a suitable location for your Spirit LS Laser Engraver. Choose a sturdy, level surface that is free from dust and debris. Make sure there is enough space around the machine for ventilation and easy access.
Once you have set up the machine, it’s time to unbox and inspect its contents. Carefully remove all the components from the packaging and check for any signs of damage during shipping. The Spirit LS Laser Engraver comes with the following items:
- 1 Spirit LS Laser Engraver
- 1 Power cord
- 1 USB cable
- 1 Set of user manuals and software
Take a moment to review the user manuals to familiarize yourself with the setup process and the machine’s features. These manuals will serve as your guide throughout your engraving journey.
Next, locate the power switch on the back of the Spirit LS Laser Engraver and turn it on. You will also need to connect the power cord and the USB cable to the corresponding ports on the machine. Ensure that the cables are securely connected to avoid any interruptions during operation.
Now that your Spirit LS Laser Engraver is powered on and connected, you will need to install the necessary software to control and manage your engraving projects. Insert the software CD or follow the instructions provided to download the software onto your computer.
Once the software is installed, double-click the program icon to launch it. You will be greeted with a user-friendly interface that allows you to create, edit, and manage your engraving designs. Familiarize yourself with the different tools and options available in the software to maximize your creativity and control over your projects.
In the next section, we will explore how to connect the Spirit LS Laser Engraver to your computer and configure the necessary settings for engraving. So, let’s move on and unleash the full potential of your Spirit LS Laser Engraver!
Unboxing the Spirit LS Laser Engraver
Congratulations on acquiring your Spirit LS Laser Engraver! In this section, we will guide you through the process of unboxing the machine and familiarizing yourself with its components.
Before you begin, make sure you have a clear and spacious area to work in. This will help prevent any accidental damage to the machine during the unboxing process.
Start by removing the packaging material from the outer box. Carefully lift the top portion of the box and set it aside. Inside, you will find the Spirit LS Laser Engraver wrapped in protective foam or plastic. Gently lift the machine and place it on a stable surface.
Take a moment to appreciate the sleek and sturdy design of the Spirit LS Laser Engraver. Its compact size makes it suitable for both professional and personal use, while its robust construction ensures durability and longevity.
Once you have the machine out, it’s time to inspect the contents and ensure that everything is present and in good condition. The Spirit LS Laser Engraver package typically includes the following:
- The Spirit LS Laser Engraver
- A power cord
- A USB cable
- User manuals and software
Carefully unwrap each component and set them aside. Take a moment to review the user manuals as they contain valuable information about the setup process, operation, and maintenance of your Spirit LS Laser Engraver.
Inspect the machine for any signs of shipping damage. Check the laser head, control panel, and any other visible parts for any abnormalities or loose connections. If you notice any issues, contact the manufacturer or vendor for further assistance.
Now that you have unboxed and inspected the Spirit LS Laser Engraver, you are ready to move on to the next steps of the setup process. In the following sections, we will cover important safety precautions, setting up the machine, and connecting it to your computer. So, let’s continue our journey to unleash the potential of the Spirit LS Laser Engraver.
Safety Precautions
Ensuring your safety and the safety of those around you is of utmost importance when using the Spirit LS Laser Engraver. This section highlights some essential safety precautions that you should follow to minimize the risk of accidents and protect yourself and your environment.
1. Read the User Manual: Familiarize yourself with the user manual provided with the Spirit LS Laser Engraver. It contains important information on safety guidelines and operating procedures specific to the machine. Make sure to follow the instructions carefully.
2. Personal Protective Equipment (PPE): Wear appropriate personal protective equipment, such as safety goggles, to protect your eyes from laser light and debris. Depending on the materials you work with, you may also need to wear protective gloves and a mask to protect against fumes or particles.
3. Ventilation: Ensure proper ventilation in the area where you use the Spirit LS Laser Engraver. Open windows or use exhaust fans to remove fumes and smoke that may be produced during the engraving process. Avoid working in confined spaces without adequate ventilation.
4. Machine Placement: Place the Spirit LS Laser Engraver on a stable, level surface that can withstand its weight. Make sure there is enough space around the machine to allow for proper airflow and access during operation.
5. Fire Safety: Keep a fire extinguisher nearby in case of any emergencies. Avoid engraving highly flammable materials and always monitor the engraving process to prevent overheating or ignition.
6. Laser Safety: The Spirit LS Laser Engraver emits a powerful laser beam. Never look directly into the laser beam, even with safety goggles. Avoid placing reflective surfaces near the machine that could redirect the laser beam unintentionally.
7. Children and Pets: Keep children and pets away from the Spirit LS Laser Engraver while it is in operation. Educate family members about the potential hazards and restrict access to the machine to authorized users only.
8. Cleaning and Maintenance: Before cleaning the machine, ensure that it is turned off and unplugged. Use a soft, lint-free cloth to clean the exterior surfaces. Avoid using solvents or abrasive cleaners that may damage the machine.
By following these safety precautions, you can enjoy a safe and productive experience with the Spirit LS Laser Engraver. Always prioritize safety and exercise caution when operating the machine. In the next section, we will guide you through the setup process of the Spirit LS Laser Engraver. So, let’s continue our journey towards unleashing your creativity with this incredible machine.
Setting Up the Spirit LS Laser Engraver
Now that you have familiarized yourself with the safety precautions, it’s time to set up your Spirit LS Laser Engraver. Follow these steps carefully to ensure a smooth and successful setup process.
1. Power Connection: Locate the power cord that came with your Spirit LS Laser Engraver. Plug one end into the power outlet and the other end into the power socket located on the back of the machine. Ensure that the connection is secure.
2. Control Panel: The control panel is where you will interact with the machine and adjust various settings. Familiarize yourself with the buttons, switches, and display panel on the control panel. Refer to the user manual for detailed information on the control panel layout and functionality.
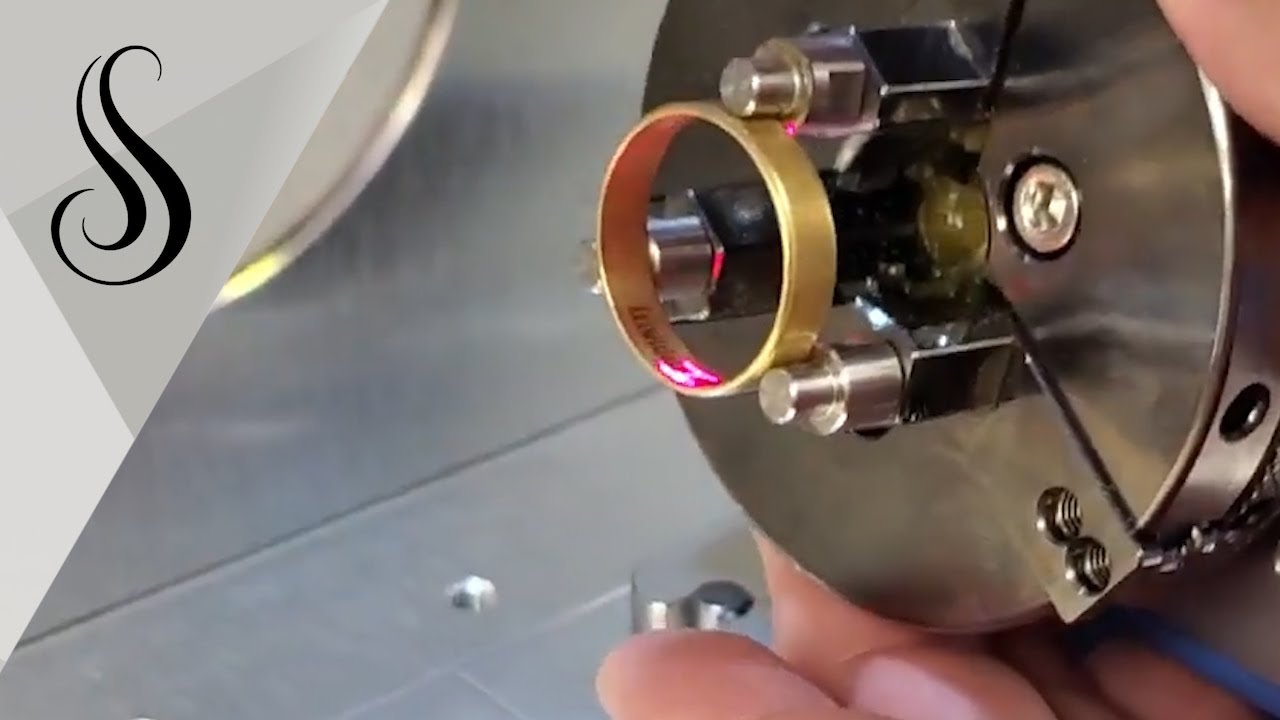
3. Laser Head Adjustment: The laser head needs to be properly aligned for accurate engraving. Carefully adjust the laser head according to the instructions provided in the user manual. Take your time to ensure precise alignment for optimal results.
4. Material Platform: The Spirit LS Laser Engraver comes with a material platform where you will place your materials for engraving. Adjust the height of the platform to accommodate the thickness of your material. Refer to the user manual for specific instructions on adjusting the material platform.
5. Exhaust Ventilation: Connect the exhaust hose to the designated port on the back of the machine. Ensure that the other end of the hose is properly secured to an exhaust system or vent. This will help remove fumes and smoke generated during the engraving process.
6. Laser Safety Shield: The Spirit LS Laser Engraver is equipped with a laser safety shield that should be positioned correctly to protect you from the laser beam. Adjust the shield to cover the working area and ensure that it is securely in place before starting any engraving tasks.
7. Test Run: Before jumping into full-scale engraving projects, it’s always a good idea to perform a test run. Use a scrap piece of material and engrave a simple design to check the laser focus, alignment, and overall performance of the machine. This will help you identify any issues or adjustments that may be necessary.
By following these steps, you will have successfully set up your Spirit LS Laser Engraver, positioning yourself for exciting engraving endeavors. In the next section, we will explore how to connect your Spirit LS Laser Engraver to a computer and install the necessary software. So, let’s move on to the next step in our journey of unleashing the potential of the Spirit LS Laser Engraver.
Connecting the Spirit LS Laser Engraver to a Computer
To fully utilize the capabilities of your Spirit LS Laser Engraver, you need to establish a connection between the machine and your computer. Follow these steps to ensure a seamless connection and unlock the full engraving potential of your machine.
1. USB Connection: Locate the USB port on the back of your Spirit LS Laser Engraver. Connect one end of the USB cable to this port and the other end to an available USB port on your computer. Ensure a secure connection.
2. Power On: Turn on your Spirit LS Laser Engraver by toggling the power switch located at the back of the machine. The control panel should light up, indicating that the machine is receiving power.
3. Windows Setup: If you are using a Windows computer, it may automatically detect and install the necessary drivers for the Spirit LS Laser Engraver. If prompted, follow the on-screen instructions to complete the installation process. In some cases, you may need to download and install the drivers from the manufacturer’s website.
4. Mac Setup: For Mac users, you may need to install the appropriate driver for the Spirit LS Laser Engraver. Visit the manufacturer’s website and download the Mac driver software. Follow the provided instructions to install the driver on your computer.
5. Software Compatibility: Ensure that the software you plan to use with the Spirit LS Laser Engraver is compatible with your computer’s operating system. Check the system requirements of the software and make any necessary updates or installations to ensure compatibility.
6. Software Configuration: Open the engraving software on your computer. Navigate to the settings or preferences section of the software and select the appropriate connection option for the Spirit LS Laser Engraver. This will establish communication between the computer and the machine.
7. Test Connection: Once the connection is established, perform a test engraving on a scrap piece of material to ensure that the computer and the Spirit LS Laser Engraver are communicating correctly. Adjust any settings or configurations as needed to achieve the desired engraving results.
By following these steps, you should now have a successful connection between your Spirit LS Laser Engraver and your computer. You are now ready to embark on a creative journey with limitless engraving possibilities. In the next section, we will explore the software installation process in more detail. So, let’s proceed and unlock the full potential of your Spirit LS Laser Engraver.
Software Installation
To fully utilize the features and capabilities of your Spirit LS Laser Engraver, it’s essential to install the necessary software on your computer. Follow these steps to successfully install the software and unleash your creativity.
1. Software Included: Locate the software CD or DVD that came with your Spirit LS Laser Engraver. Insert it into your computer’s optical drive. If your computer does not have an optical drive, don’t worry! The software can usually be downloaded from the manufacturer’s website.
2. Installation Wizard: The software installation process usually begins automatically when you insert the CD or DVD. If it doesn’t start automatically, navigate to the CD or DVD drive on your computer and double-click on the installation file to begin the process.
3. Follow Instructions: Follow the on-screen instructions provided by the installation wizard. This will typically involve accepting the terms and conditions, choosing a location for the software installation, and selecting any additional features or components you want to install.
4. Complete the Installation: Once you have selected your preferences, click on the “Install” or “Finish” button to start the installation process. Wait for the software to install completely. This may take a few minutes, depending on the size and complexity of the software.
5. Software Updates: After the initial installation, it’s a good practice to check for any available software updates. These updates often include bug fixes, performance improvements, and additional features. Launch the software and navigate to the “Help” or “Update” section to check for updates and follow the prompts to download and install them.
6. Software Registration: Some software may require you to register or activate your product. Follow the provided instructions to complete the registration process and unlock the full functionality of the software.
7. Test the Software: Once the software installation is complete, launch the program and familiarize yourself with the different features and tools available. Experiment with the various settings to get a feel for how they affect your engraving designs. You may also want to consult the user manual or online tutorials to learn more about the software’s capabilities.
By following these steps, you should have successfully installed the required software for your Spirit LS Laser Engraver. You’re now ready to take full advantage of the software’s capabilities and embark on exciting engraving projects. In the next section, we will guide you through using the control panel of the Spirit LS Laser Engraver. So, let’s continue our journey and discover the versatility of this incredible machine.
Using the Control Panel
The control panel of your Spirit LS Laser Engraver is where you can interact with the machine and make adjustments to ensure precise and accurate engravings. Familiarizing yourself with the control panel and its functions will help you navigate through the engraving process with ease. Here’s a breakdown of the key features and functions of the control panel:
1. Display Panel: The display panel provides essential information about the engraving process, such as the current job status, settings, and progress. It may also display error messages or prompts for user input. Pay close attention to the display panel to ensure that everything is running smoothly.
2. Function Buttons: The control panel is equipped with several function buttons that allow you to perform various actions. These buttons may include power on/off, start, pause, stop, and menu navigation buttons. Pressing the appropriate function button will activate the corresponding action.
3. Navigation Buttons: The navigation buttons on the control panel allow you to navigate through the menu options and settings of the Spirit LS Laser Engraver. These buttons typically include direction arrows and an enter button. Use them to scroll through the available options and select your desired settings.
4. Speed and Power Controls: The control panel provides dedicated controls for adjusting the speed and power settings of the laser engraving. These controls allow you to customize the intensity and speed of the laser beam, depending on the material and design requirements. Experiment with different settings to achieve the desired engraving results.
5. Job Memory: The Spirit LS Laser Engraver often includes a job memory feature, which allows you to save and recall frequently used settings and designs. This feature is especially useful when working on repetitive or similar engraving tasks, as it eliminates the need for manual input of settings each time.
6. Settings Customization: Depending on the specific model of your Spirit LS Laser Engraver, the control panel may offer additional customization options. These options can include adjusting laser focus, fine-tuning power levels, changing engraving depth, and more. Explore the user manual to understand the full range of customization options available to you.
It’s important to note that the specific layout and functionality of the control panel may vary slightly depending on the model of the Spirit LS Laser Engraver you are using. Refer to the user manual provided with your machine for detailed instructions specific to your model.
By understanding and utilizing the features and functions of the control panel, you can have precise control over your engraving process and achieve exceptional results. In the next section, we will guide you through loading and positioning materials onto your Spirit LS Laser Engraver. So, let’s continue on our journey of exploring the possibilities of this incredible machine.
Loading and Positioning Materials
Properly loading and positioning your materials on the Spirit LS Laser Engraver is crucial for achieving accurate and high-quality engravings. This section will guide you through the process of loading and positioning materials onto your machine.
1. Material Compatibility: Before proceeding, ensure that the material you plan to engrave is compatible with the Spirit LS Laser Engraver. The machine is capable of engraving a wide range of materials, including wood, leather, acrylic, glass, and more. Refer to the user manual or manufacturer’s guidelines for a list of compatible materials.
2. Preparing the Material: Prepare your material by cutting it to the desired size and shape. Remove any protective covering or film that may be present on the surface of the material. Ensure that the material is clean and free from dust, debris, or any obstructions that could interfere with the engraving process.
3. Material Platform Adjustment: The Spirit LS Laser Engraver comes with an adjustable material platform that allows you to accommodate materials of different thicknesses. Raise or lower the platform to match the thickness of your material. Adjust the platform securely to ensure stability during the engraving process.
4. Secure the Material: Place the prepared material onto the material platform. Depending on the material, you may need to secure it in place using clamps, tape, or other suitable methods. Ensure that the material is firmly secured to prevent any movement or shifting during the engraving process.
5. Positioning the Design: Determine the desired position and orientation of your engraving on the material. The Spirit LS Laser Engraver often offers a preview option that allows you to visualize the placement of your design before engraving. Utilize the control panel or software interface to position your design accurately.
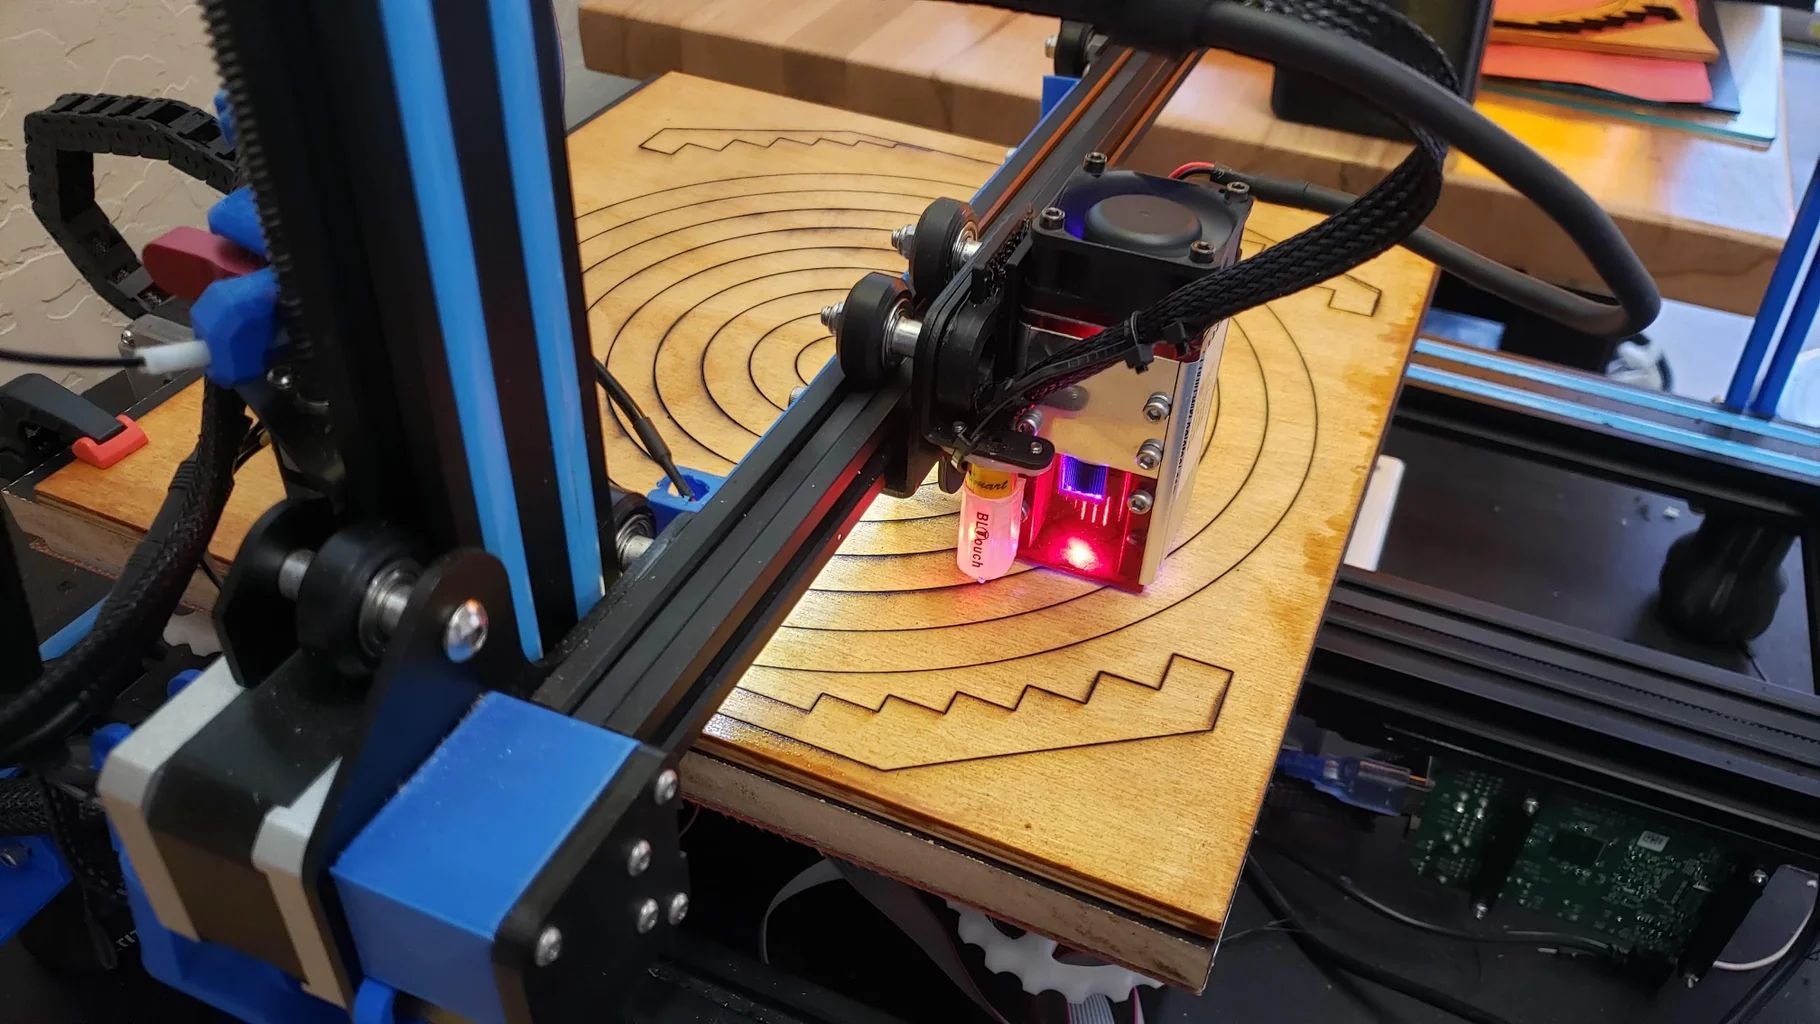
6. Focus Adjustment: Adjusting the focus ensures that the laser beam is at the optimal distance from the material’s surface, resulting in precise and sharp engravings. Refer to the user manual for instructions on adjusting the focus of your specific model. Take your time to achieve the correct focus for optimal results.
7. Test Engraving: Before beginning a full-scale engraving, perform a test engraving on a small and inconspicuous area of your material. This allows you to make any necessary adjustments to the settings, position, or focus before engraving the entire design. Analyze the test engraving to ensure that it meets your desired standards.
By following these steps, you can load and position your materials accurately on the Spirit LS Laser Engraver, ensuring precise and high-quality engravings. In the next section, we’ll explore the process of adjusting settings for engraving different materials. So, let’s continue our journey to enhance your engraving versatility.
Adjusting Settings for Engraving
Every material requires specific settings to achieve optimal engraving results on the Spirit LS Laser Engraver. By adjusting the settings, such as laser power, speed, and resolution, you can achieve precise and high-quality engravings on a variety of materials. Follow these steps to adjust the settings for engraving different materials:
1. Material Selection: Start by identifying the material you plan to engrave. Different materials have different characteristics, such as hardness, density, and heat resistance. Refer to the manufacturer’s guidelines or user manual to determine the recommended settings for your specific material.
2. Laser Power: Laser power determines the intensity of the laser beam and how deeply it penetrates the material. Adjust the laser power based on the material’s characteristics. Harder materials usually require higher power settings, while softer materials may require lower power settings to prevent damage or burning.
3. Engraving Speed: The speed at which the laser beam moves across the material affects the engraving quality. Higher speeds can result in lighter engravings, while slower speeds give deeper and more noticeable engravings. Experiment with different speeds to achieve contrasting effects on your chosen material.
4. Resolution: The resolution refers to the level of detail and precision in the engraving. Higher resolution settings create finer and more intricate engravings. However, higher resolution also increases the engraving time. Consider the intricacy of your design and the desired outcome when adjusting the resolution settings.
5. Multiple Passes: Some materials may require multiple passes of the laser beam to achieve the desired depth or darkness of the engraving. This is especially true for dense or thick materials. Experiment with multiple passes to achieve the desired result, ensuring that each pass is properly aligned with the previous one.
6. Test Engravings: Before engraving the final design on your material, perform test engravings on similar or scrap materials. This allows you to fine-tune the settings and observe the results before committing to the actual project. Make adjustments as needed to achieve the desired effect.
Remember that every material and design may require slight variations in the settings. Keep a record of successful settings for each material, as this can serve as a useful reference for future projects.
By adjusting the settings for engraving, you can achieve precise and high-quality results on a wide range of materials with your Spirit LS Laser Engraver. In the next section, we’ll explore the process of engraving on different materials. So, let’s continue our journey to unlock the full potential of this remarkable machine.
Engraving on Different Materials
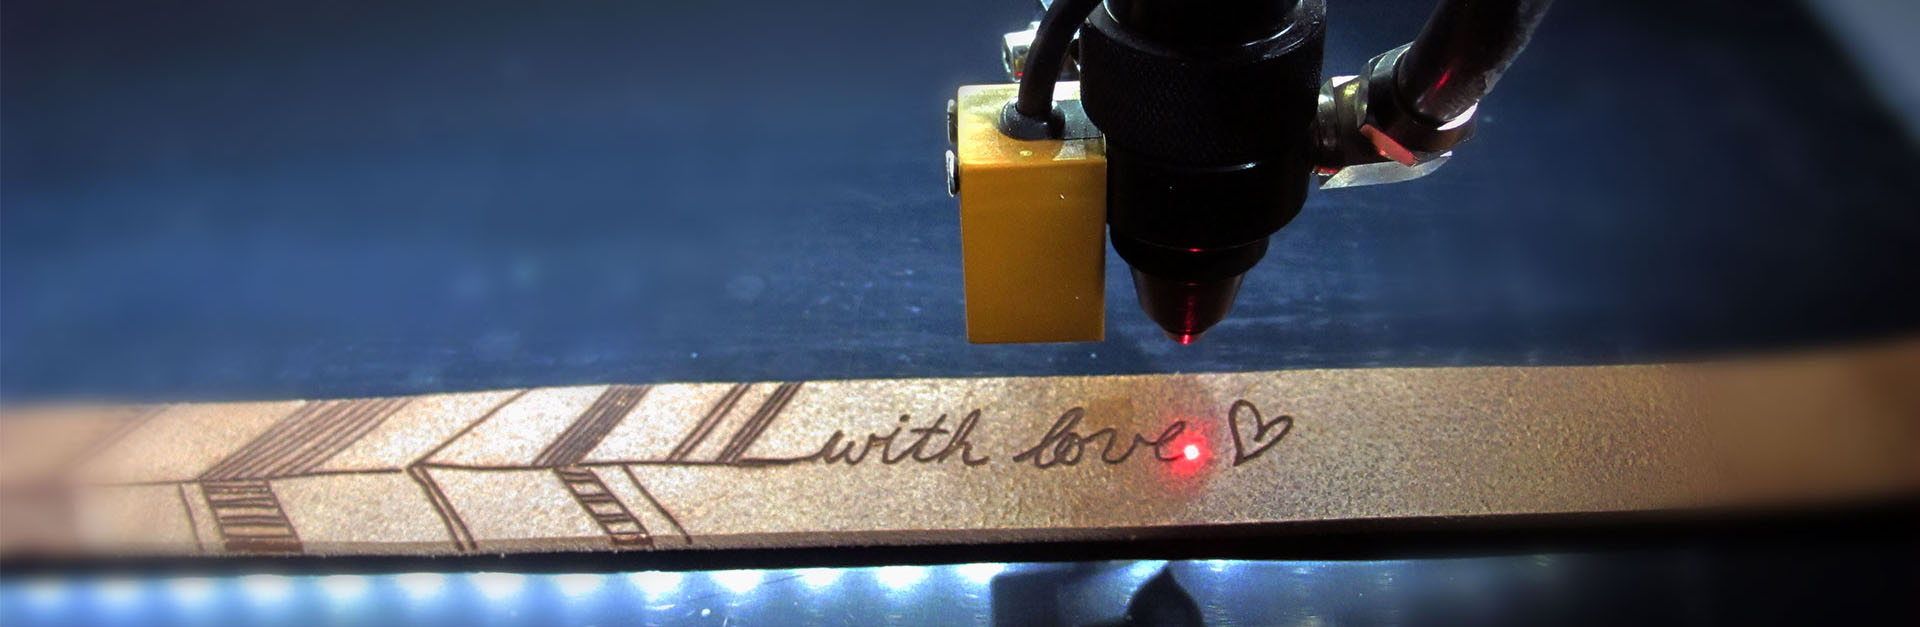
The Spirit LS Laser Engraver is designed to engrave on a variety of materials, each with its own unique characteristics. Whether you’re working with wood, acrylic, glass, or leather, understanding the nuances of each material will help you achieve stunning and precise engravings. Here’s a guide on engraving some common materials:
1. Wood: Wood is a popular choice for laser engraving due to its natural beauty and versatility. For softer woods like pine or balsa, lower power settings and slower engraving speeds are recommended to prevent excessive burning. Hardwoods such as oak or walnut may require higher power settings. Experiment with different techniques to achieve desired depth and contrast.
2. Acrylic: Acrylic offers a smooth and glossy surface that can be engraved with excellent clarity. Adjust the power and speed settings based on the thickness of the acrylic. For thinner acrylic, consider using higher speeds and lower power settings to avoid melting or charring. Thicker acrylic can tolerate higher power settings for deeper engravings.
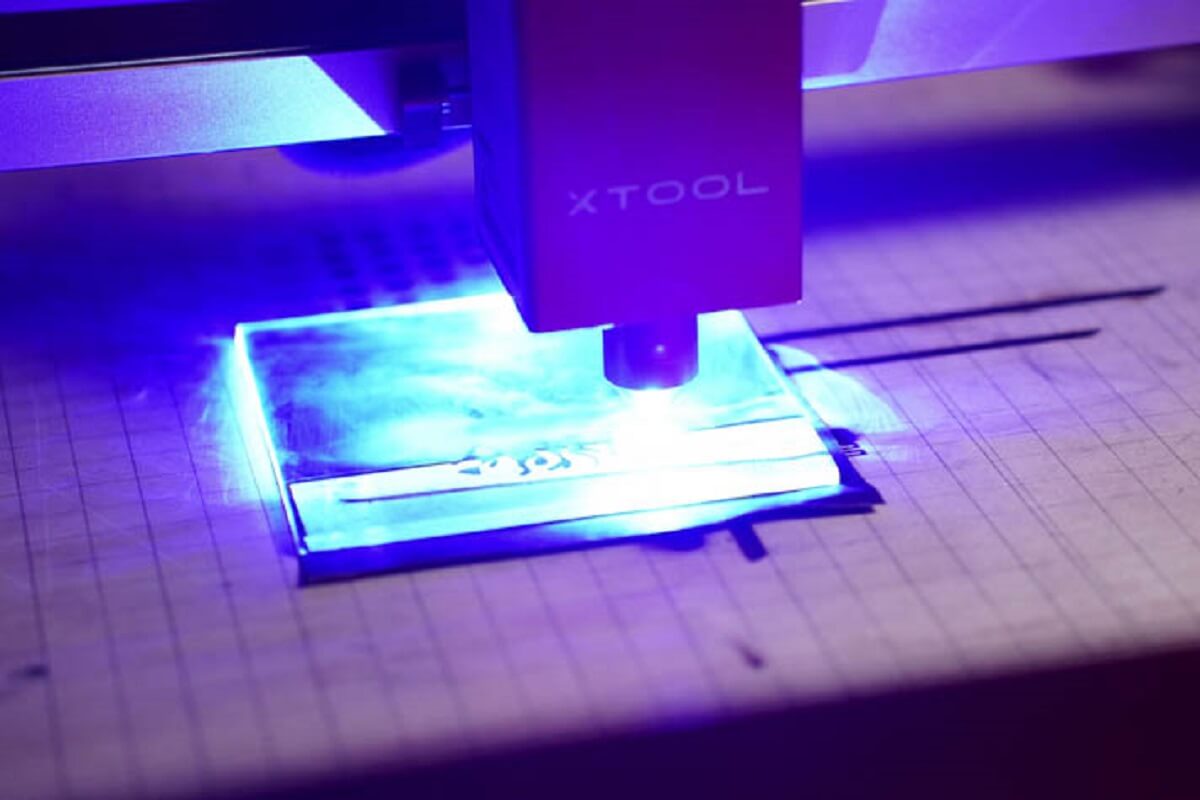
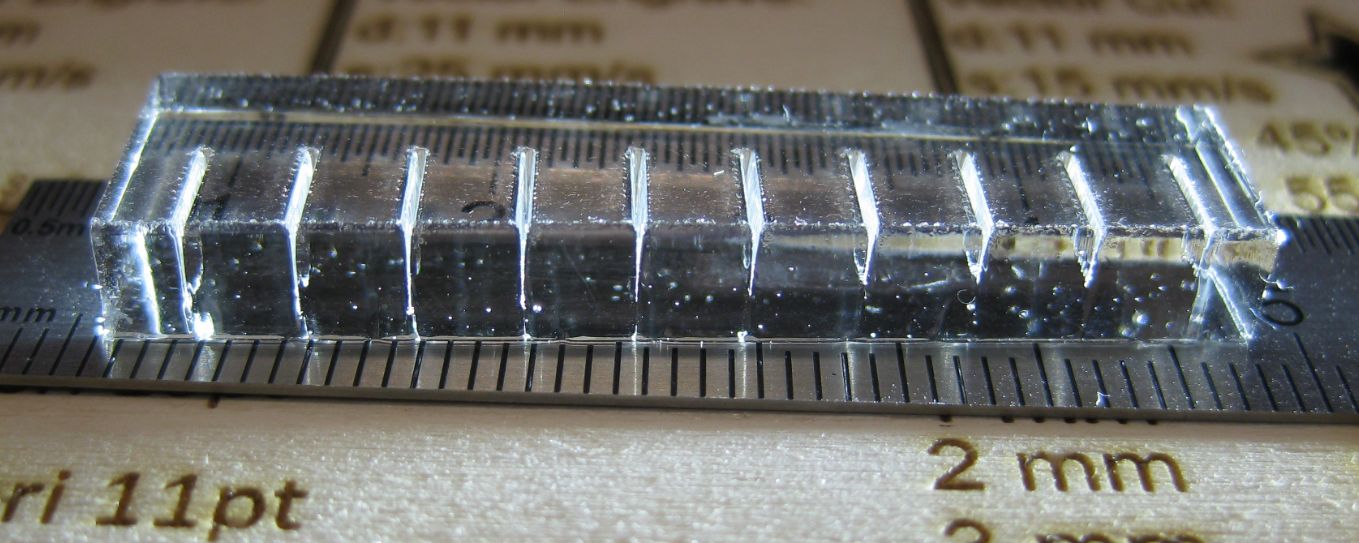
3. Glass: Engraving on glass can create stunning, translucent designs. However, engraving glass requires delicate control and special techniques. Use the lowest power settings and slowest speeds to avoid cracking or shattering the glass. Consider using specialized glass engraving paste or spray for enhanced visibility and contrast.
4. Leather: Leather engraving adds a touch of sophistication to various products like wallets, bags, and accessories. Adjust power and speed settings based on the thickness and type of leather. Lighter-colored leathers may require higher power settings for more visible engravings, while darker leathers may produce better contrast with lower power settings.
5. Metal: While the Spirit LS Laser Engraver is not designed for engraving metals, it is possible to mark certain coated or anodized metals. For such materials, use high power and low speed settings for a better result. However, it’s important to note that metal engraving may require specialized laser machines and techniques.
6. Other Materials: The Spirit LS Laser Engraver can also engrave on various other materials such as plastics, fabrics, ceramics, and more. Experimentation and adjustment of settings will be necessary to achieve optimal results on these materials. Always refer to the manufacturer’s guidelines and perform test engravings before working on valuable or delicate items.
Remember to take appropriate safety precautions when working with different materials. Use suitable ventilation and personal protective equipment (PPE) for materials that may produce fumes or debris. Ensure proper material alignment, focus, and secure positioning to achieve the best results.
By understanding the characteristics of different materials and adjusting the settings accordingly, you can create stunning and personalized engravings with your Spirit LS Laser Engraver. In the next section, we’ll provide a troubleshooting guide to help you overcome common challenges. So, let’s continue our journey of mastering the art of laser engraving.
Troubleshooting Guide
While using the Spirit LS Laser Engraver, you may encounter certain challenges or issues that can affect the quality of your engravings. This troubleshooting guide aims to help you identify and resolve common problems. Here are some troubleshooting steps to consider:
1. Poor Engraving Quality: If your engravings appear blurry, uneven, or inconsistent, check the focus of the laser beam. Ensure that the material is securely positioned and adjust the focus to achieve optimal clarity. Consider adjusting the power and speed settings to achieve the desired depth and contrast.
2. Material Burning: If you notice excessive charring or burning on the engraved material, it may be a result of improper power and speed settings. Try reducing the power or increasing the speed to minimize burning. Additionally, make sure that the material is clean and free from any debris that could affect the engraving process.
3. Laser Not Firing: If the laser beam is not firing at all, check the connections between the machine and the computer. Ensure that the USB cable is securely plugged into both devices. Restart both the machine and the computer, and try again. If the issue persists, consult the user manual or contact technical support for further assistance.
4. Engraving Alignment Issues: If your engraving is not aligning correctly with your design, check that the material is positioned accurately on the material platform. Make sure the origin point in the software aligns with the desired starting point on the material. Adjust the position and perform test engravings to ensure proper alignment.
5. Software Compatibility: If you experience issues with the engraving software, ensure that your computer meets the software’s system requirements. Check for any updates or patches available for the software. Consider reinstalling the software or trying an alternative engraving software if the issue persists.
6. Error Messages: If you encounter error messages on the control panel or software interface, refer to the user manual for troubleshooting guidance. Error messages often provide specific information about the issue and possible solutions. Follow the recommended steps to resolve the error and continue your engraving process.
7. Maintenance and Cleaning: Regularly clean the lens and mirrors of the Spirit LS Laser Engraver to ensure optimal performance. Dust and debris can affect the beam quality and engraving results. Follow the user manual instructions for proper cleaning techniques and frequency.
If none of the troubleshooting steps resolve the issue, contact the manufacturer’s technical support for further assistance. They will be able to guide you through more advanced troubleshooting or arrange repairs if necessary.
By following this troubleshooting guide, you can overcome common challenges and ensure high-quality engravings with your Spirit LS Laser Engraver. In the next section, we will wrap up our guide and summarize the key points covered. So, let’s conclude our journey of laser engraving mastery!
Conclusion
Congratulations! You have reached the end of our comprehensive guide on using the Spirit LS Laser Engraver. We have covered everything from the initial setup to troubleshooting common issues. By now, you have a solid understanding of this remarkable machine and how to unleash its full potential.
The Spirit LS Laser Engraver offers endless possibilities for creativity, allowing you to personalize and enhance various materials. From wood and acrylic to glass and leather, you can create stunning and precise engravings tailored to your unique visions.
Remember to always prioritize safety when operating the Spirit LS Laser Engraver. Follow the safety precautions outlined in this guide to protect yourself, your surroundings, and the machine itself. Properly position and secure materials, adjust settings based on the material type, and perform test engravings to ensure optimal results.
Should you encounter any challenges or issues, consult our troubleshooting guide for step-by-step solutions. And don’t hesitate to reach out to the manufacturer’s technical support for further assistance. They are there to help you maximize your engraving experience.
Now, armed with the knowledge and skills acquired from this guide, it’s time to let your creativity soar. Whether you’re a hobbyist, small business owner, or artist, the Spirit LS Laser Engraver can elevate your work to new heights. Embrace the possibilities, experiment with innovative designs, and embrace the joy of bringing your ideas to life.
Thank you for joining us on this journey of discovering the Spirit LS Laser Engraver. We hope you find great success and fulfillment in your laser engraving endeavors. Happy engraving!