Introduction
Welcome to the world of 3D printing and laser engraving! Imagine the endless possibilities of combining these two exciting technologies. Adding a laser engraver to your 3D printer opens up a whole new realm of creativity and functionality. Whether you’re a hobbyist, designer, or entrepreneur, this guide will walk you through the process of integrating a laser engraver into your 3D printing setup.
Laser engraving is the process of using a laser beam to etch or mark surfaces with precision and detail. This versatile technique can be applied to a wide range of materials, including wood, acrylic, leather, and even metal. By harnessing the power of a laser, you can personalize your 3D prints, create intricate designs, or add professional branding to your products.
Choosing the right laser engraver for your 3D printer is crucial. There are various factors to consider, such as power output, compatibility, and user-friendliness. In this guide, we will explore the different options available and help you make an informed decision.
Before diving in, it’s important to prioritize safety. Laser engravers emit powerful laser beams, which pose potential risks if not handled properly. We will discuss the necessary safety precautions and equipment to ensure a secure working environment.
Installing the laser engraver onto your 3D printer may vary depending on the make and model. However, we will provide a general step-by-step process to guide you through the installation process. This includes securing the engraver to your printer and ensuring proper connectivity.
Configuring the laser engraver software is another crucial step. We will explore the different software options available and walk you through the setup process. Additionally, we will provide tips and tricks for testing and calibrating your laser engraver to ensure optimal performance and quality.
Throughout this guide, we will provide valuable insights and practical advice to help you achieve successful laser engraving results. Whether you’re a beginner or have some experience, there’s always something to learn and improve upon. So, let’s dive in and embark on this exciting journey of combining 3D printing and laser engraving!
Understanding Laser Engraving
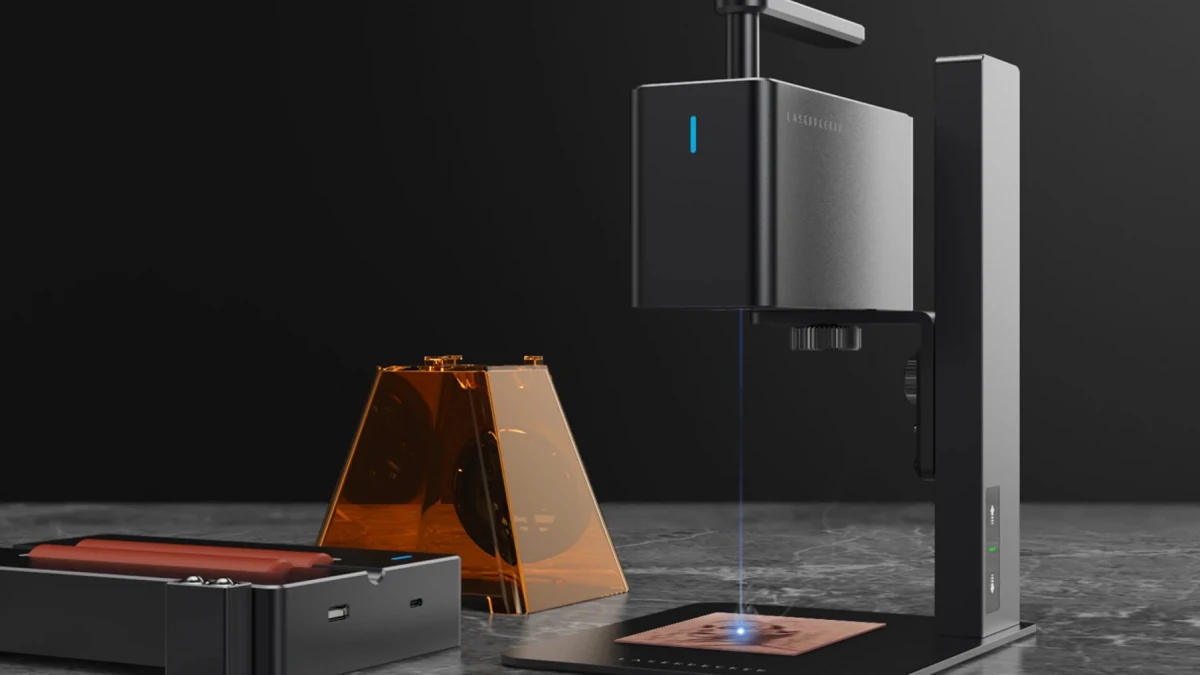
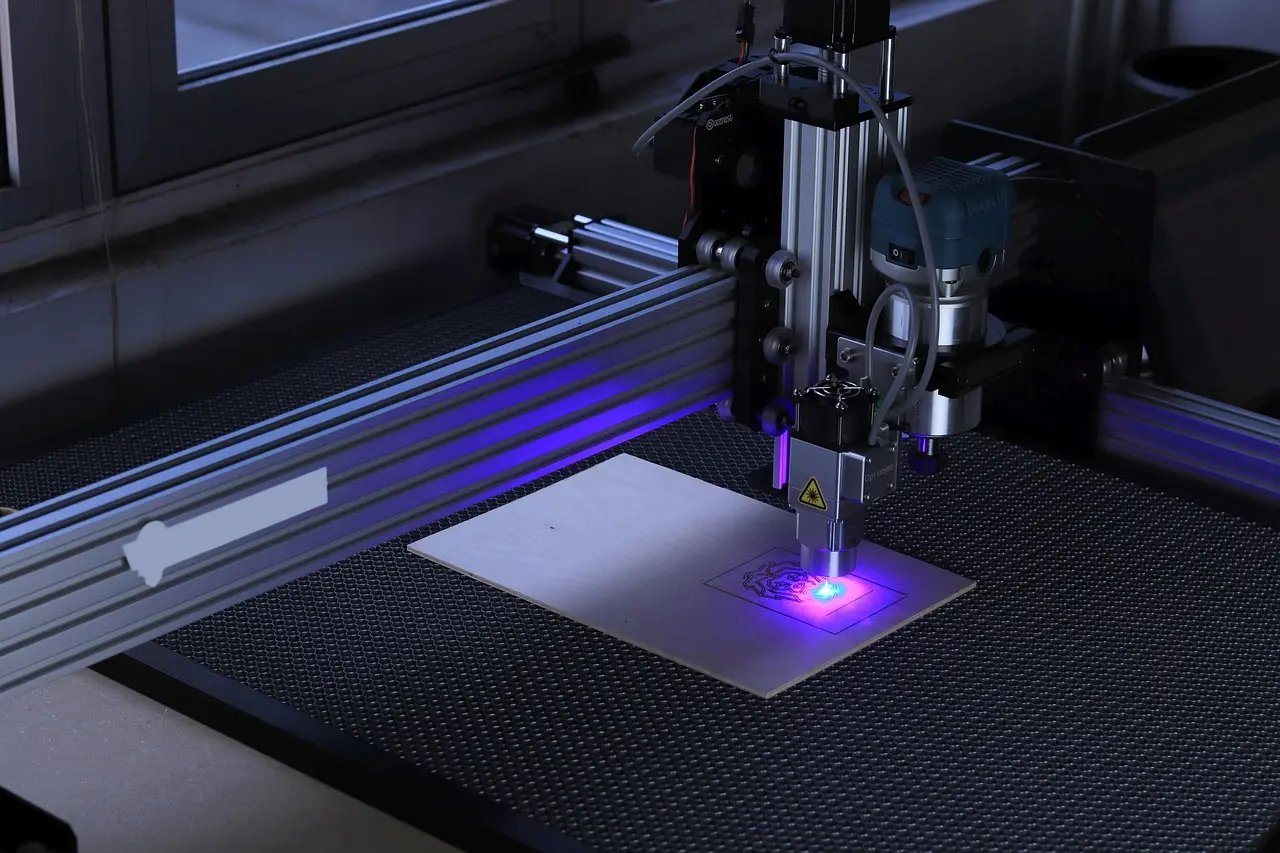
Laser engraving is a process that utilizes a high-powered laser beam to etch, mark, or engrave various materials. The laser beam is directed onto the surface of the material, which causes a controlled amount of heat to be applied. The heat then vaporizes or melts the material, creating marks or designs with incredible precision and detail.
One of the key advantages of laser engraving is its versatility. It can be used on a wide range of materials, including wood, acrylic, leather, glass, and even metals like aluminum and stainless steel. This makes it perfect for applications such as personalization, customization, and branding.
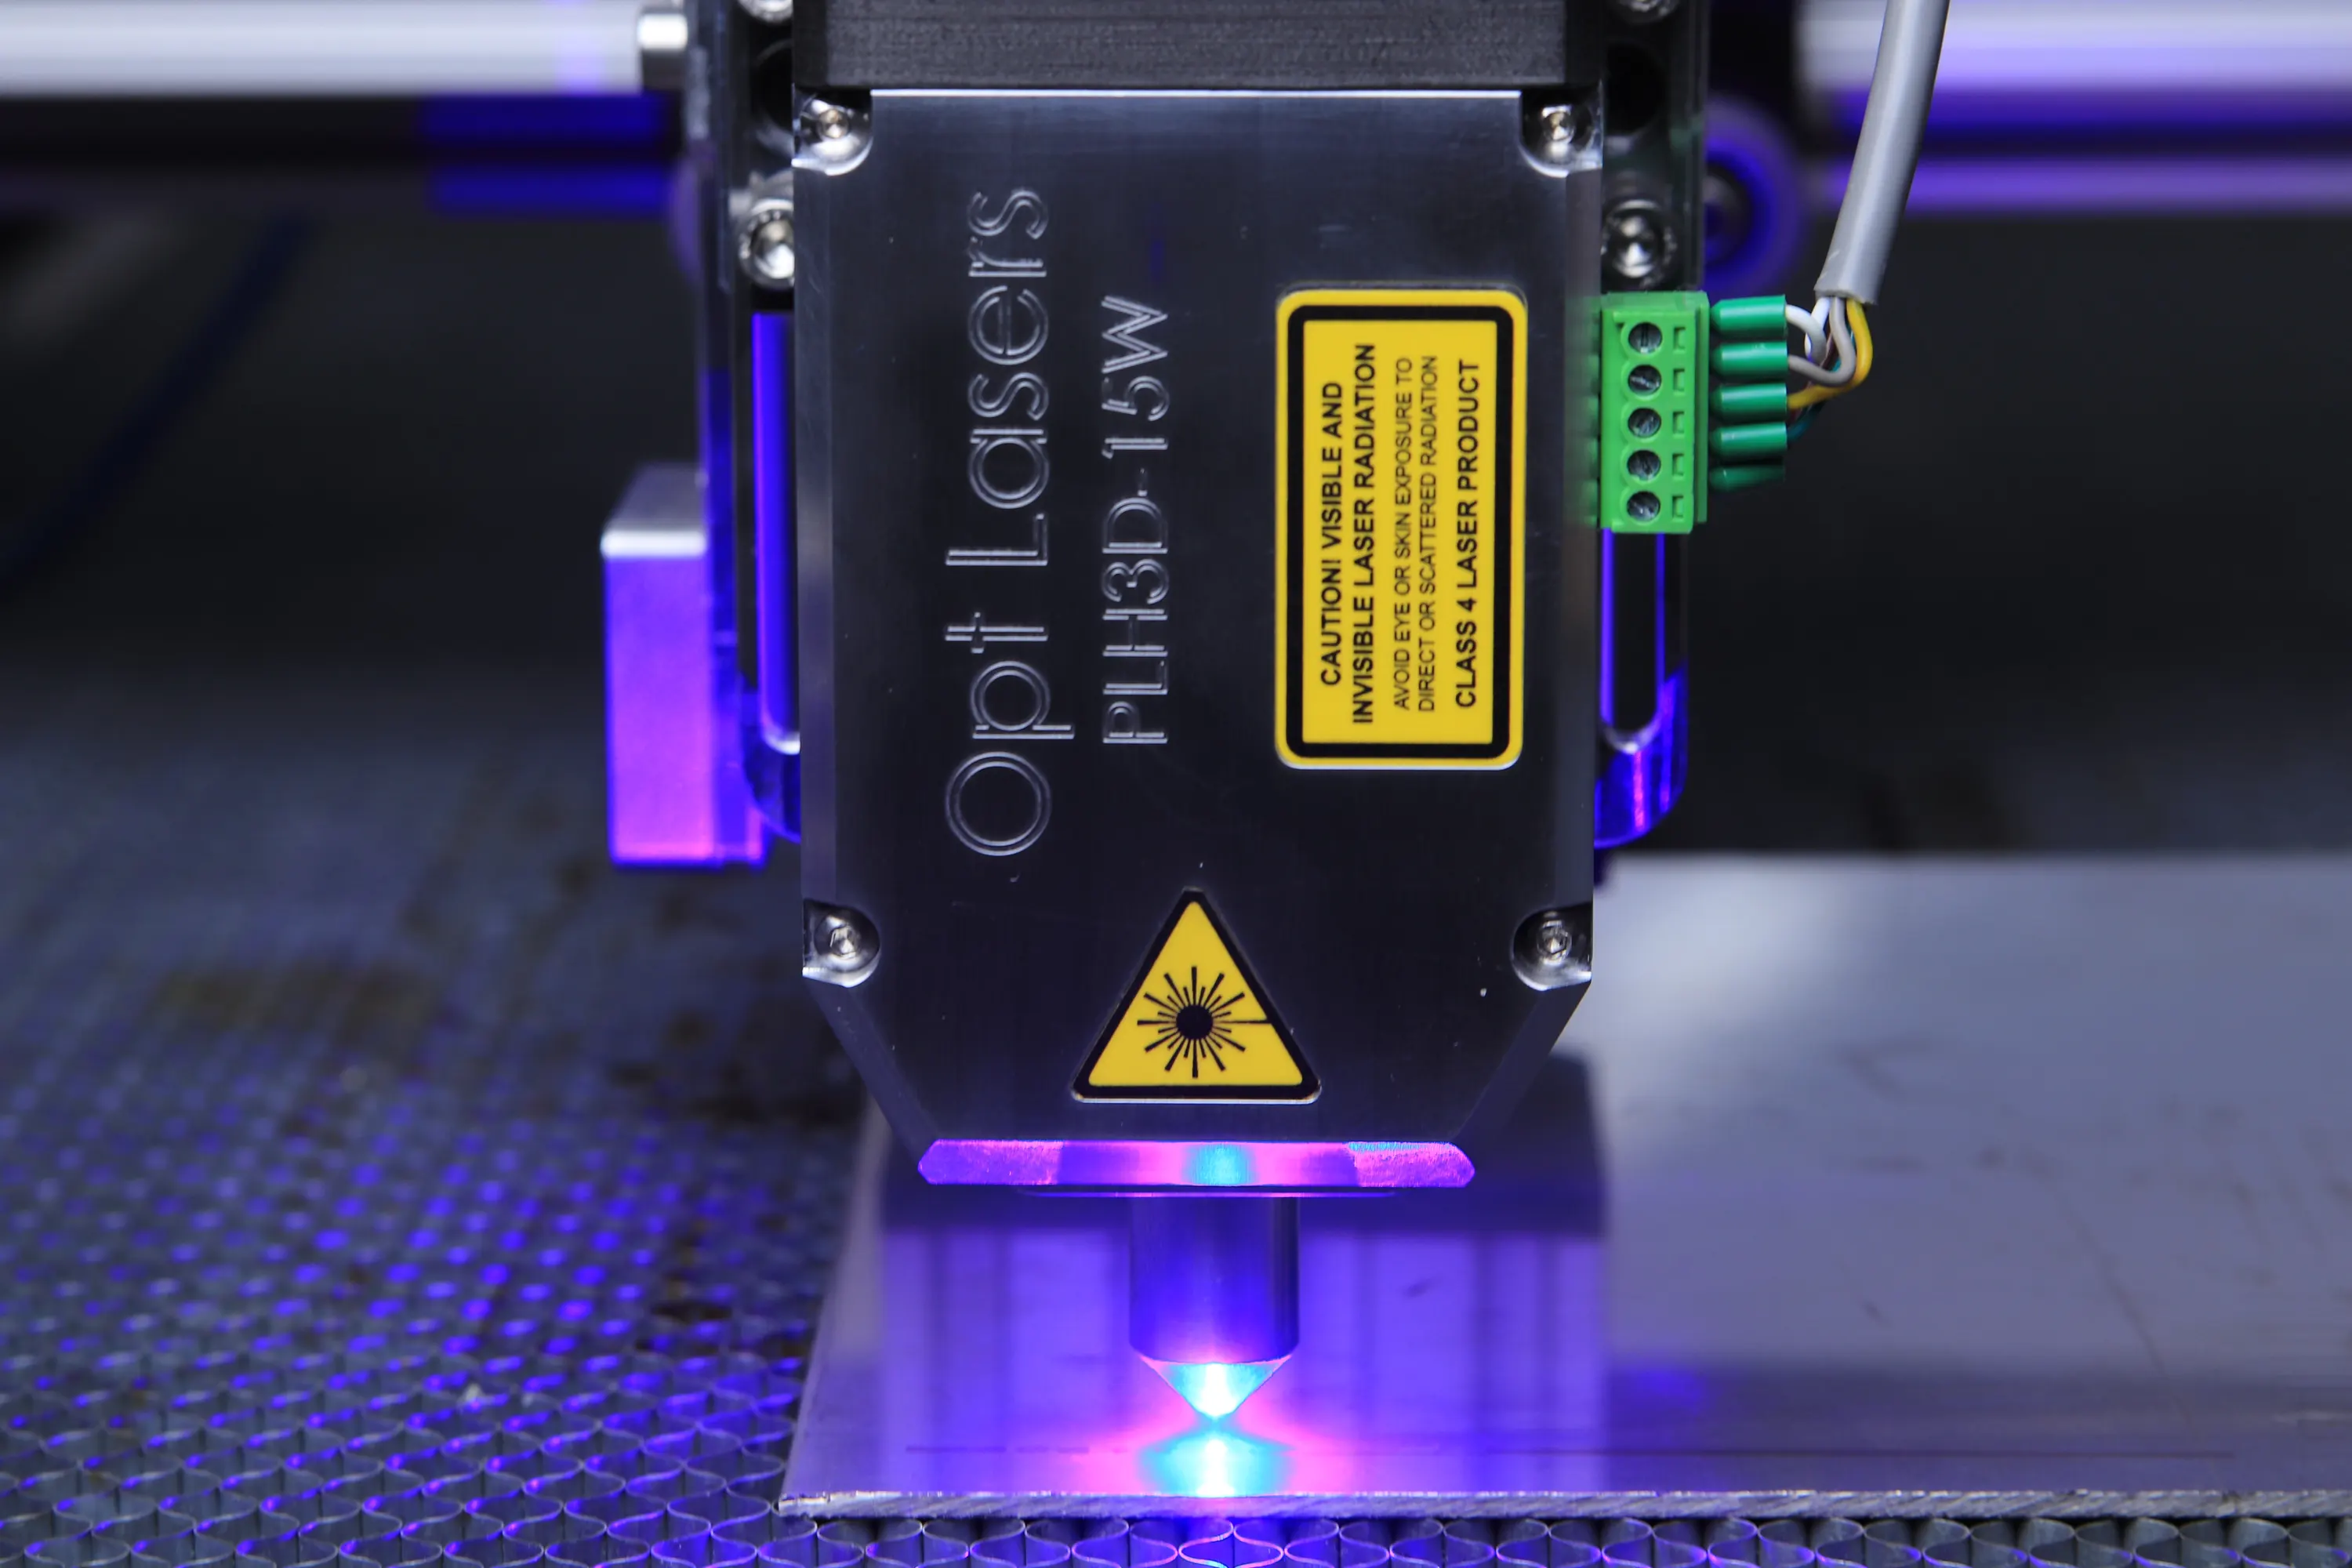
The power of the laser beam used in the engraving process determines the depth and intensity of the marks. Higher-powered lasers can engrave deeper into the material, allowing for more prominent and long-lasting results. It’s essential to choose a laser engraver that suits your specific needs and the materials you’ll be working with.
Precision is a defining characteristic of laser engraving. The laser beam follows a precise path guided by software, allowing for intricate designs and fine details. This level of precision is especially valuable when engraving small objects or creating complex patterns.
When it comes to speed, laser engraving is generally faster than traditional engraving methods. The laser beam can quickly move across the surface, creating detailed marks in a fraction of the time it would take using manual or mechanical engraving tools.
It’s also worth mentioning that laser engraving is a non-contact process. Unlike mechanical engraving tools that physically cut into the material, lasers do not come into direct contact with the surface. This eliminates the risk of damage caused by tool wear or friction, resulting in clean and consistent engravings.
Overall, laser engraving offers a wide range of possibilities for creative expression and practical applications. Whether you’re embellishing a personal item, customizing products for your business, or adding unique details to your 3D prints, laser engraving is a powerful tool in the hands of a skilled operator.
Choosing the Right Laser Engraver for Your 3D Printer
When it comes to selecting a laser engraver for your 3D printer, there are several factors to consider. We’ll explore these factors to help you make an informed decision and choose the right engraver for your specific needs.
Power Output: The power output of a laser engraver determines its capabilities. Higher-power lasers can engrave deeper, cut thicker materials, and produce more visible and long-lasting results. Consider the materials you’ll be working with and the level of detail you want to achieve when selecting the power output of your engraver.
Compatibility: Ensure that the laser engraver is compatible with your 3D printer. Check the specifications and requirements of both the printer and the engraver to ensure a smooth integration. It’s also important to consider any necessary modifications or additional accessories that may be required for compatibility.
User-Friendliness: Look for an engraver that is easy to use and offers a user-friendly interface. This will make the setup, installation, and operation of the engraver much more convenient. Consider the software provided with the engraver and its compatibility with your computer system.
Build Quality: Opt for a laser engraver that is well-built and durable. Look for sturdy construction and quality materials to ensure longevity and reliability. This is especially important if you plan to use the engraver frequently or for commercial purposes.
Budget: Set a budget for your laser engraver and stick to it. There are a wide range of options available at various price points. Consider your specific needs and requirements when determining the appropriate budget for your engraver.
Safety Features: Safety should always be a top priority. Look for engravers that come with safety features such as enclosure shields, emergency stop buttons, and protective goggles. These features help ensure a secure working environment and minimize potential risks.
Customer Reviews: Before making a final decision, read customer reviews and testimonials to get an idea of the experiences and satisfaction levels of other users. This can provide valuable insights into the performance, reliability, and overall quality of the engraver you’re considering.
By carefully considering these factors, you can choose the laser engraver that best suits your needs and allows you to achieve your desired results. Take the time to research and compare different options to make an informed decision and invest in a laser engraver that will enhance your 3D printing experience.
Safety Precautions and Equipment
When working with a laser engraver, it is crucial to prioritize safety to protect yourself and others. Laser beams can be powerful and potentially harmful if not handled correctly. Here are some safety precautions and essential equipment to consider when using a laser engraver with your 3D printer.
Protective Eyewear: Always wear appropriate laser safety goggles that are specifically designed for the wavelength of your engraver. These goggles protect your eyes from direct exposure to the laser beam and help prevent potential eye injuries.
Proper Ventilation: Ensure that your workspace is well-ventilated to prevent the buildup of fumes or particles generated during the engraving process. Consider using a dedicated ventilation system or working in a well-ventilated area to maintain good air quality.
Fire Safety Measures: Laser engravers produce heat, and certain materials can easily catch fire. Have fire extinguishing equipment readily available, such as a fire extinguisher or fire blanket, to quickly respond to any potential fire incidents.
Work area Enclosure: Consider setting up an enclosure or barriers around your laser engraver to prevent accidental exposure to the laser beam. This enclosure should be made of non-reflective materials and should be designed to contain any potential stray laser radiation.
Emergency Stop Button: Install an emergency stop button within easy reach of your workspace. This button allows you to quickly halt the laser engraving process in case of any emergencies or safety concerns.
Training and Knowledge: Ensure that you are familiar with the operation of the laser engraver and the potential hazards associated with its use. Take the time to read the user manual, attend training sessions if available, and stay up-to-date with best practices for laser safety.
Maintain a Clean Workspace: Keep your workspace clean and free from clutter to reduce the risk of accidents. Maintain a clear path to emergency exits and keep flammable materials away from the laser engraver to minimize potential risks.
Personal Protective Equipment (PPE): In addition to safety goggles, consider wearing appropriate clothing, such as long-sleeved shirts and pants, to protect your skin from potential burns or exposure to laser radiation.
Regular Maintenance: Follow the manufacturer’s guidelines for regular maintenance and cleaning of your laser engraver. Routine maintenance helps ensure the optimal performance and longevity of your equipment.
Remember, safety should never be compromised when working with a laser engraver. By taking these safety precautions, using the appropriate equipment, and maintaining a safe working environment, you can enjoy the benefits of laser engraving while minimizing potential risks.
Installing the Laser Engraver onto Your 3D Printer
Installing a laser engraver onto your 3D printer may vary depending on the make and model of your printer. However, we will provide a general step-by-step process to guide you through the installation process.
Step 1: Gather Required Tools: Before you begin, ensure that you have all the necessary tools and equipment. This may include screws, brackets, cables, and a compatible mounting kit specific to your laser engraver and 3D printer model.
Step 2: Identify Mounting Location: Determine the optimal mounting location on your 3D printer for the laser engraver. Consider factors such as available space, stability, and access to necessary connections.
Step 3: Prepare the Printer: Power off and unplug your 3D printer to ensure safety during installation. Remove any existing attachments or accessories from the designated mounting area.
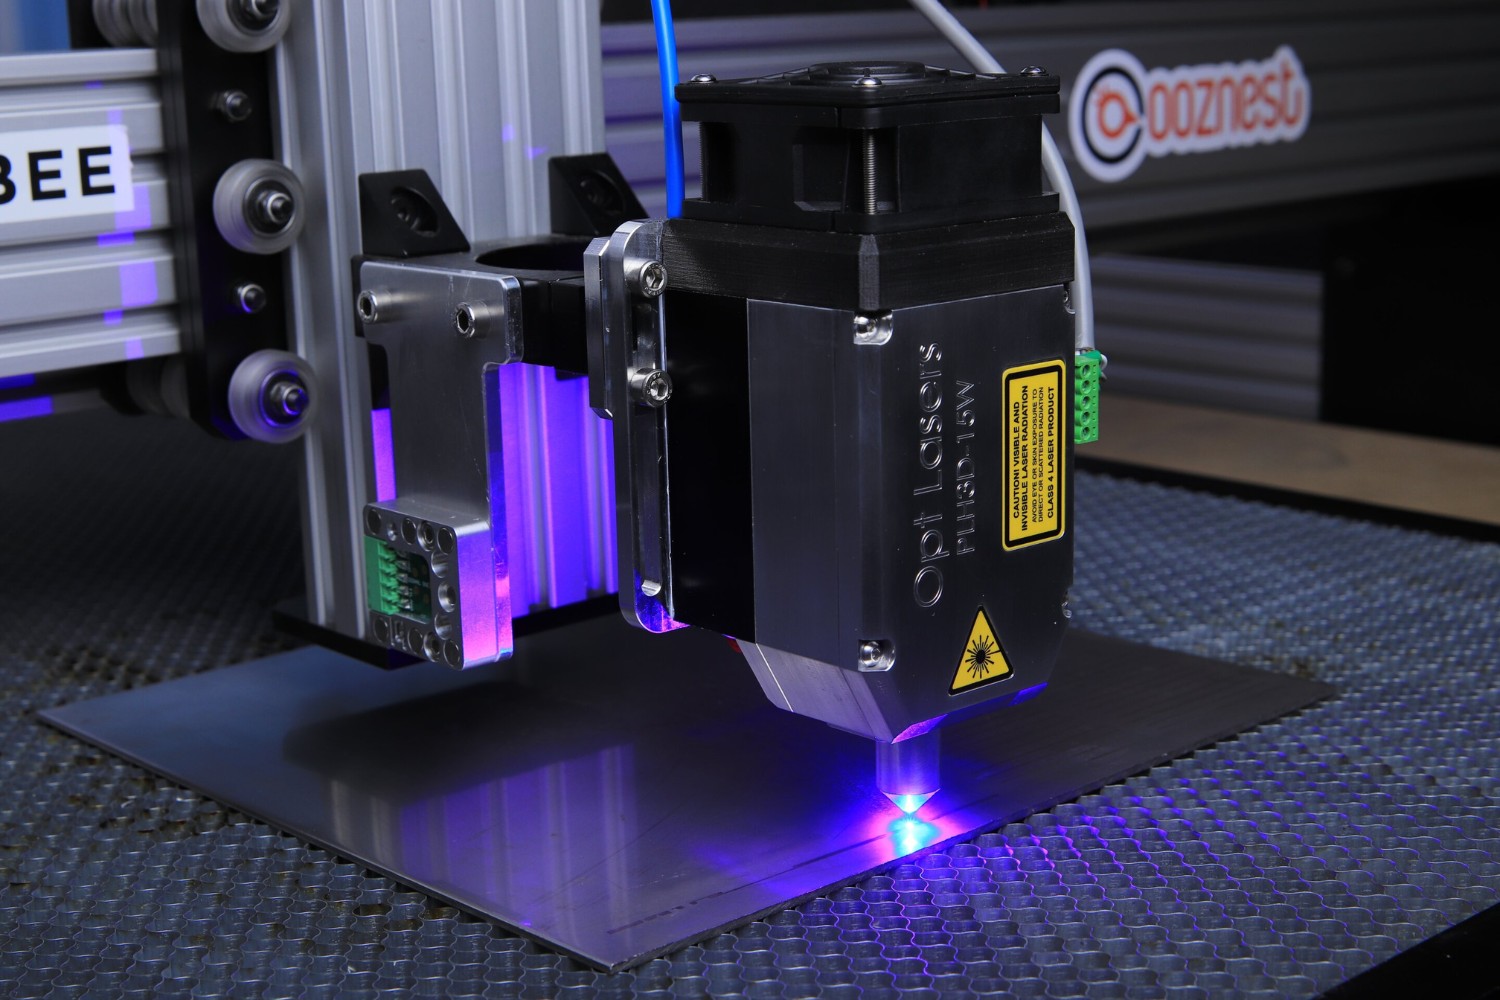
Step 4: Secure the Mounting Brackets: Attach the mounting brackets to the designated area on your 3D printer. Follow the instructions provided with the laser engraver to ensure proper alignment and secure fastening.
Step 5: Attach the Laser Engraver: Carefully align the laser engraver with the mounting brackets and secure it in place using the provided screws or fasteners. Ensure that the engraver is tightly secured, minimizing any movement or vibration during operation.
Step 6: Check Wiring Connections: Connect the necessary cables and wiring between the laser engraver and your 3D printer. This may include power connections, communication cables, and any additional accessories or sensors required for the engraver’s operation.
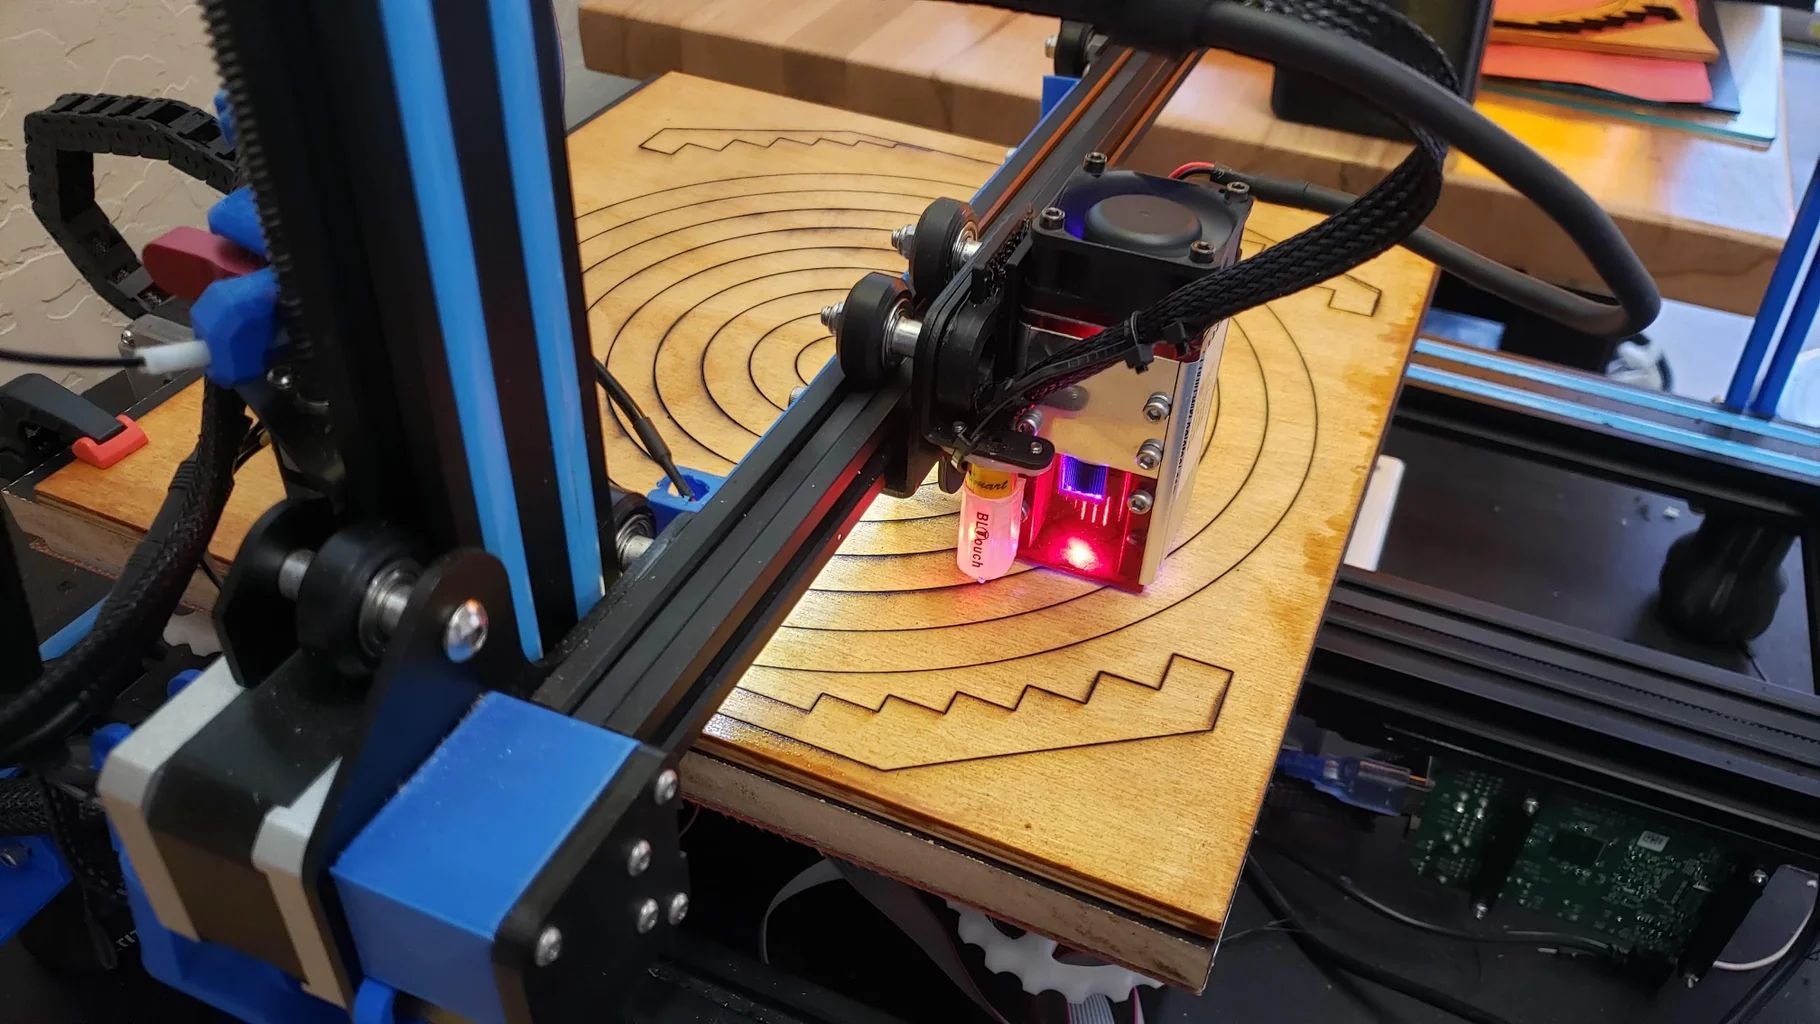
Step 7: Ensure Proper Alignment: Check the alignment of the laser engraver with your 3D printer’s nozzle or extruder. The laser beam should align precisely with the printing nozzle to ensure accurate engraving results.
Step 8: Securely Fasten: Double-check all connections and fasteners to ensure that they are securely tightened. This will prevent any shifting or loosening during the operation of your 3D printer and laser engraver.
Step 9: Test Operation: Once the laser engraver is installed, power on your 3D printer and run a test print to ensure proper communication and functionality between the printer and engraver. Verify that the laser engraver responds correctly to the commands from the printer’s software.
Remember to consult the specific installation instructions provided by the manufacturer of your laser engraver and 3D printer. These instructions may include model-specific steps or additional considerations that are crucial for a successful installation.
Overall, with proper planning and attention to detail, installing a laser engraver onto your 3D printer can be a straightforward process. Once installed, you can explore the endless possibilities of combining 3D printing and laser engraving to bring your creations to the next level.
Wiring and Connectivity
Once you have installed the laser engraver onto your 3D printer, it’s important to ensure proper wiring and connectivity between the two devices. This will allow seamless communication and coordination between the printer and the engraver. Here are the key steps to follow for wiring and connectivity:
Step 1: Power Connection: Begin by connecting the power supply of the laser engraver to a suitable power source. Make sure to use the provided power cable and follow the manufacturer’s instructions for the correct voltage and power requirements.
Step 2: Communication Cable: Connect the communication cable between the laser engraver and the 3D printer. Depending on the specific engraver and printer models, this could be a USB, serial, or other compatible cable. Ensure a secure and stable connection by firmly plugging the cable into the appropriate ports on both devices.
Step 3: Firmware Configuration: In some cases, you may need to update or configure the firmware of the 3D printer to recognize and communicate with the laser engraver. Consult the user manual or the manufacturer’s website for specific instructions on how to configure the firmware settings.
Step 4: Calibration and Synchronization: To ensure accurate engraving, you may need to calibrate and synchronize the movements of the laser engraver with the 3D printer. This involves adjusting the settings in the printer’s software to coordinate the positioning and timing of the laser engraver with the printer’s movements.
Step 5: Software Setup: Install and configure the laser engraving software on your computer. This software provides a user interface to control the laser engraver and send commands from your 3D printer’s slicing software. Follow the software’s instructions to connect the engraver to your computer and configure the settings.
Step 6: Testing and Troubleshooting: After completing the wiring and software setup, perform test runs to ensure that the connectivity and communication between the laser engraver and the 3D printer are functioning correctly. Test different engraving patterns and monitor the interaction between the devices. If any issues arise, consult the troubleshooting guide provided by the manufacturer or seek assistance from their technical support.
Step 7: Cable Management: Organize the cables and wiring to minimize interference and ensure a neat and tidy workspace. Use cable management solutions such as zip ties, cable clips, or cable covers to secure and route the cables away from moving parts or potential hazards.
By following these steps, you can establish proper wiring and connectivity between your laser engraver and 3D printer. This seamless communication allows you to efficiently control and integrate the engraver into your 3D printing projects, opening up a world of creative possibilities.
Configuring the Laser Engraver Software
Configuring the laser engraver software is a crucial step in utilizing the full capabilities of your laser engraver. The software provides the interface through which you can control the settings, design, and initiate the engraving process. Here are the key steps to follow when configuring the laser engraver software:
Step 1: Software Installation: Begin by installing the laser engraver software on your computer. The software may come with the engraver or can be downloaded from the manufacturer’s website. Follow the installation instructions provided to ensure proper installation.
Step 2: Software Setup: Launch the software and proceed with the initial setup. This may involve selecting the correct model of your laser engraver, configuring the language preferences, and setting the default parameters for engraving.
Step 3: Connecting the Laser Engraver: Connect your laser engraver to your computer using the appropriate connection method (e.g., USB or Ethernet). Ensure that the engraver is recognized by the software and establish a stable connection. Refer to the software’s user manual for specific instructions on connecting the engraver.
Step 4: Material Selection and Settings: Specify the material you will be engraving on and select the appropriate settings. The software may have predefined settings for common materials, or you may need to manually input the laser power, engraving speed, and depth for custom materials. Consult the material guidelines provided by the manufacturer to ensure optimal engraving results.
Step 5: Design Import and Creation: Import or create the design you want to engrave. The software may support various file formats, such as SVG or bitmap images. You can also use the software’s built-in tools to design custom graphics or text. Position and scale the design as desired on the work area representation within the software.
Step 6: Design Editing and Optimization: Use the software’s editing tools to customize and optimize your design. Adjust the engraving parameters, such as the line thickness, fill patterns, or dithering options, to achieve the desired engraving effect. Experiment with different settings and preview the results within the software.
Step 7: Test and Preview: Before initiating the engraving process, use the software’s preview feature to simulate the engraving. This allows you to visualize the final result and make any necessary adjustments to the design or settings. Take advantage of this feature to ensure a high-quality engraving outcome.
Step 8: Save and Export: Save your engraving project within the software’s file format or export it to a compatible format that can be read by your laser engraver. Double-check the file format requirements of your engraver to ensure compatibility and avoid any issues during the engraving process.
Step 9: Firmware Configuration: Configure any additional settings or parameters within the software that are specific to your laser engraver’s firmware. This may include features such as laser power modulation, frequency adjustments, or special engraving modes. Consult the software’s user manual or the manufacturer’s guidelines for detailed instructions.
By following these steps and familiarizing yourself with the laser engraver software’s features and settings, you can optimize the engraving process and achieve high-quality results. Take the time to experiment with different materials, settings, and designs to unlock the full potential of your laser engraver.
Testing and Calibrating the Laser Engraver
Testing and calibrating your laser engraver is essential to ensure optimal performance and achieve high-quality engraving results. This process involves fine-tuning the settings, checking alignment, and making necessary adjustments. Here are the key steps to follow when testing and calibrating your laser engraver:
Step 1: Test Engraving: Start by performing a test engraving on a sample material. Use a simple design or pattern to assess the engraver’s performance. Observe the engraving depth, clarity, and overall quality. Any inconsistencies or issues detected during this test can help identify potential calibration requirements.
Step 2: Adjusting Power and Speed: Fine-tune the laser power and engraving speed settings to achieve the desired result. If the engraving is too light, increase the power or decrease the speed. Conversely, if the engraving is too dark, reduce the power or increase the speed. Make small adjustments and retest until you attain the desired outcome.
Step 3: Alignment Check: Verify the alignment of the laser beam with the printing nozzle or extruder. This ensures that the engraving is accurately placed on the material. Adjust the alignment if necessary, following the manufacturer’s instructions. Proper alignment is crucial for precise and clean engravings.
Step 4: Calibration Test Prints: Depending on the features of your laser engraver, it may have additional calibration settings that can be adjusted. Test prints that involve calibration patterns or alignment guides can help you assess if any further adjustments are needed. These calibration features may include fonts, rulers, or alignment crosses.
Step 5: Focus Adjustment if Applicable: If your laser engraver has adjustable focus settings, ensure that the laser is properly focused on the material surface. This greatly affects the engraving quality. Consult the manufacturer’s guidelines on how to precisely adjust the focus and follow the recommended steps for your specific engraver model.
Step 6: Material Compatibility: Experiment with different materials and adjust the engraving settings accordingly. Each material may require specific laser power, speed, and other parameters for optimal engraving. Test various materials to evaluate how well the engraver handles and interacts with them.
Step 7: Iterative Testing and Refinement: Testing and calibrating your laser engraver is an iterative process. Continuously evaluate the results, make adjustments, and retest until you achieve consistent and satisfactory engraving quality. Don’t hesitate to experiment and try different settings to optimize the engraver’s performance.
Step 8: Regular Maintenance: Keep your laser engraver well-maintained by cleaning the lens, checking for loose connections, and lubricating mechanical parts if necessary. Regular maintenance ensures that the engraver operates at its best and maintains consistent performance.
By investing time and effort into testing and calibrating your laser engraver, you can fine-tune its settings to achieve exceptional engraving results. Remember to document successful calibration settings for different materials, so you can easily replicate them in the future for consistent and efficient engraving.
Tips and Tricks for Successful Laser Engraving
To achieve successful laser engraving results, it’s helpful to keep in mind these tips and tricks. By implementing these strategies, you can enhance your engraving quality, optimize efficiency, and expand your creative possibilities:
1. Material Selection: Experiment with different materials to discover their engraving properties and limits. Each material reacts differently to the laser, so it’s crucial to understand the best settings and techniques for optimal results.
2. Test on Sample Materials: Always perform a test engraving on a scrap or sample material before starting a large project. This allows you to assess the engraving depth, quality, and make any necessary adjustments before investing time and materials into a full-scale engraving.
3. Proper Ventilation: Ensure proper ventilation in your workspace to remove smoke, odor, and debris generated during the engraving process. This helps maintain a clean environment and reduces the risk of inhaling harmful fumes.
4. Graphic Design Optimization: Optimize your design files for laser engraving by converting them to vector graphics. Vector graphics ensure sharp and precise lines, resulting in clean engraving outcomes.
5. Maintain Focus: Keep the laser focus in check by regularly cleaning the lens and ensuring it’s properly aligned. Maintaining a clear focus ensures sharp and consistent engraving results.
6. Use Masking Tape: Apply masking tape to the surface of the material before engraving. This helps protect the material from discoloration, reduces smoke residue, and can result in cleaner and crisper engraving outcomes.
7. Engrave in Stages: For complex designs or deep engravings, consider breaking them down into multiple stages or passes. This allows you to maintain control over the depth and prevents excessive heat buildup that could damage the material.
8. Experiment with Speed and Power: Test different speed and power combinations to achieve the desired effect. Varying the speed and laser power allows you to create different engraving effects, from light and subtle to deep and prominent.
9. Minimize Engraving Area: To maximize engraving quality, try to minimize the size of the engraving area. This reduces the distance the laser beam needs to travel and ensures better focus and consistency.
10. Regular Maintenance: Keep your laser engraver in optimal condition by conducting routine maintenance. Clean the lens, check and tighten connections, and ensure proper alignment. Regular maintenance ensures consistent engraving quality and prolongs the lifespan of your engraver.
11. Safety First: Always prioritize safety when using a laser engraver. Wear appropriate safety goggles, ensure proper ventilation, and follow all safety guidelines provided by the manufacturer.
12. Practice and Learn: Engraving is a skill that improves with practice and experience. Take the time to learn various engraving techniques, experiment with different designs and settings, and observe the results. Don’t be afraid to push the boundaries of your creativity and expand your laser engraving capabilities.
By incorporating these tips and tricks into your laser engraving process, you can achieve impressive results and take your projects to the next level. Remember to have fun, embrace creativity, and continue learning and refining your skills as you explore the possibilities of laser engraving.
Conclusion
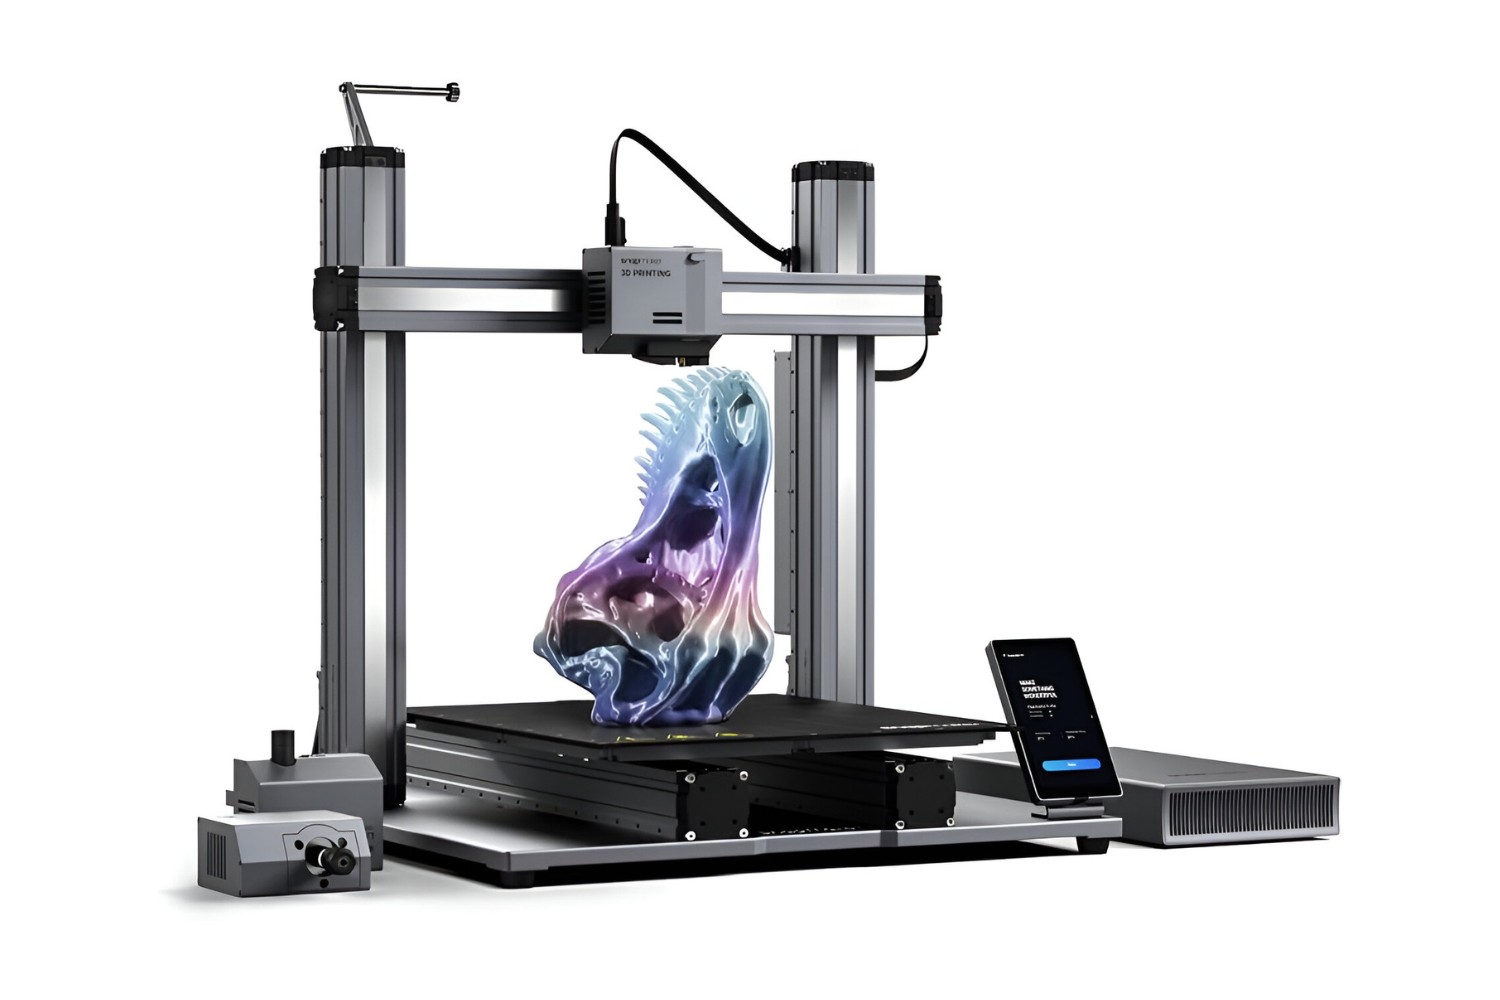
Adding a laser engraver to your 3D printer opens up a world of possibilities for creative expression, personalization, and customization. By understanding laser engraving, choosing the right equipment, prioritizing safety, and following the installation and calibration steps, you can successfully integrate a laser engraver into your 3D printing workflow.
From understanding the principles of laser engraving to selecting the appropriate laser engraver for your needs, each step plays a crucial role in ensuring smooth and successful integration. By following safety precautions, considering compatibility, and investing in quality equipment, you can mitigate risks and enjoy the benefits of laser engraving with confidence.
Configuring the laser engraver software, testing and calibrating the engraver, and implementing tips and tricks for successful engraving all contribute to achieving optimal results. Taking the time to fine-tune settings, experiment with different materials, and refine engraving techniques leads to the creation of high-quality engravings that meet your artistic or business requirements.
Remember, successful laser engraving is an ever-evolving process. As you gain experience, your skills will continue to grow, allowing you to push the boundaries of creativity and produce exceptional engravings. Regular maintenance, ongoing learning, and a willingness to explore new techniques will keep you at the forefront of laser engraving technology.
So, embrace the merging of 3D printing and laser engraving. Unleash your creativity, personalize your creations, and bring your designs to life with precision and detail. With dedication, practice, and an adventurous spirit, you can unlock the full potential of laser engraving and take your 3D printing endeavours to new heights.