Introduction
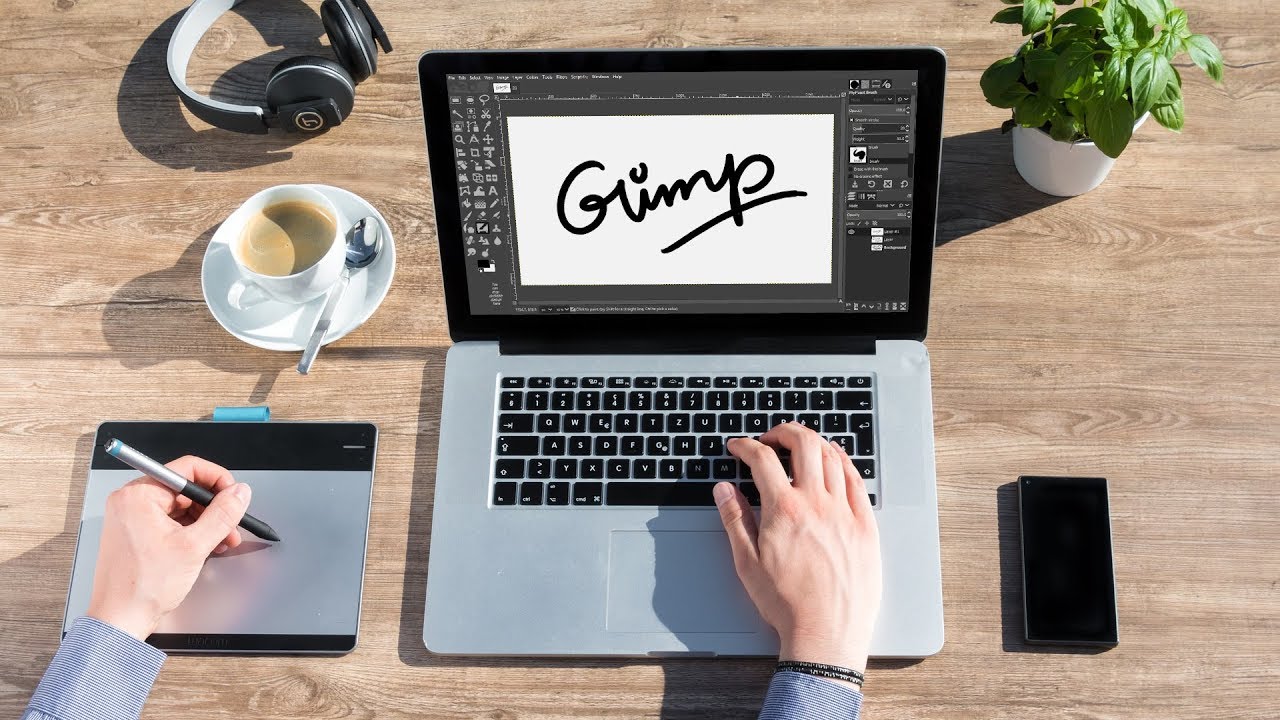
Welcome to the world of digital art and photo editing with GIMP, the powerful open-source software. If you’re looking to take your creative projects to the next level, using a tablet with GIMP can greatly enhance your workflow and artistic capabilities. In this article, we’ll explore why using a tablet with GIMP is beneficial, how to choose the right tablet, and the steps to install and configure tablet drivers for optimal performance.
Using a tablet provides a more natural and intuitive way to interact with digital art programs like GIMP. With a pen-like stylus and a pressure-sensitive drawing surface, tablets offer a level of precision and control that a mouse or trackpad can’t match. Whether you’re a professional graphic designer, a hobbyist artist, or a photographer, a tablet can revolutionize the way you work.
GIMP, the GNU Image Manipulation Program, is a versatile and feature-rich software widely used for tasks ranging from photo retouching and image composition to graphic design and digital painting. With its extensive toolset and customizable interface, GIMP offers flexibility and power for all types of creative projects.
By using a tablet, you can take full advantage of GIMP’s potential. With pressure sensitivity, you can vary the width and opacity of your brush strokes by adjusting the pressure applied to the tablet surface. This allows for more expressive and dynamic digital painting and drawing. Tablet users can also enjoy features like tilt recognition, which simulates the angle of a traditional art tool for realistic brush effects.
In the following sections, we will guide you through the process of selecting the right tablet for GIMP, installing the necessary drivers, and configuring the tablet settings within the software. We’ll also discuss utilizing pressure sensitivity and customizing tablet buttons for a truly personalized digital art experience.
So, grab your tablet, launch GIMP, and get ready to unlock your creative potential. Let’s dive into the world of tablet-driven digital art with GIMP!
Why Use a Tablet with GIMP?
Using a tablet with GIMP offers numerous benefits that can enhance your digital art and photo editing experience. Here are some compelling reasons to consider incorporating a tablet into your GIMP workflow:
- Precision and Control: Tablets provide a pen-like stylus that allows for precise and accurate control when making selections, drawing, or retouching images. With pressure sensitivity, you can vary the thickness and opacity of your brush strokes, resulting in more natural and realistic artwork.
- Improved Workflow: Working with a tablet can significantly speed up your workflow. The intuitive nature of tablets allows you to perform tasks more quickly and efficiently compared to using a mouse or trackpad. Tablet users often find that they can accomplish complex editing tasks more easily and with greater precision.
- Comfort and Ergonomics: Tablets provide a more ergonomic and comfortable way to work for extended periods. The pen-style stylus is ergonomically designed, allowing for a more natural grip and reducing strain on your hand and wrist. This is especially beneficial for artists and designers who spend long hours working on digital projects.
- Artistic Freedom: Tablets offer a level of freedom and artistic expression that is difficult to achieve with other input devices. The pressure sensitivity and tilt recognition features allow for greater artistic control and the ability to create unique brush effects. Whether you’re a digital painter, illustrator, or photographer, a tablet can unlock new possibilities for creative expression.
- Compatibility: Tablets are compatible with GIMP and other popular digital art software. They often come bundled with drivers and software that allow for seamless integration with GIMP, ensuring that you can fully utilize the features and capabilities of your tablet within the software.
By incorporating a tablet into your GIMP workflow, you can elevate your digital art and photo editing projects to new heights. The precision, control, comfort, and artistic freedom offered by tablets can transform your creative process, allowing you to bring your vision to life with ease and finesse.
Choosing the Right Tablet for GIMP
When it comes to selecting a tablet for use with GIMP, there are a few factors to consider to ensure compatibility, functionality, and optimal performance. Here are some key considerations to keep in mind:
- Pressure Sensitivity: Look for a tablet that offers pressure sensitivity. This feature allows you to vary the thickness and opacity of your brush strokes based on the pressure applied to the tablet surface. Tablets with higher levels of pressure sensitivity provide greater control and a more natural drawing experience.
- Size and Active Area: Choose a tablet with a size and active area that suits your needs. Smaller tablets are more portable and might be suitable if you have limited desk space, while larger tablets offer more drawing surface and can provide a greater degree of precision and control.
- Compatibility: Ensure that the tablet you choose is compatible with your operating system, whether it’s Windows, macOS, or Linux. Check the manufacturer’s specifications to confirm that the tablet supports your operating system version.
- Customization Options: Look for a tablet that allows you to customize the pen buttons and express keys. This enables you to assign frequently used functions or shortcuts within GIMP to these buttons, enhancing your workflow and efficiency.
- Budget: Consider your budget when selecting a tablet. There are options available in various price ranges, so it’s important to find a tablet that offers the features you need without exceeding your budget. Don’t forget to consider factors such as build quality and warranty when comparing prices.
- Reviews and Recommendations: Read reviews and seek recommendations from other artists and designers who use tablets with GIMP. Their experiences and insights can help you make an informed decision and find a tablet that suits your specific requirements.
Popular tablet brands for digital art include Wacom, Huion, and XP-Pen, but there are other reputable options available as well. Each brand offers a range of tablet models with different features and price points, so take your time to research and compare before making a final decision.
Remember, choosing the right tablet for GIMP is essential for a seamless and enjoyable digital art experience. Consider your artistic needs, workflow preferences, and budget to find a tablet that complements your creative journey and unlocks the full potential of GIMP’s powerful features.
Installing Tablet Drivers for GIMP
Before you can start using your tablet with GIMP, you will need to install the appropriate drivers for your specific tablet model. These drivers allow your computer to recognize and communicate with the tablet, enabling the tablet’s functionality within GIMP. Here’s a step-by-step guide to installing tablet drivers for GIMP:
- Start by visiting the official website of the tablet manufacturer. Look for the “Support” or “Downloads” section of the website.
- Locate the drivers or software section and search for the latest drivers compatible with your tablet model and operating system. Download the appropriate driver package.
- Once the driver package is downloaded, double-click on it to begin the installation process. Follow the on-screen instructions provided by the installer.
- During the installation, you may be prompted to connect your tablet to your computer using the provided USB cable. Follow the instructions and ensure that your tablet is properly connected.
- Once the installation is complete, restart your computer to finalize the driver installation process.
- After restarting, launch GIMP. Go to the “Edit” menu, select “Preferences,” and then choose “Input Devices.”
- In the Input Devices window, you should see your tablet listed. Ensure that it is selected as the active input device.
- In the same window, you can customize the tablet settings according to your preferences. Adjust options like pen pressure sensitivity, button assignments, and tilt recognition to suit your needs. Experiment with these settings to find the configuration that works best for you.
- Once you have configured the tablet settings, click “OK” to apply the changes.
It’s important to keep your tablet drivers up to date to ensure optimal performance. Periodically check the tablet manufacturer’s website for any driver updates and follow the same installation process to update your tablet drivers.
With the tablet drivers properly installed and configured in GIMP, you’re now ready to fully utilize the tablet’s features and take advantage of the enhanced control and precision it provides. Now, let’s move on to the next section, where we will explore how to configure tablet settings within GIMP.
Configuring Tablet Settings in GIMP
Once you have installed the tablet drivers and connected your tablet to your computer, it’s time to configure the tablet settings within GIMP. This step ensures that GIMP recognizes and utilizes your tablet’s input effectively. Here’s a guide on how to configure tablet settings in GIMP:
- Launch GIMP and go to the “Edit” menu. From the dropdown menu, select “Preferences.”
- In the Preferences window, navigate to the “Input Devices” section. Here, you will see a list of connected input devices, including your tablet.
- Select your tablet from the list to access the specific settings for your tablet.
- In the tablet settings window, you can customize various parameters to fine-tune the tablet’s behavior in GIMP. Some common settings include:
- Pressure Sensitivity: Adjust the pressure sensitivity settings to control the strength and thickness of your brush strokes based on the pressure applied to the tablet surface. Experiment with different sensitivity levels to find the one that suits your artistic style.
- Button Assignments: Customize the tablet’s buttons to perform specific functions within GIMP. You can assign commonly used tools or shortcuts to the tablet’s buttons, allowing for quick access and improved workflow.
- Tilt Recognition: If your tablet supports tilt recognition, enable this feature to simulate the natural angle of traditional art tools. Tilt recognition can provide additional control and enhance the realism of brush strokes.
- Precision and Speed: Adjust the tablet’s cursor precision and speed settings to match your preferences. Fine-tune these settings to achieve the level of control and responsiveness that feels most comfortable to you.
- As you make changes in the tablet settings, you can use the “Test Input Device” button to verify how your modifications affect the tablet’s behavior. This allows you to fine-tune the settings in real-time and ensure optimal performance.
- Once you have finished configuring the tablet settings, click “OK” to save the changes and exit the Preferences window.
With the tablet settings configured to your preferences, you can now fully unleash the potential of your tablet within GIMP. Take some time to experiment and adjust the settings according to your needs and artistic style. This customization allows you to create a personalized digital art experience that enhances your productivity and creativity.
In the next section, we’ll explore utilizing pressure sensitivity in GIMP and how it can elevate your digital artistry to new heights.
Using Pressure Sensitivity with GIMP
One of the most powerful features offered by tablets when used with GIMP is pressure sensitivity. Pressure sensitivity allows you to vary the thickness and opacity of your brush strokes based on the pressure applied to the tablet surface. This feature adds a new dimension to your digital artwork and significantly enhances your ability to create expressive and realistic designs. Here’s how to use pressure sensitivity with GIMP:
- Ensure that your tablet drivers are properly installed and configured in GIMP, as discussed in the previous sections.
- Launch GIMP and create a new canvas or open an existing project.
- Select the brush tool from the toolbox or press the ‘B’ key to activate it.
- With the brush tool active, start drawing on the canvas using your tablet’s stylus.
- Apply varying amounts of pressure to the tablet’s surface as you draw. Notice how the brush strokes change in thickness and opacity based on the pressure you exert.
- Experiment with different brush sizes and types to explore the diverse effects you can achieve with pressure sensitivity. Combine gentle strokes with bold lines to add depth and dimension to your artwork.
- Take advantage of the pressure sensitivity feature while working with other tools such as the eraser, smudge tool, or clone tool. The ability to control the intensity of these tools based on pressure allows for more precise and nuanced editing.
- Adjust the pressure sensitivity settings in GIMP’s tablet preferences if desired. Fine-tune the pressure curves to match your drawing style and make the most of your tablet’s capabilities.
- As you become more comfortable with pressure sensitivity, start experimenting with subtle variations in pressure to create intricate details, textures, and shading in your artwork.
- Remember to save your work regularly and enjoy the creative freedom and expressive possibilities that pressure sensitivity brings to your digital art process.
Using pressure sensitivity is a game-changer when it comes to digital painting and drawing in GIMP. It allows you to mimic traditional art techniques and gives you greater control over your brush strokes. Embrace this dynamic feature and explore the unlimited creative possibilities it offers.
In the next section, we’ll discuss how you can customize the buttons on your tablet and make them work for you in GIMP.
Customizing Tablet Buttons in GIMP
Customizing the buttons on your tablet can greatly enhance your productivity and streamline your workflow in GIMP. Tablets often come equipped with buttons or express keys that you can assign specific functions to, allowing for quick access to frequently used tools or actions. Here’s how you can customize the tablet buttons in GIMP:
- Launch GIMP and go to the “Edit” menu. From the dropdown menu, select “Preferences.”
- In the Preferences window, navigate to the “Input Devices” section. Here, you will find your tablet listed among the connected input devices.
- Select your tablet from the list to access the specific settings for your tablet.
- In the tablet settings window, look for the section that allows you to customize the buttons or express keys on your tablet. The options may vary depending on the tablet model and the software that comes with it.
- Click on the button or the express key that you want to customize. A dialog box or a dropdown menu will appear, allowing you to assign a specific function or shortcut to it.
- Choose a function or shortcut from the available options, or use the option to create a custom shortcut, such as launching a specific tool or applying a frequently used effect within GIMP.
- Repeat the process for each button or express key that you want to customize.
- Experiment with different button configurations to find the setup that works best for your workflow. Consider assigning shortcuts to tools or actions that you frequently use to speed up your editing process.
- Once you have finished customizing the tablet buttons, click “OK” to save the changes and exit the Preferences window.
By customizing the buttons on your tablet, you can create a personalized setup that aligns with your specific needs and preferences in GIMP. This feature allows for greater efficiency and ease of use, eliminating the need to navigate through menus to access commonly used functions.
Take some time to experiment with different button configurations and workflows to find the optimal setup that enhances your productivity and creative process. Customizing the tablet buttons in GIMP offers a level of convenience and customization that can significantly improve your digital art and photo editing experience.
In the next section, we’ll explore some advanced features and tips for tablet users in GIMP, allowing you to further elevate your digital art skills.
Advanced Features and Tips for Tablet Users in GIMP
As a tablet user in GIMP, there are several advanced features and tips you can leverage to enhance your digital artistry and optimize your workflow. These features go beyond the basics and allow you to take full advantage of the tablet’s capabilities. Here are some advanced features and tips for tablet users in GIMP:
- Tilt Recognition: If your tablet supports tilt recognition, make sure to enable this feature in GIMP’s tablet settings. Tilt recognition allows you to create more natural and nuanced brush strokes by simulating the angle and orientation of a traditional art tool. Experiment with brush settings and explore different tilt angles to achieve unique effects that add depth and dimension to your artwork.
- Custom Brush Settings: GIMP offers a wide range of brush settings that you can customize to suit your artistic style. Take advantage of features like brush dynamics, spacing, scattering, and blending modes to create diverse and unique brush effects. Adjust these settings according to your preferences and experiment with different combinations to unlock new creative possibilities.
- Layer Masks: Layer masks are an essential tool for non-destructive editing in GIMP. Tablet users can leverage pressure sensitivity to create smooth and seamless transitions in layer masks. Varying the pressure as you paint on the layer mask allows you to blend and reveal different parts of an image or artwork, resulting in more realistic and professional-looking compositions.
- Use Shortcut Keys: While the tablet buttons are convenient, make the most of GIMP’s shortcut keys to further streamline your workflow. Familiarize yourself with commonly used keyboard shortcuts for tools, layers, and effects in GIMP. This combination of tablet buttons and keyboard shortcuts can significantly speed up your editing process and make your workflow more efficient.
- Experiment with Filters and Plugins: GIMP offers a wide range of filters and plugins that can enhance your digital art. Use your tablet to experiment with different filters and plugins, and take advantage of pressure sensitivity to fine-tune the parameters. This experimentation will allow you to discover new creative effects and techniques to incorporate into your projects.
- Utilize GIMP’s Resources: GIMP supports a vast community of users who create plugins, scripts, and brush sets that can be downloaded and used in your projects. Explore these resources and integrate them into your workflow. Additionally, online tutorials and forums can provide valuable insights and techniques specifically tailored to tablet users in GIMP.
Remember, practice and experimentation are key to mastering the advanced features of GIMP as a tablet user. Strive to push the limits of your creativity and challenge yourself to explore new techniques and effects. With dedicated practice, you can unlock the full potential of your tablet and create stunning digital art with GIMP.
Now that you have a better understanding of the advanced features and tips for tablet users in GIMP, it’s time to put them into action. Embrace these techniques, continue to learn and evolve, and enjoy the process of creating digital art with your tablet and GIMP.
Conclusion
Using a tablet with GIMP opens up a world of possibilities for digital art and photo editing. With the precision, control, and pressure sensitivity offered by tablets, you can take your creative projects to new heights. In this article, we explored the benefits of using a tablet with GIMP and discussed how to choose the right tablet for your needs.
We also covered the important steps of installing tablet drivers for GIMP and configuring the tablet settings within the software. From there, we delved into the usage of pressure sensitivity, which allows for dynamic and expressive brush strokes, and we explored customizing tablet buttons to optimize your workflow.
Furthermore, we introduced advanced features and tips for tablet users in GIMP, such as tilt recognition, custom brush settings, layer masks, shortcut keys, and utilizing filters and plugins. These advanced techniques empower you to unlock your creativity and achieve professional-level results.
Remember, as you embark on your tablet-driven journey with GIMP, it’s important to practice, experiment, and continue expanding your knowledge. Explore the capabilities of your tablet, experiment with different techniques, and embrace the vibrant community that surrounds GIMP.
So, whether you’re an aspiring digital artist, a seasoned professional, or someone looking to enhance their photo editing skills, incorporating a tablet into your GIMP workflow can transform your artistic process. Embrace this powerful combination, let your creativity soar, and enjoy the process of creating stunning digital art with GIMP and your tablet.


