Introduction
Welcome to the world of PVO projectors and iPhones! If you’re looking to enhance your multimedia experience on your iPhone, then a PVO projector is just what you need. With its portable and versatile design, you can easily connect your iPhone to the projector and enjoy a larger-than-life display.
A PVO projector is a compact and lightweight device that allows you to project videos, presentations, and images onto a larger screen or surface. It offers a convenient way to share content with friends, family, or colleagues, whether you’re at home, in the office, or on the go.
In this guide, we’ll explore how to connect your iPhone to a PVO projector and make the most out of this powerful combination. You’ll learn how to adjust the display settings on your iPhone, use the PVO projector app, play videos or presentations, and troubleshoot common issues you may encounter along the way.
So, if you’re ready to elevate your iPhone experience to new heights, let’s dive into the exciting world of PVO projectors and iPhones!
What is a PVO Projector?
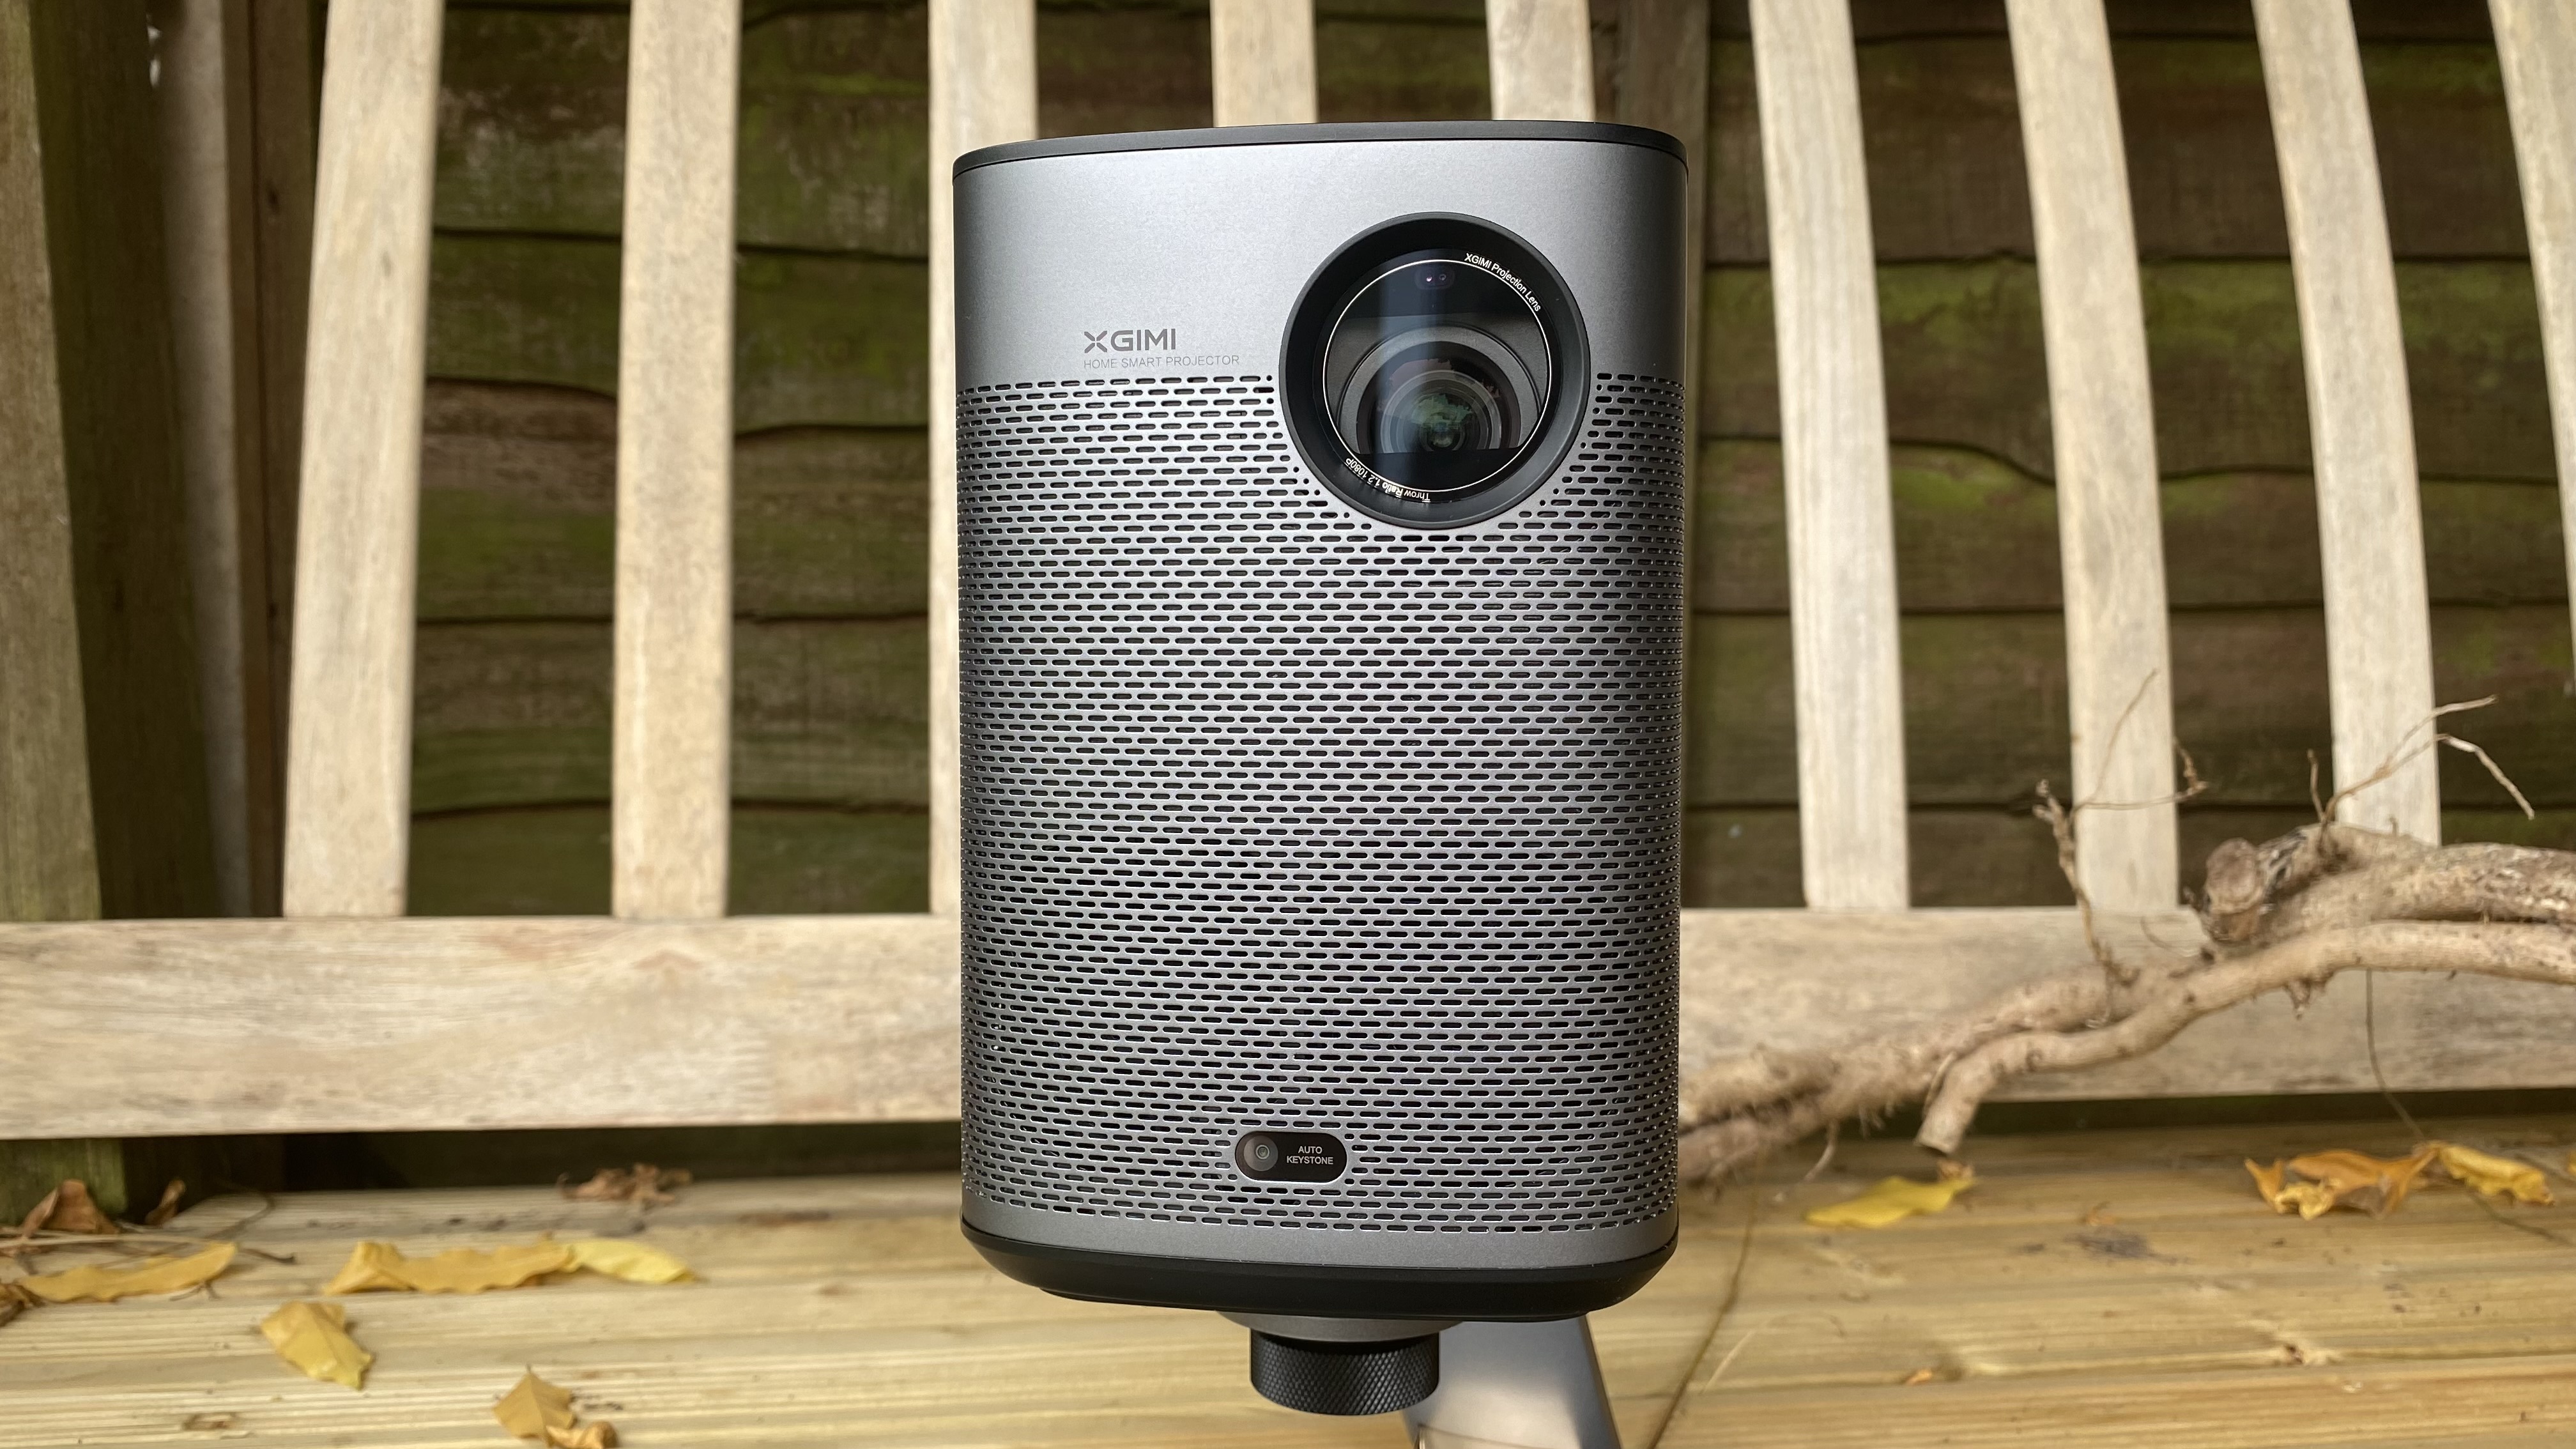
A PVO projector, also known as a portable projector, is a compact device that allows you to display multimedia content from your iPhone onto a larger screen or surface. It is designed to be portable and lightweight, making it easy to carry and use in various settings.
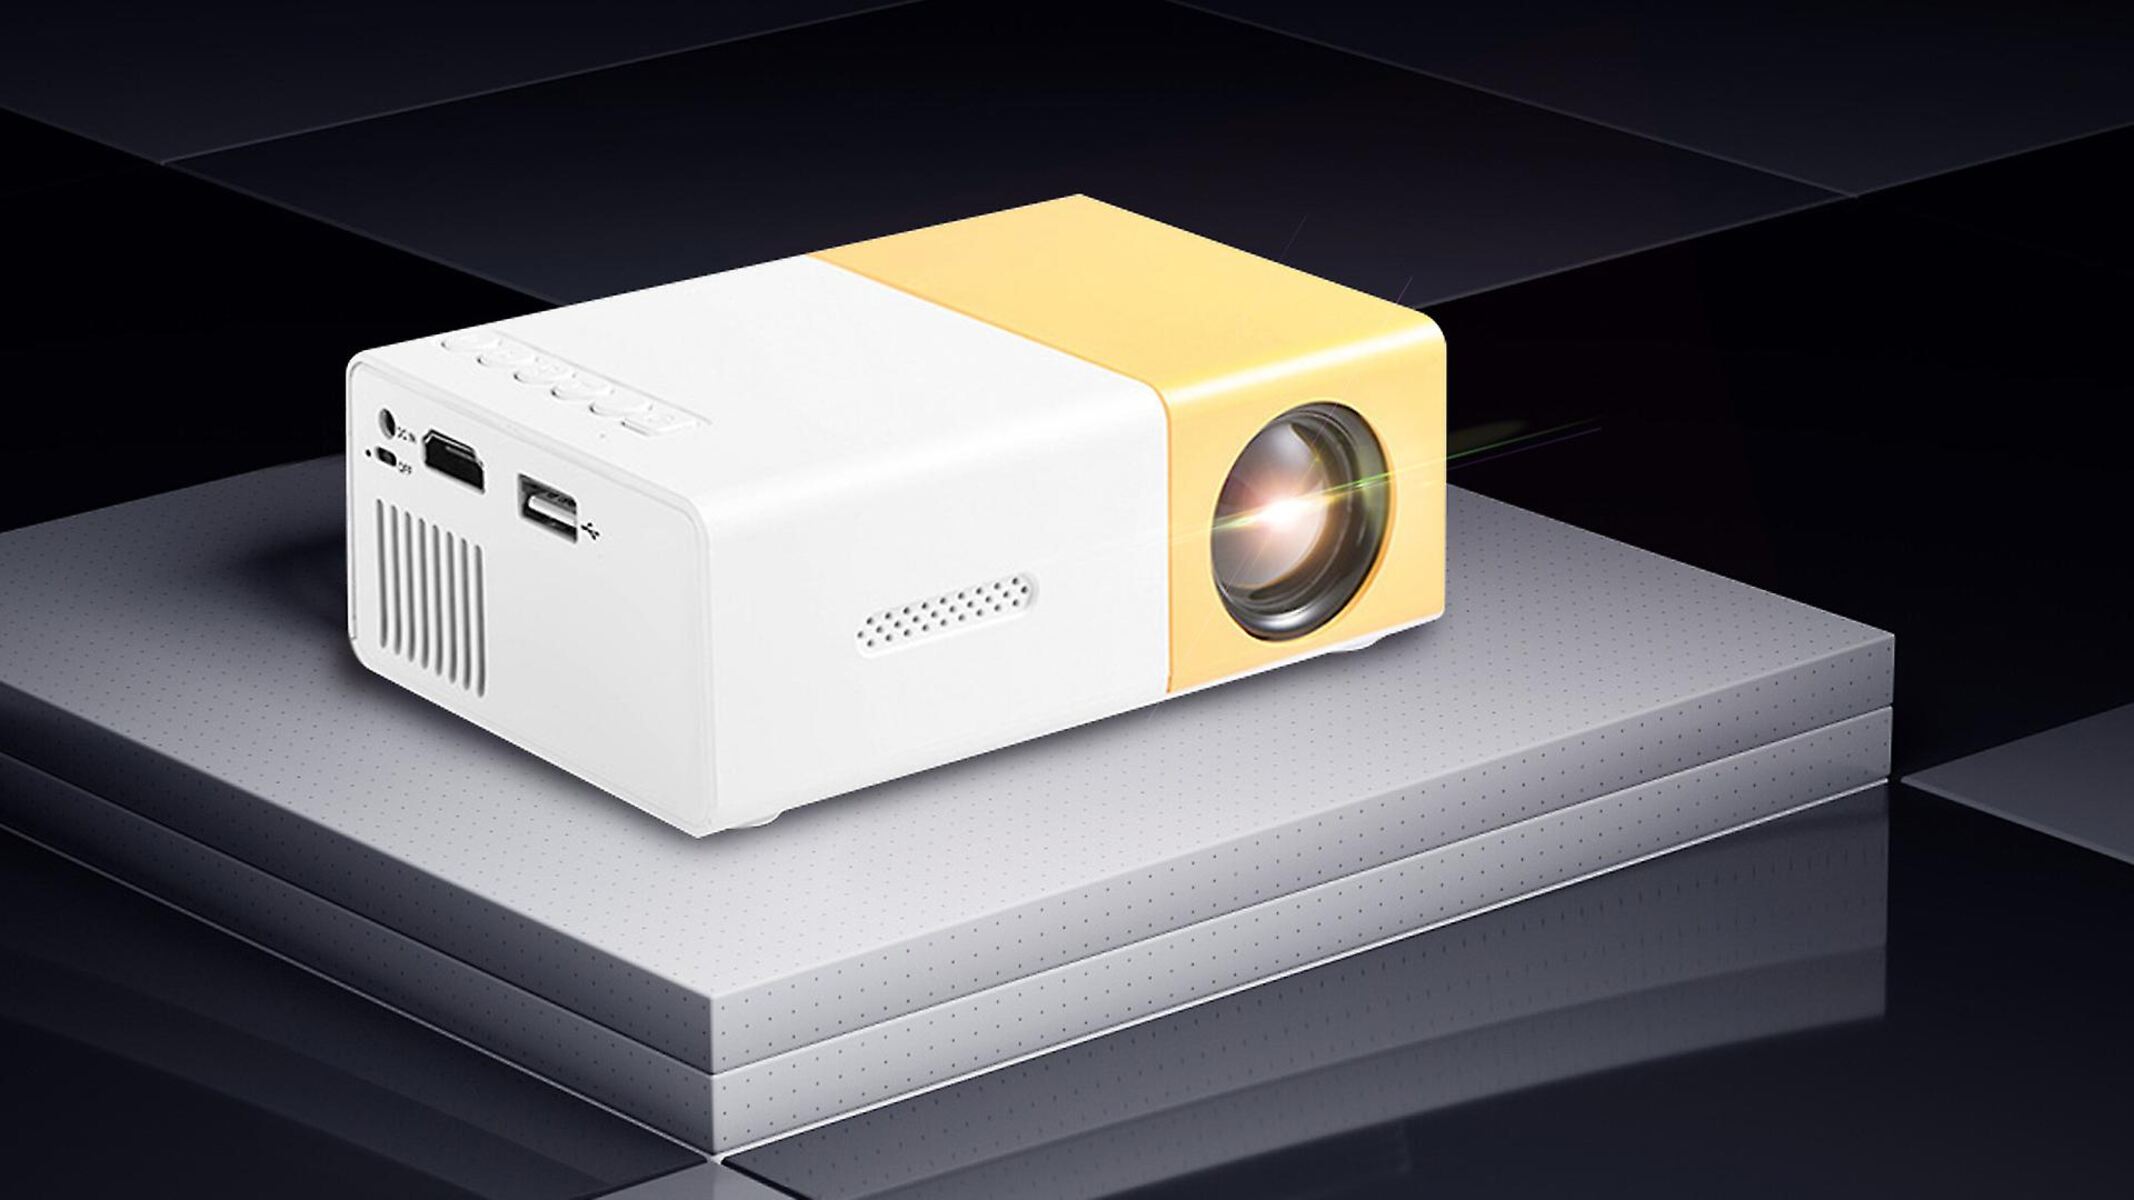
These projectors use advanced technology to project images and videos with impressive clarity and brightness. They typically have HDMI or USB ports that enable you to connect your iPhone directly to the projector, eliminating the need for additional cables or adapters.
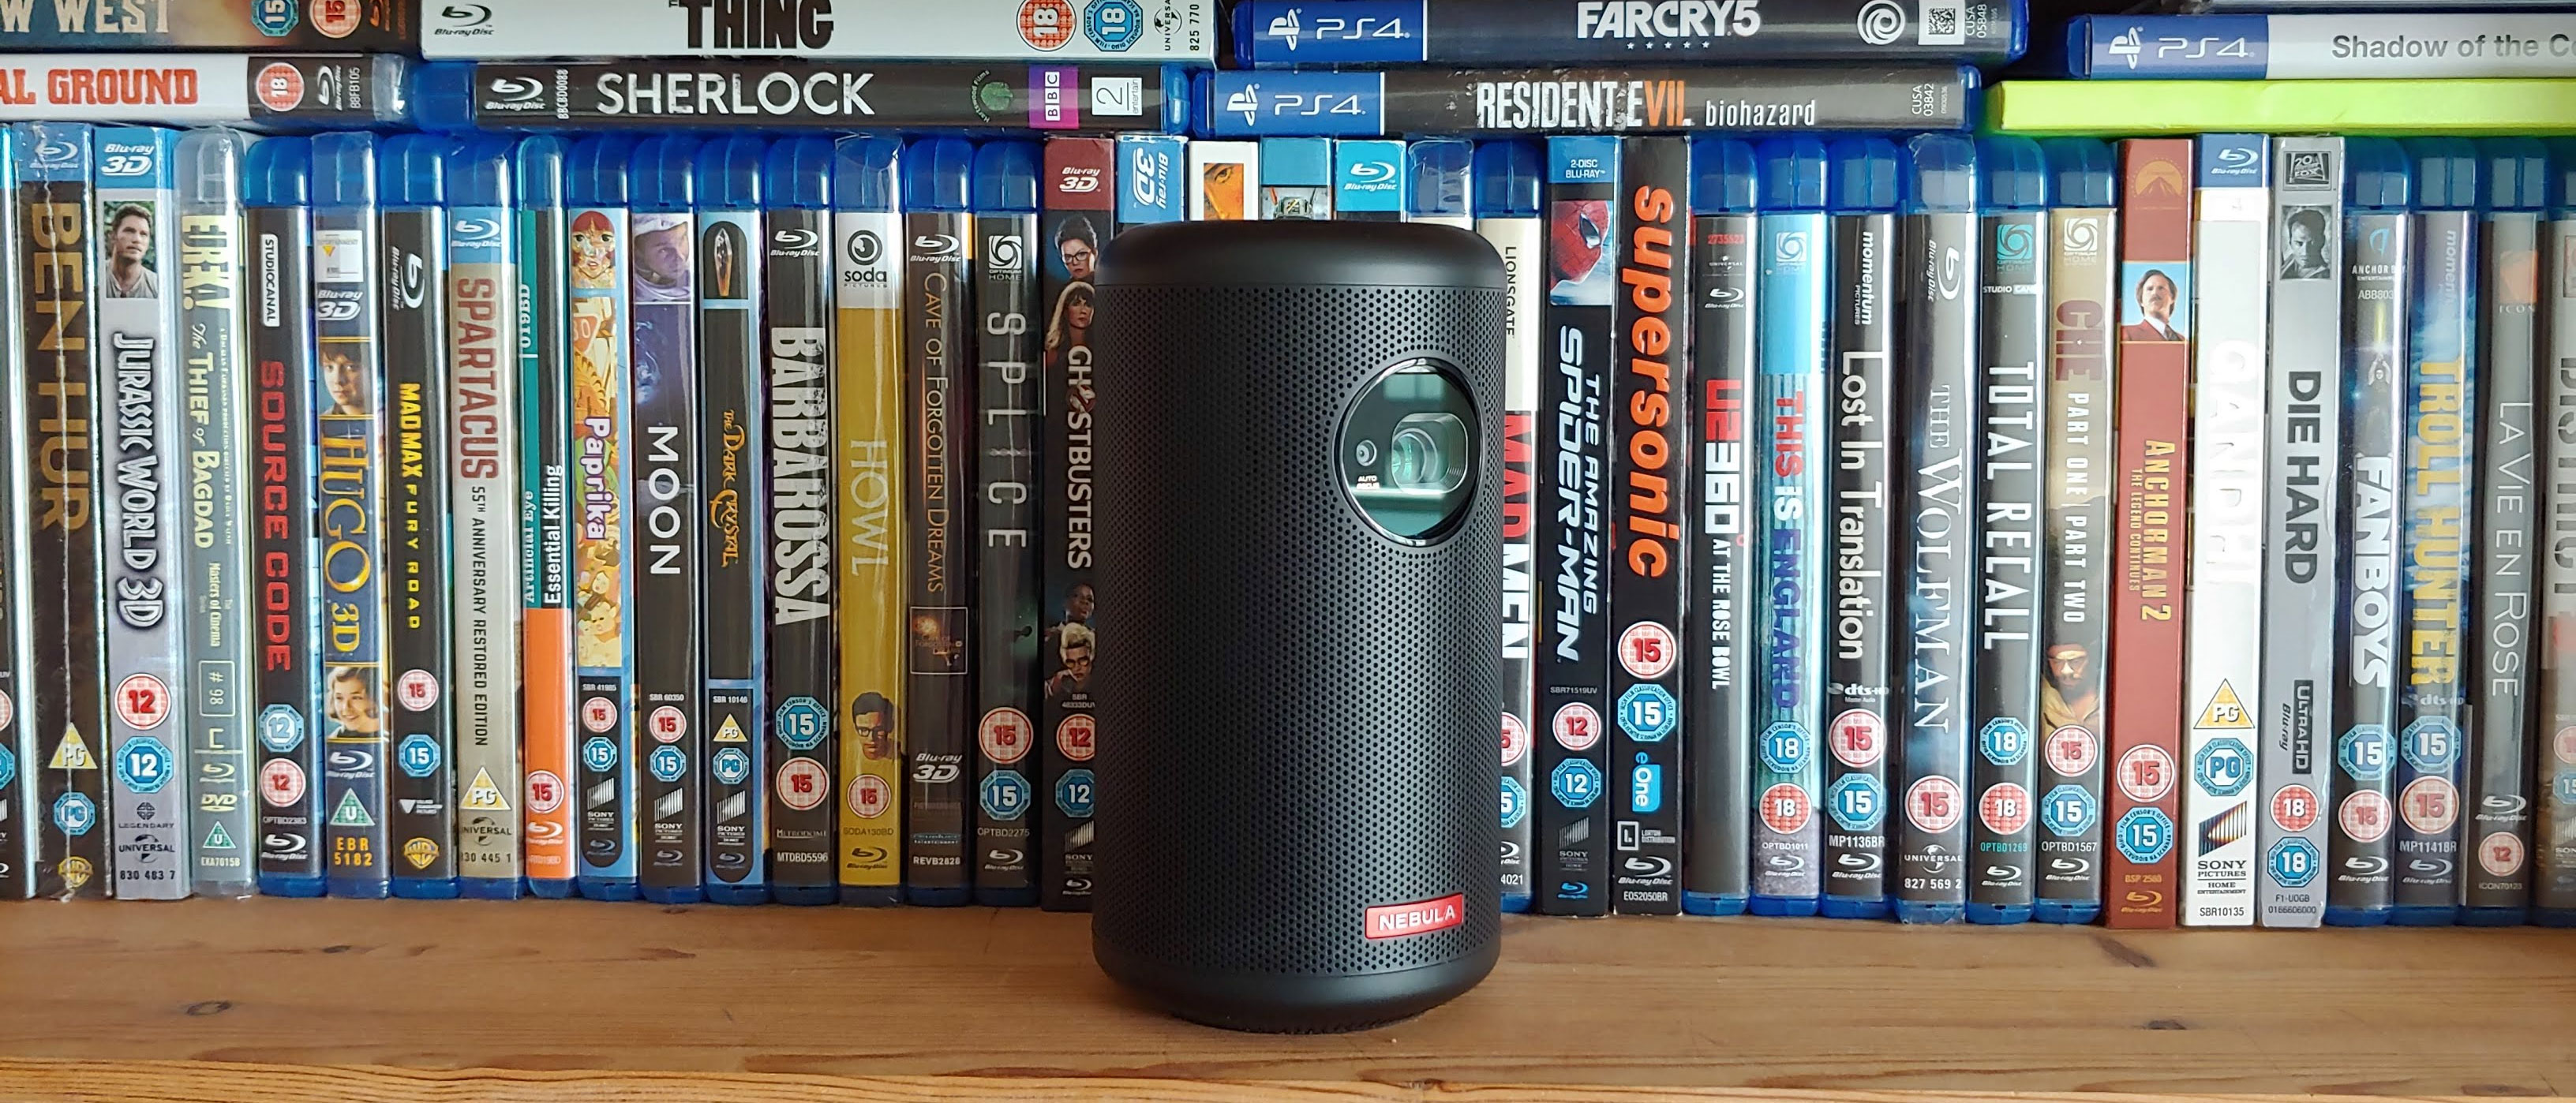
PVO projectors offer a range of features and benefits that make them a popular choice among iPhone users. One of the key advantages is their portability. You can easily slip them into your bag or pocket, allowing you to enjoy a big-screen experience wherever you go, whether it’s for personal entertainment or professional presentations.
In addition to their portability, PVO projectors also boast high-resolution displays, ensuring sharp images and vibrant colors. Many models support HD or even 4K resolution, bringing your videos and presentations to life in stunning detail.
Another standout feature of PVO projectors is their versatility. They can be used in a variety of settings, including home theaters, classrooms, offices, and outdoor gatherings. Whether you want to watch movies, showcase slideshows, or deliver impactful presentations, a PVO projector can cater to your needs.
Furthermore, PVO projectors often come with built-in speakers or audio output options, allowing you to enjoy immersive sound along with your visuals. This eliminates the need for external speakers and enhances the overall viewing experience.
With the rise in wireless connectivity, many PVO projectors also offer Bluetooth or Wi-Fi capabilities, enabling seamless wireless connections to your iPhone. This means you can easily mirror your iPhone screen or stream content wirelessly without any hassle.
In summary, a PVO projector is a portable device that enables you to project multimedia content from your iPhone onto a larger screen. With their compact size, high-resolution displays, and versatile features, PVO projectors offer a convenient and immersive way to enjoy movies, presentations, and more.
Connecting Your iPhone to the PVO Projector
Connecting your iPhone to a PVO projector is a straightforward process that requires only a few simple steps. Here’s a step-by-step guide to help you get started:
- Check your PVO projector for available ports: Before making any connections, inspect your PVO projector to determine which ports are available. Most projectors have HDMI or USB ports, but it’s best to confirm before proceeding.
- Prepare the necessary cables: Depending on your PVO projector’s ports and your iPhone’s model, you may need to use a suitable cable or adapter. Common options include HDMI to Lightning adapters or USB-C to HDMI cables.
- Connect the cable to your iPhone: Plug one end of the cable or adapter into your iPhone’s charging port or USB-C port, ensuring a secure connection.
- Connect the other end of the cable to the PVO projector: Locate the corresponding port on the projector and connect the cable securely.
- Turn on the PVO projector: Press the power button on the projector to turn it on. Make sure to follow any additional instructions provided by the manufacturer.
- Select the appropriate input source: On the PVO projector, navigate to the input source settings and select the port to which your iPhone is connected (e.g., HDMI or USB).
- Unlock your iPhone and adjust the display settings: Unlock your iPhone and swipe up from the bottom (or from the side, depending on the model) to access the Control Center. Tap on the Screen Mirroring button or AirPlay button, and select the PVO projector from the available devices.
- Wait for the connection to establish: Once you’ve selected the PVO projector as the screen mirroring option, your iPhone will establish a connection. It may take a few seconds to establish the connection, so be patient.
- Enjoy the big-screen experience: Once the connection is established, your iPhone screen will be mirrored onto the PVO projector display. You can now enjoy watching videos, browsing photos, giving presentations, or any other activities, all on a larger screen.
Keep in mind that the specific steps may vary slightly depending on the model of your PVO projector and iPhone, as well as any additional features offered by the devices. Refer to the user manuals or online resources provided by the manufacturers for more detailed instructions.
Now that you’ve successfully connected your iPhone to the PVO projector, it’s time to explore the various adjustments and settings to optimize your viewing experience.
Adjusting the Display Settings on Your iPhone
Once you have connected your iPhone to the PVO projector, it’s essential to adjust the display settings to optimize the output. Here are some key settings to consider:
1. Brightness: To adjust the brightness level, swipe down from the top right corner (or up from the bottom, depending on your iPhone model) to access the Control Center. Use the brightness slider to increase or decrease the brightness according to your preference.
2. Screen Orientation: By default, your iPhone’s screen orientation may be set to Portrait mode. However, when using a PVO projector, it’s often best to switch to Landscape mode. To do this, swipe down from the top right corner (or up from the bottom) to access the Control Center, then tap on the screen orientation lock icon to toggle between Portrait and Landscape mode.
3. Display Zoom: If you want to adjust the size of the content displayed on the screen, you can try the Display Zoom feature. Go to Settings > Display & Brightness > Display Zoom, and select either Standard or Zoomed. Standard will display more content on the screen, while Zoomed will make the content appear larger.
4. Auto-Lock: To prevent your iPhone screen from automatically turning off during a presentation or video playback, it’s recommended to set Auto-Lock to Never for as long as you need. Go to Settings > Display & Brightness > Auto-Lock, and select Never.
5. Sound and Volume: Ensure that the volume on your iPhone is set to an appropriate level for playback through the PVO projector. Use the volume buttons on your iPhone to adjust the volume level, or go to Settings > Sounds & Haptics to adjust the settings.
6. AirPlay Mirroring: If you’re experiencing any issues with screen mirroring or want to view specific content on the PVO projector only, you can utilize the AirPlay Mirroring feature. Open the Control Center, tap on the Screen Mirroring button, and select the option to mirror to the PVO projector.
7. Aspect Ratio: Depending on your PVO projector and the aspect ratio of your content, you may need to adjust the aspect ratio settings on your iPhone. This can usually be done through the settings or options provided by the projector app or video player app you are using.
Remember to review the user manual of your PVO projector for any specific settings or recommendations provided by the manufacturer. By adjusting these display settings on your iPhone, you can optimize the visual experience and ensure that the content is displayed correctly on the PVO projector screen.
Using the PVO Projector App
Most PVO projectors come with a dedicated app that enhances the user experience and provides additional features and controls. These apps are designed to make it easy to navigate and customize your projector settings directly from your iPhone. Here’s how to make the most out of the PVO projector app:
1. Download and Install: Start by downloading the PVO projector app from the App Store. Search for the specific app recommended by the PVO projector manufacturer and install it on your iPhone.
2. Connect to the Projector: Open the app and make sure your iPhone is connected to the PVO projector via the appropriate cable or wireless connection as outlined earlier in this guide.
3. Interface and Controls: Explore the app’s interface to familiarize yourself with the available controls and features. The app may include options to adjust brightness, contrast, color settings, and aspect ratios specific to the projector model.
4. Keystone Correction: Many PVO projector apps offer the feature of keystone correction, which allows you to correct any distortion resulting from projecting at an angle. You can adjust the keystone correction settings through the app to ensure a straight and proportionate display.
5. Image and Video Playback: The app may provide additional playback controls for images and videos. You can browse through your media library, select the desired content, and play it directly through the app on the PVO projector screen.
6. Slideshow and Presentation Modes: If you’re using the PVO projector for presentations or slideshows, the app might offer specific modes to enhance your experience. Look for features like automatic transitions, customizable slide timing, and laser pointer simulation.
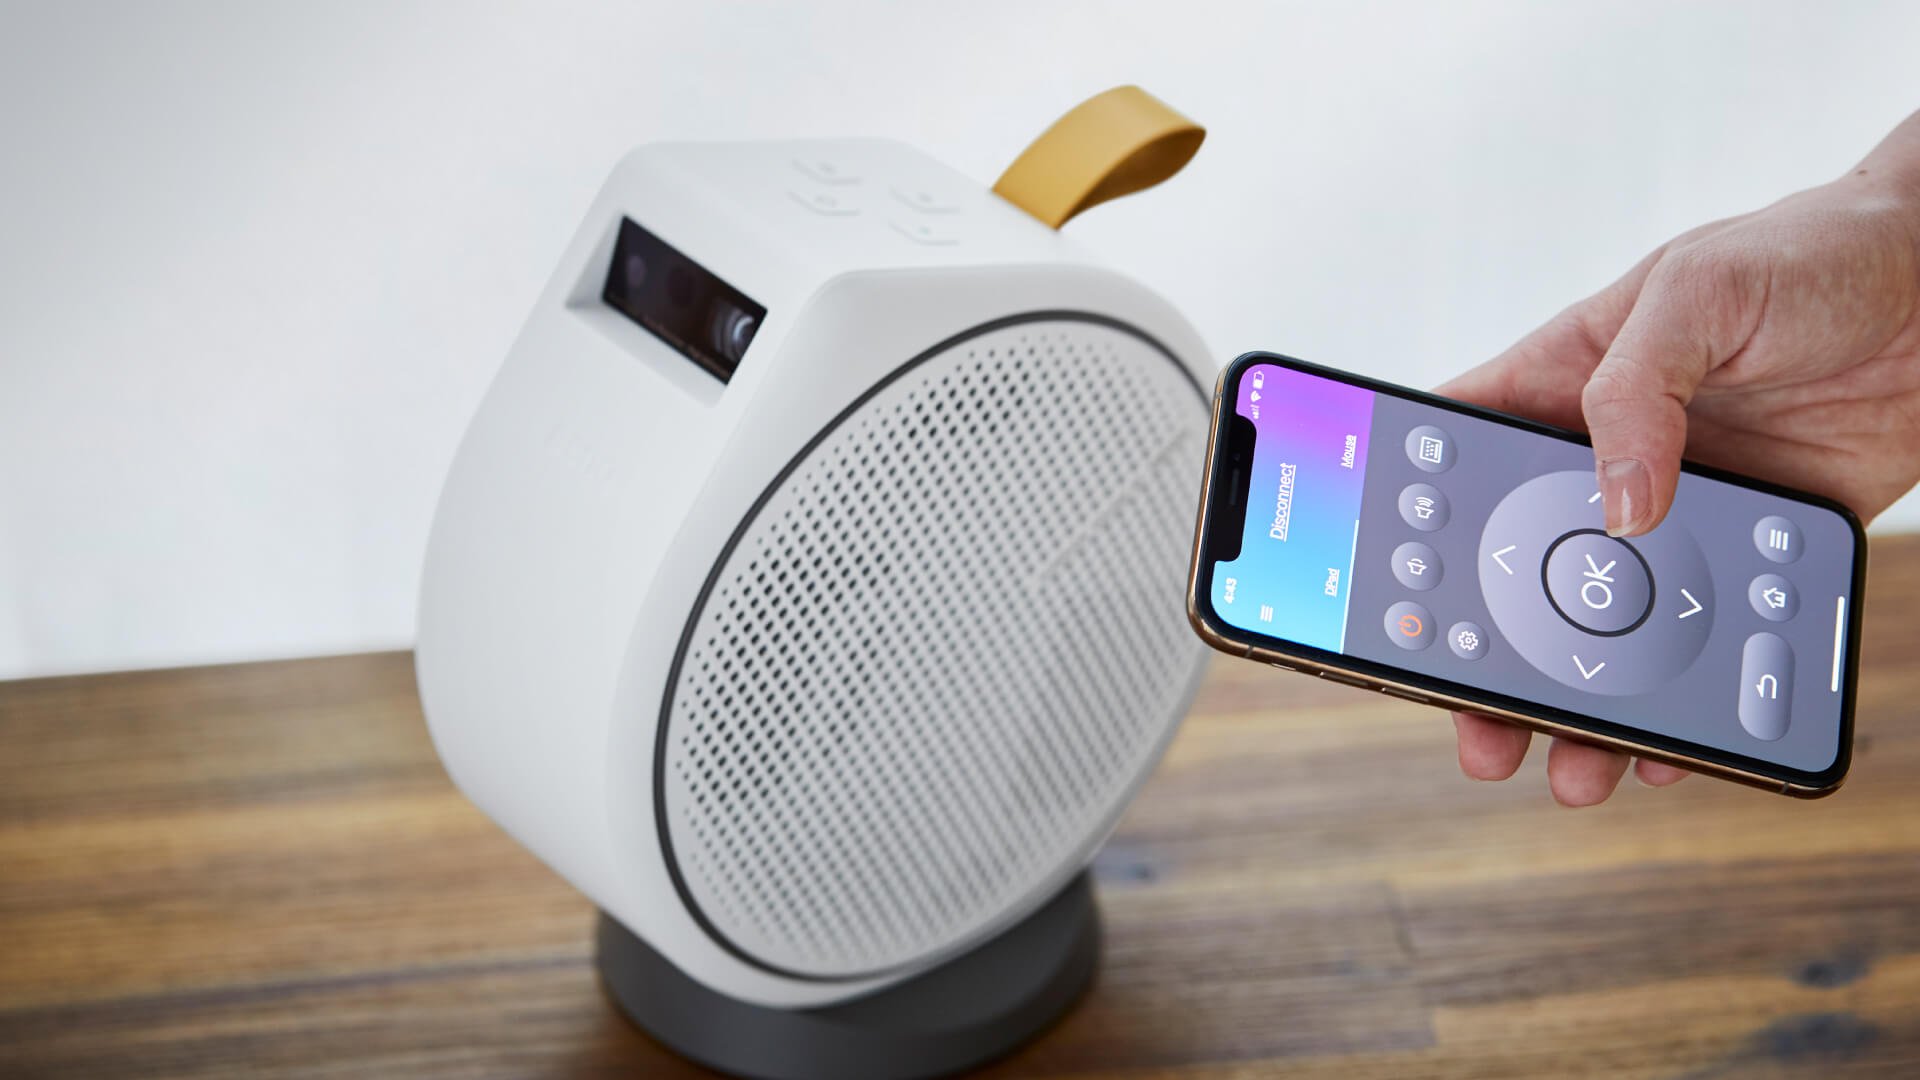
7. Wireless Connectivity: Some PVO projector apps support wireless connectivity, allowing you to control the projector and access its features without the need for cables. Check if the app offers this functionality and follow the instructions to connect wirelessly.
8. Firmware Updates: Keep an eye out for firmware updates for your PVO projector in the app. These updates may include bug fixes, performance improvements, and additional features, so it’s a good practice to install them when available.
Remember that the specific features and controls available in the PVO projector app will vary depending on the manufacturer and model. Refer to the user manual or online resources provided by the manufacturer for detailed instructions and tips on using the app.
By utilizing the dedicated PVO projector app, you can take full advantage of the projector’s features and customize your settings to suit your preferences, ultimately enhancing your overall viewing experience.
Playing Videos or Presentations from Your iPhone
One of the main purposes of connecting your iPhone to a PVO projector is to enjoy videos or deliver presentations on a larger screen. With your device connected and the settings adjusted, you’re ready to play videos or presentations directly from your iPhone. Here’s how:
1. Select the media player: Choose the media player app you prefer to use for playing videos or presentations on your iPhone. Popular options include the default Videos app, third-party video player apps, or presentation apps like PowerPoint or Keynote.
2. Open the media player: Open the selected media player app on your iPhone. If you’re using a presentation app, make sure the presentation file is already saved on your iPhone or accessible through a cloud storage service.
3. Choose your content: Navigate to the video or presentation you wish to play. If you’re using a media player app, browse through your video library and select the desired video. If you’re using a presentation app, locate the presentation file and open it within the app.
4. Play the video or presentation: Once you’ve chosen your content, tap the play button to start playing the video or presentation on your iPhone. The content will now be displayed on the PVO projector screen, offering a larger and more immersive viewing experience.
5. Control playback: Use the controls provided by the media player app to control playback, including play, pause, rewind, and fast forward. If you’re using a presentation app, you’ll have additional controls for navigating through slides, such as swiping or using the on-screen arrows.
6. Use external controls: Some PVO projectors come with remote controls or offer compatibility with external controllers. If available, you can use these external controls to navigate through videos or presentations without touching your iPhone.
7. Adjust volume and sound: If you need to adjust the volume or sound settings during playback, use the media player app’s controls or the physical volume buttons on your iPhone. Ensure that the volume is set to a suitable level for playback through the PVO projector.
8. Pause and resume playback: If you need to pause the video or presentation temporarily, use the appropriate controls in the media player app. To resume playback, simply tap the play button again.
By following these steps, you can easily play videos or deliver engaging presentations directly from your iPhone, with the content displayed on the larger screen provided by the PVO projector.
Remember to have your media files properly organized and accessible on your iPhone to ensure a smooth playback experience. Additionally, keep your iPhone charged or connected to a power source to avoid interruptions during longer video sessions or presentations.
Adjusting the Projection Size and Focus
Once you have connected your iPhone to the PVO projector and started playing your content, you may need to make adjustments to the projection size and focus to optimize the viewing experience. Here’s how you can do it:
1. Projection Distance: The distance between the PVO projector and the projection surface will determine the size of the image. To adjust the projection size, simply move the projector closer or farther away from the surface. Experiment with different distances until you achieve the desired size.
2. Zoom and Keystone Correction: Many PVO projectors offer zoom functionality that allows you to adjust the size of the projection without physically moving the projector. Use the zoom controls in the projector app or remote control to zoom in or out as needed. Additionally, if the projected image appears distorted due to the angle of projection, use the keystone correction feature to adjust and correct the distortion.
3. Projection Surface: The type of surface you project onto can affect the image quality. Ideally, choose a flat and smooth surface that is white or neutral in color for optimal projection. Avoid textured or reflective surfaces, as they may cause distortions or reflections that detract from the image quality.
4. Focus Adjustment: To achieve a clear and sharp image, adjust the focus of the projector. Most PVO projectors have a focus ring or button that allows you to fine-tune the focus. Rotate the focus ring or press the focus buttons until the image appears crisp and well-defined.
5. Test and Refine: Once you have made the initial adjustments, take a moment to step back and evaluate the projected image. Walk around the room to ensure that the projected image is uniformly focused and that there are no distortions or blurriness. Fine-tune the projection size and focus as needed to achieve the best possible result.
6. Consider Ambient Lighting: The lighting conditions in the room can also impact the projected image quality. For optimal results, dim the ambient lights or close the curtains to minimize any glare or reflections on the projection surface. This will enhance the visibility and clarity of the image.
Remember that the specific adjustment controls and options may vary depending on the model of your PVO projector. Consult the user manual or online resources provided by the manufacturer for detailed instructions and recommendations on adjusting the projection size and focus.
By taking the time to properly adjust the projection size and focus, you can ensure that the projected content from your iPhone is displayed with optimal clarity and sharpness, creating a truly immersive and enjoyable viewing experience.
Troubleshooting Common Issues
While using a PVO projector with your iPhone, you may encounter some common issues. Here’s a list of troubleshooting tips to help you address these issues:
1. No Projection: If you’re not seeing any projection on the screen, check if the PVO projector is powered on and connected properly to your iPhone. Make sure the input source on the projector matches the port you’re using on the iPhone. Also, verify that the projector lens cap is removed, and the focus is adjusted correctly.
2. No Sound: If you’re not hearing any audio, ensure that the volume on your iPhone is not muted and that the media player or presentation app is not set to silent mode. Check the audio connection between your iPhone and the PVO projector to ensure it’s secure. Also, confirm that the projector’s volume is not set to zero or muted.
3. Distorted or Blurry Image: If the projected image appears distorted or blurry, first check if the projector is positioned correctly and not tilted or at an extreme angle. Use the keystone correction feature of the projector to adjust any projection distortions caused by the angle. Additionally, adjust the focus ring to obtain a crisp and clear image.
4. Connectivity Issues: If you’re experiencing connectivity issues while using a wireless connection, verify that both the iPhone and the PVO projector are connected to the same Wi-Fi network. Ensure that your iPhone’s Bluetooth is enabled and that you’ve followed the proper steps to establish the wireless connection. Consider restarting both devices and attempting the connection again.
5. Poor Image Quality: If the image quality is not as expected, ensure that the content being played is of high resolution and compatible with the capabilities of the PVO projector. If possible, try playing a different video or presentation to see if the issue persists. Adjust the projection distance, focus, and keystone correction to optimize the image quality.
6. Compatibility Issues: If you’re using a specific app or file format that is not compatible with the PVO projector, consider using a different media player app or converting the file to a compatible format. Ensure that all software and firmware updates are installed for both your iPhone and the PVO projector to improve compatibility and performance.
7. Overheating: If the PVO projector becomes hot during extended use, it may be overheating. To prevent this, ensure that there is proper ventilation around the projector, and avoid blocking the air vents. Limit the projector’s operating time to prevent overheating, and follow any additional instructions provided by the manufacturer regarding cooling and usage duration.
8. Power Supply Issues: If your PVO projector is not turning on or is experiencing power-related problems, check that it is connected to a reliable power source or that the battery is properly charged. Try using a different power outlet or cable to eliminate any potential issues with the power supply.
If you’re encountering persistent issues with your PVO projector or need additional assistance, consult the user manual provided by the manufacturer or reach out to their customer support for further guidance.
By following these troubleshooting tips, you can resolve common issues and ensure a smooth and enjoyable experience while using your PVO projector with your iPhone.
Conclusion
Connecting your iPhone to a PVO projector opens up a whole new world of possibilities for enjoying multimedia content and delivering presentations. By following the steps outlined in this guide, you can easily connect your iPhone to a PVO projector and make the most out of this powerful combination.
We explored what a PVO projector is and the benefits it offers, including portability, high-resolution display, and versatility for various settings. We discussed how to connect your iPhone to the PVO projector, adjust display settings, and make use of the PVO projector app for enhanced control and customization.
We also covered how to play videos or deliver presentations directly from your iPhone, ensuring that the content is showcased on the larger screen provided by the PVO projector. Additionally, we provided guidance on adjusting the projection size and focus to optimize the viewing experience.
Lastly, we discussed common troubleshooting tips to help address any issues you may encounter, such as projection or sound problems, connectivity issues, poor image quality, and more.
By following the instructions and tips provided in this guide, you can confidently utilize your PVO projector with your iPhone and enjoy a captivating and immersive multimedia experience.
Remember to refer to the user manual or manufacturer’s instructions for specific details related to your PVO projector model, as settings and features may vary.
So, go ahead, connect your iPhone to a PVO projector, and elevate your entertainment, presentations, and overall visual experience to new heights!