Introduction
Welcome to the world of technology where smartphones have become an integral part of our lives. If you own an iPhone and a Mac, why not take advantage of the features offered by both devices? One such feature is using your iPhone as a webcam for your Mac. It allows you to have a high-quality video experience for video calls, online meetings, and even live streaming.
Using your iPhone as a webcam for your Mac has numerous benefits. It provides you with a portable and versatile option to capture high-quality video without the need for an additional external webcam. Additionally, it enables you to take advantage of your iPhone’s superior camera quality and other advanced features like autofocus and image stabilization.
In this article, we will guide you through the process of using your iPhone as a webcam for your Mac. Whether you need it for professional video conferences or simply want to enhance the video quality of your social media live streams, we’ve got you covered.
Before we dive into the step-by-step process, it is important to note that this method works for Mac computers running on macOS 10.14 Mojave or later, and iPhones running on iOS 13 or later. Please ensure that both your devices meet these requirements.
Now, without further ado, let’s get started and learn how to utilize the power of your iPhone as a webcam for your Mac!
Step 1: Check Compatibility
Before proceeding with using your iPhone as a webcam for your Mac, it is crucial to ensure that both devices are compatible with each other. Compatibility between your iPhone and Mac will determine whether or not you can proceed with the process.
Firstly, check the system requirements for using your iPhone as a webcam on your Mac. Make sure that your Mac computer is running on macOS 10.14 Mojave or a newer version. Similarly, ensure that your iPhone is running on iOS 13 or a newer version. Having the latest software updates on both devices will ensure a smooth and seamless experience.
Next, check if both your iPhone and Mac are connected to the same Wi-Fi network. The wireless connection is essential for establishing a link between the two devices. Make sure that both devices are within the range of the Wi-Fi network and have a stable internet connection.
Additionally, verify that you have enough storage space on your iPhone for the required apps and data. It is recommended to have sufficient free space to avoid any performance issues during the process.
Lastly, ensure that you have a compatible USB cable to connect your iPhone to your Mac. For newer iPhones, a Lightning to USB cable is commonly used, while older models may require a different type of cable. Make sure the cable is in good condition and supports data transfer.
By checking the compatibility of your devices, you can ensure a smooth setup and avoid any unnecessary issues that may arise during the process. Once you have verified the compatibility, you can proceed with the next steps to use your iPhone as a webcam on your Mac.
Step 2: Download and Install the Required Apps
In order to use your iPhone as a webcam for your Mac, you will need to download and install the necessary apps on both devices. These apps will establish a connection between your iPhone’s camera and your Mac, allowing you to use it as a webcam.
On your iPhone, go to the App Store and search for a webcam app that is compatible with both your iPhone and Mac. Some popular options include EpocCam, iVCam, and NDI HX Camera. These apps offer various features and settings to enhance your webcam experience. Choose the app that best suits your needs and preferences, and then download and install it on your iPhone.
On your Mac, you will need to download a webcam utility software that can recognize and utilize your iPhone as a webcam. Some recommended options for Mac include iVCam, EpocCam, and Camo. Visit the official website of the chosen software, download the appropriate version for your Mac, and follow the on-screen instructions to install it.
Once both the webcam app and webcam utility software are installed on your iPhone and Mac respectively, you’re one step closer to using your iPhone as a webcam for your Mac.
It is important to note that some apps and software may offer a free version with limited features, while others may require a one-time purchase or a subscription to unlock all functionalities. Take a moment to explore the options and choose the one that suits your requirements and budget.
After successfully downloading and installing the required apps, move on to the next step to connect your iPhone to your Mac and configure the webcam app.
Step 3: Connect Your iPhone to Your Mac
Now that you have downloaded and installed the necessary apps on your iPhone and Mac, it’s time to connect your iPhone to your Mac using a USB cable. This connection will allow your Mac to recognize and access your iPhone’s camera for use as a webcam.
Begin by connecting one end of the USB cable to your iPhone and the other end to an available USB port on your Mac. Ensure that the cable is securely plugged in on both ends.
Once the connection is established, your Mac will detect the presence of your iPhone and prompt you with a notification or a pop-up message. You may be asked to give permission for the computer to access your iPhone’s data or camera. Grant the necessary permissions to proceed.
If you encounter any issues with the connection, try using a different USB cable or a different USB port on your Mac. Restart both your iPhone and Mac if necessary to refresh the connection.
After successfully connecting your iPhone to your Mac, move on to the next step to configure the webcam app on your iPhone.
Note that some webcam apps may offer wireless connection options, allowing you to connect your iPhone to your Mac without a USB cable. Refer to the app’s instructions and documentation for the specific wireless connection process.
Step 4: Configure the Webcam App on Your iPhone
With your iPhone connected to your Mac, it’s time to configure the webcam app on your iPhone to ensure optimal performance and settings. The configuration process may vary depending on the app you have chosen, but the general steps are as follows:
- Launch the webcam app on your iPhone. You may be prompted to grant permissions for the app to access your iPhone’s camera and microphone. Allow these permissions to enable the app to function properly.
- Within the app settings, you may have the option to adjust the video quality, resolution, frame rate, and other camera-related settings. Customize these settings according to your preferences or requirements. Higher resolution and frame rate settings may result in a better video quality but require more bandwidth and processing power.
- Some apps also offer additional features such as autofocus, image stabilization, zoom, and filters. Explore these features and adjust them according to your needs to enhance the video output.
- Once you have configured the settings to your satisfaction, ensure that the app is running in the foreground on your iPhone. Keep the app open and ready for use in the upcoming steps.
Configuring the webcam app on your iPhone is crucial for achieving the desired video quality and ensuring a smooth performance during video calls or live streaming sessions. Take the time to explore the app’s settings and customize them to your preferences.
Once you have completed the configuration process on your iPhone, proceed to the next step to set up the webcam on your Mac.
Step 5: Set Up the Webcam on Your Mac
Now that your iPhone is connected and configured, it’s time to set up the webcam on your Mac. Follow the steps below to get your Mac ready to use your iPhone as a webcam:
- Launch the webcam utility software that you installed on your Mac. The software should automatically detect your connected iPhone and display it as an available webcam option.
- Select your iPhone from the list of available webcams in the software. This will establish a connection between your Mac and iPhone, enabling your Mac to receive video input from your iPhone’s camera.
- Depending on the software you are using, you may have additional settings and options to customize the webcam output. Adjust these settings according to your preferences or requirements. You can usually modify properties like brightness, contrast, exposure, and white balance to optimize the video quality.
- Ensure that the webcam utility software is running in the background on your Mac while using your iPhone as a webcam. Keep the software open and minimize it to the taskbar or system tray for easy access during video calls or streaming sessions.
By setting up the webcam on your Mac, you are now ready to utilize your iPhone’s camera as a webcam for various applications and services.
Remember to test the webcam setup on your Mac before using it for important meetings or events. Open a video calling app or a program that requires a webcam, and check if your iPhone is recognized as the default camera. Adjust the settings if needed and ensure that you have a clear and smooth video output.
With the webcam successfully set up on your Mac, move on to the next step to adjust the webcam settings according to your preferences.
Step 6: Adjust Webcam Settings
To ensure the best possible video quality and a seamless experience, it is recommended to adjust the webcam settings on your Mac according to your preferences. By tweaking these settings, you can optimize your webcam output and enhance the overall video experience. Follow the steps below to adjust the webcam settings:
- Open the application or platform where you will be using your iPhone as a webcam, such as a video conferencing app or streaming software.
- Navigate to the settings or preferences menu within the application.
- Look for the video or camera settings specific to the app or software you are using.
- Adjust settings such as video resolution, frame rate, and aspect ratio based on your requirements and the capabilities of your iPhone’s camera.
- Explore options to improve the lighting, color balance, and focus of the video output by adjusting settings like brightness, contrast, exposure, and autofocus.
- Test the changes you have made by starting a video call or streaming session and observing the video quality. Make further adjustments if necessary.
Remember that the specific settings and options available may vary depending on the application or software you are using. Take some time to familiarize yourself with the settings and customize them to your liking or the requirements of your specific use case.
It is essential to strike a balance between video quality and system resources. Higher-resolution and frame rate settings may result in a better video output but require more processing power and bandwidth. Adjust the settings according to your available resources for a smooth and enjoyable webcam experience.
Once you have adjusted the webcam settings to your satisfaction, you are ready to utilize your iPhone as a webcam on your Mac for various purposes.
Now that you have completed the webcam settings adjustment, proceed to the final step to learn how to use your iPhone as a webcam on your Mac.
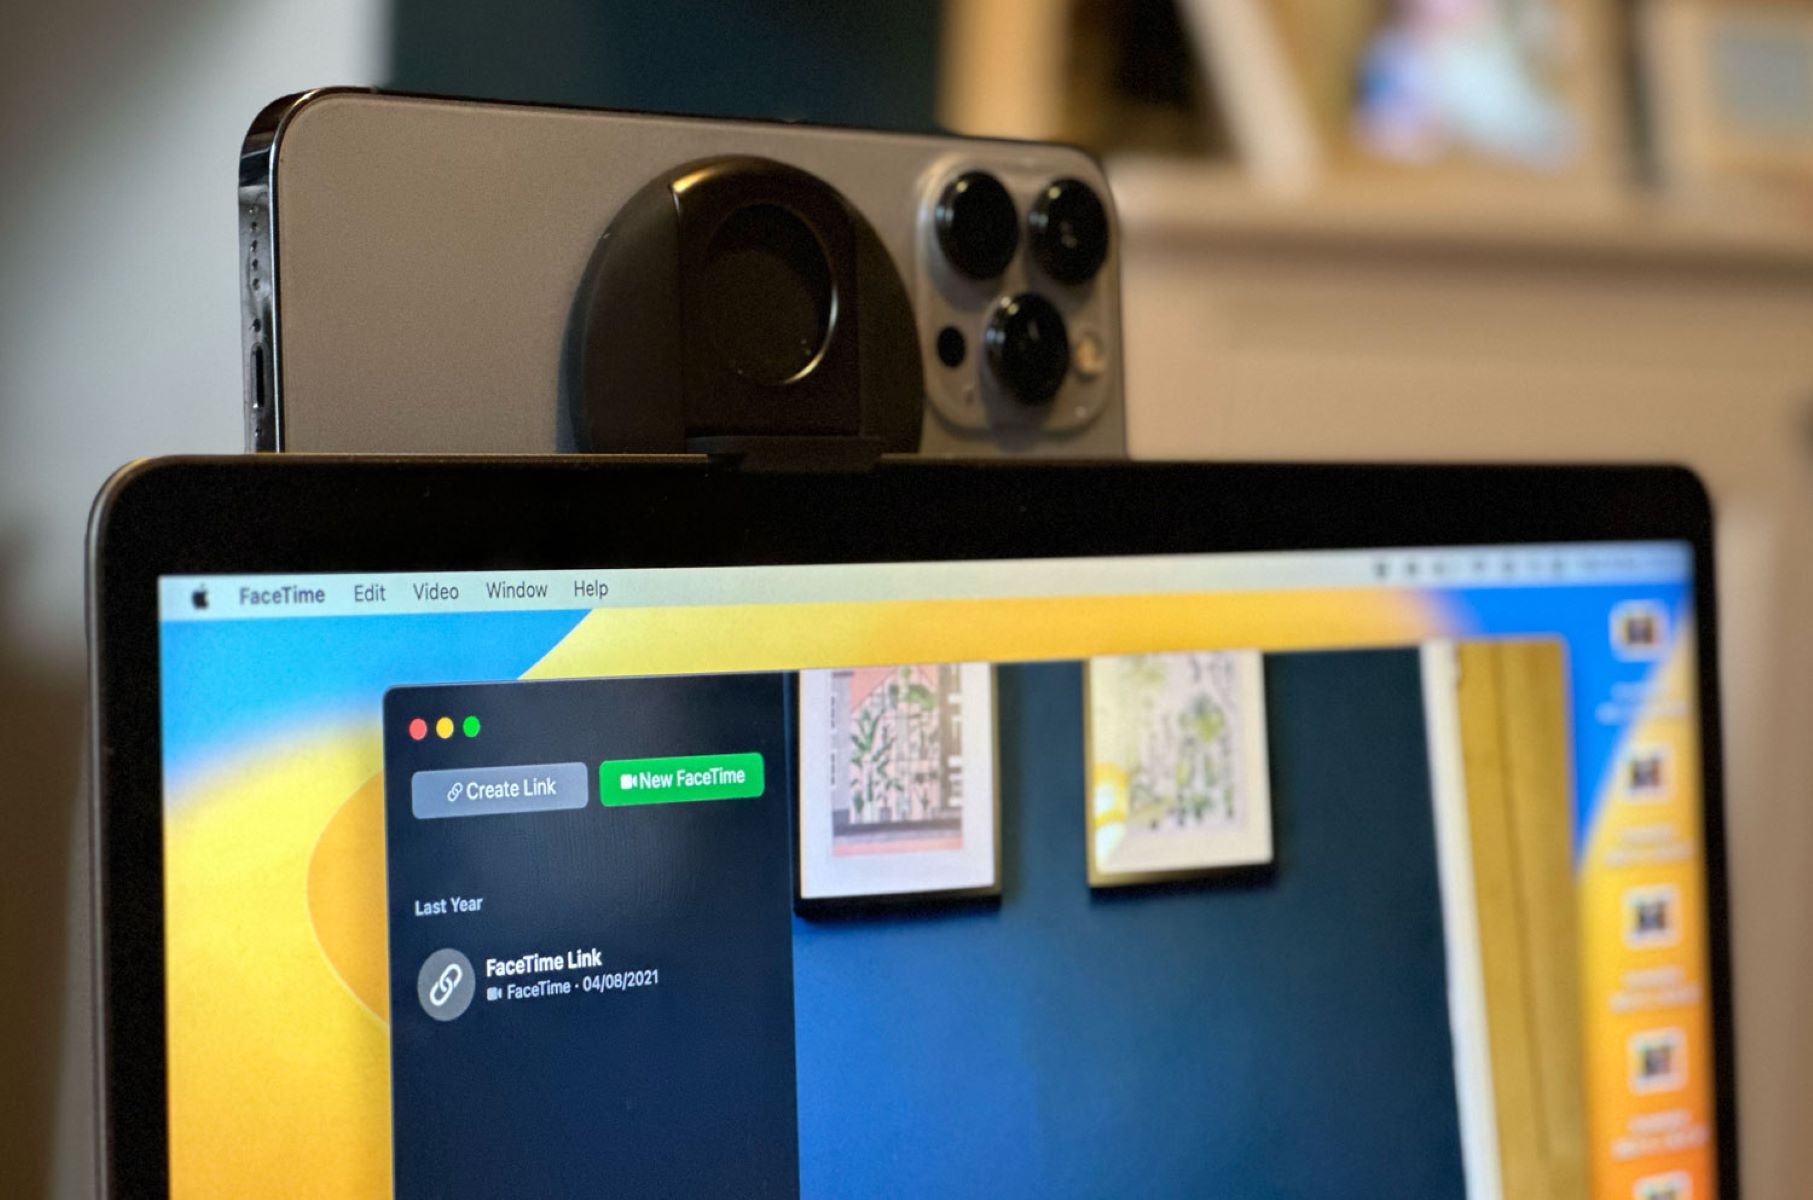
Step 7: Use Your iPhone as a Webcam on Mac
Now that you have completed all the necessary setup and configuration steps, it’s time to put your iPhone to use as a webcam on your Mac. Follow these steps to utilize your iPhone’s camera for video calls, online meetings, or live streaming:
- Open the application or platform where you want to use your webcam, such as a video conferencing app, streaming software, or online meeting platform.
- Navigate to the settings or preferences menu within the application and select the camera option.
- Choose your iPhone from the available camera options to set it as the default webcam for the application.
- Adjust any additional settings within the application or software, such as audio input, screen sharing, or chat preferences.
- Start a video call or streaming session to test your new iPhone webcam setup.
- During the video call or streaming session, ensure that your iPhone is positioned securely and at a suitable angle for optimal video framing.
- Enjoy the high-quality video output from your iPhone as you communicate or interact with others.
Keep in mind that different applications and platforms might have slight variations in the settings and steps involved in using your iPhone as a webcam. Refer to the documentation or support resources provided by the specific application for more detailed instructions.
Remember to maintain a stable internet connection and ensure that both your iPhone and Mac are charged sufficiently to avoid any disruptions during your video calls or streaming sessions.
With your iPhone successfully functioning as a webcam on your Mac, you can now take advantage of its superior camera quality and advanced features to enrich your virtual communications and content creation.
Enjoy seamless video calls, productive online meetings, and captivating live streams with the help of your iPhone as your reliable webcam companion on your Mac.
Conclusion
Using your iPhone as a webcam for your Mac opens up new possibilities for high-quality video calls, online meetings, and live streaming. With the right apps and settings in place, you can harness the power of your iPhone’s superior camera and advanced features to enhance your virtual interactions.
In this guide, we have walked through the step-by-step process of using your iPhone as a webcam for your Mac. From checking compatibility to configuring the webcam app, connecting your iPhone to your Mac, adjusting settings, and finally using your iPhone as a webcam in various applications and platforms, you are now well-equipped to make the most of this innovative solution.
By utilizing your iPhone as a webcam, you can enjoy the convenience of having a portable and versatile webcam solution without the need for an additional external webcam. Capture high-quality video, utilize features like autofocus and image stabilization, and enhance your video output for a professional and engaging experience.
Remember to choose the right webcam app and webcam utility software that best suits your needs and preferences. Explore the settings and options available to customize your webcam experience according to your specific requirements.
Finally, ensure that you have a stable internet connection, sufficient battery life on both your iPhone and Mac, and position your iPhone securely for optimal video framing during your video calls or streaming sessions.
Now that you have all the tools and knowledge at your disposal, go ahead and transform your iPhone into a powerful webcam for your Mac. Enjoy seamless and high-quality video communication, boost your productivity in online meetings, and create captivating live streams that engage your audience like never before.
Embrace the synergy between your iPhone and Mac, and let your virtual interactions and content creation reach new heights with the help of your iPhone as a reliable webcam companion.