Introduction
Are you wondering what to do with that old PC case gathering dust in your garage or basement? Don’t throw it away just yet! Old PC cases can be repurposed in a variety of creative ways, giving them a new lease on life while also reducing e-waste. Whether you’re a tech enthusiast looking for a DIY project or someone who wants to add a unique touch to their home decor, repurposing an old PC case can be a fun and rewarding endeavor.
In this article, we’ll explore 10 creative ideas for repurposing an old PC case. From transforming it into a retro gaming console to using it as a home server or even turning it into a unique flower planter, these ideas will spark your imagination and help you make the most out of your old PC case. So, dust off that neglected case, roll up your sleeves, and let’s get started on repurposing it into something amazing!
Repurposing an Old PC Case: 10 Creative Ideas
1. Turn It into a Home Server: Utilize the ample space inside the PC case to create a home server for storing and accessing your files, media, and even running web services. Install a low-power motherboard, add storage drives, and configure it as a personal cloud or a media server.
2. Transform It into a Retro Gaming Console: Give your old PC case a new life by converting it into a retro gaming console. Install a gaming emulator software, connect controllers, and load up classic games, turning your old PC case into a nostalgia-inducing gaming paradise.
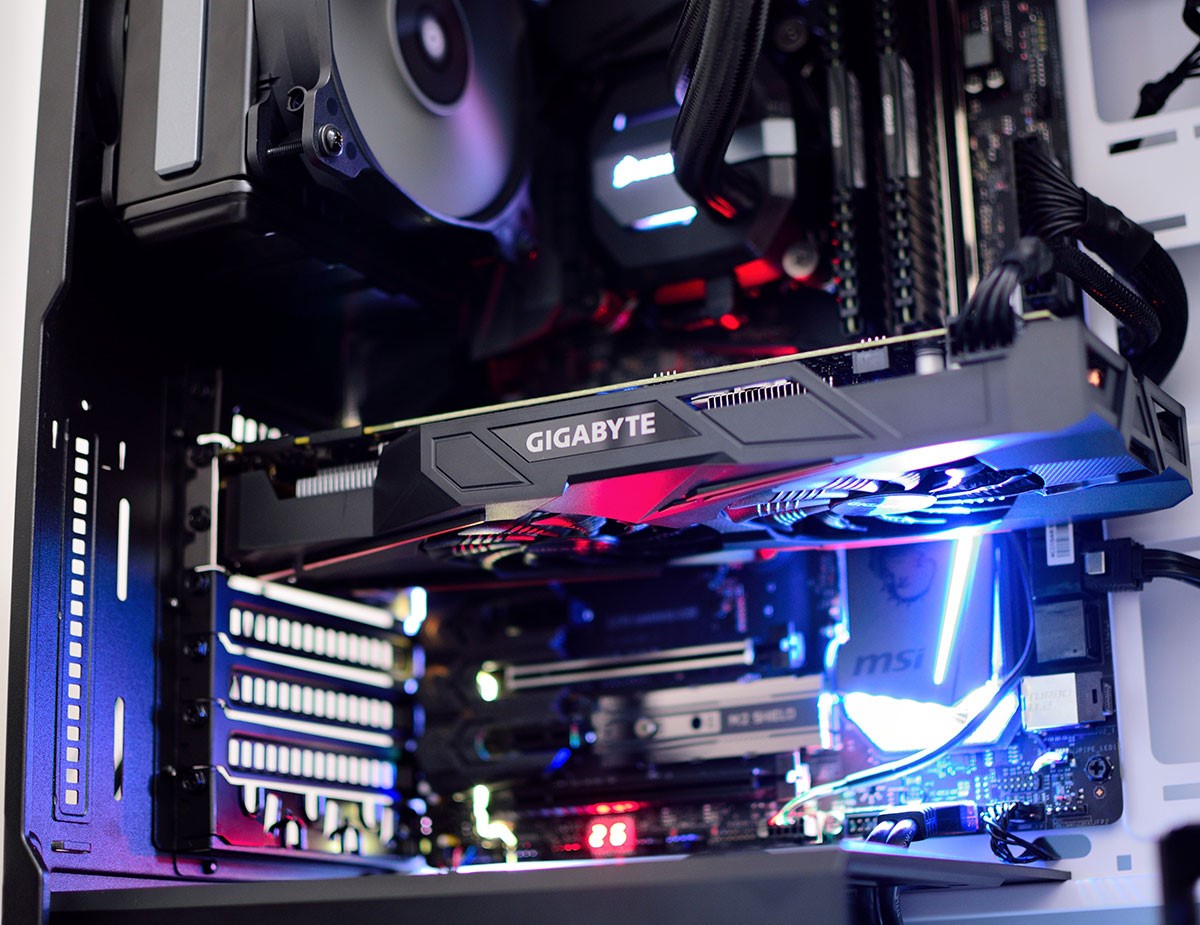
3. Convert It into a Media Center: Fit your old PC case with a mini-ITX motherboard, add a powerful graphics card, and install a media center software like Kodi. Your transformed PC case will become a versatile entertainment hub for streaming movies, TV shows, and music.
4. Build a NAS (Network-Attached Storage): Turn your old PC case into a NAS by installing multiple hard drives, setting up RAID configurations, and installing NAS software. This will provide a centralized storage solution for securely storing and accessing files from any device on your network.
5. Create a DIY Security Camera System: With some hardware modifications and the installation of surveillance software, your old PC case can be transformed into a DIY security camera system. Utilize existing USB ports or add camera cards for monitoring your property.
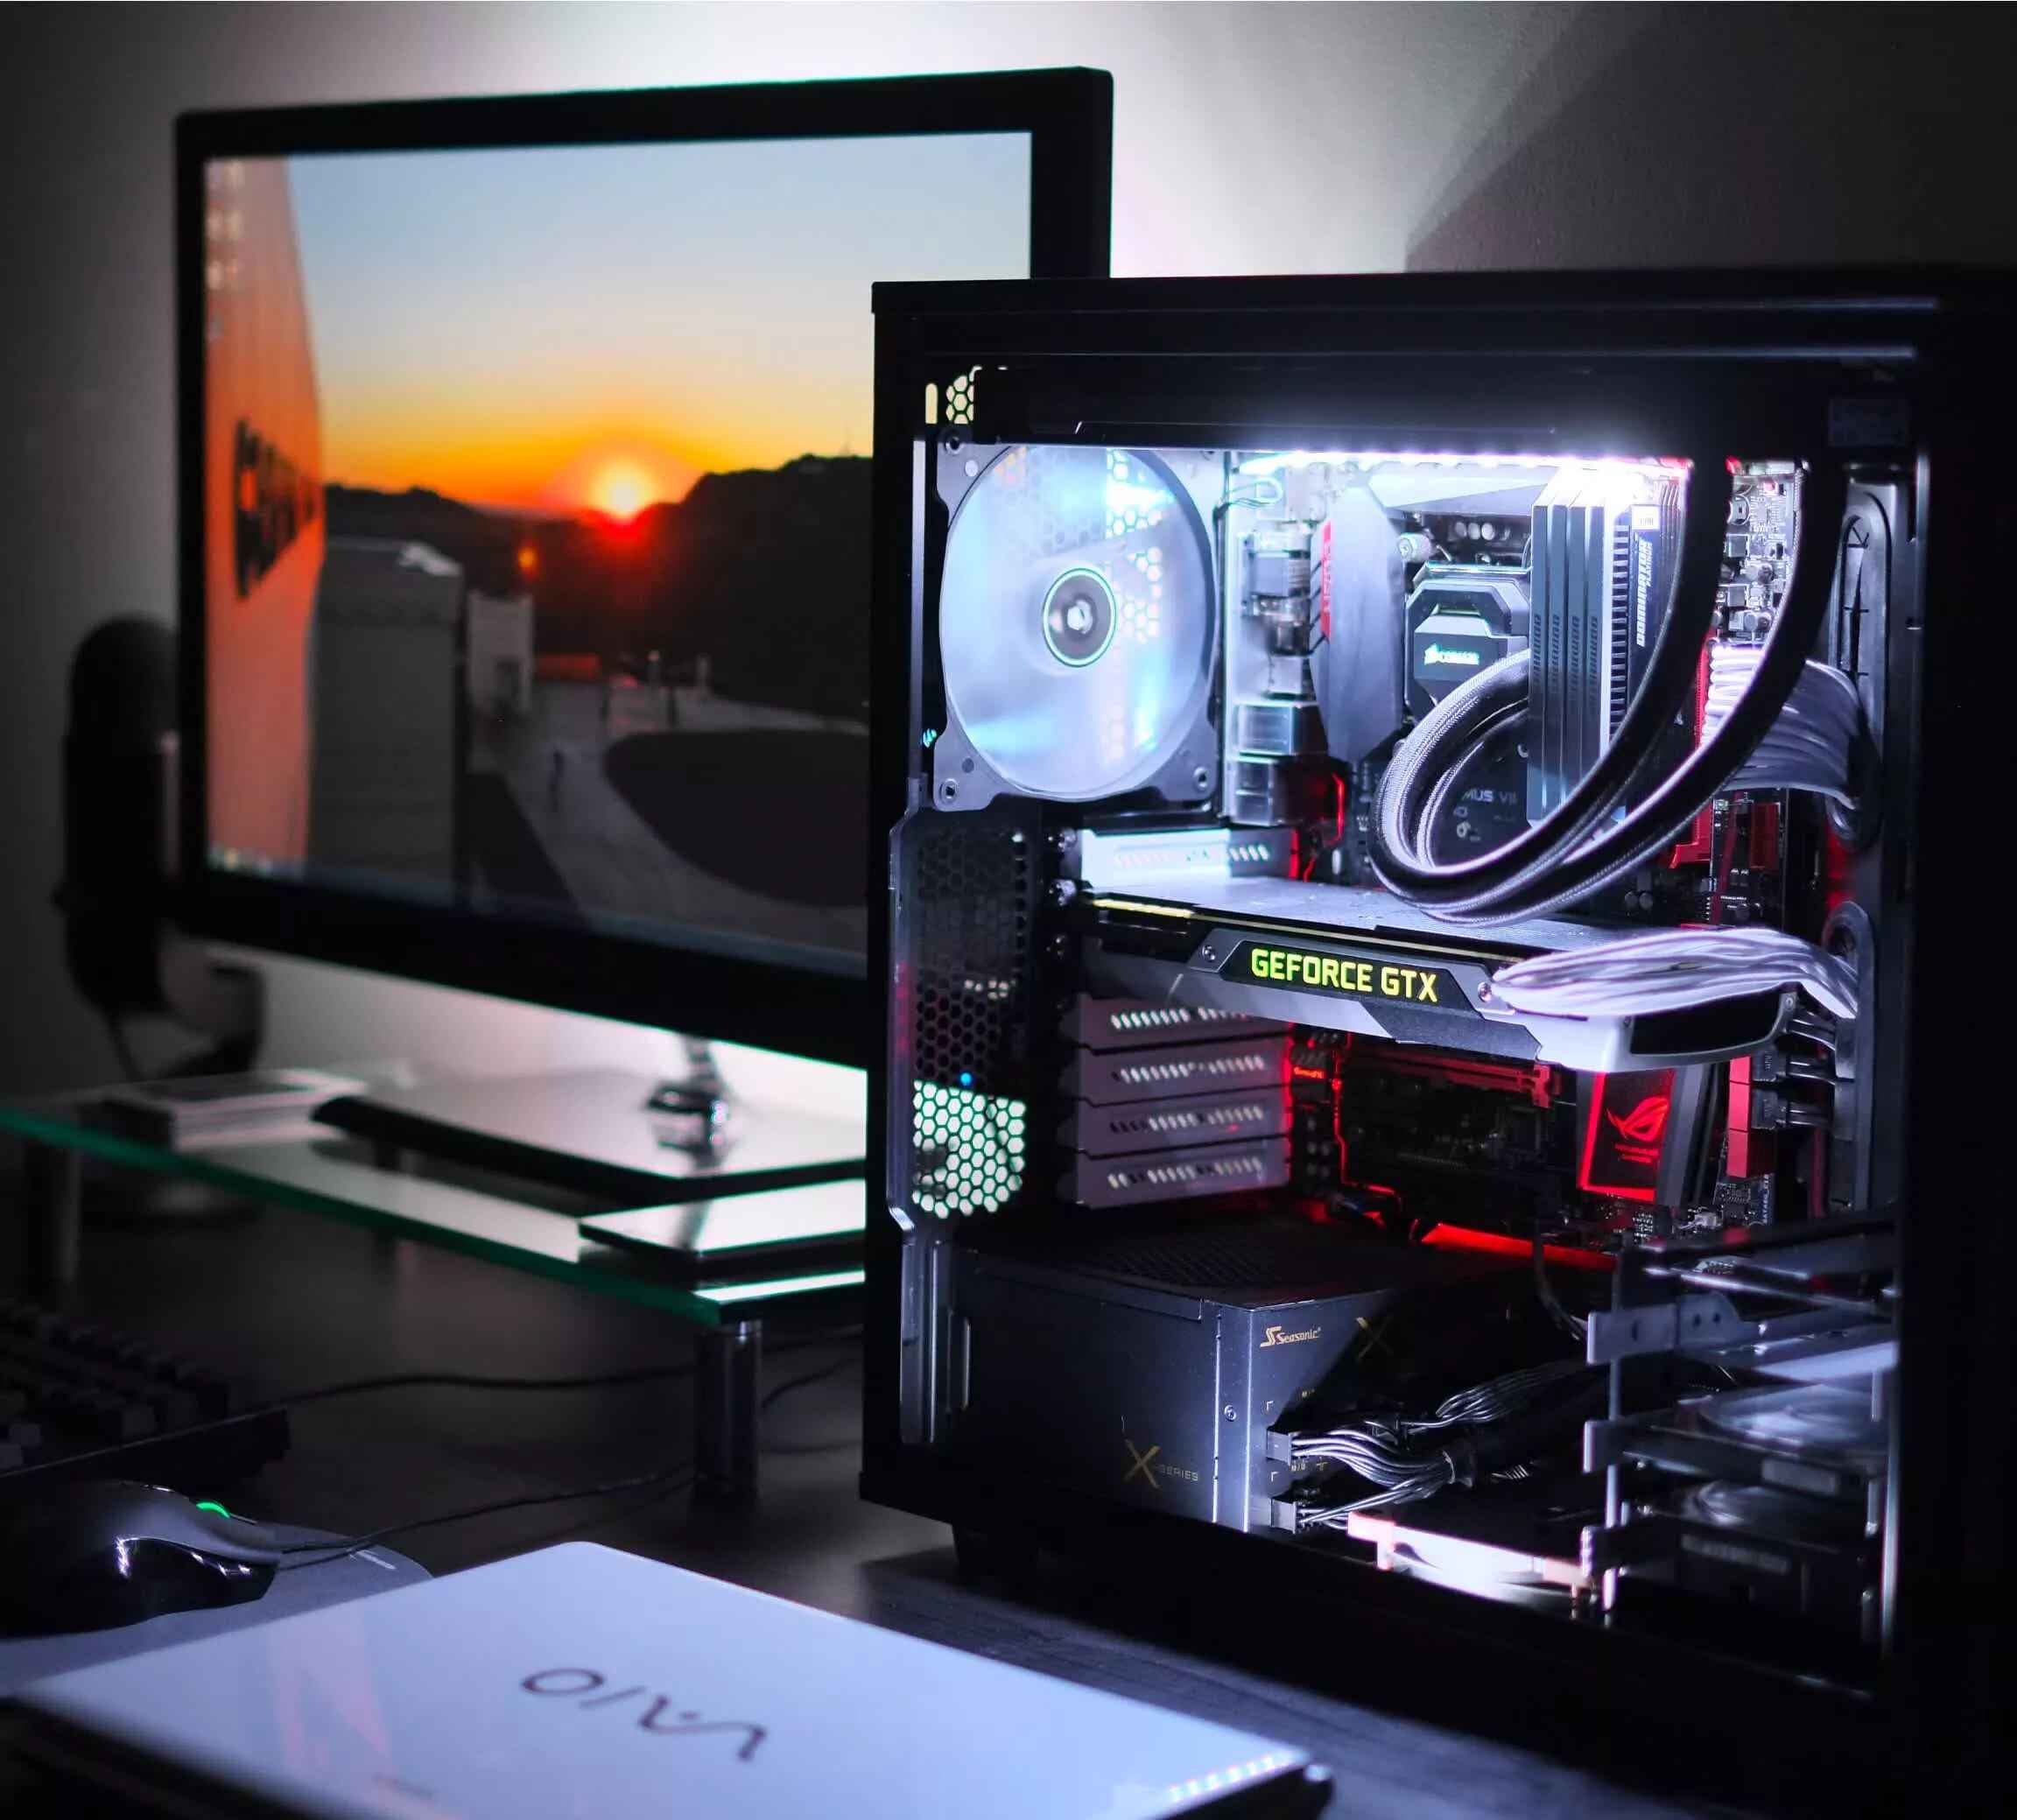
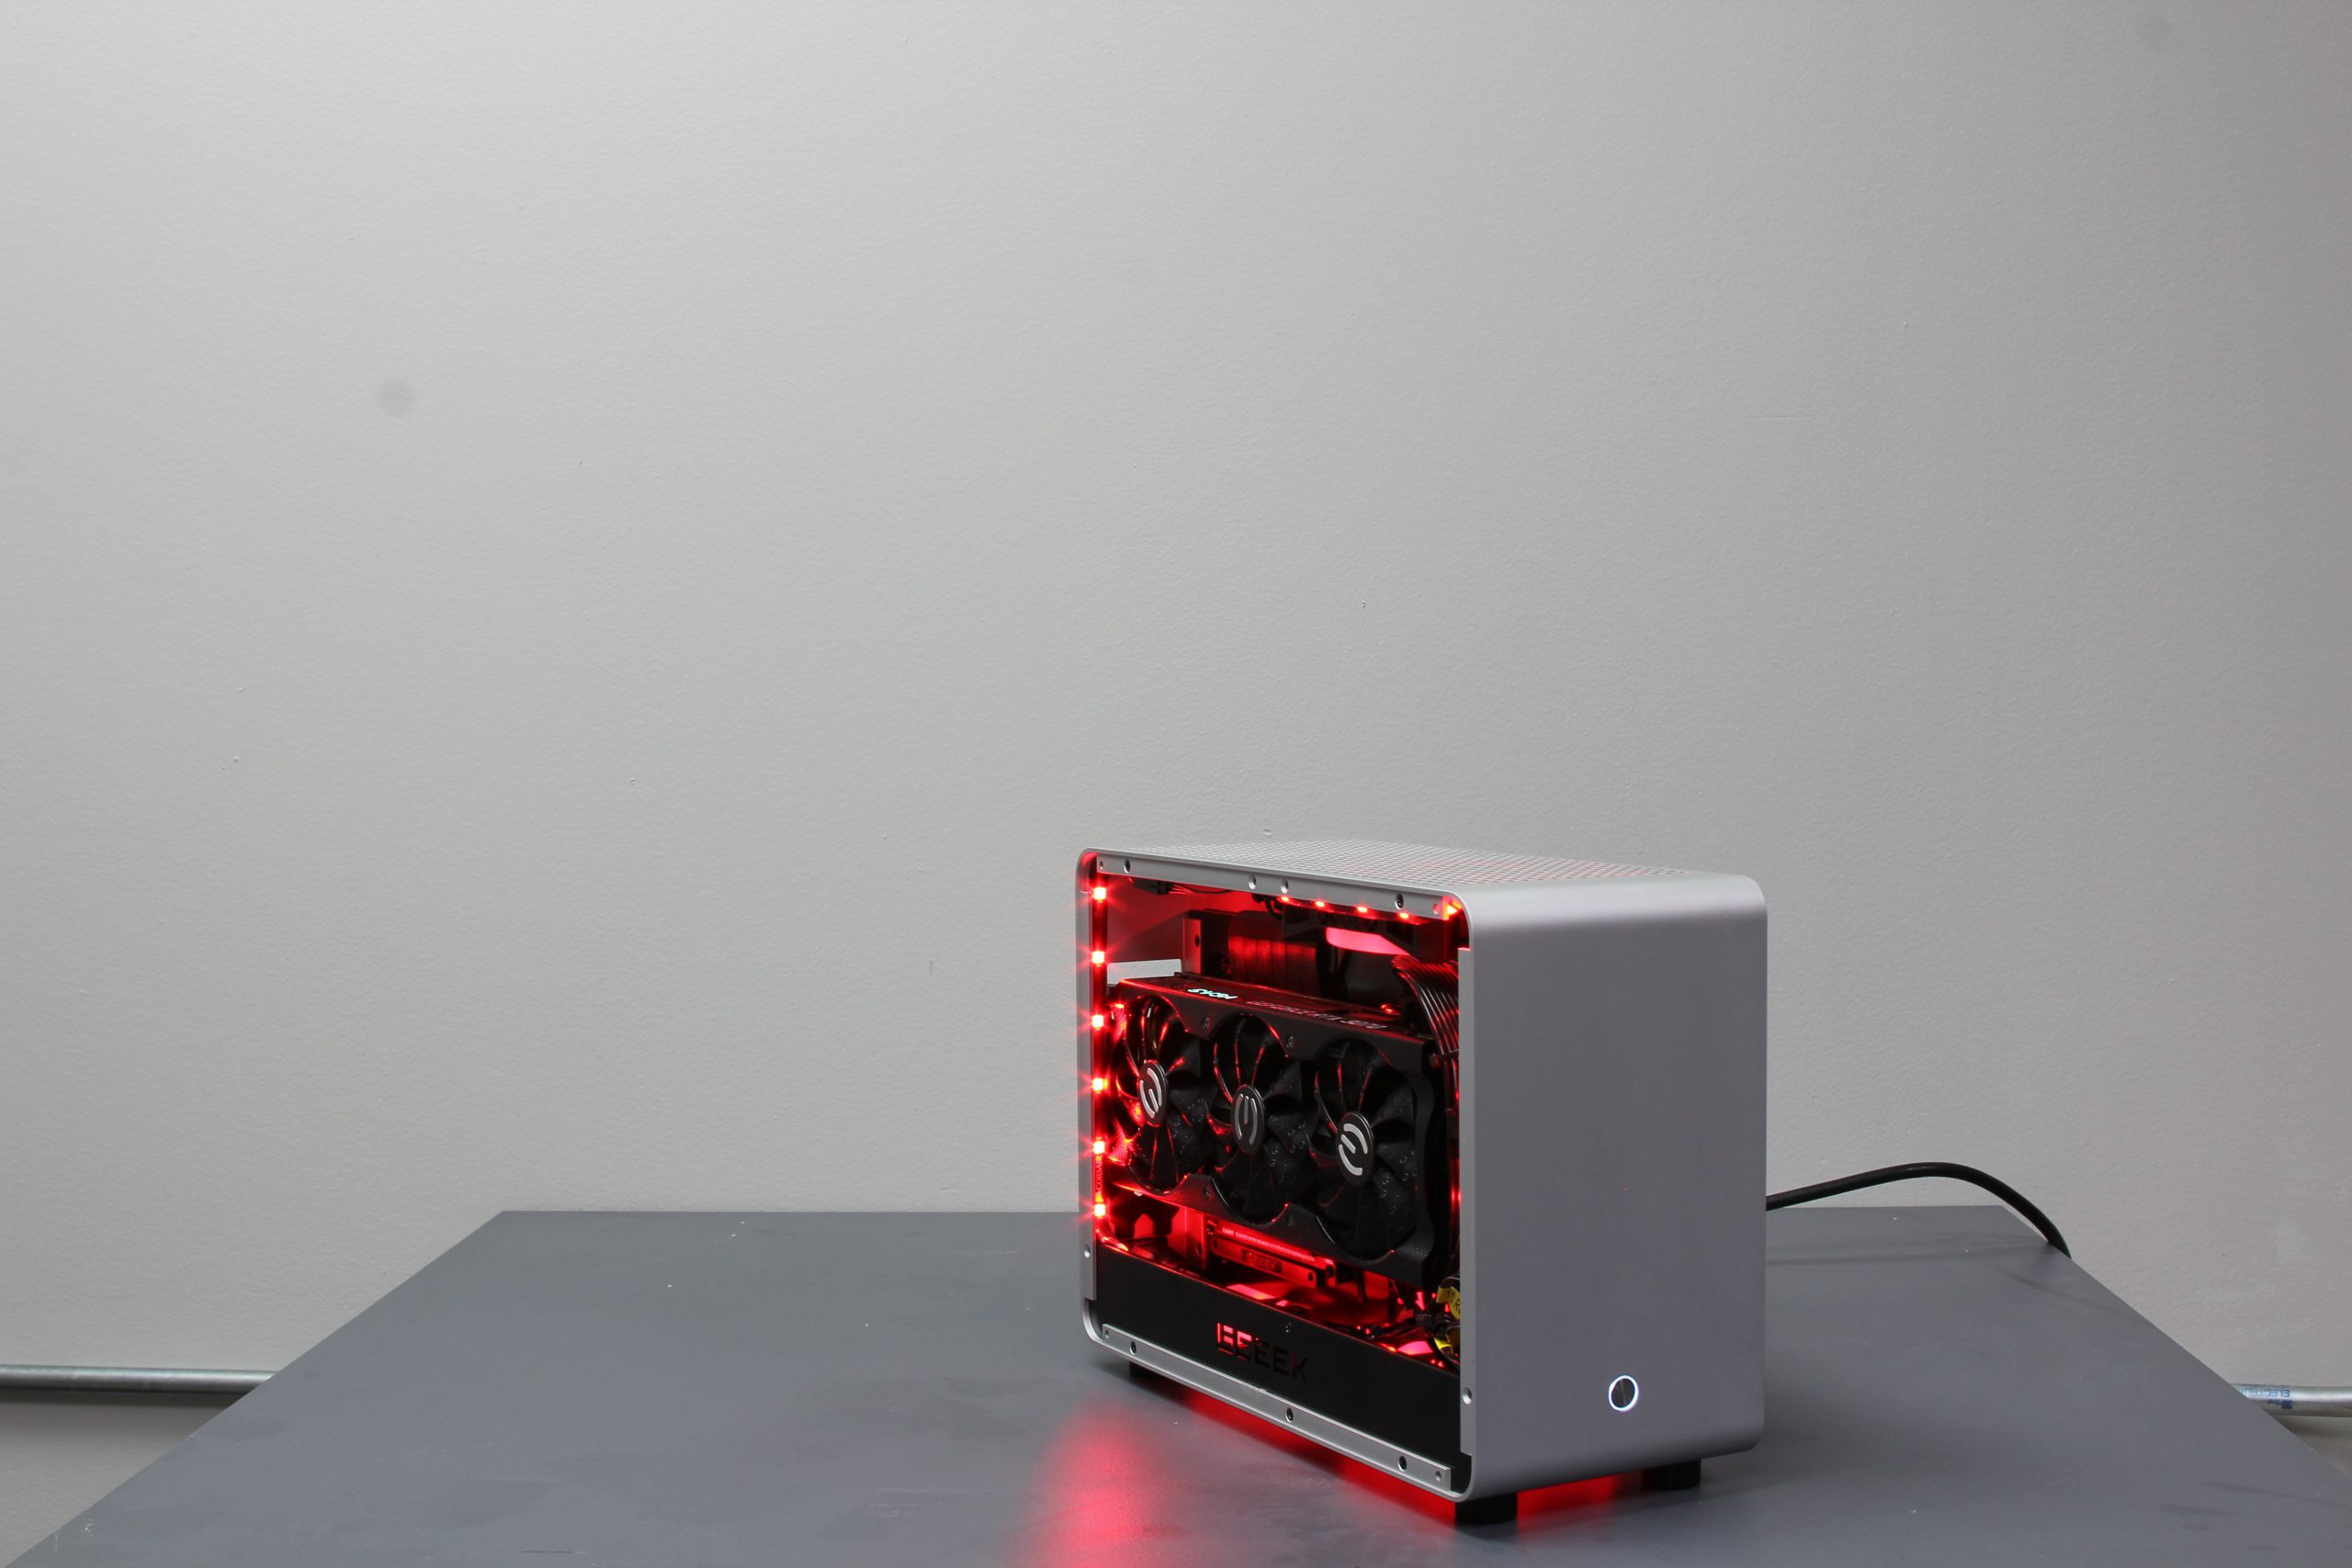
6. Design a Custom PC Case Mod: Tap into your creative side and give your old PC case a unique makeover. Cut custom shapes, install LED lights, and create a one-of-a-kind PC case mod that showcases your personal style and adds flair to your computing setup.
7. Make a Unique Flower Planter: Remove unnecessary components, add drainage holes, and fill your old PC case with soil. The result? A quirky and eye-catching flower planter that adds a touch of greenery to your desk, garden, or balcony.
8. Craft a Mini Greenhouse: Convert your old PC case into a mini greenhouse for growing small plants, herbs, or even seedlings. Seal the case, add shelves, and install small grow lights to create a controlled environment for your green thumb endeavors.
9. Build a Home Network Router: Re-purpose your old PC case by installing a router motherboard and configuring it as a home network router. This allows you to have more control over your network settings and potentially enhance internet speed and performance.
10. Turn It into a DJ Booth or Audio System Cabinet: If you’re into music and DJing, transform your old PC case into a stylish DJ booth or an audio system cabinet. Add a mixer, some speakers, and other audio equipment to create a dedicated space for your musical pursuits.
The possibilities are endless when it comes to repurposing an old PC case. These ideas will inspire you to get creative and give your old hardware a new purpose. So, instead of letting it collect dust, put your old PC case to good use and enjoy the satisfaction of a DIY project that brings new life to old technology.
Turn It into a Home Server
Have you ever considered turning your old PC case into a versatile home server? With its ample space and existing cooling capabilities, an old PC case makes for an ideal housing for a home server setup. By repurposing your old PC case as a home server, you can take advantage of its storage capacity, connectivity options, and processing power to create a personal cloud storage, media server, or even a web server.
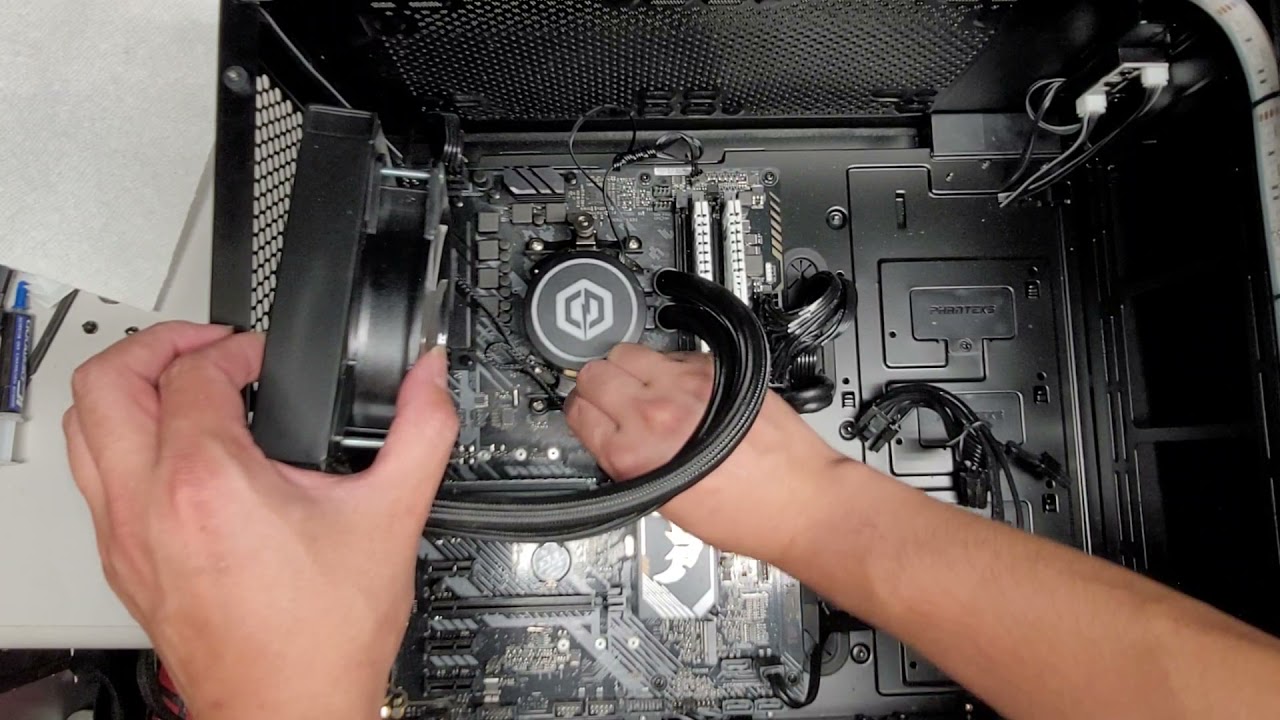
To transform your old PC case into a home server, start by selecting a low-power motherboard that fits the case’s form factor. Mini-ITX motherboards are a great option, providing the necessary processing capabilities while allowing you to maximize the available space. Install the chosen motherboard, ensuring that it is securely mounted and properly connected to the power supply and other components.
Next, add multiple storage drives to your home server to create ample storage space for your files, media, and data. Whether you use traditional hard disk drives (HDDs) or solid-state drives (SSDs) depends on your preferences and storage needs. Consider configuring your drives in a RAID (Redundant Array of Independent Disks) array for data redundancy and increased performance.
Once the hardware setup is complete, it’s time to choose the appropriate operating system for your home server. There are several options available, including open-source solutions like FreeNAS or Linux-based distributions such as Ubuntu Server. These operating systems provide robust file sharing capabilities, media streaming functions, and remote access features for managing your server from anywhere.
Setting up your home server also involves configuring network settings, security measures, and user access controls. Ensure that your server is connected to your home network with a stable and secure internet connection. This will allow you to access your files and media from other devices within your network or remotely over the internet.
With your home server up and running, you can store and access files, stream media to compatible devices, and even host your websites or web applications. Whether you want to have centralized file storage, a self-hosted media library, or a personal cloud storage solution, repurposing your old PC case as a home server provides endless possibilities for customization and personalization.
So, don’t let your old PC case go to waste. Instead, repurpose it into a powerful and functional home server. Not only will you breathe new life into your old hardware, but you’ll also have the satisfaction of creating a customized solution that fits your specific needs.
Transform It into a Retro Gaming Console
If you have a penchant for nostalgia and love retro gaming, why not repurpose your old PC case into a retro gaming console? With a few modifications and the right software, you can transform your old hardware into a gaming paradise that takes you back to the golden age of video games.
To start, select a suitable PC case that can accommodate your gaming console components. Look for a spacious case that provides enough room for installing a mini-ITX motherboard, a graphics card, and other necessary hardware. Ensure that the case has proper ventilation and cooling options to prevent overheating during gameplay.
Once you have chosen the perfect PC case, it’s time to install the required components. Begin by installing a mini-ITX motherboard that supports your desired retro gaming software. Next, add a compatible graphics card to ensure smooth gameplay and visual enhancements. Remember to connect the necessary cables, such as power cables, data cables, and audio cables, to the appropriate ports.
After installing the hardware, you’ll need to select and install suitable gaming emulator software. Emulator software allows you to play games from various retro consoles on your PC. Popular options include RetroArch, MAME (Multiple Arcade Machine Emulator), and Dolphin for GameCube and Wii games.
Before you start gaming, you’ll need to acquire ROM files of your favorite retro games. These can be legally obtained if you own original game cartridges or downloaded from trusted sources if they are no longer commercially available. Make sure to place the ROM files in the appropriate emulator software directory for easy access during gameplay.
To control your retro gaming console, connect your preferred controllers to the PC case. You can use USB controllers, adapter cables for original console controllers, or even wireless options for a cable-free experience. Once connected, configure the controller settings within the emulator software to ensure smooth and accurate gameplay.
With your retro gaming console set up, you can now dive into the world of classic games. Relive your favorite childhood memories by playing iconic titles such as Super Mario Bros, Sonic the Hedgehog, or The Legend of Zelda. Enjoy the pixel art, memorable soundtracks, and addictive gameplay that made these games legendary.
The beauty of repurposing your old PC case into a retro gaming console is not only the nostalgia it invokes but also the flexibility and customization options it offers. You can easily add or remove games, change emulator settings, and even customize the case’s appearance with retro-themed decals or LED lights.
So, why let your old PC case collect dust when it can bring back the joy of retro gaming? Repurposing it into a retro gaming console allows you to enjoy your favorite classic games in a nostalgic and unique way. Get ready to embark on a gaming journey that takes you back in time while appreciating the gaming advancements of today.
Convert It into a Media Center
If you have an old PC case lying around and want to upgrade your home entertainment setup, why not repurpose it into a media center? By converting your old PC case into a dedicated media center, you can enjoy a seamless multimedia experience and easily access your favorite movies, TV shows, music, and more.
To begin, select a PC case that can accommodate the necessary components for a media center setup. Look for a case with sufficient space to house a mini-ITX motherboard, a powerful graphics card for smooth video playback, and additional storage options for your media files. Make sure the case has proper ventilation to prevent overheating during long periods of usage.
Once you have your PC case ready, start by installing a mini-ITX motherboard that supports multimedia applications. This will serve as the central hub for your media center. Connect it to the power supply, storage drives, and any other peripherals required for audio or video output.
Next, install a media center software program, such as Kodi or Plex, on your PC. These software options provide a user-friendly interface for organizing and accessing your media collection. You can customize the interface, add artwork and metadata for your media, and create playlists for easy navigation.
To enhance your media center experience, consider adding a powerful graphics card that can handle high-definition video playback and support audio over HDMI or other output options. This will ensure smooth and crisp visuals, as well as immersive audio, when watching movies or streaming content. Connect your PC to your television or a large monitor for a cinematic viewing experience.
To store and access your media files, you can either use the existing storage drives in your old PC case or add new ones if needed. Consider using large-capacity hard drives or solid-state drives to accommodate your growing media library. Organize your files properly, create folders for different genres or categories, and ensure your media center software recognizes and indexes them correctly.
To control your media center, you can use a wireless keyboard, mouse, or a dedicated media center remote. This will allow you to navigate through menus, control playback, and adjust settings comfortably from your couch or preferred viewing spot.
Additionally, you might want to connect your media center to your home network to access streaming services, download updates, or even share media files with other devices. Make sure your media center is connected via an Ethernet cable or Wi-Fi and configure the necessary network settings for seamless connectivity.
With your old PC case transformed into a media center, kick back, relax, and enjoy your favorite movies, TV shows, or music. From streaming services like Netflix and Spotify to playing your personal media collection, your media center will provide endless entertainment options right at your fingertips.
Repurposing your old PC case into a media center not only breathes new life into your hardware but also offers a convenient and centralized solution for your multimedia needs. Take advantage of the versatility and customization options a media center provides, and elevate your home entertainment experience.
Build a NAS (Network-Attached Storage)
Repurposing your old PC case into a NAS (Network-Attached Storage) is a practical and cost-effective solution for creating a centralized storage system. By transforming your old hardware into a NAS, you can securely store and access your files, documents, media, and backups from any device on your home network.
To start building your NAS, select a PC case that can accommodate multiple hard drives. Look for a case with enough drive bays and good airflow to prevent overheating. Consider the form factor of your chosen case and the type of hard drives you plan to use, such as 3.5-inch HDDs or 2.5-inch SSDs.
Once you have your PC case, it’s time to choose the right hardware components. Install a suitable motherboard that supports your desired storage capacity and connectivity options. A mini-ITX or micro-ATX motherboard may be sufficient for most home NAS setups. Additionally, select a power supply unit that provides sufficient wattage to handle the power requirements of multiple hard drives.
Next, add the hard drives to your NAS. Depending on your needs and budget, you can opt for traditional hard disk drives (HDDs) or solid-state drives (SSDs). Consider your desired storage capacity, performance requirements, and data redundancy needs. RAID (Redundant Array of Independent Disks) configurations, such as RAID 1 or RAID 5, can offer data redundancy and fault tolerance.
Install an operating system on your NAS that is specifically designed for this purpose, such as FreeNAS or OpenMediaVault. These operating systems provide a user-friendly interface to manage your storage, create user accounts, and set up file sharing protocols like Samba or NFS. They also offer additional features like data encryption, remote access, and backup options.
Configure your network settings to ensure your NAS is connected to your home network. Connect your NAS to your router using an Ethernet cable and configure an IP address and hostname. This will allow you to access your NAS from any device on your network and enable seamless file sharing and data transfers.
Once your NAS setup is complete, you can start storing and accessing your files. Use network protocols such as SMB (Server Message Block), AFP (Apple Filing Protocol), or NFS (Network File System) to connect to your NAS from your computer, laptop, or media devices. Create separate folders or shares for different types of files, and set up user permissions to control access.
The beauty of building your own NAS is the scalability it offers. You can expand your storage capacity by adding more hard drives or upgrade to larger capacity drives as needed. Additionally, you can enable features such as remote access or media server capabilities to further enhance your NAS functionality.
Building a NAS from your old PC case not only repurposes your hardware but also provides a reliable and flexible storage solution for your home network. Take advantage of the convenience and security offered by a NAS and keep your files safe and easily accessible from any device within your home.
Create a DIY Security Camera System
If you’re looking for an innovative way to repurpose your old PC case, why not transform it into a DIY security camera system? By repurposing your old hardware, you can create a cost-effective and customizable surveillance solution for your home or office.
To start building your DIY security camera system, select a PC case that can accommodate the camera components and provide proper airflow for cooling. Look for a case with ample space to mount cameras, run cables, and install necessary hardware. Ensure that the case has proper ventilation to prevent overheating.
Next, consider the number of cameras you want to install and their specifications. You can choose from a wide range of surveillance cameras, including wired or wireless options, indoor or outdoor cameras, and cameras with varying resolutions and features. Plan the placement of cameras based on your specific surveillance needs, such as covering entryways, monitoring common areas, or securing valuable assets.
Install the chosen cameras in strategic locations within your property. Ensure that they are properly connected to the power supply and that the camera cables are neatly organized within the PC case. Use additional hardware like camera mounts or brackets to securely position the cameras for optimal monitoring angles.
To record and store the camera footage, you’ll need to install surveillance software on your old PC. Various open-source software options, such as ZoneMinder or Blue Iris, offer robust features for camera management, recording, and remote access. Set up your software to configure motion detection alerts, scheduled recordings, and storage preferences.
Connect your cameras to your PC either directly through USB ports or using capture cards for analog cameras. Ensure that the cameras are recognized by your surveillance software and set up the appropriate settings for each camera, such as motion sensitivity, resolution, and frame rate.
For remote access to your security camera system, configure your network settings and set up port forwarding on your router. This will allow you to access your cameras and view live or recorded footage from outside your home network, using a computer or mobile device. Alternatively, you can also access your camera feeds over the local network using a dedicated monitor attached to your PC.
With your DIY security camera system up and running, you can monitor your property, deter potential intruders, and have peace of mind knowing that your premises are protected. Depending on your surveillance software, you can receive real-time alerts, review recorded footage, and even integrate your system with other smart home devices.
Repurposing your old PC case into a DIY security camera system offers a cost-effective solution for home or small business surveillance. Take advantage of your existing hardware and create a customized system that fits your specific security needs, all while repurposing and extending the lifespan of your old PC case.
Design a Custom PC Case Mod
If you have a creative streak and want to showcase your personality, repurposing your old PC case into a custom case mod is the perfect project for you. With a custom PC case mod, you can transform your old hardware into a unique and visually stunning work of art that reflects your style and creativity.
To begin your custom case mod, select an old PC case that you wish to transform. Look for a case with a design that you find appealing or one that provides ample space for your modifications. It’s important to choose a case that allows for easy access to the internal components, as you’ll need to make adjustments and additions to bring your vision to life.
Now it’s time to let your imagination run wild! Decide on a theme or concept for your custom case mod. It could be anything from a futuristic sci-fi design to a retro-inspired arcade cabinet. Consider your interests, hobbies, or favorite games, movies, or TV shows for inspiration. Sketch out your ideas and plan the modifications you want to make to the case.
Once you have a clear vision, start making the physical modifications to your old PC case. This may involve cutting holes, adding custom panels, or creating unique designs on the case using tools such as a Dremel, jigsaw, or paint. Experiment with different techniques and materials to achieve the desired effect.
As you modify the case, take into account functionality and practicality. Ensure that the modifications you make do not obstruct airflow, impede the functionality of the hardware, or compromise the structural integrity of the case.
To enhance the visual appeal of your custom case mod, consider adding LED lighting. You can install RGB LED strips or individual LEDs to illuminate specific areas of the case or create mesmerizing lighting effects. Experiment with different color combinations and patterns to achieve the desired ambience.
Furthermore, you can personalize your custom case mod by adding decals, custom graphics, or even hand-painted artwork. Consider using vinyl stickers, stencils, or airbrushing techniques to add unique designs or logos that align with your custom case mod theme.
Don’t forget to pay attention to cable management. Properly organize and route the cables inside the case to maintain a clean and professional look. Utilize cable ties, zip-ties, or cable management accessories to secure and hide the cables, ensuring they do not obstruct the view of your custom modifications.
Once your custom case mod is complete, assemble the hardware back into the case and power it up to admire your work. Share your creation with the PC modding community or showcase it at local events to inspire fellow enthusiasts and receive feedback on your craftsmanship.
Embarking on a custom PC case mod allows you to unleash your creativity and transform your old hardware into a visually stunning piece of art. Let your imagination guide you as you modify, paint, and personalize your old PC case into a unique creation that is truly one-of-a-kind.
Make a Unique Flower Planter
Repurposing your old PC case as a flower planter is a creative and quirky way to add a touch of uniqueness to your home decor. By transforming your old hardware into a unique flower planter, you can give your space a fresh and eco-friendly makeover while showcasing your love for technology and plants.
Start by selecting an old PC case that you want to repurpose as a flower planter. Consider the size and shape of the case, ensuring it has enough space to hold soil and accommodate your choice of plants. You can choose to repurpose a complete PC case or remove unnecessary components to create more room for the plants.
Once you have your PC case ready, it’s time to prepare it for planting. Drill several drainage holes in the bottom of the case to ensure proper water drainage and prevent waterlogging. You can also line the bottom of the case with a layer of gravel or small stones to further aid drainage.
Next, decide on the type of plants you want to grow in your unique flower planter. Consider the lighting conditions and the size of the plants to ensure they will thrive in the chosen space. You can opt for small succulents, low-maintenance ferns, colorful flowers, or even create your own miniature herb garden by planting herbs like basil, rosemary, or mint.
Fill your PC case planter with nutrient-rich soil, leaving enough space for the plants to grow. Ensure that the soil is well-drained and suitable for the type of plants you have chosen. Water the soil lightly before planting the chosen plants, gently placing them into the soil and securing them in place.
Place your unique flower planter in a well-lit area that suits the needs of your plants. Consider placing it near a window or on a balcony where it can receive ample sunlight, or use artificial grow lights to provide the necessary light if your plants require it.
To care for your unique flower planter, water the plants regularly and provide any necessary plant-specific care, such as fertilizing or pruning. Keep an eye on the moisture level in the soil and adjust watering accordingly to ensure your plants thrive.
Your repurposed PC case flower planter will not only serve as a vessel for your plants but also add a conversation piece and a touch of personality to your space. It’s a unique way to showcase your love for technology while embracing the beauty of nature.
Be creative and experiment with different arrangements, color schemes, and combinations of plants. Consider adding decorative elements like pebbles, ornaments, or even painting the case with vibrant colors to further personalize your flower planter.
Transforming your old PC case into a unique flower planter is a fun and eco-friendly way to repurpose your old hardware. It allows you to bring a piece of nature indoors while highlighting your creativity and passion for technology in a truly unconventional way.
Craft a Mini Greenhouse
If you’re an avid gardener or plant enthusiast, why not repurpose your old PC case into a mini greenhouse? With its transparent and enclosed structure, an old PC case can create the perfect environment for nurturing your plants, protecting them from harsh weather conditions, and extending your growing season.
To begin crafting your mini greenhouse, select a PC case that has enough space to accommodate your plants. Look for a case with a clear side panel or remove unnecessary components, ensuring that it offers enough height and depth for your plants to grow. It’s important to choose a case that allows for proper ventilation and easy access to your plants when needed.
Once you have your PC case, you’ll need to create the optimal environment for your plants. Place a tray or shallow container inside the case to serve as a water reservoir. This will help maintain proper humidity levels and provide a humid microclimate for your plants. You can also add a layer of small stones or gravel at the bottom of the case to improve drainage.
Next, create a suitable growing medium for your plants. Use a high-quality potting mix or create your own by combining different types of soil, compost, and organic matter. Ensure the growing medium provides proper nutrients and drainage for your plants’ roots.
Now it’s time to select the plants for your mini greenhouse. Choose plants that thrive in the conditions you can provide within the PC case, such as herbs, succulents, or small potted flowers. Consider the lighting requirements and space needed for growth when selecting your plants.
Carefully plant your chosen plants in the prepared growing medium, leaving enough space between them to allow for growth. Be mindful of the positioning of the plants, ensuring they receive adequate light and can access the water reservoir when necessary.
To maintain a suitable environment within your mini greenhouse, monitor the humidity and temperature levels. Open the PC case occasionally to allow for air circulation and prevent excessive moisture buildup. Adjust the ventilation by partially opening the case or using a small fan to control temperature and optimize airflow.
Regularly water your plants as needed. Keep an eye on the moisture levels in the growing medium and adjust watering accordingly. Be careful not to overwater, as this can lead to root rot and other plant health issues.
Additionally, consider using artificial lighting, such as LED grow lights, to supplement natural light and provide the necessary light spectrum for optimal plant growth. Place the lights within the mini greenhouse to ensure that all plants receive adequate illumination.
With your mini greenhouse set up, enjoy the benefits of an extended growing season and an ideal environment for your plants. Observe their growth, make any necessary adjustments, and revel in the joy of having your own mini oasis of greenery within an old PC case.
Repurposing your old PC case into a mini greenhouse not only provides a unique and visually appealing display but also allows you to practice sustainable gardening and appreciate the beauty of plants in a confined space. Embrace the possibilities and bring your gardening hobby to new heights with a DIY mini greenhouse.
Build a Home Network Router
If you’re looking for more control over your home network or want to enhance your internet speed and performance, repurposing your old PC case to build a home network router is a viable option. By harnessing the power of your old hardware, you can create a customized and robust networking solution that meets your specific needs.
To begin building your home network router, select a PC case that can accommodate the necessary components and has proper ventilation for cooling. Look for a case that offers ample space for a motherboard, network interfaces, and additional components you may need.
Next, choose a suitable motherboard that supports the necessary networking features. Look for a motherboard with multiple Ethernet ports or expansion slots for network interface cards (NICs). Consider the type of connections you require, such as Gigabit Ethernet or Wi-Fi, and select the appropriate NICs or wireless cards.
Install the chosen motherboard and NICs into your PC case, ensuring they are securely mounted and properly connected to each other. Connect the necessary cables, including power cables, data cables, and any additional cables required for network connectivity or external devices.
Choose a suitable operating system to run on your home network router. Linux-based distributions like pfSense or DD-WRT offer advanced networking features and customization options. Install the operating system on your router and configure it to suit your network requirements, including IP addressing, firewall rules, and port forwarding.
Configure your network settings to ensure that your home network router is connected to your internet service provider (ISP). This may involve setting up DHCP or static IP addressing, configuring DNS servers, and establishing network interfaces for WAN (Wide Area Network) and LAN (Local Area Network) connections.
Set up additional features to optimize your home network router, such as Quality of Service (QoS) to prioritize certain types of network traffic, VPN (Virtual Private Network) capabilities for secure remote access, or even DNS filtering to block unwanted content. Customize your router settings to meet your specific needs and enhance your network performance.
Consider implementing security measures to protect your home network and personal data. Enable password protection, disable unused services or ports, and regularly update your router’s firmware to ensure you have the latest security patches. Implementing basic security practices will help safeguard your network from unauthorized access.
With your home network router set up, connect your devices to your new router and enjoy the benefits of a customized and optimized network. Experience faster internet speed, enhanced network stability, and the freedom to shape your network environment according to your needs.
Building a home network router not only repurposes your old PC case but also provides you with greater control, security, and flexibility over your home network. Utilize the power of your old hardware and create a networking solution that best suits your requirements, ensuring a seamless and efficient home network experience.
Turn It into a DJ Booth or Audio System Cabinet
If you have a passion for music and DJing, repurposing your old PC case into a DJ booth or audio system cabinet is a creative and practical way to elevate your music experience. By transforming your old hardware, you can create a dedicated space for your DJ setup or house your audio equipment in a stylish and personalized cabinet.
To turn your old PC case into a DJ booth or audio system cabinet, select a case that has enough space to accommodate your equipment. Consider the size of your DJ controller, mixers, turntables, or other audio components you want to include in your setup. Look for a case with proper ventilation to prevent overheating and ample room to handle cables and connections.
Once you have your PC case, modify it as needed to suit your DJ or audio setup. This may involve removing unnecessary components, cutting holes for audio and power cables, or adding shelves or racks to house your equipment. Plan the layout of your DJ booth or audio system cabinet carefully to ensure efficient use of space and easy access to your gear.
Consider adding LED lighting to enhance the aesthetics and create an atmosphere that matches your musical style. Install LED strips inside the case or on the edges to add a dynamic and vibrant lighting effect. Choose colors that complement your setup and customize the lighting patterns to suit your taste.
Ensure that your DJ booth or audio system cabinet offers convenient cable management options. Use cable ties, cable clips, or cable management accessories to route and secure your cables neatly. This will not only reduce clutter but also make it easier to connect and disconnect your equipment when needed.
Personalize your DJ booth or audio system cabinet to reflect your style. Consider adding decals, artwork, or designs that are inspired by music, your favorite artists, or your DJ persona. Customize the exterior of the case using paint, vinyl wraps, or even 3D printed elements to make it uniquely yours.
Create a comfortable and immersive DJing experience by adding a suitable DJ booth table or stand that complements your setup. Invest in a sturdy and ergonomic DJ table or build one yourself using materials that match the aesthetics of your DJ booth or audio system cabinet.
Set up your DJ equipment or audio components inside the repurposed PC case, ensuring everything is securely positioned and connections are properly made. Test the functionality of your setup before using it for performances or enjoyment. Make any necessary adjustments to optimize your workflow and ensure everything is working smoothly.
With your DJ booth or audio system cabinet complete, let the music take center stage. This dedicated space allows you to fully immerse yourself in your DJing or audio experience without distractions. Showcase your talent, entertain your friends, or simply enjoy the pure joy of music within your custom-built DJ booth or audio system cabinet.
Repurposing your old PC case into a DJ booth or audio system cabinet not only repurposes your old hardware but also provides a stylish and practical solution for your music passion. Let your creativity shine and create a personal sanctuary where you can mix, play, and enjoy your favorite tunes to the fullest.
Conclusion
Repurposing an old PC case offers a multitude of creative possibilities that allow you to give new life to your outdated hardware. Whether you choose to convert it into a home server, retro gaming console, media center, NAS, security camera system, custom case mod, flower planter, mini greenhouse, home network router, or DJ booth/audio system cabinet, repurposing your old PC case provides a fulfilling and meaningful DIY project.
Each of these repurposing ideas showcases the versatility and adaptability of an old PC case. From enhancing productivity and functionality to showcasing creativity and personal style, repurposing your old hardware offers a sustainable and eco-friendly way to keep it out of landfills while also satisfying your needs or interests.
By repurposing your old PC case, you not only rediscover the hidden potential in your old hardware but also have the satisfaction of creating something unique and personalized. From giving your home network a boost to enjoying retro gaming sessions or cultivating a mini oasis of greenery, the possibilities are truly endless.
Remember to unleash your creativity, experiment with different ideas, and personalize your repurposed PC case to reflect your passions and style. Whether you’re a tech enthusiast, a gaming aficionado, a music lover, or a DIY enthusiast, repurposing an old PC case allows you to merge your interests and create something truly extraordinary.
So, before you discard your old PC case, consider the repurposing ideas mentioned here and embark on a new DIY project. Tap into your imagination, use your technical skills, and enjoy the journey of transforming an obsolete piece of technology into something functional, unique, and visually striking.
Get creative, have fun, and harness the potential of your old PC case to bring fresh and exciting possibilities into your life.