Introduction
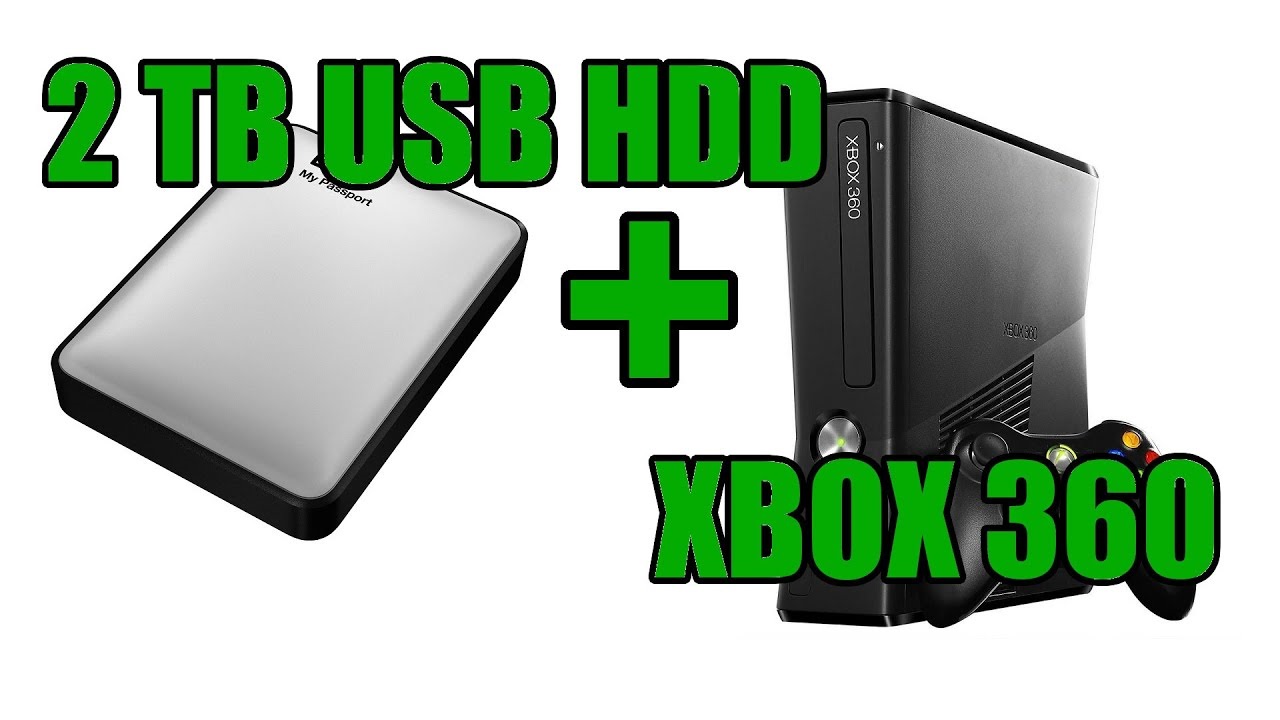
Welcome to the world of gaming on Xbox 360! As a passionate gamer, you know the importance of having enough storage space to accommodate your growing collection of games, save files, and multimedia content. This is where an external hard drive comes in handy. By connecting an external hard drive to your Xbox 360, you can expand your storage capacity and enjoy the convenience of having all your games and media in one place.
In this article, we will guide you on how to use an external hard drive on Xbox 360. Whether you’re a new Xbox 360 owner looking to expand storage or a seasoned gamer looking to optimize your gaming experience, we have you covered.
Choosing the right external hard drive is the first step in the process. We will discuss factors to consider, such as storage capacity and compatibility, to ensure you make the best choice for your gaming needs.
Once you have your external hard drive, formatting it for use with Xbox 360 is crucial. We’ll walk you through the formatting process step by step, ensuring that your hard drive is optimized for Xbox 360 gaming.
Connecting the external hard drive to your Xbox 360 is the next step. We’ll provide clear instructions on how to establish a connection and ensure that your external hard drive is recognized by your console.
After the connection is established, transferring game data to the external hard drive becomes imperative. We’ll explain how to move your game saves, downloadable content, and arcade games to your external storage, freeing up valuable space on your console’s internal hard drive.
Managing game data on the external hard drive is crucial to avoid clutter and organize your gaming library efficiently. We’ll explore ways to organize your games, create folders, and keep everything easily accessible.
But it’s not just about games. An external hard drive can also serve as a repository for your multimedia files. We’ll guide you on how to store and play music, videos, and other media files on your external hard drive, so you can have entertainment at your fingertips.
Inevitably, there may be times when you encounter issues or face challenges with your external hard drive on Xbox 360. We’ll provide troubleshooting tips and common solutions to help you overcome these hurdles and get back to gaming seamlessly.
Now that we’ve given you a brief overview, let’s dive deeper into each step and equip you with the knowledge to make the most of your external hard drive on Xbox 360. So, grab your controller, sit back, and get ready to expand your gaming world!
Choosing the Right External Hard Drive
When it comes to choosing an external hard drive for your Xbox 360, there are a few key factors to consider. These factors will ensure that you select a hard drive that is compatible with your console and provides sufficient storage space for your gaming needs.
Storage Capacity: One of the most important considerations is the storage capacity of the external hard drive. Xbox 360 games can take up a significant amount of space, so it’s essential to choose a hard drive with ample storage. Ideally, opt for a hard drive with a minimum capacity of 500GB or higher to accommodate your growing game library.
Compatibility: Not all external hard drives are compatible with Xbox 360. The console supports USB 2.0 and USB 3.0 connectivity, so make sure the hard drive you choose has one of these interfaces. Additionally, it should be compatible with the Xbox 360 file system, which is based on FAT32. Most external hard drives come pre-formatted as NTFS, so you may need to reformat the drive to FAT32 to ensure compatibility.
Speed: Gaming requires fast data transfer speeds to ensure smooth gameplay and reduced loading times. Look for an external hard drive with a rotational speed of 7200 RPM for optimal performance. Higher RPM drives offer faster data access, enhancing your gaming experience.
Portability: If you plan to take your external hard drive with you, portability is a vital consideration. Look for a compact and lightweight option that is easy to transport. Some external hard drives are designed with rugged and shock-resistant features, making them ideal for gaming on the go.
Price: While it’s tempting to opt for the cheapest option, investing in a high-quality external hard drive will ensure longevity and reliable performance. Compare prices and read reviews to find a balance between affordability and quality.
Brand: Stick to reputable brands when selecting an external hard drive. Brands like Seagate, Western Digital, and Toshiba are known for producing reliable and durable hard drives that are compatible with Xbox 360.
By considering these factors, you can choose an external hard drive that meets your requirements and enhances your gaming experience. Now that you know what to look for, let’s move on to the next step: formatting the external hard drive for Xbox 360.
Formatting the External Hard Drive for Xbox 360
Before you can start using your external hard drive with Xbox 360, it needs to be formatted correctly. Formatting ensures that the hard drive is compatible with the console’s file system and allows you to utilize its full storage capacity. Here’s how to format the external hard drive for Xbox 360:
Step 1: Connect the Hard Drive: Plug the external hard drive into one of the USB ports on your Xbox 360 console. Make sure it’s connected securely.
Step 2: Access Storage Devices: From the Xbox 360 dashboard, navigate to the “Settings” tab and select “System Settings.” Then, choose “Storage” from the list of options.
Step 3: Select the External Hard Drive: In the “Storage” menu, you should see the external hard drive listed as a storage device. Click on it to select it.
Step 4: Format the Hard Drive: Once you’ve selected the external hard drive, choose the “Format” option from the available menu. Xbox 360 will give you a warning that formatting will erase all data on the hard drive. If there’s any data you want to keep, make sure you back it up before proceeding.
Step 5: Confirm the Formatting: Xbox 360 will ask you to confirm the formatting process. Read the warning carefully and, if you’re sure you want to format the hard drive, select “Yes.” The formatting process will begin, and it may take a few minutes to complete.
Step 6: Formatting Complete: Once the formatting is finished, you’ll receive a notification on your screen. Your external hard drive is now formatted for Xbox 360 and ready to use.
It’s important to note that formatting the external hard drive for use with Xbox 360 will erase all existing data on the drive. Therefore, ensure you’ve backed up any important files before proceeding with the formatting process.
If you’ve accidentally formatted the wrong drive or want to use the hard drive with a different device, you may need to reformat it to the appropriate file system compatible with that device.
Now that you’ve successfully formatted the external hard drive, it’s time to connect it to your Xbox 360 and start transferring your game data. In the next section, we’ll guide you through the process of connecting the external hard drive to your console.
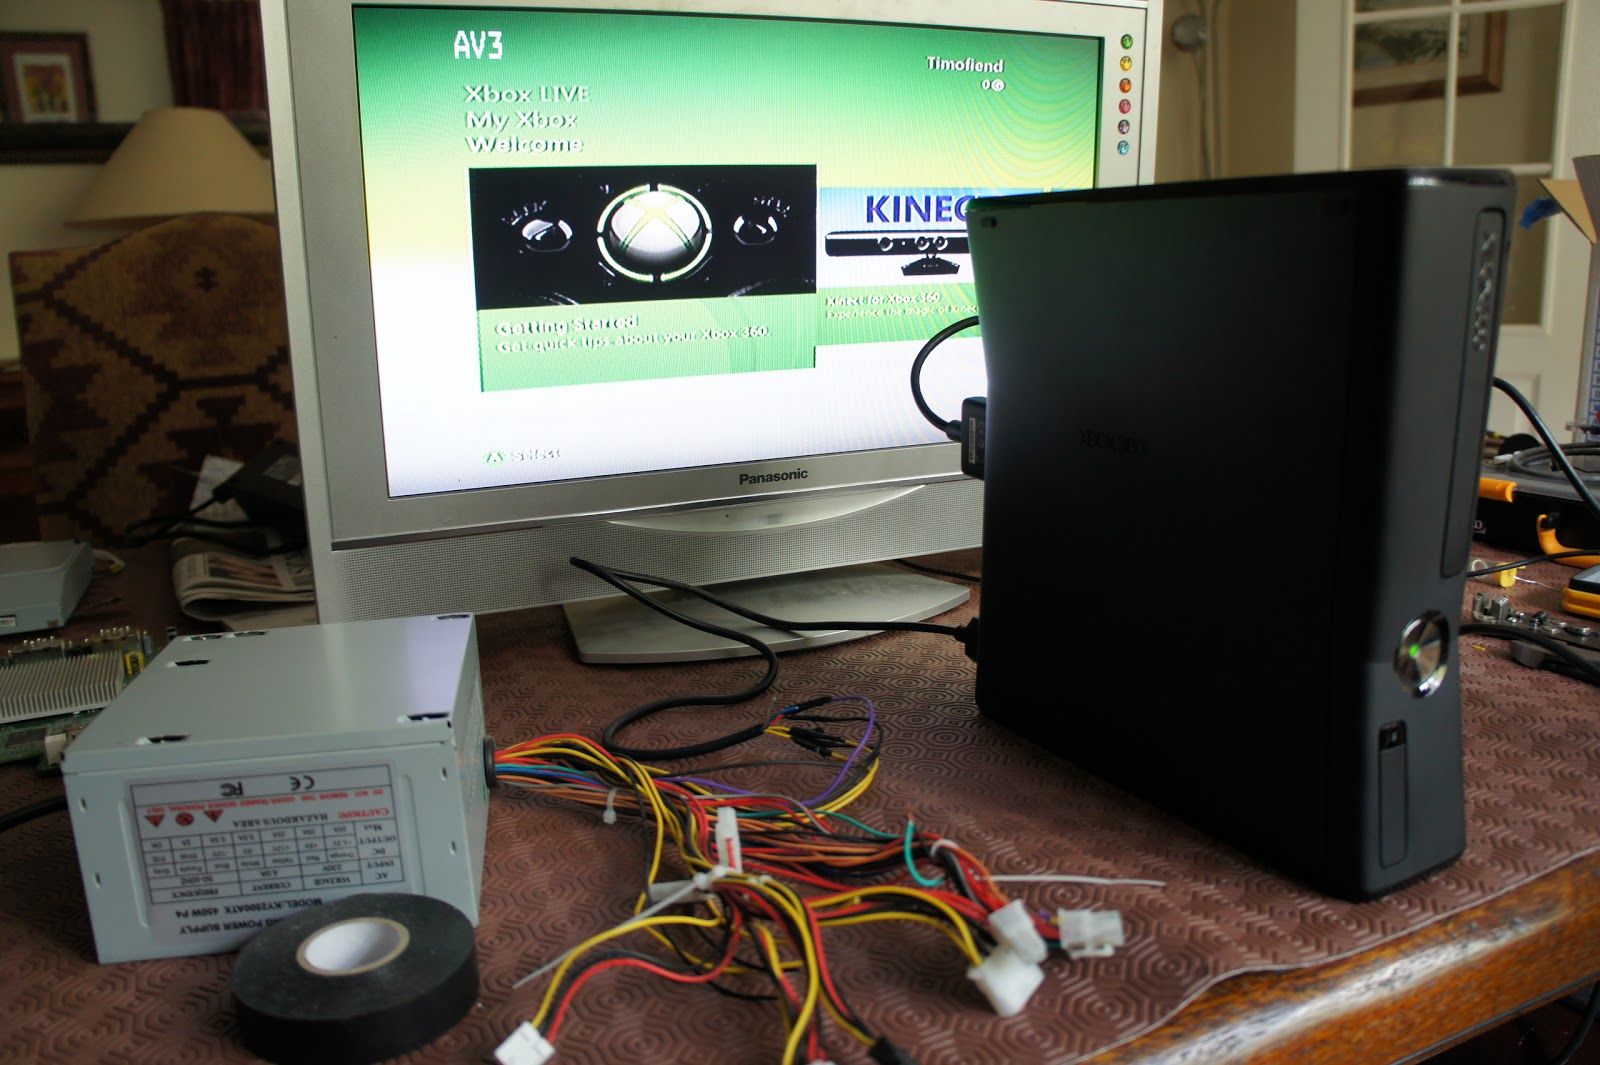
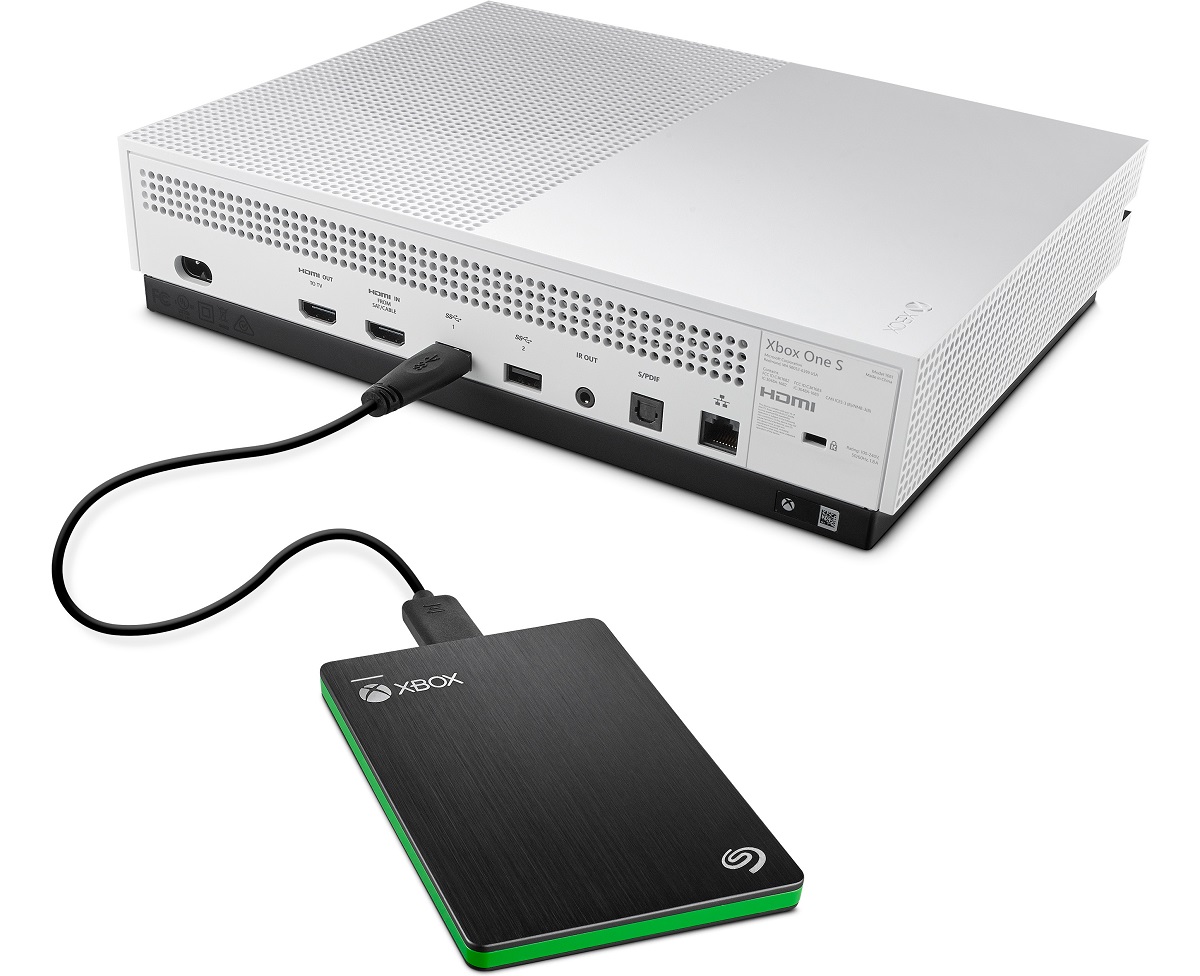
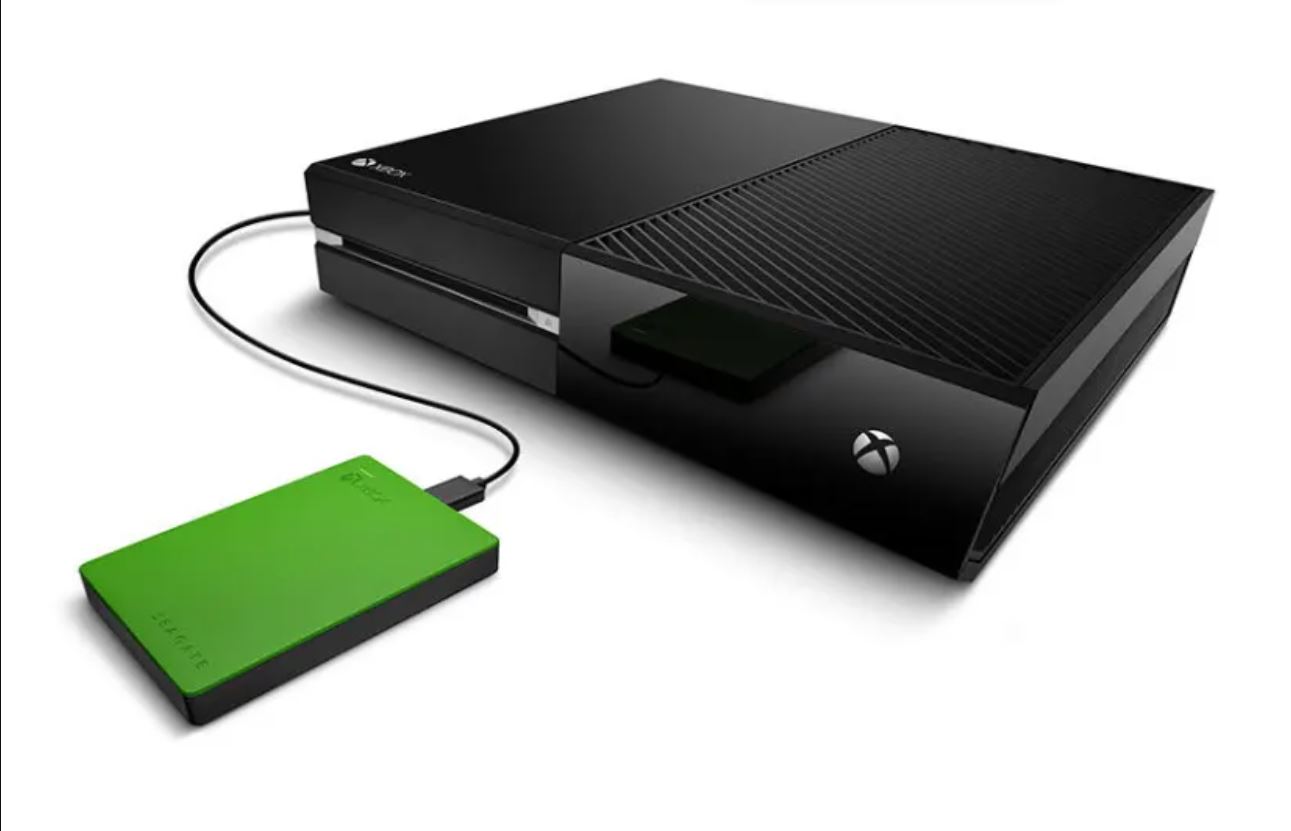
Connecting the External Hard Drive to Xbox 360
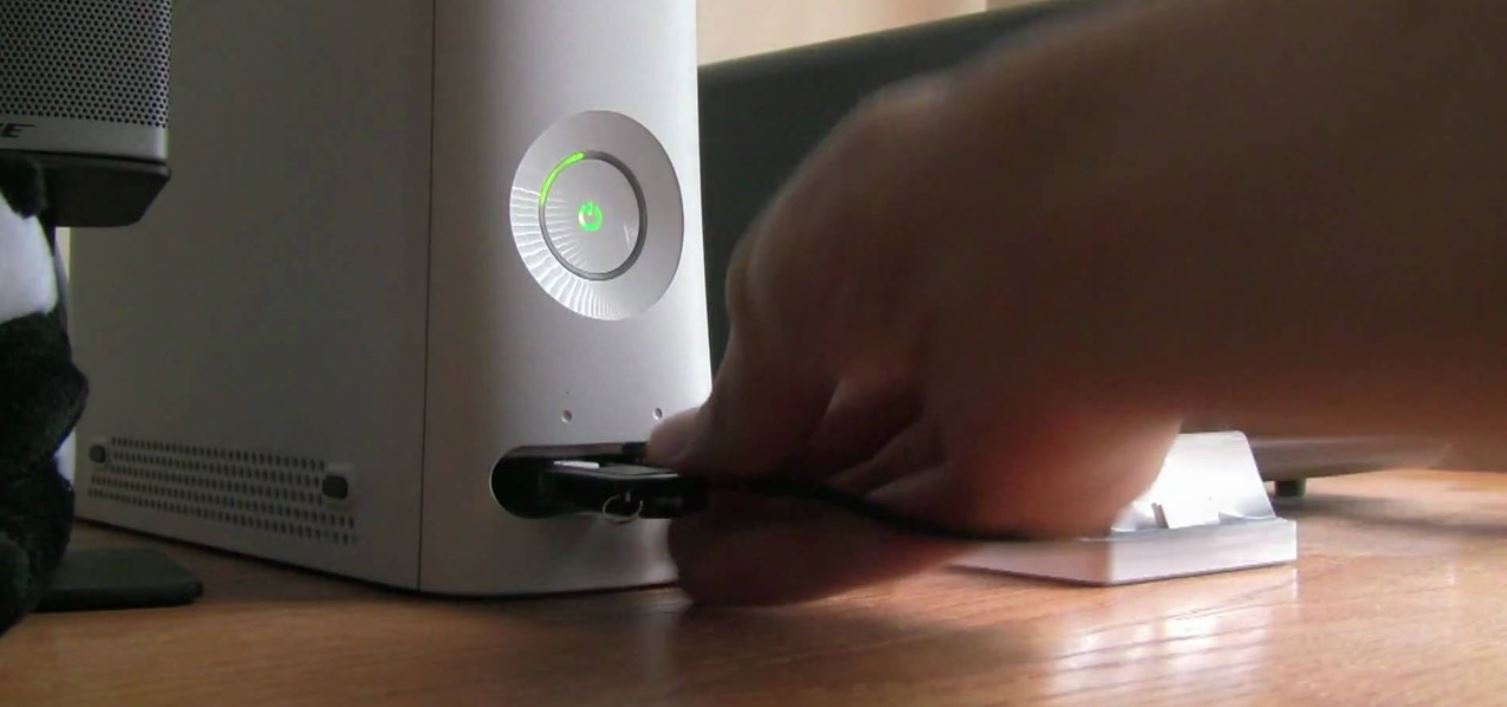
Now that you have formatted your external hard drive for Xbox 360, it’s time to connect it to your console. By establishing a secure connection, you can start utilizing the expanded storage space for your game data. Here’s how to connect the external hard drive to your Xbox 360:
Step 1: Power off your Xbox 360: Make sure your Xbox 360 is turned off before proceeding with the connection process. This will prevent any potential issues during the connection.
Step 2: Locate the USB ports: On the front or back of your Xbox 360 console, you’ll find one or more USB ports. These are usually rectangular-shaped ports where you can plug in your external hard drive.
Step 3: Connect the external hard drive: Take the USB cable of your external hard drive and plug it into one of the available USB ports on your Xbox 360. Ensure that the connection is secure and that the cable is inserted fully into the port.
Step 4: Power on your Xbox 360: Turn on your Xbox 360 console and wait for it to boot up. The console will automatically detect the connected external hard drive.
Step 5: Confirm the connection: To verify that your Xbox 360 has recognized the external hard drive, navigate to the “Settings” tab on the Xbox 360 dashboard, select “System Settings,” and then choose “Storage.” You should see the external hard drive listed as one of the storage devices.
If you don’t see the external hard drive listed, double-check the connection and make sure it’s properly plugged into the USB port. You may also need to power cycle your Xbox 360 by turning it off and unplugging it from the power source for a few seconds before plugging it back in and powering it on.
Once you’ve established the connection and verified that your Xbox 360 recognizes the external hard drive, you’re ready to start transferring your game data. In the next section, we’ll guide you through the process of transferring game data to the external hard drive.
Transferring Game Data to the External Hard Drive
With your external hard drive connected to your Xbox 360, it’s time to transfer your game data to the new storage device. This process will allow you to free up space on your console’s internal hard drive and ensure that your games and game saves are safely stored on the external drive. Here’s how to transfer game data to the external hard drive:
Step 1: Access Storage Settings: Navigate to the “Settings” tab on the Xbox 360 dashboard and select “System Settings.” Then, choose “Storage” from the list of options.
Step 2: Select Move or Copy: In the “Storage” menu, you’ll see a list of storage devices, including the internal hard drive and the newly connected external hard drive. Select the internal hard drive and choose “Move” or “Copy” depending on your preference.
Step 3: Choose Content to Transfer: After selecting “Move” or “Copy,” you’ll be presented with a list of content types, such as games, game saves, and downloadable content. Select the content you want to transfer to the external hard drive. You can select individual items or choose to move or copy all content.
Step 4: Confirm the Transfer: Xbox 360 will display a screen with a progress bar indicating the transfer process. Confirm the transfer by selecting “Yes” or “OK.” The transfer can take some time, depending on the amount of data being transferred.
Step 5: Verify the Transfer: Once the transfer is complete, you can go back to the “Storage” menu and check if the selected content has been successfully transferred to the external hard drive. You should see the content listed under the external hard drive storage.
You can repeat this process for each game or content type you want to transfer to the external hard drive. Remember to leave enough space on the internal hard drive for system updates and any content you want to keep locally.
It’s worth noting that copying content to the external hard drive allows you to keep a copy on both the internal and external drives, while moving content removes it from the internal drive and exclusively stores it on the external drive. Choose the option that suits your storage preference.
By transferring game data to the external hard drive, you are optimizing storage space on your console and ensuring that your game progress and downloadable content are securely stored. In the next section, we’ll explore how to manage game data on the external hard drive.
Managing Game Data on the External Hard Drive
Now that you have successfully transferred your game data to the external hard drive, it’s important to manage and organize it effectively. Proper management will allow you to easily access your games, game saves, and downloadable content, ensuring a smooth gaming experience. Here are some tips for managing game data on the external hard drive:
Creating Folders: Take advantage of the folder organization feature on Xbox 360 to keep your game data organized. Create separate folders for different game genres, multiplayer games, or specific franchises. This way, you can easily locate and access your games based on your preferences.
Renaming Files: If you have multiple versions of the same game or different saved game files, consider renaming them to avoid confusion. Use descriptive names that indicate the progress or specific achievements associated with each save file.
Deleting Unwanted Content: As your game library grows, you may want to delete games or content that you no longer play or need. Deleting unwanted content from the external hard drive will free up valuable storage space for new games or multimedia files.
Updating Games: Some games require updates or patches to ensure optimal performance. When connected to Xbox Live, the external hard drive will automatically download and install updates for games stored on it. Regularly check for updates to keep your games up to date.
Moving Content Back to the Internal Hard Drive: If you want to play a specific game from the internal hard drive or free up space on the external hard drive, you can move content back to the internal storage. Use the same process as transferring game data but select the internal hard drive as the destination.
Game Saves: Game saves are crucial for preserving your progress in games. Ensure that you regularly back up your game saves, either by copying them to your computer or using cloud storage services, to prevent any loss of progress in the event of a hard drive failure or accidental deletion.
By effectively managing your game data on the external hard drive, you can enhance your gaming experience and easily access your favorite games and content. Take the time to organize your files and regularly update and maintain your game library for a seamless gaming experience.
In addition to games, you can also utilize the external hard drive to store multimedia files such as music, videos, and photos. We’ll explore how to use the external hard drive for multimedia storage in the next section.
Using the External Hard Drive to Store Multimedia Files
Aside from storing games and game data, your external hard drive can also serve as a convenient repository for your multimedia files. With its ample storage capacity, you can store your favorite music, videos, and photos all in one place. Here’s how to use the external hard drive to store and enjoy multimedia files:
Step 1: Organize Your Files: Create folders on your external hard drive to organize your multimedia files. You can create separate folders for music, videos, and photos, or categorize them based on genre or event.
Step 2: Transfer Your Files: Connect the external hard drive to your computer and transfer your multimedia files to the appropriate folders on the drive. Ensure that the files are compatible with Xbox 360 supported formats, such as MP3 for music and AVI or MP4 for videos.
Step 3: Connect the External Hard Drive to Xbox 360: Safely disconnect the external hard drive from your computer and connect it to one of the USB ports on your Xbox 360. Ensure a secure connection.
Step 4: Access Your Multimedia Files: From the Xbox 360 dashboard, navigate to the “Media” tab and select the type of multimedia file you want to access, such as “Music,” “Videos,” or “Pictures.” Choose the external hard drive as the source and browse through your organized folders to locate the files you want to enjoy.
Step 5: Enjoy your Multimedia: With your multimedia files stored on the external hard drive, you can now enjoy your favorite music, videos, and photos directly on your Xbox 360. Use the media player features to control playback, create playlists, or even display a slideshow of your photos.
Remember to keep your multimedia files organized and regularly update your library as you add new content. You can easily add or remove files by connecting the external hard drive back to your computer and managing the files accordingly.
Using the external hard drive to store your multimedia files not only frees up space on your console’s internal hard drive, but it also provides convenience and accessibility to enjoy your favorite media on the big screen.
In the next section, we’ll address some common issues you may encounter when using an external hard drive on Xbox 360 and provide troubleshooting tips to help you resolve them.
Troubleshooting Common Issues
While using an external hard drive with Xbox 360 can greatly enhance your gaming experience, you may encounter some common issues along the way. Understanding and troubleshooting these issues can help you overcome any obstacles that may arise. Here are some common issues and their possible solutions:
Issue: External Hard Drive Not Recognized: If your Xbox 360 console does not recognize the external hard drive, ensure that it is properly connected to the USB port. Try using a different USB port on the console or a different USB cable. Restart your console and check if the hard drive is detected. If the issue persists, try formatting the hard drive again following the previously mentioned instructions.
Issue: Slow Data Transfer: If you experience slow data transfer speeds when moving or copying files to the external hard drive, it may be due to the USB port or cable. Ensure that you are using a USB 3.0 port and a compatible USB 3.0 cable for faster data transfer. Avoid using USB hubs or extensions, as they can affect transfer speeds.
Issue: Limited Storage Capacity: If you find that you’re running out of storage space on your external hard drive, consider deleting unnecessary files or transferring them to another storage device. You can also manage your game data and remove games or content you no longer need to free up space. If needed, consider investing in a larger capacity external hard drive.
Issue: Compatibility with Xbox Live: Some external hard drives may not be compatible with Xbox Live. If you encounter any issues accessing Xbox Live or connecting to online multiplayer, try disconnecting the external hard drive and see if the problem persists. If the issue is resolved, consider using a different external hard drive or contacting Xbox Support for further assistance.
Issue: Corrupted Files: In rare instances, files on the external hard drive may become corrupted. If you receive error messages or experience issues with specific files, try transferring them again from your computer or deleting them and re-downloading them. If the problem persists, consider formatting the external hard drive and starting fresh.
If you continue to experience issues or encounter other problems with your external hard drive on Xbox 360, it’s recommended to consult the Xbox Support website or contact their customer support for further assistance. They can provide specific troubleshooting steps or guide you through any technical issues you may encounter.
By being aware of these common issues and knowing how to troubleshoot them, you can effectively overcome any challenges and fully enjoy the benefits of using an external hard drive with your Xbox 360.
With the troubleshooting tips provided, you can maximize your gaming experience and ensure smooth operation of your external hard drive on Xbox 360. Now you’re equipped with the knowledge to make the most of your gaming setup and expand your storage capabilities.
Conclusion
In conclusion, utilizing an external hard drive with your Xbox 360 can greatly enhance your gaming experience by providing additional storage space and organization for your game data and multimedia files. By choosing the right external hard drive, formatting it correctly, and effectively managing your content, you can optimize your gaming setup and ensure a seamless gaming experience.
When selecting an external hard drive, consider factors such as storage capacity, compatibility, speed, and portability. These considerations will ensure that you choose a hard drive that meets your specific gaming needs.
Formatting the external hard drive for use with Xbox 360 is essential to ensure compatibility with the console’s file system. Follow the step-by-step instructions provided to format the drive properly and establish a secure connection.
Transferring game data and managing it on the external hard drive will help you free up space on your console’s internal hard drive and keep your games organized. Use folders, rename files, and regularly update your library to ensure easy accessibility and a clutter-free experience.
Don’t forget that your external hard drive can also serve as a storage hub for your multimedia files. Store your favorite music, videos, and photos on the drive, and enjoy them directly on your Xbox 360.
If you encounter any issues along the way, refer to the troubleshooting tips provided to help you overcome common problems. Whether it’s ensuring the hard drive is recognized, troubleshooting slow transfer speeds, dealing with limited storage capacity, or resolving compatibility issues, there are solutions available.
By following the guidance provided in this article, you can make the most of your external hard drive on Xbox 360 and create an optimized gaming setup. Now, grab your controller, dive into your gaming library, and experience the joy of having all your games and multimedia files at your fingertips. Happy gaming!