Benefits of Using a POS System on an iPad
Point of Sale (POS) systems have revolutionized the way businesses handle transactions and manage their operations. With the advent of technology, traditional cash registers are being replaced by more advanced and efficient solutions. Using a POS system on an iPad offers numerous benefits that can streamline your business processes and enhance customer experiences.
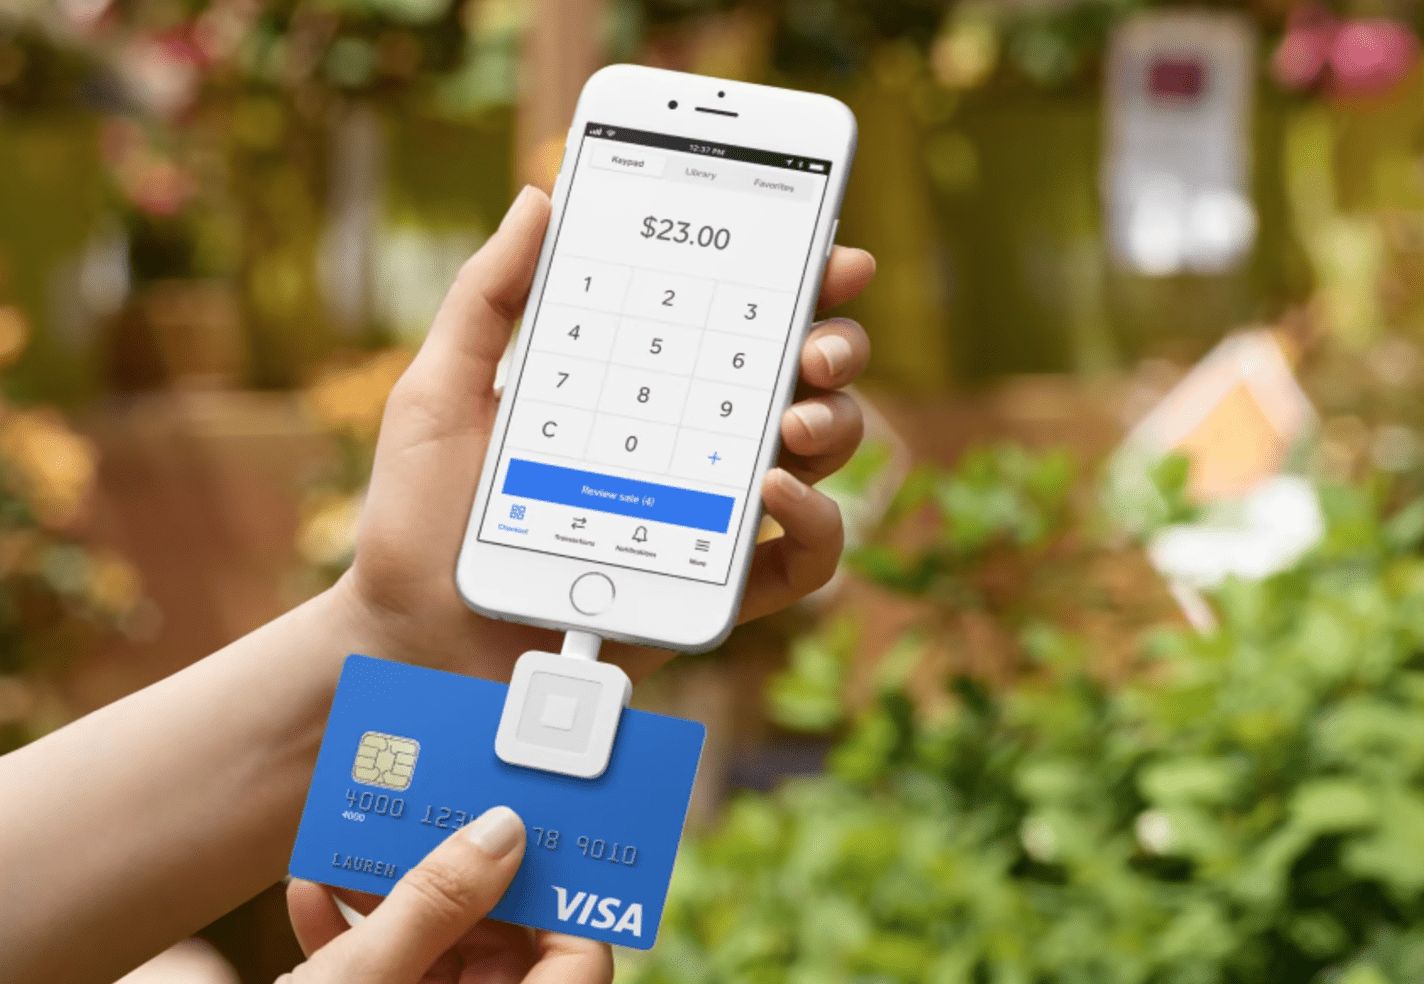
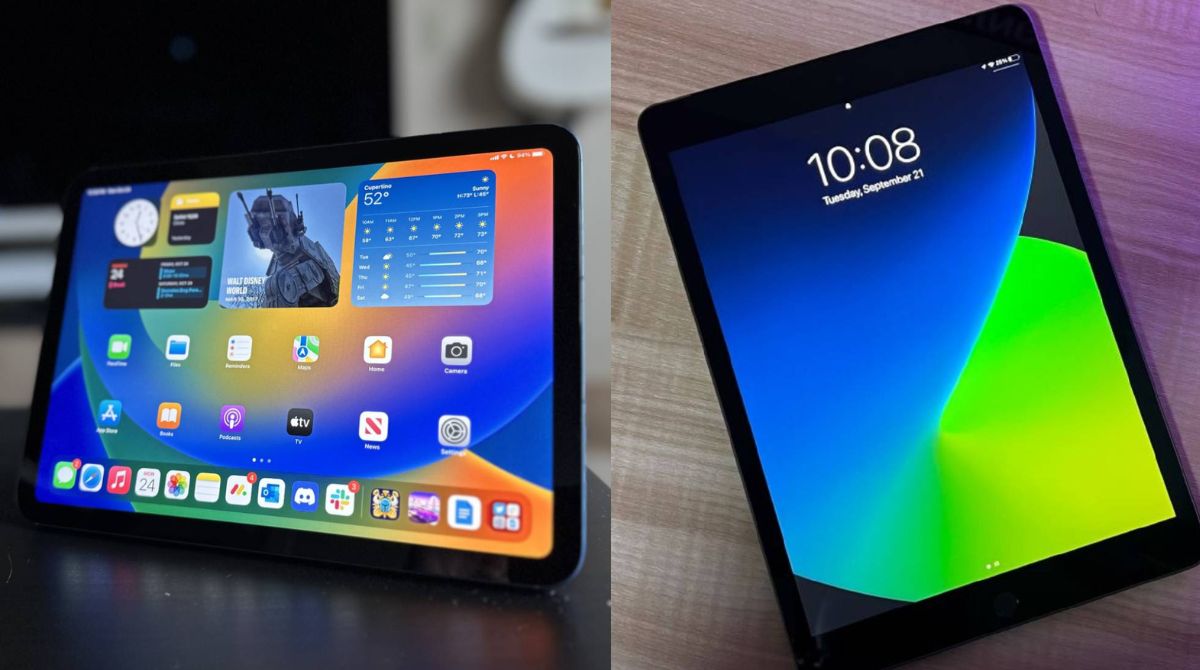
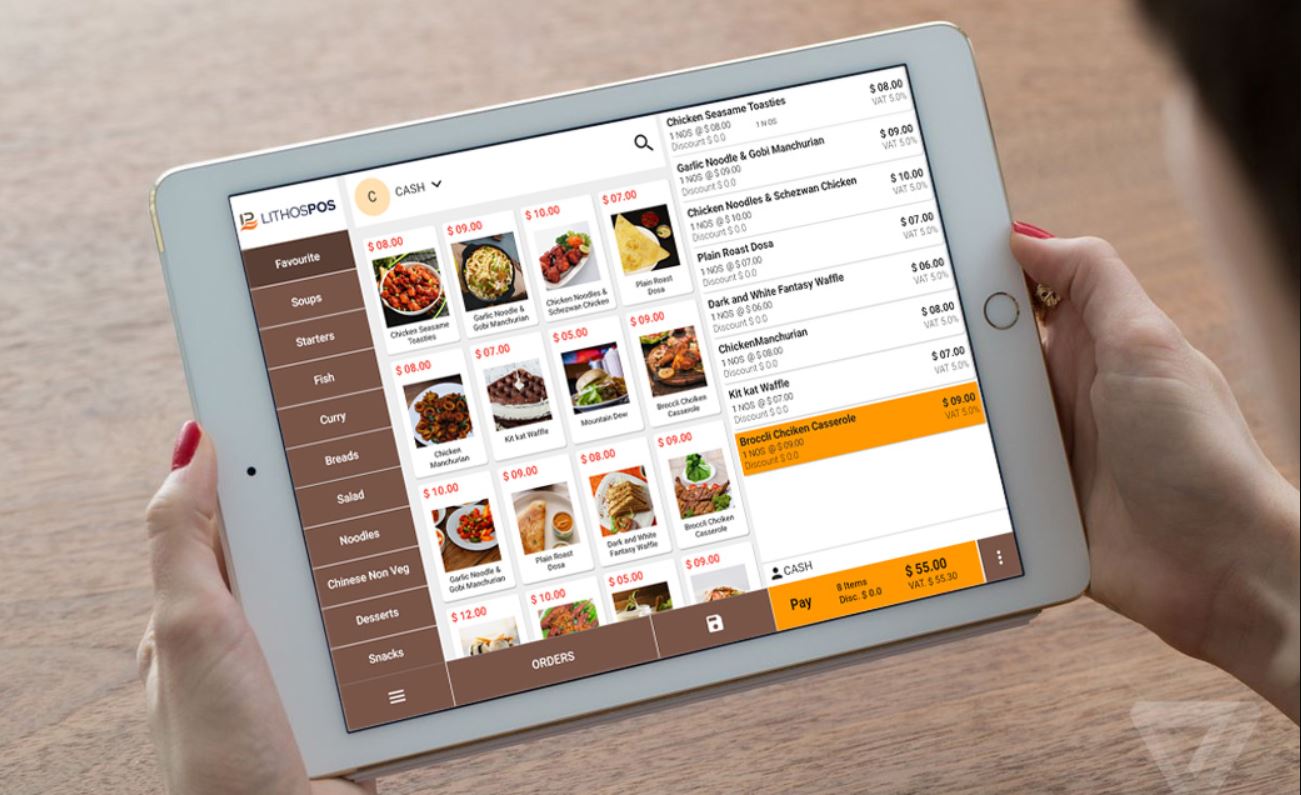
One significant benefit of using a POS system on an iPad is its portability. The lightweight and compact design of an iPad make it easy to carry around your establishment, allowing you to complete transactions from anywhere within your premises. Whether you have a retail store, restaurant, or a mobile business, an iPad POS system gives you the freedom to serve your customers without being tied down to a stationary cash register.
Another advantage of an iPad POS system is its user-friendly interface. With its intuitive touch screen, navigating through different functions becomes effortless. Training your staff to use the system is quick and hassle-free, which reduces the learning curve and minimizes potential errors. The simplicity of an iPad POS system ensures smooth and efficient operations, even during peak hours.
Integration is another key benefit of using a POS system on an iPad. These systems offer seamless integration with other business tools such as inventory management software, accounting systems, and customer relationship management (CRM) platforms. This integration eliminates manual data entry and improves accuracy, saving you time and effort in managing multiple systems.
One of the most significant advantages of an iPad POS system is the availability of real-time data. You can access up-to-date sales, inventory, and customer information from anywhere using a cloud-based iPad POS system. This allows you to make data-driven decisions, monitor key performance indicators, and identify trends that can help you optimize your business strategies.
Additionally, an iPad POS system enables you to provide a personalized and efficient customer experience. With the ability to easily track customer preferences, purchase history, and loyalty programs, you can tailor your offerings to meet their needs. This level of personalization enhances customer satisfaction and fosters customer loyalty, leading to repeat business and positive word-of-mouth recommendations.
Lastly, using an iPad POS system can reduce costs and increase efficiency. By automating tasks like inventory management, tracking sales, and generating reports, you can save valuable time and resources. With streamlined operations and accurate data, you can make informed decisions to optimize your inventory, reduce waste, and improve profitability.
Overall, using a POS system on an iPad offers a range of benefits for businesses of all sizes and industries. Its portability, user-friendly interface, seamless integration capability, real-time data access, personalized customer experience, and cost-saving features make it a powerful tool to drive growth and success in today’s competitive market.
Setting Up Your POS System on an iPad
Setting up a POS system on an iPad is a straightforward process that can be done in a few simple steps. By following these steps, you can get your POS system up and running quickly and efficiently.
The first step in setting up your POS system on an iPad is to choose the right POS system app. There are several options available in the App Store that cater to different business needs, so it’s essential to choose one that aligns with your industry and requirements. Look for features like inventory management, sales reporting, and integration capabilities with other tools you use.
Once you’ve selected the app, download and install it on your iPad. Most POS system apps offer a free trial, allowing you to test its functionality and suitability for your business before committing to a subscription or purchase.
After installing the app, you’ll need to create an account or sign in if you already have one. Follow the on-screen prompts to set up your account, including entering your business information, such as the name, address, and contact details. This information will be used on receipts and other customer-facing documents.
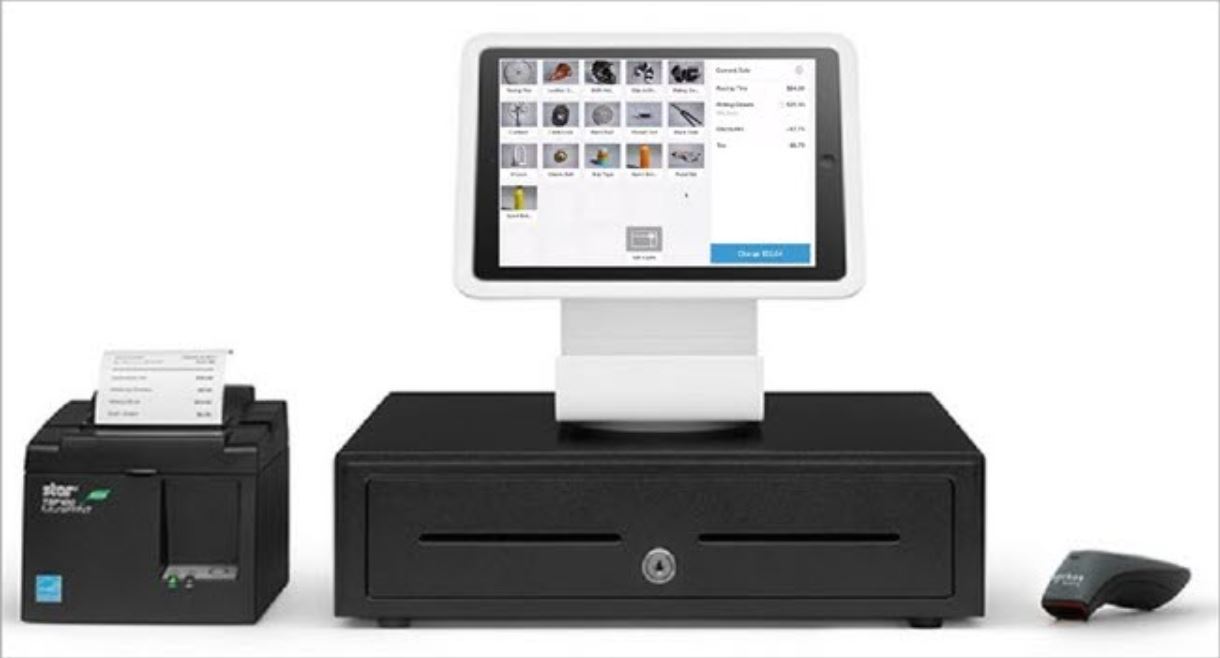
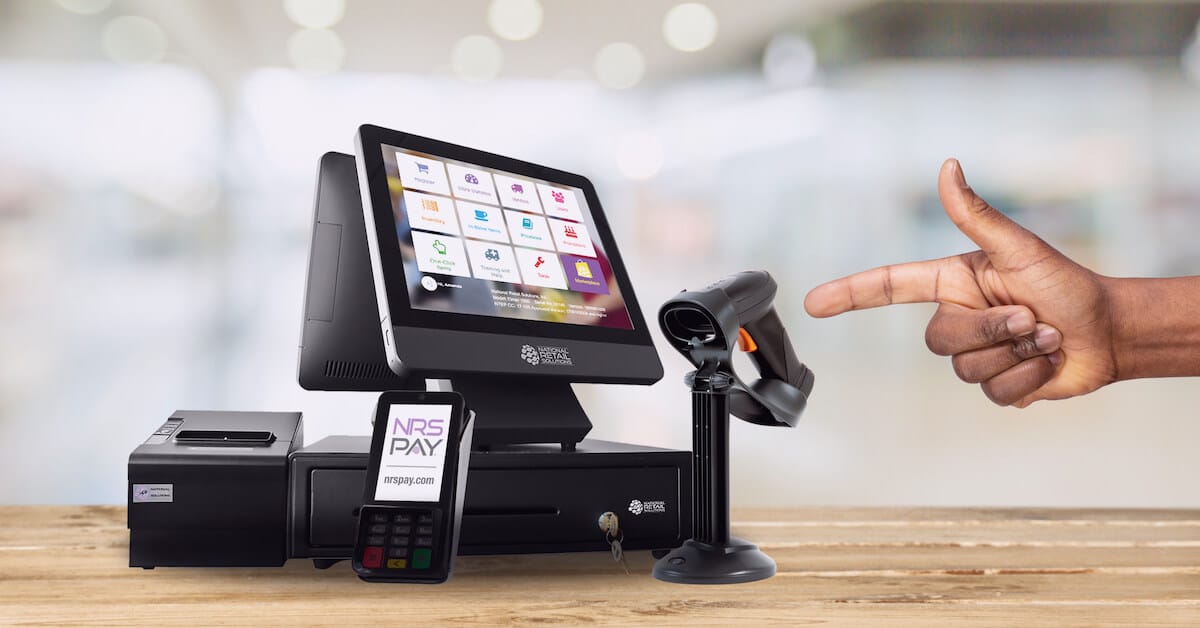
Next, connect your iPad to the necessary hardware components. Depending on your business needs, this could include a receipt printer, cash drawer, barcode scanner, and card reader. Make sure to check the compatibility of these devices with your chosen POS system app to ensure they work seamlessly together.
Once your hardware is connected, you can begin customizing your POS system settings. This includes configuring tax rates, setting up discounts and promotions, creating user accounts for your staff, and customizing the appearance of your receipts. Take the time to personalize these settings to align with the unique needs and branding of your business.
Now it’s time to add your products to the POS system. Enter the relevant details for each product, such as name, description, price, and any variations or options available. Depending on your POS system app, you may also be able to add product images to enhance visual identification.
With your products added, you can set up and manage your inventory. Some POS system apps provide features for tracking stock levels, issuing purchase orders, and generating inventory reports. Utilizing these features can help you keep track of your inventory, prevent stockouts, and streamline your purchasing process.
Once everything is set up, you’re ready to start accepting payments. Your POS system app will have built-in payment processing capabilities, allowing you to accept various payment methods, including cash, credit and debit cards, and mobile payments. Ensure that you have the necessary payment processing accounts set up and configured to enable seamless transactions.
Lastly, take some time to familiarize yourself with the sales reporting and analytics features of your POS system app. These features can provide valuable insights into your business performance, such as top-selling products, peak sales hours, and customer purchasing patterns. Utilizing these reports can help you make data-driven decisions to optimize your operations and drive growth.
By following these steps, you can set up your POS system on an iPad and unleash its full potential in streamlining your business operations and enhancing the customer experience.
Choosing the Right POS System App
Choosing the right POS system app is crucial for the success of your business. It’s important to select an app that meets your specific needs and seamlessly integrates with your operations. Here are some factors to consider when choosing a POS system app for your iPad:
1. Features: Assess the features and functionalities offered by different POS system apps. Consider what features are essential for your business, such as inventory management, employee management, reporting, integrations, and customer relationship management (CRM) capabilities. Make a list of your requirements and compare them with the features offered by the apps you’re considering.
2. Scalability: Consider the future growth of your business. Will the POS system app be able to accommodate your expanding needs? Look for an app that can handle increasing product catalogs, additional registers, and multiple locations if applicable.
3. User-Friendliness: An intuitive and user-friendly interface is essential for ease of use and quick training for your staff. Look for apps that offer a clean and intuitive design, simple navigation, and minimal learning curve.
4. Compatibility and Integration: Ensure that the POS system app is compatible with your iPad model and operating system. Additionally, look for apps that integrate seamlessly with other tools you use, such as accounting software, online ordering platforms, and customer loyalty programs. This integration saves you time and effort by automating data transfer between platforms.
5. Customization Options: Consider your branding and customization needs. Look for apps that allow you to personalize your receipts with your logo, customize discounts and promotions, and tailor the interface to match your brand aesthetic.
6. Customer Support: Check for the availability of reliable customer support options. Look for apps that offer responsive customer support channels, such as email, phone, or live chat. A dedicated and knowledgeable support team can assist you in troubleshooting issues and provide guidance when needed.
7. Pricing: Consider your budget and evaluate the pricing structure of different POS system apps. Some apps offer flexible pricing plans based on the size of your business or transaction volumes. Assess the value for money and ensure that the app’s features justify the cost.
8. Reviews and Recommendations: Read online reviews and seek recommendations from other business owners in your industry. Feedback from actual users can provide insights into the pros and cons of different POS system apps and help you make an informed decision.
By carefully considering these factors, you can select the right POS system app for your iPad. Remember to prioritize the features that align with your business requirements, ensure compatibility and ease of use, and assess the app’s scalability for your future growth. Making the right choice will contribute to smooth operations, improved efficiency, and enhanced customer experiences.
Connecting Your iPad to Hardware
One of the essential steps in setting up your POS system on an iPad is connecting it to the necessary hardware components. This hardware integration allows for a seamless and efficient transaction process. Here’s a guide on how to connect your iPad to the required hardware:
1. Receipt Printer: Connect your iPad to a compatible receipt printer using either a USB cable or through a wireless connection. Make sure to check the compatibility requirements of your chosen POS system app and the receipt printer to ensure they work together seamlessly. Once connected, test the printer to confirm that it can properly print receipts.
2. Cash Drawer: Depending on your business’s cash handling needs, you may need to connect a cash drawer to your iPad POS system. Connect the cash drawer to the receipt printer or directly to the iPad, following the instructions provided by the manufacturer. Ensure that the cash drawer opens automatically when a transaction is completed.
3. Barcode Scanner: If your business handles a large number of products with barcodes, consider connecting a barcode scanner to your iPad. Connect the barcode scanner to the USB or Bluetooth port of your iPad, following the manufacturer’s instructions. Test the scanner to ensure that it can accurately read and record barcode information.
4. Card Reader or Payment Terminal: To accept credit and debit card payments, you’ll need to connect a card reader or payment terminal to your iPad. Some POS system apps offer built-in payment processing capabilities, while others require additional hardware for card payments. Connect the card reader or payment terminal to your iPad using a compatible cable or Bluetooth connection. Make sure that the card reader is properly synced with your POS system app and that it can securely process card payments.
5. Other Hardware Components: Depending on your business needs, you may require additional hardware components such as a customer display, kitchen printer, or scales for weighing items. Follow the manufacturer’s instructions to connect and configure these devices appropriately, ensuring compatibility with your POS system app.
While connecting your iPad to hardware components, it’s essential to consider the overall layout and organization of your checkout area. Ensure that the cables are neatly managed and do not obstruct the workflow or create safety hazards. Additionally, make sure that the hardware components are securely mounted or positioned to avoid accidental disconnections or damage.
Once you have connected all the necessary hardware components, test each device to ensure proper functionality. Verify that the iPad can communicate with the connected devices, and conduct test transactions to confirm that everything is working as expected. If any issues arise, consult the user manual, contact the hardware manufacturer’s support, or reach out to the support team of your POS system app for assistance.
By properly connecting your iPad to the required hardware, you can create a well-integrated and efficient POS system that streamlines your operations and delivers a smooth customer experience.
Customizing Your POS System Settings
Customizing the settings of your POS system is an important step in setting up your iPad for optimal functionality and aligning it with your specific business needs. By customizing your POS system settings, you can personalize the user experience, tailor your receipts, and configure various options to suit your operations. Here’s a guide on how to customize your POS system settings:
1. Tax Rates: Set up the applicable tax rates for your business. Depending on your location and the products or services you offer, you may have different tax rates. Enter these tax rates accurately so that they can be automatically applied to your sales transactions.
2. Discounts and Promotions: Customize the options for discounts and promotions that you offer to your customers. This includes setting specific discount percentages, creating coupon codes, or implementing special promotions like buy one, get one free. Tailor these options to align with your marketing strategies and customer preferences.
3. User Accounts: Create and manage user accounts for your staff members. Assign different roles and permissions to ensure that each employee has access only to the necessary functions and information. This helps enhance security and accountability within your organization.
4. Receipt Customization: Personalize your receipts to include your logo, business name, and contact details. Many POS system apps allow you to customize the layout and design of your receipts to match your branding. Take advantage of this feature to create a professional and cohesive brand image.
5. Appearance and Layout: Some POS system apps offer options to customize the appearance and layout of the user interface. This includes selecting color schemes, font styles, and button placements. Tailor the interface to your preference and ensure that it aligns with your brand aesthetic.
6. Product Categories and Variations: Organize your products into different categories to streamline the ordering process. This makes it easier for your staff to locate and select the correct items during transactions. Additionally, if you offer products with variations, such as sizes or colors, set up these variations within the system for accurate inventory tracking.
7. Customer Information and Loyalty Programs: Configure settings related to customer profiles and loyalty programs. Decide which information you want to collect from your customers, such as names, email addresses, or phone numbers. Set up loyalty programs, including point systems or special rewards, to incentivize repeat business and customer loyalty.
8. Sales and Reporting Preferences: Customize the settings for generating sales reports and analytics. Select the specific data you want to include in your reports, such as sales by product, sales by customer, or sales by date range. Define the frequency of these reports and determine how you want to receive them, whether via email or in-app notifications.
9. Integrations and Add-Ons: Explore any available integrations and add-ons that can enhance the functionality of your POS system. This might include integrating with accounting software, online ordering platforms, or CRM systems. Evaluate these options based on your specific needs and consider the benefits they can bring to your business.
10. Security Settings: Set up security settings to ensure the protection of your data and prevent unauthorized access. This includes enabling features such as passcodes or biometric authentication to restrict access to the POS system. Regularly review and update these security settings to maintain a secure system.
By customizing your POS system settings, you can optimize the system to fit your business requirements and improve efficiency in your everyday operations. Take the time to evaluate each setting and make adjustments as needed to create a personalized and efficient POS system on your iPad.
Adding and Managing Products
One of the key functions of a POS system on an iPad is the ability to add and manage products. By effectively organizing and maintaining your product catalog within the POS system, you can streamline your inventory management and ensure accurate and efficient transactions. Here’s a step-by-step guide on how to add and manage products using your iPad POS system:
1. Add Product Details: Start by entering the relevant information for each product, such as the name, description, SKU or barcode, and price. It’s essential to provide accurate and detailed descriptions to ensure clarity for both your staff and customers.
2. Categorize Products: Organize your products into categories to make them easier to locate and select during transactions. Create categories that align with your business needs, such as clothing, electronics, or accessories. Depending on your POS system app, you may be able to assign products to multiple categories.
3. Add Product Variations: If you offer products with variations, such as sizes, colors, or styles, set up these variations within the system. Specify the different options available for each variation, including their additional costs or prices. This capability ensures accurate inventory tracking and simplifies the ordering process.
4. Upload Product Images: Enhance the visual appeal of your product catalog by uploading high-quality images. Visual representation of your products can attract customers and provide them with a clear idea of what to expect. Ensure that the images are clear, properly cropped, and accurately represent the products.
5. Manage Inventory: Utilize the inventory management features of your POS system to keep track of stock levels. Set initial stock quantities for each product and update them as sales are made. Some POS systems offer automated stock alerts or low inventory notifications to help you reorder items when needed.
6. Track and Adjust Prices: As prices change or promotions occur, it’s important to update the prices of your products. Most POS systems allow you to adjust prices individually or in bulk. Regularly review your pricing strategy and make necessary adjustments to stay competitive in the market.
7. Inventory Receiving: When receiving new inventory, use your POS system to update stock levels accordingly. Record the quantity of each product received, and the system will automatically adjust the stock levels for accurate tracking. This feature helps prevent stockouts and ensures that you have the necessary products available for sale.
8. Product Search and Filtering: Take advantage of the search and filtering capabilities of your POS system to quickly find specific products. These features can help you locate products based on various criteria, such as name, category, or SKU, saving you time during transactions or when updating inventory.
9. Product Performance Analysis: Utilize the sales reports and analytics offered by your POS system to analyze the performance of your products. Identify top-selling items, slow-moving inventory, and trends in customer preferences. This analysis will help you make informed decisions regarding product ordering, marketing initiatives, and inventory management.
10. Regular Maintenance: Regularly review and update your product catalog to ensure its accuracy and relevancy. Remove discontinued or obsolete products, update descriptions or images, and modify prices as necessary. This ongoing maintenance ensures that your product catalog remains up to date and reflects your current offerings.
By effectively adding and managing products within your iPad POS system, you can stay organized, ensure accurate inventory management, and provide efficient customer service. Take the time to set up your product catalog correctly and utilize the available features provided by your POS system to maximize its benefit to your business.
Setting Up and Managing Inventory
Setting up and effectively managing your inventory is a crucial aspect of running a successful business. With a POS system on your iPad, you have powerful tools at your disposal to streamline and optimize your inventory management processes. Here are the key steps involved in setting up and managing inventory using your iPad POS system:
1. Initial Setup: Begin by entering the initial stock quantities for each product in your inventory. This helps establish a baseline, allowing the system to accurately track inventory levels as sales and purchases occur.
2. Organize Inventory: Categorize your inventory into logical groups or categories. This makes it easier to locate specific items and monitor stock levels for each group. Whether you organize by product type, brand, or any other relevant category, ensure that it aligns with your business needs.
3. Barcoding: If your products have barcodes, utilize your POS system to manage barcode scanning. You can print and attach barcodes to your products or use existing barcodes. This enables faster and more accurate inventory tracking and reduces the chances of human error during sales and restocking.
4. Track Stock Movements: Utilize your POS system’s inventory tracking features to monitor stock movements. This includes tracking stock received, items sold, returned products, and damaged or expired items. The system will automatically update stock quantities based on these movements.
5. Automated Alerts: Enable automated alerts within your POS system to notify you when certain inventory levels reach a predetermined threshold. This ensures that you stay proactive in restocking popular items and avoiding stockouts, enabling smooth operations and maximizing sales opportunities.
6. Purchase Orders: Use your POS system to generate and manage purchase orders. When stock levels are low or when items are selling quickly, the system can automatically create purchase orders based on predefined reorder points. This helps streamline the procurement process and ensures that you have sufficient inventory to meet customer demand.
7. Inventory Adjustments: Make necessary inventory adjustments as situations arise. This can include updating stock levels to account for damaged or lost items, writing off obsolete inventory, or making manual adjustments to correct discrepancies between recorded stock and physical counts.
8. Stocktake and Physical Counts: Conduct regular physical counts of your inventory to ensure the accuracy of recorded stock levels. Periodically compare the physical counts to the system’s recorded counts and make any necessary adjustments. This helps identify discrepancies and maintain accurate inventory information within the system.
9. Reporting and Analytics: Utilize the reporting and analytics capabilities of your POS system to gain insights into your inventory performance. Monitor metrics such as bestselling items, slow-moving stock, turnover rates, and profit margins. This data-driven approach enables you to optimize your inventory, improve cash flow, and make informed decisions about purchasing and pricing strategies.
10. Regular Maintenance: Regularly review and update your inventory data to keep it accurate and up to date. Remove discontinued or obsolete items, add new products, and update item details as necessary. Proper maintenance ensures that your inventory information reflects your current stock and helps avoid issues such as selling out-of-stock items.
By setting up and managing your inventory effectively using your iPad POS system, you can optimize stock levels, streamline purchasing processes, and make data-driven decisions. Take advantage of the features and tools provided by your POS system to ensure accurate inventory tracking and enhance your overall business operations.
Accepting Payments
As a business owner, the ability to accept payments efficiently and securely is crucial for serving your customers and generating revenue. With a POS system on your iPad, you can easily process various forms of payment, providing a seamless checkout experience. Here’s a guide to accepting payments using your iPad POS system:
1. Cash Payments: For customers paying with cash, simply input the amount tendered into your POS system. The system will calculate any change due and print a receipt if desired. Make sure to have sufficient cash on hand to provide change and keep track of cash transactions for accurate cash reconciliation.
2. Credit and Debit Card Payments: Accepting card payments requires a card reader or payment terminal that can connect to your iPad. Connect the device to your iPad through a USB or Bluetooth connection and follow the prompts on your POS system. Insert or swipe the customer’s card, or have them tap it if contactless payment is available, to process the transaction securely. Some systems may also support chip card technology for added security.
3. Mobile Payments: With the increasing popularity of mobile payment platforms, consider integrating your POS system with popular mobile payment apps like Apple Pay, Google Pay, or Samsung Pay. This allows customers to conveniently make payments using their smartphones or smartwatches. Ensure that your POS system and payment hardware are compatible with the mobile payment platforms you want to support.
4. Gift Cards and Vouchers: If you offer gift cards or vouchers, your POS system should have the ability to accept and process these forms of payment. Scan or input the barcode or unique code displayed on the gift card or voucher to deduct the appropriate amount from the total purchase price. Keep track of the remaining balance on gift cards for future use.
5. Split Payments: In situations where customers want to split their payment between multiple forms, such as cash and card, your POS system should provide the option to split the transaction accordingly. This capability allows for flexibility and convenience, accommodating different customer preferences.
6. Tipping: If your business involves service-oriented transactions, consider enabling a tipping feature within your POS system. This allows customers to add a tip amount to their total bill, either with a percentage or a specific dollar amount. Providing this option enhances customer satisfaction and ensures a smooth experience during the payment process.
7. Foreign Currency Conversion: If your business caters to international customers, your POS system might offer the ability to process payments in different currencies. This feature can streamline transactions for international customers and accurately calculate the foreign currency amount based on the prevailing exchange rate.
8. Payment Integration: Integrate your POS system with a payment processor or gateway for seamless and secure payment processing. This integration ensures that payments are processed in real-time, minimizing errors and enhancing transaction speed and accuracy.
9. Providing Receipts: After a payment is processed, your POS system can generate and print a receipt for the customer. Alternatively, you may choose to send a digital receipt via email or text message if your POS system supports these options. Receipts not only provide customers with proof of purchase but can also serve as marketing tools by including special offers, surveys, or referral programs.
10. Security and Compliance: Ensure that your POS system adheres to industry-standard security measures to protect customer payment information. Your POS system and payment processor should comply with Payment Card Industry Data Security Standard (PCI DSS) requirements and offer encryption and tokenization to safeguard sensitive data.
By accepting payments through your iPad POS system, you can provide a streamlined and secure payment process for your customers. Be sure to regularly update your POS system software to benefit from the latest security features and payment options, providing a positive payment experience that encourages customer loyalty and satisfaction.
Managing Customer Profiles and Loyalty Programs
In today’s competitive business landscape, building and maintaining strong relationships with your customers is crucial for success. With a POS system on your iPad, you have the ability to manage customer profiles and implement loyalty programs to create personalized experiences and foster customer loyalty. Here’s a guide to effectively managing customer profiles and loyalty programs using your iPad POS system:
1. Creating Customer Profiles: Utilize your POS system to create individual profiles for each customer. Collect basic information such as name, email address, phone number, and any other relevant details that can help you understand your customers better. Ensure that you comply with data protection regulations and obtain the necessary consent for storing customer information.
2. Recording Purchase History: Associate customer profiles with their purchase history by linking each transaction to their respective profiles. This enables you to track their buying patterns, preferences, and spending habits. With this information, you can better understand and cater to their needs, create personalized recommendations, and offer tailored promotions.
3. Implementing Loyalty Programs: Design and manage loyalty programs within your POS system to reward and incentivize repeat business. Set up point-based systems, tiered reward levels, or special offers exclusively available to loyal customers. The POS system should track customers’ loyalty program participation and automatically apply any earned rewards or discounts at the time of purchase.
4. Communicating with Customers: Leverage your POS system’s communication features to engage with your customers. Send personalized emails or text messages to keep them informed about exclusive promotions, upcoming events, or new product launches. Use the customer profiles and their purchase history to segment your customer base and deliver targeted messages that resonate with their interests.
5. Developing Customer-Only Offers: Create special offers or discounts that are exclusive to your loyal customers. Utilize your POS system to track and apply these customer-specific discounts during checkout. This approach makes your customers feel valued and appreciated, encouraging them to continue shopping with your business.
6. Gathering Customer Feedback: Utilize the customer profiles to gather feedback and reviews from your customers. Send survey requests through your POS system or include links to online review platforms in your communications. Use the insights gained from customer feedback to improve your products, services, and overall customer experience.
7. Personalizing Recommendations: Analyze the purchase history and preferences of your customers to generate personalized product recommendations. Your POS system can leverage artificial intelligence or machine learning algorithms to identify customer buying patterns and suggest complementary or relevant products during the checkout process. This tailored approach enhances customer satisfaction and encourages upselling and cross-selling opportunities.
8. Managing Customer Rewards: Monitor and manage the rewards earned by your loyal customers. Your POS system should provide you with the ability to view, amend, or adjust loyalty program points or rewards balances. With accurate management of customer rewards, you can ensure a seamless and enjoyable redemption experience.
9. Tracking Customer Analytics: Utilize the analytics features within your POS system to gain insights into customer behavior and preferences. Analyze data such as average purchase value, frequency of visits, and customer lifetime value. These analytics can help you make data-driven decisions to refine your marketing strategies, improve customer service, and enhance overall business performance.
10. Ensuring Data Privacy and Security: Respect and protect your customers’ personal information by maintaining proper data privacy and security measures. Ensure that your POS system complies with relevant regulations, such as the General Data Protection Regulation (GDPR), and implement security features that safeguard customer data from unauthorized access or breaches.
By managing customer profiles and implementing loyalty programs through your iPad POS system, you can build stronger relationships with your customers, enhance their overall experience, and foster long-term brand loyalty. Utilize the data within your POS system to personalize interactions, create targeted marketing campaigns, and continuously improve your offerings to meet and exceed customer expectations.
Generating Sales Reports and Analytics
Tracking and analyzing sales data is essential for understanding the performance of your business, identifying trends, and making informed decisions. With a POS system on your iPad, you have access to powerful reporting and analytics tools that can generate valuable insights. Here’s a guide to generating sales reports and analytics using your iPad POS system:
1. Sales Summary: Generate sales summary reports that provide an overview of your business’s performance. These reports typically include total sales, average transaction value, number of transactions, and sales trends over a specified time period. Analysis of sales summaries can help you understand the overall health of your business and identify patterns or fluctuations in sales.
2. Product Performance: Identify your top-selling products and analyze their performance using your POS system’s product performance reports. These reports show you which items are generating the most revenue and which may need additional promotion or attention. Understanding your best-selling products helps you optimize your inventory, refine your marketing strategies, and identify opportunities for cross-selling or upselling.
3. Customer Analytics: Leverage your POS system to generate customer analytics reports, providing insights into your customer base. Analyze information such as customer demographics, purchase frequency, and customer lifetime value. Understanding your customers’ behaviors and preferences allows you to tailor your marketing efforts, personalize customer interactions, and create targeted promotions to drive customer loyalty and increase revenue.
4. Inventory Analysis: Utilize your POS system’s inventory analysis reports to evaluate your inventory performance. These reports help you identify slow-moving or excess stock, track stock turnover rates, and calculate the value of your inventory. By analyzing your inventory data, you can optimize purchasing decisions, prevent stockouts, and improve cash flow by managing inventory levels more effectively.
5. Sales by Time and Date: Analyze sales patterns by time and date to determine the busiest hours or days for your business. Your POS system can generate reports that show sales trends throughout the week, month, or year. This information allows you to optimize staffing levels, schedule promotions during peak periods, and make data-driven decisions regarding business hours or seasonal adjustments.
6. Revenue by Payment Method: Analyze revenue breakdowns by payment method to understand customer payment preferences. Your POS system can provide reports showing the percentage of sales made through cash, credit/debit cards, mobile payments, or other payment options. This data helps you evaluate the effectiveness of different payment methods in your business and optimize your payment processing strategies.
7. Employee Performance: Evaluate individual employee performance using sales data and employee productivity reports. Your POS system can generate reports that show the number of transactions or sales attributed to each employee. This information helps you recognize top-performing employees, identify training needs, and incentivize your staff based on performance metrics.
8. Profit Margins: Utilize your POS system’s profit margin reports to assess the profitability of different products or product categories. Understanding your profit margins helps you make pricing decisions, identify opportunities for cost savings, and focus on high-margin products to maximize your business’s profitability.
9. Comparative Analysis: Compare sales data and revenue performance over different time periods using your POS system’s comparative analysis reports. These reports allow you to identify trends, make year-over-year or month-over-month comparisons, and evaluate the success of marketing campaigns or promotions. Comparative analysis provides insights into your business’s growth and helps you make data-driven decisions for future strategies.
10. Customized Reports: Many POS systems allow you to create customized reports tailored to specific needs. These reports can be generated based on specific criteria such as product categories, customer segments, or sales channels. By creating customized reports, you can drill down into specific areas of your business and generate insights based on your unique requirements.
By utilizing the reporting and analytics capabilities of your iPad POS system, you can gain valuable insights into your business’s sales performance, identify areas for improvement, and make data-driven decisions. Regularly analyze the generated reports to stay informed about your business’s financial health, customer behavior, and inventory performance.
Integrating Your POS System with Other Business Tools
An important aspect of maximizing the efficiency and effectiveness of your POS system on an iPad is integrating it with other business tools. Integration allows for seamless data transfer, streamlining processes, and providing a holistic view of your operations. Here’s a guide to integrating your POS system with other business tools:
1. Accounting Software: Connect your POS system to your accounting software to automate financial data transfer. This integration eliminates the need for manual data entry and reduces the risk of errors. Sales transactions, revenue figures, and other financial data can be automatically synced, making financial reporting and reconciliation much faster and more accurate.
2. Inventory Management System: Integrate your POS system with an inventory management system to automate inventory updates. This integration ensures that your inventory levels are always up to date, as any sales made through the POS system will automatically reflect in your inventory data. This helps prevent stockouts, optimize purchasing decisions, and streamline inventory management processes.
3. Customer Relationship Management (CRM) System: Sync your POS system with a CRM system to centralize customer data. This integration allows for a comprehensive view of your customers, combining transaction history from your POS system with other customer interactions and communications. Access to this consolidated data enables personalized marketing efforts, improved customer service, and targeted customer engagement.
4. E-commerce Platforms: Integrate your POS system with your e-commerce platforms to synchronize inventory and sales data across multiple channels. This integration ensures that your online and offline sales data are consistently updated, allowing for accurate inventory management and real-time visibility into your overall business performance.
5. Employee Management System: Connect your POS system with an employee management system or scheduling software to streamline staff scheduling and payroll processes. Integration allows for accurate tracking of employee sales, hours worked, and commissions, which can be seamlessly imported into your payroll system for efficient payroll processing.
6. Marketing Tools: Integrate your POS system with marketing tools, such as email marketing platforms or customer segmentation software. This integration enables targeted marketing campaigns based on customer purchase history, preferences, or loyalty program participation. Segmenting customers based on their behavior helps optimize marketing efforts and increase customer engagement.
7. Delivery and Ordering Platforms: If you offer delivery or online ordering services, integrate your POS system with these platforms to automate order processing and streamline fulfillment. This integration ensures that orders placed through these platforms are automatically transmitted to your POS system, reducing order errors and improving order accuracy and fulfillment efficiency.
8. Analytics and Reporting Tools: Link your POS system with analytics and reporting tools to gain deep insights into your business’s performance. This integration allows for the consolidation of data from different sources, enabling comprehensive analytics and customized reporting. By combining data from your POS system with other relevant metrics, you can gain a holistic view of your business and make data-driven decisions.
9. Payment Gateways: Integrate your POS system with payment gateways to securely process online and mobile payments. This integration ensures that transactions made through your POS system are directly routed to the payment gateway for processing, providing a seamless payment experience for your customers while ensuring the security of their financial information.
10. Third-Party Apps and Services: Explore and utilize third-party integrations provided by your POS system or other service providers. These integrations can include loyalty program platforms, reservation systems, analytics tools, or social media management applications. Integrating with these tools expands the capabilities of your POS system and allows you to leverage additional services and features for your business.
By integrating your POS system with other business tools, you can leverage the strengths of each platform and streamline your operations. Seamless data transfer and real-time synchronization enable better decision-making, increased productivity, enhanced customer experience, and improved overall business performance.
Troubleshooting Common Issues
While using a POS system on an iPad can greatly streamline your business operations, there may be times when you encounter common issues that can disrupt your workflow. Being familiar with troubleshooting techniques can help you quickly resolve problems and minimize downtime. Here are some common issues you may encounter when using a POS system on an iPad and steps to troubleshoot them:
1. Connectivity Problems: If you are experiencing connectivity issues between your iPad and peripherals, such as receipt printers or card readers, check the connections. Ensure that cables are securely plugged in. If using wireless connections, verify that your iPad and peripherals are on the same network. Resetting the network settings or power cycling the devices may help restore the connection.
2. Unresponsive Touch Screen: If your iPad’s touch screen becomes unresponsive, try cleaning the screen with a soft, lint-free cloth. If the issue persists, restart the iPad by pressing and holding the power button until the “Slide to power off” option appears. Slide it to power off the device, then turn it back on after a few seconds.
3. Freezing or Crashing Apps: If your POS app freezes or crashes, force quit the app by double-clicking the home button and swiping up on the app’s thumbnail. Restart the app and check for any available updates. If the issue continues, uninstall and reinstall the app to ensure you have the latest version and a fresh installation.
4. Printer or Peripheral Issues: If your printer or peripheral is not functioning correctly, first ensure that it is properly connected to your iPad. Check for any error messages on the device and consult the manufacturer’s troubleshooting guidelines. If necessary, power cycle the device or reinstall the drivers or firmware to resolve any software-related issues.
5. Syncing and Data Transfer Problems: If you are experiencing syncing or data transfer issues between your POS system and other software, check the integration settings and ensure they are correctly configured. Verify that you are using compatible versions of the software and that they are up to date. Contact the vendor or support team of the software for further assistance if the problem persists.
6. Poor Battery Life: If your iPad’s battery life seems inadequate, ensure that unnecessary background apps are closed. Adjust the display brightness and enable energy-saving settings. Consider using a charging dock or power bank to keep your iPad charged during busy periods. If the battery issue persists, contact Apple support or schedule a battery replacement if necessary.
7. Data Loss or Corruption: Take measures to regularly back up your POS system’s data to prevent data loss or corruption. Utilize a cloud storage service or an external storage device to back up critical information. Regularly check the backups to ensure their integrity and test the data restoration process to be prepared in case of any unforeseen issues.
8. Software Errors or Bugs: If you experience recurring software errors or encounter bugs, check for available updates to your POS system’s software. Software updates often include bug fixes and stability improvements. If the issue persists, reach out to the POS system’s support team for further guidance or troubleshooting assistance.
9. Training and User Errors: If you or your staff are encountering difficulties or making errors when using the POS system, ensure that adequate training has been provided. Review the POS system’s user manual or training materials and conduct additional training sessions if necessary. Regularly communicate with your staff to address any concerns or challenges they may be facing.
10. Hardware Malfunctions: In the event of a hardware malfunction, such as a non-responsive button or a damaged screen, contact the manufacturer or authorized service provider for repairs or replacement options. Follow their troubleshooting guidelines and warranty procedures to rectify the issue efficiently.
Remember to keep a record of any troubleshooting steps you take, including the date and description of the issue, as well as the steps performed to resolve it. This documentation can prove useful if further assistance is needed or if similar issues occur in the future.
By following these troubleshooting techniques, you can swiftly address common issues that may arise when using a POS system on an iPad. Quick problem resolution helps maintain productivity, ensuring a seamless workflow that benefits your business and keeps your customers satisfied.
Best Practices for Using a POS System on an iPad
To ensure a smooth and efficient experience when using a POS system on an iPad, it’s important to follow best practices that enhance functionality, security, and overall productivity. Here are some essential best practices to consider:
1. Regularly Update Software: Keep your iPad’s operating system and your POS system app up to date. Software updates often include bug fixes, security enhancements, and new features that improve system performance and stability. Regularly checking for updates and installing them promptly ensures you are benefiting from the latest improvements.
2. Secure Your Device: Implement security measures to protect your iPad and the data it contains. Enable a strong passcode or biometric authentication, such as Touch ID or Face ID, to prevent unauthorized access. Activate the “Find My” feature to track or remotely wipe your iPad in case of loss or theft. Be cautious when installing new apps and only download from trusted sources.
3. Train Staff Effectively: Provide comprehensive training to your staff on how to use the POS system on the iPad. Ensure they are familiar with features, functionalities, and any specific workflows applicable to your business. Regularly communicate and update them on any changes or enhancements to the system. Ongoing training and clear communication foster confidence and competence among staff members.
4. Maintain a Clean and Organized Workspace: Keep your workstation tidy and free from clutter. Position your iPad, peripherals, and necessary equipment in an organized manner to streamline operations. This not only improves efficiency but also creates a professional and aesthetically pleasing environment for both staff and customers.
5. Backup Data Regularly: Safeguard your business data by regularly backing up your POS system’s data. Use cloud-based storage or external storage devices to store backups. A regular backup routine ensures that your data is protected in case of unexpected events like hardware failures, software glitches, or data corruption.
6. Monitor and Manage Inventory Proactively: Keep a close eye on your inventory levels and make informed decisions to avoid stockouts or excess inventory. Utilize your POS system’s inventory management features to set up automated stock alerts, monitor sales trends, and adjust purchasing orders accordingly. Regularly reconcile physical inventory counts with your system’s inventory data to maintain accuracy.
7. Create and Review Sales Reports: Set aside time to generate and review sales reports from your POS system regularly. Analyze key performance indicators such as total sales, revenue by product or category, and customer insights. The insights gained from these reports can guide decision-making, identify areas for improvement, and help optimize business strategies.
8. Provide Excellent Customer Service: Utilize your iPad POS system to enhance customer interactions. Ensure your staff is well-versed in using the system to provide efficient and accurate service. Train them to engage with customers effectively, utilizing customer profiles and purchase history to offer personalized recommendations or promotions. A positive customer experience contributes to customer loyalty and helps generate repeat business.
9. Regularly Review Security Settings: Regularly review and update security settings within your POS system and on your iPad. Take advantage of security features provided by your POS system, including user access controls and encryption of sensitive data. Regularly change passwords and restrict access to authorized personnel only. Pay attention to any security alerts or updates provided by your POS system provider.
10. Stay Informed About Updates and Enhancements: Keep yourself updated with the latest developments in POS technology and new features offered by your POS system provider. Subscribe to newsletters, participate in webinars or training sessions, and engage with the POS system’s support team to ensure you are optimizing the functionality and capabilities of your POS system.
By adhering to these best practices, you can maximize the benefits of using a POS system on an iPad. Improved efficiency, enhanced security, and a focus on customer satisfaction help drive business growth and success.
Conclusion
Using a POS system on an iPad can revolutionize how you manage your business operations, streamline transactions, and enhance customer experiences. By following best practices such as regular software updates, securing your device, and training your staff, you can optimize the functionality and security of your POS system. Integration with other business tools, such as accounting software and inventory management systems, allows for seamless data transfer and comprehensive insights into your business performance. Generating sales reports and analyzing data provides valuable insights for informed decision-making and business growth. Troubleshooting common issues and staying proactive in resolving them ensures minimal disruption to your operations.
With the ability to accept various forms of payment, manage inventory efficiently, and personalize customer experiences, a POS system on an iPad empowers you to stay ahead in the competitive business landscape. By implementing these best practices, you can increase productivity, streamline processes, and ultimately drive business success.
As technology continues to evolve, staying up to date with new features and enhancements offered by your POS system provider is crucial. By leveraging the capabilities of your iPad POS system and continually seeking improvements, you can adapt and thrive in an ever-changing business environment.