Introduction
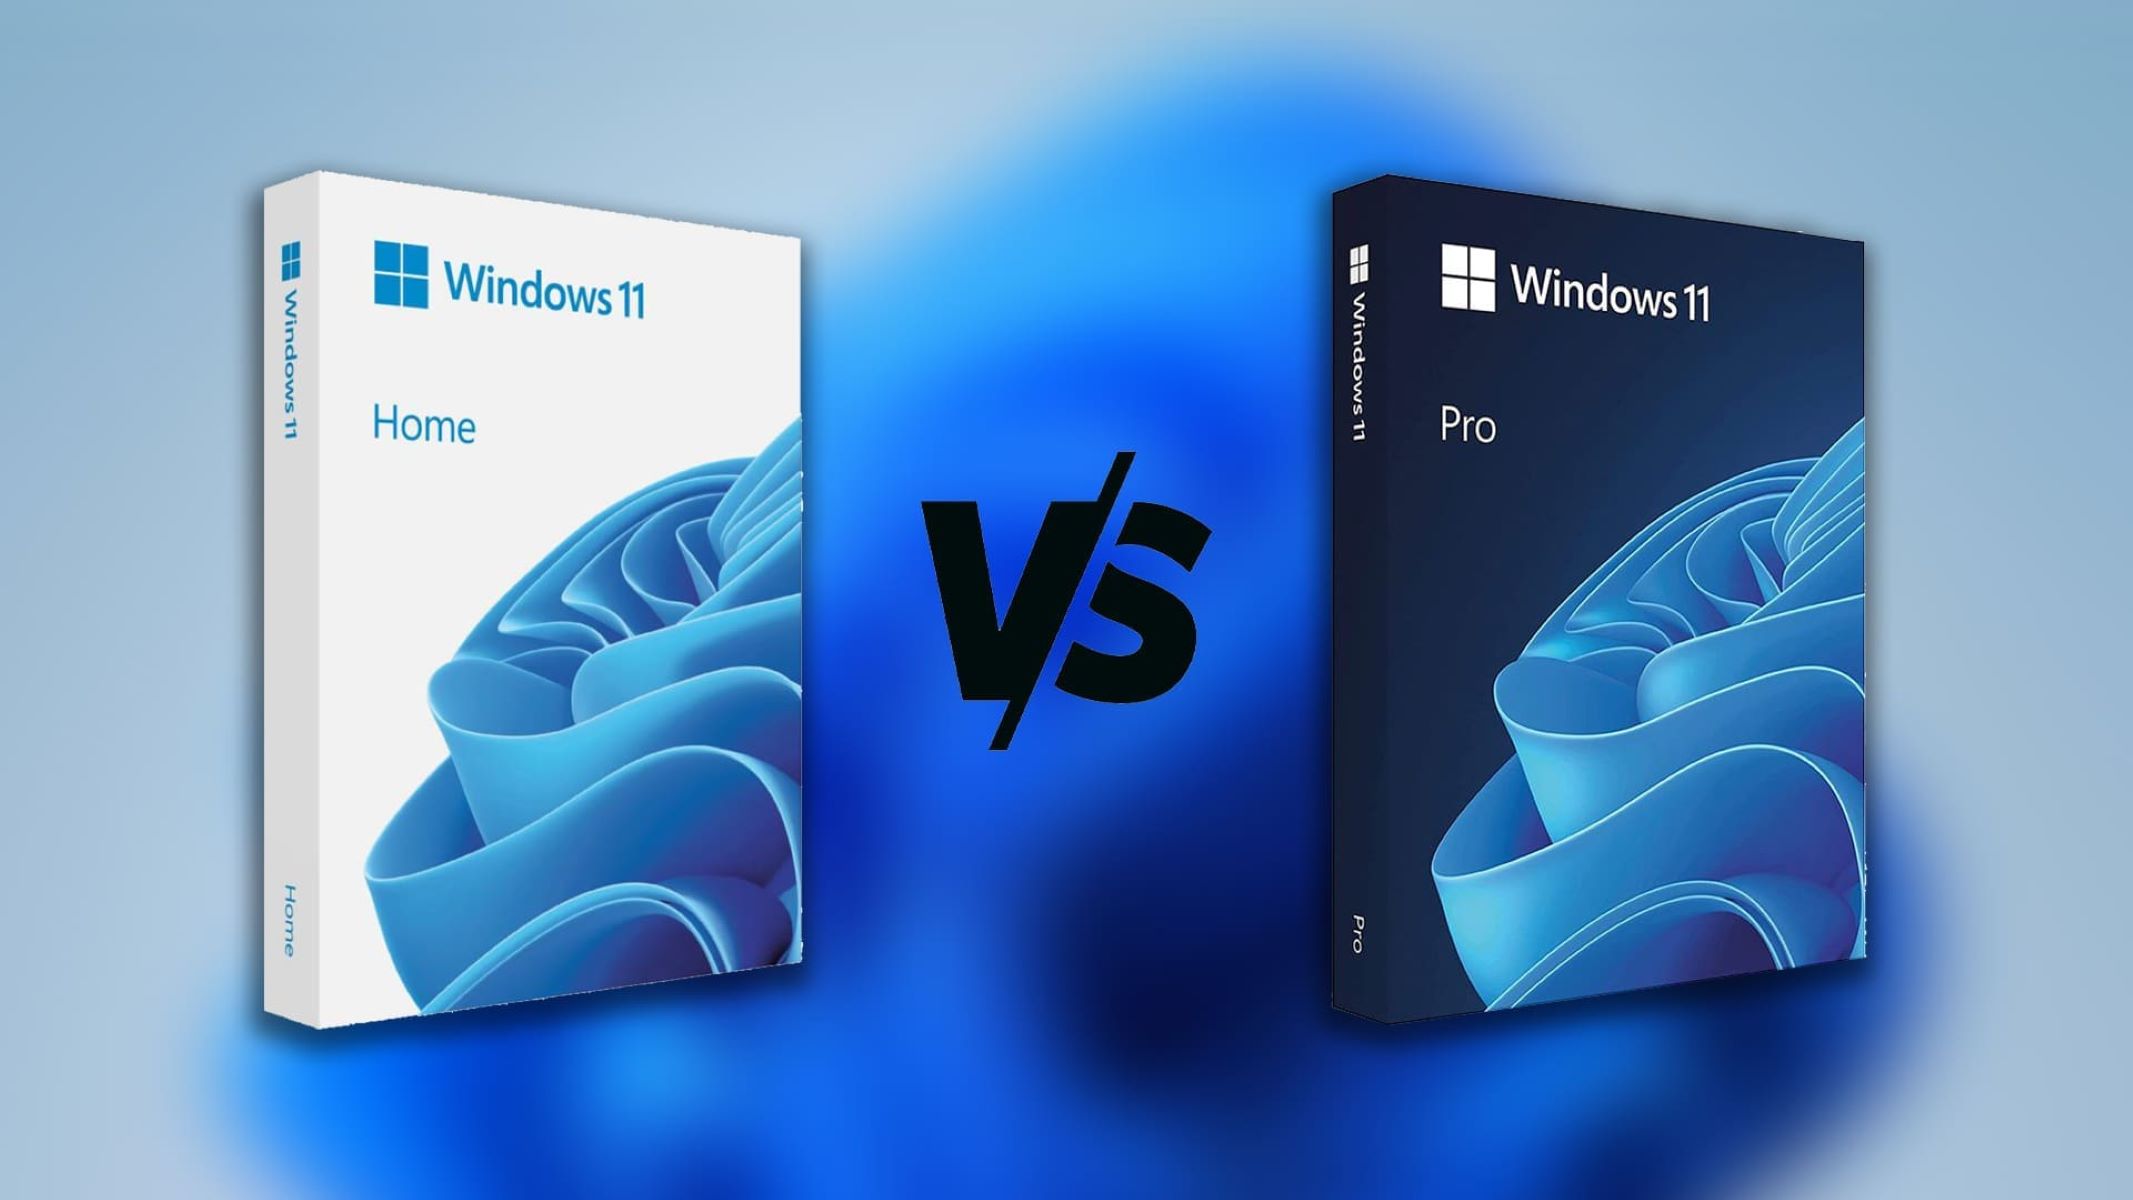
Welcome to our guide on how to upgrade your Windows 10 Home edition to Windows 10 Pro! Whether you’re a business professional or a power user looking for additional features and capabilities, upgrading to Windows 10 Pro can provide you with the enhanced functionality and security you need.
Windows 10 Pro offers a wide range of benefits over the Home edition, including advanced encryption tools, remote desktop access, domain join, and the ability to install and run professional software applications. By upgrading, you can unlock a world of new possibilities tailored to meet your specific needs.
Before diving into the process of upgrading, it’s important to note that upgrading to Windows 10 Pro requires a valid product key. If you don’t already have one, you’ll need to purchase a license from the Microsoft Store or a trusted retailer.
In this guide, we’ll walk you through the step-by-step process of upgrading your Windows 10 Home edition to Windows 10 Pro. We’ll also provide some troubleshooting tips along the way to ensure a smooth and successful upgrade.
It’s important to note that upgrading your operating system can involve risks, including the potential loss of data or compatibility issues with certain software applications. Therefore, it’s highly recommended to back up your important files and create a system restore point before proceeding with the upgrade.
Now, let’s dive into the requirements and steps to upgrade your Windows 10 Home to Windows 10 Pro.
System Requirements
Before upgrading to Windows 10 Pro, it’s important to ensure that your computer meets the necessary system requirements. These requirements ensure that your device can support the additional features and functionality offered by the Pro edition. Here are the minimum system requirements for Windows 10 Pro:
- Processor: 1 GHz or faster processor or System on a Chip (SoC)
- RAM: 1 gigabyte (GB) for 32-bit or 2 GB for 64-bit
- Hard disk space: 32 GB for 64-bit or 32-bit
- Graphics card: DirectX 9 or later with WDDM 1.0 driver
- Display: 800×600 resolution
Additionally, to qualify for a free upgrade to Windows 10 Pro, your computer must already be running a genuine and activated copy of Windows 10 Home. If you are running an older version of Windows, you’ll need to first upgrade to Windows 10 Home before proceeding with the upgrade to Windows 10 Pro.
It’s also important to ensure that your computer has sufficient disk space to accommodate the upgrade. If your device has limited storage space, you may need to free up some space by deleting unnecessary files or moving them to an external storage device.
Before proceeding with the upgrade, it’s a good idea to check for any pending updates for your current version of Windows 10 Home. Installing the latest updates can help ensure a smooth transition to Windows 10 Pro and address any compatibility issues or bugs that may be present in your current installation.
Now that you’re familiar with the system requirements, it’s time to back up your important data to avoid any potential loss during the upgrade process.
Backup Your Data
Before proceeding with the upgrade to Windows 10 Pro, it’s crucial to back up your important data to avoid any potential loss. While the upgrade process typically preserves your files and personal settings, it’s always better to be safe than sorry. Here’s how you can back up your data:
- External Storage: Connect an external hard drive or USB flash drive to your computer. You can then manually copy and paste your important files, documents, photos, videos, and any other data you wish to back up onto the external storage device.
- Cloud Storage: Utilize cloud storage services such as Microsoft OneDrive, Google Drive, or Dropbox to backup your data. Upload your files and folders to the cloud storage, ensuring that they are securely stored and accessible from any device with an internet connection.
- System Image: Create a system image, which is an exact snapshot of your entire Windows 10 Home installation, including files, programs, and settings. This option can be found in the Control Panel under “Backup and Restore” or by searching for “Backup” in the Windows search bar.
Whichever method you choose, make sure to validate that your data has been successfully backed up and is easily recoverable. Test restoring a few files from your backup to ensure they can be accessed and opened without any issues.
Once you have confirmed the successful backup of your data, you can proceed with confidence to the next step, which involves checking for any available updates for your Windows 10 Home edition.
Check for Updates
Before beginning the upgrade process, it’s essential to check for any available updates for your Windows 10 Home edition. Installing the latest updates ensures that your operating system is up-to-date and can help prevent compatibility issues during the upgrade to Windows 10 Pro. Here’s how you can check for updates:
- Windows Update: Open the Settings app by clicking on the Start menu and selecting the gear icon. In the Settings window, navigate to the “Update & Security” section. Click on “Windows Update” in the left sidebar, then click on the “Check for updates” button. Windows will automatically scan for available updates and install them if any are found.
- Windows Update Assistant: If the Windows Update method doesn’t find any updates or encounters errors, you can use the Windows Update Assistant. This tool, provided by Microsoft, allows you to manually download and install the latest updates for your Windows 10 Home edition. Simply visit the official Windows Update Assistant website, download the tool, and follow the on-screen instructions to check for updates.
- Windows Update Catalog: For advanced users, the Windows Update Catalog provides a way to manually download updates and install them offline. Visit the Windows Update Catalog website, search for the latest updates applicable to your Windows 10 Home edition, and download them. Once downloaded, double-click the downloaded files to install them.
It’s important to ensure that you have a stable internet connection before checking for updates. Large updates may require a significant amount of bandwidth, so it’s advisable to use a reliable and high-speed connection to prevent interruptions during the download and installation process.
After you’ve checked for updates and installed any available updates, you’re ready to proceed with the next step: purchasing a Windows 10 Pro license.
Purchase Windows 10 Pro
In order to upgrade your Windows 10 Home edition to Windows 10 Pro, you will need a valid Windows 10 Pro license. Here are the steps to purchase a Windows 10 Pro license:
- Microsoft Store: The most convenient and reliable way to purchase a Windows 10 Pro license is through the Microsoft Store. Visit the official Microsoft Store website, search for “Windows 10 Pro,” and select the version that suits your needs (such as the Home to Pro upgrade). Follow the prompts to complete the purchase, providing payment information and any necessary personal details.
- Authorized Retailers: If you prefer to purchase a physical copy of Windows 10 Pro or want to explore other pricing options, you can visit authorized retailers. These include local computer stores, electronics retailers, and online platforms. Ensure that the retailer is reputable and offers genuine products to avoid any potential licensing issues.
- Volume Licensing: For businesses or organizations that require multiple Windows 10 Pro licenses, Microsoft offers volume licensing options. This allows you to purchase licenses in bulk at discounted rates. Visit the official Microsoft Volume Licensing website for more information and to explore the available options.
When purchasing a Windows 10 Pro license, it’s important to verify that it is compatible with the version and edition of your Windows 10 Home. Pay attention to the license type, such as OEM or retail, as it may affect the terms and conditions of use.
After successfully purchasing a Windows 10 Pro license, which typically includes a product key, you will need to activate Windows 10 Pro to complete the upgrade process. The activation process will be covered in the next section.
Activate Windows 10 Pro
Once you have obtained a valid Windows 10 Pro license, the next step in upgrading from Windows 10 Home to Windows 10 Pro is to activate your new license. Activation ensures that your copy of Windows is genuine and properly licensed. Follow these steps to activate Windows 10 Pro:
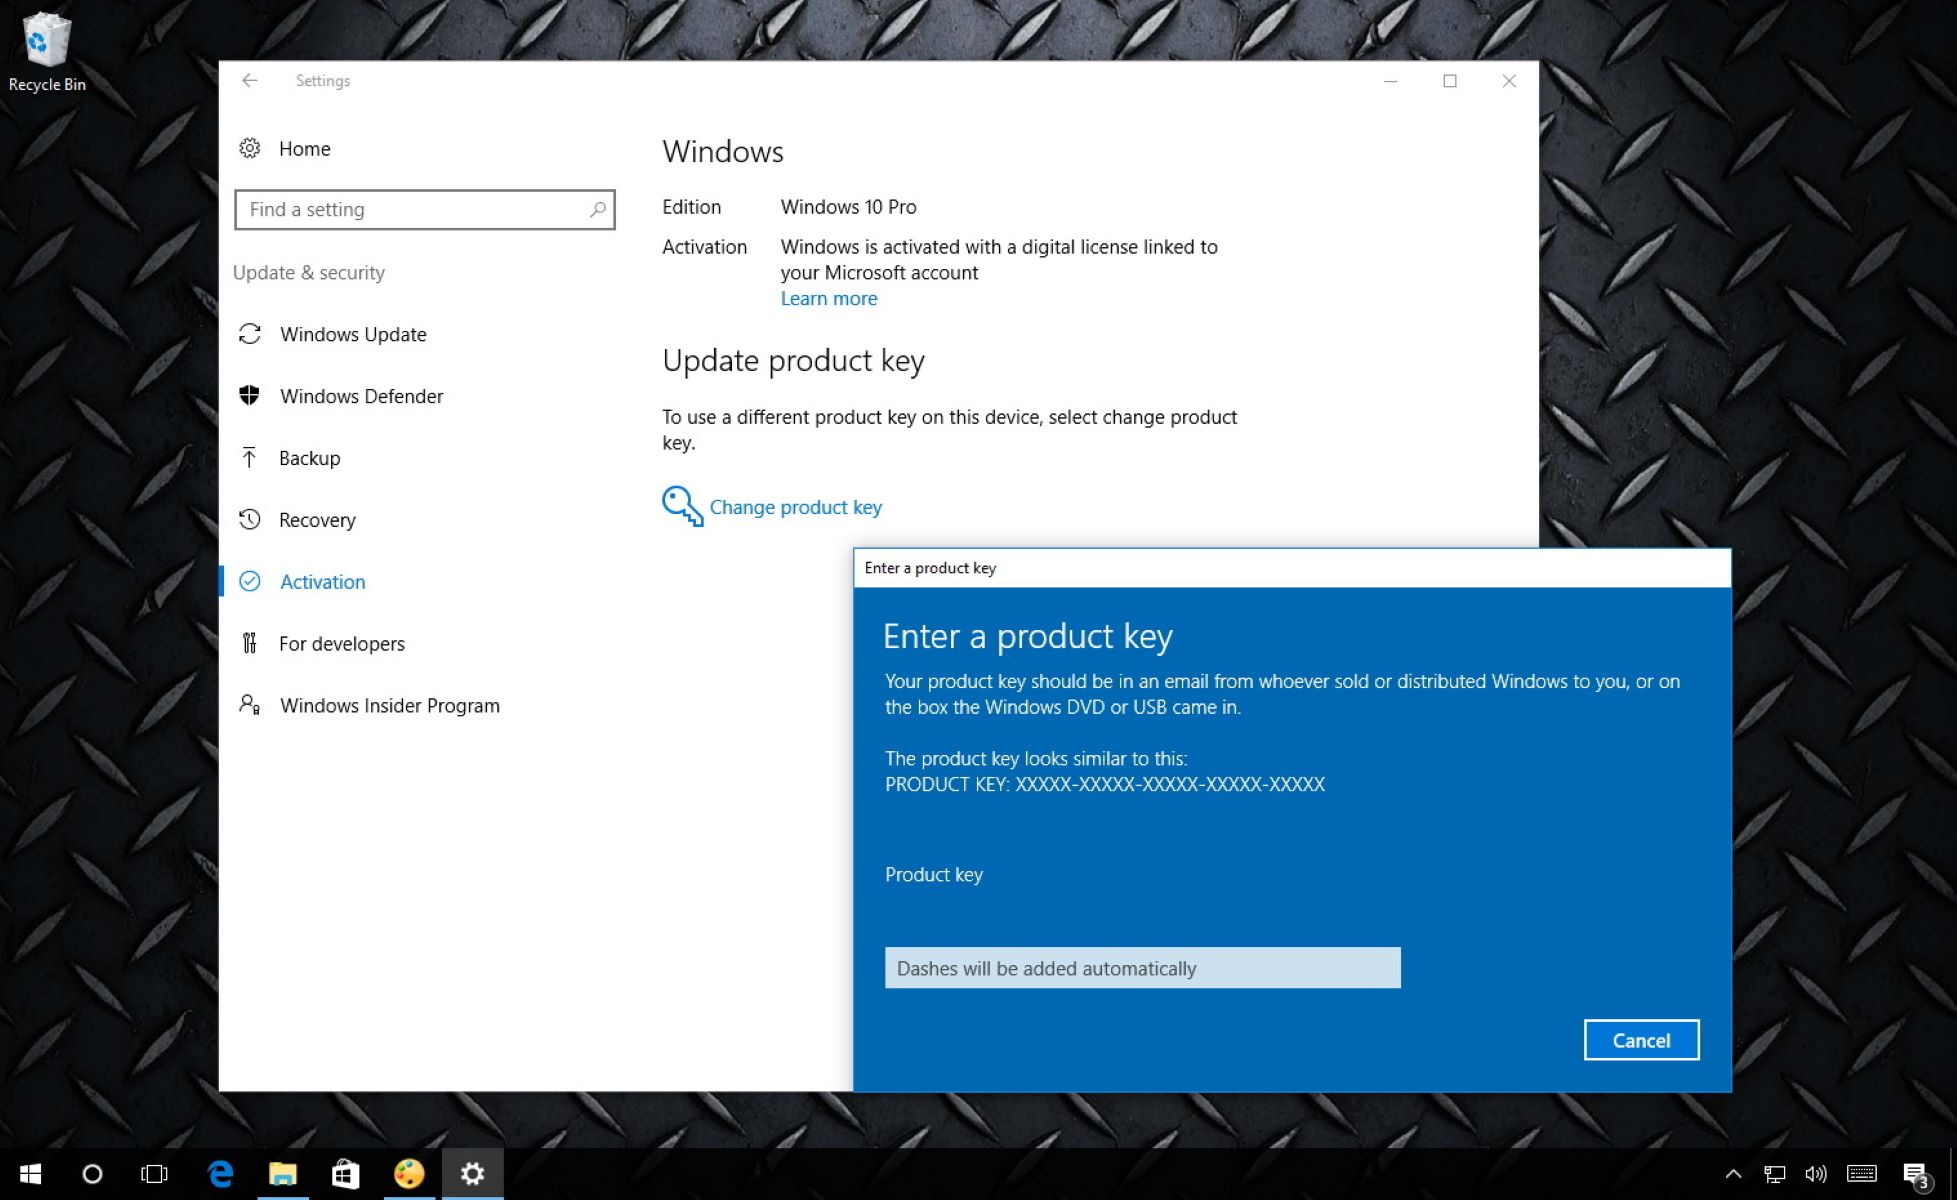
- Open Activation Settings: Click on the Start menu, then navigate to Settings. From the Settings window, click on the “Update & Security” option, and then select the “Activation” tab.
- Enter Product Key: In the Activation tab, click on the “Change product key” option. Enter the product key you obtained when purchasing the Windows 10 Pro license. Note that the product key is a 25-character alphanumeric code. Click “Next” to proceed.
- Activate Windows: After entering the product key, Windows will validate it and attempt to activate your copy of Windows 10 Pro. If the product key is valid and you have an internet connection, Windows will be activated automatically. If you encounter any issues during activation, follow the on-screen instructions or try the “Troubleshooting” section later in this guide.
- Confirmation: Once activation is successful, you will see a confirmation message indicating that Windows is activated with a digital license for Windows 10 Pro. You can verify the activation status by returning to the Activation tab in Settings.
It’s important to note that each product key is unique to a single license, so make sure to keep your product key in a safe place. Avoid sharing or using counterfeit product keys, as this can result in activation failures or legal issues.
With Windows 10 Pro successfully activated, you’re now ready to proceed with the actual upgrade process, which will be covered in the next section of this guide.
Upgrade Process
Now that you have a valid Windows 10 Pro license and have activated it, you’re ready to proceed with the upgrade from Windows 10 Home to Windows 10 Pro. Follow these steps to complete the upgrade process:
- Open Activation Settings: Click on the Start menu, then navigate to Settings. From the Settings window, click on the “Update & Security” option, and then select the “Activation” tab.
- Go to Microsoft Store: In the Activation tab, click on the “Go to Store” option under the edition section. This will open the Microsoft Store application.
- Purchase Upgrade: In the Microsoft Store, you should see the Windows 10 Pro upgrade option. Click on “Buy” or “Upgrade” to proceed with the purchase. Confirm the payment details and complete the transaction.
- Download and Install: Once the transaction is complete, the Microsoft Store will initiate the download and installation process for the Windows 10 Pro upgrade. This process may take some time depending on your internet connection and system specifications.
- Follow on-Screen Instructions: During the upgrade process, you may be prompted to make decisions about your settings, such as privacy options or default app preferences. Follow the on-screen instructions and make the appropriate choices based on your preferences.
- Restart Your Computer: After the upgrade is complete, you will be prompted to restart your computer. Save any unsaved work and click on “Restart” to continue.
- Verification: Once your computer restarts, it will now be running Windows 10 Pro. To verify the upgrade, go to the Settings app and navigate to the “System” section. Under “About”, you should see Windows 10 Pro listed as the edition.
Congratulations! You have successfully upgraded from Windows 10 Home to Windows 10 Pro. You can now enjoy the additional features and capabilities offered by the Pro edition.
If you encounter any issues during the upgrade process, don’t worry. The next section will provide some troubleshooting tips to help you overcome common obstacles and ensure a smooth upgrade experience.
Troubleshooting
While upgrading from Windows 10 Home to Windows 10 Pro is generally a straightforward process, you may encounter some common issues along the way. Here are a few troubleshooting tips to help you overcome any obstacles and ensure a successful upgrade:
- Check Internet Connection: Ensure that you have a stable and reliable internet connection throughout the upgrade process. A weak or intermittent connection can cause interruptions or errors during the download and installation of Windows 10 Pro.
- Update Drivers: Outdated or incompatible drivers can sometimes cause issues during the upgrade process. Make sure to update your drivers before attempting the upgrade. Visit the manufacturer’s website for your computer or motherboard to download and install the latest drivers for your specific hardware.
- Free Up Disk Space: If you receive an error message indicating that you don’t have enough disk space to perform the upgrade, you’ll need to free up some space on your computer. Delete unnecessary files or move them to an external storage device to create more space.
- Disable Security Software: Occasionally, security software such as antivirus programs or firewalls can interfere with the upgrade process. Temporarily disable your security software before starting the upgrade and re-enable it once the upgrade is complete.
- Run Windows Update Troubleshooter: If your computer encounters issues during the update or activation process, you can use the built-in Windows Update Troubleshooter to identify and fix common problems. Search for “Troubleshoot” in the Windows search bar, select “Troubleshoot Settings,” and then click on “Windows Update” under “Get up and running.”
- Contact Microsoft Support: If you’ve tried the above troubleshooting steps and are still unable to successfully upgrade to Windows 10 Pro, it may be time to seek assistance from Microsoft Support. They have experienced professionals who can provide further guidance and help resolve any specific issues you may be encountering.
Remember, the upgrade process can take some time, so it’s important to have patience and allow the installation to complete without interruption. Following these troubleshooting steps should address most common issues and help you successfully upgrade to Windows 10 Pro.
With the troubleshooting steps covered, you should now be well-equipped to handle any obstacles that may arise during the upgrade process. Once the upgrade is complete, you can enjoy the enhanced features and capabilities of Windows 10 Pro.
Conclusion
Congratulations! You have reached the end of our guide on how to upgrade your Windows 10 Home edition to Windows 10 Pro. By following the steps outlined in this article, you should now have a better understanding of the process and be equipped with the necessary knowledge to successfully upgrade your operating system.
We covered the system requirements, the importance of backing up your data, checking for updates, purchasing a Windows 10 Pro license, activating your new license, and finally, the upgrade process itself. We also provided troubleshooting tips to help you overcome any common issues that may arise during the upgrade.
It’s important to note that upgrading your operating system can involve risks and that it’s always recommended to back up your data before proceeding. This ensures that you have a copy of your important files in case of any unforeseen issues during the upgrade process.
If you encounter any difficulties or have specific questions regarding your upgrade journey, don’t hesitate to seek assistance from Microsoft Support or consult trusted online resources for further guidance.
Once you have successfully upgraded to Windows 10 Pro, you can take advantage of the advanced features and enhanced security that the Pro edition offers. Whether you’re a business professional or a power user, Windows 10 Pro provides you with the tools and functionality to meet your specific needs.
Thank you for taking the time to read our guide. We hope it has been informative and helpful in your upgrade process. Enjoy your new Windows 10 Pro experience!


