Introduction
Welcome to this comprehensive guide on how to upgrade the RAM on an HP Stream 11 laptop. If you’re experiencing slow performance or your laptop struggles to handle multitasking, a RAM upgrade can significantly improve its speed and overall responsiveness. Adding more RAM allows your laptop to run more programs simultaneously, enhancing your productivity and overall user experience.
The HP Stream 11 is a budget-friendly and compact laptop that packs a lot of power in a small package. Despite its small form factor, this laptop provides an excellent platform for upgrading the RAM, giving you the opportunity to customize its performance to suit your needs.
Before we dive into the details, it’s important to note that upgrading the RAM requires some technical knowledge, basic computer skills, and careful handling of delicate components. If you don’t feel comfortable performing the upgrade yourself, it’s always best to seek professional assistance.
Upgrading the RAM on your HP Stream 11 will not only breathe new life into your laptop but also extend its lifespan. With a few simple steps, you can boost its performance and enjoy a smoother computing experience without breaking the bank.
In the following sections, we will guide you through the entire process, from checking compatibility to installing the new RAM module. By following our step-by-step instructions, you’ll be able to confidently upgrade the RAM on your HP Stream 11 and unlock its true potential.
Checking Compatibility
Before you proceed with upgrading the RAM on your HP Stream 11, it’s essential to ensure that the RAM module you purchase is compatible with your laptop. RAM modules come in different sizes, speeds, and types, and using an incompatible module can cause compatibility issues or even damage your laptop.
The HP Stream 11 laptop typically uses DDR3L RAM modules, specifically of the SODIMM form factor. It’s crucial to confirm the exact specifications of your current RAM module and find a compatible replacement. To do this, you can follow these steps:
- Check your laptop’s documentation: Review your laptop’s user manual or visit the official HP website to find information about the supported RAM specifications for your specific laptop model.
- Look for compatible RAM on manufacturer websites: Check the websites of reputable RAM manufacturers like Kingston, Crucial, or Corsair. They often provide compatibility tools that allow you to enter your laptop model information and verify the compatible RAM options.
- Use third-party compatibility tools: There are various online tools available that can help identify compatible RAM modules for your laptop model. Simply enter your laptop’s make and model, and the tool will provide you with a list of compatible RAM options.
Once you’ve determined the specific RAM module that is compatible with your HP Stream 11, make a note of its capacity and speed. It’s worth noting that while upgrading the RAM, it’s always a good idea to opt for a higher capacity module to maximize the benefits of the upgrade. However, ensure that the new module’s capacity doesn’t exceed the maximum supported by your laptop.
Gathering Tools and Materials
Before you begin the RAM upgrade process, it’s important to gather all the necessary tools and materials to ensure a smooth and successful installation. Here’s a list of items you’ll need:
- Compatible RAM module: As mentioned in the previous section, make sure you have a compatible RAM module that meets the specifications of your HP Stream 11.
- Anti-static wrist strap: This strap helps prevent static electricity from damaging sensitive electronic components. It’s recommended to wear one during the upgrade process.
- Screwdriver: Depending on the model of your HP Stream 11, you may need a Phillips-head or Torx screwdriver to remove the screws securing the back cover.
- Small container or cup: This will come in handy for holding and organizing the screws you remove from the laptop.
- Clean cloth or microfiber cloth: This will help you clean any dust or smudges from the laptop and the RAM module.
Additionally, it’s always a good idea to have a clean and clutter-free workspace to perform the upgrade. Make sure you have ample lighting and enough space to lay out the laptop and its components. It’s recommended to work on a non-static surface, such as a wooden or anti-static mat, to minimize the risk of static discharge.
Once you have all the necessary tools and materials ready, you can proceed to the next steps of the RAM upgrade process. Remember to handle the components with care and avoid touching the sensitive gold connectors on the RAM module to prevent any damage.
Preparing the Laptop
Before diving into the physical steps of upgrading the RAM on your HP Stream 11, there are a few preparatory measures you should take to ensure a successful and hassle-free process. Follow the steps below to prepare your laptop:
- Power off the laptop: Before you begin any hardware modifications, make sure your HP Stream 11 is completely powered off. Disconnect the power adapter and remove the battery if possible.
- Ground yourself: To prevent any static discharge that could potentially damage the laptop’s internal components, it’s important to ground yourself. You can do this by wearing an anti-static wrist strap or by touching a grounded metal surface before touching any internal parts.
- Clean the external surfaces: Use a clean cloth or microfiber cloth to wipe down the laptop’s external surfaces, removing any dust or debris. It’s always a good idea to work with a clean device to prevent any foreign particles from entering during the upgrade process.
- Backup your data: While the RAM upgrade itself should not impact your data, it’s always a good precautionary measure to back up any important files or documents before making any hardware changes to your laptop.
- Remove any peripherals: Unplug any USB devices or other peripherals that are connected to your laptop. This will provide better access to the internals of the device during the RAM upgrade.
By following these preparatory steps, you ensure that your laptop is in the best possible condition for the RAM upgrade. Taking these precautions will minimize the risk of static discharge, protect your data, and provide a clean and optimized workspace for the hardware modifications.
Removing the Back Cover
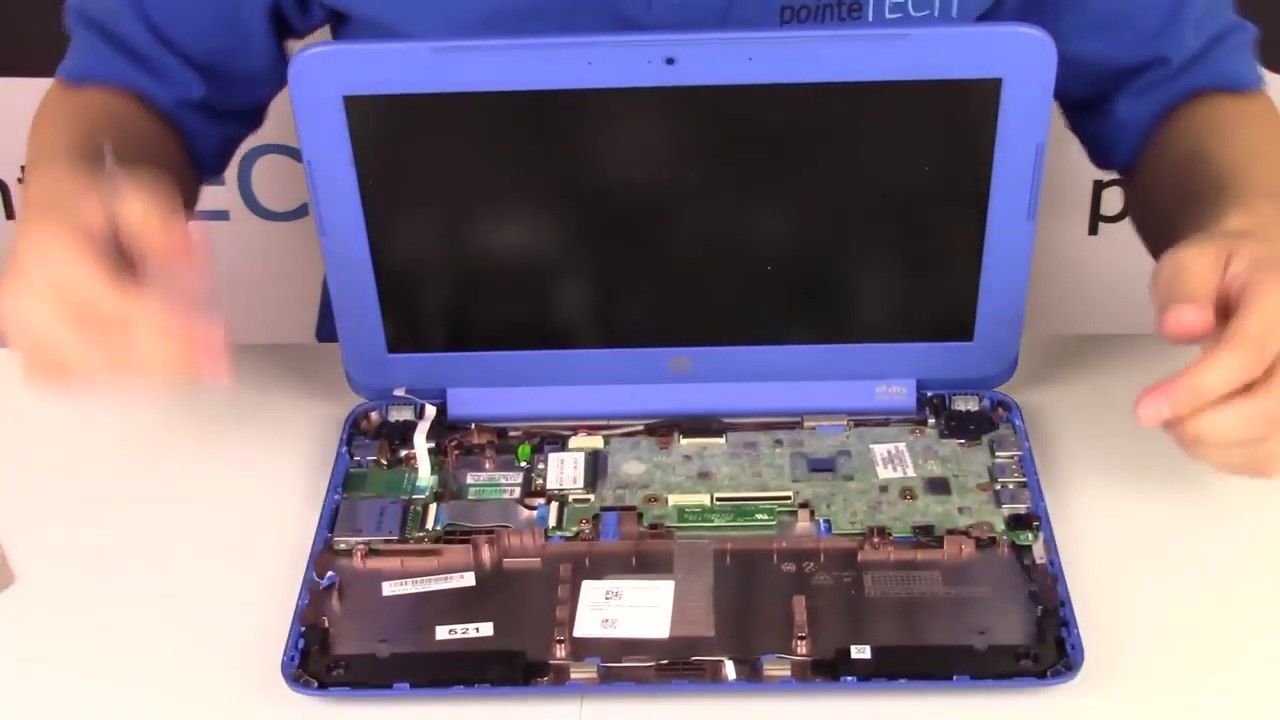
The first step in upgrading the RAM on your HP Stream 11 is to remove the back cover of the laptop. This will give you access to the internal components, including the RAM slot. Follow the steps below to remove the back cover safely:
- Disconnect the laptop from the power source: Make sure the HP Stream 11 is powered off and disconnected from the power adapter before proceeding.
- Flip the laptop over: Place the laptop upside down on a flat and stable surface. Ensure that the hinges are facing you.
- Locate the screws securing the back cover: Look for the screws around the outer edge of the back cover. The number and placement of the screws may vary depending on the specific model of your HP Stream 11.
- Use the appropriate screwdriver: Depending on the type of screws used, either a Phillips-head or Torx screwdriver may be required. Unscrew the screws, keeping them in a safe place to prevent loss.
- Remove the back cover: Gently lift the back cover away from the laptop. You may need to use a plastic pry tool or your fingernail to carefully separate the cover from the laptop’s body. Take your time and apply gentle pressure to avoid damaging any internal components.
Once the back cover is removed, you will have a clear view of the internal components of your HP Stream 11. However, be cautious as there may still be cables or ribbon connectors attached to the back cover. Avoid placing excessive strain on these connections.
Remember to keep the screws in a safe place and take note of their positions as they may differ in length or thread type. This will ensure that you can easily reassemble the laptop after upgrading the RAM.
In the next section, we will guide you on how to locate the RAM slot inside your HP Stream 11.
Locating the RAM Slot
After removing the back cover of your HP Stream 11, the next step is to locate the RAM slot. The RAM slot is where the current RAM module is inserted and where the new module will be installed. Follow the steps below to find the RAM slot:
- Identify the motherboard: Look for the main circuit board inside your laptop. It is typically located in the center of the laptop and is easily distinguishable as the largest board.
- Spot the RAM slot: Locate the rectangular slot on the motherboard. This is the RAM slot where the RAM module is inserted. Depending on the laptop model, there may be one or two RAM slots. The HP Stream 11 typically has one RAM slot.
- Observe any latches or retainers: Take note of any latches or retainers on the sides of the RAM slot. These are designed to hold the RAM module securely in place. You may need to release these latches during the installation or removal process.
It’s important to handle the RAM slot and surrounding components with care. The motherboard and its delicate components can be easily damaged by static electricity or rough handling.
Once you have located the RAM slot, you are one step closer to upgrading the RAM on your HP Stream 11. In the next section, we will guide you through the process of removing the old RAM module.
Removing the Old RAM Module
Now that you have located the RAM slot inside your HP Stream 11, it’s time to remove the old RAM module. Follow the steps below to safely remove the old module:
- Ensure the laptop is powered off and disconnected from the power source: Double-check that your laptop is completely powered off and unplugged before proceeding to avoid any potential damage to the internal components.
- Locate the retention clips: Look for the retention clips on each side of the RAM module inside the RAM slot. These clips hold the RAM module in place, ensuring a secure connection.
- Release the retention clips: Gently push outward on the retention clips to release them from the sides of the RAM module. The clips should move away from the module and spring back when released.
- Carefully remove the old RAM module: Once the retention clips are released, the old RAM module will pop-up at a slight angle. Grasp the module by its edges, ensuring not to touch the gold connector pins, and gently pull it out of the RAM slot.
Take note of the orientation of the old RAM module as you remove it from the RAM slot. This will help ensure that you install the new module correctly in the next step.
Set the old RAM module aside in a safe place. If it is in good condition, you may consider keeping it as a backup or selling it if no longer needed.
With the old RAM module removed, you are now ready to install the new RAM module in the next section.
Installing the New RAM Module
With the old RAM module removed from the RAM slot, it’s time to install the new RAM module in your HP Stream 11. Follow the steps below to ensure a successful installation:
- Ensure the laptop is still powered off and disconnected from the power source: Before proceeding, make sure your laptop is powered off and unplugged to prevent any damage to the components.
- Handle the new RAM module with care: Align the notch on the module with the slot in the RAM slot, ensuring it matches the orientation of the old module you removed previously. Avoid touching the gold connector pins on the new module to prevent any damage from static electricity or oils on your fingers.
- Insert the new RAM module into the RAM slot: Hold the new RAM module at a slight angle and carefully insert it into the slot, ensuring that the gold connector pins on the module are fully inserted and making contact with the slot.
- Secure the module with the retention clips: Once the module is fully inserted, gently press down on the module until it is evenly seated in the slot. The retention clips should automatically snap back into place, securing the module in its position.
Ensure that the new RAM module is securely fastened in the RAM slot to prevent any disconnections or instability during use. It should be firmly seated and aligned with the slot.
With the new RAM module successfully installed, the upgrade process is almost complete. In the next section, we will guide you through the process of closing the back cover of your HP Stream 11.
Closing the Back Cover
After successfully installing the new RAM module in your HP Stream 11, the next step is to carefully close the back cover of the laptop. Follow the steps below to ensure the back cover is securely and correctly reattached:
- Check for any loose cables or connectors: Before closing the back cover, double-check that there are no loose cables or connectors inside the laptop. Ensure that all cables are properly connected and not obstructed by the back cover.
- Align the back cover with the laptop body: Hold the back cover above the laptop body and align the edges of the cover with the corresponding edges of the laptop. Take care to align the screw holes on the back cover with the screw holes on the laptop’s body.
- Gently press the back cover into place: Starting from one corner, apply gentle pressure and press the back cover down onto the laptop body. Work your way around the edges, applying even pressure, until the cover is snugly in place.
- Replace and tighten the screws: Using the appropriate screwdriver, insert and tighten each screw in its respective location. Make sure the screws are securely tightened, but avoid over-tightening, as it may damage the threads or the back cover.
Take your time while aligning and closing the back cover to ensure a proper fit. Avoid applying excessive force, as it may damage the laptop’s internal components or the back cover itself.
Once you have successfully closed the back cover and tightened all the screws, your HP Stream 11 is ready to be powered on and tested with its upgraded RAM module.
In the next section, we will guide you through the final step of testing the RAM upgrade to ensure it has been successfully installed.
Testing the Upgrade
After upgrading the RAM on your HP Stream 11 and closing the back cover, it is essential to test the new RAM module to ensure it has been successfully installed and is functioning properly. Follow the steps below to conduct a thorough test:
- Power on the laptop: Connect the power adapter and turn on your HP Stream 11.
- Check the BIOS: During the boot-up process, enter the BIOS settings by pressing the designated key (e.g., F2, ESC, or Del) as indicated on the screen. In the BIOS, locate the system information or memory section to verify that the new RAM module is recognized and correctly identified.
- Run diagnostic software: Use diagnostic software, such as Windows Memory Diagnostic or Memtest86, to perform a comprehensive memory test. These tools will check the integrity and stability of the RAM module to ensure it is functioning as intended.
- Monitor system performance: Once the laptop has booted into the operating system, observe the system’s performance and responsiveness. Launch multiple applications and perform tasks that previously caused slowdowns or issues. If the laptop now performs significantly better, it indicates that the RAM upgrade was successful.
- Check system properties: Right-click on “My Computer” (or “This PC”) and select “Properties” to verify that the new RAM module is recognized and displayed correctly under the system properties.
By following these testing procedures, you can determine if the new RAM module is functioning as expected and if the upgrade has been successful. If any issues arise, double-check the installation, ensure the RAM module is fully seated in the RAM slot, and consult the laptop’s documentation or seek technical assistance if needed.
With the RAM upgrade successfully tested and verified, you can now enjoy the increased performance and improved multitasking capabilities on your HP Stream 11.
Conclusion
Congratulations! You have successfully learned how to upgrade the RAM on your HP Stream 11 laptop. By following the steps outlined in this guide, you have unlocked the potential to enhance the performance and speed of your laptop.
Upgrading the RAM on your HP Stream 11 allows for smoother multitasking, faster application load times, and improved overall system responsiveness. Whether you’re a student, professional, or casual user, the upgraded RAM will provide a noticeable difference in your computing experience.
Throughout the process, it’s important to exercise caution, handle the components with care, and ensure compatibility when selecting a new RAM module. By doing so, you can avoid any damage to the laptop and ensure a successful upgrade.
Remember that proper grounding and the use of an anti-static wrist strap are crucial during the installation process to prevent any static discharge that could harm the internal components of your laptop.
After installing the new RAM module, don’t forget to test the upgrade to verify that it is functioning correctly. Checking the BIOS settings, running diagnostic software, and monitoring system performance will give you confidence that the RAM upgrade has been successful.
With the upgraded RAM in place, you can now enjoy a more efficient and responsive HP Stream 11, allowing you to tackle tasks and projects with ease. Whether it’s running multiple applications simultaneously, handling resource-intensive projects, or simply improving your everyday computing experience, the RAM upgrade will provide a noticeable improvement.
Thank you for following this guide. We hope that you found it informative and helpful in upgrading the RAM on your HP Stream 11. Enjoy the enhanced performance and productivity that the upgraded RAM brings to your laptop!