Introduction
Welcome to the exciting world of PlayStation 5! If you’ve recently acquired this highly coveted gaming console, one of the first things you’ll want to know is how to turn it on using the controller. In this guide, we will walk you through the simple steps to power up your PS5 with ease. Whether you’re a seasoned gamer or new to the PlayStation family, this article will provide you with the knowledge you need to start playing your favorite games in no time.
The PlayStation 5 is designed to offer an immersive gaming experience with stunning graphics, responsive controls, and innovative features. The controller plays a crucial role in navigating your way through the console’s interface and enjoying a wide range of games. Thankfully, powering on the PS5 using the controller is a straightforward process that can be done with just a few simple steps.
Before we dive into the steps, it’s important to note that the controller needs to be properly charged before you can use it to turn on the PS5. A fully charged controller ensures uninterrupted gaming sessions and avoids any frustrations of a dead battery in the middle of gameplay. Once you’ve confirmed that the controller is ready, you’re all set to get started.
In the following sections, we will guide you through the step-by-step process of turning on your PS5 using the controller. Rest assured, by the end of this guide, you’ll be well-equipped with the knowledge to power up your PS5 effortlessly and embark on countless hours of gaming fun.
Step 1: Ensure the Controller is Charged
Before turning on your PS5 with the controller, it’s crucial to ensure that the controller is charged and ready to use. There’s nothing worse than eagerly starting a gaming session, only to realize that your controller’s battery is low. Follow these simple steps to make sure your controller is fully charged:
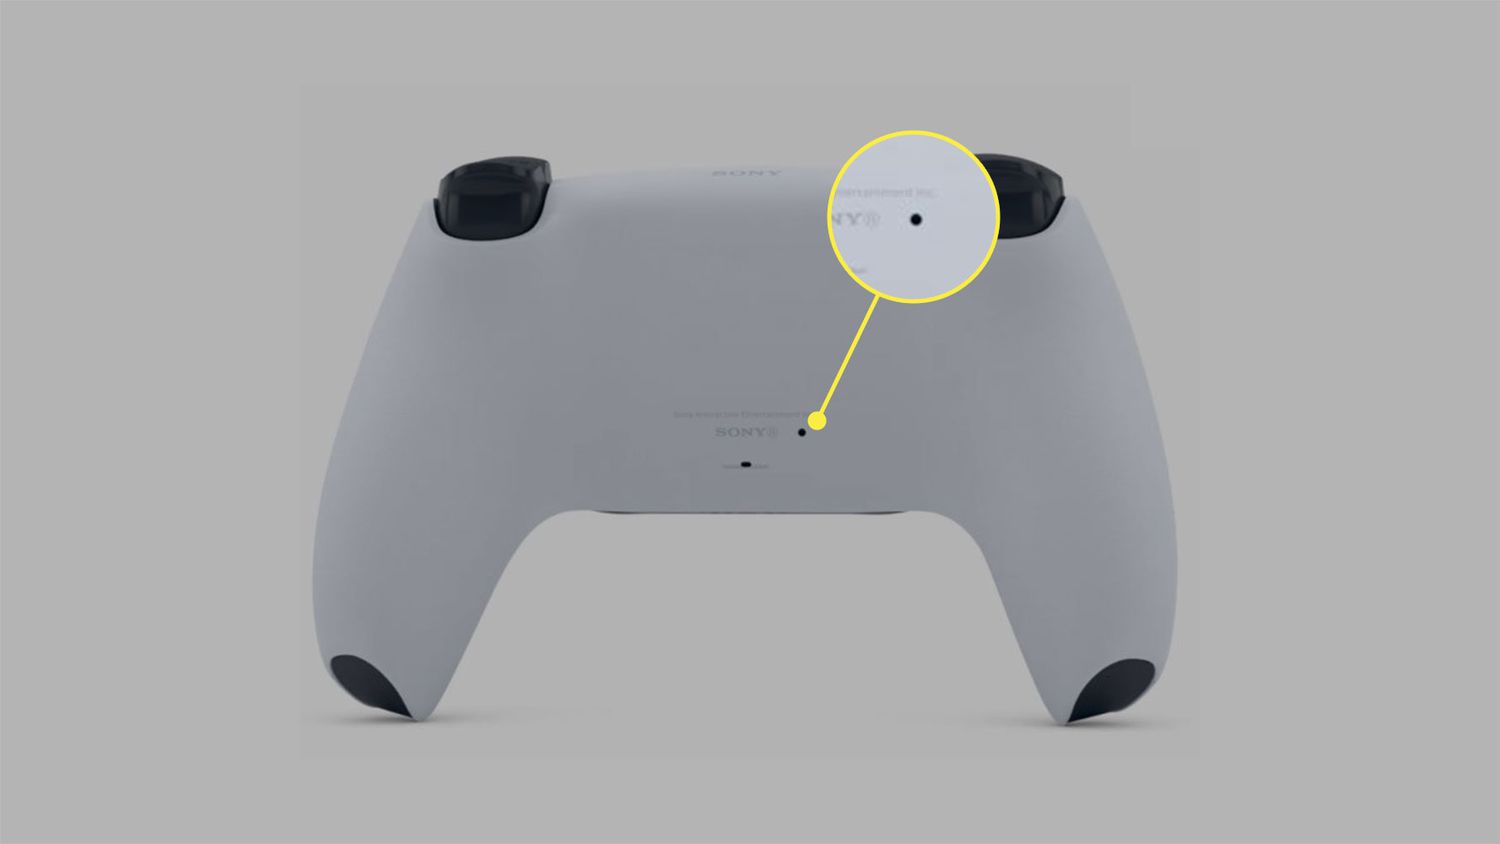
- Connect the USB-C cable: Take the USB-C cable that came with your PS5 and connect one end to the controller’s charging port. The charging port is located at the top-center of the controller.
- Connect the other end of the USB-C cable to either one of the USB ports on the front or back of the PS5 console. The USB ports are rectangular-shaped and can be found on the front and back of the console.
- Once the cable is connected, you’ll notice a small yellow light on the front of the controller near the USB port. This light indicates that the controller is charging.
- Leave the controller connected to the console for a few hours or until the yellow light turns off. This indicates that the controller’s battery is fully charged and ready to use.
- Once the controller is fully charged, disconnect it from the USB cable. You can now proceed to turning on your PS5 with the controller.
By ensuring that your controller is charged, you’ll be able to enjoy uninterrupted gaming sessions without any worries of the battery dying. It’s always a good idea to charge the controller after each gaming session to keep it ready for the next time you want to play.
Step 2: Power on the PlayStation 5 Console
Now that your controller is fully charged, it’s time to power on your PlayStation 5 console. Here are the simple steps to do so:
- Locate the power button: On the front of the PS5 console, locate the power button. It is a small circular button with the PlayStation logo on it.
- Position yourself in front of the console: Stand or sit in front of the console, ensuring that you have a clear line of sight to the power button.
- Press the power button: Using your finger, lightly press and hold the power button for a few seconds until you hear a beep sound and see the console’s blue LED light turn on. This indicates that the console is powering on.
- Wait for the console to boot up: Give the console a few moments to boot up. During this time, you may see the PlayStation logo or a screen displaying the console’s loading progress.
- Once the console has finished booting up, you’ll be taken to the home screen where you can access various features and games.
By following these steps, you will successfully power on your PlayStation 5 console. Ensure that you have a stable power source and the console is properly connected to your TV or monitor for the best gaming experience. Now that your console is up and running, it’s time to move on to the next step of turning on the PS5 using the controller.
Step 3: Press the PlayStation Button on the Controller
Once your PlayStation 5 console is powered on, it’s time to use the controller to complete the setup process. The PlayStation button on the controller plays a key role in turning on the PS5. Follow these steps to press the PlayStation button and continue with the setup:
- Ensure that the controller is within range: Make sure that your controller is within the wireless range of the console. Typically, the range is around 10-15 feet (3-4.5 meters), but this may vary depending on the environment.
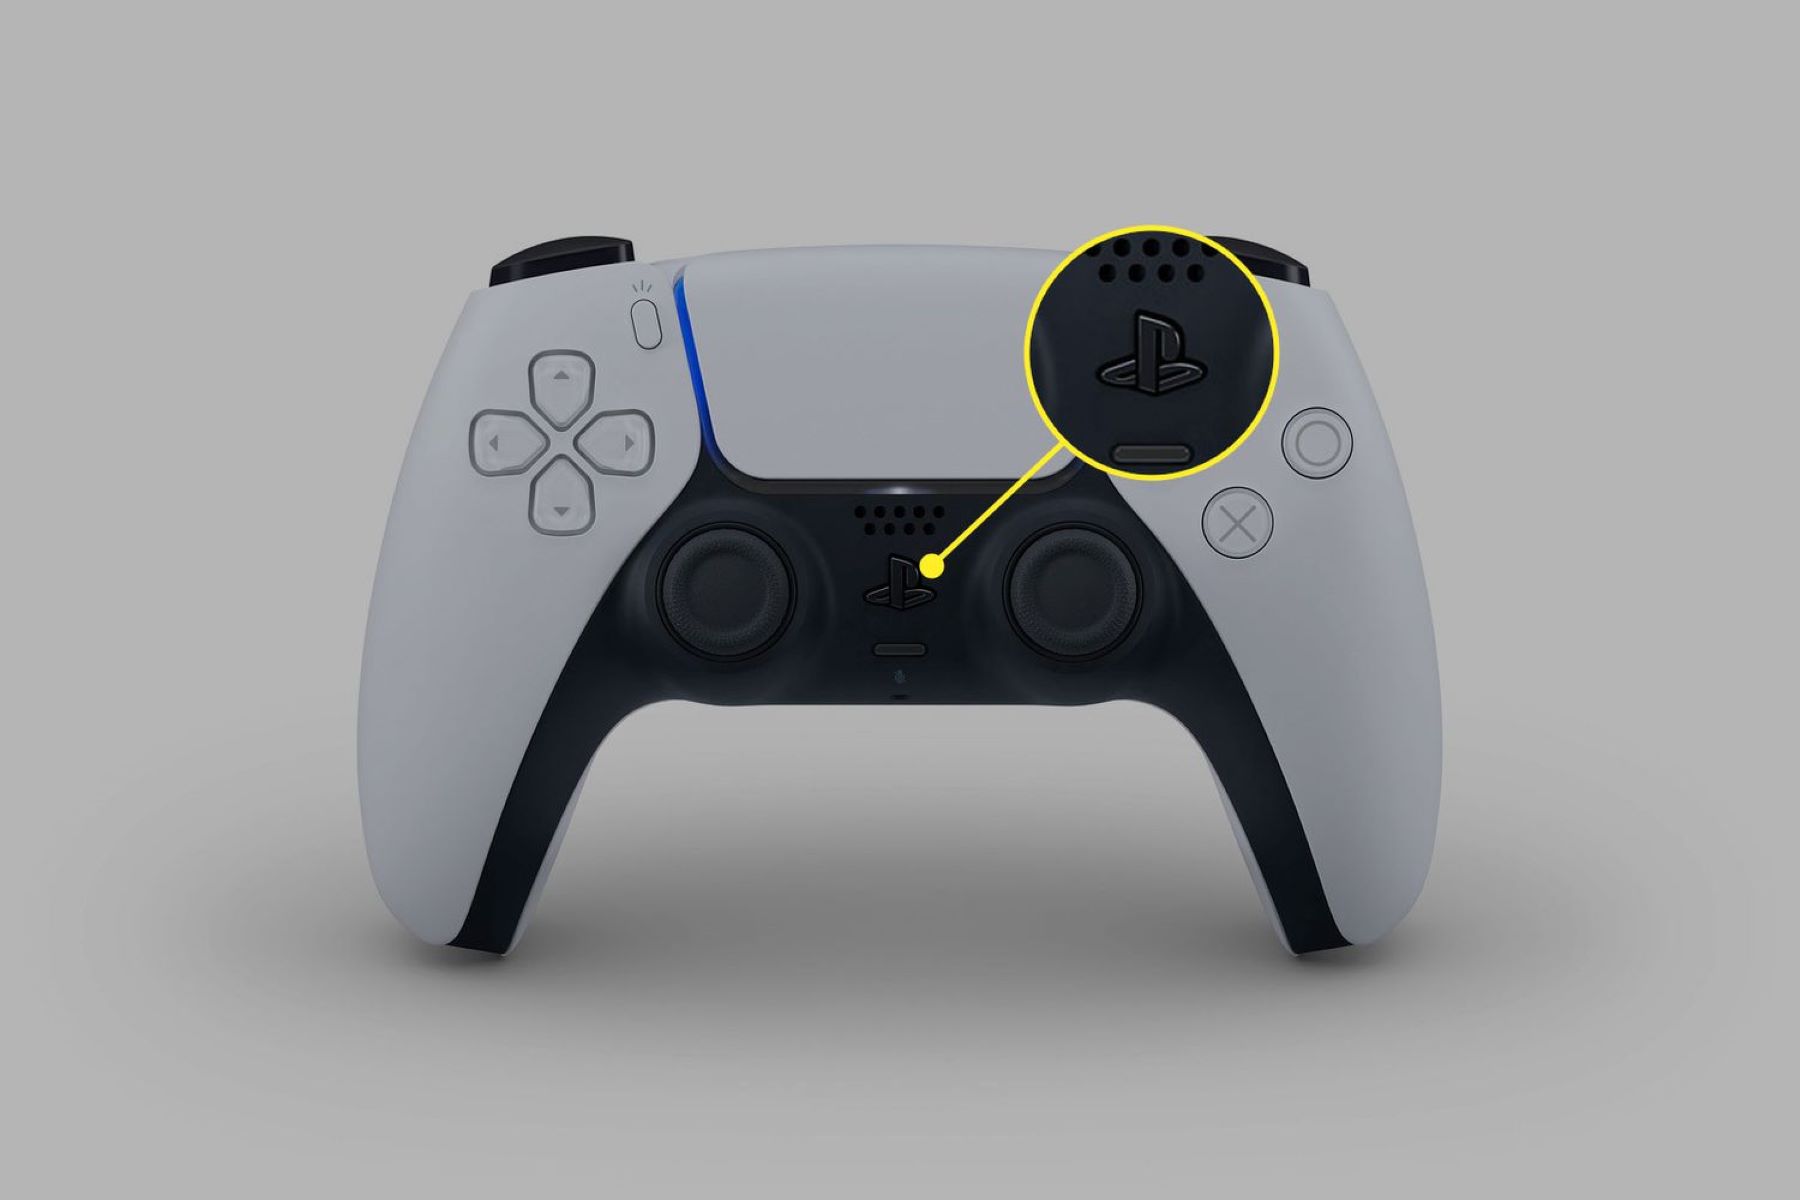
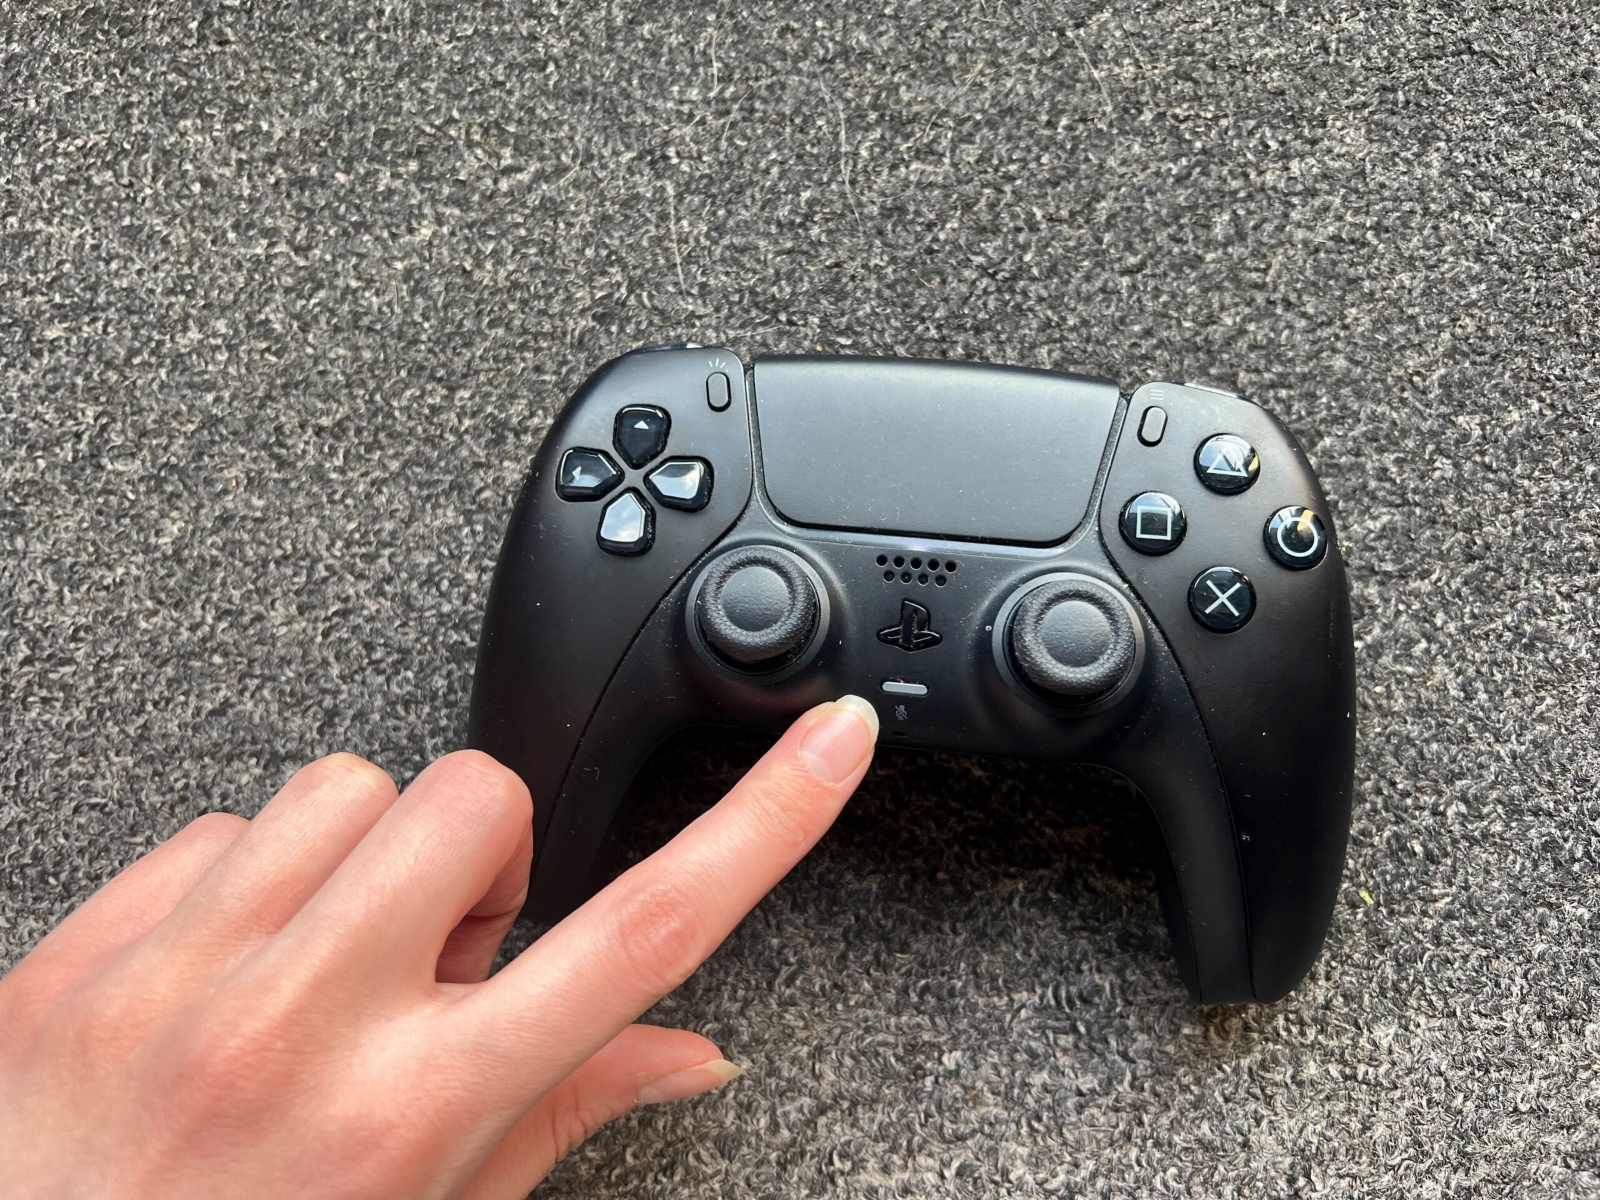
- Locate the PlayStation button: On the front of the controller, near the top, you will find the PlayStation button. It is a rounded button with the iconic PlayStation logo on it.
- Press the PlayStation button: Using your thumb or finger, press and hold the PlayStation button for a few seconds until you see the light bar on the controller turn on. This indicates that the controller is connecting to the console.
- Wait for the controller to connect: Give the controller a few moments to establish a connection with the PS5 console. You may see a loading screen or the controller’s light bar flashing during this process.
- Once the controller is successfully connected, you’ll be taken to a screen where you can choose your user profile and continue with the setup process.
By pressing the PlayStation button on the controller, you will establish a connection between the controller and the PS5 console, allowing you to navigate through the setup process. Make sure to keep the controller nearby and avoid any obstructions that could interfere with the wireless connection. With the controller connected and ready, it’s time to move on to the next step of choosing your user profile.
Step 4: Choose Your User Profile
After successfully connecting the controller to the PlayStation 5 console, it’s time to choose your user profile. The user profile allows you to personalize your gaming experience and save your progress in games. Follow these steps to select your user profile:
- On the screen, you will see a list of available user profiles. User profiles may include your own profile, profiles of other players, or guest profiles.
- Highlight and select your desired user profile using the directional buttons on the controller. You can navigate through the list using the left stick or the directional pad.
- If you’re creating a new user profile, follow the on-screen prompts to set up your profile. This may include entering your username, selecting an avatar, or customizing your profile settings.
- If you’re selecting an existing user profile, you will be taken to the home screen associated with that profile.
- Once you’ve selected or created your user profile, you’re ready to start playing! Navigate through the console’s interface using the left stick or the directional pad and explore the various features and games available to you.
Choosing your user profile allows you to personalize your gaming experience and keep track of your progress in games. You can switch between user profiles at any time to accommodate different players or access specific save files. Now that you’ve selected your user profile, it’s time to dive into the world of gaming with your PlayStation 5!
Step 5: Start Playing!
Now that you’ve successfully set up your user profile, it’s time to embark on an exciting gaming adventure with your PlayStation 5! Follow these steps to start playing your favorite games:
- From the home screen, navigate to the game library or the game’s icon displayed on the screen. You can use the left stick or the directional pad to move the cursor and the “X” button to select.
- Once you’ve selected the game you want to play, press the “X” button to launch the game. Depending on the game, you may be prompted to download updates or install any necessary files before you can start playing.
- Follow any on-screen instructions or prompts provided by the game to get started. This may include selecting game modes, customizing settings, or creating a new game save.
- Once the game has launched, immerse yourself in the virtual world and enjoy hours of gameplay! Use the controller’s buttons, sticks, and touchpad to control your character or interact with the game’s environment.
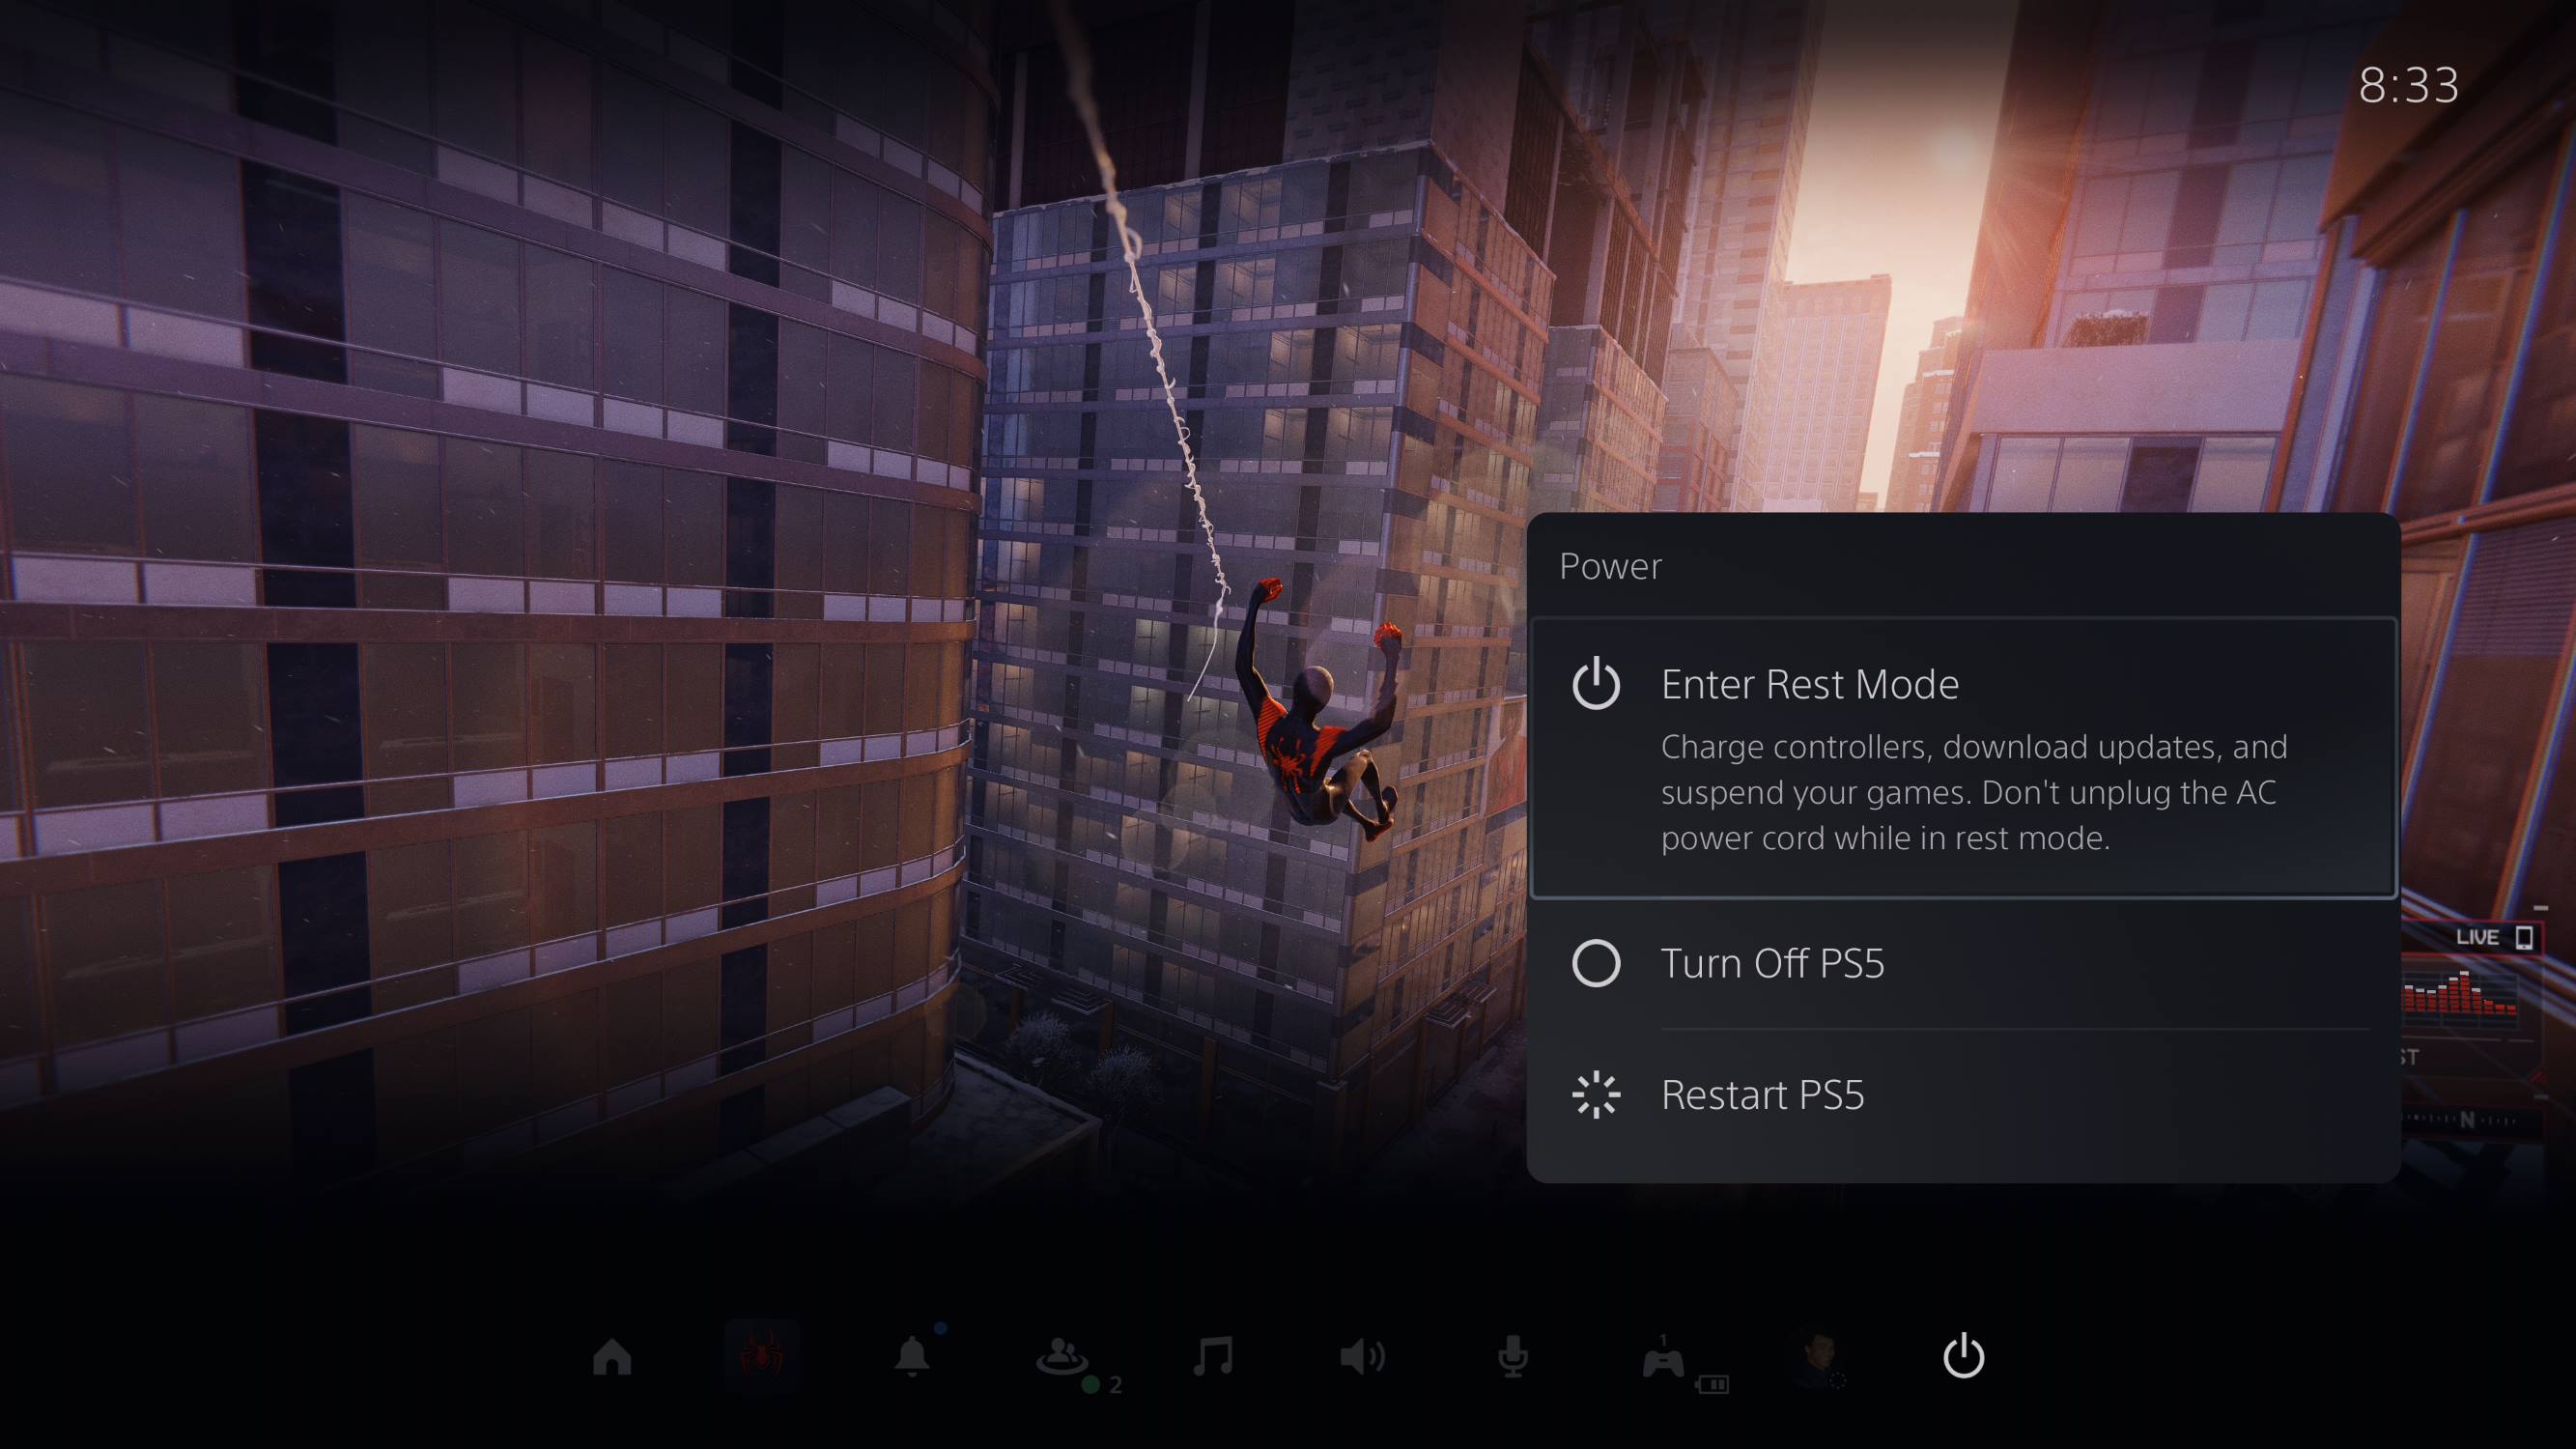
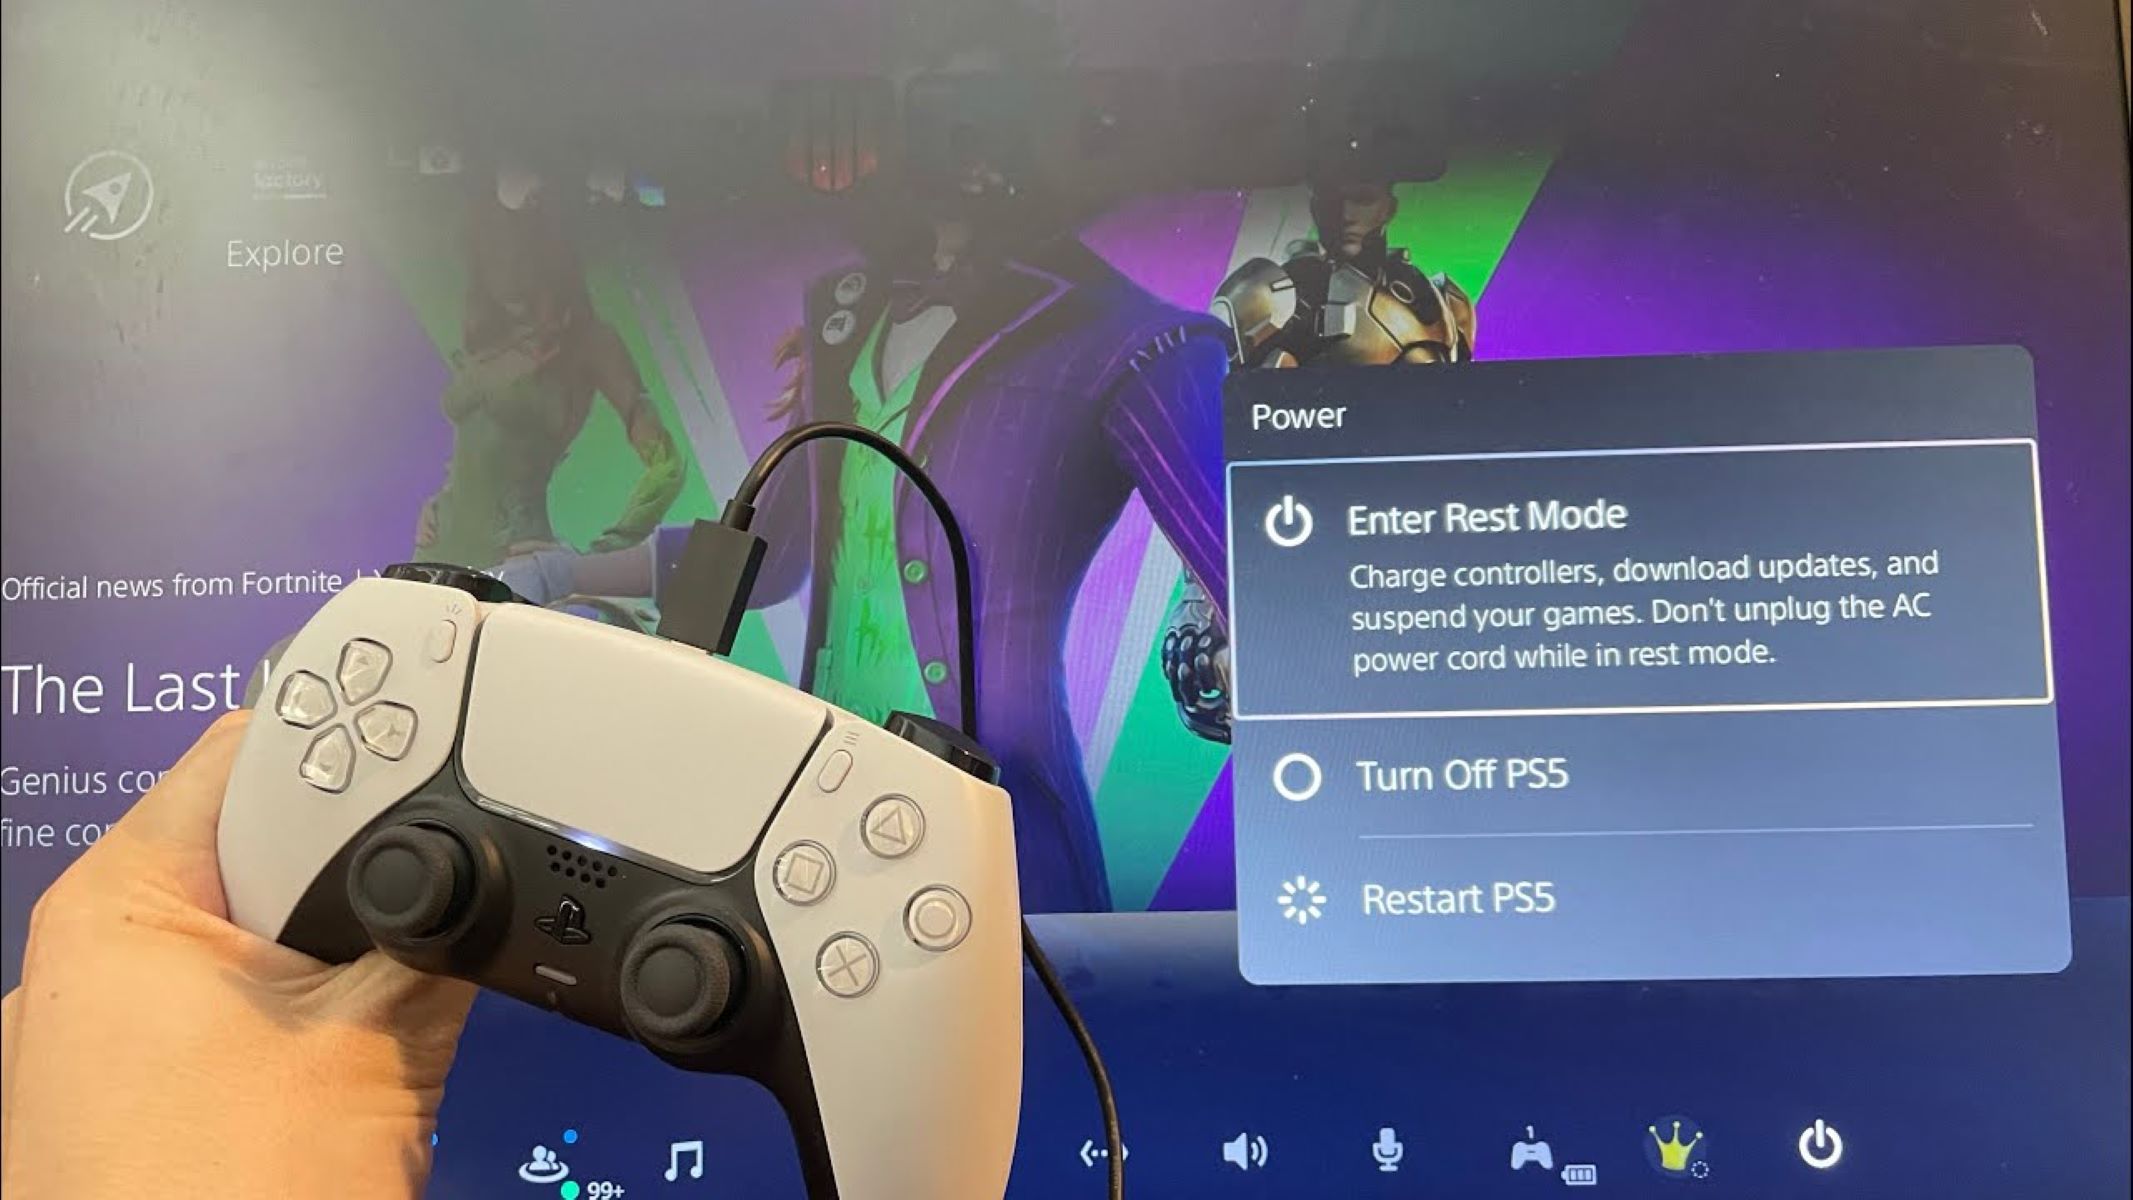
- When you’re finished playing, you can either put the console into rest mode by pressing and holding the PlayStation button on the controller and selecting “Enter Rest Mode,” or power off the console by pressing and holding the PlayStation button and selecting “Turn Off PS5.
Remember to save your game progress regularly to ensure that you don’t lose any hard-earned achievements or milestones. Additionally, make sure to take breaks and practice good gaming habits to maintain a healthy balance in your gaming sessions.
With your PlayStation 5 up and running, you’re ready to embark on countless thrilling adventures and experience some of the best gaming moments. The combination of the powerful console and the intuitive controller will elevate your gameplay to new heights. So grab your controller, choose your game, and let the gaming begin!