Introduction
Welcome to our guide on how to turn off Google Authenticator! Google Authenticator is a popular two-factor authentication app that adds an extra layer of security to your online accounts. While it provides enhanced protection against unauthorized access, there may be situations where you need to disable it, such as when switching devices or troubleshooting login issues.
In this article, we will walk you through the step-by-step process of turning off Google Authenticator. Whether you’re using it for your email, social media accounts, or other online services, our guide will help you disable it smoothly.
Please note that Google Authenticator is just one of many two-factor authentication methods available, and disabling it will revert your account to a single-factor authentication mode. Make sure you understand the security implications and consult the platform’s official guides or support if you have any concerns.
Now, let’s dive into the steps required to turn off Google Authenticator and regain full control of your account.
Step 1: Open the Google Authenticator app
The first step in turning off Google Authenticator is to open the app on your mobile device. The Google Authenticator app is available for both Android and iOS devices, and you can download it for free from the respective app stores.
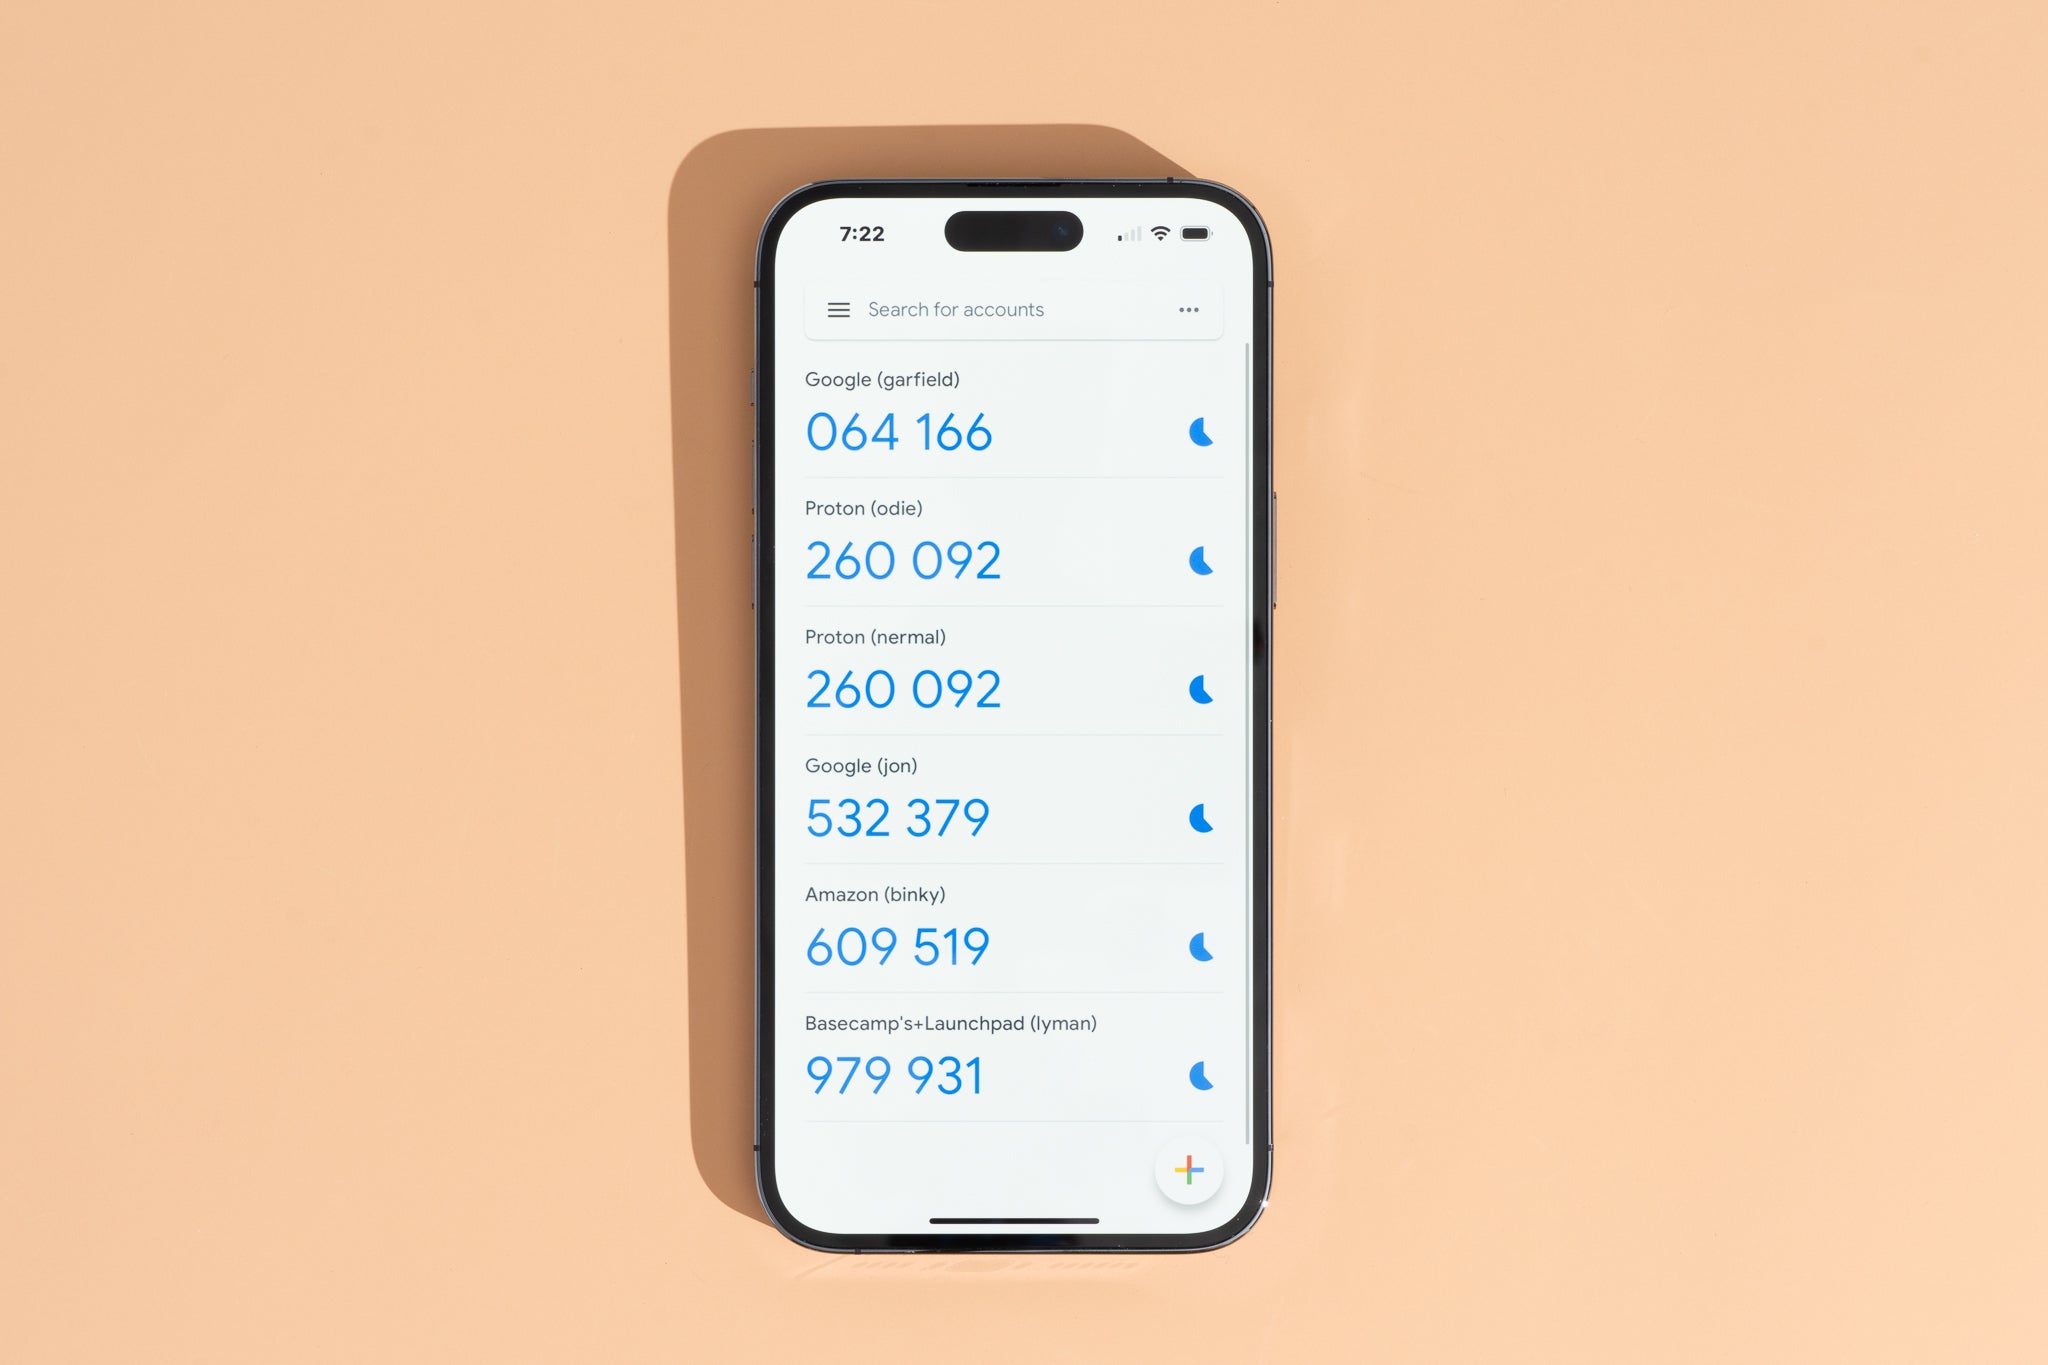
Once you have installed and opened the app, you will see a list of accounts that you have set up for two-factor authentication. These can include accounts for email providers, social media platforms, and other online services.
Scroll through the list and locate the account for which you want to turn off Google Authenticator. Tap on its name to proceed to the next step.
If you have multiple accounts in the app, make sure to choose the correct one to disable two-factor authentication. This step is crucial to ensure that you disable the security feature for the correct account.
By opening the Google Authenticator app and selecting the desired account, you are now ready to proceed to the next step in turning off Google Authenticator.
Step 2: Select the account you want to turn off
After opening the Google Authenticator app, you will see a list of accounts that you have set up for two-factor authentication. This list may include accounts for email providers, social media platforms, and other online services.
Take a moment to locate and select the account for which you want to turn off Google Authenticator. It is important to choose the correct account to disable two-factor authentication, as disabling it for the wrong account may lead to security issues.
When you select the desired account, you will be taken to a screen that displays a time-based one-time password (TOTP). This six-digit code refreshes every 30 seconds and is used for authentication purposes when logging into your account.
Keep in mind that each account in the Google Authenticator app has its own unique TOTP code. Make sure to select the correct account and verify that the displayed TOTP code matches the one associated with the account you want to turn off.
Once you have confirmed the account and its associated TOTP code, you are now ready to proceed to the next step and turn off Google Authenticator for that specific account.
Step 3: Tap on the three-dot menu icon
After selecting the account you want to turn off Google Authenticator for, you will need to access the settings menu within the app. To do this, look for the three-dot menu icon, often located in the top-right or bottom-right corner of the screen.
Tapping on the three-dot menu icon will open a dropdown menu with various options and settings for the selected account.
Depending on the version of the Google Authenticator app you are using, the three-dot menu icon may be replaced with an ellipsis symbol (…) or another similar icon. Regardless of the specific icon, the functionality remains the same.
Once you have located the three-dot menu icon, tap on it to access the additional options.
If you are having trouble finding the menu icon, you can consult the app’s official documentation or seek assistance from the platform’s support team.
By tapping on the three-dot menu icon, you are now ready to proceed to the next step and access the settings to turn off Google Authenticator for the selected account.
Step 4: Choose “Settings” from the dropdown menu
After tapping on the three-dot menu icon, a dropdown menu will appear on your screen. This menu contains various options and settings for the selected account in the Google Authenticator app. To turn off Google Authenticator, you will need to access the settings.
Scroll through the dropdown menu and look for the “Settings” option. The location of the “Settings” option may vary depending on the version of the app you are using, but it is generally located towards the bottom of the menu.
Once you have located the “Settings” option, tap on it to access the settings for the selected account.
If you are unable to find the “Settings” option, refer to the app’s official documentation or reach out to the platform’s support team for guidance.
By choosing “Settings” from the dropdown menu, you are one step closer to turning off Google Authenticator for the selected account. Proceed to the next step to complete the process.
Step 5: Select “Turn off 2FA”
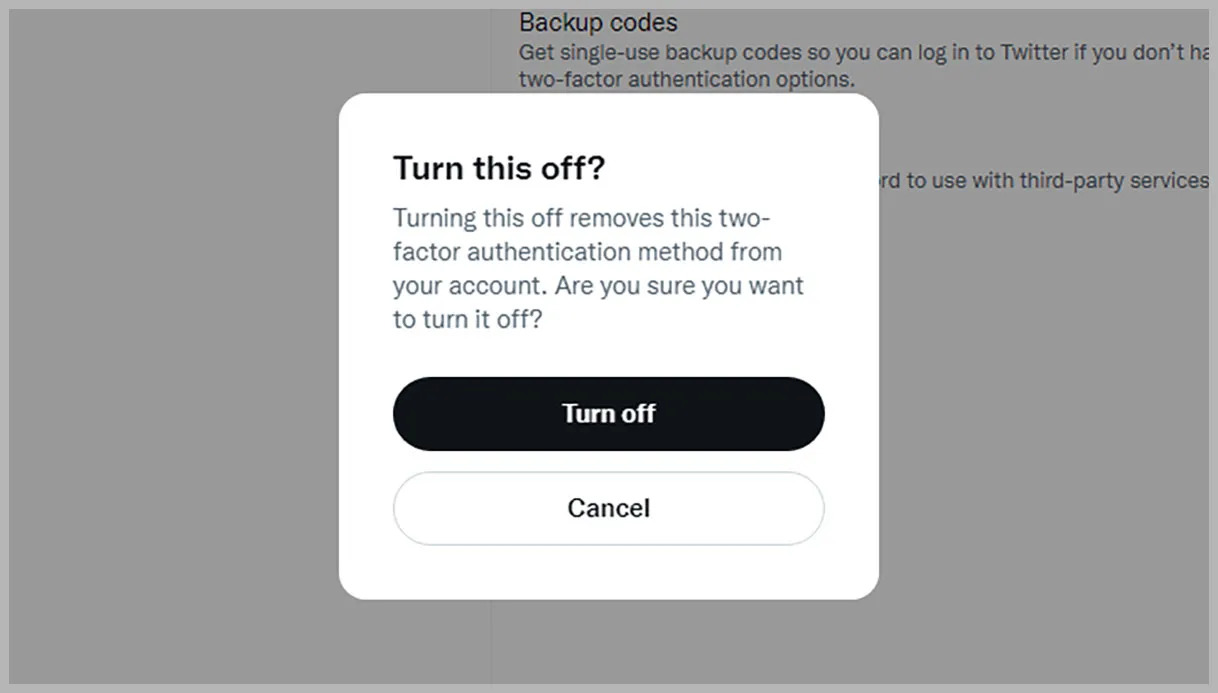
After accessing the settings for the selected account, you will be presented with a list of options and configurations. Your objective is to find the option that allows you to turn off Google Authenticator, typically labeled as “Turn off 2FA” or something similar.
Scroll through the settings until you locate the option to disable two-factor authentication for the account. Depending on the app version and platform, this option may be listed under different names, such as “Disable 2-Step Verification” or “Deactivate Two-Factor Authentication.”
Once you have found the appropriate option, tap on it to proceed with turning off Google Authenticator for the selected account.
Before making the final confirmation, the app might prompt you to verify your identity through other means, such as a password or a biometric authentication method (e.g., fingerprint or face recognition).
Ensure that you have a backup authentication method in place before disabling Google Authenticator. This can be an email address, a phone number, or any other method supported by the platform to ensure continued account security.
Once you have successfully completed the necessary steps and confirmed the disabling of Google Authenticator, the app will turn off two-factor authentication for the selected account.
It’s important to note that the specific process may vary depending on the app version, platform, and the service you are using. If you encounter any difficulties or have any questions, refer to the app’s documentation or contact the platform’s support for assistance.
By selecting “Turn off 2FA” and following the respective prompts, you have successfully disabled two-factor authentication using Google Authenticator for the selected account.
Conclusion
Congratulations! You have successfully learned how to turn off Google Authenticator for your selected account. By following the step-by-step instructions in this guide, you can now disable two-factor authentication and regain control over your account.
It’s important to remember that turning off two-factor authentication should be done with caution. While it may be necessary in certain situations, disabling this security feature removes an additional layer of protection from your account.
If you decide to re-enable two-factor authentication in the future, you can follow the corresponding instructions provided by the platform or service you are using. This will help you strengthen the security of your account and protect it from unauthorized access.
Remember to always keep your accounts secure by using strong, unique passwords, enabling additional security measures when possible, and regularly updating your login information.
If you encounter any difficulties or have any questions during the process of turning off Google Authenticator, don’t hesitate to consult the official documentation or reach out to the platform’s support team for assistance.
Thank you for following this guide, and we hope it has been helpful in achieving your goal of turning off Google Authenticator for your selected account. Stay safe and secure in your online activities!