Introduction
Welcome to the exciting world of 3D scanning! If you’re fascinated by technology and the possibilities it offers, then you’re in for a treat. In this article, we’re going to explore how you can transform your Kinect device into a powerful 3D scanner. So, grab your Kinect, roll up your sleeves, and let’s get started!
But first, let’s answer the burning question: what exactly is a Kinect? The Kinect sensor was initially developed for the Xbox gaming console, but its capabilities go far beyond gaming. It’s a depth-sensing camera that uses infrared technology to track the movement of objects and people in a 3D space. This makes it an ideal device for creating 3D scans of real-world objects.
Now that we understand what a Kinect is, let’s dive into the nitty-gritty. How does a Kinect actually work? It relies on a combination of cameras, depth sensors, and infrared projectors to capture the depth and shape of objects in front of it. These sensors work together to create a detailed 3D representation of the scanned object, which can then be used for a variety of purposes such as 3D printing, virtual reality, and animation.
Before we jump into the scanning process, it’s beneficial to have a basic understanding of 3D scanning itself. 3D scanning is the process of capturing the geometry, texture, and color of a real-world object to create a digital model. This digital model can be manipulated, modified, or reproduced using various computer software programs. It’s a revolutionary technology that has applications in industries like architecture, manufacturing, healthcare, and entertainment.
Now that you have a grasp of the fundamentals, it’s time to start turning your Kinect into a 3D scanner. In the following sections, we’ll guide you through the step-by-step process, from setting up your Kinect to cleaning up and editing your scans, and finally exporting and saving your scanned objects. So, let’s roll up our sleeves and unlock the full potential of your Kinect!
What is a Kinect?
The Kinect is a motion sensing input device developed by Microsoft for gaming consoles, primarily for the Xbox. However, its capabilities extend far beyond the realm of gaming. The Kinect features an array of cameras, depth sensors, and infrared projectors, which work together to track and interpret the movements of people and objects in a three-dimensional space.
When it was first released in 2010, the Kinect revolutionized the gaming industry by allowing players to control games using their body movements, rather than a traditional controller. This innovative technology opened up a whole new world of interactive and immersive gaming experiences. But the Kinect’s potential doesn’t end there.
Due to its advanced sensors and motion tracking capabilities, the Kinect can be repurposed for a wide range of applications beyond gaming. One such application is 3D scanning. By utilizing the Kinect’s depth-sensing capabilities, it’s possible to transform the device into a powerful 3D scanner, capable of capturing the geometry and texture of real-world objects.
With a Kinect in hand, you can now capture precise 3D models of objects simply by moving the device around them. This makes it an ideal tool for artists, designers, architects, and researchers who need to create accurate digital representations of physical objects. The resulting 3D scans can be used for various purposes such as 3D printing, virtual reality experiences, animation, and more.
The Kinect’s ability to accurately track movement and capture depth information is truly remarkable. It uses a combination of structured light, infrared illumination, and depth sensing technology to create high-fidelity 3D scans. This means that not only can you capture the shape and contours of an object, but you can also capture details like its texture and color.
Overall, the Kinect is an incredibly versatile and powerful device that goes well beyond its original purpose in the gaming world. By repurposing it as a 3D scanner, you can unlock a whole new realm of possibilities and creative opportunities. So, if you have a Kinect lying around and have been curious to explore the world of 3D scanning, now is the time to get started!
How does a Kinect work?
The Kinect is a fascinating piece of technology that relies on a combination of cameras, depth sensors, and infrared projectors to track and interpret the movements of objects and people in a three-dimensional space. Let’s dive into the details of how the Kinect works and marvel at its capabilities.
The Kinect’s primary components include an RGB camera, an infrared (IR) camera, and an array of depth sensors. The RGB camera captures the normal color images that we are familiar with, while the IR camera and depth sensors work together to create a depth map of the scene.
The depth sensors emit infrared light, which is invisible to the human eye, and reflect it off the objects in the environment. The IR camera then captures this reflected light, allowing the Kinect to measure the time it takes for the light to travel back and forth. By knowing the speed of light, the Kinect can calculate the distance between the sensor and the objects, thereby creating a depth map.
Using the depth map and the RGB images, the Kinect can identify and track individual objects and people in real-time. It can detect skeletal movements, facial expressions, and even recognize individual users. This is made possible by sophisticated software algorithms that analyze the data and extract relevant information about the objects and people in the scene.
Additionally, the Kinect’s motorized base allows it to pan and tilt, enabling it to track the movement of objects and adjust its field of view accordingly. This ensures that the Kinect can accurately capture and track objects no matter where they are within its range.
One of the key advantages of the Kinect is its ability to process all this data in real-time. This means that the device can interpret and respond to movements and gestures instantaneously, making it ideal for interactive applications like gaming or virtual reality experiences.
The Kinect’s technology has evolved over the years, with newer versions incorporating improved cameras, sensors, and algorithms. These advancements have led to even more precise and accurate tracking, resulting in enhanced user experiences and greater application possibilities.
In summary, the Kinect’s intricate combination of cameras, depth sensors, and software algorithms allows it to capture and interpret the movements of objects and people in a three-dimensional space. By relying on infrared technology and sophisticated processing, the Kinect offers unparalleled tracking capabilities that have revolutionized not only the gaming industry but also various other fields like healthcare, research, and art.
Understanding 3D scanning
Before we dive into the process of transforming your Kinect into a 3D scanner, it’s important to have a basic understanding of 3D scanning itself. 3D scanning is a process that involves capturing the geometry, texture, and color of a real-world object to create a digital model. It’s a technology that has revolutionized industries like architecture, manufacturing, healthcare, and entertainment.
There are several methods used for 3D scanning, each with its own strengths and limitations. One common method is called laser scanning, which involves using laser beams to measure the distance between the scanner and the object’s surface. This technique is highly accurate and can capture very detailed models, making it suitable for industrial applications.
Another method is photogrammetry, which involves taking multiple photographs of an object from different angles and using software to analyze and stitch them together into a 3D model. This method is more accessible and affordable, often utilized by artists and hobbyists for capturing objects or environments.
Now, where does the Kinect come into play? The Kinect utilizes a method called structured light scanning, which is based on projecting a pattern of infrared dots onto the object and analyzing how the pattern deforms on the object’s surface. By measuring the distortions of the projected pattern, the Kinect can calculate the depth information and generate a 3D representation of the object.
Structured light scanning, combined with the Kinect’s depth sensors, allows for quick and accurate 3D scans. The resulting digital model can be further processed and refined using specialized software to remove any imperfections or unwanted artifacts.
It’s worth noting that 3D scanning goes beyond just capturing the shape of an object. Depending on the technology used, it’s also possible to capture the texture and color of the object’s surface. This allows for a more immersive and realistic representation in the digital world.
The applications of 3D scanning are vast. In industries like architecture and design, 3D scanning is used to create detailed models of buildings or landscapes for planning and visualization. In the field of healthcare, it’s used for creating customized prosthetics or dental aligners. In the entertainment industry, it’s used for character modeling and animation.
Overall, understanding the concept of 3D scanning is crucial in unlocking the full potential of your Kinect as a 3D scanner. It’s a powerful technology that bridges the gap between the physical and digital worlds, offering endless possibilities for creativity and innovation in various fields.
Step 1: Setting up your Kinect
Before you can start using your Kinect as a 3D scanner, you’ll need to set it up properly. Here we’ll guide you through the necessary steps to get your Kinect up and running.
The first thing you’ll need is a compatible device to connect your Kinect to. The Kinect was initially designed for the Xbox gaming console, but it can also be used with a PC. If you’re using a PC, make sure it meets the minimum system requirements for running the Kinect software.
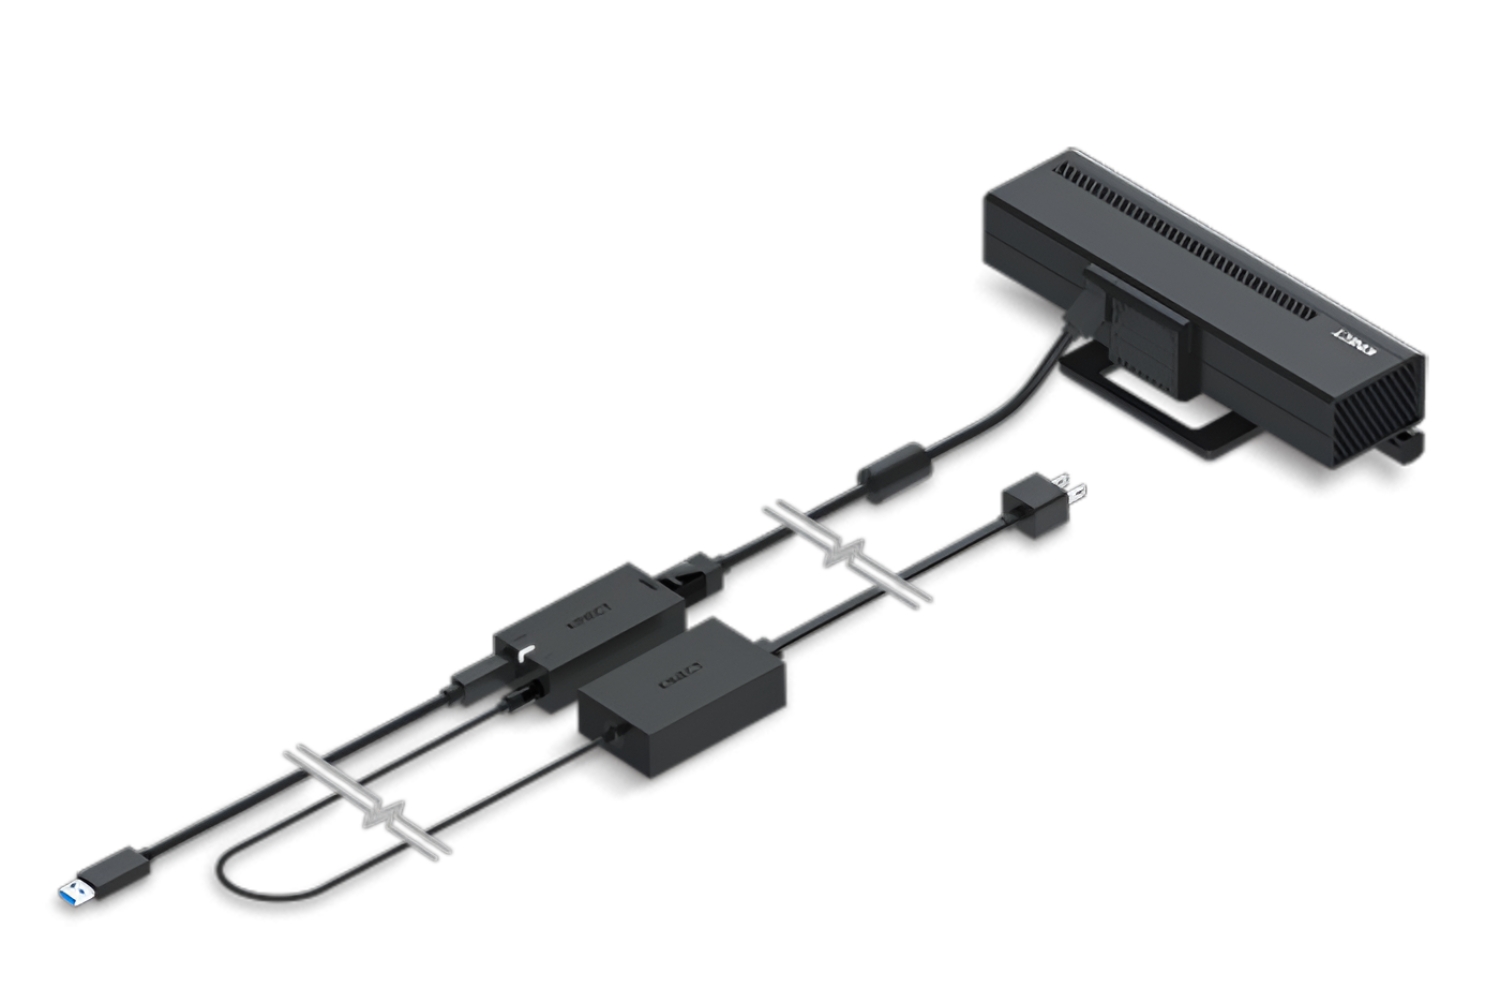
Next, you’ll need to physically connect your Kinect to your device. The Kinect comes with a USB connector, so simply plug it into an available USB port on your computer. If you’re using the original Xbox 360 Kinect, you may also need to connect the power supply to an electrical outlet.
Once the physical connection is established, you’ll need to install the necessary drivers and software to use your Kinect. Microsoft provides the Kinect for Windows SDK (Software Development Kit) that includes the drivers and software libraries required to operate the Kinect on a PC. You can download the SDK from the official Microsoft website and follow the installation instructions provided.
After the installation is complete, you may need to restart your computer to ensure that the Kinect is correctly recognized by the system.
Now that your Kinect is connected and the drivers are installed, it’s time to test if it’s working properly. Launch the Kinect software, and if everything is set up correctly, you should see a live video feed from the Kinect’s RGB camera. You can try moving in front of the Kinect to see if the motion tracking is working and if the depth sensors are accurately capturing the distance to objects.
If you encounter any issues during the setup process or while testing the Kinect, it’s recommended to consult the troubleshooting guides and support resources provided by Microsoft. They have a dedicated Kinect support page that can help you resolve common issues or provide additional assistance.
Once you’ve successfully set up your Kinect and verified that it’s working correctly, you’re ready to move on to the next step: installing the necessary software for 3D scanning. With your Kinect up and running, you’re now one step closer to transforming it into a powerful 3D scanner and unlocking a world of creative possibilities!
Step 2: Installing the necessary software
With your Kinect set up and ready to go, the next step is to install the necessary software to turn it into a 3D scanner. There are several software options available that are specifically designed for Kinect-based 3D scanning. Here’s how you can get started:
The first software option to consider is ReconstructMe. ReconstructMe is a user-friendly and powerful 3D scanning application that supports Kinect-based scanning. You can download the software from the ReconstructMe website and follow the installation instructions provided. Once installed, you can launch the application and begin capturing 3D scans using your Kinect.
Another popular software choice is Skanect. Skanect offers a range of scanning functionalities and is compatible with the Kinect sensor. To install Skanect, visit the Skanect website and download the software. Follow the installation instructions to complete the setup. Once installed, you can connect your Kinect and start scanning objects with Skanect.
If you prefer an open-source option, you can consider using the OpenKinect libraries. These libraries provide a set of tools and APIs for working with Kinect devices, including 3D scanning. To utilize the OpenKinect libraries, you’ll need to download and install them on your computer. You can find detailed installation instructions and documentation on the OpenKinect website. Once installed, you can use the provided tools and libraries to develop your own custom 3D scanning application using the Kinect.
It’s important to note that whichever software option you choose, make sure it’s compatible with the version of the Kinect you’re using, whether it’s the original Xbox 360 Kinect or the later Kinect for Windows version.
Before diving into the scanning process, take some time to explore the software’s features and settings. Familiarize yourself with the scanning controls, the different scanning modes available, and any post-processing options offered by the software. This will ensure that you can make the most out of your scans and optimize the settings for your specific needs.
Lastly, it’s worth mentioning that there are other software options available in addition to the ones mentioned above. Do some research, read reviews, and consider your specific requirements to find the software that best suits your needs and preferences.
Now that you have the necessary software installed, you’re ready to move on to the next step: calibrating your Kinect. Calibration is an essential process to ensure accurate and high-quality 3D scans. So let’s proceed to the next step and fine-tune your Kinect for optimal scanning performance!
Step 3: Calibrating your Kinect
Now that you have the required software installed, it’s time to calibrate your Kinect before diving into the actual scanning process. Calibration is a crucial step that ensures accurate and high-quality 3D scans. Follow these steps to calibrate your Kinect:
1. Launch the 3D scanning software you installed in the previous step. Navigate to the calibration section or settings within the software.
2. Place your Kinect on a stable surface, ensuring it is positioned securely and facing the objects you intend to scan.
3. Start the calibration process within the software. This may involve moving the Kinect in a specific pattern or aligning it with a calibration target provided by the software.
4. Follow the on-screen instructions provided by the software to adjust the Kinect’s position and settings. Most calibration processes involve aligning the depth sensors, calibrating the field of view, and optimizing the distance range for scanning.
5. Take your time during the calibration process and ensure that the Kinect is accurately calibrated. This step is critical for obtaining precise and properly aligned 3D scans.
6. Once the calibration process is complete, verify the calibration by performing a test scan. Capture a simple object or your surroundings to check if the resulting 3D model appears correctly aligned and accurately represents the object’s shape and proportions.
If you encounter any issues during the calibration process or if the scan results are not satisfactory, refer to the software’s documentation or support resources for troubleshooting guidance. It’s possible that minor adjustments may be required to achieve optimal calibration.
Remember, proper calibration is essential for obtaining high-quality 3D scans. Spending a little extra time to ensure accurate calibration will greatly enhance the overall scanning experience and the quality of your final results.
Now that your Kinect is calibrated and ready to go, you can move on to the exciting part: scanning objects with your Kinect. In the next step, we’ll explore the process of capturing 3D scans using your calibrated Kinect and the installed software. So, get your Kinect ready and let’s start capturing the world in three dimensions!
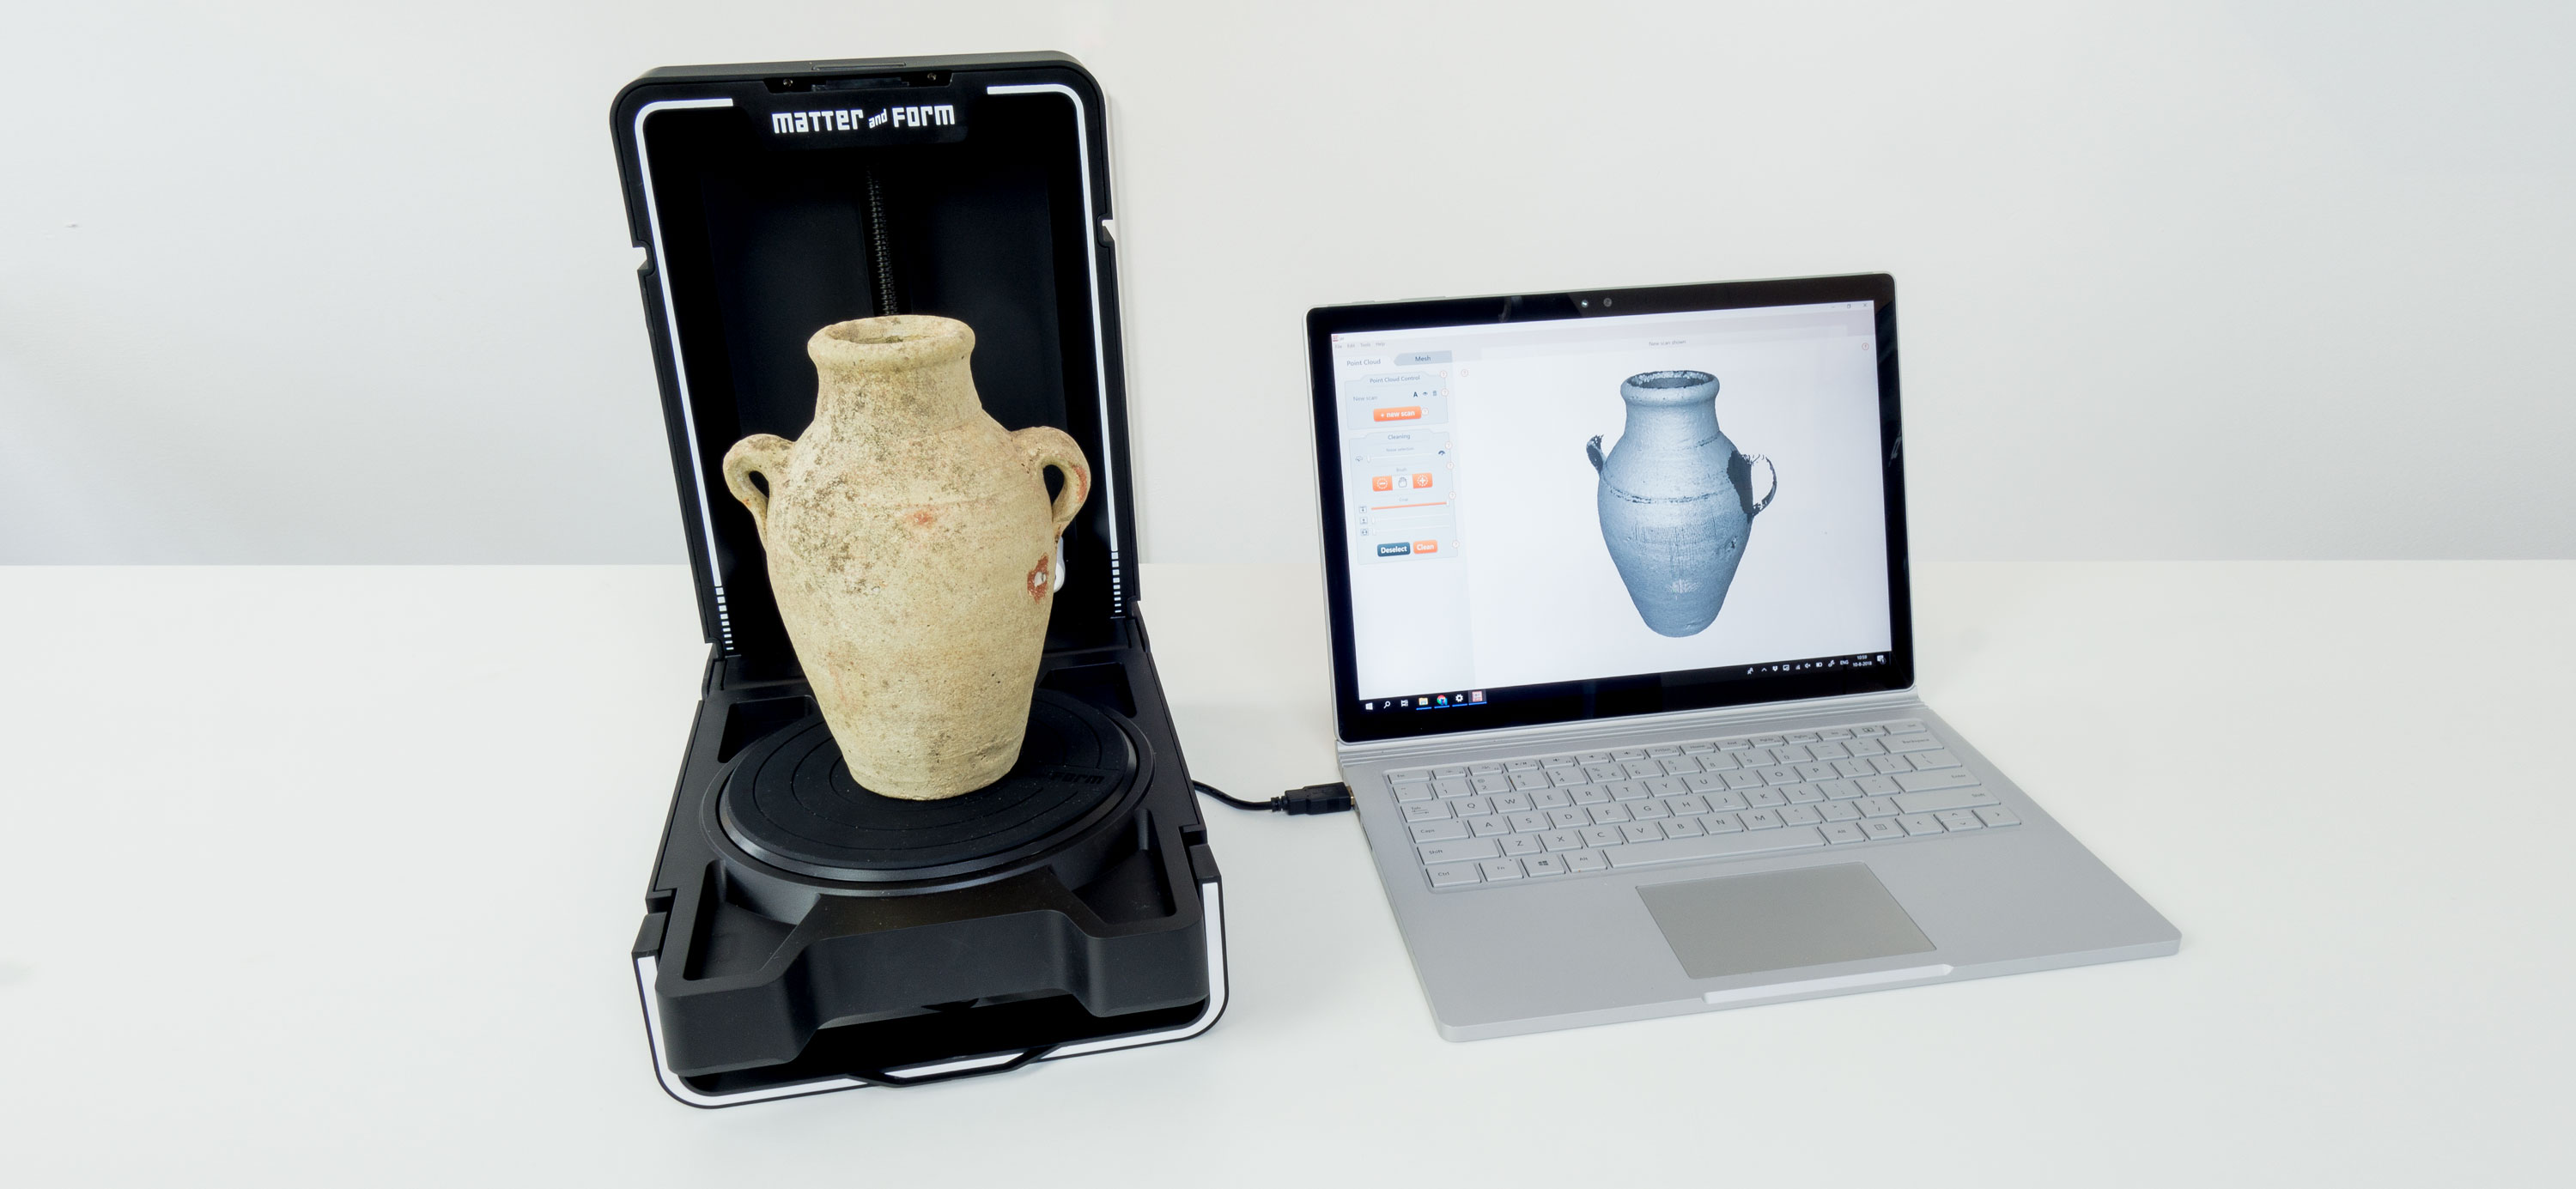
Step 4: Scanning objects with your Kinect
With your calibrated Kinect and the software ready, it’s time to dive into the exciting process of scanning objects in 3D. Follow these steps to capture stunning 3D scans using your Kinect:
1. Launch the 3D scanning software you installed and calibrated in the previous steps. Familiarize yourself with the interface and the available scanning options.
2. Position the object you want to scan in front of the Kinect. Make sure the object is well-lit and placed on a stable surface to minimize unnecessary movement.
3. Adjust the scanning settings in the software according to your preferences. This might include tweaking parameters such as resolution, scanning speed, or texture capture quality.
4. Start the scanning process. Move the Kinect around the object, ensuring that you cover all sides and angles. It’s important to maintain a consistent speed and distance from the object for accurate scanning results.
5. As you move the Kinect, the software will capture and process the depth data to create a real-time representation of the object on the screen. Monitor the live preview to ensure that all areas of the object are being captured adequately.
6. If there are any missed areas or gaps in the scan, you can easily go back and rescan those specific regions to ensure complete coverage.
7. Depending on the software you are using, you may have the option to apply real-time meshing or alignment to the scan while capturing it. This can help to refine the scan as you go along.
8. Once you are satisfied with the scan, finalize the process and generate the final 3D model from the captured data. The software will typically provide options to clean up and refine the scan, such as removing unnecessary artifacts or smoothing the mesh.
9. Review the final 3D scan and make any further adjustments if needed. It’s common for small imperfections or noise to appear in the initial scans, so take the time to fine-tune the model to your satisfaction.
10. Save the finalized 3D scan in a suitable file format (such as .obj, .stl, or .ply) that is compatible with your intended use or further processing.
Remember that practice makes perfect when it comes to 3D scanning. Experiment with different objects, lighting conditions, and scanning techniques to improve your skills and achieve better results.
Now that you have successfully scanned an object in 3D, you can move on to the next step: cleaning up and editing your scans. This step involves refining the captured models to ensure they are accurate and ready for further use. So, let’s proceed and polish those scan results!
Step 5: Cleaning up and editing your scans
After capturing a 3D scan with your Kinect, the next step is to clean up and edit the scan to ensure its accuracy and prepare it for further use. Here are the key steps to follow:
1. Open your 3D scanning software and load the scan you want to clean up and edit. Take a closer look at the scan and identify any areas that may require improvement or adjustments.
2. Use the software’s editing tools to remove any unwanted artifacts or noise that may have been captured during the scanning process. This may include smoothing out rough surfaces, filling in holes or gaps, or removing any stray geometry.
3. Pay attention to the scan’s alignment. If the scan is composed of multiple scans or if the registration is not perfect, you may need to adjust the alignment to ensure proper alignment of the model’s components.
4. Use the editing tools to refine the shape and details of the scan. This may involve sculpting the model, adjusting the geometry, or fine-tuning specific features to ensure accuracy and a more visually appealing result.
5. If necessary, you can also apply texture mapping or projection to add color and texture to the scan. This can enhance the realism and visual quality of the model.
6. Take advantage of any post-processing options offered by the software. This may include tools for smoothing the mesh, reducing noise, or optimizing the geometry for better performance.
7. As you make edits and adjustments, regularly preview the changes to ensure that you are achieving the desired results. This will help you catch any mistakes or issues early on and facilitate a smoother editing process.
8. Once you are satisfied with the cleaning and editing of the scan, save the final edited version in the appropriate file format. Consider the intended use of the scan and choose a file format that is compatible with your desired application, whether it’s 3D printing, virtual reality, or animation.
Remember that the extent of cleaning and editing required will vary depending on the quality of the original scan and your specific needs. It may take some trial and error to achieve the desired result, so don’t hesitate to iterate and make further adjustments as needed.
Now that your scan is cleaned up and edited, you’re almost ready to export and save your scanned object. However, before we finalize the process, let’s explore the final step: exporting and saving your scanned objects.
Step 6: Exporting and saving your scanned objects
Once you have cleaned up and edited your 3D scans, it’s time to export and save them in a usable format. This final step allows you to share, modify, or use the scanned objects for various applications. Follow these steps to export and save your scanned objects:
1. Open your 3D scanning software and load the finalized scan that is ready for export. Ensure that any necessary cleaning and editing have been completed to your satisfaction.
2. Check the available export options in the software. Common file formats for 3D scans include .obj, .stl, .ply, and .fbx. Choose the format that best suits your intended use or compatibility requirements.
3. Set the export parameters, such as the desired level of detail, unit of measurement, and any additional options specific to the chosen file format. Consider the purpose of the exported scan when making these choices.
4. Specify the destination folder or location where you want to save the exported file. Choose a location that is easily accessible and organized for future reference or use.
5. Click the export or save button to initiate the export process. Depending on the complexity and size of the scan, this process may take a few moments to complete.
6. Once the export is finished, verify that the exported file is saved in the chosen location. Open the exported file in a 3D viewer or the application you plan to use it in to ensure that the export was successful and the scan appears as expected.
7. Make a backup copy of the exported file to preserve the original version. It’s always a good practice to keep a backup in case any future modifications or changes are needed.
8. If desired, you can also explore additional processing options to further optimize or refine the exported scan. This may include reducing the file size, optimizing the mesh, or applying additional post-processing effects or modifications.
Congratulations! You have successfully exported and saved your scanned object. Your 3D scan is now ready for use in various applications such as 3D printing, computer graphics, virtual reality, or animations.
Remember to keep a record of the scanning parameters, software settings, and any additional information related to the scan. This documentation will be valuable if you need to revisit or modify the scan in the future.
Now that you have completed the process of turning your Kinect into a 3D scanner, you can continue exploring and experimenting with different objects, settings, and techniques to expand your skills and achieve even better results. Enjoy the exciting world of 3D scanning!
Conclusion
Congratulations on successfully transforming your Kinect into a powerful 3D scanner! Throughout this guide, we explored the steps involved in setting up your Kinect, installing the necessary software, calibrating the device, scanning objects, cleaning up and editing your scans, and finally exporting and saving your scanned objects. By following these steps, you’ve unlocked the ability to capture detailed 3D models using the Kinect’s depth-sensing technology.
3D scanning opens up a world of possibilities for various industries and creative endeavors. Whether you’re an artist, designer, engineer, or hobbyist, the ability to digitize real-world objects with ease can revolutionize your approach to projects. From 3D printing prototypes and artifacts to creating virtual reality experiences and animation, your Kinect-turned-3D scanner can be a powerful tool in your creative arsenal.
Remember to keep practicing and experimenting with different objects, lighting conditions, and software settings to improve your scanning skills and achieve optimal results. Each scan presents an opportunity to learn and refine your technique.
Stay up-to-date with advancements in 3D scanning technology, as new tools and software are continually emerging. Explore different software options and techniques to find the ones that best fit your needs and preferences.
Don’t hesitate to reach out to online communities, forums, or tutorials for additional guidance and inspiration. Connecting with fellow 3D scanning enthusiasts can provide valuable insights and keep you motivated on your scanning journey.
Now that you have completed this guide, you have a solid foundation for using your Kinect as a 3D scanner. Embrace the possibilities and continue exploring the endless creative potential that 3D scanning offers. So, grab your Kinect, dive into the world of 3D scanning, and let your imagination soar!