Introduction
Welcome to the exciting world of the Samsung Note 10 3D Scanner! With this powerful tool, you can turn your smartphone into a portable 3D scanning device. Whether you’re an artist, designer, engineer, or just someone who loves to explore new technology, the Samsung Note 10 3D Scanner offers endless possibilities for capturing and manipulating three-dimensional objects.
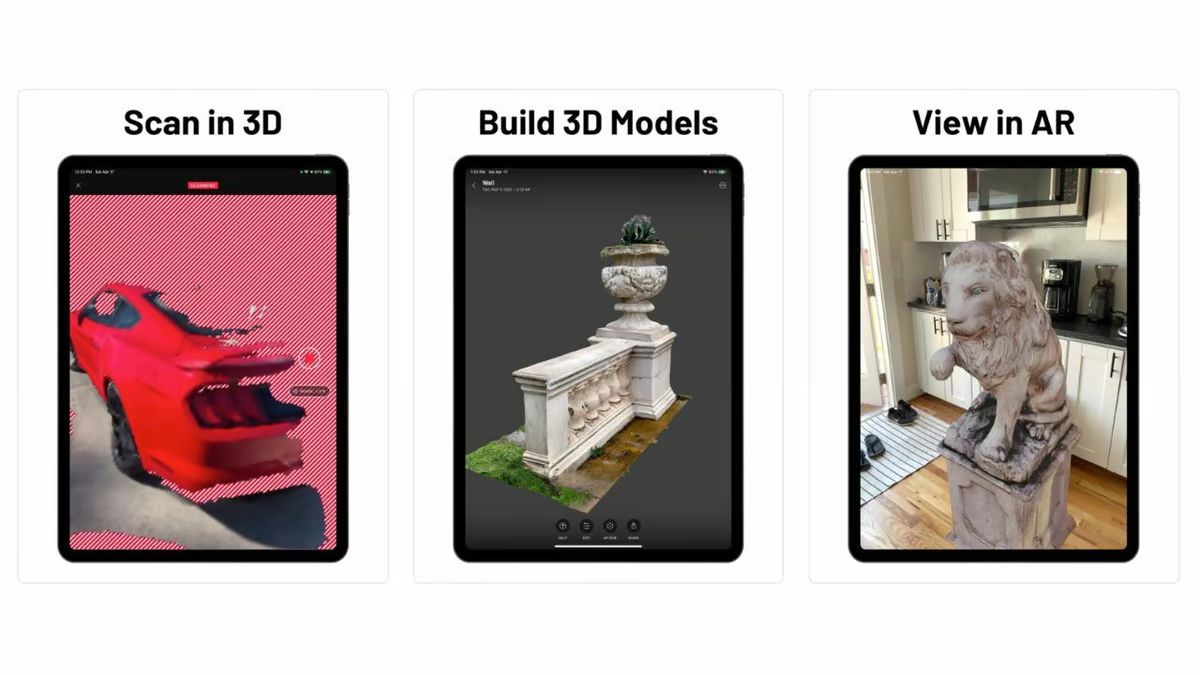
By utilizing advanced hardware and software, the Samsung Note 10 3D Scanner is capable of scanning objects and converting them into digital 3D models with remarkable precision and detail. This opens up a whole new realm of creativity and practical applications, from creating custom designs for 3D printing to capturing realistic virtual objects for augmented reality experiences.
In this guide, we will take you through the process of using the Samsung Note 10 3D Scanner step by step. We will explore the different features and functions of the 3D Scanner app, provide tips and recommendations for achieving optimal scan results, and guide you through editing and refining your scanned objects. Additionally, we will cover exporting and sharing your scanned files, as well as troubleshooting common issues that may arise during the scanning process.
Whether you are a beginner or an experienced user, this guide will equip you with the knowledge and skills to make the most of the Samsung Note 10 3D Scanner. So, let’s dive in and unlock the potential of this incredible technology!
What is the Samsung Note 10 3D Scanner?
The Samsung Note 10 3D Scanner is a revolutionary feature that takes advantage of the powerful hardware and software capabilities of the Samsung Note 10 smartphone. It allows users to scan real-life objects and convert them into digital 3D models.
Using a combination of the device’s camera system, depth sensors, and advanced algorithms, the 3D Scanner is able to capture the shape, texture, and intricate details of any object. This technology opens up a myriad of possibilities for artists, designers, engineers, and hobbyists alike.
With the Samsung Note 10 3D Scanner, you can bring physical objects into the digital realm. Whether you want to preserve a cherished memento, create personalized 3D printed objects, or explore the possibilities of augmented reality, this tool provides a convenient and accessible solution.
One of the standout features of the Samsung Note 10 3D Scanner is its ease of use. The intuitive interface guides users through the scanning process, making it accessible to both beginners and experienced users. Simply launch the 3D Scanner app on your Note 10, point the camera at the object you want to scan, and follow the on-screen instructions.
It’s important to note that while the Samsung Note 10 3D Scanner offers impressive scanning capabilities, it does have some limitations. For example, highly reflective or transparent objects may prove challenging to scan accurately. Additionally, intricate details on small objects may require more precise positioning or multiple scans to capture all the nuances.
However, with a bit of experimentation and the tips and techniques provided in this guide, you’ll be well on your way to creating stunning 3D models with the Samsung Note 10 3D Scanner. So, let’s dive in and discover the endless possibilities that this incredible tool offers!
Getting Started with the 3D Scanner
Before you start using the Samsung Note 10 3D Scanner, there are a few basic steps you need to follow to ensure optimal performance and scanning results.
Step 1: Check Compatibility
First and foremost, make sure that your Samsung Note 10 smartphone is compatible with the 3D Scanner feature. The 3D Scanner is typically pre-installed on newer Note 10 models, but if you’re unsure, you can check for the app in your app drawer or search for it in the Samsung Galaxy Store.
Step 2: Clear Space and Lighting
For accurate scanning, find a well-lit area with ample space to maneuver around the object you want to scan. Ideally, choose an area with natural lighting or use additional lighting to ensure good visibility and minimize shadows.
Step 3: Calibrate the Scanner
To ensure precise measurements and accurate scanning results, it’s important to calibrate the 3D Scanner before you start scanning objects. Follow the on-screen instructions provided by the app to complete the calibration process. This step is typically done only once, unless you experience significant changes in lighting conditions or if prompted by the app.
Step 4: Familiarize Yourself with the Interface
Before diving into scanning objects, take a few moments to familiarize yourself with the 3D Scanner app interface. The app is designed to be user-friendly, with clear instructions and interactive elements guiding you through the scanning process. Spend some time exploring the different features, such as scan settings, editing options, and exporting functions, to get a better understanding of the app’s capabilities.
Step 5: Start Scanning!
With your Samsung Note 10 calibrated and the scanning area prepared, it’s time to start scanning. Position the object you want to scan on a stable surface and launch the 3D Scanner app. Follow the on-screen instructions to make sure the object is properly captured from all angles.
Remember, practice makes perfect! Don’t be discouraged if your first few scans don’t turn out as expected. Keep experimenting with different objects, lighting conditions, and scanning techniques to improve your skills and achieve better results.
Now that you’re familiar with the basics of getting started with the Samsung Note 10 3D Scanner, let’s explore the app interface and its different features in more detail in the next section.
Understanding the 3D Scanner App Interface
When you launch the Samsung Note 10 3D Scanner app, you will be greeted with an intuitive and user-friendly interface. Understanding the different elements of the app interface will help you navigate through the scanning process smoothly.
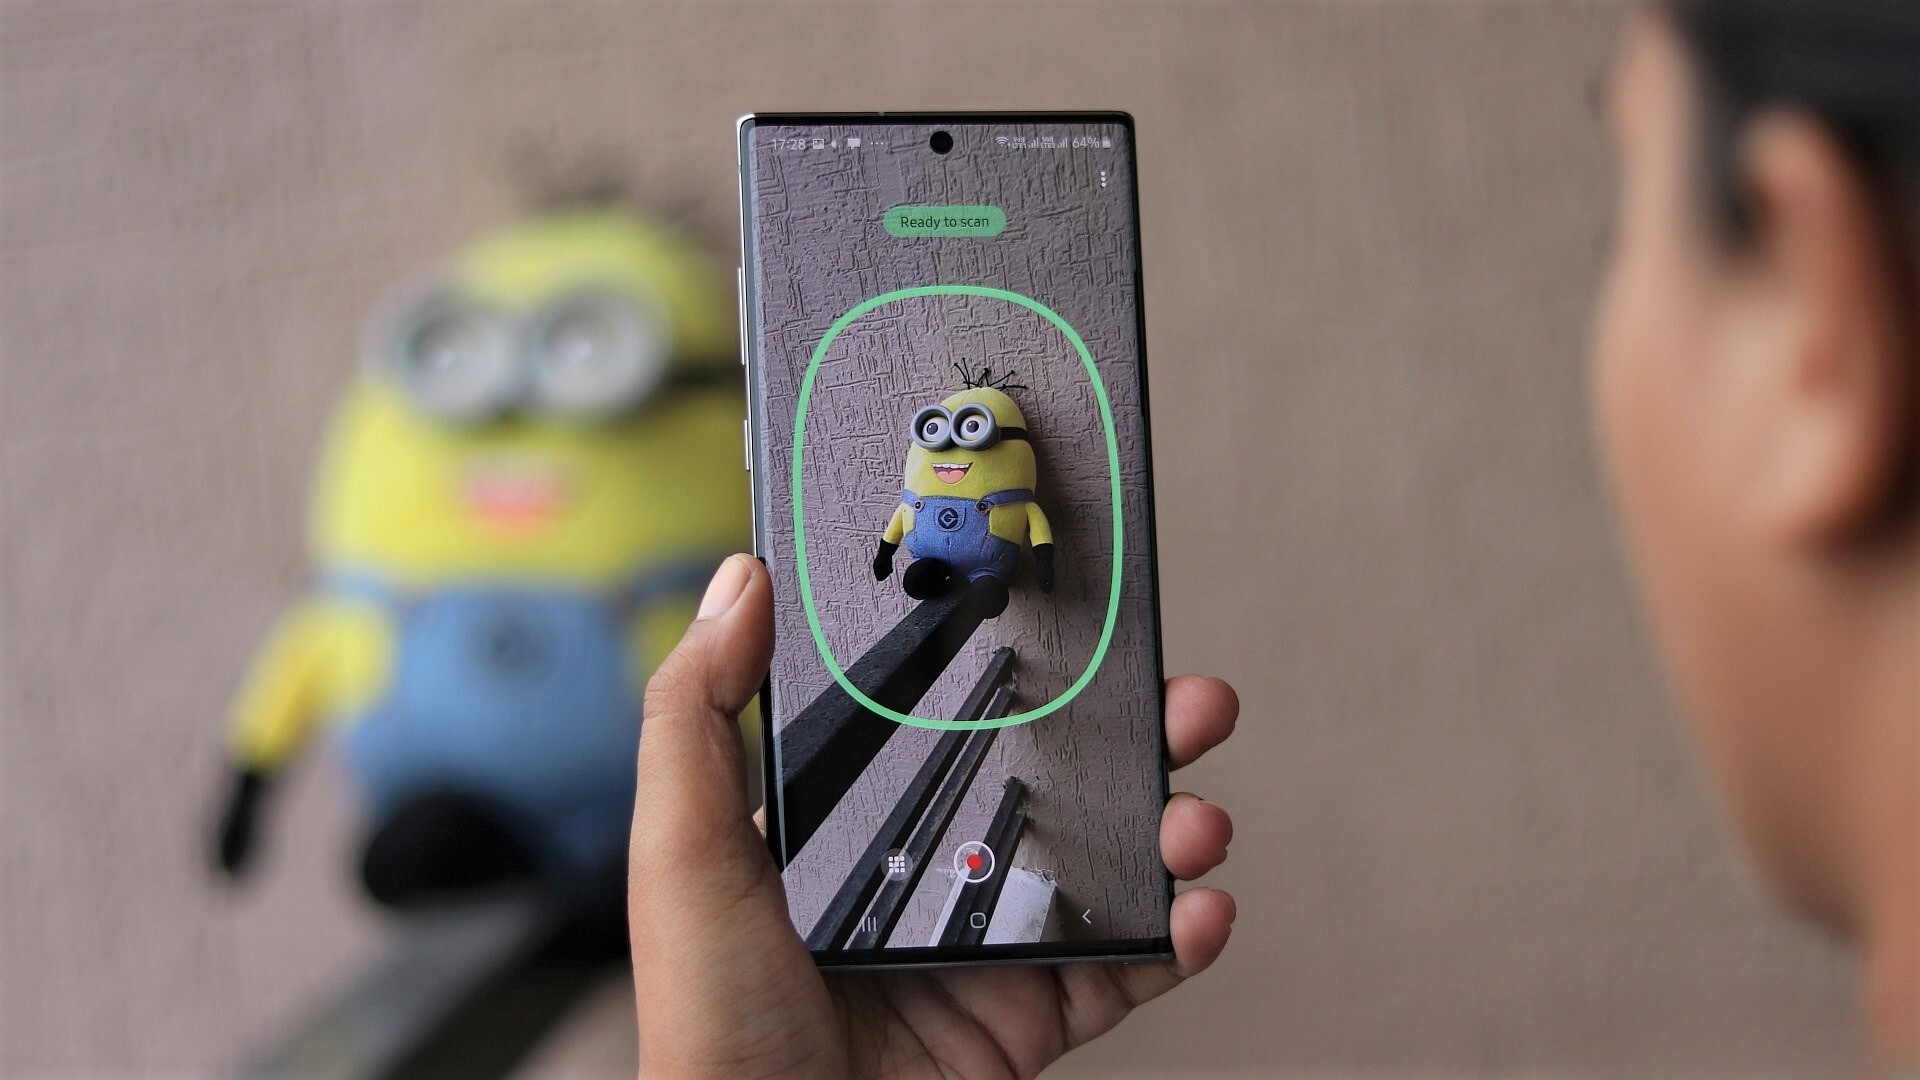
1. Camera View
The camera view is the main screen of the app where you will see the live feed from your smartphone’s camera. This is where you position and capture the object you want to scan. Make sure the object is well-framed and fully visible within the camera view.
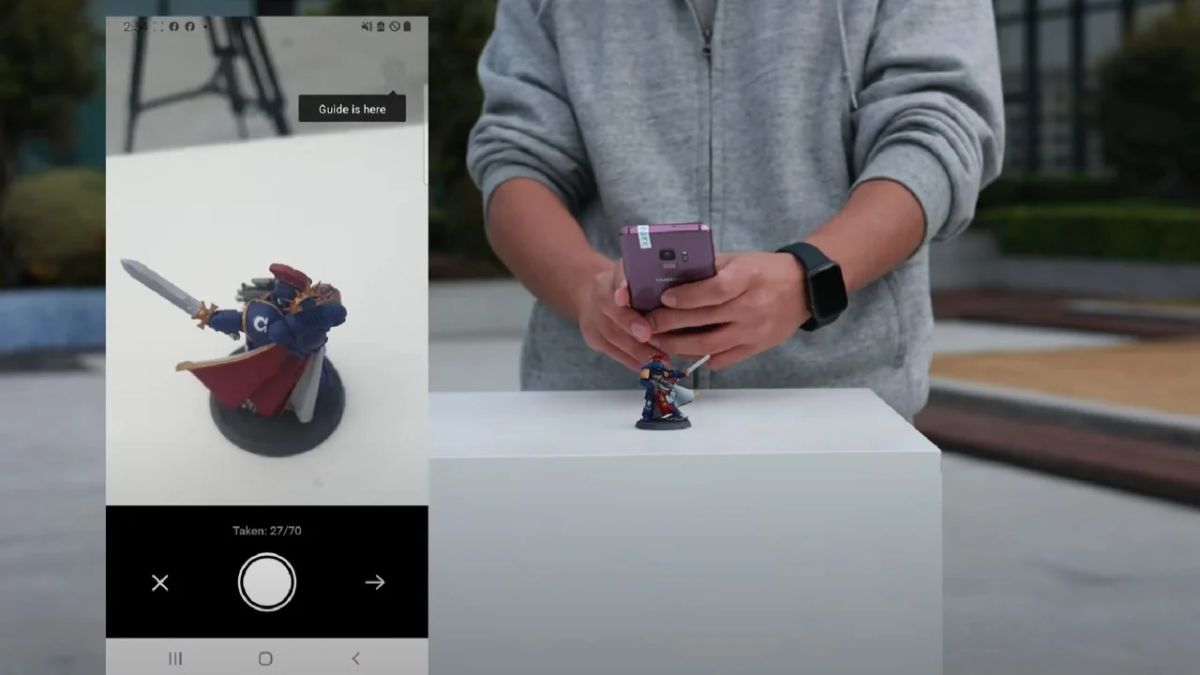
2. Scanning Guidance
At the top of the camera view, you will find on-screen instructions and guidance to help you position the object correctly. Follow these prompts to ensure that you capture all angles and necessary details of the object.
3. Scan Progress
As you move around the object and capture different angles, the scan progress will be indicated on the screen. This gives you a visual representation of how much of the object has been scanned and helps you determine if any areas need to be revisited for better scanning coverage.
4. Tools and Settings
Located at the bottom of the screen, you will find a set of tools and settings that allow you to customize your scanning experience. These tools include options for adjusting the scan resolution, selecting the desired file format, and adjusting the exposure and white balance settings.
5. Object Alignment and Refinement
Once you have completed the initial scan, the app will automatically align and merge the different scans to create a cohesive 3D model. You can then use the app’s intuitive editing tools to refine and clean up the model, remove unwanted elements, and enhance the overall quality of the scan.
6. Export and Share
The final step is to export and share your scanned 3D model. The app offers various export options, such as saving the model to your device’s gallery or sharing it directly to social media platforms. You can also choose to export the scan as a compatible file format for 3D printing or further manipulation in 3D modeling software.
By understanding the various elements of the 3D Scanner app interface, you will be able to navigate through the scanning process with confidence and efficiency. In the next section, we will explore scan settings and provide recommendations for achieving optimal scan results with the Samsung Note 10 3D Scanner.
Scan Settings and Recommendations
When using the Samsung Note 10 3D Scanner, it’s important to understand the scan settings and make the necessary adjustments to achieve optimal scan results. Here are some recommendations to help you get the best possible scans:
1. Scan Resolution
The scan resolution determines the level of detail captured in your scan. Higher resolution settings result in more detailed scans but may take longer to capture and process. For most general scans, a medium resolution is usually sufficient. However, for highly detailed or smaller objects, you may want to use a higher resolution setting.
2. Lighting Conditions
Good lighting is crucial for obtaining quality scans. Avoid overly bright or dim lighting conditions as they can affect the accuracy of the scans. Natural light or evenly distributed artificial light is ideal for capturing the true colors and details of the object. If necessary, you can use additional light sources to enhance the lighting conditions.
3. Object Placement
When positioning the object for scanning, make sure it is stable and positioned on a contrasting surface that provides enough visual information for the camera to track and capture details. Avoid placing the object on reflective or patterned surfaces, as they can interfere with the scanning process.
4. Object Size and Distance
Consider the size and distance of the object from the camera when scanning. Smaller objects may require closer proximity to ensure sufficient detail is captured. For larger objects, you may need to move further away to encompass the entire object within the camera view. Experiment with different distances to find the optimal position for your specific object.
5. Steady Movement
When moving around the object to capture different angles, make sure to move smoothly and steadily. Jerky or rapid movements can result in blurry scans or misalignments. Take your time and maintain a steady pace to capture clear and well-aligned scans.
6. Multiple Scans
If your object has intricate details or hard-to-reach areas, consider capturing multiple scans from different angles. This will ensure that all aspects of the object are captured and contribute to a more comprehensive 3D model.
By adjusting the scan settings and following these recommendations, you can significantly improve the quality and accuracy of your scans using the Samsung Note 10 3D Scanner. In the next section, we will explore the process of scanning objects in more detail.
Scanning Objects with the Samsung Note 10 3D Scanner
The process of scanning objects with the Samsung Note 10 3D Scanner involves capturing multiple scans from different angles to create a comprehensive 3D model. Follow these steps to ensure successful scanning:
1. Prepare the Object
Select the object you want to scan and ensure it is clean and free from any dust or debris. If necessary, place the object on a stable surface to prevent movement during the scanning process.
2. Launch the 3D Scanner App
Open the 3D Scanner app on your Samsung Note 10 and ensure the camera view is displayed on the screen. Familiarize yourself with the scanning guidance prompts and make any necessary adjustments to the scan settings.
3. Follow the Scanning Guidance
The app will provide on-screen instructions to guide you through the scanning process. Follow the prompts and move around the object while keeping it in the frame of the camera view. Make sure to capture all sides and angles of the object for a comprehensive scan.
4. Check the Scan Progress
As you scan, monitor the scan progress indicator to ensure that you have captured all necessary areas of the object. If any parts are missing or need improvement, you can retrace your steps and rescan those areas before proceeding.
5. Complete the Initial Scan
Once you have scanned all angles and sides of the object, the app will automatically merge the scans to create an initial 3D model. Take a moment to review the model and make sure it aligns properly before proceeding to the next step.
6. Refine and Edit the Scan
After the initial scan, you have the option to refine and edit the 3D model within the app. Use the editing tools provided to remove any unwanted elements, clean up the scan, and enhance the overall quality of the model.
7. Export and Share the Scan
Once you are satisfied with the scan, you can export it in various file formats suitable for 3D printing or further manipulation in 3D modeling software. The app also allows you to share the scan directly to social media platforms or save it to your device’s gallery for future use.
With practice and experimentation, you can master the art of scanning objects with the Samsung Note 10 3D Scanner. In the next section, we will explore how to optimize your scans for 3D printing.
Optimizing Scans for 3D Printing
If you plan to 3D print your scanned objects using the Samsung Note 10 3D Scanner, it’s important to optimize your scans for a successful printing outcome. Here are some tips to help you achieve the best results:
1. Check and Adjust Scale
Before proceeding with 3D printing, it is crucial to check the scale of your scanned object. The app may automatically scale the object based on its initial dimensions, but it’s always a good idea to double-check and adjust if necessary. Make sure the size of the object matches your desired print dimensions.
2. Repair and Clean the Model
Scan data may sometimes have imperfections or errors that need to be addressed before printing. Use 3D modeling software or the editing tools in the app to repair any holes, gaps, or mesh errors in the scanned model. Smoothing out rough surfaces and optimizing the mesh will also contribute to a better print quality.
3. Reduce Polygon Count
High-resolution scans can generate models with a dense mesh, which may result in a large file size and potentially slower printing. To optimize your scan for 3D printing, consider reducing the polygon count of the model. This can be done using various 3D modeling software or within the app itself, depending on the available editing tools.
4. Ensure Watertight and Manifold Geometry
To ensure a successful 3D print, make sure the scanned model has watertight and manifold geometry. This means there are no gaps or holes in the mesh that would cause printing errors or difficulties. Check for any non-manifold edges or intersecting geometry and fix them using modeling software.
5. Orient the Object for Print
When preparing for 3D printing, consider how the scanned object will be placed on the print bed. Optimize the orientation of the model to minimize the need for supports and achieve the best surface finish. Experiment with different orientations to find the optimal position that balances print quality and support requirements.
6. Test Print and Refine
As with any 3D printing project, it’s always a good idea to test print a scaled-down version of your scanned object before committing to a full-size print. This allows you to identify any potential printing issues, fine-tune your settings, and make any necessary adjustments to ensure a successful final print.
By following these optimization tips, you can maximize the potential of your scanned objects and ensure a smooth and successful 3D printing process. In the next section, we will explore the editing and refining capabilities of the Samsung Note 10 3D Scanner.
Editing and Refining Scanned Objects
Once you have completed the initial scan with the Samsung Note 10 3D Scanner, you have the option to further edit and refine the scanned objects within the app. This enables you to enhance the quality, remove imperfections, and perfect the scanned model before exporting or 3D printing. Here are some key editing and refining features:
1. Removing Unwanted Elements
The editing tools in the app allow you to easily remove any unwanted elements or artifacts from the scanned model. You can delete unnecessary parts of the scan, such as stray geometry or background objects, to clean up the overall appearance and focus on the desired object.
2. Smoothing and Surface Refinement
If the scanned model has rough or jagged surfaces, you can utilize the smoothing tools to refine the mesh and create a more polished appearance. This helps to eliminate any irregularities and ensure a smoother surface finish in the final print.
3. Hole Filling and Repairing
If there are any holes or gaps in the scanned model, you can use the hole filling and repairing tools to mend them. This is particularly important for ensuring a watertight and manifold model that is suitable for 3D printing.
4. Sculpting and Detail Enhancement
The app may offer sculpting tools that allow you to manipulate and enhance the details of the scanned model. Depending on the complexity of the object and the capabilities of the app, you can refine specific areas or add fine details to bring out the intricacies of the object.
5. Texture Mapping and Painting
If your object has captured textures during the scanning process, you can utilize texture mapping tools to align and enhance the visual appearance. Additionally, some apps may offer painting capabilities, allowing you to apply colors or textures to the model for a more vibrant and realistic representation.
6. Preview and Compare
Throughout the editing process, utilize the preview feature to view the model from different angles and assess the changes made. You can also compare the edited version with the original scan to ensure that the refinements have improved the overall quality and desired outcome.
By utilizing these editing and refining features, you can take your scanned objects to the next level of quality and precision within the Samsung Note 10 3D Scanner app. In the next section, we will explore the options for exporting and sharing your scanned files.
Exporting and Sharing Scanned Files
Once you have scanned and refined your objects using the Samsung Note 10 3D Scanner, you have several options for exporting and sharing your scanned files. This allows you to use the scans for various purposes, including 3D printing, further editing in other software, or showcasing your work to others. Here are some common methods for exporting and sharing:
1. Save to Gallery
The most basic option is to save your scanned files to your device’s gallery. This allows you to access and view the scans directly on your smartphone. From the gallery, you can easily share the files through messaging apps, email, or other file sharing platforms.
2. Export in Supported File Formats
The 3D Scanner app may offer the option to export your scans in various file formats, such as OBJ, STL, or PLY. These are widely compatible file formats that can be used in different 3D software or sent directly to 3D printers for manufacturing. Choose the format that best suits your intended use.
3. Share to Social Media
If you want to showcase your scans to a wider audience, consider sharing them on social media platforms. The 3D Scanner app often integrates with popular social media apps, allowing you to directly share your scans with friends, followers, or communities interested in 3D art and technology.
4. Cloud Storage
If you prefer to store your scanned files in the cloud for easy access and sharing, consider utilizing cloud storage services such as Google Drive, Dropbox, or OneDrive. By uploading your scans to the cloud, you can access them from any device and easily share them with others via shared links.
5. Collaborative Platforms
In addition to social media, there are dedicated online platforms and communities for 3D artists and enthusiasts. Consider joining these platforms to showcase your scans, gain feedback from other users, and explore collaborative opportunities with other creatives.
Choose the method of exporting and sharing that aligns with your goals and the intended audience for your scanned files. Whether it’s for personal use or professional showcasing, the Samsung Note 10 3D Scanner provides multiple options to share your creative work with others.
In the next section, we will provide some troubleshooting tips to help you overcome common issues that you may encounter while using the Samsung Note 10 3D Scanner.
Troubleshooting Tips for the Samsung Note 10 3D Scanner
The Samsung Note 10 3D Scanner is a powerful tool, but it’s not without its challenges. If you encounter any issues or difficulties while using the scanner, here are some troubleshooting tips to help you overcome common problems:
1. Ensure Sufficient Lighting
Poor lighting conditions can negatively impact the accuracy of your scans. Make sure you have adequate lighting that is evenly distributed across the object you are scanning. Additional lighting sources, such as lamps or ring lights, can help improve visibility and reduce shadows.
2. Clean the Camera Lens and Sensors
Dust or smudges on the camera lens or depth sensors can affect the quality of your scans. Before scanning, ensure that the lens and sensors are clean and free from any debris. Use a microfiber cloth or lens cleaning solution to gently wipe away any dirt or fingerprints.
3. Check for Sufficient Storage Space
If you are experiencing performance issues or issues saving your scans, check if your device has sufficient storage space. Scanning objects and creating 3D models can require significant storage capacity. Consider freeing up space on your device by deleting unnecessary files or transferring data to external storage.
4. Calibrate the Scanner
If you are getting inaccurate scans or misalignments, recalibrating the 3D Scanner can help improve the scanning accuracy. Go to the app settings and locate the calibration option. Follow the on-screen instructions to recalibrate the scanner, ensuring that you are in a well-lit area with a stable surface.
5. Experiment with Different Scanning Techniques
If you are not achieving the desired results with your scans, try experimenting with different scanning techniques. Vary your scanning distance, angle, or speed to find the optimal approach for capturing the details and geometry of the object. It may require some trial and error to achieve the best results.
6. Update the App and System Software
Ensure that you have the latest version of the 3D Scanner app installed on your Samsung Note 10. Additionally, keeping your device’s system software up to date can contribute to improved performance and compatibility with the scanner. Regularly check for app and system updates through the app store or system settings.
If you are still experiencing difficulties with the Samsung Note 10 3D Scanner, you may need to reach out to Samsung support for further assistance. They can provide more specific guidance based on your device and any known issues or updates.
By following these troubleshooting tips, you can overcome common challenges and make the most out of your experience with the Samsung Note 10 3D Scanner.
Conclusion
The Samsung Note 10 3D Scanner is a powerful tool that unlocks a world of possibilities for creative individuals, artists, designers, engineers, and anyone who wants to explore the realms of 3D scanning and printing. Through advanced hardware and software technology, the Note 10 3D Scanner enables you to capture real-life objects and transform them into digital 3D models with remarkable accuracy and detail.
In this guide, we have covered the fundamental aspects of using the Samsung Note 10 3D Scanner, including getting started, understanding the app interface, optimizing scans for 3D printing, editing and refining scanned objects, and exporting and sharing scanned files. We have also provided troubleshooting tips to help you overcome common challenges that may arise during the scanning process.
By following the tips and recommendations provided in this guide, you can enhance your scanning skills, achieve better scan results, and unleash your creativity in the digital world. Remember to experiment, practice, and explore different techniques to make the most out of the capabilities offered by the Samsung Note 10 3D Scanner.
With this powerful tool in your hands, the possibilities are endless. Whether you want to create custom designs for 3D printing, capture detailed models for virtual or augmented reality experiences, or simply explore the world of 3D scanning, the Samsung Note 10 3D Scanner opens up a realm of exciting possibilities and creative potential.
So, take your Samsung Note 10 and embark on this extraordinary journey into the world of 3D scanning. Unleash your creativity, capture the world around you in three dimensions, and bring your ideas to life through the power of the Samsung Note 10 3D Scanner.