Introduction
Welcome to our guide on how to transfer Windows from SSD to M.2! This step-by-step tutorial will provide you with all the necessary information and instructions to smoothly migrate your operating system from your current SSD to a faster and more advanced M.2 drive.
But before we dive into the process, let’s briefly understand what M.2 is and why you should consider transferring your Windows installation to this new technology.
M.2 is a small and compact form factor that allows for the installation of solid-state drives (SSDs) directly onto the motherboard of your computer. These M.2 drives offer several advantages over traditional SSDs, such as faster read and write speeds, improved performance, and reduced power consumption.
Now, you may be wondering why you should bother transferring your Windows operating system from your existing SSD to an M.2 drive. The answer is simple: to take full advantage of the benefits that M.2 drives have to offer.
By transferring your Windows installation to an M.2 drive, you can experience faster boot times, improved system responsiveness, and shorter application loading times. This can significantly enhance your overall computing experience, whether you use your computer for gaming, professional work, or everyday tasks.
However, the process of transferring your Windows installation may seem daunting at first. That’s why we’ve prepared this comprehensive guide to walk you through each step of the process, from backing up your data to setting the M.2 drive as the primary boot device.
So, if you’re ready to elevate your system’s performance by transferring Windows from SSD to M.2, let’s get started with the preparations in the next section.
What is M.2?
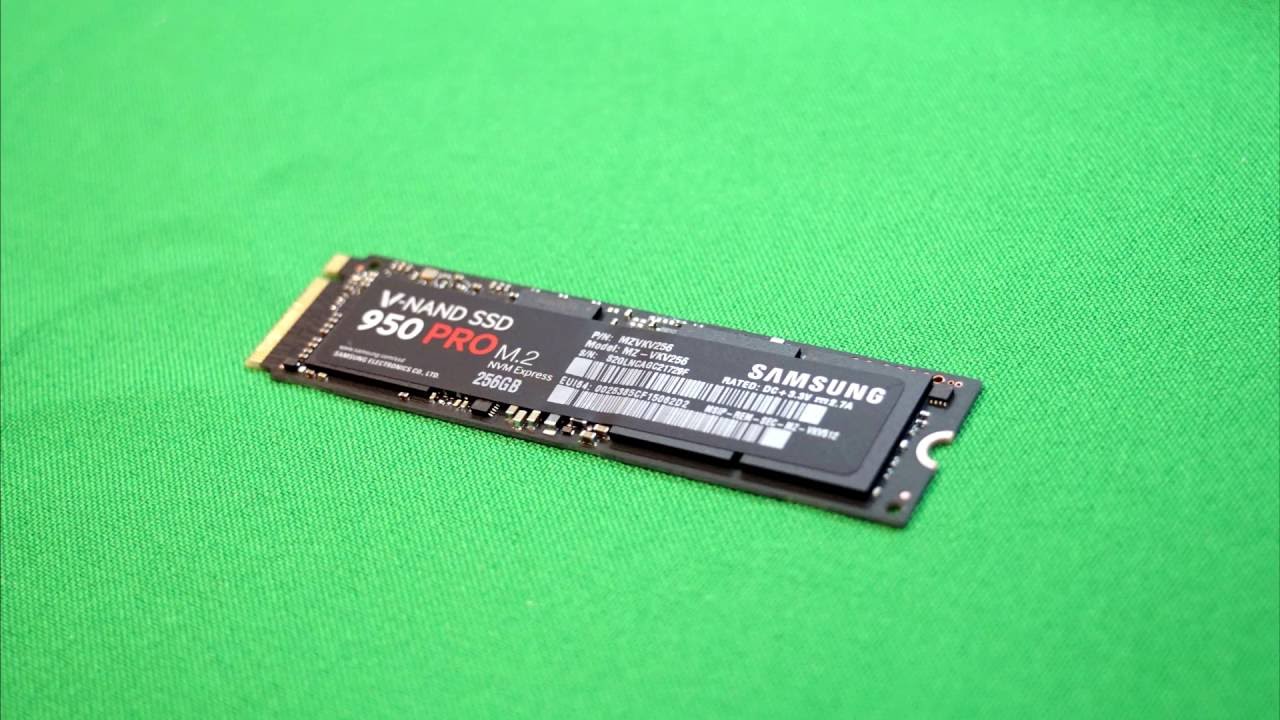
M.2 is a form factor specification for solid-state drives (SSDs) and other devices that connect directly to a computer’s motherboard. It was introduced as a successor to traditional 2.5-inch SATA drives and offers several key advantages.
Unlike traditional hard drives, M.2 drives are much smaller in size and follow a standardized shape and connector design. This compact form factor makes them ideal for thin and lightweight laptops, ultrabooks, and small desktop systems.
M.2 drives come in different lengths and widths, with the most common ones being 22mm wide. They are also available in various storage capacities, ranging from 128GB to several terabytes. Additionally, M.2 drives can use different interfaces, including SATA III and PCIe, each offering different levels of performance.
One of the major advantages of M.2 drives is their speed. Depending on the interface used, M.2 drives can deliver significantly faster read and write speeds compared to traditional hard drives and even standard SSDs. This allows for quicker boot times, faster application launches, and improved overall system performance.
Another notable feature of M.2 drives is their support for NVMe (Non-Volatile Memory Express) technology. NVMe is a high-performance interface protocol specifically designed for accessing storage devices, such as SSDs, connected via PCIe. NVMe offers faster data transfer speeds and lower latency, allowing for more efficient data access and improved system responsiveness.
In addition to their speed and performance benefits, M.2 drives are also known for their energy efficiency. They consume less power compared to traditional drives, making them ideal for portable devices and reducing overall energy costs.
M.2 drives are incredibly versatile and can be used for various purposes beyond just storage. They can house other components like Wi-Fi or Bluetooth modules, providing additional functionality without the need for separate expansion cards. M.2 slots can also support different types of devices, such as graphics cards or networking adapters, using adapters or specialized modules.
Overall, M.2 drives offer a compact, high-speed, and energy-efficient storage solution that is becoming increasingly popular in modern computing devices. Now that we have a better understanding of what M.2 is, let’s move on to the reasons why you should consider transferring your Windows installation to an M.2 drive.
Why Transfer Windows from SSD to M.2?
There are several compelling reasons why you should consider transferring your Windows operating system from your existing SSD to an M.2 drive. Let’s explore some of the key benefits that make this migration worthwhile.
1. Improved Performance: One of the primary advantages of M.2 drives is their superior performance compared to traditional SSDs. M.2 drives can deliver faster read and write speeds, resulting in quicker boot times, reduced application loading times, and improved overall system responsiveness. By transferring your Windows installation to an M.2 drive, you can unleash the full potential of your system and enjoy a more seamless computing experience.
2. Faster Data Transfer: M.2 drives utilize the PCIe interface, which offers significantly higher data transfer rates than the SATA interface used by traditional SSDs. This means that transferring large files, running resource-intensive applications, or working with multimedia content becomes much smoother and faster on an M.2 drive. Whether you’re a gamer, content creator, or professional user, the increased speed and efficiency of an M.2 drive can greatly enhance your productivity and enjoyment.
3. Space Efficiency: M.2 drives are incredibly compact and take up minimal space on your motherboard. This can be particularly beneficial for small form factor PCs or laptops that have limited internal space for storage devices. By transferring your Windows installation to an M.2 drive, you can free up valuable space for other components or accessories, making your system more efficient and streamlined.
4. Energy Efficiency: M.2 drives not only deliver impressive performance but also consume less power compared to traditional hard drives and SSDs. This energy-efficient design not only improves the battery life of laptops and portable devices but also reduces the overall heat generated by your system. With an M.2 drive, you can enjoy efficient storage without sacrificing power savings and thermal management.
5. Future-Proofing: M.2 drives are rapidly becoming the standard for storage devices, and many modern motherboards come with M.2 slots as a primary storage option. By transferring your Windows installation to an M.2 drive, you ensure that your operating system is compatible with the latest technology and ready for future upgrades. This can save you from the hassle of migrating your system again when upgrading your hardware.
In summary, transferring your Windows operating system from an SSD to an M.2 drive offers significant performance improvements, faster data transfer rates, space efficiency, energy efficiency, and future-proofing. With these benefits in mind, it’s clear why more and more users are choosing to make the switch. Next, we’ll guide you through the necessary preparations for a smooth transfer process.
Preparing for the Transfer
Before you can proceed with transferring your Windows operating system from your existing SSD to an M.2 drive, there are a few essential preparations that need to be made. By following these steps, you’ll ensure a smooth and successful migration process. Let’s get started!
1. Backup Data and Create a System Image: It’s crucial to back up your important files, documents, and media before proceeding with any system changes. Create a backup of your data on an external drive or cloud storage to prevent any data loss during the transfer process. Additionally, create a system image using Windows Backup or a third-party backup tool. This will create a snapshot of your entire system, including the operating system, applications, and settings, which can be restored if anything goes wrong during the transfer.
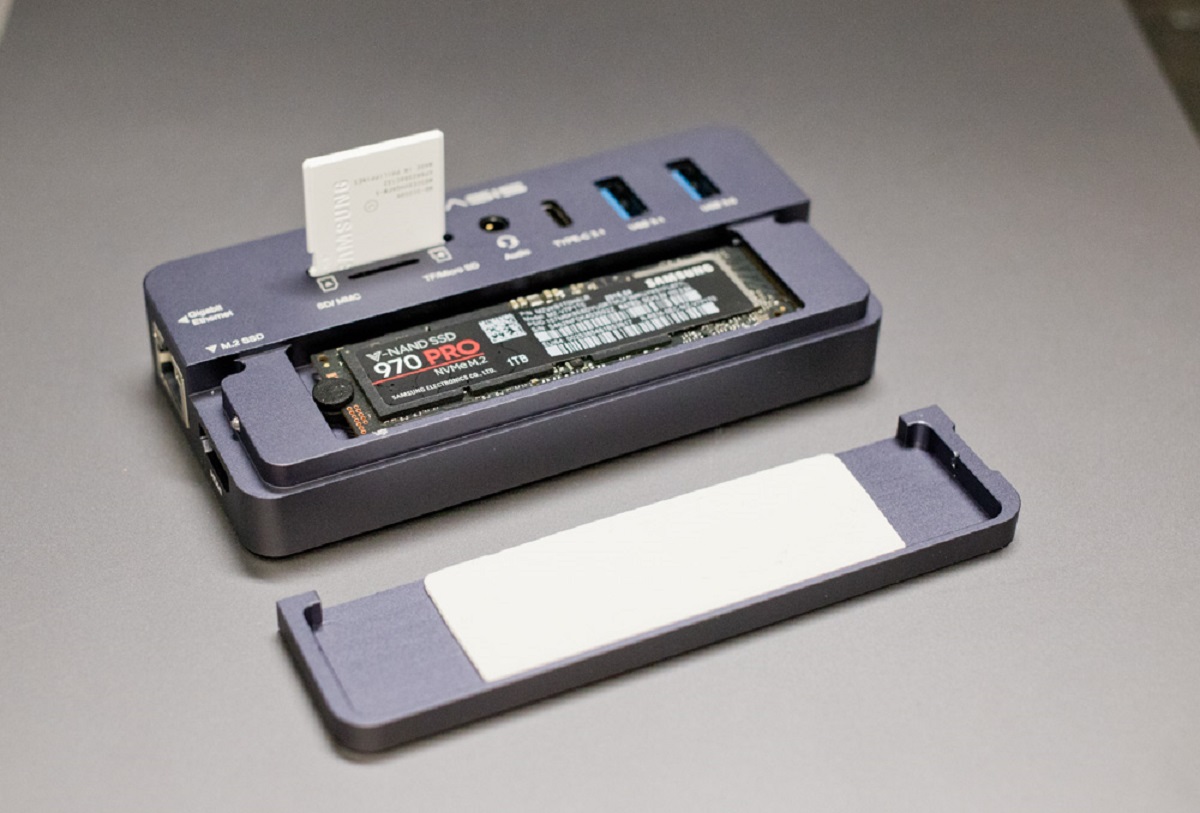
2. Check M.2 Compatibility and Prepare the M.2 Drive: Before purchasing an M.2 drive, ensure that your motherboard supports M.2 devices and that you have an available M.2 slot. Consult your motherboard’s manual or visit the manufacturer’s website to verify compatibility. Once you have confirmed compatibility, prepare the M.2 drive by removing any protective stickers and inserting it into the M.2 slot securely.
3. Connect the M.2 Drive and Boot Into the Current SSD: With the M.2 drive properly inserted, connect your computer to the power source and turn it on. During the boot process, access the BIOS setup by pressing the designated key (usually DEL or F2) and change the boot order to prioritize your current SSD as the primary boot device. Save the changes and exit the BIOS to proceed with booting into your current Windows installation.
4. Migrate the Windows Operating System: To transfer your Windows operating system, you can use specialized migration software like EaseUS Todo Backup, AOMEI Backupper, or Macrium Reflect. Follow the instructions provided by the software to clone your existing SSD onto the new M.2 drive. This process may take some time depending on the size of your SSD.
5. Set the M.2 Drive as the Primary Boot Device: After the cloning process is complete, shut down your computer and disconnect the power source. Remove the old SSD from your system and replace it with the new M.2 drive. Connect the power source again and boot into the BIOS setup. Set the M.2 drive as the primary boot device and save the changes. This ensures that your system will now boot from the M.2 drive.
6. Verify the Transfer and Delete Old Files: Once your system boots from the M.2 drive, verify that everything is functioning correctly. Check that the Windows operating system, applications, and settings are intact. If everything looks good, you can safely delete the old files from your previous SSD to free up storage space.
By following these preparations, you’ll be well-equipped to proceed with the transfer of your Windows operating system from your SSD to an M.2 drive. In the next section, we’ll dive into the step-by-step process of migrating your Windows installation.
Step 1: Backup Data and Create a System Image
Before you embark on transferring your Windows operating system from your current SSD to an M.2 drive, it is crucial to perform a thorough backup of your data and create a system image. This essential step ensures that all your important files and settings are safely preserved and can be restored in case anything goes wrong during the transfer process.
To begin, start by backing up all your important files, documents, photos, videos, and any other data that you consider valuable. Copy them to an external hard drive, USB flash drive, or utilize cloud storage services like Google Drive, Dropbox, or Microsoft OneDrive. This step will safeguard your data and provide peace of mind knowing that it can be easily retrieved if needed.
In addition to backing up your data, creating a system image is equally important. A system image is a snapshot of your entire system, including the operating system, applications, settings, and files. It is a robust backup solution that allows you to restore your entire system to its previous state, ensuring minimal data loss and an efficient recovery process.
Windows provides a built-in tool called “Windows Backup and Restore” for creating a system image. To access it, go to Control Panel, select “Backup and Restore,” and click on “Create a system image” on the left-hand side. Connect an external storage device with sufficient space to store the system image file and follow the instructions provided by the software.
Alternatively, you can use third-party backup and imaging software like EaseUS Todo Backup, AOMEI Backupper, or Macrium Reflect. These tools offer more advanced features and flexibility, allowing you to schedule regular backups, customize image options, and restore specific files or folders as needed.
Creating a system image may take some time, especially if you have a large amount of data. Therefore, ensure that your computer is plugged into a power source to prevent any interruptions during the process. Once the system image creation is complete, double-check that the image file is successfully generated and stored in a safe location.
Remember, the backup process is crucial for safeguarding your data and providing an insurance policy in case any issues arise during the transfer of your Windows operating system. So, take the time to perform a thorough backup of your data and create a reliable system image before proceeding with the next steps.
In the following sections, we’ll guide you through the remaining steps of transferring your Windows installation from your current SSD to the M.2 drive. So let’s move on to Step 2: Checking M.2 compatibility and preparing the M.2 drive.
Step 2: Check M.2 Compatibility and Prepare the M.2 Drive
In this step, we will ensure that your motherboard supports M.2 drives and prepare the M.2 drive for the Windows transfer process. It’s essential to confirm compatibility and properly set up the M.2 drive to ensure a smooth transition. Let’s dive in!
1. Check Motherboard Compatibility: Start by checking if your motherboard supports M.2 drives and which types it can accommodate. Consult your motherboard’s documentation or visit the manufacturer’s website to find this information. Look for the M.2 slot specifications, such as supported length and keying (M-key or B-key), to ensure compatibility.
2. Confirm Available M.2 Slot: Once you have determined the compatibility of your motherboard, identify the available M.2 slot. Most motherboards have multiple M.2 slots, so choose the one that suits your needs best. Consider factors such as slot placement, size restrictions, and potential interference with other components.
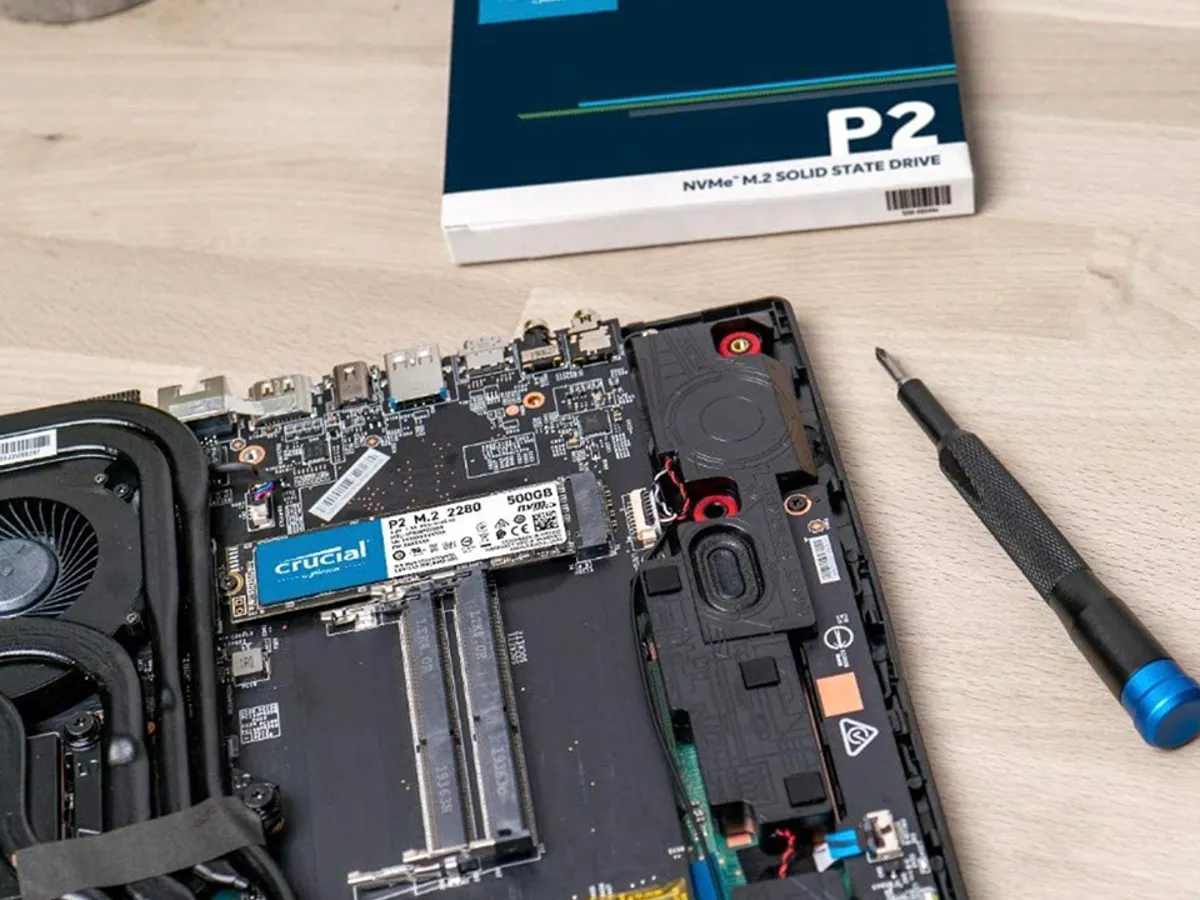
3. Remove Protective Covers and Insert M.2 Drive: Before inserting the M.2 drive, check for any protective covers or stickers on the slot or drive itself. Remove them carefully to reveal the connector pins and ensure a proper connection. Align the notches on the M.2 drive with the keying on the slot (M-key or B-key) and gently insert the drive at a 30-degree angle. Apply light pressure until the drive is firmly seated.
4. Secure the M.2 Drive: After inserting the M.2 drive, secure it in place using the provided M.2 screw. Locate the mounting hole near the end of the M.2 slot or consult your motherboard’s manual for the exact screw location. Use a small screwdriver to tighten the screw just enough to hold the drive firmly in place. Be careful not to overtighten or damage the drive or motherboard.
5. Verify Installation: Once the M.2 drive is securely installed, double-check that it is properly recognized by your system. Restart your computer and enter the BIOS setup by pressing the appropriate key (often DEL or F2). Navigate to the storage or boot settings and ensure that the M.2 drive is detected. If it is not recognized, check your installation and consult your motherboard’s manual for troubleshooting guidance.
By following these steps, you have now confirmed the compatibility of your motherboard with M.2 drives and successfully prepared the M.2 drive for the Windows transfer. In the next step, we will guide you through connecting the M.2 drive and booting into your current SSD. So let’s move on to Step 3: Connect the M.2 drive and boot into the current SSD.
Step 3: Connect the M.2 Drive and Boot into the Current SSD
Now that you have successfully prepared the M.2 drive, it’s time to connect it to your computer and boot into your current SSD. This step is crucial for ensuring a smooth transition and setting up the foundation for the Windows transfer process. Let’s get started!
1. Power Off and Disconnect: Before making any connections, ensure that your computer is powered off and disconnected from the power source. This will prevent any potential damage to your system during the installation process.
2. Locate the M.2 Slot and Connector: Open your computer’s case or access the internal components, depending on your system’s design. Locate the M.2 slot on your motherboard and take note of the connector. M.2 slots can have different keying configurations (M-key or B-key), and it’s crucial to match the M.2 drive’s keying with the slot’s design.
3. Connect the M.2 Drive: Place the M.2 drive into the corresponding M.2 slot at a 30-degree angle. Align the notches on the drive with the keying on the slot. Apply gentle pressure to insert the drive fully into the slot until it is seated securely. Do not force the drive, as it should insert smoothly.
4. Secure the M.2 Drive: Depending on your motherboard, you may need to secure the M.2 drive with a screw or a retention mechanism. Consult your motherboard’s manual for specific instructions on securing the M.2 drive. Use a screwdriver to tighten the screw, ensuring that the drive is firmly held in place.
5. Connect Power and Data Cables: Next, connect the appropriate power and data cables to the M.2 drive. Some M.2 drives require both PCIe power and SATA data connections, while others may only require one or the other. Refer to your M.2 drive’s documentation and your motherboard’s manual for proper cable connections.
6. Boot into the Current SSD: Once the M.2 drive is connected, reconnect your computer to the power source and power it on. During the boot process, enter the BIOS setup by pressing the designated key (usually DEL or F2). In the BIOS settings, navigate to the boot options and change the boot order to prioritize your current SSD as the primary boot device. Save the changes and exit the BIOS.
7. Verify Successful Boot: After exiting the BIOS, your system should boot into your current SSD as usual. Take a moment to ensure that everything is functioning correctly and all your files and applications are accessible. This will confirm that the M.2 drive connection and boot settings are properly configured.
With the M.2 drive connected and your system successfully booting into your current SSD, you have completed Step 3 of the process. In the next step, we will guide you through the critical process of migrating your Windows operating system to the M.2 drive. So let’s move on to Step 4: Migrate the Windows Operating System.
Step 4: Migrate the Windows Operating System
Now that you have successfully connected the M.2 drive and booted into your current SSD, it’s time to migrate your Windows operating system from the SSD to the M.2 drive. This step is crucial for transferring all your files, settings, and applications to the faster and more advanced M.2 drive. Let’s dive into the migration process!
1. Choose a Migration Tool: There are several migration tools available that can help you transfer your Windows operating system from the SSD to the M.2 drive. Popular options include EaseUS Todo Backup, AOMEI Backupper, and Macrium Reflect. Choose the tool that suits your needs and download it from the official website.
2. Launch the Migration Tool: Once you have installed the migration tool, launch the program on your computer. Most tools feature a user-friendly interface with step-by-step instructions, making the migration process straightforward.
3. Select Source and Target Drives: In the migration tool, you’ll be prompted to select the source (current SSD) and target (M.2 drive) drives. Ensure that you choose the correct drives to avoid any data loss or issues during the migration. Double-check the drive labels or serial numbers if needed.
4. Customize Migration Settings: Depending on the migration tool you’re using, you may have the option to customize the migration settings. This can include selecting specific partitions, resizing partitions, or adjusting other advanced options. Review and adjust these settings according to your preferences.
5. Start the Migration Process: Once you have customized the migration settings, start the migration process by clicking the appropriate button. The tool will then begin transferring your Windows operating system, files, and settings from the SSD to the M.2 drive. The time required for the migration will depend on the size of your SSD and the speed of your computer.
6. Monitor the Migration Progress: During the migration process, the tool will provide you with a progress indicator or status bar. Monitor this progress and do not interrupt the process until it has been completed. Avoid using your computer for resource-intensive tasks, as it may slow down the migration or even cause errors.
7. Complete the Migration: Once the migration is complete, you will receive a notification from the migration tool. At this stage, the Windows operating system, along with all your files and settings, should be successfully transferred to the M.2 drive.
It’s important to note that after the migration, your current SSD will remain intact and unchanged. However, it is advisable to keep a backup of the SSD for a while, just in case any issues arise.
Congratulations! You have successfully migrated your Windows operating system from the SSD to the M.2 drive. In the next step, we will guide you through setting the M.2 drive as the primary boot device. So, let’s move on to Step 5: Set the M.2 Drive as the Primary Boot Device.
Step 5: Set the M.2 Drive as the Primary Boot Device
In this step, we will guide you through the process of setting the M.2 drive as the primary boot device in your system’s BIOS. By doing this, you ensure that your computer will boot from the M.2 drive, taking full advantage of its speed and performance. Let’s proceed with setting the M.2 drive as the primary boot device.
1. Restart Your Computer: Begin by restarting your computer. You can do this by clicking on the Start menu and selecting Restart or by manually pressing the restart button on your computer’s case.
2. Access the BIOS Setup: During the boot process, your computer will display a manufacturer-specific logo or a black screen with text indicating which key to press to access the BIOS setup. Common keys for accessing the BIOS are DEL, F2, or F10, but it can vary depending on your computer’s manufacturer. Press the designated key to enter the BIOS setup.
3. Navigate to the Boot Options: Once you’re in the BIOS setup, navigate to the section that contains the boot options. The name of this section may vary depending on your motherboard’s manufacturer and BIOS version. Look for options like Boot, Boot Configuration, or Boot Priority.
4. Change the Boot Order: Within the boot options section, you’ll find a list of available boot devices. Locate the M.2 drive in the list and use the provided commands (usually the + or – keys) to move it to the top of the boot order. This will ensure that the BIOS prioritizes the M.2 drive as the primary boot device.
5. Save Changes and Exit: Once you have set the M.2 drive as the primary boot device, save the changes you made in the BIOS setup. Look for an option to save and exit, usually labeled as “Save and Exit” or “Exit and Save Changes.” Confirm your selection and wait for the computer to restart.
6. Verify Successful Boot: After the computer restarts, it should now boot from the M.2 drive as the primary boot device. Pay attention to the boot process and make sure that your Windows operating system loads from the M.2 drive. This indicates that the M.2 drive has been successfully set as the primary boot device.
Congratulations! You have successfully set the M.2 drive as the primary boot device in your system’s BIOS. Your computer will now boot from the M.2 drive, allowing you to enjoy its enhanced speed and performance. In the next step, we will guide you through verifying the transfer and deleting old files. So, let’s move on to Step 6: Verify the Transfer and Delete Old Files.
Step 6: Verify the Transfer and Delete Old Files
After setting the M.2 drive as the primary boot device, it’s crucial to verify that the transfer of your Windows operating system was successful and to take care of any remaining tasks, such as deleting old files from your previous SSD. Let’s proceed with step 6 to ensure everything is in order.
1. Verify the Transfer: Once your computer boots from the M.2 drive, take a moment to verify that the transfer of your Windows operating system was successful. Check for any noticeable differences in system performance, such as faster boot times, reduced application loading times, or improved overall responsiveness. Ensure that all your files, applications, and settings are intact and function as expected.
2. Cautiously Review Files: Go through your transferred files on the M.2 drive to ensure that everything has been successfully migrated. Open a few files and verify that they open correctly without any errors. If you notice any issues or missing files, refer to your backup and system image created in step 1 to restore any necessary data.
3. Delete Old Files: Once you have confidently verified the success of the transfer and ensured that all necessary files are present on the M.2 drive, it’s time to delete the old files from your previous SSD. Be cautious during this step, as deleting the wrong files could result in permanent data loss. Remove any unnecessary files, folders, or partitions from your previous SSD to free up storage space.
4. Securely Dispose of the Old SSD (If Applicable): If you no longer need your previous SSD, it’s essential to securely dispose of it. This involves permanently wiping the drive by using specialized software or physically destroying it to ensure that no sensitive data can be retrieved. Properly disposing of your old SSD protects your privacy and prevents unauthorized access to your data.
5. Perform Regular Backups: Now that your Windows operating system is successfully transferred to the M.2 drive, it’s crucial to regularly back up your data. Create a backup schedule that fits your needs and back up your important files, documents, and media regularly to ensure the safety of your data and simplify future system migrations or recoveries.
By following these steps, you can confidently verify the success of the transfer, delete old files from your previous SSD, and ensure the long-term reliability and performance of your system on the new M.2 drive.
Congratulations! You have completed all the necessary steps to transfer your Windows operating system from an SSD to an M.2 drive. Enjoy the improved speed, responsiveness, and efficiency that the M.2 drive brings to your computing experience.
If you have any further questions or need assistance, please do not hesitate to seek further support.
Conclusion
Congratulations on successfully transferring your Windows operating system from an SSD to an M.2 drive! By following the step-by-step instructions in this guide, you have optimized your system’s performance, improved data transfer speeds, and taken advantage of the benefits that M.2 drives have to offer.
The migration process involved crucial steps such as backing up your data, preparing the M.2 drive, connecting it to your computer, and setting it as the primary boot device. You also performed the migration itself and verified its success, followed by the deletion of old files from the previous SSD.
With your Windows operating system now running on the M.2 drive, you can experience faster boot times, reduced application loading times, and improved overall system responsiveness. The increased data transfer speeds of the M.2 drive will significantly enhance your multitasking capabilities and overall computing experience.
Remember to regularly back up your data to ensure its safety and to perform routine maintenance on your M.2 drive, such as updating firmware and monitoring its health status. By doing so, you can extend the longevity and reliability of your system.
If you encounter any issues during the process or need further assistance, don’t hesitate to consult the user manuals or online resources specific to your hardware components. Additionally, keep up with firmware updates and driver installations to stay up to date with the latest improvements and fixes.
We hope that this guide has helped you successfully transfer your Windows operating system from an SSD to an M.2 drive. Enjoy the improved performance and efficiency that your system now offers. Thank you for choosing our guide, and happy computing!