Introduction
Transferring photos from your iPad to an external hard drive is a great way to free up storage space on your device and backup your precious memories. Whether you’re running out of space or simply want to keep your photos safe, this guide will walk you through the step-by-step process of transferring photos from your iPad to an external hard drive.
By transferring your photos to an external hard drive, you can create a reliable backup solution and ensure that your memories are always accessible, even if something happens to your iPad. Additionally, it allows you to free up valuable storage space on your device, allowing you to continue capturing new moments without the worry of running out of storage.
While transferring photos may seem like a daunting task, it’s actually quite simple with the right tools and guidance. In this article, we will discuss the necessary steps you need to take to successfully transfer your photos from your iPad to an external hard drive.
Before we get started, make sure you have an external hard drive with enough storage capacity to accommodate your photos. It’s also a good idea to connect your iPad to a power source to ensure that the transfer process doesn’t drain the battery.
Now that you’re ready, let’s dive into the step-by-step process of transferring photos from your iPad to an external hard drive!
Step 1: Connect your external hard drive to your iPad
The first step in transferring photos from your iPad to an external hard drive is to establish a physical connection between the two devices. Here’s how you can do it:
- Start by obtaining the appropriate connector or adapter that will allow you to connect your external hard drive to your iPad. The specific connector you’ll need depends on the model of your iPad and the type of external hard drive you have. Common connector types include USB-C, Lightning, or the older 30-pin connector. You can purchase these connectors from reputable online retailers or electronic stores.
- Once you have the necessary connector, connect one end to the port on your iPad, and the other end to the USB or Thunderbolt port on your external hard drive. Ensure that the connection is secure. Your iPad should recognize the external hard drive and display a notification on the screen.
- If your external hard drive requires power, make sure it is plugged into an electrical outlet or powered through another means, such as a USB hub. This will ensure that the hard drive remains operational during the transfer process.
It’s worth noting that some external hard drives may require additional software or apps to be installed on your iPad for compatibility and file management. Check the manufacturer’s instructions or website to see if there are any specific requirements or recommended apps for your device.
With the physical connection established, you’re now ready to move on to the next step and access the Photos app on your iPad.
Step 2: Access the Photos app on your iPad
Now that your external hard drive is connected to your iPad, it’s time to access the Photos app, which is where you’ll be able to select and transfer the photos you want to move to the external hard drive. Follow these steps to access the Photos app:
- Unlock your iPad and locate the Photos app icon on your home screen. The Photos app is represented by a multicolored flower icon.
- Tap on the Photos app icon to open the application. Once launched, you’ll be taken to the main screen, where you can browse through all your photo albums and collections.
- Use the tabs at the bottom of the screen to navigate through the different sections of the Photos app. The “Photos” tab displays all your photos in chronological order, while the “Albums” tab organizes your photos into specific albums or collections.
- Select the appropriate album or collection where the photos you want to transfer are located. You can browse through your albums by scrolling horizontally or tapping on the album name to view its contents.
- Once you’ve found the album or collection that contains the photos you wish to transfer, tap on it to open it. This will display all the individual photos within that album or collection.
Now that you’ve accessed the Photos app on your iPad and found the specific album or collection where your desired photos are stored, you’re ready to proceed to the next step and learn how to select the photos you want to transfer.
Step 3: Select the photos you want to transfer
Now that you’ve accessed the Photos app on your iPad and opened the specific album or collection where your desired photos are located, it’s time to select the photos you want to transfer to your external hard drive. Follow these steps:
- While viewing the photos within the album or collection, tap on the “Select” button located at the top right corner of the screen. This will enable you to choose multiple photos at once.
- After tapping on the “Select” button, you’ll notice that each photo within the album or collection has a small circular checkmark appearing on it. To select a photo, simply tap on the checkmark on the top left corner of the photo. You can select multiple photos by tapping on the checkmark of each desired photo.
- If you’d like to select all the photos within the album or collection, tap on the “Select All” option located at the top left corner of the screen. This will automatically mark all photos with a checkmark.
- As you select photos, you’ll notice that the number of selected photos is displayed at the top of the screen. This will help you keep track of the total number of photos you’ve chosen for transfer.
- If you accidentally select a photo that you don’t want to transfer, simply tap on the checkmark again to deselect it.
Once you’ve made your selections, and you’re satisfied with the photos you’ve chosen for transfer, it’s time to move on to the next step and learn how to export these selected photos to your external hard drive.
Step 4: Export the selected photos to your external hard drive
With the desired photos selected in the Photos app on your iPad, it’s time to export them to your external hard drive. Follow these steps to successfully transfer the selected photos:
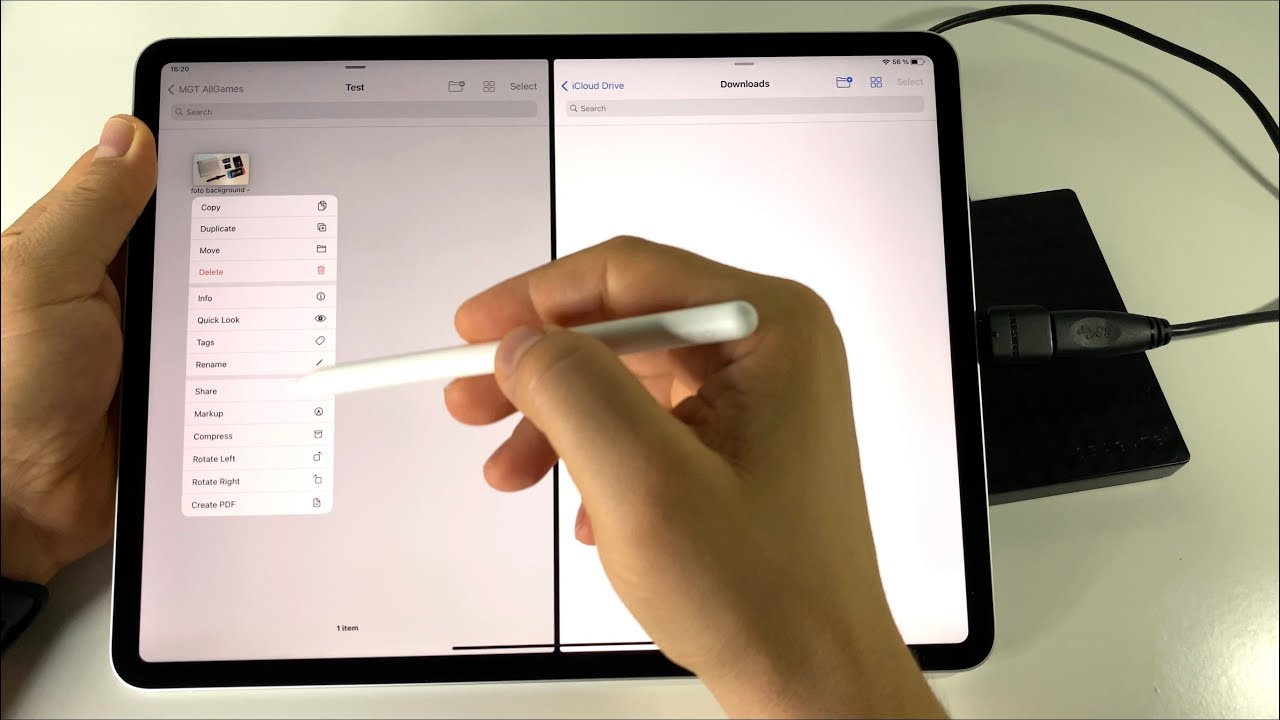
- Tap on the “Share” button, which is represented by a square icon with an upward arrow. You can find this icon at the bottom left or bottom right corner of the screen, depending on your iPad model or iOS version.
- A menu will pop up, displaying various sharing options. Scroll through the available options until you find and tap on the “Save to Files” button. This will open the Files app, which allows you to manage and organize your files on your iPad.
- In the Files app, navigate to the location where you want to save the exported photos on your external hard drive. This could be a specific folder or directory that you’ve created or a default location within the external hard drive.
- Once you’ve reached the desired location, tap on the “Save” button located at the top right corner of the screen. This will initiate the export process, transferring the selected photos from your iPad to your external hard drive.
- Depending on the number of photos you’re transferring and the speed of your external hard drive, the process may take a few moments to complete. Ensure that both your iPad and your external hard drive remain connected during the transfer to avoid any interruptions.
Once the transfer process is finished, you will receive a notification or confirmation that the photos have been successfully exported to your external hard drive. You can now disconnect your external hard drive from your iPad, knowing that your valuable photos are safely stored in a separate location.
It’s recommended to verify the transferred photos on your external hard drive to ensure they are intact and accessible before deleting them from your iPad. This will give you peace of mind and guarantee that your memories are securely backed up.
Now that you’ve successfully exported the selected photos to your external hard drive, you’re ready to move on to the final step and confirm that the photos have been transferred successfully.
Step 5: Verify that the photos have been successfully transferred
After completing the transfer process, it’s important to verify that the photos have been successfully transferred from your iPad to your external hard drive. Follow these steps to ensure that your precious memories are stored safely:
- Reconnect your external hard drive to your iPad, either via the same connector or adapter that you used earlier or through a different compatible port.
- Unlock your iPad and navigate to the Files app. Open the app and locate the files and folders on your external hard drive where you saved the transferred photos.
- Browse through the files and folders to find the specific location where you transferred the photos. You should see the transferred photos displayed as individual files or within the respective folders.
- Tap on one of the transferred photos to open and view it. Ensure that the photo is displayed correctly and that no corruption or loss of quality has occurred during the transfer.
- If you transferred multiple photos, take a few moments to browse through each of them and verify their integrity. Look for any discrepancies, such as missing photos or any signs of data corruption.
- If you are satisfied with the verification process and all the transferred photos appear intact, you can disconnect your external hard drive from your iPad. Safely remove the connector or adapter from both devices.
By following these steps, you can ensure that the photos you transferred from your iPad to your external hard drive are safe, accessible, and in optimal condition. Remember to store your external hard drive in a secure location to protect it from physical damage or theft.
Now that you have verified the successful transfer of your photos, you can confidently delete the transferred photos from your iPad to free up storage space and continue capturing new memories without worrying about running out of memory.
Congratulations! You have successfully completed the process of transferring photos from your iPad to an external hard drive. Enjoy the extra storage space on your device and the reassurance of having a backup of your cherished photos.
Conclusion
Transferring photos from your iPad to an external hard drive is a valuable practice that helps you free up storage space, create a reliable backup, and ensure the safety of your precious memories. By following the step-by-step process outlined in this guide, you can easily transfer your photos and enjoy the benefits of increased storage capacity.
Through connecting your external hard drive to your iPad, accessing the Photos app, selecting the desired photos, exporting them to the external hard drive, and verifying the successful transfer, you can confidently store your photos in a separate location and avoid the risk of losing them due to accidental deletion, device damage, or other unforeseen circumstances.
Remember to periodically check your external hard drive and ensure that your transferred photos are still intact and accessible. Additionally, it’s a good practice to make regular backups of your external hard drive to a secondary storage location to provide an extra layer of security.
Whether you’re a professional photographer, a hobbyist, or simply someone who loves capturing memories on your iPad, transferring your photos to an external hard drive is a smart and efficient way to manage your photo library. It not only frees up space on your device but also gives you peace of mind, knowing that your precious memories are safely stored and protected.
So, don’t hesitate to go through the steps outlined in this guide and start transferring your photos from your iPad to an external hard drive. Enjoy the additional storage space, peace of mind, and the ability to continue capturing more memories without worrying about running out of space on your iPad.