Introduction
Welcome to the world of computer hardware troubleshooting! One common issue that many PC users face is a faulty power supply unit (PSU). A malfunctioning PSU can lead to a variety of problems, from random shutdowns and system instability to damaged components. But fear not! In this guide, we will discuss how to test a PSU using a simple tool that you probably already have in your home – a paperclip.
Before we dive into the details, let’s first understand what a PSU is and why it is important to test it.
What is a PSU?
A Power Supply Unit, or PSU, is an essential component in a computer system. Its main function is to convert the alternating current (AC) from your wall outlet into direct current (DC) that your computer’s components can use. The PSU provides power to the motherboard, graphics card, hard drives, and other devices, ensuring they receive a steady and regulated power supply to operate optimally.
PSUs come in various wattages and configurations, depending on the power requirements of your computer. It is crucial to use a PSU that can handle the power demands of your system to prevent any issues like overheating or power shortages.
Why should you test a PSU?
Testing a PSU is important for a couple of reasons. First, it allows you to diagnose if the PSU is the cause of any system issues you may be experiencing. If your computer is randomly shutting down, not powering on, or exhibiting strange behaviors, a faulty PSU could be the culprit.
Secondly, testing a PSU helps to ensure its functionality and reliability. A malfunctioning PSU can not only disrupt your computer’s performance but also potentially damage other expensive components, such as the motherboard or graphics card. By testing the PSU, you can identify any defects or irregularities and take the necessary steps to rectify the problem.
Now that we understand the importance of testing a PSU, let’s move on to the tools you will need to perform the test.
What is a PSU?
A Power Supply Unit, or PSU, is an essential component in a computer system. Its main function is to convert the alternating current (AC) from your wall outlet into direct current (DC) that your computer’s components can use. Think of it as the heart of your computer, supplying power to all the other vital organs.
The PSU receives AC power from the wall outlet and then uses various circuitry and components to transform it into a stable and regulated DC voltage. This DC voltage is then distributed to the various hardware components inside the computer, such as the motherboard, graphics card, hard drives, and other peripheral devices.
PSUs come in different sizes and wattages, allowing you to choose the right one for your specific computer needs. The wattage rating of a PSU indicates how much power it can deliver to the computer components. A higher wattage PSU is typically required for systems with high-performance graphics cards, multiple hard drives, and other power-hungry components.
In addition to providing power to the components, the PSU also plays a crucial role in safeguarding your system against power surges and fluctuations. It contains built-in protections, such as overvoltage protection, undervoltage protection, short circuit protection, and overload protection. These features are designed to prevent damage to the computer hardware in case of irregularities in the power supply.
PSUs are typically located at the back of the computer case, near the power socket. They have a variety of connectors and cables that attach to the different components inside the computer. The most common connector is the 24-pin ATX connector, which provides power to the motherboard. Other connectors include PCIe connectors for graphics cards, SATA connectors for hard drives and SSDs, and peripheral connectors for devices such as fans and optical drives.
Overall, the power supply unit is a critical component in any computer system. It provides the necessary electrical power to keep your computer running smoothly and ensures the stability and longevity of your hardware components. Understanding the role and importance of a PSU is essential when troubleshooting power-related issues or when choosing a new power supply for your computer.
Why should you test a PSU?
Testing a PSU is an important step in troubleshooting computer issues and ensuring the reliability and stability of your system. Here are a few reasons why you should test a PSU:
Determining the cause of system issues:
When your computer experiences random shutdowns, failure to power on, or unexpected errors, the PSU could be the culprit. Testing the PSU helps you identify if it is the source of the problem. By ruling out or confirming the PSU as the cause, you can focus your troubleshooting efforts on the relevant components and avoid replacing unnecessary parts.
Preventing damage to other components:
A faulty PSU can cause power irregularities that may damage other hardware components. Power surges, fluctuations, or inadequate power supply can lead to system instability or, in extreme cases, permanent damage to components like the motherboard, graphics card, or hard drives. Testing the PSU ensures it is functioning correctly, minimizing the risk of damage to other expensive hardware.
Ensuring stable and efficient performance:
A PSU that is not delivering the correct voltage or struggling to meet the power demands of your system can result in performance issues. Testing the PSU allows you to verify its output, ensuring a stable and adequate power supply to all your computer components. This, in turn, promotes reliable and efficient performance, particularly for power-hungry components like high-end graphics cards or intensive applications.
Budget-friendly troubleshooting:
Testing a PSU with a paperclip or other simple tools is a cost-effective way to diagnose power-related problems. It saves you from purchasing a new PSU unnecessarily, especially if the issue lies elsewhere in your system. By testing the PSU first, you can determine if it needs replacement or if another component requires attention.
Peace of mind:
Knowing that your PSU is functioning properly provides peace of mind when using your computer. It eliminates the worry of sudden shutdowns or system instability caused by power-related issues. Regularly testing the PSU can help identify potential problems before they escalate, allowing you to take preventive measures and ensure the longevity of your computer system.
Now that you understand the importance of testing a PSU, let’s move on to the tools you’ll need to perform the test.
What tools do you need?
Testing a PSU with a paperclip doesn’t require any specialized or expensive tools. In fact, you may already have everything you need right at home. Here is a list of essential tools for PSU testing:
1. Paperclip:
A simple paperclip is the key tool for PSU testing. It serves as a jumper wire to connect specific pins on the PSU’s 24-pin main power connector, simulating the power-on signal that the motherboard normally sends.
2. Multimeter:
While not mandatory, a digital multimeter comes in handy for more advanced PSU testing. It allows you to measure voltages accurately and detect any fluctuations or abnormalities in the PSU’s output. A multimeter is especially useful if you suspect voltage issues but is not essential for the simple paperclip test.
3. Safety precautions:
Whenever working with a PSU or any electrical components, it is crucial to prioritize safety. Make sure to have the following safety precautions in place:
- Rubber gloves and safety glasses: Protect yourself from electrical shocks and debris.
- A well-ventilated area: Work in an open space to ensure proper airflow and avoid inhaling potentially harmful fumes.
- A grounded anti-static mat or wrist strap: Prevent electrostatic discharge (ESD) that could damage sensitive components.
These are the basic tools and safety precautions needed for testing a PSU using a paperclip. Now, let’s proceed to the step-by-step guide on how to test a PSU with a paperclip.
Step-by-Step Guide to Testing a PSU with a Paperclip
Testing a PSU with a paperclip is a simple procedure that helps determine if the PSU is functioning properly. Follow these step-by-step instructions:
Step 1: Safety First
Before starting, ensure that your computer is turned off and unplugged from the power source. This prevents any potential electrical hazards while working with the PSU.
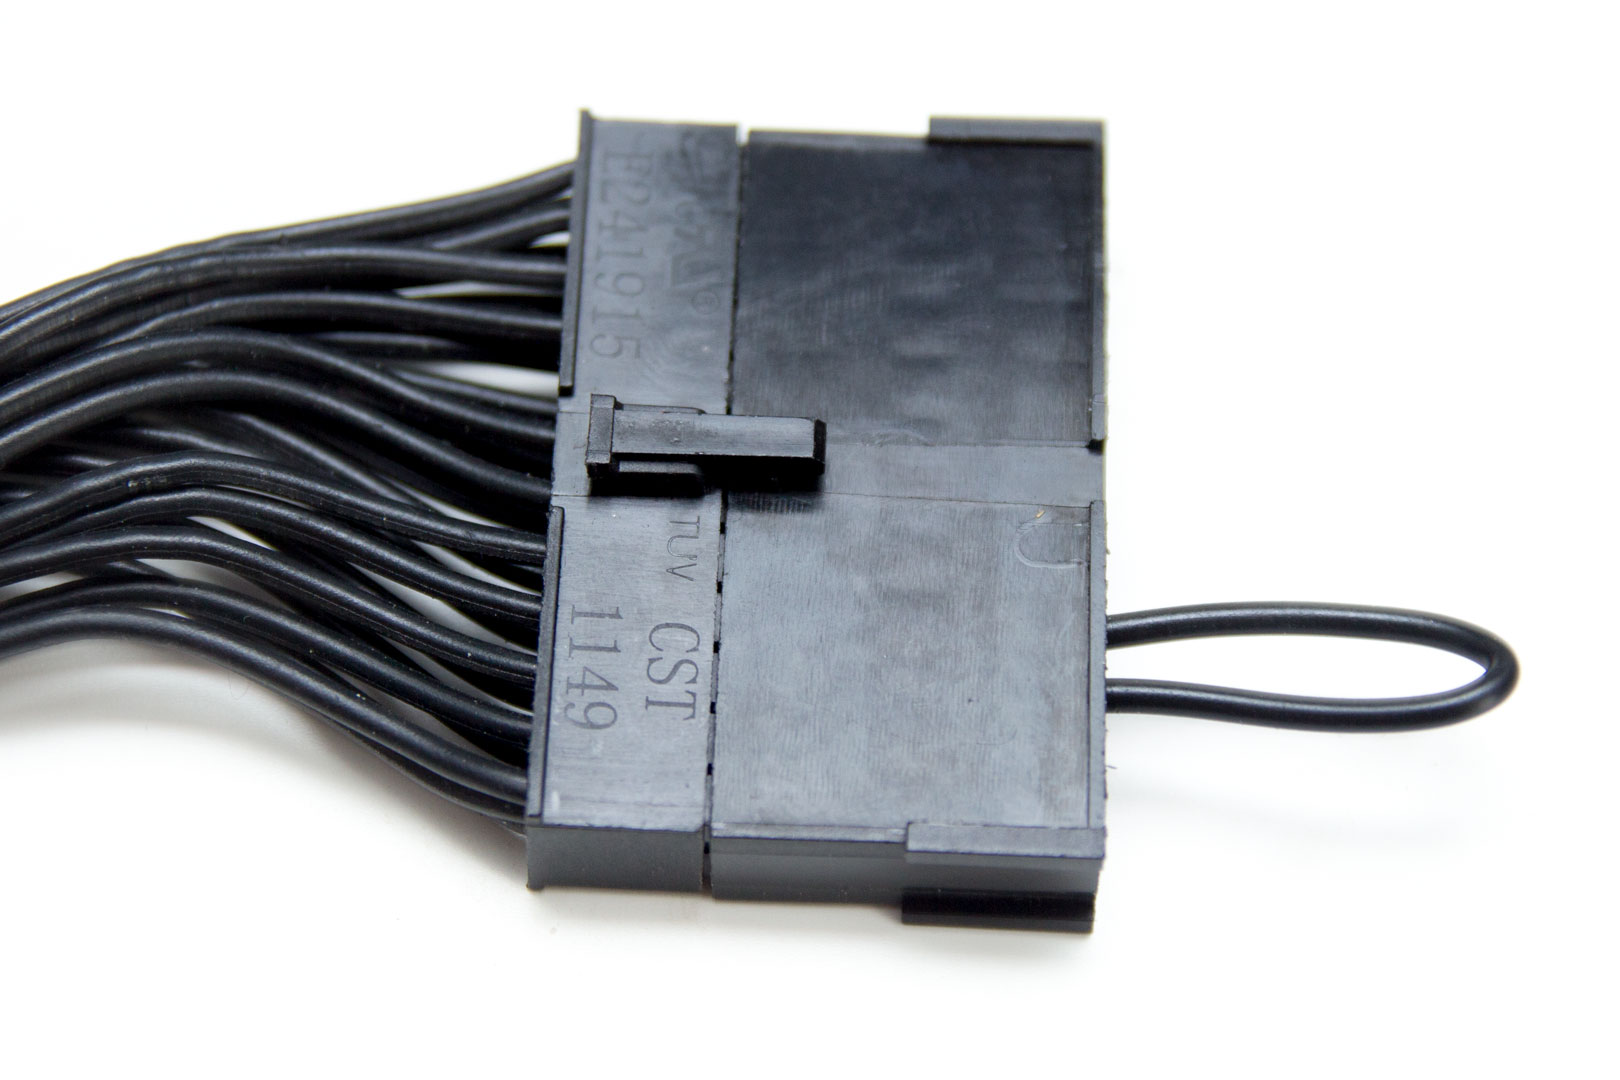
Step 2: Locate the 24-pin Main Power Connector
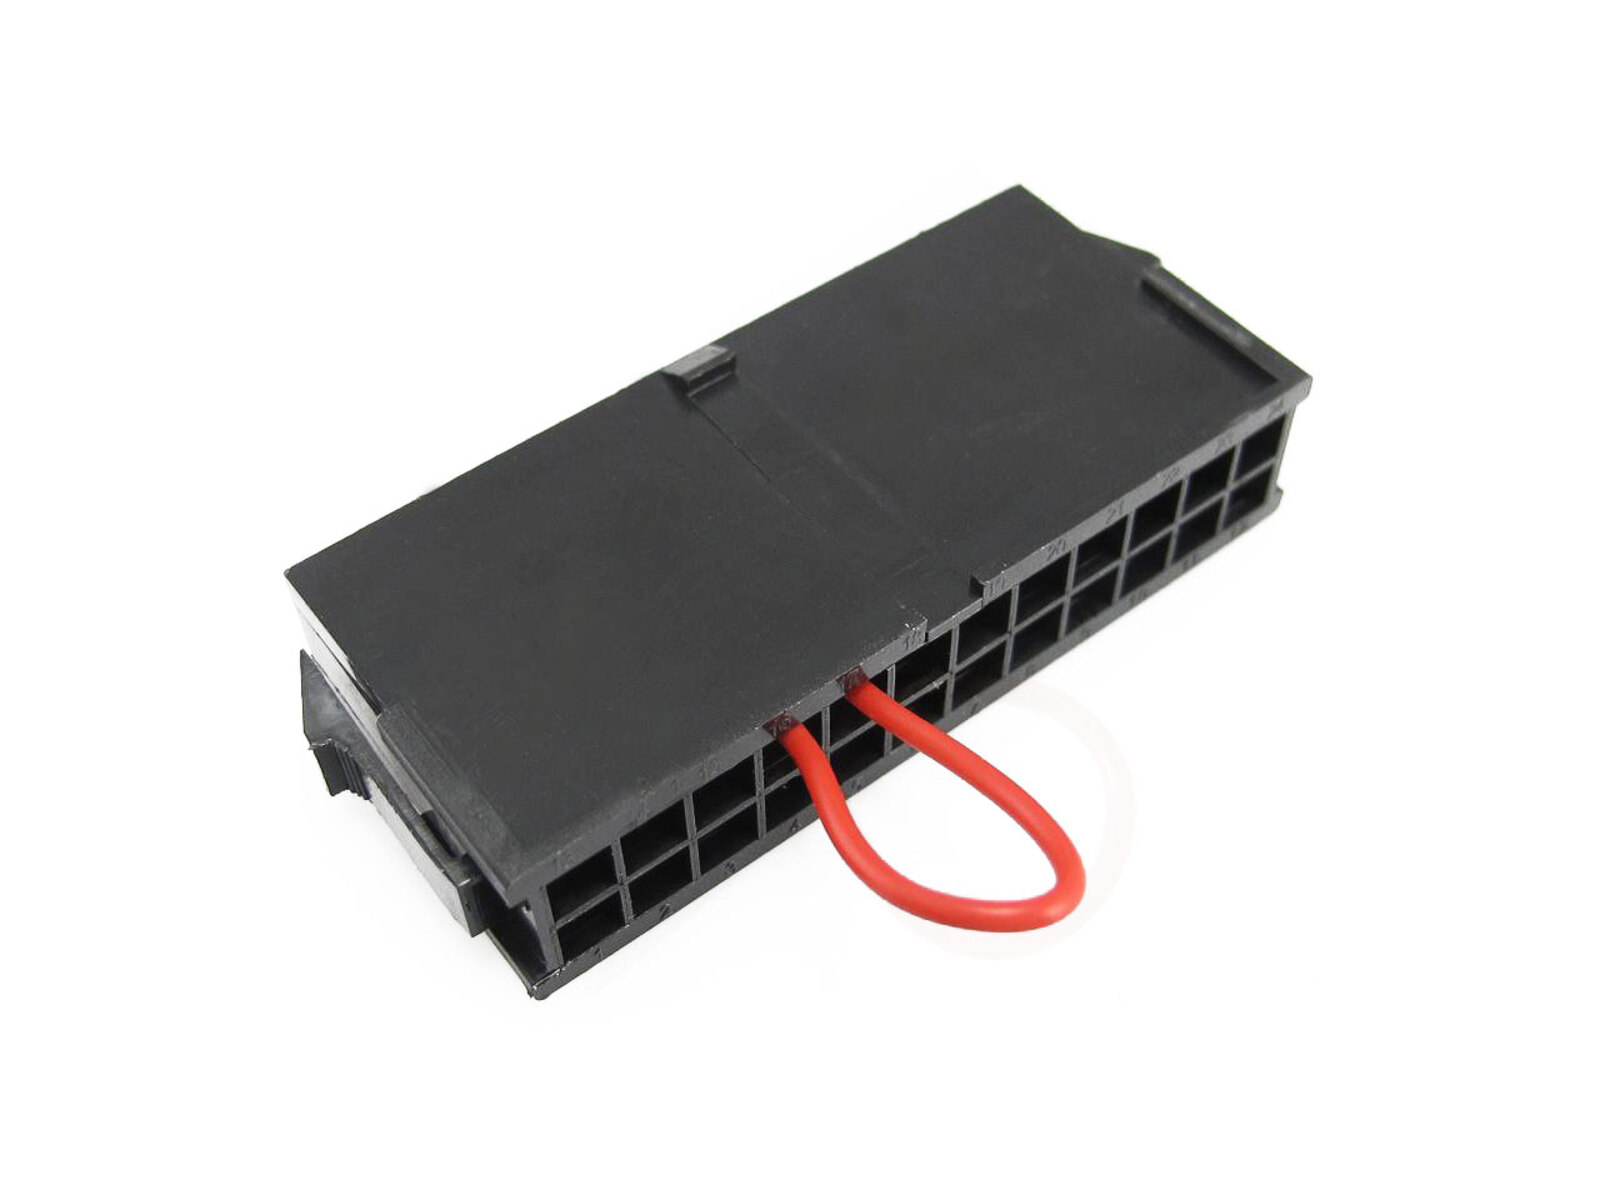
Identify the 24-pin main power connector on the PSU. This connector usually consists of a large plug with 24 pins and is located at the end of the PSU cables. It provides power to the motherboard and is the key component for the testing process.
Step 3: Unplug the 24-pin Main Power Connector
Disconnect the 24-pin main power connector from the motherboard. This ensures that the PSU is isolated and not supplying power to any components during the testing process.
Step 4: Bend the Paperclip
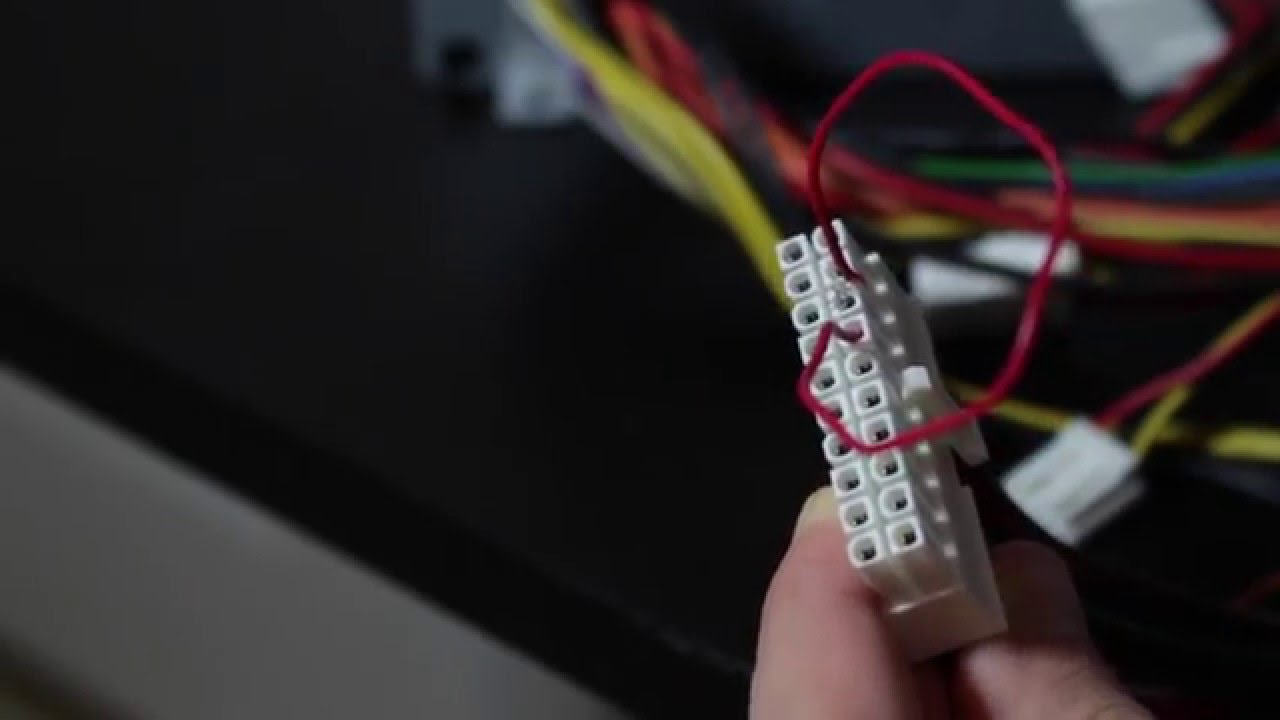
Take a standard paperclip and straighten it. Then, bend the paperclip into a U-shape, leaving a small loop at one end. This loop will make it easier to remove the paperclip from the connector later.
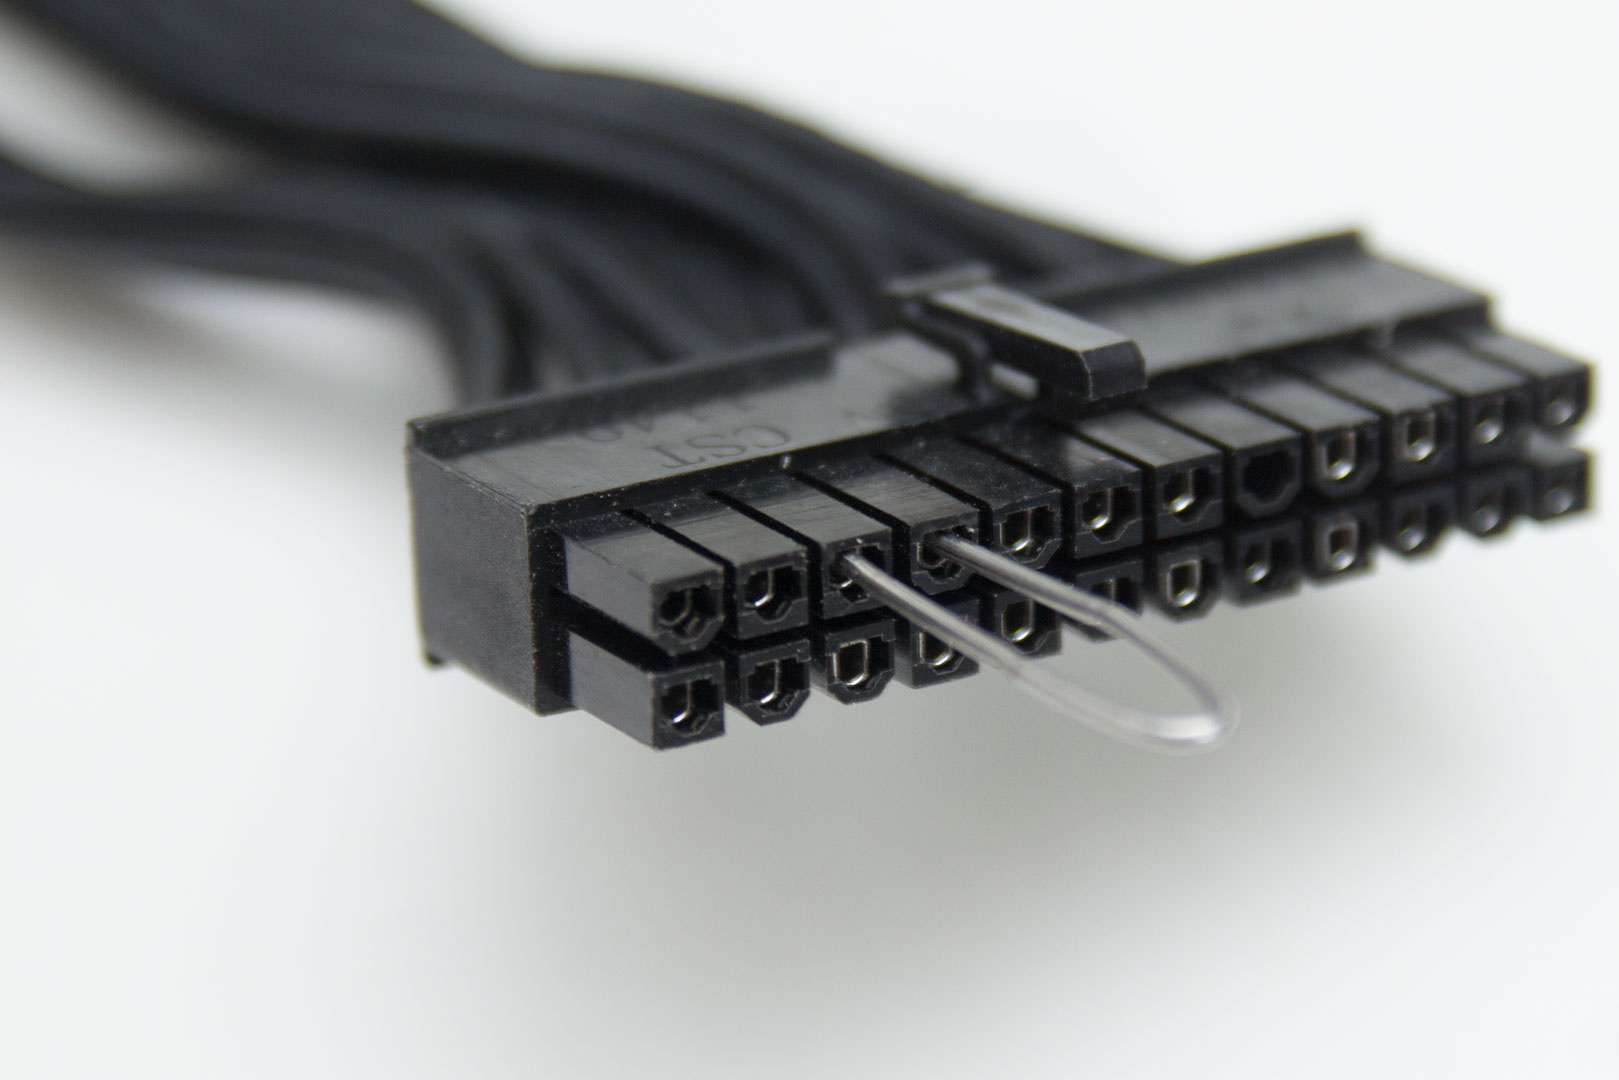
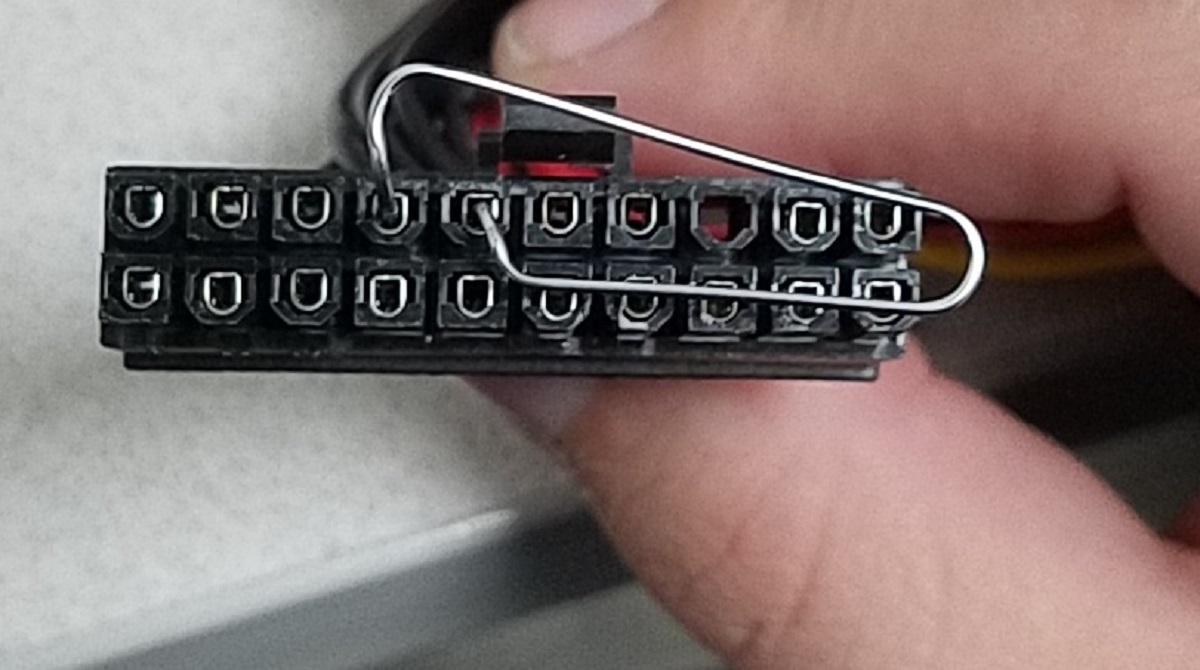
Step 5: Insert the Paperclip
Insert one end of the paperclip into the pin 16 of the 24-pin main power connector. Pin 16 is typically a green wire and is labeled either “PS_ON” or “Power On”. This pin is responsible for signaling the PSU to turn on when the motherboard receives the power-on command.
Step 6: Connect the Paperclip
While holding the paperclip in place, plug the 24-pin main power connector back into the motherboard. Ensure that the paperclip remains inserted into pin 16 while the connector is securely attached.
Step 7: Power On the PSU
Locate the power switch on the back of the PSU. Flip the switch to the “On” position without actually powering on the computer. This supplies power to the PSU without any other components receiving power.
Step 8: Observe the PSU
With the PSU powered on, observe the PSU’s fan. If the fan spins up and remains running after a few seconds, it’s a good indication that the PSU is functioning correctly. This confirms that the PSU is capable of providing power and that the issue may lie elsewhere in the system.
Note: If the PSU fan does not spin or if you notice any unusual sounds, it indicates a potential issue with the PSU, such as a faulty fan or internal components. In such cases, it is advisable to replace the PSU.
Step 9: Power Off and Disconnect
Once you have finished testing the PSU, power off the PSU by flipping the switch on the back to the “Off” position. Then, remove the paperclip from the pin 16 of the main power connector and disconnect the 24-pin connector from the motherboard.
With these steps, you have successfully tested the PSU with a paperclip. This straightforward process can help determine if the PSU is working, allowing you to proceed with further troubleshooting or necessary replacements.
Precautions to Take Before Testing a PSU
Before you test a PSU, it’s important to keep safety in mind and take certain precautions to prevent any accidents or damage to your computer system. Here are some essential precautions to follow:
1. Turn off and unplug your computer:
Before working with the PSU, make sure your computer is completely powered off and unplugged from the power source. This eliminates the risk of electrical shock and allows you to work safely.
2. Ground yourself:
Static electricity can damage sensitive computer components. To prevent this, make sure to ground yourself by either wearing an anti-static wrist strap or by touching a grounded metal object, such as the computer case.
3. Wear safety gear:
It’s a good practice to wear rubber gloves and safety glasses to protect yourself from potential hazards while working with electrical components. This protects you from electric shocks and prevents debris from entering your eyes.
4. Work in a well-ventilated area:
When testing a PSU, it’s important to have proper airflow to prevent overheating. Therefore, work in a well-ventilated area or consider using a fan to maintain a cool environment. This also helps to avoid inhaling any potentially harmful fumes that might be released during the process.
5. Disconnect all power cables:
Prior to testing the PSU, ensure that all power cables are disconnected from the motherboard and components. This includes the 24-pin main power connector, PCIe connectors, SATA connectors, and any peripheral connectors. This prevents any accidental damage to the components and ensures a safe testing environment.
6. Do not touch any live wires:
Exercise caution and avoid touching any live wires or exposed connectors while the PSU is connected to power. This minimizes the risk of electric shocks and potential short circuits.
7. Follow manufacturer guidelines:
Read and follow the manufacturer’s guidelines for your PSU before attempting any testing. Different PSU models may have specific instructions, and it’s important to adhere to them for safety and optimal results.
By following these precautions, you can ensure a safe testing process and protect both yourself and your computer from potential harm. Once you have taken these precautions, you can proceed with confidence to test your PSU and diagnose any power-related issues.
Other Methods to Test a PSU
While using a paperclip to test a PSU is a simple and convenient method, there are alternative approaches available if you prefer to use a more specialized tool. Here are a few other methods to test a PSU:
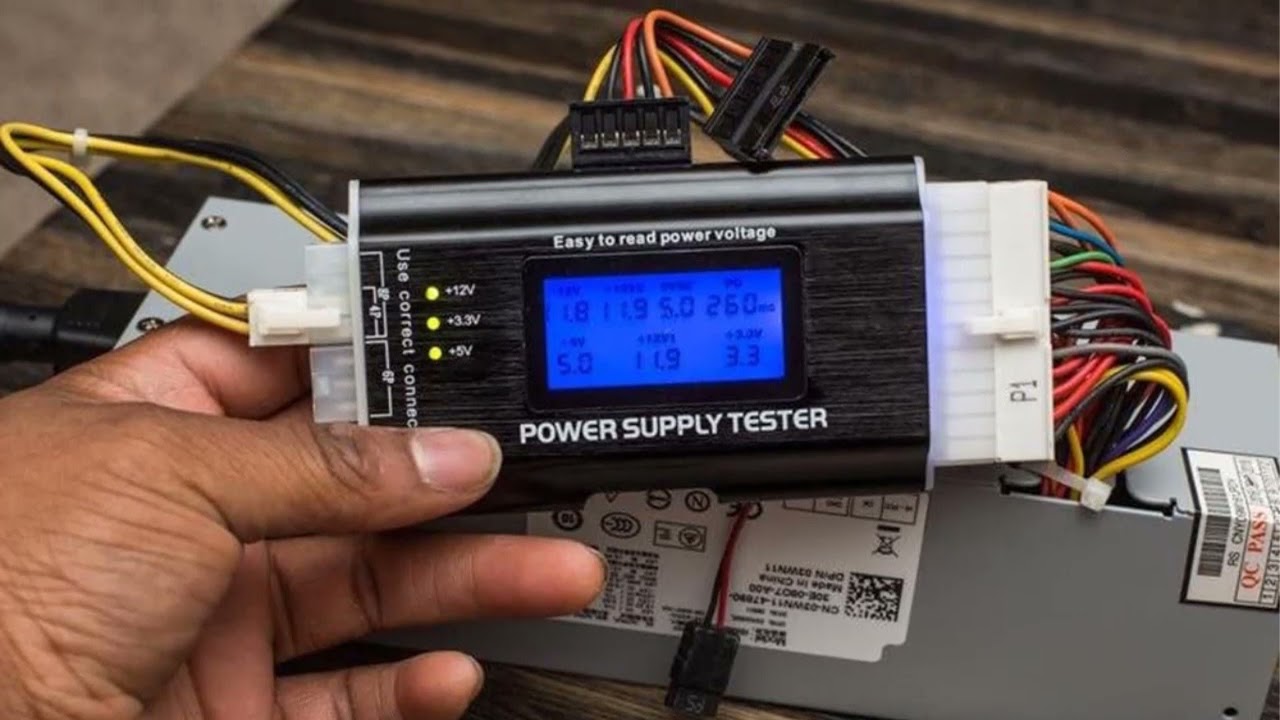
1. Using a PSU Tester:
A PSU tester is a dedicated device designed specifically for testing power supplies. It typically features an LCD screen and various connectors that allow you to check the voltage output, amperage, and power-on signals of the PSU. PSU testers are user-friendly and provide more detailed information than the paperclip method. They are widely available and can be a valuable investment for computer enthusiasts or professionals who frequently troubleshoot hardware issues.
2. Using a Multimeter:
If you have access to a digital multimeter, you can use it to test the voltage output of the PSU. Set the multimeter to DC voltage mode and connect the positive (red) probe to the yellow wire on a molex connector or the 24-pin main power connector’s appropriate pin. Connect the negative (black) probe to a black wire. The multimeter will display the voltage output of the PSU in real-time, allowing you to verify if it falls within the acceptable range specified by the manufacturer.
3. Connecting the PSU to a Known Working System:
If you have a spare computer or a friend’s computer that is functioning correctly, you can try connecting your PSU to that system. Disconnect the working PSU from the system and replace it with the one you want to test. Power on the computer and monitor its performance. If the system works flawlessly with the PSU installed, it indicates that the PSU is likely functioning correctly. Conversely, if the system experiences issues or instability, it suggests a problem with the PSU.
4. Seeking Professional Help:
If you are unsure about testing a PSU yourself or if you suspect a more complex issue with your computer system, it is recommended to seek professional assistance. Computer repair technicians or specialists can accurately diagnose and test the PSU using advanced tools and equipment. They have the expertise to identify any underlying issues and provide appropriate solutions.
Keep in mind that while these methods can help diagnose PSU problems, they might not be foolproof. If you still experience issues after testing, it may be necessary to replace the PSU or seek further professional assistance to fully address the problem.
Now that you are aware of various methods to test a PSU, you can choose the one that aligns with your preference and the tools at your disposal.
Conclusion
Testing a power supply unit (PSU) is an essential step in troubleshooting computer issues and ensuring optimal performance and reliability. Whether you opt for the simple paperclip method or use specialized tools like PSU testers or multimeters, testing allows you to identify potential problems with the PSU and determine if it is the source of any system issues.
By testing a PSU, you can save time and money by avoiding unnecessary replacements of other components. It also helps prevent further damage to your computer system and ensures stable power supply to your hardware, minimizing the risk of system instability or component failures.
Remember to take necessary precautions before testing a PSU, such as turning off and unplugging the computer, grounding yourself, and working in a well-ventilated area. Following safety guidelines protects both you and your computer from potential hazards.
It’s important to note that PSU testing methods mentioned in this guide are meant for diagnosing basic issues. If you encounter persistent problems or complex issues, it’s advisable to seek professional assistance from computer repair technicians who have the expertise and tools to thoroughly diagnose and resolve PSU-related concerns.
Regular testing and maintenance of your PSU can contribute to a longer lifespan for your computer system and provide peace of mind, knowing that your hardware is operating optimally.
With the knowledge and understanding gained from this guide, you are now equipped to test your PSU and take appropriate action in ensuring the reliability and performance of your computer system. Remember to consult the manufacturer’s guidelines and adhere to best practices when working with your PSU.
Keep your power supply in check, and happy computing!