Choosing the Right Smartphone for Video Recording
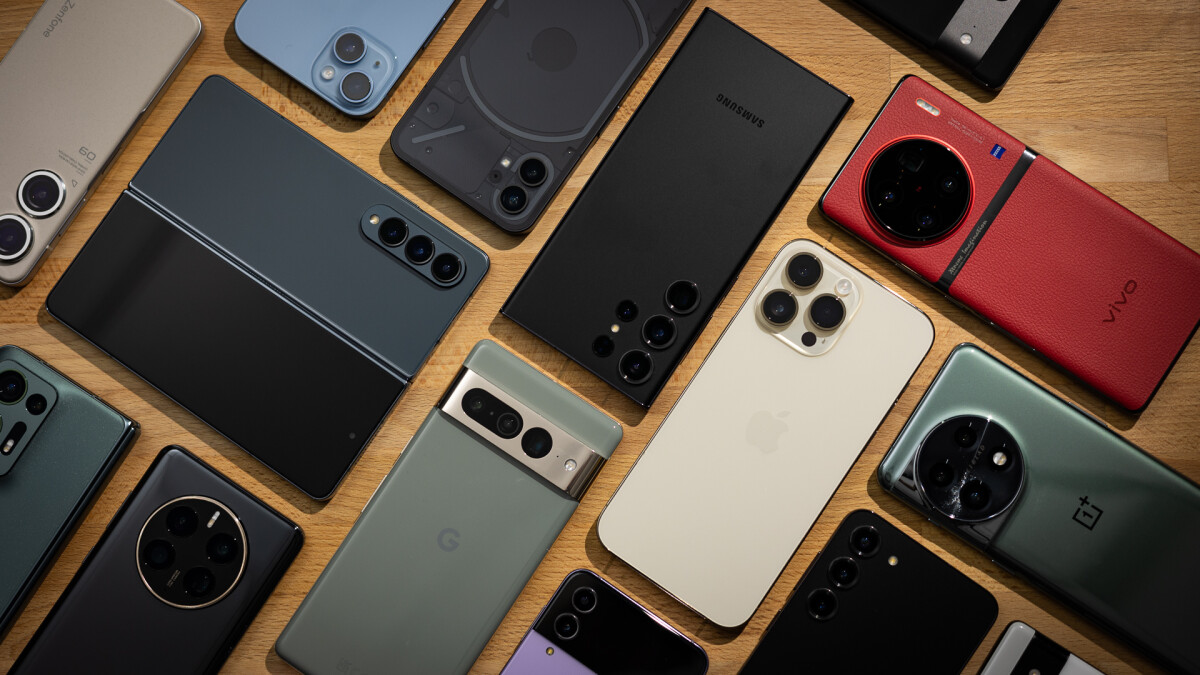
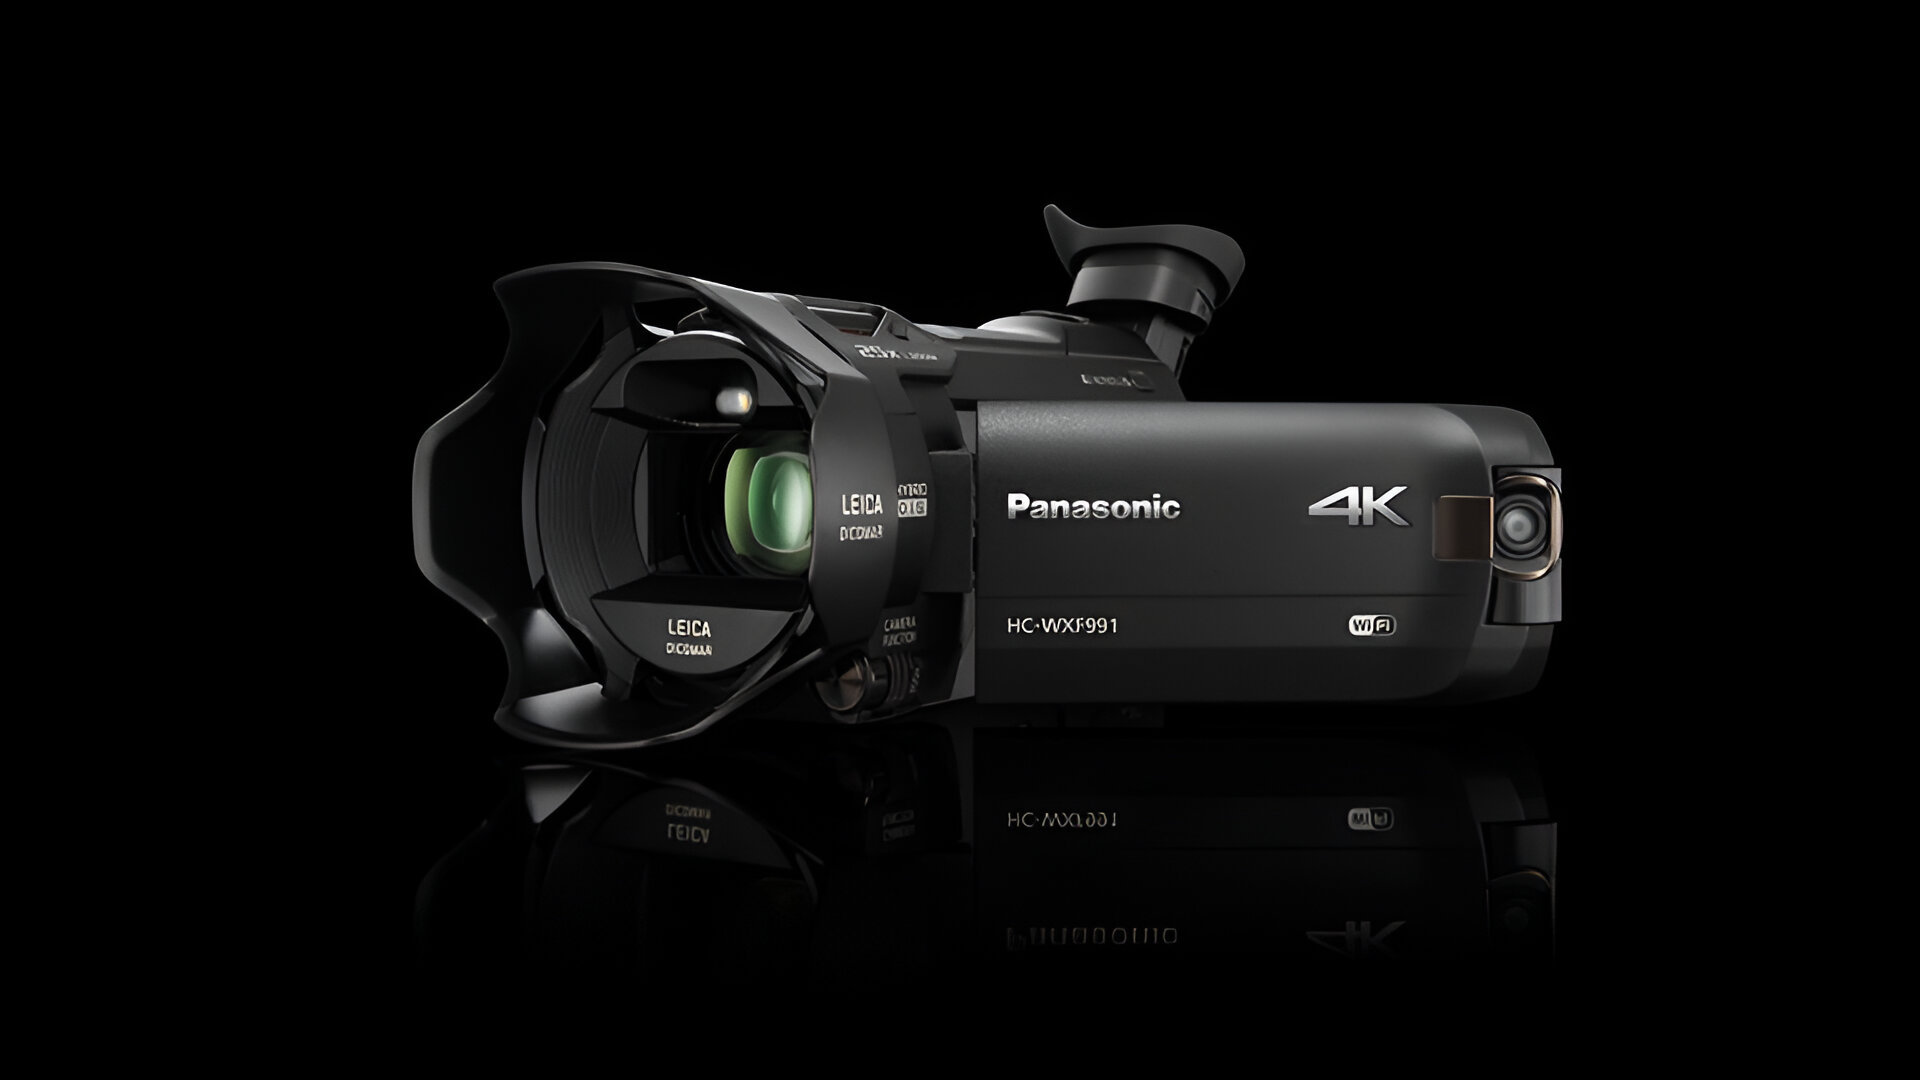
When it comes to shooting professional videos with a smartphone, choosing the right device is a crucial first step. Not all smartphones are created equal in terms of camera capabilities and features. Here are some factors to consider when selecting the right smartphone for video recording.
Firstly, look for a smartphone with a high-quality camera sensor. A larger sensor size allows for better low-light performance and improved dynamic range. Additionally, a higher megapixel count can result in sharper and more detailed videos. Be sure to check the camera specifications and reviews before making a decision.
Another important factor to consider is the availability of manual controls. Some smartphones offer manual controls for exposure, white balance, ISO, and shutter speed, allowing you to have more control over the final look of your videos. This can be particularly useful when shooting in challenging lighting conditions or when you want to achieve a specific creative effect.
Next, consider the video resolution and frame rate options available on the smartphone. Higher resolution options, such as 4K or even 8K, can provide greater detail and clarity in your videos. Additionally, having the option to shoot at different frame rates, such as 24fps or 60fps, can give you more flexibility in terms of capturing different types of subjects and achieving the desired visual aesthetic.
Another aspect to take into account is the availability of optical image stabilization (OIS) or electronic image stabilization (EIS). Both technologies help reduce camera shake and produce smoother, more professional-looking videos. OIS is generally considered more effective, but EIS can still provide decent stabilization if implemented well.
Lastly, consider the storage capacity of the smartphone. Shooting high-quality videos can quickly consume a significant amount of storage space. Ensure that the smartphone has ample storage or the option to expand the storage capacity with a microSD card.
By taking these factors into consideration, you can choose a smartphone that meets your specific video recording needs and empowers you to capture professional-looking videos.
Understanding the Basic Features of your Smartphone Camera
Before you start shooting professional videos with your smartphone, it’s essential to familiarize yourself with the basic features of your smartphone camera. Understanding these features will allow you to make the most of your device’s capabilities and capture high-quality videos.
The first feature to understand is the autofocus functionality. Most smartphone cameras have autofocus capabilities, which can automatically adjust the focus based on the subject in the frame. This ensures that your videos remain sharp and clear, even if the subject or camera position changes.
Next, learn about the exposure compensation feature. This feature allows you to adjust the brightness of your videos by either increasing or decreasing the exposure value. By experimenting with exposure compensation, you can achieve the desired lighting effect and prevent overexposed or underexposed footage.
Another important feature to explore is the white balance settings. White balance helps adjust the color temperature of your videos to accurately represent the true colors in different lighting conditions. Experiment with different white balance presets or manually adjust the white balance to achieve the most natural and appealing colors in your videos.
Additionally, become familiar with the different shooting modes available on your smartphone camera. Most smartphones offer options like auto mode, portrait mode, night mode, and more. Each mode is designed to optimize the camera settings based on specific shooting scenarios. Understanding when and how to use these modes can significantly enhance the quality of your videos.
Furthermore, explore the different focus modes available on your smartphone camera. Alongside autofocus, there might be options for manual focus or touch focus. Manual focus allows you to have precise control over the focus point, which can be particularly useful for creative effects or when shooting videos with specific depth of field requirements.
Lastly, familiarize yourself with the HDR (High Dynamic Range) feature. This feature is designed to capture a wider range of tones, particularly in high-contrast scenes. When HDR is enabled, the camera takes multiple shots of varying exposures and combines them to create a well-balanced and more detailed video.
By understanding and experimenting with these basic features of your smartphone camera, you’ll be able to take full advantage of its capabilities and capture professional-looking videos.
Optimizing Video Settings on your Smartphone
Once you have a smartphone with a capable camera, it’s important to optimize the video settings to ensure you capture the best possible footage. Here are some key settings to consider when optimizing videos on your smartphone.
The first setting to adjust is the resolution. Depending on your smartphone, you may have various resolution options, such as 720p, 1080p, or even 4K. Higher resolutions generally provide more detail, but they also result in larger file sizes. Consider the purpose of your video and the storage capacity of your device when selecting the appropriate resolution.
Next, pay attention to the frame rate settings. Frame rate refers to the number of frames captured per second and significantly impacts the smoothness of your video. Common frame rates are 24fps, 30fps, and 60fps. While 24fps can lend a cinematic look, 60fps achieves a more realistic and smoother motion. Experiment with different frame rates to find the one that suits your desired aesthetic.
Furthermore, take advantage of the video stabilization feature, if available on your smartphone. This feature helps reduce camera shake and produces smoother footage. Depending on your device, you may have options for optical image stabilization (OIS), electronic image stabilization (EIS), or a combination of both. Enable the appropriate stabilization method to enhance the overall quality of your videos.
Consider adjusting the exposure settings as well. Many smartphones allow you to manually adjust the exposure, which is useful in challenging lighting situations. By increasing or decreasing the exposure, you can ensure that your videos are properly lit and maintain a balanced exposure throughout the scene.
Don’t forget about the audio settings. While most smartphones have built-in microphones, the audio quality may not always be optimal. Consider investing in an external microphone or using headphones with a built-in microphone for better audio recording. Also, be mindful of any wind noise and try to minimize it by using a windproof cover or positioning yourself in a sheltered area.
Lastly, explore any additional settings or modes offered by your smartphone camera app. This can include features like slow-motion recording, time-lapse, or even manual controls for ISO, shutter speed, and white balance. Experimenting with these settings can add creativity and variety to your videos.
By optimizing these video settings on your smartphone, you’ll be able to capture high-quality footage that meets your specific requirements and elevates the overall professionalism of your videos.
Utilizing Composition Techniques for Professional-looking Videos
Composition plays a vital role in creating visually appealing and professional-looking videos. By utilizing composition techniques, you can enhance the visual impact of your footage and engage your audience. Here are some composition tips to consider when shooting videos with your smartphone.
The rule of thirds is a fundamental composition principle that can bring balance and interest to your videos. Imagine your frame divided into a grid of nine equal sections formed by two horizontal and two vertical lines. Positioning your subject or important elements along these lines or at the intersections can create visually pleasing compositions. Avoid placing your subject dead center in the frame, as it can lead to static and uninteresting visuals.
Another technique to consider is leading lines. Leading lines are visual elements within your scene that guide the viewer’s eye towards the subject or main point of interest. Utilize natural lines such as roads, pathways, or architectural elements to create a sense of depth and guide the viewer’s attention towards the focal point of your video.
When composing videos, remember to leave some empty space or negative space. Negative space refers to the empty areas of a frame that surround the subject. It helps provide breathing room, draw attention to the subject, and create a sense of balance. Experiment with different compositions and framing to incorporate negative space effectively.
Additionally, consider the concept of foreground, middle ground, and background to add depth to your videos. Incorporating elements in the foreground, middle ground, and background can create a more layered and immersive visual experience. This technique can be particularly effective when shooting landscape or wide-angle videos.
Don’t forget to pay attention to the overall framing and aspect ratio of your videos. Each aspect ratio, whether it’s the traditional 16:9 or the more cinematic 2.35:1, can evoke different emotions and aesthetics. Choose the aspect ratio that best suits your subject and story and frame your shots accordingly.
Finally, be mindful of the visual elements in the background of your shots. These elements can either enhance or distract from the main subject. Look out for unwanted objects, cluttered backgrounds, or anything that may take away from the overall composition. Keep your background clean and free from distractions, and choose locations that complement your subject.
By utilizing these composition techniques, you can create visually engaging and professional-looking videos that captivate your audience and convey your intended message effectively.
Lighting Tips for High-quality Smartphone Videos
Proper lighting is key to capturing high-quality videos with your smartphone. Regardless of the subject or location, good lighting can significantly enhance the overall visual appeal and professionalism of your footage. Here are some lighting tips to consider when shooting videos with your smartphone.
Firstly, make use of natural light whenever possible. Natural light is often the most flattering and provides a more realistic and vibrant look to your videos. When shooting indoors, position yourself near windows or doors to allow as much natural light as possible to illuminate your subject. Avoid harsh direct sunlight, as it can cause shadows or overexposure. Alternatively, when shooting outdoors, try to schedule your shoot during the golden hour when the lighting is soft and warm.
If natural light is limited or not available, consider using artificial lighting sources. A common option is to use LED lights or portable video lights. These lights are compact, adjustable, and provide consistent illumination. Place the lights in strategic positions to create a balanced and well-lit scene. Experiment with different angles and intensities to achieve the desired look and mood.
Another lighting technique to explore is backlighting. Backlighting involves positioning the light source behind the subject, creating a glow or halo effect. This technique can add depth and drama to your videos. However, be cautious not to allow the backlight to overpower the subject, resulting in underexposure. Adjust the exposure settings on your smartphone to ensure the subject remains well-lit.
When shooting interviews or close-ups, consider using a fill light. A fill light helps reduce harsh shadows and creates a more even and balanced lighting setup. It can be as simple as using a reflector to bounce light onto the subject or positioning a secondary light source to fill in the shadows.
When shooting in low-light conditions, it’s important to stabilize your smartphone to prevent motion blur. Utilize a tripod or find a stable surface to place your phone. Additionally, increase the ISO setting on your smartphone to make it more sensitive to the available light. However, be mindful that too high of an ISO can introduce digital noise and degrade the overall quality of your videos.
Lastly, avoid mixing different color temperatures of light sources. Lighting sources have varying color temperatures, such as warm (yellow) or cool (blue). If you mix light sources with different color temperatures, it can result in an unbalanced and unnatural-looking video. Whenever possible, try to match the color temperature of your lighting sources or use color correction techniques in post-production to maintain consistency.
By implementing these lighting tips, you can greatly improve the visual quality of your smartphone videos and create professional-looking footage that captivates your audience.
Capturing Steady Shots without a Tripod
While a tripod is a valuable tool for achieving steady shots, there may be times when you don’t have one readily available. However, that doesn’t mean you have to sacrifice stability in your smartphone videos. Here are some techniques to capture steady shots without a tripod.
Firstly, use both hands to hold your smartphone securely. Hold the phone with one hand gripping the bottom and the other hand supporting the side or back. This grip provides stability and minimizes camera shake. Keep your arms close to your body and brace yourself against a solid object, like a wall or tree, for additional support.
Next, adjust your stance and position to further stabilize your shots. Plant your feet firmly on the ground, shoulder-width apart. Distribute your weight evenly and bend your knees slightly to create a stable base. Avoid standing on tiptoes or shifting your weight excessively while recording. This stance helps minimize unnecessary movement and keeps your shots steady.
Utilize any available objects or surfaces to create makeshift supports. Look for ledges, walls, or tables that you can rest your smartphone on. Experiment with different angles and heights to find the most stable position. You can also use objects like bean bags, books, or even a folded towel to prop up your smartphone securely.
If there is no stable surface available, try using your surroundings to stabilize your shots. Lean against a wall or a tree to steady your hand. Use your body as a stabilizer, ensuring that your elbows are tucked into your sides to minimize any movement. Taking advantage of your environment can significantly improve stability.
Consider utilizing the built-in stabilization features on your smartphone camera. Many smartphones today have optical image stabilization (OIS) or electronic image stabilization (EIS) technology built into the camera. These features help compensate for hand movements and produce smoother footage. Enable the stabilization option in your camera settings to take full advantage of this feature.
Another useful technique is to shoot in short bursts or intervals. Instead of recording continuously, start and stop recording between shots. This allows you to reset your grip and posture, reducing fatigue and improving stability. You can later edit and combine the clips seamlessly during post-production.
Lastly, utilize video editing software to further enhance stability. Most video editing programs offer features like stabilization or warp stabilizer that can reduce camera shake and produce steady footage. If you find that your shots are still not as stable as you’d like, you can apply these stabilizing effects during the editing process.
By applying these techniques, you can capture steady shots with your smartphone even without a tripod. Practice and experiment with different methods to find the approach that works best for you in various shooting scenarios.
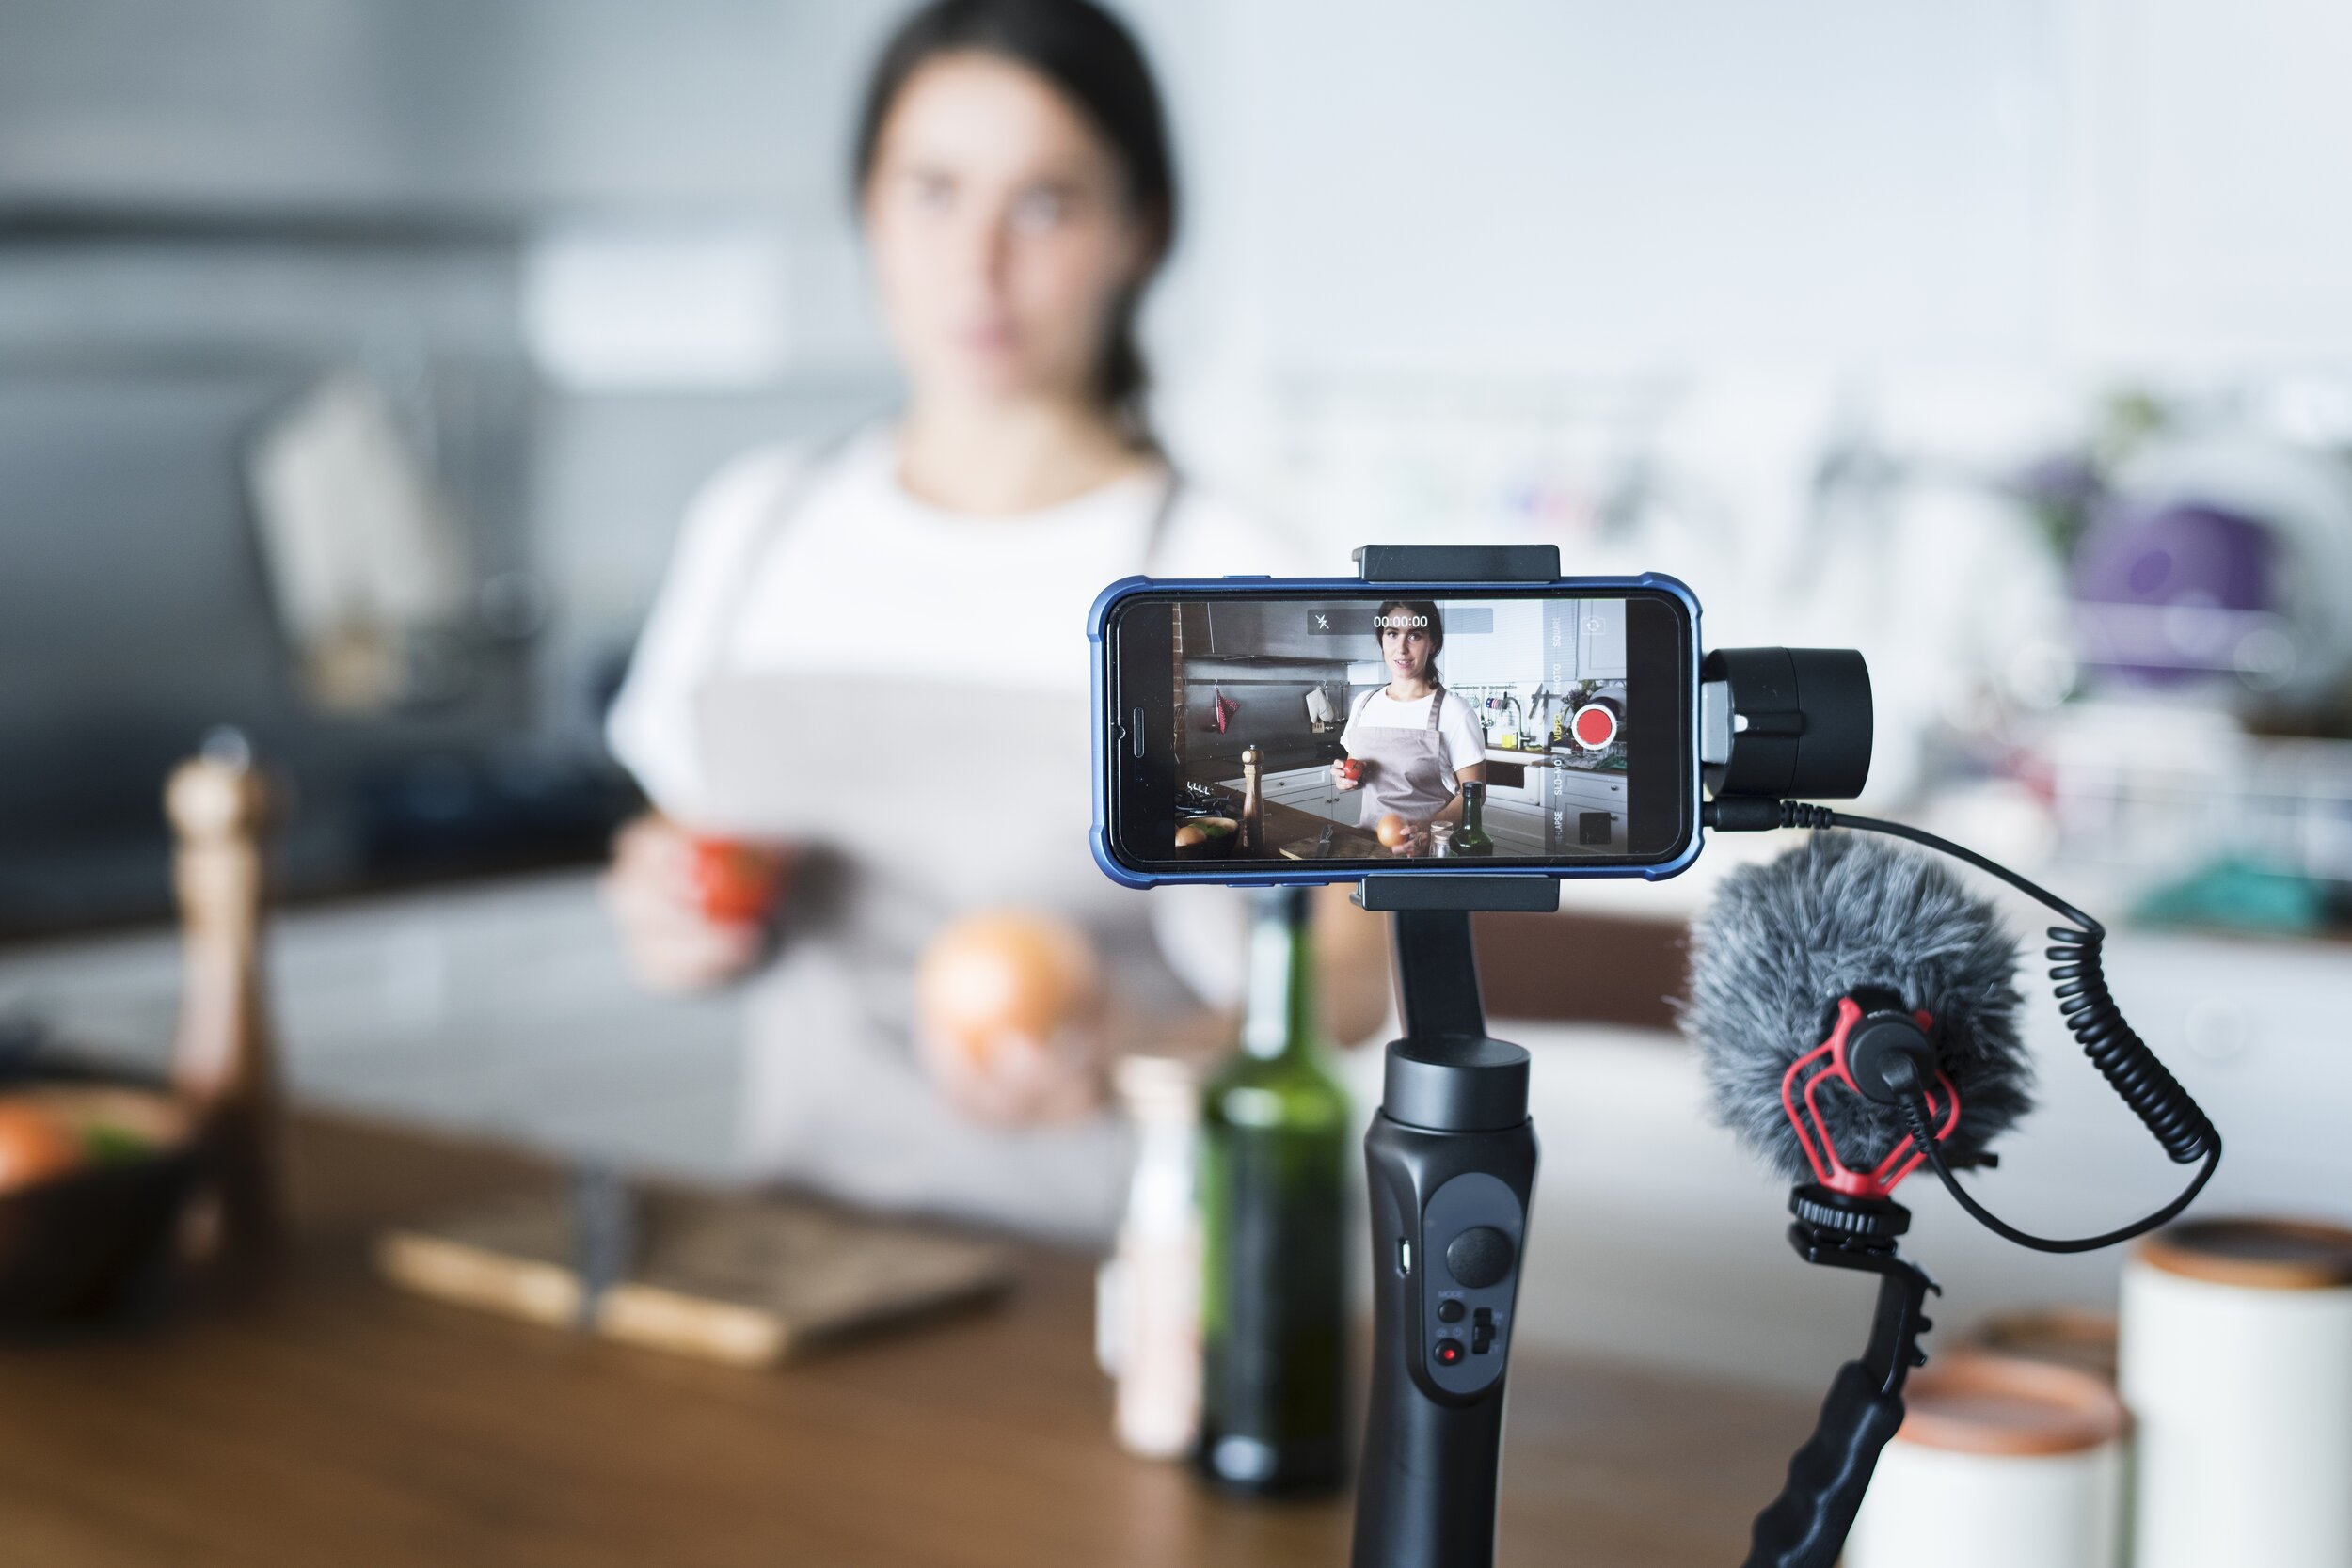
Using External Accessories to Enhance the Quality of your Videos
If you want to take your smartphone videos to the next level, consider using external accessories to enhance the quality and versatility of your footage. These accessories can provide additional functionality, improved audio, better stabilization, and more. Here are some external accessories to consider using for your smartphone videos.
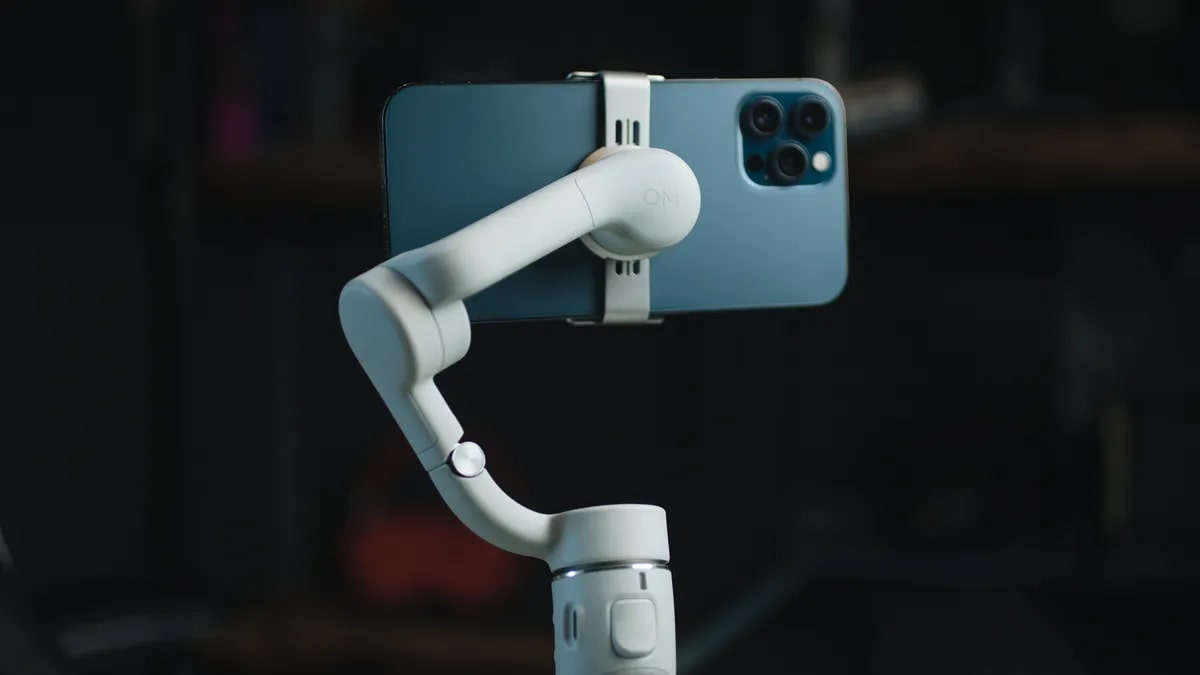
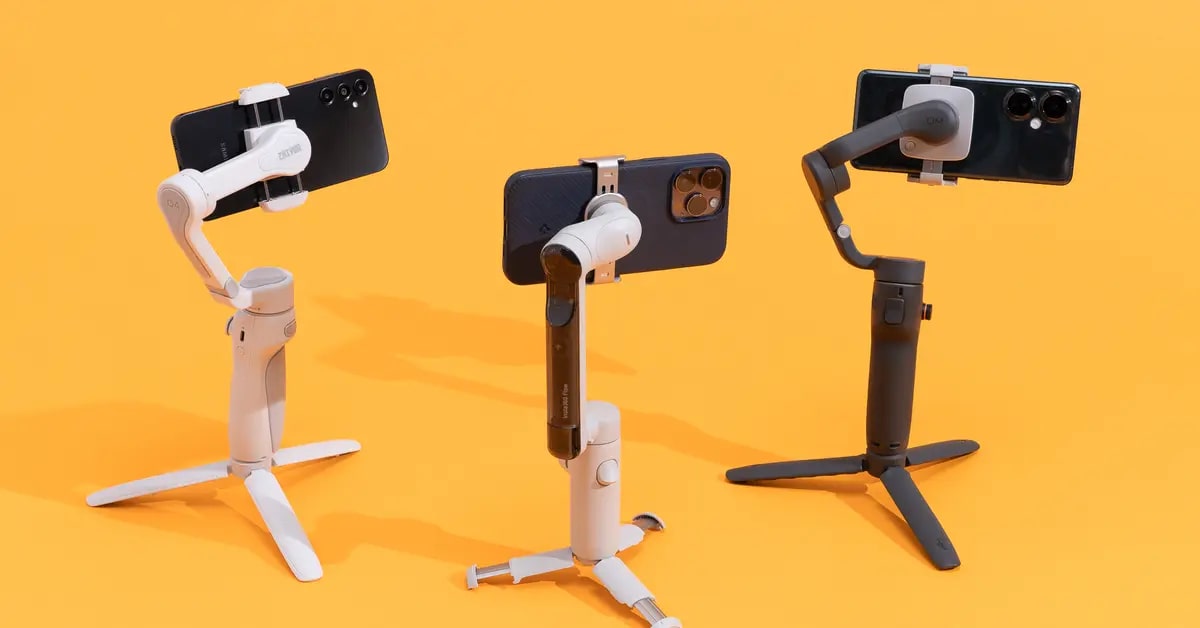
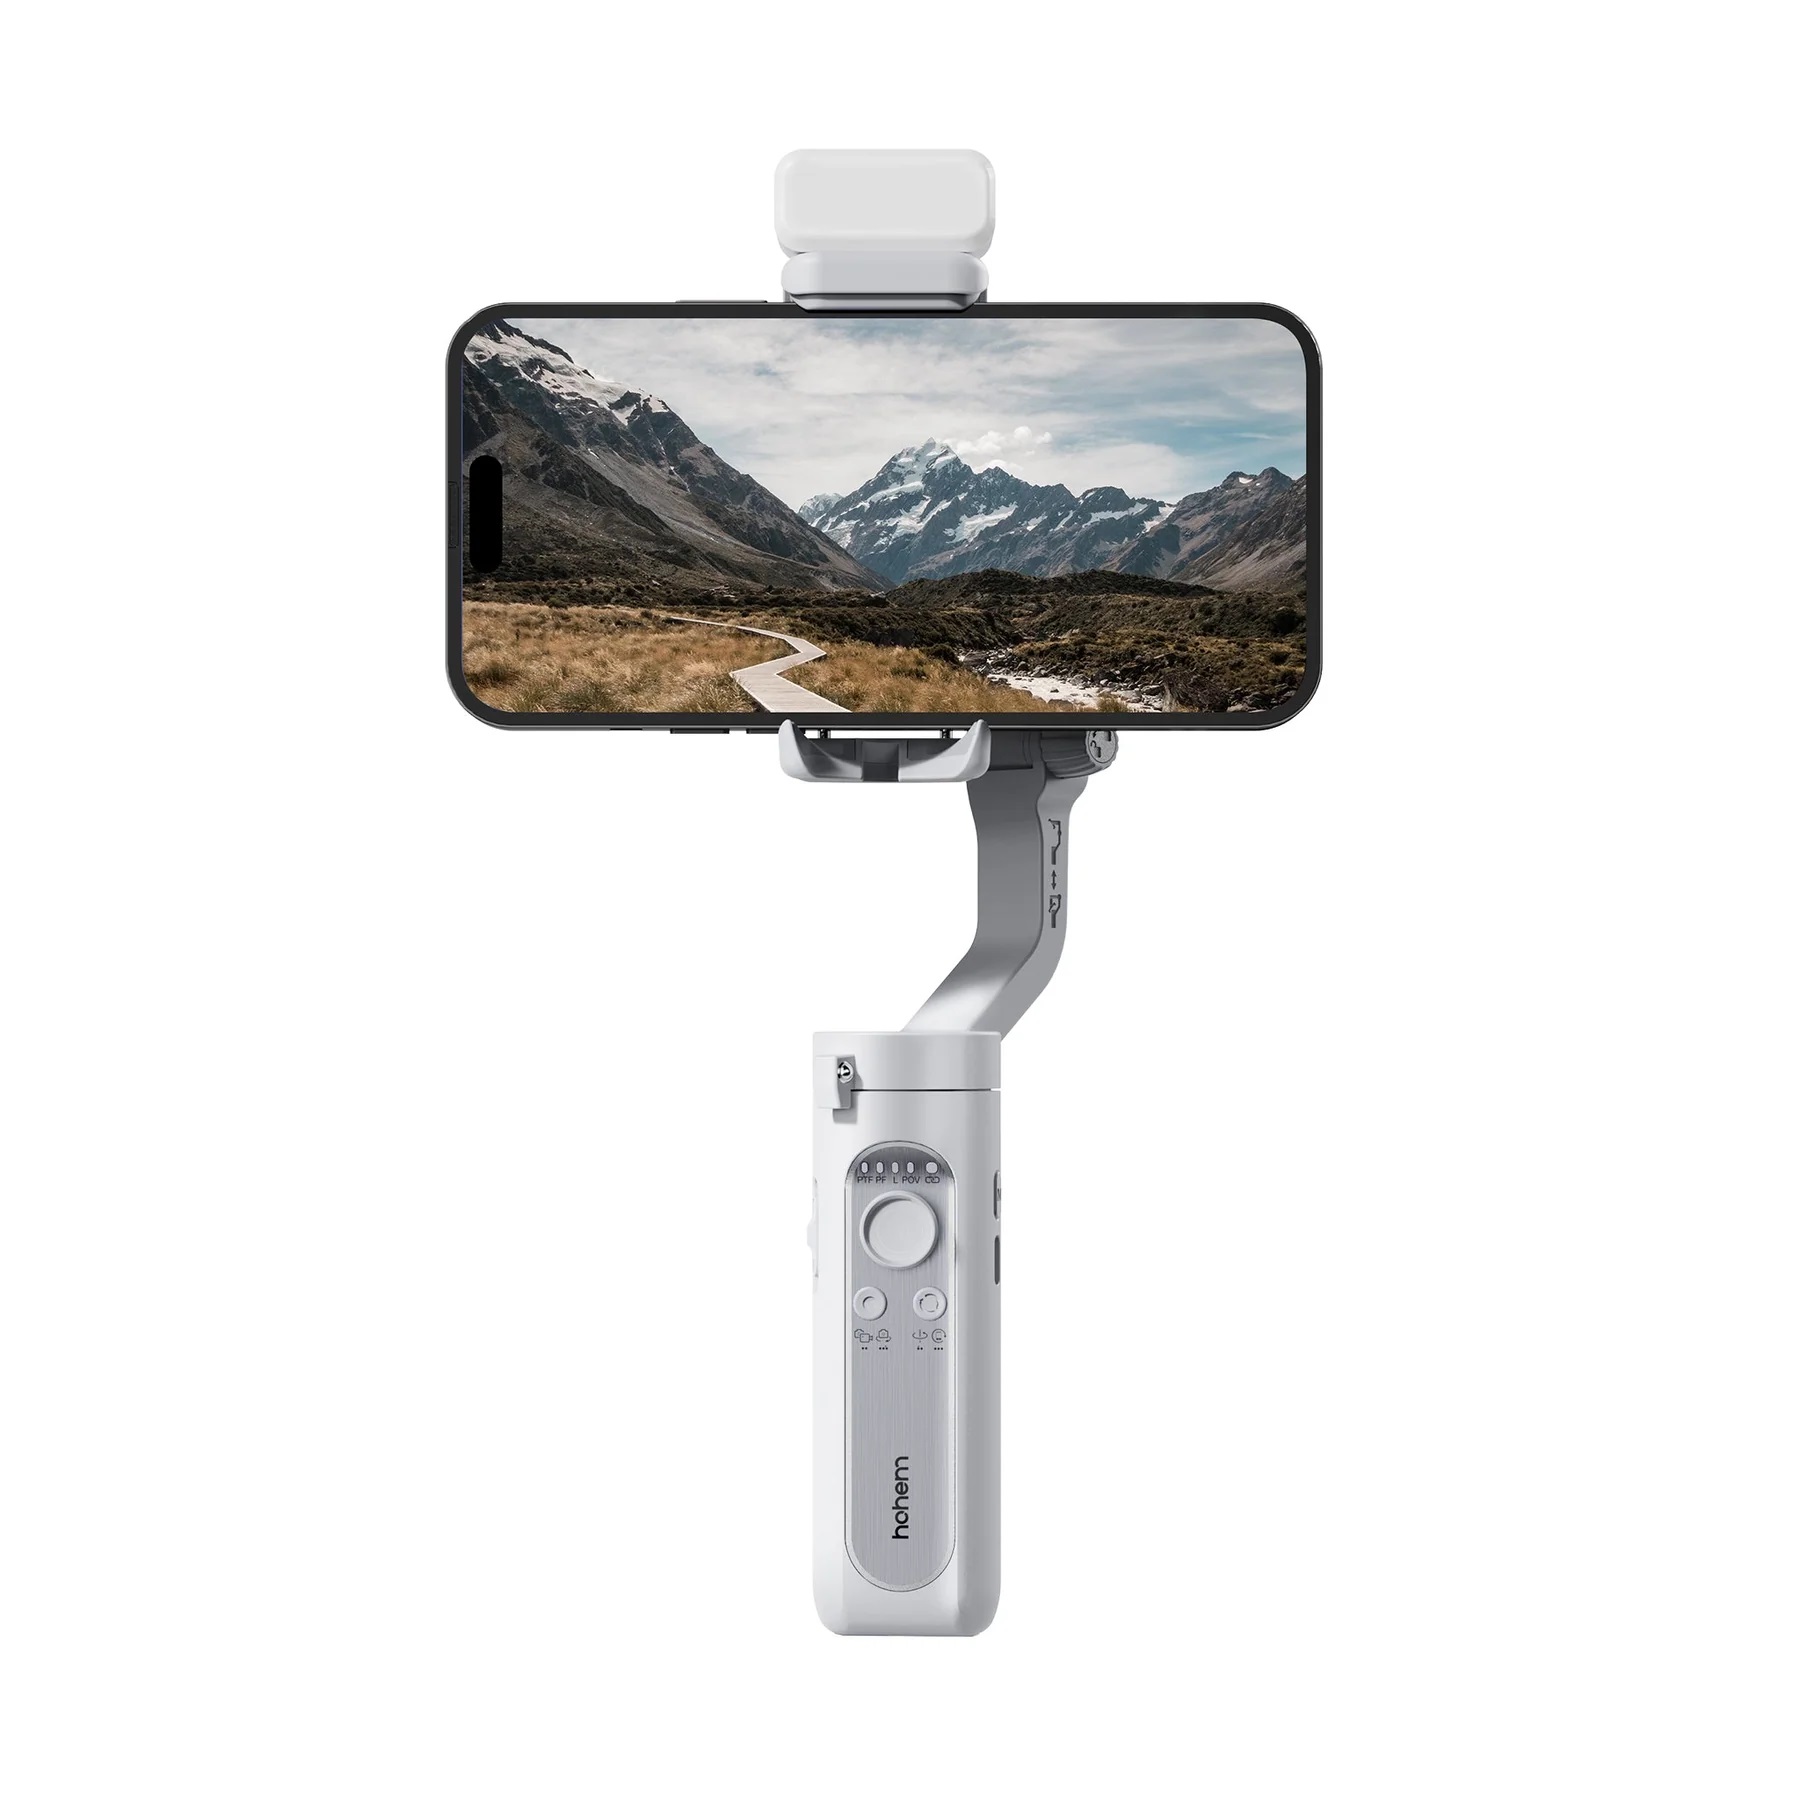
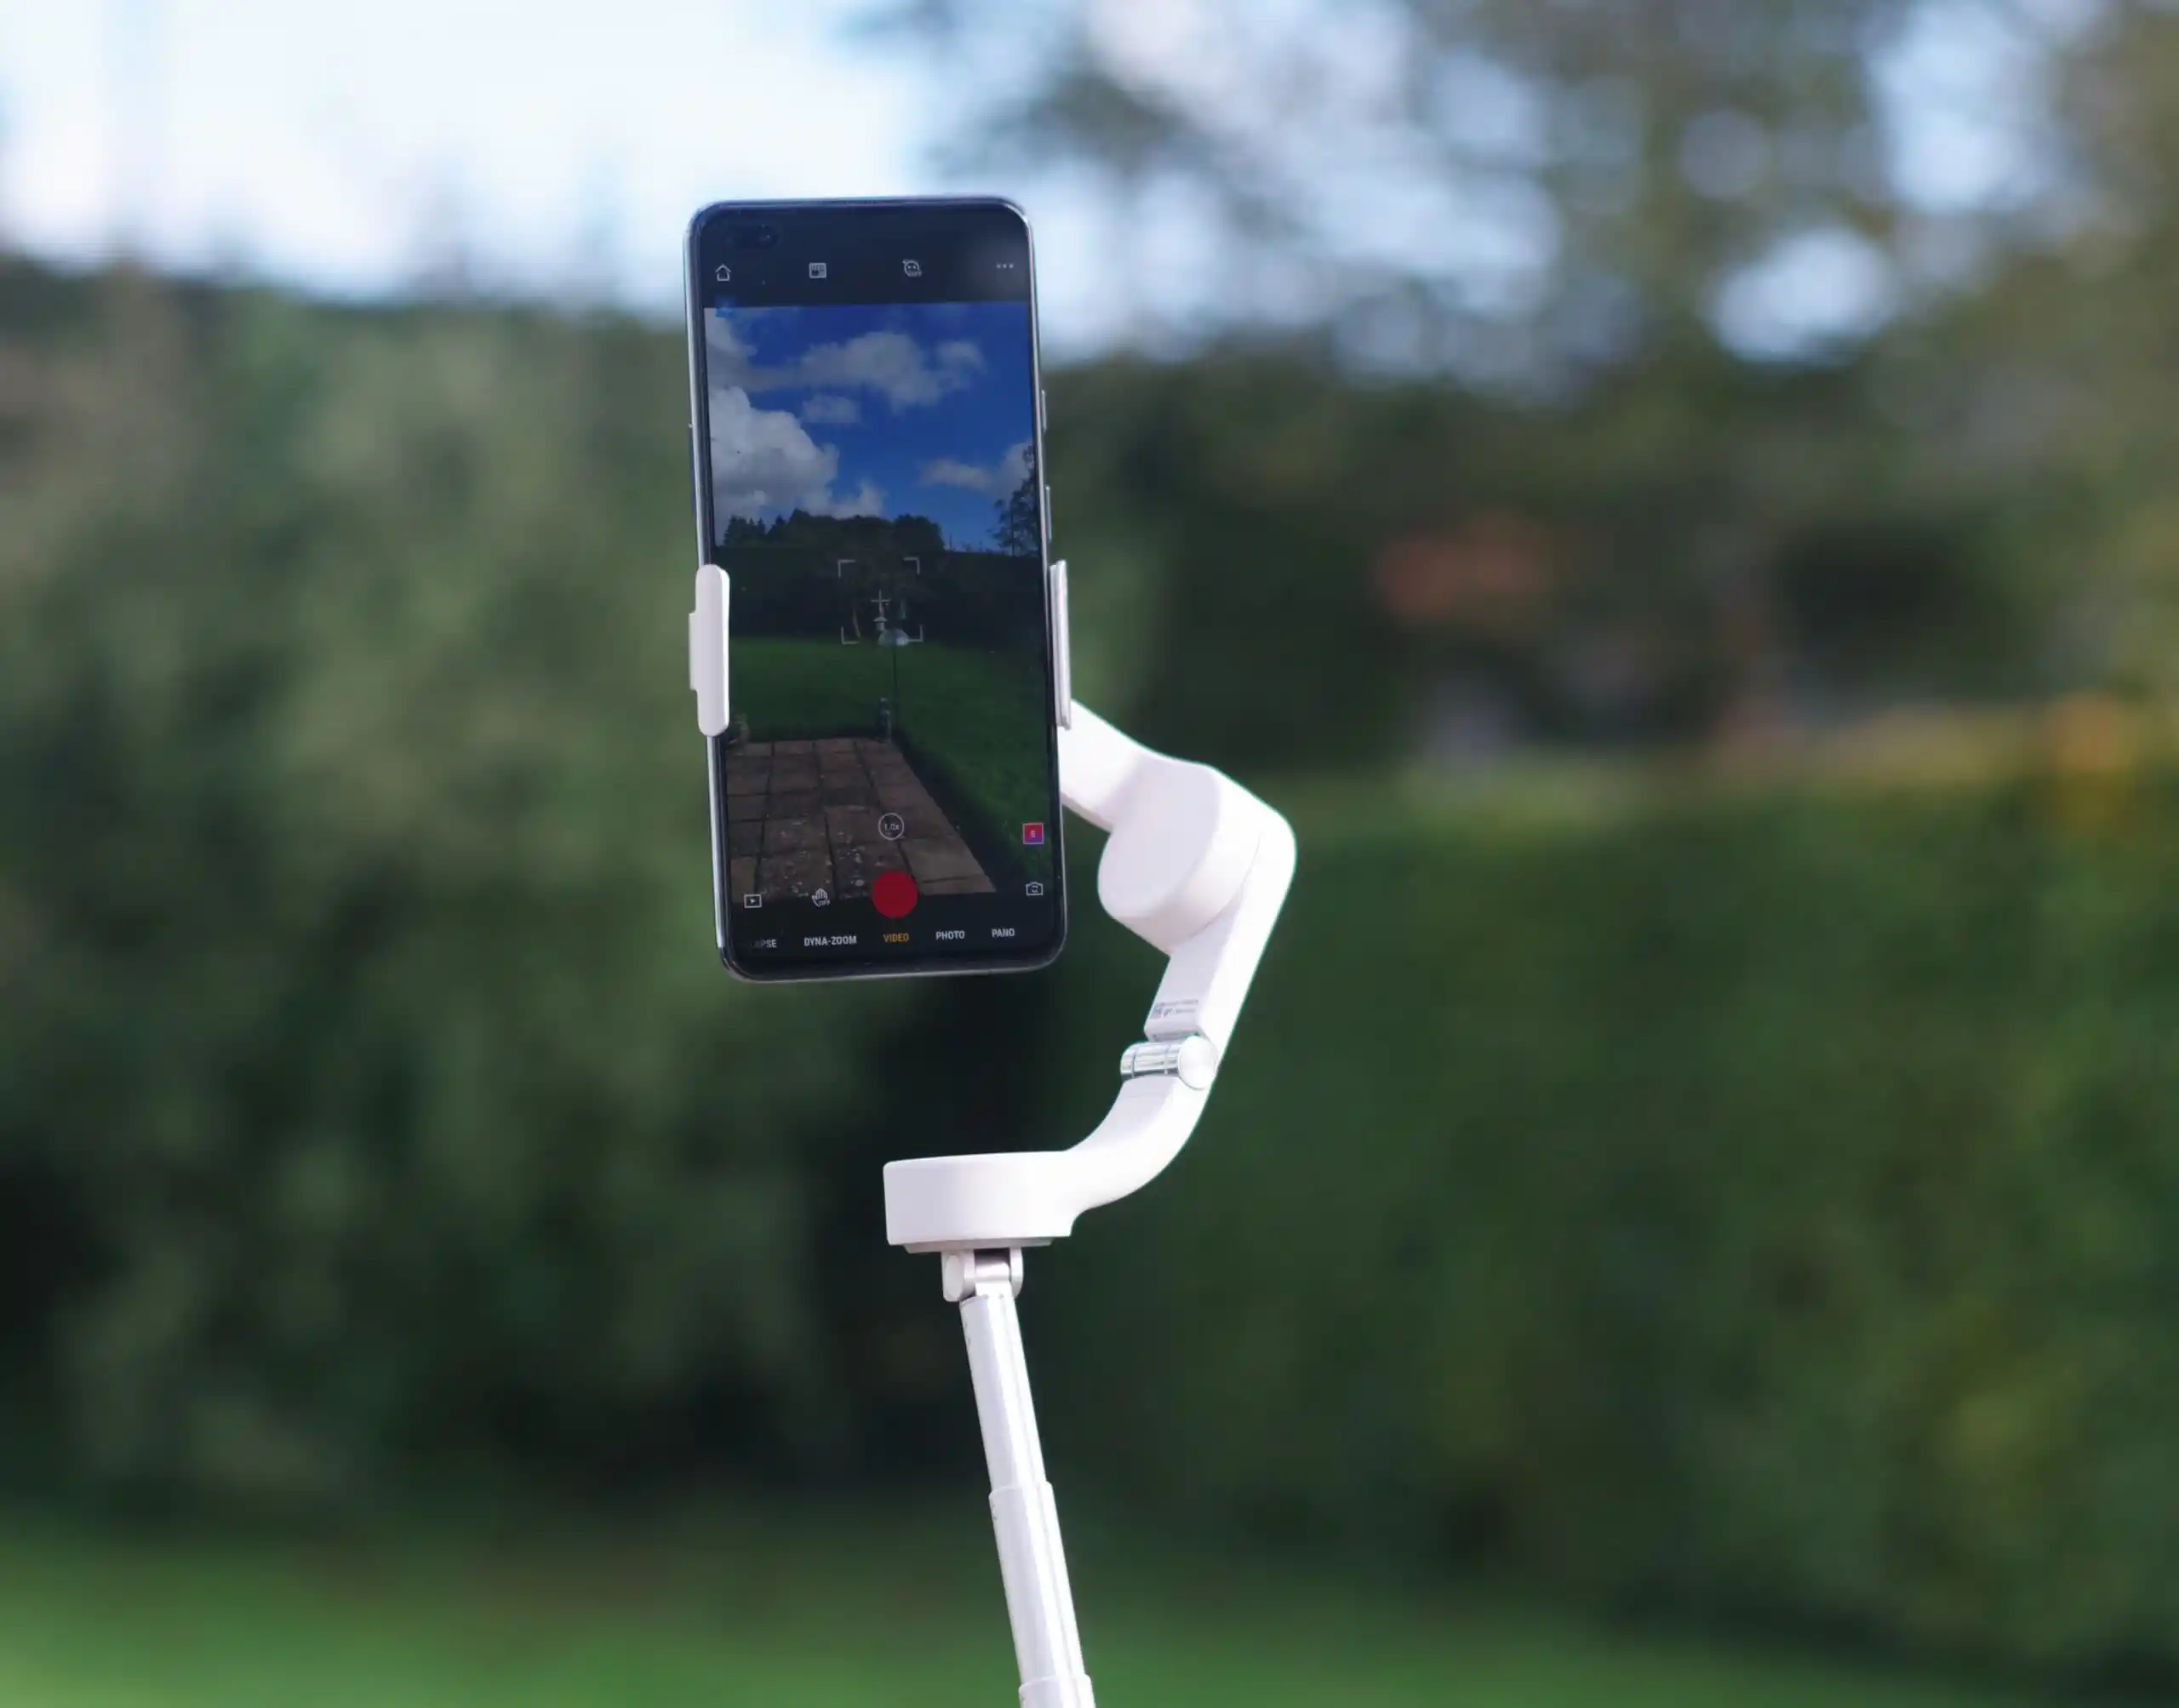
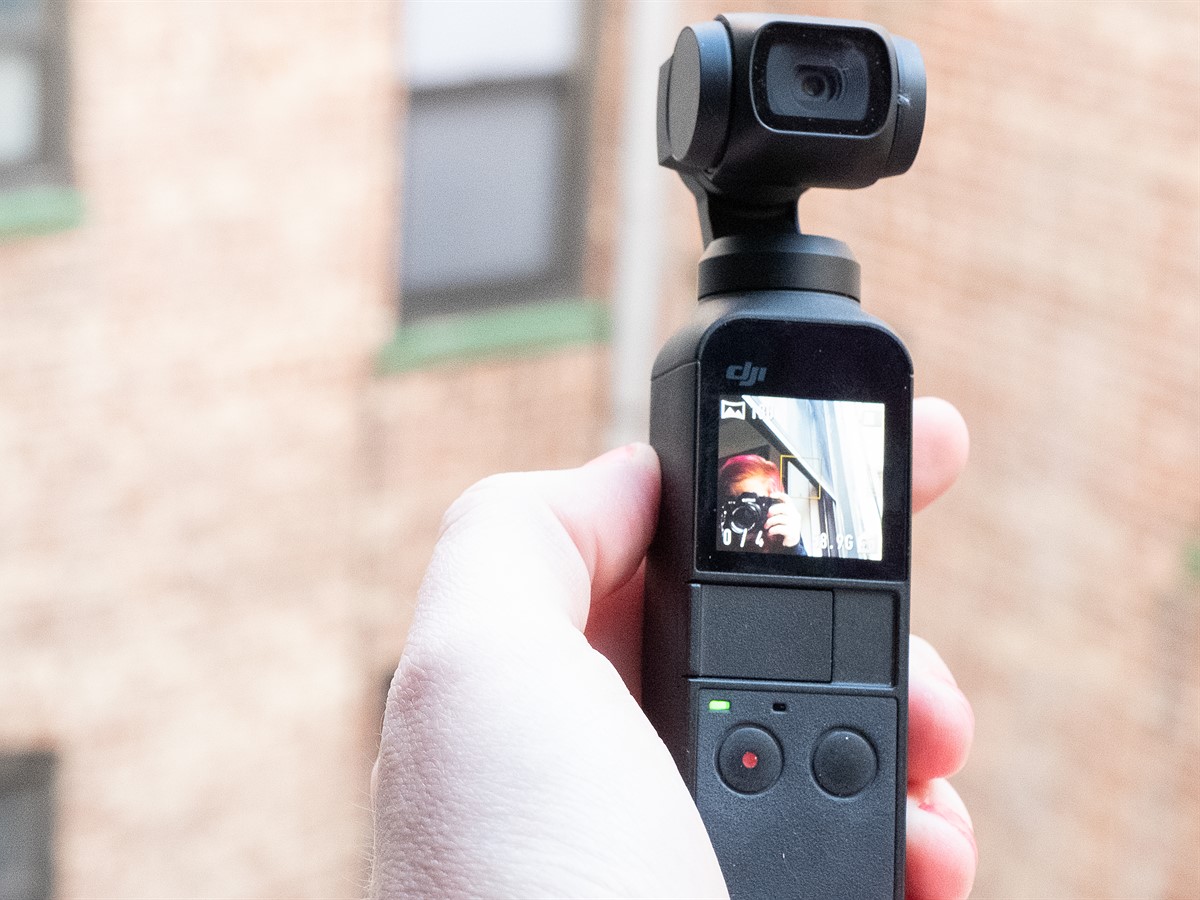
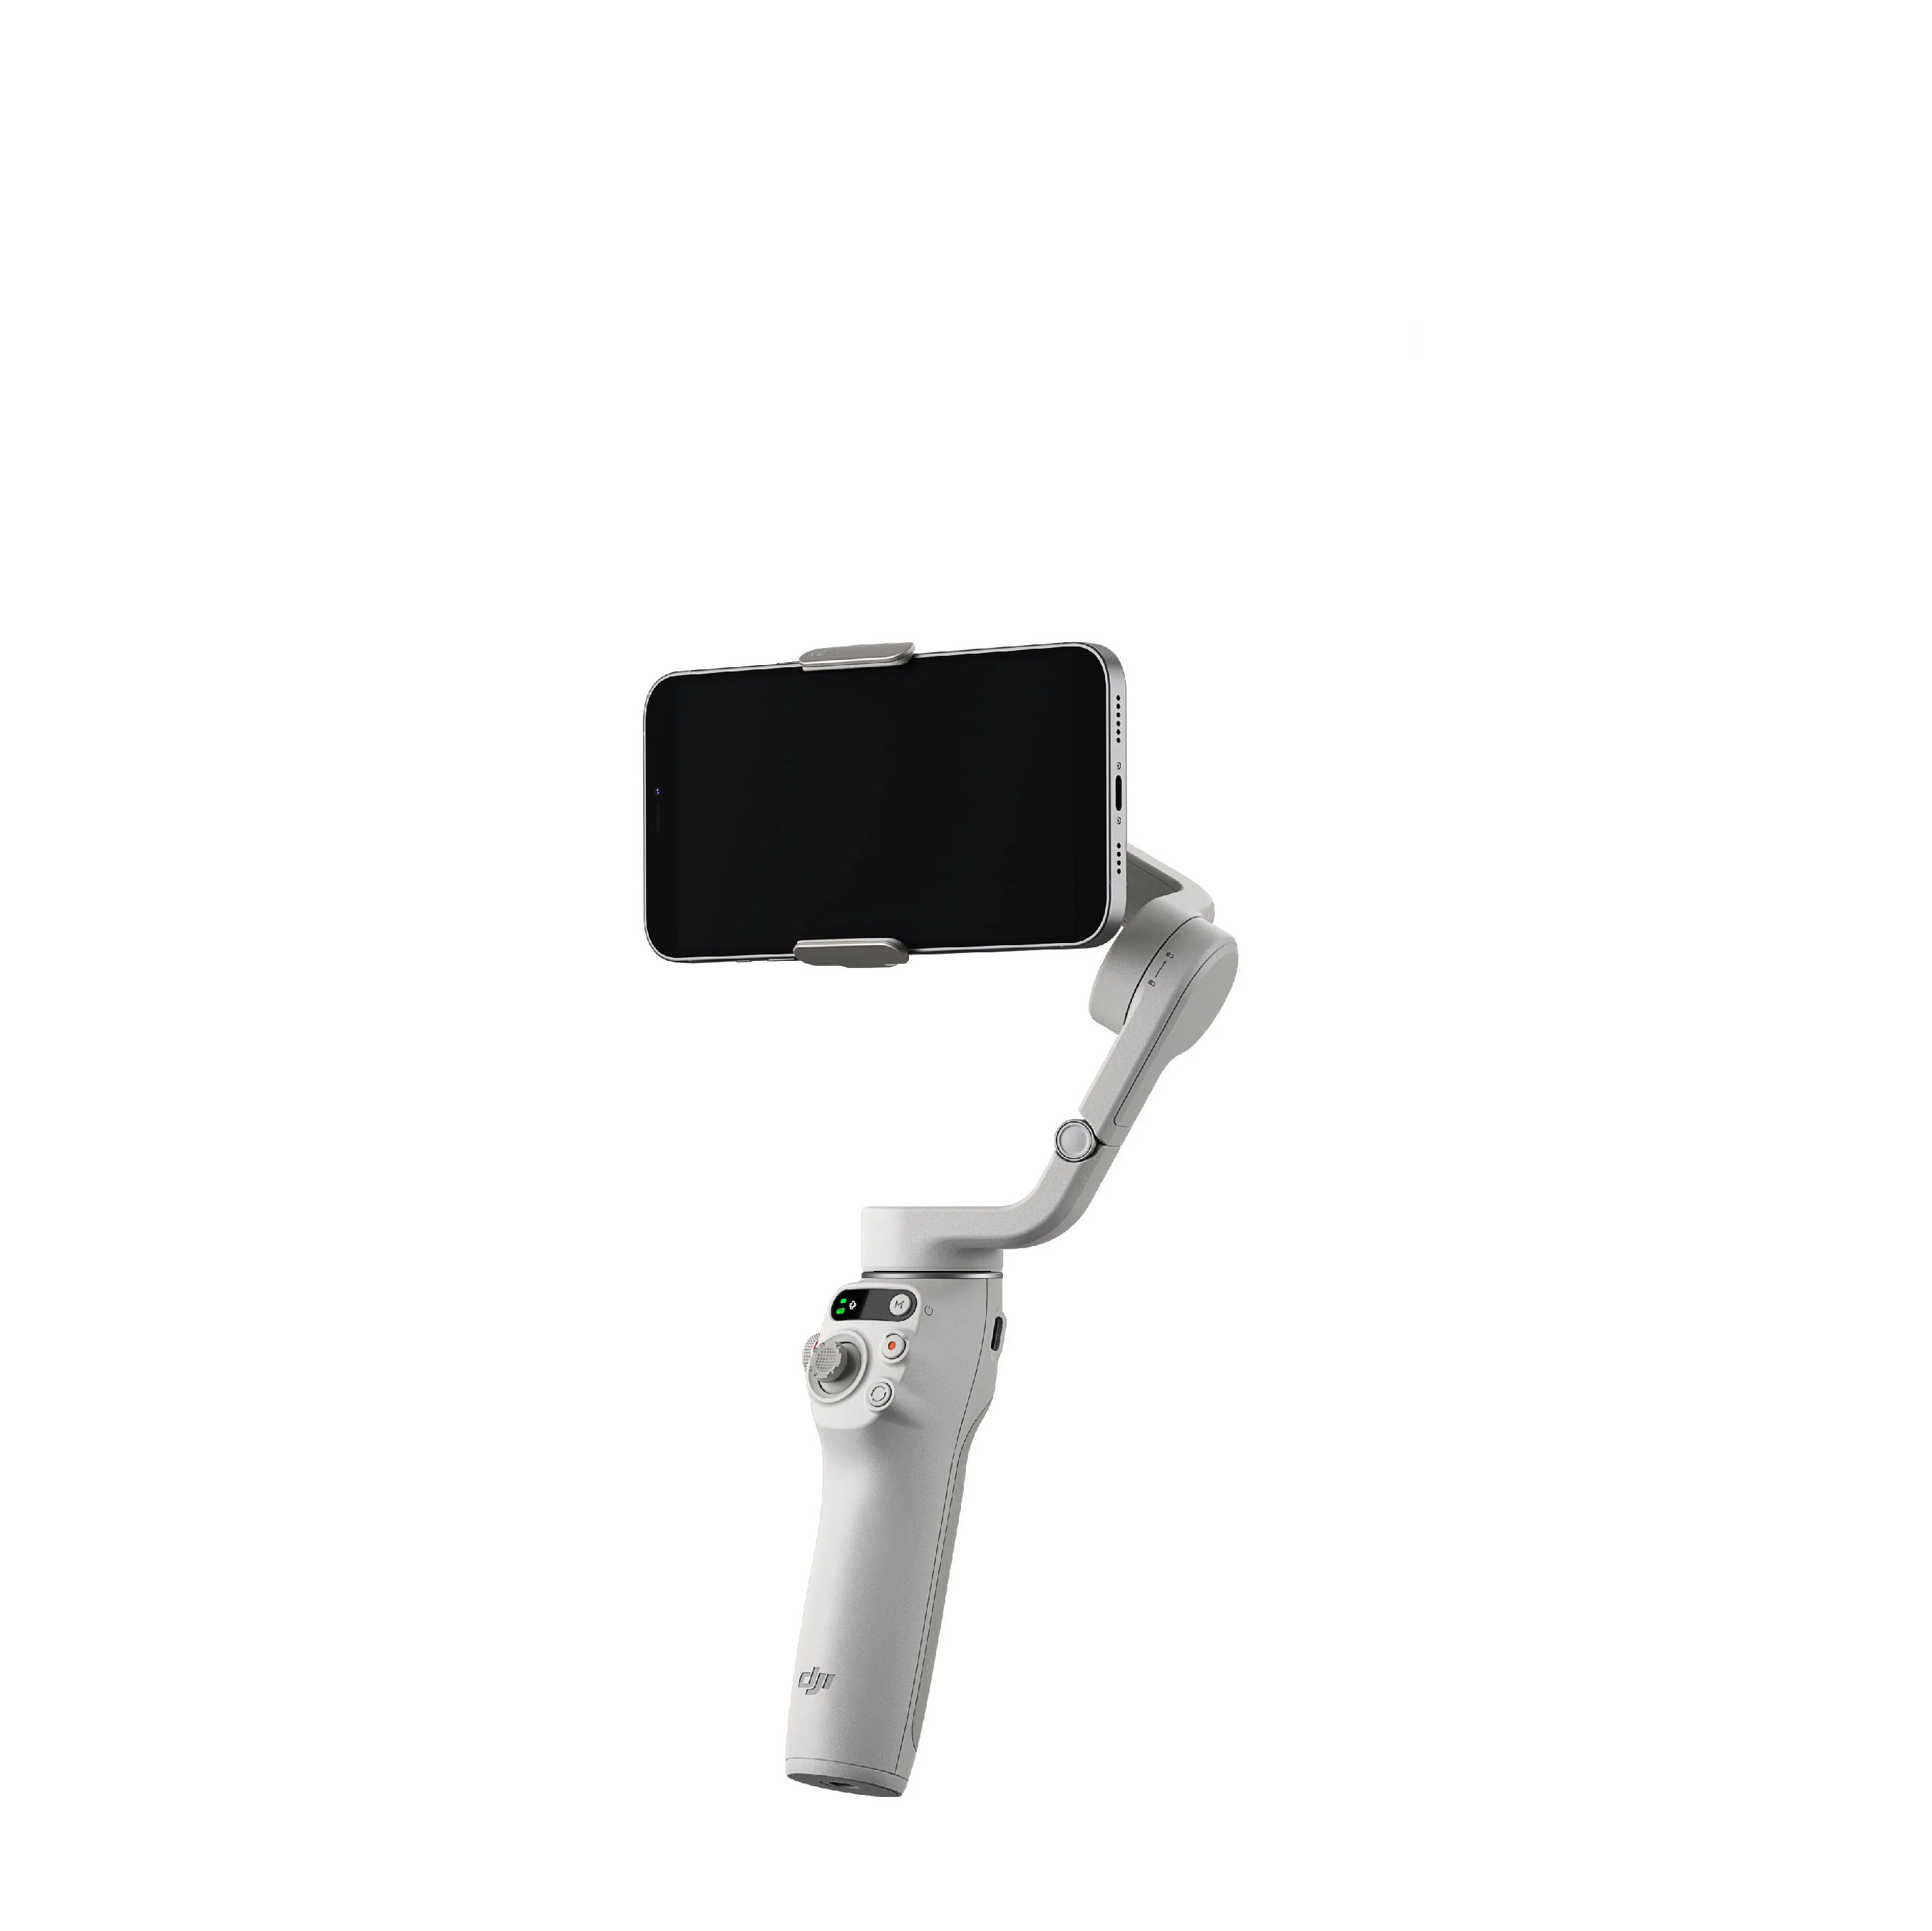
The first accessory to consider is a smartphone gimbal. A gimbal is a handheld stabilizer that helps eliminate camera shake and produce smooth, steady footage. It uses motors to counteract your hand’s movements, ensuring that your videos are stable and professional-looking. By using a smartphone gimbal, you can achieve cinematic sweeps, pans, and follow shots that were once only possible with expensive camera rigs.
Another useful accessory is an attachable lens kit. These kits typically consist of wide-angle, telephoto, and macro lenses that you can attach to your smartphone camera. A wide-angle lens allows you to capture more of the scene, while a telephoto lens brings you closer to distant subjects. A macro lens is useful for capturing stunning close-up shots with intricate detail. These attachable lenses can add versatility and creative options to your smartphone videos.
To improve audio quality, consider investing in an external microphone. Built-in smartphone microphones may not always capture high-quality audio, especially in noisy environments. An external microphone can help eliminate background noise and capture clearer, more professional sound. There are a variety of options available, including shotgun microphones, lapel microphones, and handheld microphones specifically designed for smartphones.
If you frequently record videos outdoors or in windy locations, a windscreen or a deadcat furry cover is a must-have accessory. It helps reduce wind noise, ensuring that your audio remains clean and clear. These accessories can be easily attached to your external microphone, providing effective wind protection without compromising audio quality.
A smartphone tripod mount or a smartphone rig can also be handy accessories. These tools allow you to mount your smartphone onto a tripod or attach additional accessories, such as lights or microphones. They provide stability and flexibility, making it easier to capture steady shots or add extra elements to your setup.
When shooting in low-light conditions, a portable LED light panel or a camera flash attachment can be incredibly useful. These accessories provide additional light to brighten up your subjects and eliminate unwanted shadows. Experiment with different lighting angles and intensities to achieve the desired look and mood in your videos.
Lastly, consider using an external battery pack or a power bank to ensure that your smartphone stays charged during extended video shoots. This is especially important when using power-intensive features like video recording, stabilization, or external accessories. Having a reliable power source ensures that you won’t miss any critical moments due to a drained battery.
By using these external accessories, you can greatly enhance the quality, versatility, and creativity of your smartphone videos. Experiment with different accessories to find the ones that best suit your specific needs and style of filmmaking.
Creating Engaging Videos with Proper Audio Recording
When it comes to creating engaging videos, audio plays a crucial role in captivating your audience. Proper audio recording is essential to ensure clear and professional-sounding soundtracks for your videos. Here are some tips to help you achieve high-quality audio in your smartphone videos.
The first tip is to find a quiet and controlled environment for recording. Avoid noisy areas with distractions or background sounds that may interfere with your audio. If possible, choose a location where you have control over the ambient noise. Close windows, turn off fans or air conditioners, and politely ask others to keep quiet during the recording.
Consider investing in an external microphone for improved audio quality. Built-in smartphone microphones are generally designed for everyday use and may not capture the best audio in all situations. External microphones can provide better sound isolation and clearer audio reproduction. There are various options available, such as shotgun microphones for directional sound capture, lapel microphones for interviews, and handheld microphones for versatile recording situations.
Proper microphone placement is crucial for capturing high-quality audio. When using an external microphone, aim to position it as close to the sound source as possible without disrupting the frame or blocking the camera lens. This will help minimize ambient noise and provide a clearer audio signal. Experiment with different microphone placements to achieve the best results for each recording scenario.
Monitoring your audio while recording is essential to ensure that the levels are balanced and there are no technical issues. Connect headphones to your smartphone or use a wireless monitoring setup to listen to the audio in real-time. This allows you to catch any problems, such as clipping, distortions, or room echo, and make adjustments accordingly.
Remember to adjust the microphone sensitivity or gain settings on your smartphone to optimize the audio recording. Different situations may require different levels of sensitivity to capture the desired audio range without distortion or noise. Test different levels in advance to find the optimal setting for your specific recording environment.
Consider using a portable sound booth or a sound blanket to help minimize echo and reverberations. These can be especially useful when recording in large or open spaces where sound reflections may affect the audio quality. Sound blankets or foam panels can help absorb unwanted reflections, creating a more controlled and professional sound environment.
In post-production, utilize audio editing software to enhance and refine your recorded audio. This includes adjusting levels, removing background noise or unwanted elements, and adding effects if necessary. Pay attention to the overall audio balance, ensuring that the voice or main sound elements are clear and well-balanced with any accompanying music or sound effects.
When recording voiceovers or narrations, speak clearly and maintain a consistent distance from the microphone. Avoid sudden changes in vocal volume or position, as they can create inconsistencies and make it harder to edit the audio seamlessly.
Lastly, always perform audio tests before every significant recording session. Test your equipment, check the audio quality, and make any necessary adjustments or troubleshooting. It’s better to catch any issues beforehand so that you can ensure a smooth and successful recording process.
By applying these tips and techniques, you can create engaging videos with proper audio recording that keeps your viewers fully immersed and captivated in your content.
Editing and Enhancing your Smartphone Videos
Editing is a crucial step in creating polished and professional-looking videos with your smartphone footage. With the right editing techniques and tools, you can enhance your videos, fine-tune the visuals, and create a cohesive narrative. Here are some tips for editing and enhancing your smartphone videos.
Firstly, organize your video clips and import them into a dedicated video editing software or app. This will allow you to easily access and arrange your footage for editing. Consider using a timeline-based editing interface that offers precise control over the placement and duration of your clips.
Start by trimming and cutting unnecessary footage from your clips to streamline your video. Remove any mistakes, long pauses, or footage that doesn’t contribute to the overall story or message. Use the editing software’s trimming tools to precisely select the sections you want to keep.
Experiment with different transitions to smooth out the cuts and create seamless visual flow between your clips. Use simple transitions like cross dissolves or cuts for a clean and professional look. Avoid excessive use of flashy or animated transitions, as they can distract from the content and appear overly gimmicky.
Adjust the color and exposure of your clips to achieve a consistent and visually appealing look throughout your video. Most editing software offers color correction and grading tools that allow you to fine-tune the brightness, contrast, saturation, and color balance of your footage. Experiment with different adjustments to enhance the mood and tone of your video.
Consider adding text overlays or captions to provide context, titles, or additional information in your videos. Use concise and clear wording, choosing fonts, sizes, and colors that are legible and visually appealing. Text overlays can be particularly useful for introducing segments, emphasizing key points, or providing subtitles.
Don’t forget to incorporate music and audio elements to enhance the overall atmosphere of your video. Explore royalty-free music libraries or create custom soundtracks that complement the mood and tone of your content. Adjust the audio levels to ensure that the voiceover, dialogues, or background music are well-balanced and easily heard.
When adding effects and transitions, use them sparingly and purposefully. Overusing effects can make your video appear amateurish and distract from the content. Select effects that enhance the storytelling or emphasize specific moments, rather than using them for the sake of novelty.
Take advantage of the various editing tools available in your chosen software or app. Experiment with techniques such as slow motion, time-lapse, or image stabilization to add visual interest and creativity to your videos. These tools can help you create captivating and dynamic content.
Preview your video frequently while editing to get a sense of the flow, pacing, and overall impact of the footage. Make any necessary adjustments to ensure a smooth and engaging viewing experience for your audience.
Finally, export your edited video in a high-quality format suitable for your intended platform or distribution. Consider the resolution, aspect ratio, and file size requirements of the platform you’ll be sharing your video on. Export settings can greatly impact the final quality and compatibility of your video.
By implementing these editing techniques and tools, you can elevate your smartphone videos from raw footage to refined and captivating visual stories.