Introduction
Welcome to this guide on how to set up OBS (Open Broadcaster Software) with an ultrawide monitor. If you’re new to OBS or just recently got an ultrawide display, this article will take you through the step-by-step process of configuring OBS for optimal performance and capturing amazing content on your ultrawide monitor.
Streaming and recording gameplay or creating video content has become increasingly popular, and OBS is a powerful tool that can help you achieve professional-level streams and recordings. Whether you’re a gamer, a streamer, or a content creator, setting up OBS with an ultrawide monitor will provide you with a wider field of view and improved immersion for your audience.
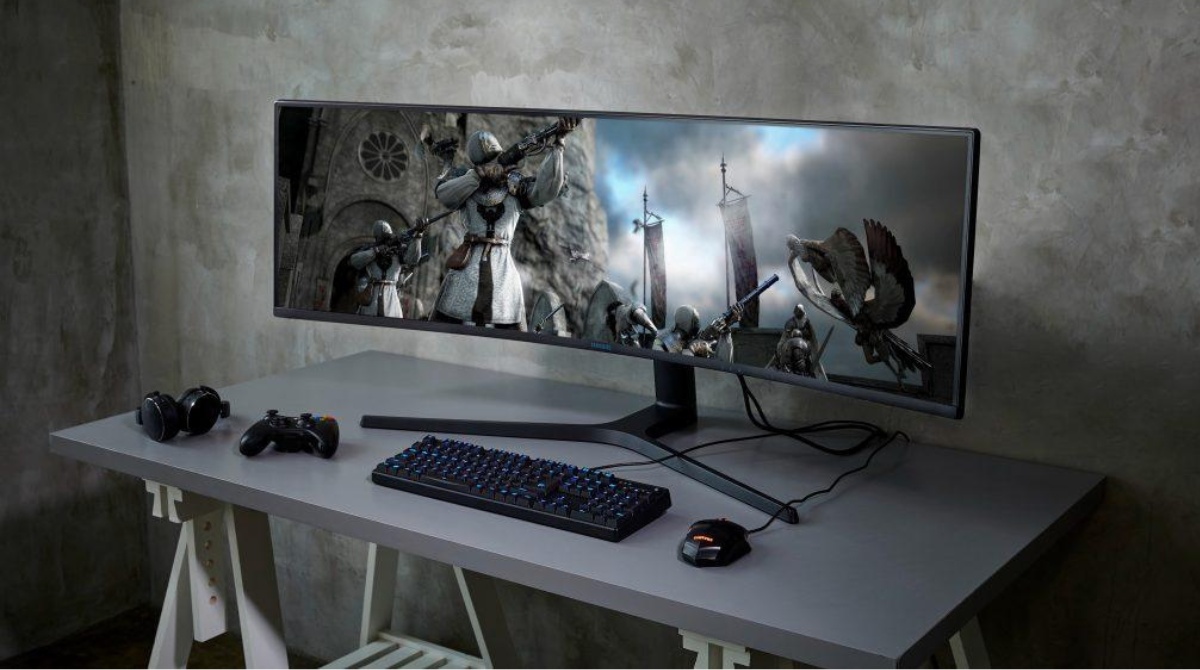
Before we dive into the setup process, let’s briefly explain what an ultrawide monitor is. Unlike traditional 16:9 displays, ultrawide monitors have an aspect ratio of 21:9 or higher, offering a wider horizontal screen space. This wider aspect ratio is particularly advantageous for gaming and content creation, as it allows for a broader view and better multitasking capabilities.
Now that we’ve covered the basics, let’s get started with the setup process. In the following sections, we’ll cover the necessary steps to connect your ultrawide monitor, install OBS, configure OBS for your monitor, set up scenes and sources, adjust display and video settings, customize the OBS layout, and finally, test and troubleshoot any issues that may arise.
Step 1: Connecting your Ultrawide Monitor
The first step in setting up OBS with an ultrawide monitor is to ensure that your monitor is properly connected to your computer. Follow these steps to connect your ultrawide monitor:
- Check the cable compatibility: Determine the type of cable required to connect your ultrawide monitor to your computer. Most ultrawide monitors support DisplayPort or HDMI cables. Make sure you have the appropriate cable on hand.
- Power off your computer and monitor: Before making any connections, ensure that both your computer and ultrawide monitor are powered off. This will prevent any potential damage to the devices.
- Locate the ports: Look for the video ports on your computer and the corresponding ports on your ultrawide monitor. These ports are usually located on the back or sides of the devices.
- Connect the cable: Take the cable you identified in step 1 and connect one end to the video port on your computer. Then, connect the other end to the corresponding port on your ultrawide monitor.
- Secure the connections: Ensure that the cable connections are secure by tightening any screws or fasteners that may be present on the ports.
- Power on your computer and monitor: After making the connections, power on your computer and monitor. Wait for your computer to fully boot up before proceeding to the next steps.
- Check the display settings: Once your computer has started, right-click on the desktop and select “Display settings” or “Screen resolution.” Make sure that your ultrawide monitor is detected and set as the primary display.
By following these steps, you will have successfully connected your ultrawide monitor to your computer. Now, let’s move on to the next step, which is installing OBS.
Step 2: Installing OBS
Now that your ultrawide monitor is connected, it’s time to install OBS (Open Broadcaster Software) on your computer. OBS is a free and open-source streaming and recording software that is widely used by content creators and streamers.
Follow these steps to install OBS:
- Download OBS: Visit the official OBS website (https://obsproject.com) and navigate to the “Download” section. Choose the version that is compatible with your operating system (Windows, macOS, or Linux).
- Run the installer: Once the download is complete, locate the installer file and run it. Follow the on-screen prompts to proceed with the installation.
- Choose installation options: During the installation process, you may be presented with various options, such as choosing the installation location and whether to create desktop shortcuts. Customize these options according to your preferences.
- Complete the installation: After selecting your preferred options, click on the “Install” or “Finish” button to complete the installation process. OBS will be installed on your computer.
- Launch OBS: Once the installation is finished, you can launch OBS by double-clicking the desktop shortcut or searching for “OBS” in your computer’s application menu.
After installing OBS, you are now ready to move on to the next step, which is configuring OBS for your ultrawide monitor. This will ensure that OBS properly recognizes and optimizes the display settings for your ultrawide monitor, enabling you to capture high-quality content with ease.
Step 3: Configuring OBS for Ultrawide Monitor
After installing OBS, it’s important to configure the settings specifically for your ultrawide monitor. This will ensure that OBS captures the correct aspect ratio and utilizes the full screen real estate of your monitor. Follow these steps to configure OBS for your ultrawide monitor:
- Open OBS: Launch OBS on your computer by double-clicking the desktop shortcut or searching for “OBS” in your application menu.
- Access the settings: Click on the “Settings” button in the lower-right corner of the OBS window. This will open the settings menu.
- Select the “Video” tab: In the settings menu, navigate to the “Video” tab located on the left-hand side.
- Set the base canvas resolution: Under the “Base (Canvas) Resolution” section, select the resolution that matches the native resolution of your ultrawide monitor. It is typically denoted with the aspect ratio, such as 2560×1080 or 3440×1440.
- Set the output (scaled) resolution: In the “Output (Scaled) Resolution” section, you can choose the resolution at which you want to output your content. It is recommended to set this to the same resolution as the base canvas resolution.
- Choose the aspect ratio: Scroll down to the “Common FPS Values” section and select the aspect ratio that corresponds to your ultrawide monitor. Typically, this will be 21:9 or a similar ratio.
- Apply the settings: Once you have adjusted the necessary settings, click on the “Apply” button at the bottom-right corner of the settings menu to save the changes.
- Close the settings menu: After applying the changes, close the settings menu to return to the main OBS window.
By following these steps, you have successfully configured OBS for your ultrawide monitor. Now, you can proceed to the next step, which is setting up scenes and sources in OBS to customize your content and add different elements like webcam feed, overlays, and more.
Step 4: Setting up Scenes and Sources in OBS
Now that you have configured OBS for your ultrawide monitor, it’s time to set up scenes and sources. Scenes are different configurations of sources that you can switch between during your stream or recording. Sources are the individual elements that make up your scene, such as your gameplay, webcam, overlays, and more. Follow these steps to set up scenes and sources in OBS:
- Create a new scene: In the lower-left corner of the OBS window, click on the plus icon in the “Scenes” section to create a new scene. Give your scene a descriptive name.
- Add sources to the scene: With your new scene selected, click on the plus icon in the “Sources” section to add sources to your scene. Select the desired sources such as “Display Capture” to capture your game, “Video Capture Device” for your webcam, or “Image” for overlays or logos.
- Position and resize sources: After adding sources, you can select and manipulate them on the preview window. Click and drag to position them or use the resize handles to adjust their size.
- Customize source properties: Right-click on a source and select “Properties” to customize its specific settings. For example, you can choose the specific display or window to capture in a display capture source or adjust the webcam properties in a video capture device source.
- Add additional scenes and sources: Repeat steps 1-4 to create additional scenes and add more sources as needed for your content. You can switch between scenes by clicking on their respective names in the “Scenes” section of OBS.
- Preview and test: Use the preview window to check your scenes and sources for any adjustments needed. Make sure your sources are properly positioned and appear as intended.
By following these steps, you have successfully set up scenes and sources in OBS. Now, you can move on to the next step, which is adjusting display and video settings in OBS to optimize the visual quality of your stream or recording.
Step 5: Adjusting Display and Video Settings
After setting up scenes and sources in OBS, it’s important to fine-tune the display and video settings to ensure optimal visual quality for your stream or recording. Adjusting these settings can help enhance the clarity and smoothness of your content. Follow these steps to adjust display and video settings in OBS:
- Open OBS: Launch OBS on your computer if it’s not already open.
- Access the settings: Click on the “Settings” button in the lower-right corner of the OBS window.
- Select the “Video” tab: In the settings menu, navigate to the “Video” tab located on the left-hand side.
- Configure the video settings: Adjust the following settings to optimize your video quality:
- Base (Canvas) Resolution: Keep this setting the same as the native resolution of your ultrawide monitor.
- Output (Scaled) Resolution: Set this to the same resolution as your base canvas resolution for consistent quality.
- Downscale Filter: Choose a downscale filter like Lanczos or Bicubic to improve the sharpness of downscaled video.
- Common FPS Values: Select the appropriate frame rate for your stream or recording, such as 30 or 60 FPS.
- Configure the display settings: Scroll down to the “Display” section of the settings menu.
- Monitor: If you have multiple monitors, select the one that you want to use as the primary display for OBS.
- Fullscreen: Choose whether you want to run OBS in fullscreen mode or windowed mode.
- Apply and save the settings: Once you have adjusted the necessary settings, click on the “Apply” button at the bottom-right corner of the settings menu to save the changes.
- Close the settings menu: After applying the changes, close the settings menu to return to the OBS main window.
By following these steps, you have successfully adjusted the display and video settings in OBS. Now, your stream or recording will have improved visual quality and smoother performance. In the next step, we will explore how to customize the OBS layout to make the most out of your ultrawide monitor.
Step 6: Customizing the OBS Layout for Ultrawide Monitor
Customizing the OBS layout is an important step in maximizing the use of your ultrawide monitor. By arranging the various elements of OBS to fit your monitor’s wider aspect ratio, you can improve the efficiency and aesthetics of your streaming or recording setup. Follow these steps to customize the OBS layout for your ultrawide monitor:
- Resize and position the OBS window: Click and drag the edges of the OBS window to resize it according to your preferred dimensions. Position it in a way that utilizes the available screen space effectively.
- Resize and rearrange sources: In the main OBS window, select the sources and use the resize handles to adjust the size and position of each source. Rearrange them to maximize the use of your ultrawide monitor’s wider screen space.
- Create multiple scenes: Consider creating multiple scenes to accommodate different layouts or variations of your stream or recording. This allows you to easily switch between different setups and layouts during your content creation process.
- Utilize scenes and sources hotkeys: Assign hotkeys to different scenes and sources to enable quick and seamless transitions during your stream or recording. This can help streamline your content creation process and make it more interactive for your audience.
- Experiment with different layouts: Take advantage of your ultrawide monitor’s extra screen real estate by experimenting with different layouts. For example, you can have your gameplay on one side and additional sources or overlays on the other side of the screen.
- Snap sources to the sides: Use the OBS screen snapping feature to align sources and elements with the edges of the OBS window. This can help maintain consistency and create a visually pleasing layout.
By customizing the OBS layout to suit your ultrawide monitor, you can create a more immersive and professional-looking stream or recording. Feel free to adjust and experiment with different layouts until you find the setup that works best for your content. Next, we’ll move on to the final step, where we’ll cover testing and troubleshooting to ensure everything is running smoothly.
Step 7: Testing and Troubleshooting
After setting up OBS with your ultrawide monitor and customizing the layout, it’s essential to test your setup and troubleshoot any potential issues before going live with your stream or recording. Testing and troubleshooting will help ensure a smooth and high-quality viewing experience for your audience. Follow these steps to test and troubleshoot your OBS setup:
- Preview your stream or recording: Use the preview feature in OBS to review how your content will appear to viewers. Check if all your sources are properly positioned, and ensure that the aspect ratio of your ultrawide monitor is correctly displayed.
- Gameplay and source visibility: Verify that your gameplay and other sources are clearly visible and not obstructed by overlays, webcam footage, or any other elements. Adjust the placement and size of sources if necessary to achieve a balanced and appealing composition.
- Audio settings: Test your audio settings to ensure that your microphone and game audio levels are appropriately balanced. Adjust them as needed to provide a clear and immersive audio experience for your viewers.
- Recording/streaming quality: Conduct a test recording or streaming session to evaluate the quality of your output. Check for any issues such as lag, dropped frames, or audio desync. Make adjustments to your settings as needed to optimize the performance and quality of your stream or recording.
- Network and internet stability: If you are streaming online, ensure that your internet connection is stable and can handle the bandwidth required for your chosen streaming settings. Consider running a speed test to confirm that your connection is sufficient.
- Backup plans: Have backup plans in place in case of unexpected technical difficulties. Familiarize yourself with OBS features such as hotkeys for scene switching in case you need to quickly switch to a backup scene.
- Regular maintenance and updates: Keep your OBS software and any plugins or overlays up to date. Regularly check for updates and install them to ensure you have the latest features and fixes.
By thoroughly testing and troubleshooting your OBS setup, you can address any issues before they arise during your stream or recording. This will help you deliver a seamless and professional experience to your audience. With the completion of this step, you are now ready to start streaming or recording with OBS using your ultrawide monitor.
Conclusion
Congratulations! You have successfully set up OBS with your ultrawide monitor, allowing you to create stunning streams and recordings. By following the step-by-step process outlined in this guide, you have configured OBS to optimize the performance and visual quality of your content.
Throughout the process, we covered the necessary steps, including connecting your ultrawide monitor, installing OBS, configuring OBS for your monitor, setting up scenes and sources, adjusting display and video settings, customizing the OBS layout, and testing and troubleshooting your setup.
With your ultrawide monitor and OBS configured, take the time to experiment with different layouts, sources, and scenes to create a unique and engaging streaming or recording environment. Remember to continuously test and troubleshoot as you go along, ensuring a smooth and high-quality experience for your audience.
Whether you’re an aspiring content creator, a passionate gamer, or a dedicated streamer, OBS combined with an ultrawide monitor offers a powerful tool to elevate your streaming and recording game. Embrace the increased field of view, improved immersion, and enhanced visual quality that an ultrawide monitor brings to your content creation process.
Keep in mind that the world of content creation is ever-evolving, and there is always room for growth and improvement. Stay informed about the latest OBS updates, explore new techniques, and engage with your audience to create an enjoyable and interactive streaming or recording experience.
Now, it’s time to unleash your creativity, share your passion, and entertain your viewers with captivating streams and recordings. Best of luck on your content creation journey with OBS and your ultrawide monitor!