Introduction
Welcome to the world of smart entertainment! Owning a Toshiba Smart TV opens up a whole new realm of possibilities for enjoying your favorite movies, TV shows, and online content. With its sleek design and advanced features, the Toshiba Smart TV is designed to provide you with an immersive viewing experience.
In this guide, we will walk you through the process of setting up your Toshiba Smart TV, from unboxing to configuring various settings. Whether you’re a tech enthusiast or a beginner, our step-by-step instructions will help you get your smart TV up and running in no time.
With the advancements in technology, smart TVs have become increasingly popular. These televisions offer seamless connectivity, allowing you to access a wide range of online services, such as streaming platforms, social media apps, and even web browsing. The Toshiba Smart TV takes this convenience to the next level, offering a user-friendly interface and a host of features.
Before delving into the setup process, it’s important to understand the components of your Toshiba Smart TV. From the slim and elegant display panel to the various input and output ports, each part plays a crucial role in delivering an exceptional entertainment experience.
Alongside the built-in Wi-Fi capability, the Toshiba Smart TV offers Ethernet connectivity, HDMI ports, USB ports, and even Bluetooth connectivity options. These features provide flexibility when it comes to connecting your TV to the internet, as well as to external devices.
So without further ado, let’s get started and unleash the full potential of your Toshiba Smart TV. Follow our instructions carefully, and soon you’ll be enjoying a whole new level of entertainment right from the comfort of your own living room.
Unboxing and Connecting the Toshiba Smart TV
Congratulations on your brand-new Toshiba Smart TV! Before diving into the setup process, it’s essential to unbox the TV and connect it to your existing home entertainment system. Here’s a step-by-step guide to help you get started:
- Unbox the TV: Carefully remove the Toshiba Smart TV from its packaging, taking care not to damage the screen or any other components. Ensure that you have all the necessary accessories, including the remote control, power cord, and stand (if applicable).
- Choose a suitable location: Select a suitable location for your Toshiba Smart TV. Ensure that there’s enough space to accommodate the TV and that it’s placed at a comfortable viewing height.
- Assemble the Stand: If your Toshiba Smart TV comes with a stand, follow the instructions provided to assemble it securely. Make sure the TV is stable and doesn’t wobble.
- Connect the power cord: Plug one end of the power cord into the back of the TV and the other end into a power outlet. Ensure that the power outlet is easily accessible.
- Connect external devices: Depending on your preferences and available equipment, you may want to connect external devices such as cable/satellite boxes, gaming consoles, or soundbars. Use HDMI cables to establish these connections, ensuring a high-quality audio and video experience.
- Turn on the TV: Press the power button on the TV or use the remote control to turn on the Toshiba Smart TV. You’ll be greeted with an initial setup screen.
- Configure language and location settings: Follow the on-screen prompts to choose your preferred language and location. These settings will determine the default language and the available services based on your geographical location.
- Tune in to broadcast channels (optional): If you plan to watch over-the-air broadcast channels, select the option to scan for channels. This will allow your Toshiba Smart TV to detect and store available channels. Alternatively, you can skip this step and move on to the next.
- Connect to the internet: Choose your preferred method of connecting to the internet. If your Toshiba Smart TV is equipped with Wi-Fi, select the wireless network you want to connect to and enter the password. If you prefer a wired connection, use an Ethernet cable to connect the TV to your router.
- Complete the setup: Once you are connected to the internet, follow the remaining on-screen instructions to complete the setup process. This may include signing in to your Toshiba Smart TV account or creating a new one.
With these steps, you’ll have successfully unboxed and connected your Toshiba Smart TV. Now, you’re ready to explore the wide range of features and content that await you. So sit back, relax, and get ready to enjoy a remarkable entertainment experience right from your living room.
Setting up the Network Connection
One of the key features of a Toshiba Smart TV is its ability to connect to the internet, opening up a world of streaming content and online services. Setting up the network connection is essential to unlock the full potential of your smart TV. Follow these steps to get your Toshiba Smart TV connected to the internet:
- Access the Settings menu: On your Toshiba Smart TV remote control, press the Home button to access the main menu. Navigate to the “Settings” option using the arrow keys and press the Enter button to select it.
- Select Network: In the Settings menu, locate and select the “Network” option. This will take you to the network setup screen.
- Choose the connection method: Depending on your network setup and preferences, you can choose between a wireless (Wi-Fi) or wired (Ethernet) connection. Select the appropriate option to proceed.
- Wireless Connection: If you’re opting for a wireless connection, the TV will scan for available Wi-Fi networks. Once the scan is complete, select your network from the list of detected networks. If your network is password-protected, enter the password using the on-screen keyboard.
- Wired Connection: If you’re connecting your Toshiba Smart TV via Ethernet, plug one end of the Ethernet cable into the TV’s Ethernet port and the other end into your router or modem.
- Test the connection: After selecting your network or connecting via Ethernet, your Toshiba Smart TV will attempt to establish a connection. It will display the progress and notify you once the connection is successful.
- Adjust network settings: In some cases, you may need to make additional adjustments to the network settings, such as setting up a static IP, configuring DNS servers, or enabling proxy settings. Consult your internet service provider or network administrator for specific instructions if necessary.
- Confirm the connection: Once the network connection is established, your Toshiba Smart TV will display the confirmation message. You can now enjoy a wide range of online content, including streaming services, apps, and more.
With the network connection set up on your Toshiba Smart TV, you can now explore the vast world of entertainment that the internet has to offer. From streaming your favorite shows and movies to accessing music, games, and social media, the possibilities are endless. So kick back, grab your remote, and start enjoying the seamless connectivity of your Toshiba Smart TV.
Initial Setup and On-Screen Guide
After connecting your Toshiba Smart TV to the internet and completing the network setup, it’s time to proceed with the initial setup and familiarize yourself with the on-screen guide. This guide will help you navigate through the various settings and features of your smart TV. Follow these steps to complete the initial setup:
- Welcome screen: Once the network connection is established, your Toshiba Smart TV will display a welcome screen. Use the arrow keys on your remote control to select your desired language and press Enter to confirm.
- Terms of Service: Next, you’ll be presented with the Terms of Service agreement. Read through the terms, and if you agree, select “Accept” to proceed. If you do not agree, you will not be able to continue.
- Data Collection: You may be prompted to choose whether or not to allow Toshiba to collect anonymous usage data. This is optional but can help improve future updates and services. Make your selection and move on.
- Register or sign in (optional): If you have a Toshiba Smart TV account, you can sign in at this stage. If not, you may have the option to create a new account or skip this step. Registering or signing in can provide access to additional features and personalized recommendations.
- Network Settings: Double-check your network settings to ensure that your Toshiba Smart TV is still connected to the internet. If needed, you can make any necessary adjustments in this section.
- Date and Time: Set the date and time on your Toshiba Smart TV. This will ensure that time-sensitive features, such as program guides and scheduled recordings, function correctly.
- On-Screen Guide: Familiarize yourself with the on-screen guide, which provides quick access to various settings and features. Use the arrow keys on your remote control to navigate through the guide. Each option represents a different aspect of your TV’s functionality, such as picture settings, sound settings, network settings, and more.
- Personalization: Customize your Toshiba Smart TV according to your preferences. Adjust picture settings, sound settings, and other display options to enhance your viewing experience.
- Explore Apps: Take some time to explore the available apps and services on your Toshiba Smart TV. From popular streaming platforms to news apps, there’s something for everyone. Download and install any desired apps to tailor your entertainment experience.
Completing the initial setup and familiarizing yourself with the on-screen guide will empower you to maximize the features and capabilities of your Toshiba Smart TV. So take your time to explore and customize your settings, ensuring that your TV is optimized for your unique preferences. Now that the initial setup is complete, you’re ready to embark on an exciting journey of smart entertainment.
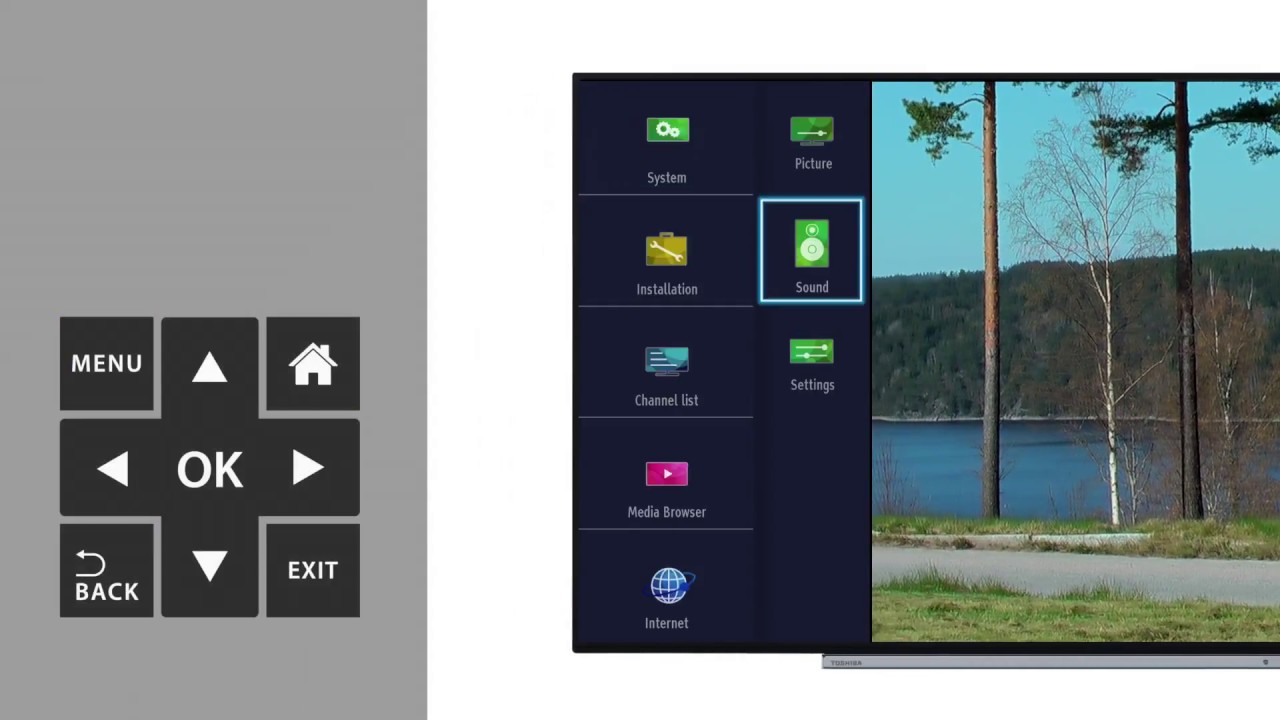
Configuring Picture and Sound Settings
One of the key benefits of owning a Toshiba Smart TV is the ability to customize the picture and sound settings to create an immersive viewing experience. By adjusting these settings, you can optimize the picture quality, enhance the audio output, and personalize your entertainment setup. Follow these steps to configure the picture and sound settings on your Toshiba Smart TV:
- Access the Settings menu: On your Toshiba Smart TV remote control, press the Home button to access the main menu. Navigate to the “Settings” option using the arrow keys and press the Enter button to select it.
- Select Picture Settings: In the Settings menu, locate and select the “Picture” or “Display” option. This will open up a range of picture settings for you to customize.
- Adjust Picture Mode: Choose the desired picture mode based on your preference and the content you’re viewing. Options typically include Standard, Vivid, Cinema, and Game. Experiment with different modes to find the one that suits your needs best.
- Tweak the Picture Settings: Within the Picture Settings menu, you’ll find options to adjust brightness, contrast, color, sharpness, and more. Make incremental changes to these settings to achieve the optimal picture quality for your viewing environment.
- Enable or Disable Motion Enhancement: Depending on personal preference, you can enable or disable motion enhancement features such as Motion Smoothing or Motion Interpolation. These settings can help reduce motion blur in fast-paced scenes, but some viewers prefer a more natural look without them.
- Access Sound Settings: Return to the main Settings menu and select the “Sound” option. This will allow you to adjust the audio settings to suit your preferences.
- Choose Sound Mode: Similar to picture settings, select the appropriate sound mode based on your content and preferences. Options may include Standard, Music, Movie, and Sports.
- Adjust Sound Settings: Within the Sound Settings menu, you can fine-tune settings like bass, treble, balance, and surround sound. Experiment with these settings to achieve the desired audio output.
- Enable Virtual Surround Sound (optional): If your Toshiba Smart TV supports virtual surround sound, you can enable this feature for a more immersive audio experience. Virtual surround sound creates the illusion of a multi-channel speaker setup, enhancing the spatiality of the audio.
- Save and Apply Settings: Once you’ve made the necessary adjustments to the picture and sound settings, make sure to save the changes before exiting the menu. This will ensure that your customized settings are applied whenever you watch content on your Toshiba Smart TV.
By configuring the picture and sound settings according to your preferences, you can elevate your viewing experience to a whole new level. Take the time to fine-tune these settings and experiment with different modes to find the combination that suits your personal preference. With a bit of adjustment, you’ll be able to enjoy stunning visuals and immersive sound on your Toshiba Smart TV.
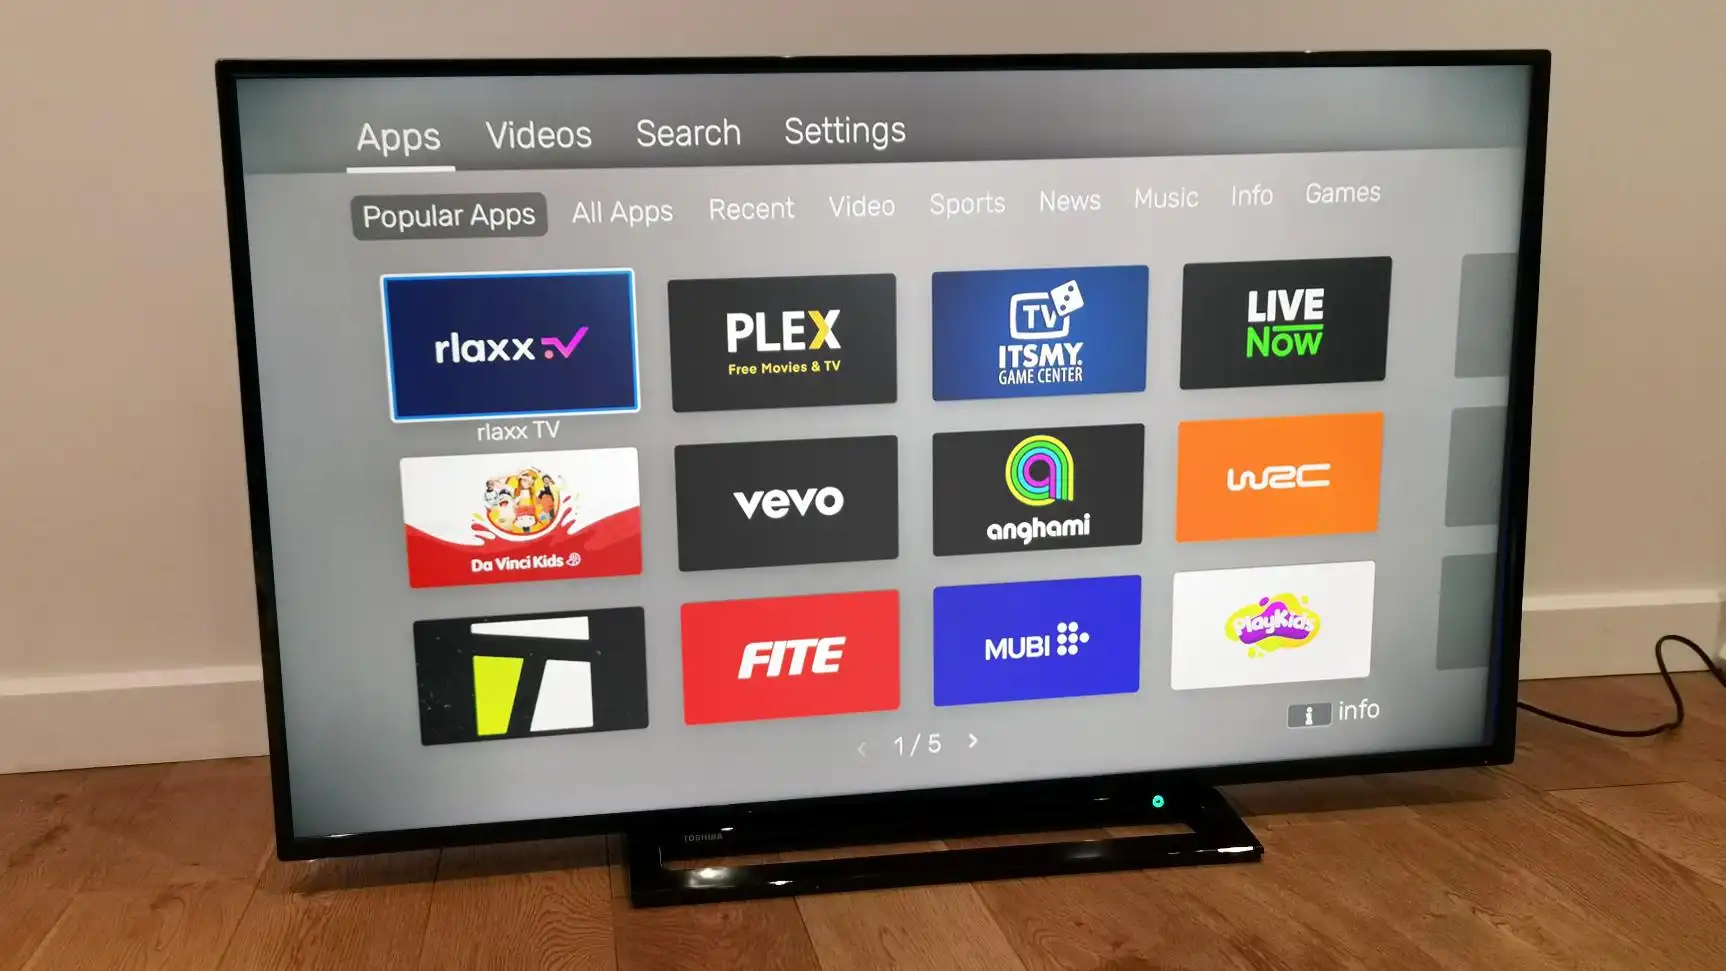
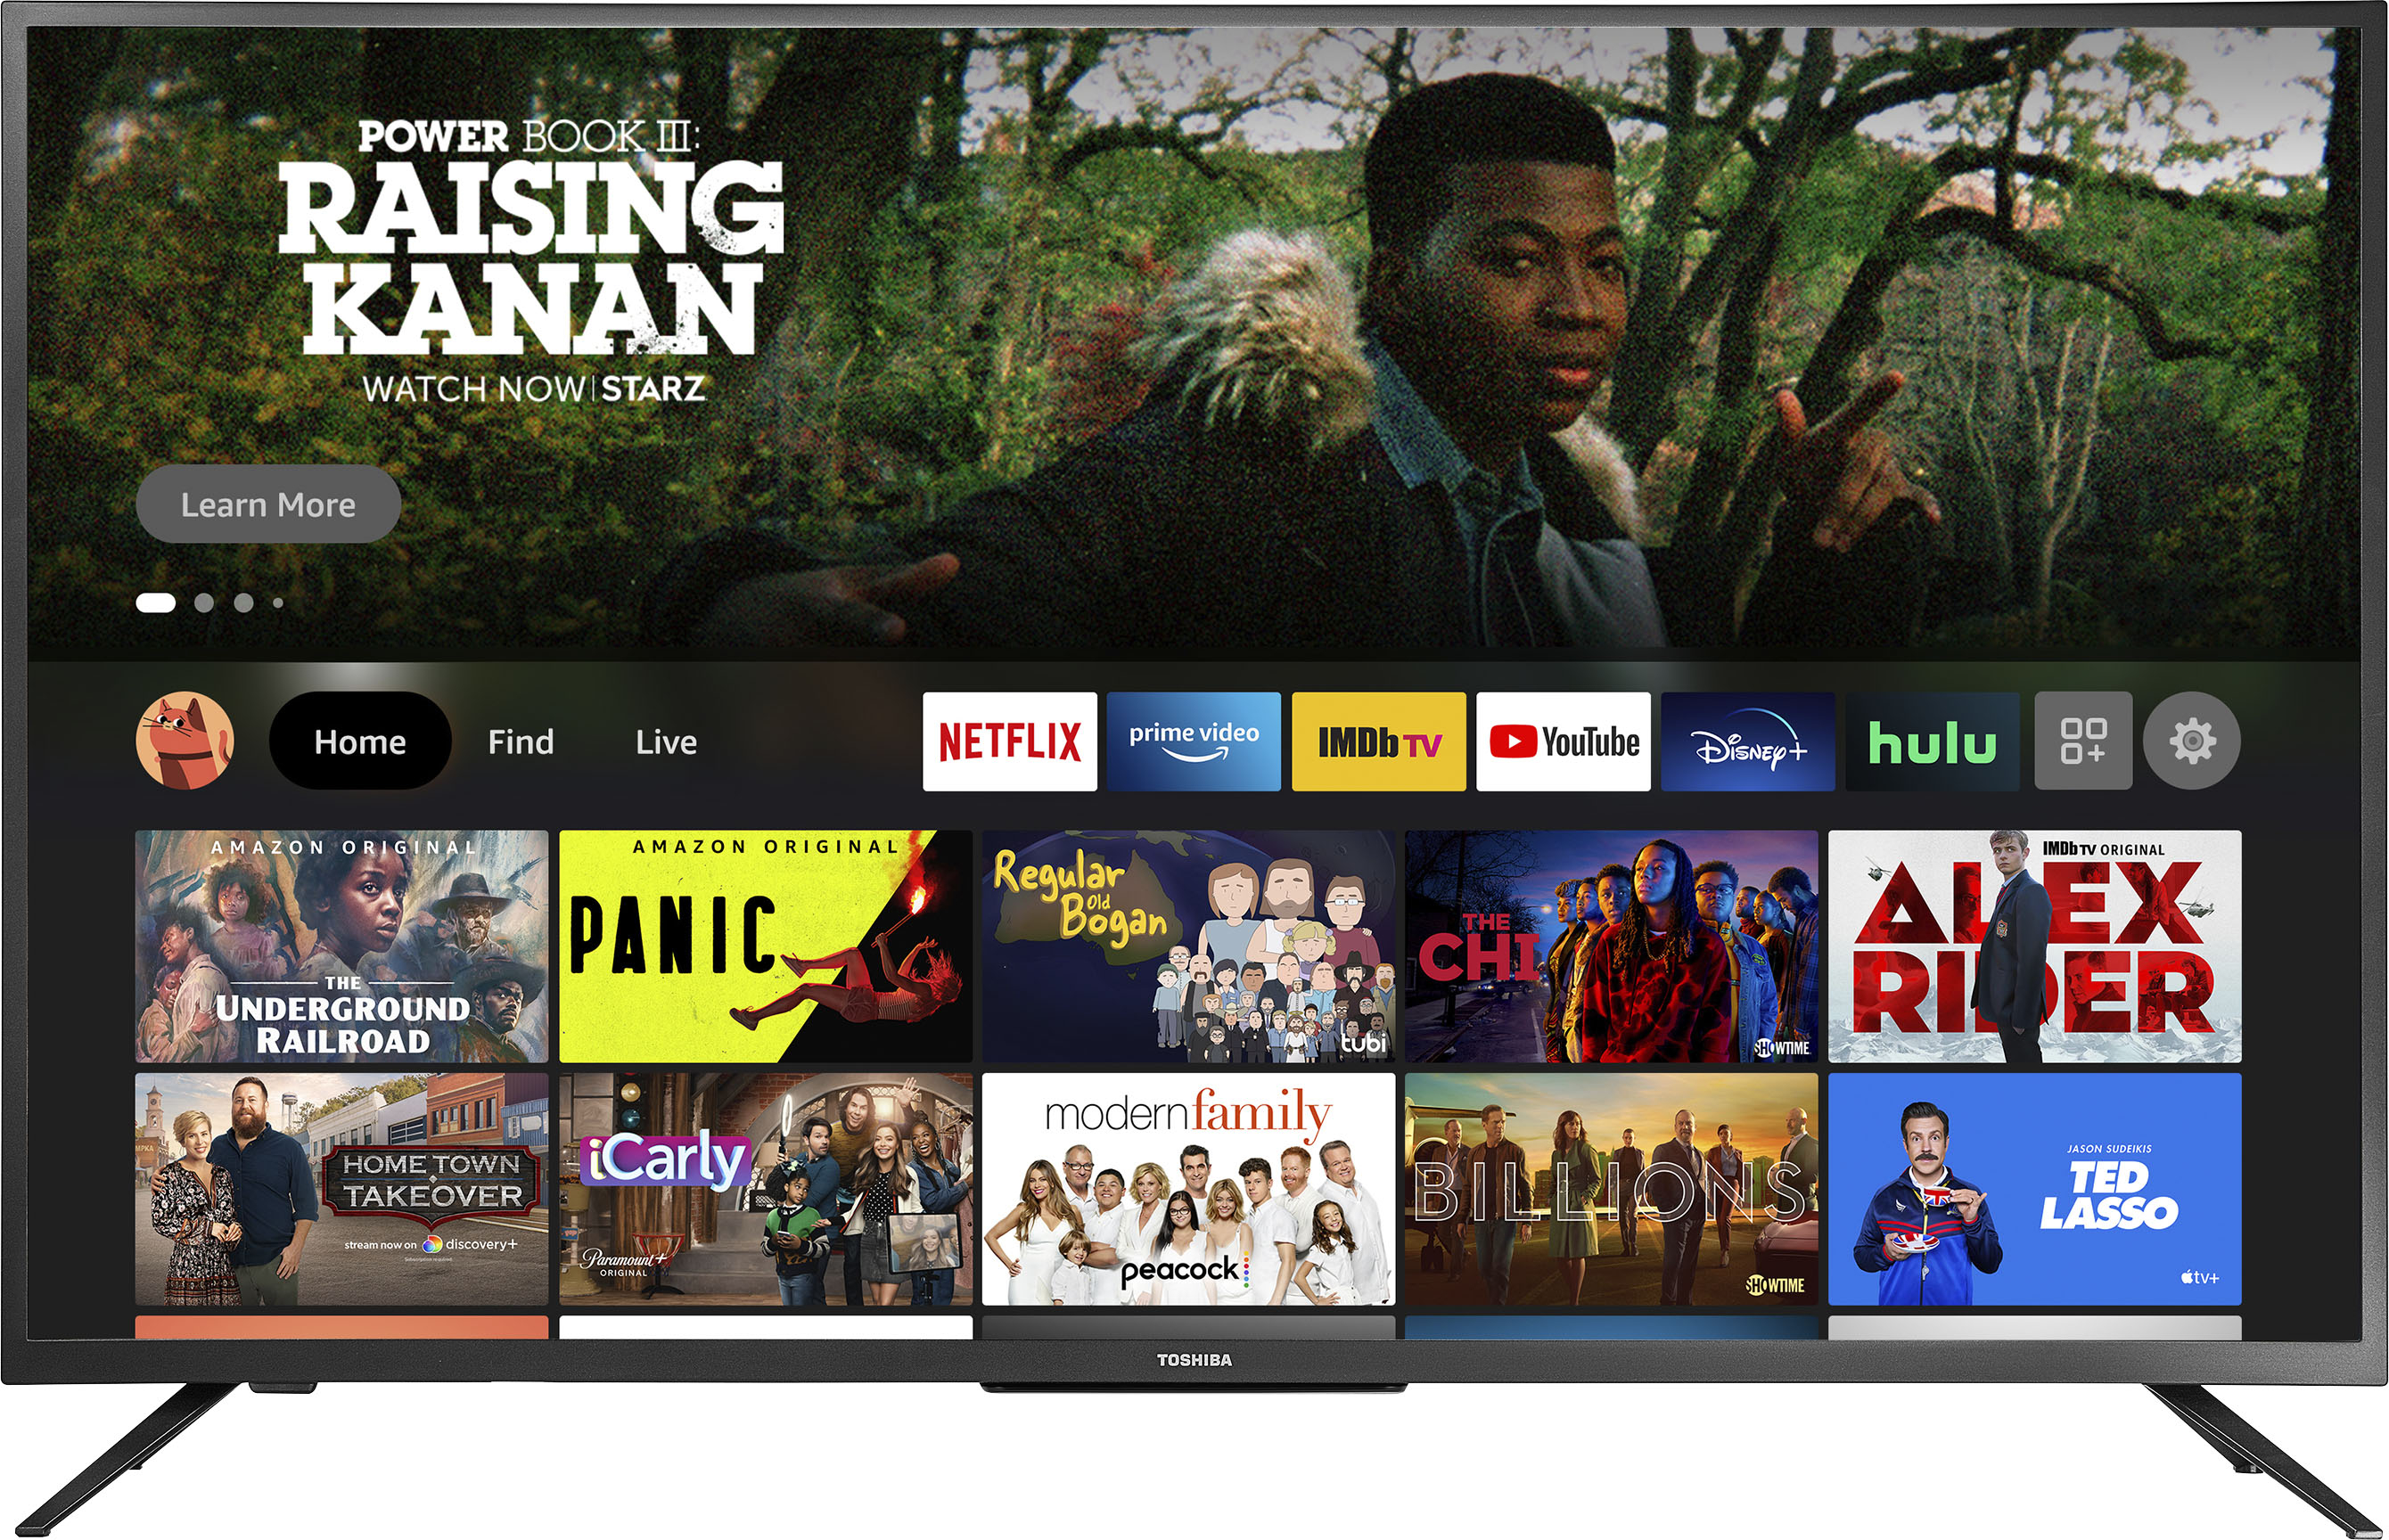
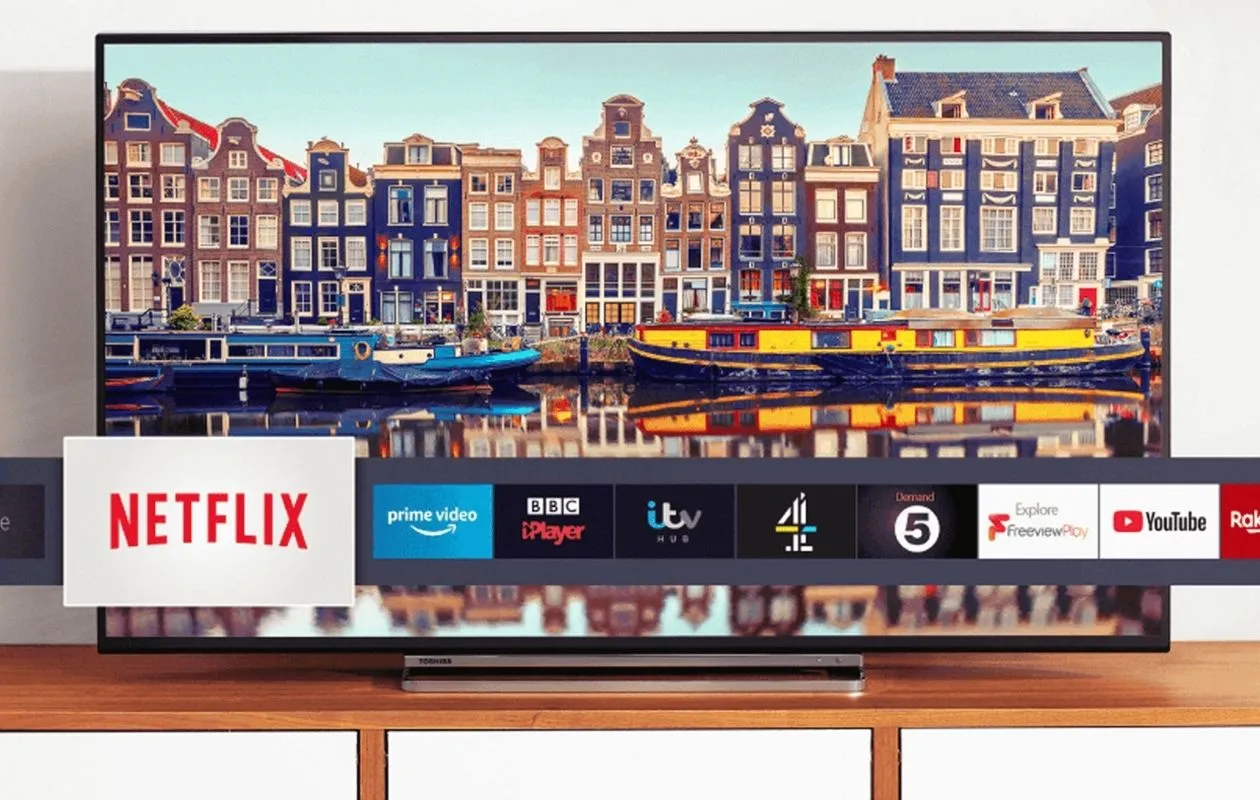
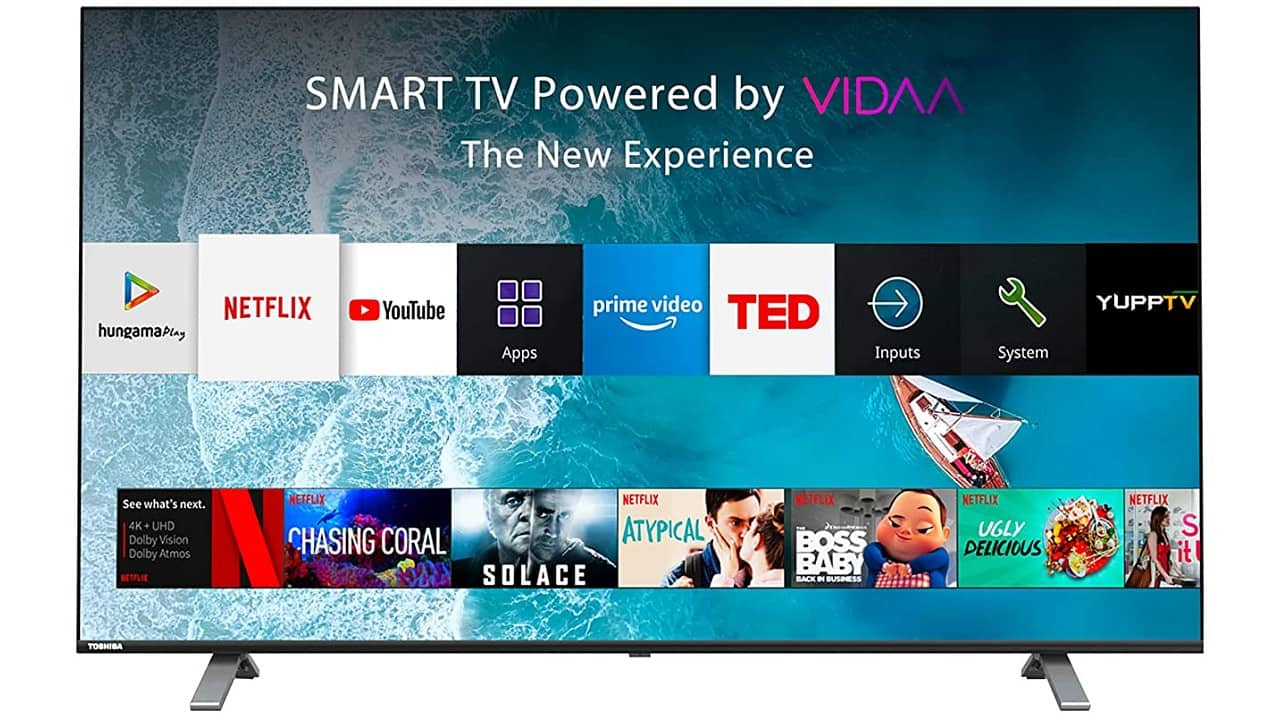
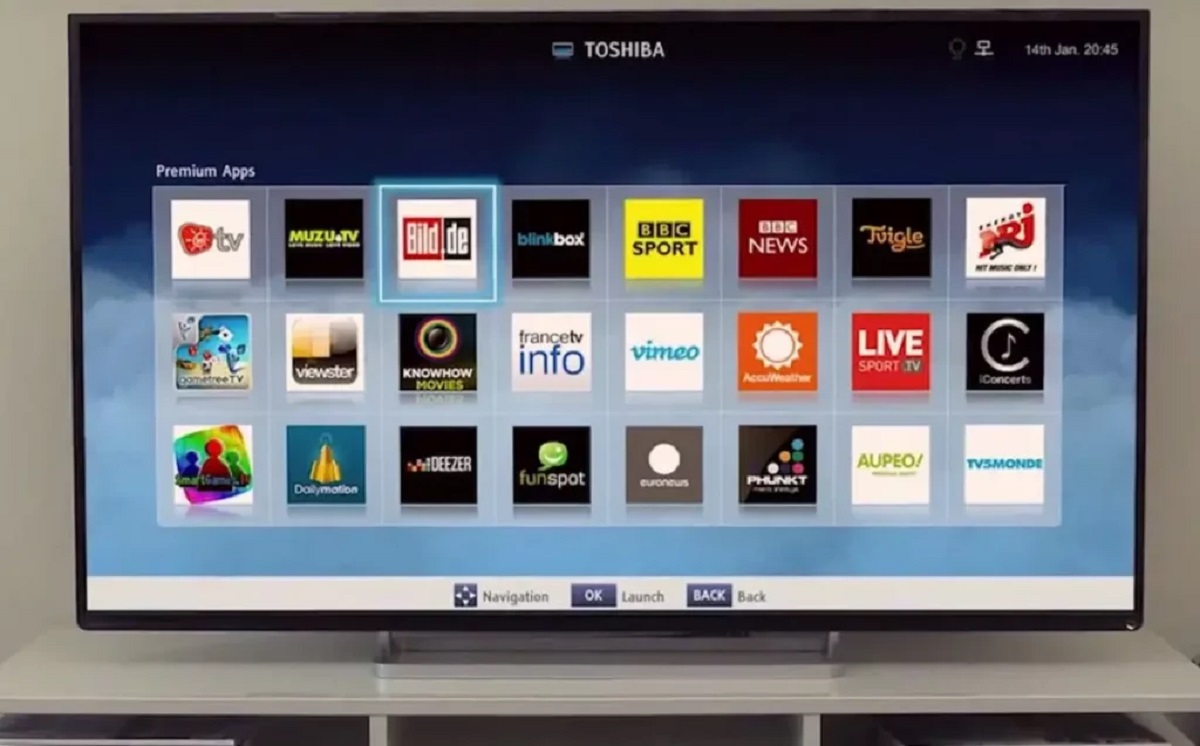
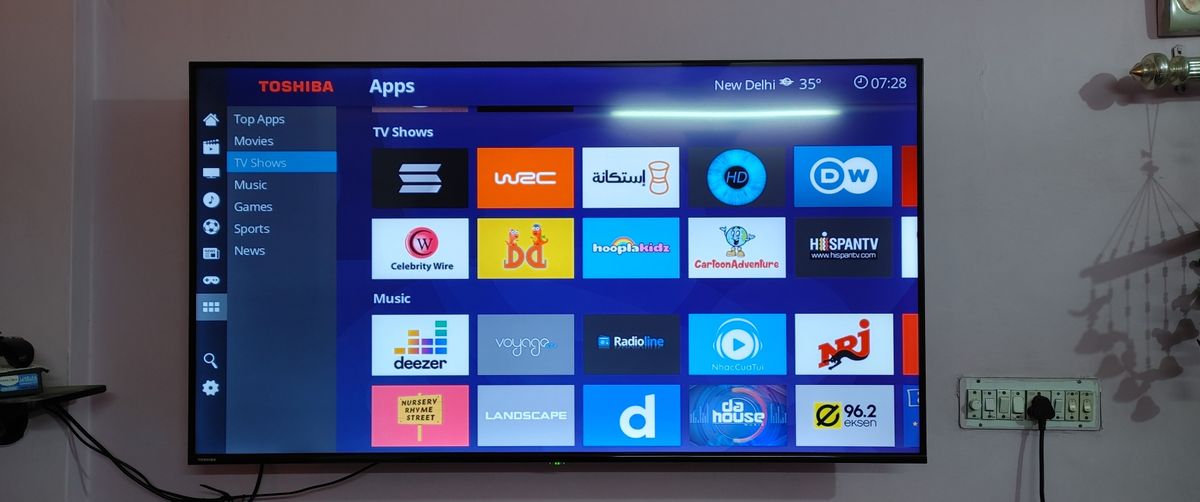
Installing and Configuring Apps
A major advantage of owning a Toshiba Smart TV is the ability to access a wide range of apps and online services directly from your TV. Whether you want to stream movies and TV shows, catch up on the latest news, or enjoy music and games, installing and configuring apps on your Toshiba Smart TV is straightforward. Follow these steps to get started:
- Access the Apps menu: On your Toshiba Smart TV remote control, look for the dedicated Apps or Smart button and press it. Alternatively, you can navigate to the main menu and select the “Apps” option.
- Explore the App Store: Once in the Apps menu, you’ll be presented with a variety of apps available for download. Browse through the categories or use the search function to find apps that pique your interest. Popular options include streaming platforms like Netflix, Hulu, and Disney+, as well as social media apps and games.
- Install an App: When you’ve found an app you’d like to install, navigate to it and select the “Install” or “Download” option. The app will begin downloading and installing onto your Toshiba Smart TV. Larger apps may take some time to download, so be patient.
- Launch and Sign In: Once the app is installed, you can launch it from the Apps menu or the TV’s home screen. Follow the on-screen instructions to sign in to your existing account or create a new one, depending on the app.
- Configure App Settings: Within each app, you’ll find settings specific to that particular service. These settings allow you to personalize your app experience, including playback preferences, parental controls, subtitle settings, and more. Explore the app’s settings menu to tailor it to your liking.
- Update Apps: To ensure that your apps are running smoothly and benefitting from the latest features and bug fixes, it’s important to keep them up to date. Check the app store or the TV’s settings menu regularly for app updates and install them when prompted.
- Uninstall Apps: If you no longer use a particular app or want to free up space on your Toshiba Smart TV, you can uninstall apps you no longer need. Simply navigate to the Apps menu, select the app you wish to remove, and choose the “Uninstall” or “Delete” option.
Installing and configuring apps on your Toshiba Smart TV opens up a world of possibilities for entertainment and convenience. Explore the vast array of available apps, install your favorites, and customize the settings to suit your preferences. With just a few clicks, you’ll have a personalized selection of apps tailored to your interests and needs, right at your fingertips on your Toshiba Smart TV.
Adding External Devices and Peripherals
Your Toshiba Smart TV is not limited to just its built-in features. It offers various connectivity options, allowing you to connect external devices and peripherals to enhance your viewing and gaming experience. Here’s how you can add external devices and peripherals to your Toshiba Smart TV:
- Identify the available ports: Take a look at the back or side of your Toshiba Smart TV to identify the available ports. Common ports include HDMI, USB, Ethernet, optical audio, and headphone jacks.
- Connect a gaming console: If you have a gaming console such as an Xbox, PlayStation, or Nintendo Switch, connect it to your Toshiba Smart TV using an HDMI cable. Plug one end of the HDMI cable into the console’s HDMI output and the other end into an available HDMI input on your TV.
- Connect a Blu-ray player or DVD player: To enjoy your favorite movies and TV shows on physical media, connect your Blu-ray player or DVD player to your Toshiba Smart TV using an HDMI cable. This will ensure high-quality audio and video playback.
- Connect a soundbar or external speakers: If you want to enhance the audio experience of your Toshiba Smart TV, consider connecting a soundbar or external speakers. Use an HDMI or optical audio cable to connect the soundbar or speakers to the corresponding ports on your TV.
- Connect a streaming device: If you prefer to use a dedicated streaming device, such as a Roku, Amazon Fire TV Stick, or Apple TV, connect it to your Toshiba Smart TV using an HDMI cable. This will give you access to additional streaming apps and services.
- Connect a USB device: If you want to access media files stored on a USB device, such as a flash drive or external hard drive, insert the USB device into the USB port on your Toshiba Smart TV. The TV will detect and display the available files for playback.
- Connect a keyboard or mouse: If you find it more convenient to navigate through menus and input text using a keyboard or mouse, you can connect compatible USB or wireless devices to your Toshiba Smart TV. Simply plug in the USB receiver or connect via Bluetooth, depending on the device.
- Configure the inputs: Once you’ve connected your external devices and peripherals, access the Inputs or Source menu on your Toshiba Smart TV. Here, you can select the appropriate input source for each connected device. This allows you to easily switch between different input sources.
Adding external devices and peripherals to your Toshiba Smart TV expands the possibilities and ensures a personalized and versatile entertainment setup. Whether you’re immersing yourself in gaming, enjoying high-quality audio, or accessing media from various sources, connecting external devices provides you with a truly customized experience on your Toshiba Smart TV.
Troubleshooting Common Issues
While Toshiba Smart TVs are designed to provide a seamless entertainment experience, occasional issues may arise. Here are some common problems you might encounter with your Toshiba Smart TV and troubleshooting steps to resolve them:
- No Power or No Display:
- Check the power cord connection and ensure it’s plugged in securely.
- Verify that the power outlet is functioning properly by connecting another device.
- Try pressing the power button on the TV or the remote control to turn on the TV.
- If there’s still no display, ensure the input source is correct and check the HDMI or AV cables connecting your TV to external devices.
- No Internet Connection:
- Ensure that your Wi-Fi or Ethernet connection is active and working properly.
- Check the network settings on your Toshiba Smart TV and confirm it’s connected to the correct network.
- If using Wi-Fi, move the router closer to the TV or consider using a Wi-Fi extender for a stronger signal.
- Reset your router and try reconnecting your Toshiba Smart TV to the network.
- App or Streaming Issues:
- If an app is freezing or not responding, try closing and reopening it.
- Check for app updates in the app store and install any available updates.
- Restart your Toshiba Smart TV to clear any temporary glitches.
- If streaming quality is poor, ensure you have a stable internet connection or try reducing the resolution in the app settings.
- Audio or Sound Issues:
- Check the volume level on both your Toshiba Smart TV and any external audio devices.
- Make sure the audio cables are securely connected and not damaged.
- Try switching to a different audio output in the TV’s settings (e.g., HDMI or optical audio).
- Verify that the audio settings on your TV and external devices are properly configured.
- Remote Control Issues:
- Replace the batteries in your Toshiba Smart TV remote control if it’s not responding.
- Ensure there are no obstructions between the remote and the TV’s sensor.
- Try resetting the remote control by removing the batteries, pressing all the buttons, and reinserting the batteries.
- Consider using the Toshiba Smart TV app as a remote control alternative.
- General Performance Issues:
- Ensure that your Toshiba Smart TV’s software is up to date by checking for available updates in the TV’s settings.
- Reset your Toshiba Smart TV to factory settings if you’re experiencing persistent performance issues.
- Disconnect any unnecessary connected devices to free up system resources.
- Consider performing a speed test on your internet connection to ensure it meets the minimum requirements for streaming and online activities.
If these troubleshooting steps do not resolve the issue with your Toshiba Smart TV, consult the user manual or visit Toshiba’s support website for further assistance. Remember to provide as much detail as possible when seeking help to ensure a faster and more accurate resolution to your problem. With the right troubleshooting techniques, you can effectively address common issues and ensure a smooth and enjoyable experience with your Toshiba Smart TV.
Tips and Tricks for a Better Smart TV Experience
Unlock the full potential of your Toshiba Smart TV and elevate your entertainment experience with these tips and tricks:
- Use Voice Control: Many Toshiba Smart TVs come with built-in voice control capabilities. Take advantage of this feature to search for content, change settings, and control your TV with simple voice commands. Just press the voice control button on your remote and speak your command.
- Customize the Home Screen: Personalize your Toshiba Smart TV’s home screen by rearranging the app icons. Move your most frequently used apps to the front for quick and easy access to your favorite content.
- Explore Shortcuts: Toshiba Smart TVs often have dedicated buttons on the remote control for quick access to popular streaming services like Netflix, YouTube, or Amazon Prime Video. Take advantage of these shortcuts to launch your favorite apps directly.
- Use Screen Mirroring: Mirror your smartphone, tablet, or laptop screen to your Toshiba Smart TV to enjoy content on a larger display. Use the built-in screen mirroring feature or explore options like Google Chromecast or Apple AirPlay for seamless wireless casting.
- Enable Parental Controls: If you have children at home, utilize the parental control settings on your Toshiba Smart TV to restrict access to certain content or apps. Set a PIN code to prevent unauthorized access to restricted content.
- Utilize Picture-in-Picture: Take advantage of the Picture-in-Picture (PiP) feature to multitask while watching TV. Keep an eye on a sports game or news broadcast while browsing the internet or using other apps on your Toshiba Smart TV.
- Explore Additional Features: Toshiba Smart TVs often have additional features like multi-screen viewing, sleep timers, energy-saving modes, and smartphone app integration. Familiarize yourself with these features to enhance your overall viewing experience.
- Update Firmware: Regularly check for firmware updates for your Toshiba Smart TV. Firmware updates often provide bug fixes, feature enhancements, and improved performance, ensuring you have the latest functionalities available.
- Clean the Screen: Keep your Toshiba Smart TV screen free from dust and smudges by gently wiping it with a soft, microfiber cloth. Avoid using harsh chemicals or abrasive materials that can damage the screen.
- Control Ambient Lighting: Adjust the lighting in your viewing area to minimize glare and enhance the viewing experience. Consider installing dimmer switches or using blackout curtains to create an optimal environment for watching your Toshiba Smart TV.
By incorporating these tips and tricks into your Toshiba Smart TV usage, you can maximize your entertainment options, customize your settings, and enhance your overall viewing experience. Explore the various features and functionalities of your smart TV to discover even more ways to enjoy seamless connectivity and immersive entertainment right in your living room.
Conclusion
Setting up and maximizing the potential of your Toshiba Smart TV is an exciting journey that opens a world of entertainment possibilities. From unboxing to configuring settings, connecting external devices, and exploring a wide variety of apps, your Toshiba Smart TV provides a seamless and immersive viewing experience.
Throughout this guide, we have covered the essential steps to get your Toshiba Smart TV up and running, including unboxing and connecting the TV, setting up the network connection, configuring picture and sound settings, installing and configuring apps, adding external devices and peripherals, troubleshooting common issues, and providing tips and tricks for a better smart TV experience.
By following these steps, you can optimize your viewing experience and personalize your Toshiba Smart TV to suit your preferences. Whether you’re streaming your favorite shows and movies, gaming with friends, or exploring online content, your Toshiba Smart TV offers a wealth of entertainment options.
Remember to regularly update your Toshiba Smart TV’s firmware and explore new features and apps that become available over time. Stay up to date with the latest technology advancements to ensure you’re making the most of your smart TV’s capabilities.
With careful setup, customization, and troubleshooting, your Toshiba Smart TV will continue to provide countless hours of enjoyment for you and your family. So sit back, relax, and immerse yourself in the world of smart entertainment with your Toshiba Smart TV!