Introduction
Welcome to the exciting world of electric pressure cookers! With their time-saving capabilities and versatile cooking options, electric pressure cookers have become a popular kitchen appliance for busy individuals and families. Whether you’re a novice cook or a seasoned chef, the electric pressure cooker is a game-changer in the kitchen.
In this article, we will guide you through the process of setting up an electric pressure cooker and show you how to make the most of this handy appliance. From unboxing and assembling to cooking delicious meals, we’ll cover all the necessary steps and provide you with some helpful tips along the way.
If you haven’t used an electric pressure cooker before, don’t worry! Despite their advanced features, these cookers are designed with user-friendliness in mind. They offer a safe and efficient way to cook a wide variety of dishes, from soups and stews to rice and even desserts. With the ability to cook food up to 70% faster than traditional methods, the electric pressure cooker is a time-saving powerhouse.
Not only do electric pressure cookers save time, but they also bring out incredible flavors in your meals. The sealed environment and high-pressure cooking process help infuse flavors into your ingredients, resulting in rich and savory dishes. Whether you’re cooking meat, vegetables, or grains, the electric pressure cooker allows you to create delicious and satisfying meals with minimal effort.
Another advantage of using an electric pressure cooker is its energy efficiency. Compared to using multiple pots and pans on the stovetop or oven, the electric pressure cooker requires less energy to cook your meals. This not only saves you money on your energy bill but also reduces your carbon footprint, making it an environmentally friendly option.
Throughout this article, we will provide you with step-by-step instructions on how to set up and use your electric pressure cooker properly. We will cover essential aspects such as safety precautions, assembling the cooker, adding ingredients, selecting cooking times and pressure levels, and cleaning and maintenance tips.
So, let’s get started on this culinary adventure with your electric pressure cooker. By the end of this article, you’ll have the confidence and knowledge to embark on exciting cooking experiments and enjoy delicious meals in no time!
What is an Electric Pressure Cooker?
An electric pressure cooker is a kitchen appliance that utilizes pressure and heat to cook food quickly and efficiently. It is equipped with a sealed pot and a pressure release valve, allowing the internal pressure to increase, which in turn raises the boiling point of water. This higher boiling point allows food to cook faster, reducing cooking times by up to 70% compared to traditional cooking methods.
Unlike stovetop pressure cookers, electric pressure cookers are self-contained and do not require the use of an external heat source. They are designed with safety features such as locking mechanisms and pressure release valves to ensure safe and convenient cooking experiences.
Electric pressure cookers are versatile appliances that can be used for a wide range of cooking tasks. From tenderizing tough cuts of meat to steaming vegetables, cooking grains, making soups, stews, or even desserts, the electric pressure cooker is a multi-functional kitchen tool that can handle various cooking techniques with ease.
One of the key advantages of an electric pressure cooker is its ability to retain flavors and nutrients in the food. The sealed environment created by the pressure cooking process enhances the infusion of flavors, resulting in more delicious and flavorful meals. Additionally, the high-pressure and shorter cooking times help to preserve nutrients in the food, making it a healthier cooking option.
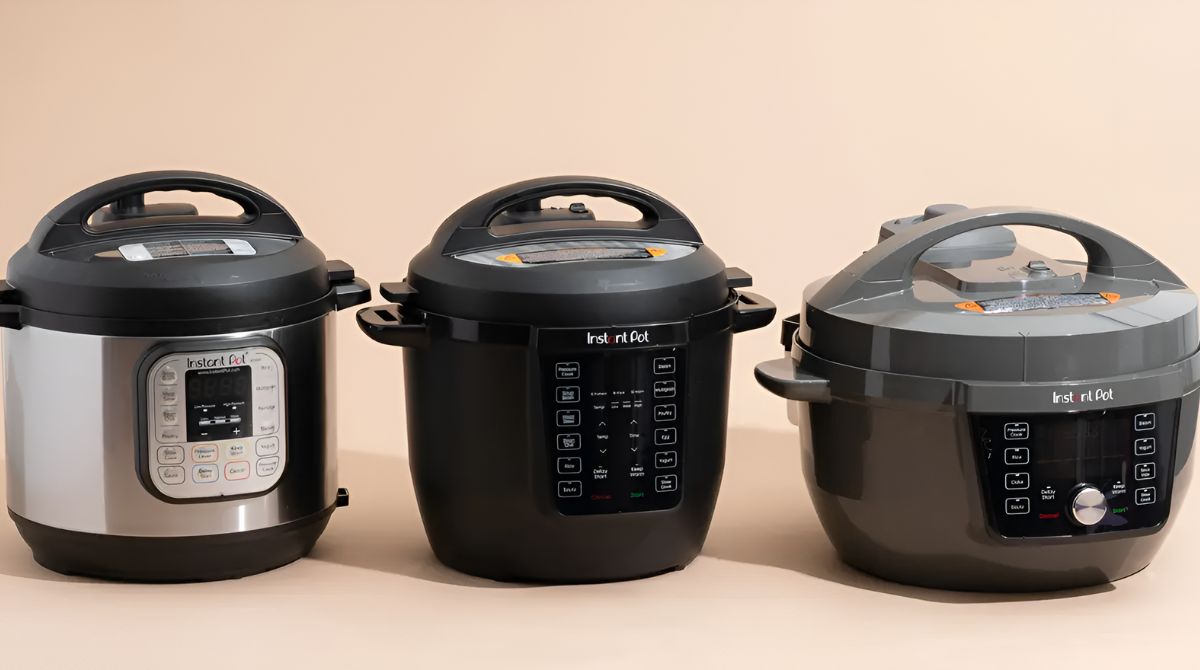
Modern electric pressure cookers are equipped with advanced features and programmable settings to allow for precise cooking. They often include options for different pressure levels, cooking times, and various cooking functions such as sautéing, slow cooking, and even yogurt making. Some models even offer smart connectivity, allowing you to control and monitor the cooking process through smartphone apps.
Using an electric pressure cooker is not only convenient but also energy-efficient. By significantly reducing cooking times, it consumes less energy compared to traditional cooking methods. This not only saves time but also reduces your energy consumption, making it a more environmentally friendly choice for your kitchen.
Now that you have a better understanding of what an electric pressure cooker is and its capabilities, let’s move on to the next section, where we will explore the benefits of using an electric pressure cooker.
Benefits of Using an Electric Pressure Cooker
Using an electric pressure cooker in your kitchen comes with a multitude of benefits that make it a must-have appliance for both novice and experienced cooks. Let’s explore some of the advantages of incorporating an electric pressure cooker into your cooking routine.
1. Time Savings: One of the most significant benefits of using an electric pressure cooker is its ability to drastically reduce cooking times. The high-pressure environment created inside the cooker speeds up the cooking process, allowing you to prepare meals in a fraction of the time compared to traditional cooking methods. What used to take hours can now be done in minutes, making it a lifesaver for busy individuals and families.
2. Energy Efficiency: Electric pressure cookers are energy-efficient appliances. By cooking food quickly and at higher temperatures, they consume less energy compared to traditional cooking methods. This not only saves time but also reduces your energy consumption, leading to lower utility bills and a smaller carbon footprint.
3. Versatility: Electric pressure cookers are incredibly versatile. They can be used to make a wide variety of dishes, including soups, stews, chili, rice, beans, meats, vegetables, and even desserts. With programmable settings and preset cooking functions, you can easily customize the cooking process to achieve the desired results for different recipes.
4. Nutrient Retention: Unlike boiling or other conventional cooking methods that can leach out nutrients from food, electric pressure cookers help to retain the natural flavors, colors, and nutrients in your meals. The shorter cooking times and sealed environment ensure that vitamins, minerals, and other beneficial compounds are preserved, resulting in healthier and more nutritious meals.
5. Flavor Enhancement: The sealed environment of the electric pressure cooker allows flavors to intensify and meld together. The high pressure infuses flavors into the food, resulting in richer and more flavorful dishes. Whether you’re cooking meat, vegetables, or grains, the pressure cooking process enhances the taste and texture, making each bite a satisfying experience.
6. Convenience: Electric pressure cookers are designed to make your cooking experience more convenient. Many models offer programmable settings, delayed start options, and keep-warm functions, allowing you to prepare meals in advance and have them ready when you need them. With one-pot cooking and easy cleanup, you can spend less time in the kitchen and more time enjoying your delicious creations.
7. Safety: Electric pressure cookers are equipped with safety features that make them user-friendly and secure to use. They are designed with locking mechanisms that prevent accidental opening while there is pressure inside the cooker. Additionally, pressure release valves ensure that excess pressure is safely released to prevent any mishaps. These safety features give you peace of mind while cooking with an electric pressure cooker.
Now that you’re familiar with the numerous benefits of using an electric pressure cooker, let’s move on to the next section, where we will discuss some important safety precautions to keep in mind when using your electric pressure cooker.
Safety Precautions
While electric pressure cookers are designed with safety features, it is essential to follow proper precautions to ensure safe and trouble-free cooking experiences. Here are some important safety measures to keep in mind when using an electric pressure cooker:
1. Read the User Manual: Before using your electric pressure cooker, thoroughly read the user manual provided by the manufacturer. Familiarize yourself with the specific features, functions, and safety guidelines of your cooker.
2. Check the Sealing Ring: Inspect the sealing ring of your electric pressure cooker before each use. Ensure that it is clean, properly positioned, and free from any damage. The sealing ring ensures a tight seal, preventing steam from escaping during the cooking process.
3. Do Not Overfill: When cooking with an electric pressure cooker, avoid overfilling it with ingredients. Leave enough space for food expansion and the release of steam during the cooking process. Most manufacturers specify a maximum fill line inside the cooker, so be sure to follow it.
4. Properly Vent and Release Pressure: Always use caution when venting and releasing pressure from the electric pressure cooker. Follow the manufacturer’s instructions on how to safely release pressure using the pressure release valve or other designated methods. Do not force the lid open if there is still pressure inside the cooker.
5. Keep Clear of Steam: Avoid placing your hands or any body part over the steam release valve or the lid when releasing pressure. The hot steam can cause burns. Use long utensils or tongs to operate the pressure release valve to keep a safe distance from the steam.
6. Use Proper Ventilation: Ensure that the area around your electric pressure cooker is well-ventilated during the cooking process. Adequate ventilation helps dissipate steam and prevents the buildup of excess heat, reducing the risk of accidents.
7. Follow Cooking Time and Pressure Recommendations: Different recipes require varying cooking times and pressure levels. It is crucial to follow recommended cooking times and pressure settings specified in the recipe or the user manual of your electric pressure cooker. Cooking for longer than necessary or exceeding the recommended pressure can compromise food quality and safety.
8. Avoid Opening the Lid During Cooking: Once you have started the cooking process, avoid opening the lid unless necessary. Opening the lid prematurely can release pressure and interrupt the cooking process, resulting in undercooked food and potential safety hazards.
9. Disconnect After Use: After you have finished using your electric pressure cooker, make sure to disconnect it from the power source. This helps prevent any accidental activations or electrical hazards.
10. Regular Cleaning and Maintenance: Clean your electric pressure cooker regularly following the manufacturer’s instructions. This includes cleaning the sealing ring, pressure release valve, cooking pot, and other removable parts. Regular maintenance ensures optimal performance and extends the lifespan of your appliance.
By following these safety precautions, you can enjoy worry-free cooking experiences with your electric pressure cooker. Now that we have covered the safety aspects, let’s move on to the next section, where we will guide you through the process of unboxing and assembling your electric pressure cooker.
Unboxing and Assembling
Excitement is in the air as you unbox your brand-new electric pressure cooker! Before you can start cooking delicious meals, it’s important to properly assemble your cooker. Let’s go through the unboxing and assembly process step by step:
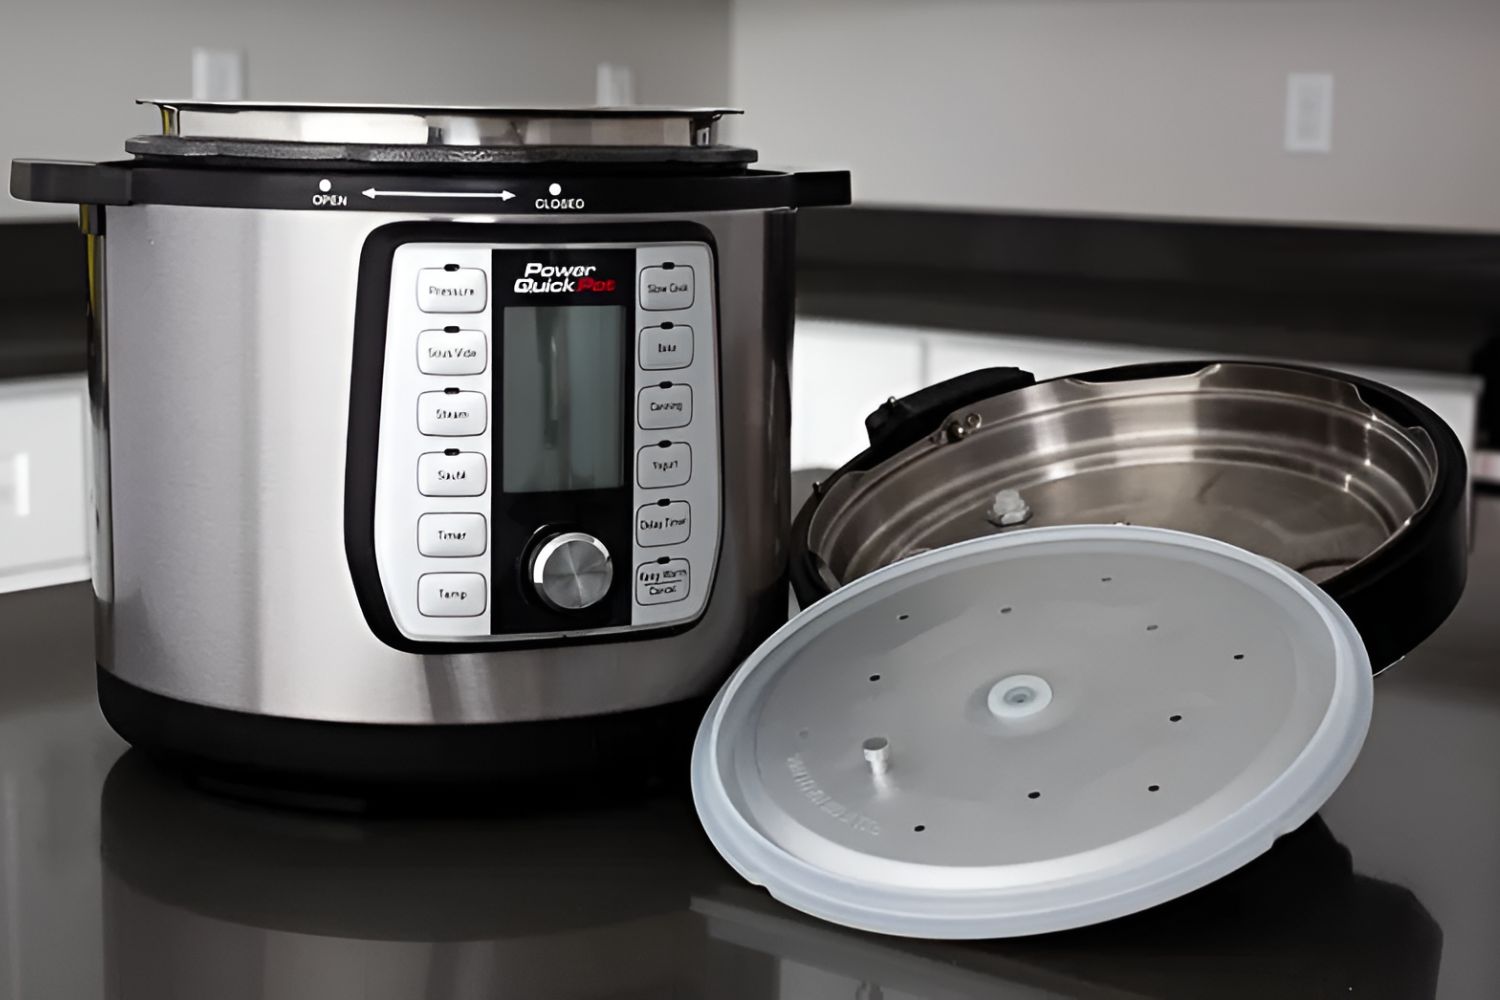
1. Unbox the Pressure Cooker: Carefully remove the electric pressure cooker from its packaging, ensuring that all the components are included. These typically include the main cooking pot, the lid with the sealing ring, a removable condensation collector, and any additional accessories or attachments.
2. Read the Instruction Manual: Take a moment to read the instruction manual provided with your electric pressure cooker. The manual will provide specific details on how to assemble the various parts correctly.
3. Clean the Parts: Before assembling the cooker, wash all the removable parts, such as the cooking pot and sealing ring, with warm soapy water. Rinse thoroughly and dry them completely to ensure cleanliness and eliminate any residue from the manufacturing process.
4. Insert the Sealing Ring: Take the sealing ring and inspect it for any damage. Place it securely into the designated groove on the inside of the lid. Ensure that the sealing ring is fitted snugly and evenly all the way around the circumference of the lid.
5. Attach the Lid: Align the lid with the main cooking pot, ensuring that the handles are properly aligned. Carefully lower the lid onto the pot, gently pressing it down until it fits securely in place. The lid should lock into position with an audible click or indication.
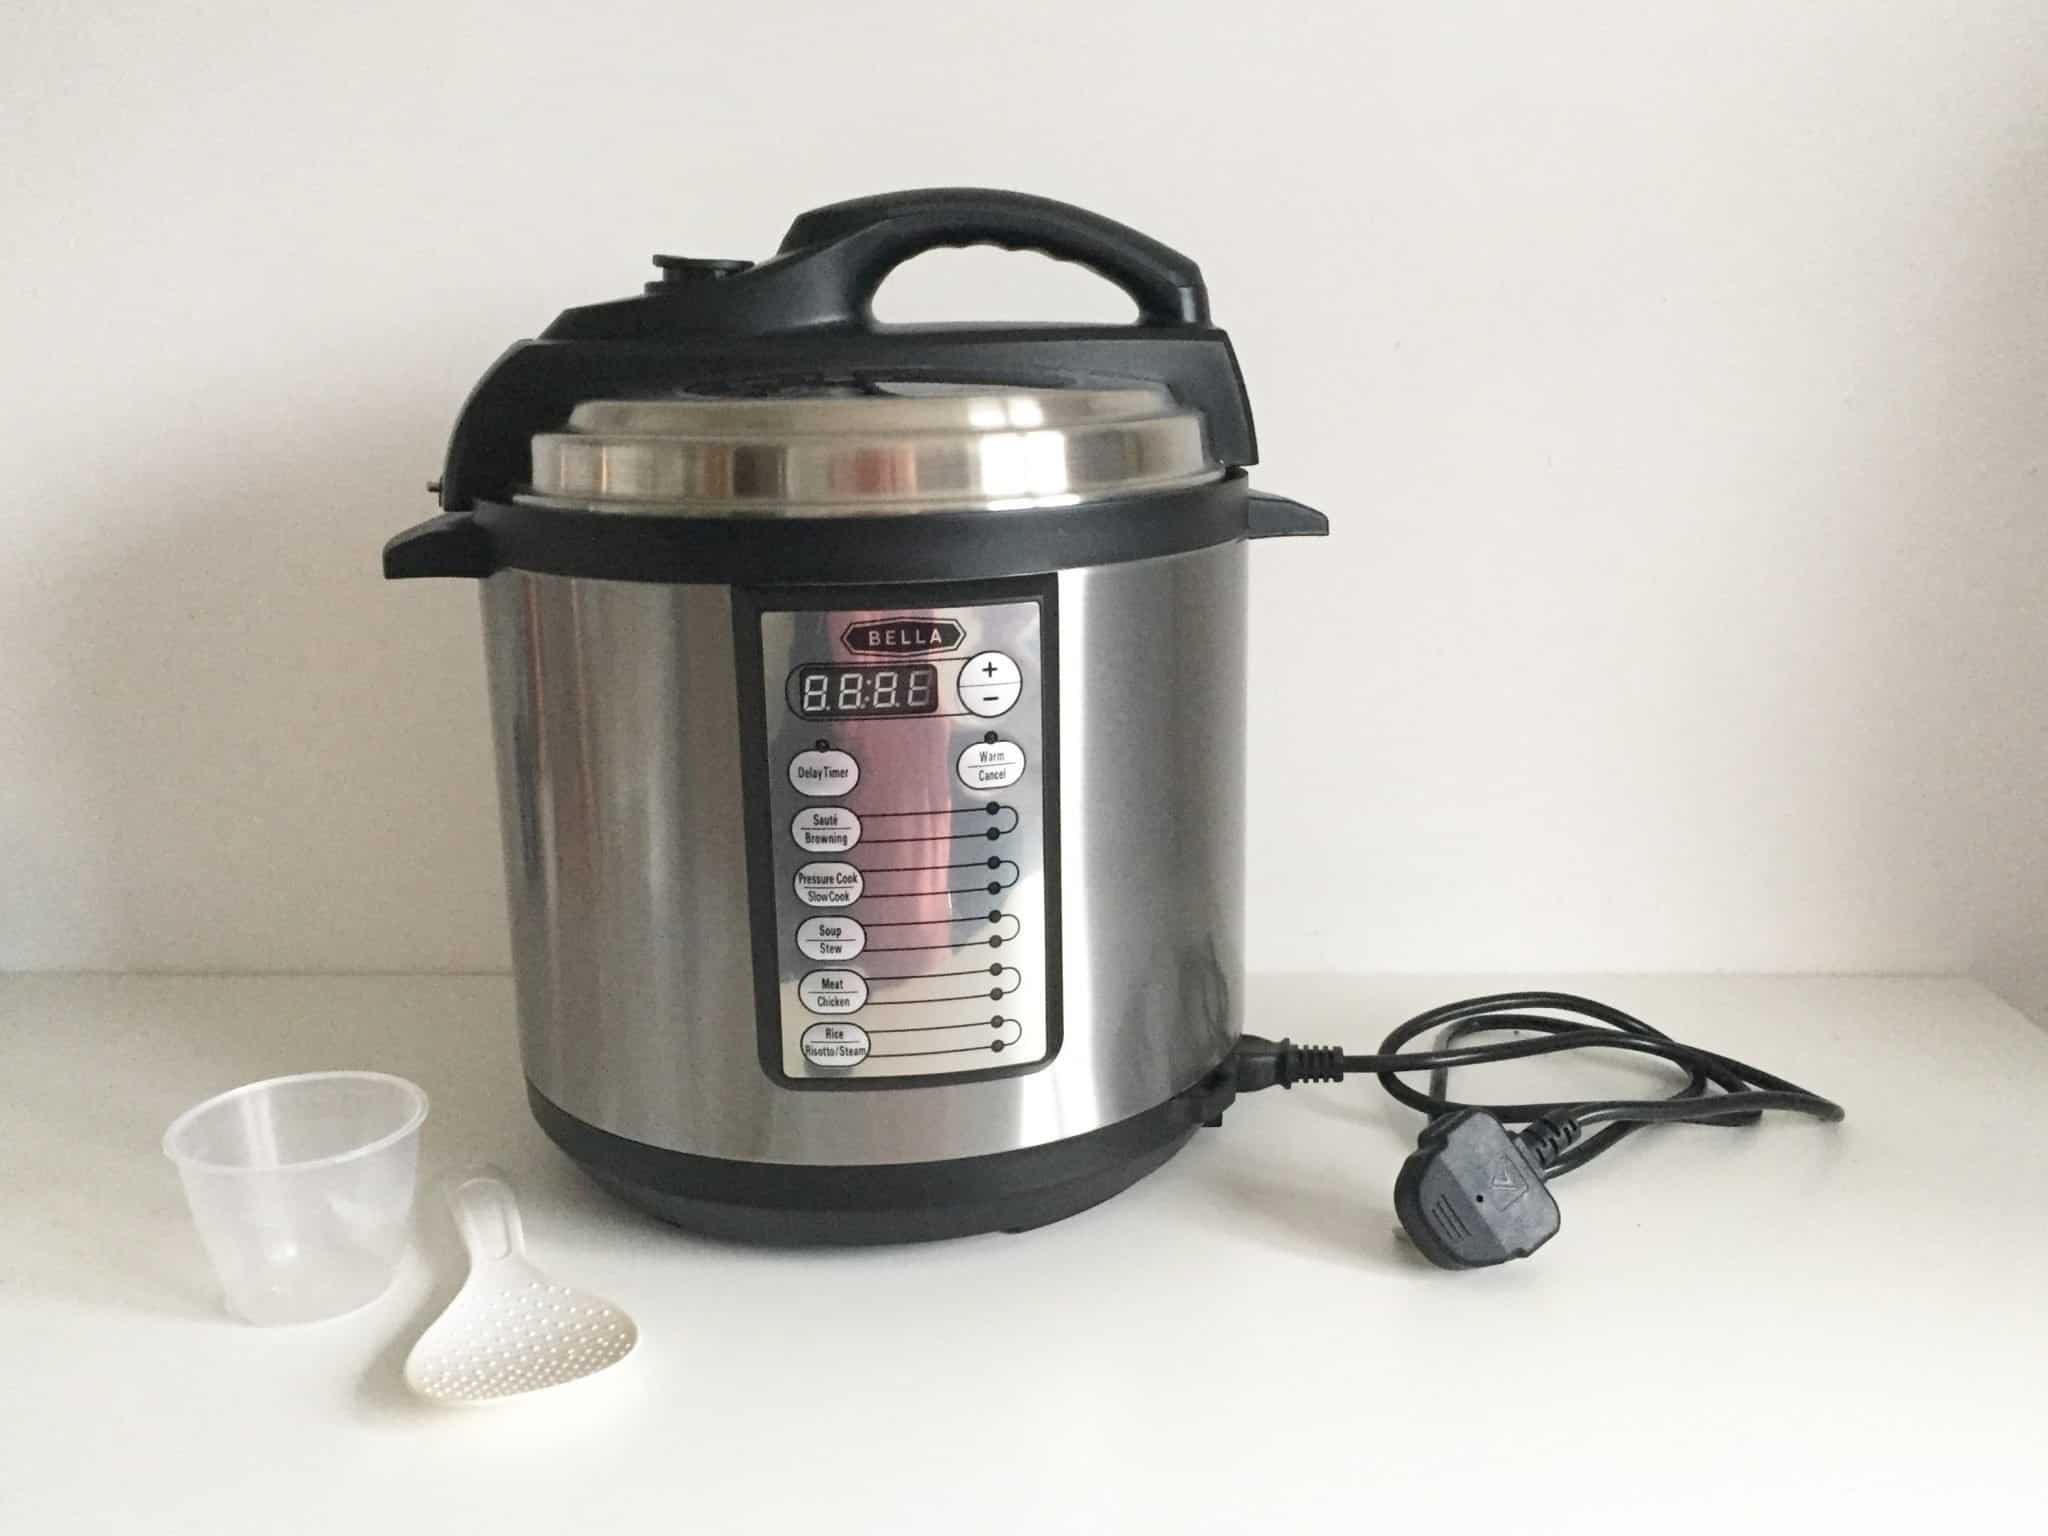
6. Connect the Power Cord: Locate the power cord attached to the pressure cooker unit. Connect it to the designated power socket on the cooker. Ensure that the connection is secure and that the cord is not twisted or damaged.
7. Position the Condensation Collector: Many electric pressure cookers come with a removable condensation collector. Place the condensation collector into the designated slot below the pressure release valve. This collector helps to collect and trap any excess liquid or condensation that may accumulate during the cooking process.
8. Confirm the Settings and Display: Once the electric pressure cooker is assembled, make sure that the control panel or display is functioning properly. Familiarize yourself with the various buttons and settings available on your specific model. Refer to the instruction manual for a detailed overview of the control panel features.
9. Test the Pressure Release Valve: While the pressure cooker is still empty, test the pressure release valve. Push or twist the valve to ensure that it moves freely. A well-functioning valve is essential for safe pressure release during and after cooking.
10. Perform a Test Run: Before using your electric pressure cooker for the first time, it is recommended to perform a test run with water. Follow the instructions in the user manual to add water to the pot, close the lid, and set the appropriate settings. This test run ensures that the cooker is functioning correctly and familiarizes you with the cooking process.
Once you have successfully unboxed and assembled your electric pressure cooker, you’re ready to start cooking delicious meals! In the next section, we will guide you through the process of setting up the pressure release valve on your cooker.
Setting Up the Pressure Release Valve
The pressure release valve is a crucial component of an electric pressure cooker as it allows you to control the release of built-up pressure during and after the cooking process. Properly setting up the pressure release valve ensures safe and efficient cooking. Let’s walk through the steps of setting up the pressure release valve on your electric pressure cooker:
1. Understand the Pressure Release Positions: Electric pressure cookers typically have two main pressure release positions: Sealed and Venting. The Sealed position keeps the pressure locked inside the cooker, while the Venting position allows the pressure to escape gradually. Familiarize yourself with these positions before proceeding.
2. Consult the Instruction Manual: Every electric pressure cooker varies in terms of design and functionality. Refer to the instruction manual provided with your cooker for specific guidance on setting up and using the pressure release valve. The manual will outline any unique features or instructions specific to your model.
3. Identify the Pressure Release Valve: Locate the pressure release valve on your electric pressure cooker. It is usually a small knob or switch located on the lid. The valve may have different markings or symbols to indicate the various release positions. Take note of these markings for accurate usage.
4. Initial Position: Start by ensuring that the pressure release valve is in the initial position before starting the cooking process. This position is often indicated as “Sealed,” “Closed,” or “Lock.” It allows pressure to build up inside the cooker during cooking and prevents steam from escaping.
5. Adjusting the Valve: Before starting the cooking process, follow the instructions provided with your electric pressure cooker to ensure that the pressure release valve is properly set. Some models require you to turn the valve to the Venting position manually, while others may have digital controls to select the desired position.
6. Venting Position: When the cooking cycle is complete, and you’re ready to release the pressure, carefully switch the pressure release valve to the Venting position. This allows steam to escape gradually and reduces the pressure inside the cooker. It’s important to follow the manufacturer’s instructions for releasing pressure to ensure safe venting.
7. Quick Release vs. Natural Release: Electric pressure cookers offer two main methods for releasing pressure: Quick Release and Natural Release. Quick Release involves manually switching the pressure release valve to the Venting position, releasing steam immediately. Natural Release allows the pressure to decrease naturally over time without intervention. Refer to your recipe or cooking instructions to determine the appropriate release method for your dish.
8. Testing the Valve: Before each use, it’s important to test the pressure release valve to ensure it moves freely and functions correctly. Gently push or twist the valve to confirm that it is not stuck or blocked by any debris. A well-working pressure release valve is essential for safe pressure release during cooking.
9. Cleaning and Maintenance: Regularly clean the pressure release valve to remove any residue that may accumulate over time. Refer to the manufacturer’s instructions for proper cleaning methods, as some valves may be detachable for more thorough cleaning. Keeping the valve clean and free from debris ensures its smooth operation.
Properly setting up and using the pressure release valve on your electric pressure cooker guarantees safe and efficient cooking experiences. Now that you have successfully set up the pressure release valve, we can move on to the next section, which covers adding liquid and ingredients to your cooker.
Adding Liquid and Ingredients
When using an electric pressure cooker, it’s important to add the right amount of liquid and ingredients to ensure proper cooking and flavorful results. In this section, we will guide you through the process of adding liquid and ingredients to your electric pressure cooker:
1. Follow Recipe Guidelines: Whether you’re using a specific recipe or creating your own, it’s essential to follow the recommended guidelines for the amount of liquid and ingredients. These guidelines will help achieve the desired taste, texture, and consistency of your dish.
2. Determine Required Liquid: Most recipes will specify the amount of liquid required. As a general rule, you’ll need to add at least 1 cup (240 ml) of liquid to create the necessary steam and pressure for cooking. Common liquids include water, broth, stock, wine, or a combination of these.
3. Consider Ingredients’ Moisture Content: Take into account the moisture content of the ingredients you’re using. Ingredients such as vegetables, fruits, and proteins like meat or tofu contribute moisture during the cooking process. Adjust the amount of additional liquid accordingly to avoid excess liquid buildup or a dry final result.
4. Measuring Liquids: Use a measuring cup or scale to accurately measure the required amount of liquid. Pour the liquid into the cooking pot of your electric pressure cooker, ensuring it stays below the maximum fill line. Overfilling may result in liquid spillover or clogging of the pressure release valve.
5. Adding Ingredients: After adding the required liquid, it’s time to add your other ingredients, such as vegetables, meats, grains, or spices. Follow the recipe instructions on the order and arrangement of the ingredients to ensure even cooking and flavor distribution.
6. Stirring and Layering: Depending on the recipe, you may need to stir the ingredients together or layer them in the cooking pot. Stirring is beneficial for dishes like soups or stews, while layering is often used for layered meals like lasagna or casseroles. Follow the recipe’s instructions for the best results.
7. Avoid Overfilling: It’s crucial to avoid overfilling your electric pressure cooker to ensure safe and efficient cooking. Leave sufficient space between the ingredients and the maximum fill line indicated on the inner pot. This space allows for the expansion of food and the release of steam during the cooking process.
8. Wipe the Rim Clean: Before securing the lid of the pressure cooker, ensure that the rim of the cooking pot is clean and free from any food particles or liquid. Wiping the rim clean helps achieve a proper seal and prevents any obstruction during the cooking process.
9. Adjust Seasonings: Take a moment to taste and adjust the seasonings of your dish before sealing the lid. Keep in mind that the flavor may intensify during the pressure cooking process, so it’s best to start with slightly less seasoning and adjust as needed later.
10. Secure the Lid: Once you’ve added the appropriate liquid and ingredients and made any necessary adjustments, securely attach the lid to your electric pressure cooker. Ensure that the lid is properly aligned and locked in place before proceeding with the cooking process.
By following these steps, you can confidently add the right amount of liquid and ingredients to your electric pressure cooker. Now that your ingredients are in place, it’s time to move on to the next section, which covers selecting the cooking time and pressure level.
Selecting the Cooking Time and Pressure Level
Choosing the correct cooking time and pressure level is key to achieving perfectly cooked dishes in your electric pressure cooker. In this section, we will guide you through the process of selecting the appropriate cooking time and pressure level for your desired results:
1. Refer to Recipe Guidelines: If you’re following a specific recipe, refer to the cooking instructions for the recommended cooking time and pressure level. These guidelines have been tested to ensure optimal results. It’s best to start with the recommended settings and adjust based on your preferences and experience.
2. Adjust Cooking Time: The cooking time in an electric pressure cooker is generally shorter than traditional methods. Keep in mind that various factors, such as the quantity and size of ingredients, can affect the cooking time. Use the recipe’s recommended cooking time as a starting point and adjust based on your personal taste and the specific ingredients you’re using.
3. Programmable Options: Electric pressure cookers often have programmable options that allow you to set specific cooking times and pressure levels. These programmable functions ensure precision and consistency in cooking, especially when experimenting with different recipes or making adjustments based on personal preference.
4. Set the Pressure Level: Most electric pressure cookers offer multiple pressure levels, typically high pressure and low pressure. High pressure is suitable for most recipes, as it allows for faster cooking times and tenderizing tougher cuts of meat. Low pressure is generally used for more delicate ingredients or when you want to prevent overcooking.
5. Manual Setting: If you prefer to have more control over the cooking time and pressure level, you can use the manual setting on your electric pressure cooker. This allows you to manually adjust the cooking time and pressure level according to your specific requirements. Refer to the instruction manual for detailed steps on how to use the manual setting on your specific model.
6. Keep Warm Function: Many electric pressure cookers come with a keep warm function that automatically kicks in after the cooking time is complete. This function maintains the temperature of your cooked food, keeping it warm until you’re ready to serve. It’s a convenient feature that allows you to delay serving while keeping your food at a safe temperature.
7. Quick Cooking vs. Slow Cooking: Electric pressure cookers are known for their quick cooking capabilities. However, some models also offer slow cooking functions for dishes that benefit from longer, gentle cooking. Slow cooking allows flavors to develop more fully and is ideal for dishes like stews or braised meats.
8. Trial and Error: It may take some trial and error to find the perfect cooking time and pressure level that suits your preferences. Don’t be afraid to experiment and adjust the settings based on your taste and the outcome of your dishes. Keep notes on your cooking times and pressure levels for future reference.
9. Safety Considerations: While you may want to reduce the cooking time to expedite the process, always prioritize safety. Ensure that ingredients are properly cooked and reach a safe internal temperature. Follow recommended guidelines for cooking times to minimize the risk of undercooking and potential foodborne illnesses.
10. Keep an Eye on Cooking Progress: Once you’ve set the cooking time and pressure level, keep an eye on the progress of your dish. Some electric pressure cookers have an indicator that shows when the cooker is pressurized and when the cooking time has elapsed. This allows you to monitor the cooking process and make any necessary adjustments.
By selecting the appropriate cooking time and pressure level, you can achieve delectable results in your electric pressure cooker. Now that you’ve set the cooking parameters, let’s move on to the next section, where we will explore the process of starting the cooking process.
Starting the Cooking Process
Now that you have set the cooking time and pressure level, it’s time to start the cooking process in your electric pressure cooker. You’re just a few steps away from enjoying a delicious meal. Let’s go through the process of starting the cooking process:
1. Double Check Settings: Before you begin, double-check that you have selected the correct cooking time and pressure level based on your recipe or personal preference. Confirm that the lid is properly secured and that the pressure release valve is set to the desired position.
2. Plug In and Power On: Ensure that your electric pressure cooker is plugged into a power source and power it on. The control panel or display should light up, indicating that the cooker is ready for operation. Some models may require you to select a cooking mode or preheat the cooker before proceeding.
3. Preheat (If Required): Depending on your recipe or the cooking mode you’ve chosen, you may need to preheat the electric pressure cooker before adding your ingredients. Refer to the recipe or instruction manual for specific guidelines on preheating, if necessary.
4. Add Food: With the cooker preheated (if required), carefully add your prepared ingredients to the cooker pot. Follow the recipe’s instructions on the order and arrangement of the ingredients. Ensure that you do not exceed the maximum fill line mentioned on the inner pot.
5. Seal the Lid: Once the ingredients are in the pot, securely seal the lid of the electric pressure cooker by aligning it with the pot handles and twisting or locking it in place. Make sure the lid is properly sealed to prevent steam leaks during the cooking process.
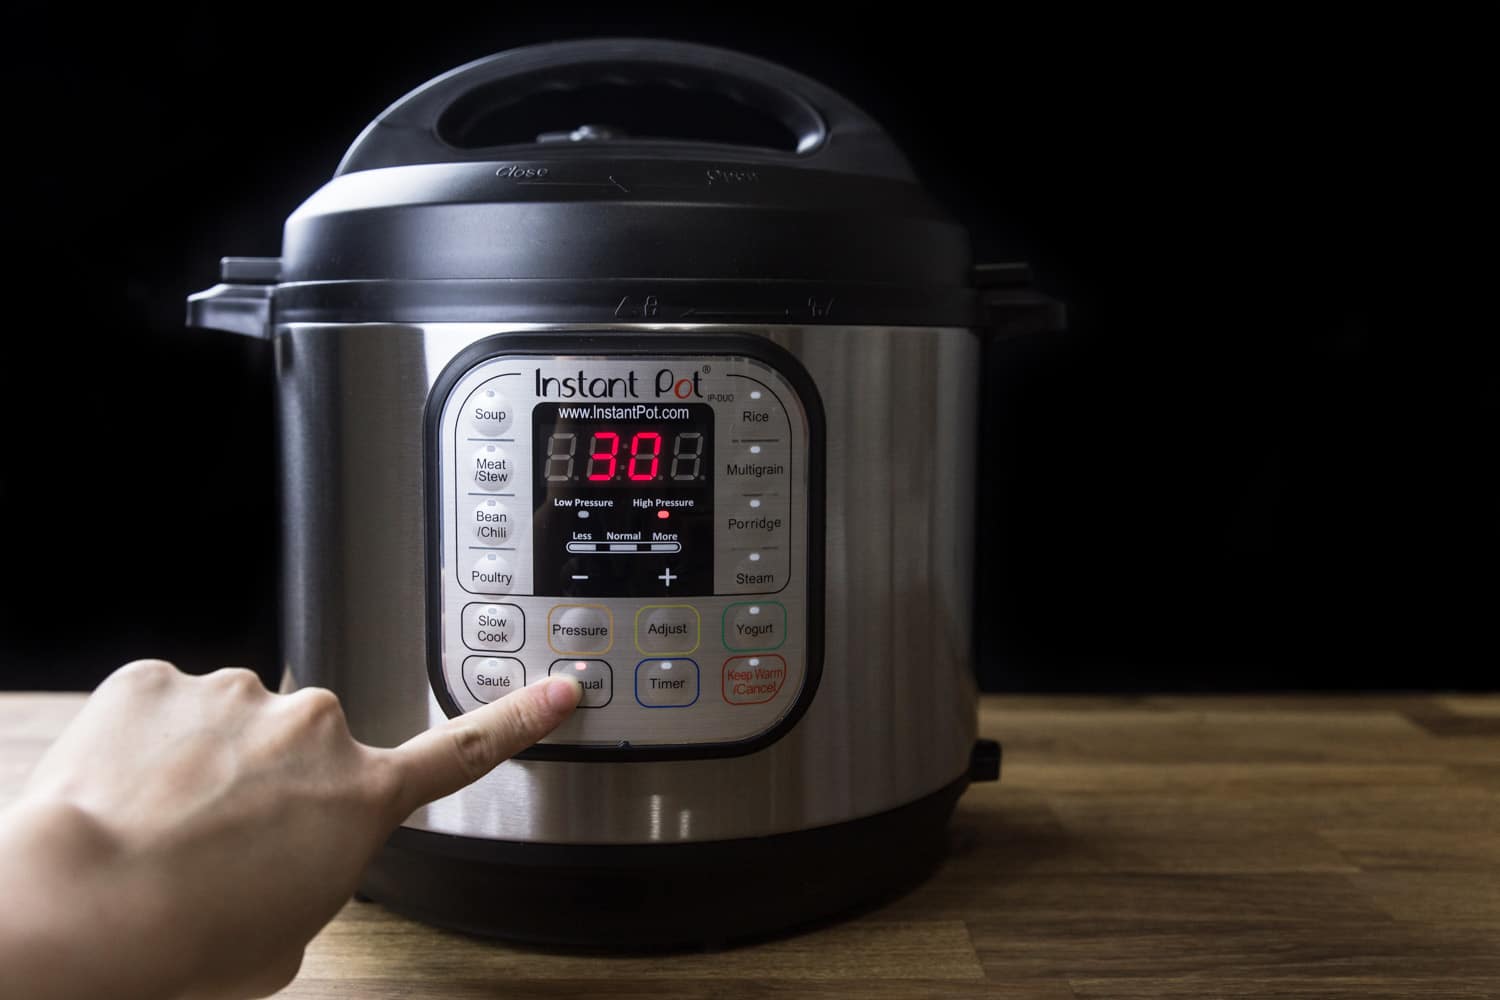
6. Select Cooking Mode: If your electric pressure cooker offers different cooking modes or presets for specific recipes, select the appropriate mode for your dish. The control panel may include options like “Rice,” “Soup,” “Meat,” or “Manual” depending on your model. Choose the mode that best matches your recipe or cooking style.
7. Start the Cooking Process: Once you have selected the desired cooking mode, start the cooking process by pressing the corresponding button on the control panel. The electric pressure cooker will begin to build pressure, and the cooking time will start counting down. The display or indicator lights will show the progress of the cooking process.
8. Wait for Pressure Buildup: It takes some time for the electric pressure cooker to reach the desired pressure level. During this time, you may hear the sound of steam escaping. This is normal and indicates that the cooker is building up pressure. Once the cooker has reached the target pressure, the cooking time will start counting down.
9. Avoid opening the lid: During the cooking process, it’s crucial to avoid opening the lid unless necessary. Opening the lid can disrupt the pressure and prolong the cooking time. If you need to make any adjustments or add ingredients, refer to the recipe’s guidelines or consult the instruction manual for proper procedures.
10. End of Cooking Cycle: When the cooking time is complete, most electric pressure cookers will automatically switch to a keep warm function to maintain the temperature of your food until you’re ready to serve. Some models may emit a beep or audible signal to indicate the end of the cooking cycle.
Once the cooking cycle is complete, you can choose to release the pressure using either the Quick Release or Natural Release method, depending on your recipe or personal preference. It’s important to follow the recipe’s instructions for pressure release to achieve the desired results.
With the cooking process underway, get ready to savor the delightful aroma and enjoy the wonderful flavors of your meal. In the next section, we will explore the differences between the Quick Release and Natural Release methods and discuss when to use each one.
Natural Release vs. Quick Release
When using an electric pressure cooker, you have the option to release the pressure in two main ways: Natural Release and Quick Release. Each method has its purpose and is used in different cooking scenarios. Let’s take a closer look at Natural Release and Quick Release to understand when to use each one:
Natural Release:
Natural Release is the process of allowing the pressure inside the cooker to decrease naturally over time. It involves leaving the cooker undisturbed after the cooking cycle is complete, allowing the pressure to slowly dissipate. This process typically takes anywhere from 10 to 20 minutes, but it may vary depending on the recipe and the amount of pressure built up during cooking.
Natural Release is ideal for foods with a high liquid content or delicate ingredients. It helps to maintain the texture, prevent overcooking, and allows flavors to develop further. It is particularly useful for dishes like stews, soups, or braised meats where a longer cooking time is desired. It also allows for more thorough cooking of tougher cuts of meat, resulting in tender and succulent outcomes. Natural Release is recommended for recipes that have a longer cooking time, as it gives the food extra time to absorb flavors and reach the desired doneness.
Quick Release:
Quick Release, also known as Manual Release or Steam Release, is the process of manually releasing the pressure from the cooker using the pressure release valve. It is achieved by turning the valve from the Sealed or Locked position to the Venting position, allowing steam to quickly escape from the cooker. This method rapidly reduces the pressure inside the cooker and stops the cooking process immediately.
Quick Release is typically used for foods that benefit from a shorter cooking time or when you need to prevent overcooking of delicate ingredients such as seafood, vegetables, or fruits. It’s particularly handy for dishes where you want to retain crispness or minimize the risk of food becoming mushy. Quick Release is also useful when time is of the essence, and you need to release pressure quickly to check the doneness of the food or add additional ingredients.
It’s important to note that when using the Quick Release method, hot steam is released rapidly from the cooker, so it’s crucial to exercise caution. Ensure that your hands and face are away from the steam release valve, and use long utensils or tongs to operate the valve.
Some recipes may recommend a combination of Natural Release and Quick Release. This is known as a Hybrid Release or a Controlled Release method. It involves starting with Natural Release for a specific period and then using Quick Release to release any remaining pressure quickly. This method allows for the benefits of both methods and is especially helpful for recipes that require precise control of texture and flavor.
The choice between Natural Release and Quick Release depends on the recipe and the desired outcome. Always follow the recipe’s guidelines or consult the instruction manual of your electric pressure cooker to determine which method is most suitable for your specific dish.
In the next section, we will explore the steps for cleaning and maintaining your electric pressure cooker to ensure its longevity and optimal performance.
Cleaning and Maintenance
Cleaning and maintaining your electric pressure cooker is crucial for its long-term durability and performance. Regular maintenance ensures that your cooker remains in optimal condition and continues to provide delicious meals for years to come. Let’s delve into the steps for cleaning and maintaining your electric pressure cooker:
1. Unplug and Allow to Cool: Before cleaning your electric pressure cooker, make sure it is unplugged and has cooled down. Safety is paramount, and it’s essential to avoid any potential accidents or burns.
2. Disassemble Removable Parts: Start by disassembling the removable parts of your electric pressure cooker, such as the sealing ring, condensation collector, and any other detachable accessories. Check the instruction manual for specific guidance on the disassembly process for your particular model.
3. Clean with Warm, Soapy Water: Wash the removable parts in warm, soapy water to remove any food residue or oils. Use a non-abrasive sponge or cloth to gently clean each part. Make sure to rinse thoroughly to remove all soap residue.
4. Clean the Main Housing: Use a damp cloth or sponge to wipe down the exterior of the electric pressure cooker, including the control panel and the lid. If there are any stubborn stains or spills, you can use a mild kitchen cleaner or a mixture of baking soda and water. Avoid using harsh abrasive cleaners that can damage the surface.
5. Clean the Pressure Release Valve and Vent: Inspect the pressure release valve and vent area for any buildup or clogs. Use a small brush, such as a toothbrush, to gently clean these parts. Ensure that the pressure release valve moves freely and that the vent is clear of any debris. Refer to the instruction manual for detailed cleaning instructions specific to your model.
6. Clean the Inner Pot: Remove the inner pot from the electric pressure cooker and wash it with warm, soapy water. Pay special attention to any food particles or residue that may be stuck to the bottom or sides of the pot. Use a non-abrasive sponge or cloth to avoid scratching the surface of the pot.
7. Check the Sealing Ring: Inspect the sealing ring for any damage or signs of wear and tear. Over time, the sealing ring may become discolored or develop an odor. If necessary, replace the sealing ring according to the manufacturer’s recommendations. A properly maintained sealing ring ensures a good seal and efficient pressure cooking.
8. Reassemble and Store Properly: Once all the parts are clean and dry, reassemble your electric pressure cooker. Make sure that each part is properly aligned and securely in place. Store your cooker in a cool, dry area away from direct sunlight or excessive heat.
9. Regular Inspection: Regularly inspect your electric pressure cooker for any signs of wear, damage, or malfunction. Check for loose or damaged parts, any unusual odors, or irregularities in performance. If you notice any issues, refer to the instruction manual or contact the manufacturer for assistance.
10. Follow Manufacturer’s Guidelines: Always follow the specific cleaning and maintenance guidelines provided by the manufacturer. Different electric pressure cooker models may have unique features or requirements. Abiding by the manufacturer’s instructions ensures the longevity and optimal performance of your specific cooker.
By following these steps for cleaning and maintenance, you can extend the lifespan of your electric pressure cooker and continue to enjoy delicious meals for years to come. With a little regular care and attention, your cooker will reward you with countless delightful culinary experiences.
In the final section, we will share some valuable tips and tricks to enhance your experience of using an electric pressure cooker.
Tips and Tricks for Using an Electric Pressure Cooker
Using an electric pressure cooker can be a game-changer in your kitchen, streamlining your cooking process and delivering delicious meals in no time. To help you make the most of your electric pressure cooker, here are some valuable tips and tricks:
1. Start with Basic Recipes: If you’re new to using an electric pressure cooker, begin with simple recipes to familiarize yourself with the cooking process and understand how your cooker operates. Once you gain confidence, you can gradually experiment with more complex dishes.
2. Adapt Recipes for Pressure Cooking: Not all recipes are designed for pressure cooking. When adapting recipes, adjust cooking times and ingredients accordingly. Remember that pressure cooking requires less liquid due to the sealed environment, so reduce the liquid amounts from traditional recipes.
3. Use the Sauté Function: Many electric pressure cookers have a sauté function that allows you to brown ingredients or reduce sauces before pressure cooking. This additional step adds depth of flavor and saves time by eliminating the need for extra pots or pans.
4. Take Advantage of Stackable Inserts: Stackable inserts offer the ability to cook multiple dishes simultaneously, which is especially handy for one-pot meals or cooking sides simultaneously with the main course. Stackable steamer baskets or pans can help you maximize the space in your electric pressure cooker.
5. Utilize the Delay Start Function: The delay start function allows you to set a specific time for your electric pressure cooker to initiate the cooking process. This feature is particularly useful for planning meals in advance and ensuring they are ready at a specific time, even if you’re not present in the kitchen.
6. Experiment with Flavors and Spices: Pressure cooking intensifies flavors, so don’t be afraid to experiment with different spices, herbs, and seasonings. Be mindful that some flavors can become more pronounced, so start with smaller amounts and adjust as needed.
7. Release Pressure in a Safe Area: When using the Quick Release method, ensure that you release pressure in a safe area away from children, pets, and delicate surfaces. The forceful release of hot steam can cause accidents or damage, so exercise caution.
8. Use Natural Release for Meat: For tender and juicy meat, allow for Natural Release when cooking proteins. This extra time allows the meat to relax and tenderize, resulting in more succulent and flavorful dishes.
9. Plan for Additional Cooking Time: While pressure cooking is generally faster than traditional methods, it’s important to factor in additional time for the cooker to reach pressure and release pressure after cooking. Consider these extra minutes when planning your meals.
10. Join an Electric Pressure Cooker Community: Engage with online communities, forums, or social media groups dedicated to electric pressure cooking. These platforms offer a wealth of tips, recipe ideas, and troubleshooting advice from experienced users, helping you expand your cooking repertoire.
Remember, practice makes perfect when it comes to using an electric pressure cooker. Don’t get discouraged if your first attempts aren’t flawless. With time and experience, you’ll become more comfortable and confident in creating delicious meals with your electric pressure cooker.
Now armed with these tips and tricks, you’re ready to embark on a culinary adventure with your electric pressure cooker. Enjoy exploring new flavors, saving time in the kitchen, and delighting in the convenience of this remarkable kitchen appliance!
Conclusion
Congratulations! You have reached the end of our guide on how to set up and use an electric pressure cooker. By now, you should have a good understanding of what an electric pressure cooker is, its benefits, safety precautions, and how to use it effectively in your kitchen. You have learned about unboxing and assembling the cooker, setting up the pressure release valve, adding liquid and ingredients, selecting the cooking time and pressure level, starting the cooking process, and releasing pressure using Natural Release or Quick Release methods.
Using an electric pressure cooker opens up a world of possibilities for quick, convenient, and delicious meals. The time-saving capabilities, energy efficiency, and versatility of this kitchen appliance make it an indispensable tool for busy individuals and families. Whether you’re preparing a flavorful stew, a hearty soup, or a tenderly cooked roast, an electric pressure cooker helps you achieve outstanding results in a fraction of the time.
Always remember to follow safety precautions, read the instruction manual provided by the manufacturer, and consult reliable recipes and cooking resources. Don’t be afraid to experiment and adjust recipes to suit your personal taste and dietary preferences. With practice and experience, you’ll become more confident and creative in utilizing your electric pressure cooker to its fullest potential.
Now it’s time to unleash your culinary creativity and enjoy the countless benefits of using an electric pressure cooker. Get ready to impress your family and friends with mouthwatering dishes that are cooked quickly and bursting with flavor. Say goodbye to long hours spent in the kitchen, and embrace the convenience and efficiency of this remarkable kitchen appliance.
We hope this guide has equipped you with the necessary knowledge and inspiration to make the most of your electric pressure cooker. So, dive in, try new recipes, and have fun exploring the endless possibilities that await you in the world of electric pressure cooking!