Introduction
Welcome to the world of Android tablets! Whether you’re a tech-savvy individual or just getting started with the latest gadgets, setting up an Android tablet is a straightforward process that will have you up and running in no time. Designed to offer a portable and versatile computing experience, Android tablets provide you with a world of entertainment, productivity, and connectivity at your fingertips.
In this guide, we will walk you through the step-by-step process of setting up your Android tablet. From the initial setup to customizing your device, we’ll cover everything you need to know to get the most out of your new tablet.
Before we dive into the setup process, it’s important to make sure your tablet is fully charged. This ensures that you have enough power to complete the setup without any interruptions. So, grab your charger and plug it into a power source to give your tablet a boost before getting started.
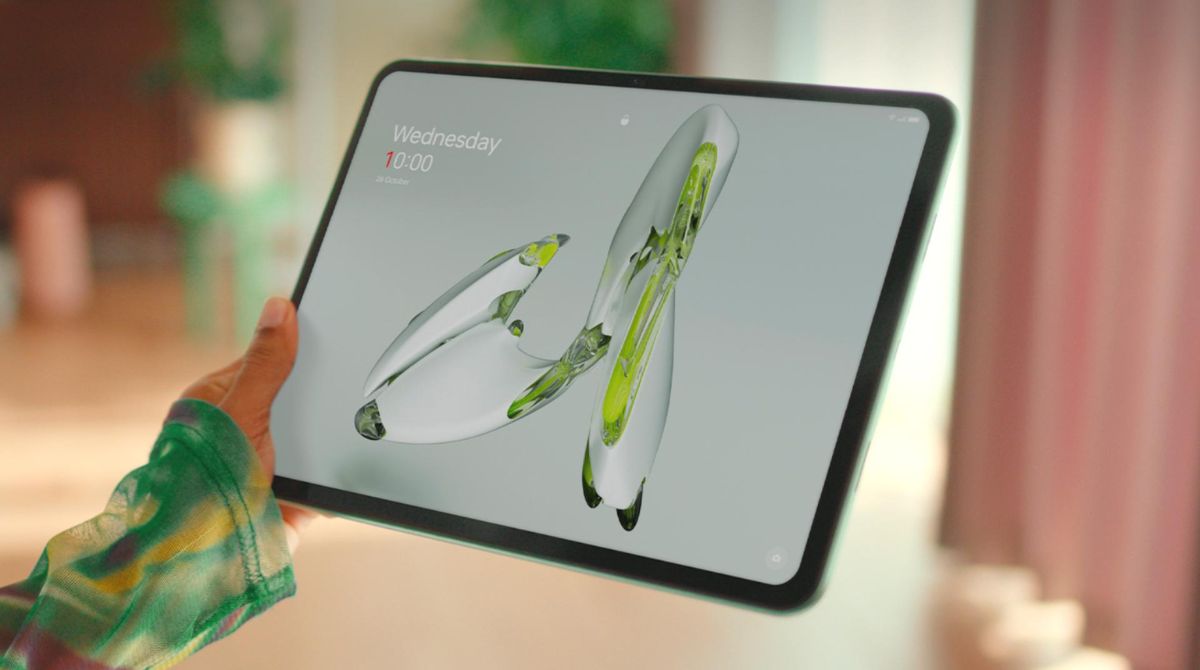
Once your tablet is charged, it’s time to power it on. Locate the power button on your tablet, usually located on the side or top of the device, and press and hold it until the screen lights up. You’ll see the manufacturer’s logo appear, indicating that the tablet is turning on. After a few moments, you’ll be greeted with the setup screen, where you can begin the initial configuration of your tablet.
Now, let’s get started on the exciting journey of setting up your Android tablet! Just follow the steps ahead, and you’ll be ready to explore all the features and possibilities that your new tablet has to offer.
Step 1: Charge the tablet
The first step in setting up your Android tablet is to ensure that it has enough power to complete the setup process. It’s always a good idea to charge your tablet fully before starting, as this will ensure that you have uninterrupted power during the setup and customization process.
To charge your tablet, locate the charging port on the device. It is typically located at the bottom or side of the tablet. Take the charging cable that came with your tablet and plug it into the charging port. Then, connect the other end of the cable to a power source, such as a wall outlet or USB port on your computer.
Once your tablet is connected to a power source, you should see a charging indicator on the screen. This can be a battery icon or a percentage that indicates the amount of charge your tablet has. Let your tablet charge for at least 30 minutes to ensure that it has enough power for the setup process.
During the charging process, it’s essential to avoid using your tablet as the setup process may drain the battery and potentially interrupt the setup. So, it’s best to let your tablet charge undisturbed until it reaches a sufficient level of battery power.
Once your tablet is fully charged, you are ready to move on to the next step of the setup process. Charging your tablet ensures that you have a reliable power source throughout the setup and customization process, allowing you to set up your tablet without any interruptions or concerns about running out of battery.
Remember, maintaining a well-charged tablet is crucial for optimal performance and longevity. It’s recommended to charge your tablet regularly and avoid letting the battery drain completely before recharging it. This will help extend the overall battery life of your tablet and ensure that it’s always ready for use when you need it.
Step 2: Power on the tablet
Now that your tablet is charged and ready to go, it’s time to power it on. To turn on your Android tablet, locate the power button. The location of the power button may vary depending on the model and manufacturer of your tablet, but it is typically located on the side or top edge of the device.
Once you’ve located the power button, press and hold it for a few seconds until you see the screen come to life. You may also see the manufacturer’s logo appear on the screen, indicating that your tablet is booting up.
After a brief moment, you will be greeted with the setup screen. This is where you will begin the initial configuration of your tablet. The setup process may vary slightly depending on the version of Android you are running and any modifications made by the manufacturer, but the basic steps remain the same.
On the setup screen, you will be prompted to select your language and region preferences. Choose the language that you are most comfortable with and the region that corresponds to your location. This ensures that your tablet displays information and content in the language and settings that are most relevant to you.
Once you have selected your language and region, you may be prompted to connect to a Wi-Fi network. Connecting to a Wi-Fi network during the setup process allows your tablet to download any necessary updates and ensures that you have a stable internet connection for the remainder of the setup process.
If you have a Wi-Fi network available, choose the network from the list of available networks and enter the password if required. If you don’t have access to Wi-Fi at the moment, you can skip this step and connect to a network later.
After connecting to a Wi-Fi network, your tablet may prompt you to sign in to a Google account. If you already have a Google account, enter your credentials to sign in. If you don’t have a Google account, you can create one during the setup process or skip this step and create an account later.
Once you have completed these steps, your tablet will continue with the setup process, allowing you to customize your settings, install necessary apps, and transfer data from your old device if desired. We’ll cover these steps in more detail in the following sections.
Powering on your Android tablet is the gateway to all the possibilities and features it has to offer. With the device turned on, you’re ready to dive into the exciting world of apps, entertainment, and productivity right at your fingertips.
Step 3: Select language and region
After powering on your Android tablet, the next step in the setup process is to select your preferred language and region. This ensures that your tablet displays information and content in the language and settings that are most relevant to you.
On the setup screen, you will be prompted to choose your preferred language. Scroll through the list of available languages and select the one that you are most comfortable with. This will determine the language used for system notifications, menus, and other text displayed on your tablet.
Once you have selected your language, you will then be asked to choose your region. Select the region that corresponds to your location. The region setting helps your tablet provide more accurate information such as local date and time, currency, weather, and other location-specific services.
The language and region settings can usually be customized later if needed, but it’s important to choose the correct options during the initial setup to ensure a smooth and tailored experience with your tablet.
It’s worth noting that the language and region options may vary slightly depending on the version of Android you are running and any modifications made by the manufacturer. However, the process should be relatively straightforward and intuitive.
By selecting the appropriate language and region, you can optimize your user experience on the tablet. Your Android device will display content and information in a way that is familiar and comfortable to you, making it easier to navigate and utilize the various features and functionalities of your tablet.
Once you have selected your language and region preferences, you can proceed with the setup process to connect to a Wi-Fi network, sign in to a Google account, and customize other settings according to your preferences. We will cover these steps in detail in the following sections.
Now, take a moment to choose your preferred language and region, and get ready to explore and enjoy your Android tablet in a way that suits you best.
Step 4: Connect to Wi-Fi network
Once you have selected your language and region preferences, the next step in setting up your Android tablet is to connect to a Wi-Fi network. Connecting to Wi-Fi allows your tablet to access the internet, download updates, and utilize online services and features.
On the setup screen, you will see a list of available Wi-Fi networks in your vicinity. Tap on the network you want to connect to. If the network is protected, you will be prompted to enter the network password.
Enter the password carefully, making sure to type it correctly. Passwords are case-sensitive, so pay attention to uppercase and lowercase letters. If you are unsure about the password, check with the network administrator or refer to the Wi-Fi router’s documentation.
If you don’t have access to a Wi-Fi network at the moment, you can choose to skip this step for now and connect to a network later. However, connecting to Wi-Fi during the setup process is recommended to ensure a smooth and uninterrupted experience.
It’s worth noting that if you are setting up your tablet for the first time, you may encounter a mobile data setup wizard. This wizard helps you choose whether you want to use your mobile data or Wi-Fi for internet connectivity. Select your preferred option based on your data plan and availability of Wi-Fi networks.
Once you have successfully connected to a Wi-Fi network, your tablet will confirm the connection and may proceed with downloading any necessary updates. This may take some time depending on the size and number of updates, so ensure that your tablet is connected to a stable Wi-Fi network and has sufficient battery power.
Connecting to a Wi-Fi network during the setup process ensures that your tablet stays up-to-date and allows you to access online services such as email, social media, and app downloads. It also enables you to make the most of various features and functionalities that require an internet connection.
Now that your tablet is connected to a Wi-Fi network, you can move forward with the setup process to sign in to your Google account, customize settings, install necessary apps, and transfer data from your old device if desired. We will cover these steps in detail in the following sections.
With your tablet connected to Wi-Fi, you are one step closer to fully utilizing all the exciting features and possibilities that it has to offer. Get ready to explore and enjoy a connected and convenient experience with your Android tablet.
Step 5: Sign in to Google account
Signing in to your Google account is an essential step in setting up your Android tablet. Your Google account provides access to various Google services, including Gmail, Google Drive, Google Play Store, and more. It also helps you personalize your tablet experience and sync your data across devices.
On the setup screen, you will see an option to sign in to your Google account. If you already have a Google account, enter your email address and password and tap on the Sign In button. If you don’t have a Google account yet, you can create one by tapping on the Create account option.
If you choose to create a new Google account, you will be guided through the process of providing your personal details, setting up a username and password, and agreeing to Google’s terms and conditions. Make sure to choose a secure password and keep it confidential to protect your account.
Once you have signed in or created a Google account, your tablet will begin syncing your data. This includes your contacts, calendar events, app data, and other information associated with your Google account. Syncing your data allows you to access your information across multiple devices seamlessly.
In addition to syncing data, signing in to your Google account also enables you to download apps and games from the Google Play Store. You can explore a vast library of apps, ranging from social media and productivity tools to entertainment and games.
As you sign in to your Google account, you may also be prompted to set up additional security measures, such as adding a backup phone number or enabling two-factor authentication. These measures help protect your account from unauthorized access and provide an extra layer of security for your data.
Signing in to your Google account not only enhances the functionality and accessibility of your Android tablet but also ensures a seamless integration with other Google services. It allows you to take advantage of the full range of features and benefits that come with owning an Android device.
Now that you’ve signed in to your Google account, you can proceed with customizing your settings, installing necessary apps, and exploring the various features and functionalities of your Android tablet. We will cover these steps in detail in the following sections.
With your Google account connected to your tablet, you’re ready to unlock a world of possibilities and make the most of your Android experience. Get ready to personalize, sync, and discover all that your tablet has to offer!
Step 6: Set up security
Setting up security measures on your Android tablet is crucial to safeguard your device and protect your personal information. Fortunately, Android provides several options to help you secure your tablet and ensure that only authorized users have access to your device.
During the setup process, you will be prompted to set up a lock screen. The lock screen serves as a barrier between your tablet and unauthorized access. There are several types of lock screen options available, including PIN, pattern, password, and biometric options such as fingerprint or face recognition.
Choose a lock screen option that you find most convenient and secure. If you prefer a PIN, pattern, or password, follow the on-screen instructions to set it up. Make sure to choose a strong PIN, pattern, or password that is not easily guessable but easy for you to remember.
If your tablet supports biometric authentication like fingerprint or face recognition, you can choose to set it up as well. These options provide quick and convenient access to your device while adding an additional layer of security.
In addition to the lock screen, Android also offers advanced security features such as Find My Device, which can help you locate, lock, or erase your tablet in case it gets lost or stolen. Make sure to enable Find My Device and follow the instructions to set it up during the initial setup process.
Another important security consideration is app permissions. Android allows you to determine which permissions you want to grant to each app installed on your tablet. During the setup process, you may be prompted to review and grant permission requests from certain apps. Carefully evaluate each permission request and decide which permissions you are comfortable granting.
It’s also a good idea to keep your tablet’s software up to date. Android periodically releases updates to enhance security and fix any vulnerabilities. Make sure to enable automatic updates or manually check for updates regularly to ensure that your tablet’s software is always up to date.
Lastly, it’s important to be vigilant and practice safe browsing habits. Be cautious when downloading apps from third-party sources and avoid clicking on suspicious links or downloading files from unknown sources. Install a reputable antivirus or security app from the Google Play Store to further protect your tablet from malware and other online threats.
By setting up security measures on your Android tablet, you can have peace of mind knowing that your device and personal information are protected. Take the time to configure your lock screen, review app permissions, enable Find My Device, keep your software up to date, and practice safe browsing to ensure a secure and enjoyable experience with your tablet.
With your tablet securely set up, you’re ready to move on to the next steps of customizing settings, installing necessary apps, and exploring all the exciting features and possibilities that your Android tablet has to offer.
Step 7: Install necessary apps
Now that your Android tablet is set up and secured, it’s time to personalize it by installing the necessary apps that suit your needs and interests. The Google Play Store is the hub for downloading and installing a wide variety of apps, ranging from productivity tools to entertainment and everything in between.
To access the Google Play Store, locate the Play Store app on your tablet’s home screen or in the app drawer. Tap on it to open the Play Store.
Once inside the Play Store, you can explore apps using the search bar or browse through categories and recommendations. There are apps available for productivity, social media, gaming, photography, fitness, and much more, so take your time to discover the ones that align with your preferences.
When you find an app you want to install, tap on it to open the app’s page. Here, you can read the app’s description, check user ratings and reviews, and view screenshots or videos to get a better sense of its features and functionality.
If you decide to install the app, tap on the “Install” or “Get” button. Depending on your tablet’s settings, you may need to grant certain permissions for the app to install or access specific features on your tablet. Review the permissions and tap “Accept” or “Allow” to proceed with the installation.
Apps are generally downloaded and installed automatically, so sit back and let your tablet do the work. Once the installation is complete, you’ll find the app’s icon on your home screen or in the app drawer. Tap on the app’s icon to launch it and start using its features.
Remember that installing too many apps can affect the performance and storage capacity of your tablet. Be mindful of the apps you install and regularly review and uninstall any apps that you no longer use.
In addition to apps, you may also want to consider installing useful widgets and shortcuts on your home screen to enhance your tablet experience. Widgets are mini-applications that provide quick access to specific information or functions, such as weather updates or calendar events. Shortcuts allow you to directly access specific app features or actions.
By installing necessary apps and customizing your home screen with widgets and shortcuts, you can tailor your tablet to meet your specific needs and make it a truly personalized device.
With the Google Play Store at your fingertips, a world of apps awaits you. Explore, install, and make the most of the diverse range of apps available to enrich your Android tablet experience.
In the next step, we’ll cover customizing settings to further personalize your tablet and ensure it perfectly matches your preferences and requirements.
Step 8: Customize settings
Customizing the settings on your Android tablet allows you to personalize it according to your preferences and make it truly yours. By accessing the Settings menu, you can fine-tune various aspects of your tablet’s functionality, appearance, and behavior.
To access the settings, swipe down from the top of the screen to bring up the notification shade, and then tap on the gear-shaped icon in the top-right corner. This will open the Settings menu.
Within the Settings menu, you’ll find several categories, such as Wireless & Networks, Display, Sound, Apps, and more. Tap on a category to access its specific settings options.
Here are some key settings that you may want to customize:
- Wi-Fi & Networks: Adjust Wi-Fi, Bluetooth, mobile data, and other network-related settings.
- Display: Modify the screen brightness, wallpaper, sleep settings, and screen timeout duration.
- Sound: Adjust volume levels, ringtone, notification settings, and enable or disable vibration.
- Language & Input: Change the language, add or remove keyboards, and adjust typing preferences.
- Notifications: Manage how notifications are displayed, configure app-specific notification settings, and control Do Not Disturb mode.
- Accounts: Add or remove Google accounts, sync settings, and manage other account-related preferences.
- Privacy: Control app permissions, manage location settings, and configure privacy-related options.
- Security: Set up screen lock options, manage device encryption, and enable or disable security features such as Google Play Protect.
- Device Maintenance: Optimize your tablet’s performance, check for storage usage, battery usage, and manage system updates.
These are just a few examples of the settings you can customize. Take your time to explore the various categories and options available to tailor your tablet to your liking.
Aside from the system settings, many individual apps also have their own settings that you can customize to further personalize your tablet experience. These settings can usually be accessed by opening the app and tapping on the menu icon or navigating through the app’s interface.
By customizing your tablet’s settings, you can ensure that it operates according to your preferences and suits your unique needs. Take the time to adjust the settings to create a comfortable and personalized user experience.
With your tablet’s settings customized to your liking, you’re ready to use your Android tablet in a way that perfectly matches your needs and preferences. Explore the various features and functionalities with your personalized settings and discover all that your tablet has to offer.
Step 9: Transfer data from old device
If you are upgrading to a new Android tablet from an old device, you may want to transfer your data, such as contacts, photos, and apps, to ensure a seamless transition. Android provides several methods to transfer data from your old device to your new tablet.
One of the easiest and most common methods is to use Google’s built-in backup and restore feature. During the initial setup process of your new tablet, you may be asked if you want to restore data from an existing device. If you select this option, your tablet will ask you to sign in to your Google account, which should be the same account you used on your old device.
By signing in with your Google account, your tablet will automatically restore your previously backed up data, including app settings, contacts, calendar events, Chrome bookmarks, and even Wi-Fi passwords. This can save you a lot of time and effort in manually transferring data.
Another option is to use a data transfer app specifically designed for this purpose. There are several third-party apps available on the Google Play Store that allow you to transfer data from one device to another. These apps use various methods, such as Wi-Fi, Bluetooth, or even a direct cable connection to facilitate the transfer process.
To use a data transfer app, you typically need to install the app on both your old device and your new tablet. Follow the instructions provided by the app to initiate the transfer and select the types of data you want to transfer. This method is useful if you have a significant amount of data or if you prefer a more manual control over the transfer process.
If you prefer a more traditional approach, you can manually transfer your data by connecting your old device to your computer and transferring files using a USB cable. This method allows you to directly access the files on your old device and copy them to your computer. Once the files are on your computer, you can connect your new tablet and copy the files over.
Additionally, cloud storage services such as Google Drive, Dropbox, or OneDrive can also be utilized to transfer data. Upload your files from your old device to the cloud storage service, and then download them onto your new tablet. This method is convenient if you have limited storage on your devices or if you want to access your files from anywhere.
Transferring data from your old device to your new tablet ensures that you have all your important files, contacts, and apps readily available. Choose the method that works best for you and follow the instructions to complete the transfer process.
With your data safely transferred to your new tablet, you can enjoy a seamless transition and start exploring all the features and functionalities that your Android tablet has to offer.
Step 10: Explore the tablet
Congratulations! You have successfully set up your Android tablet, customized the settings, and transferred your data. Now it’s time to start exploring all the incredible features and possibilities that your tablet has to offer.
Android tablets provide a wide array of entertainment, productivity, and connectivity options. Here are a few key areas to explore:
Apps: Open the app drawer or check your home screen to discover the apps you have installed. From social media and messaging apps to productivity tools and gaming apps, there are countless options to choose from. Take the time to explore and try out different apps based on your interests and needs.
Widgets: Widgets offer quick access to information and functionality right from your home screen. Long-press on the home screen to access the widget menu and choose from a variety of widgets that you can customize and place on your home screen. Check out widgets for weather updates, calendar events, news headlines, and more.
Home screen customization: Make your tablet truly yours by customizing the home screen. Long-press on an empty space on the home screen to access various customization options, such as changing wallpapers, rearranging app icons, and creating folders. Arrange your home screen to suit your preferences and make it more efficient for your daily use.
Notification center: Swipe down from the top of the screen to open the notification center. Here, you’ll find notifications from apps, quick settings toggles, and access to more detailed settings. Customize the notification center by rearranging the quick settings toggles or choosing which notifications to display or hide.
Google Assistant: Android tablets come with built-in support for Google Assistant. Access Google Assistant by tapping and holding the home button or saying “Hey Google” if your tablet supports the voice activation feature. Use Google Assistant to set reminders, get answers to questions, play music, control smart devices, and much more.
Browsing the web: Use the pre-installed web browser or download a browser of your choice from the Google Play Store to browse the internet. Access your favorite websites, bookmark pages, and customize your browsing experience to fit your needs.
Media consumption: Android tablets provide an excellent platform for enjoying various forms of media. Use apps like YouTube, Netflix, Spotify, or your preferred media streaming apps to watch videos, listen to music, and immerse yourself in your favorite shows, movies, and songs.
Productivity tools: Take advantage of productivity apps such as Google Docs, Google Sheets, and Google Slides to create, edit, and collaborate on documents, spreadsheets, and presentations. Also, explore productivity apps for note-taking, task management, and organizing your work or personal life.
Customize settings: Don’t forget that you can continue to personalize and fine-tune your tablet’s settings even after the initial setup. Access the Settings menu to explore more options for customization and configuration.
With these suggestions in mind, feel free to delve into the rich ecosystem of apps, settings, and features available on your Android tablet. The more you explore and experiment, the more you’ll discover the countless possibilities and potentials that come with owning an Android tablet.
Remember, your tablet is a versatile and powerful tool that can enhance your productivity, keep you entertained, and keep you connected. Enjoy the journey as you uncover new features, discover exciting apps, and make the most of your Android tablet experience.
Conclusion
Congratulations on successfully setting up your Android tablet! By following the step-by-step process outlined in this guide, you have now configured your tablet, personalized the settings, and are ready to explore all the features and possibilities that your device has to offer.
From charging your tablet and powering it on to customizing settings, installing apps, and transferring data from your old device, each step in the setup process has been carefully designed to help you optimize your tablet experience.
With your tablet up and running, take the time to personalize it further by exploring different apps, customizing the home screen, and discovering useful widgets. Familiarize yourself with the notification center, make the most of Google Assistant, browse the web, and indulge in media consumption options.
As you continue to use your Android tablet, remember to keep it updated with the latest software releases to ensure optimal performance and security. Regularly check for app updates and explore the vast collection of apps available on the Google Play Store to expand your device’s capabilities.
Whether you use your tablet for work, entertainment, or a combination of both, make the most of its versatility and convenience. Stay connected with family and friends, access important documents and content on the go, and enjoy endless entertainment possibilities at your fingertips.
Lastly, don’t hesitate to refer back to this guide or seek support from online resources or community forums if you encounter any questions or issues. The Android community is vast and willing to help each other with troubleshooting and providing tips and tricks.
Now that you have set up your Android tablet and embarked on this exciting journey, enjoy using your device to its fullest potential. Embrace the opportunities it offers, adapt it to your needs, and explore new ways to leverage its capabilities.
Wishing you a delightful and rewarding experience with your Android tablet!