Introduction
Welcome to the world of Amazon tablets! Whether you’ve just purchased a new Amazon tablet or are considering getting one, this guide will walk you through the setup process to ensure you have a smooth and enjoyable experience with your device.
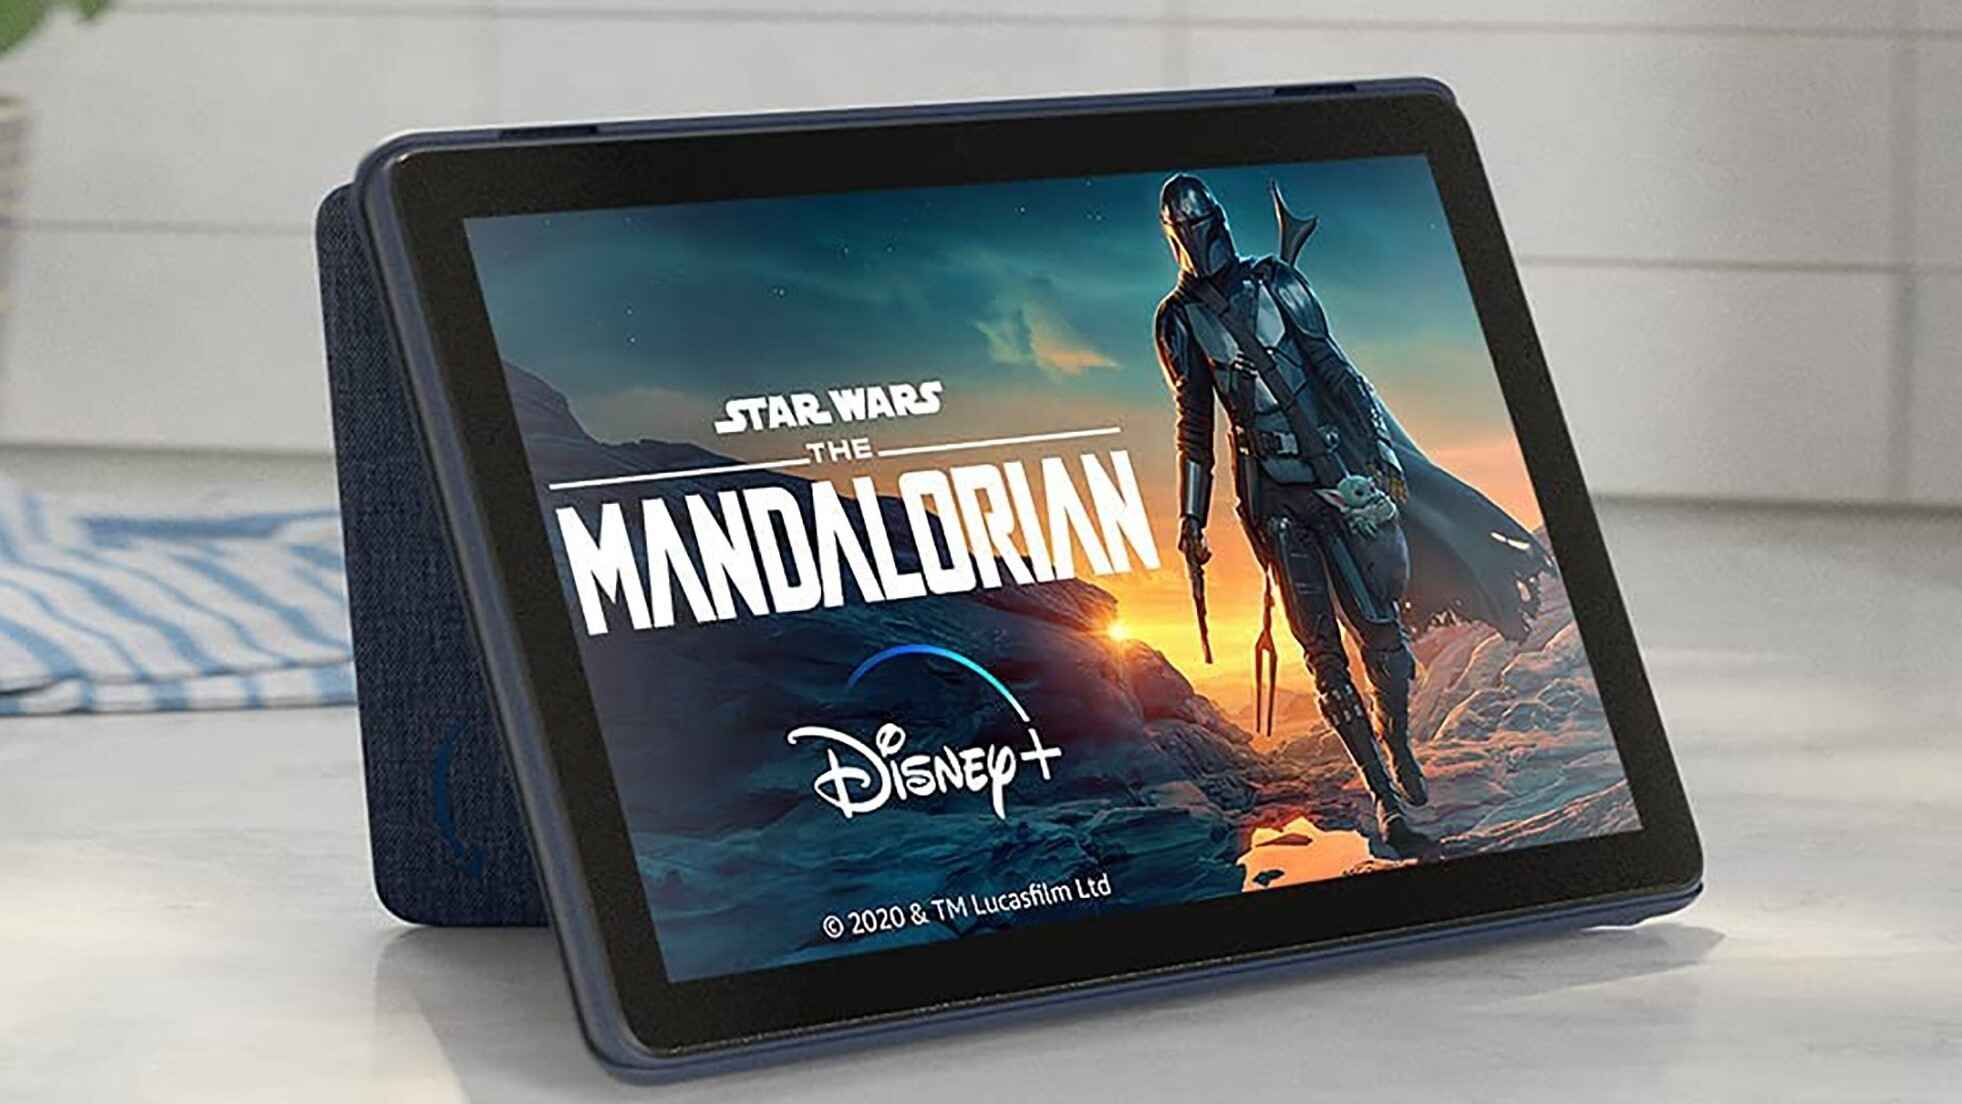
Amazon offers a range of tablets, including the popular Fire HD and Fire HD Kids Edition. These tablets provide a versatile platform for browsing the web, watching movies and TV shows, playing games, reading books, and much more. With their user-friendly interface and access to the vast Amazon Appstore, you can customize your tablet to suit your needs and preferences.
Setting up your Amazon tablet is a straightforward process that requires a few simple steps. By following this guide, you’ll be able to unbox your device, connect to Wi-Fi, sign in to your Amazon account, personalize your home screen, and manage various settings. Whether you’re a tech-savvy individual or a beginner, this guide is designed to assist you in the setup process.
Before we dive into the step-by-step instructions, it’s important to note that this guide is specifically tailored for Amazon tablets. While the setup process may differ slightly across different Amazon tablet models, the underlying principles and steps remain largely the same. So, regardless of which Amazon tablet you have, this guide will provide you with the necessary foundation to get started.
So, without further ado, let’s unbox your Amazon tablet and embark on this exciting journey of customization and personalization.
Step 1: Unboxing the Amazon Tablet
Congratulations on your new Amazon tablet! The first step in getting started is to unbox the device. Follow these simple steps to unbox your Amazon tablet:
- Locate the box: Find the box that your Amazon tablet was delivered in. It should be labeled with the Amazon logo and the specific model of the tablet.
- Remove the box cover: Take off the top cover of the box by sliding it or lifting it away.
- Take out the tablet: Carefully lift the tablet out of the box and set it aside. Be gentle to avoid any damage.
- Check the contents: Inside the box, you’ll usually find the tablet, a USB charging cable, and a power adapter. Ensure that all the necessary components are present.
- Remove any protective plastics: Your Amazon tablet may have protective plastics or stickers covering the screen or other parts. Peel off these protective coverings, taking care not to scratch or damage the device.
- Inspect the tablet: Take a moment to examine the tablet for any visible defects or damage. If you notice anything unusual, contact Amazon customer support for assistance.
Once you’ve unboxed your Amazon tablet and inspected it, you’re now ready to move on to the next step of powering on the device. Make sure to keep the box and packaging materials in a safe place in case you need them for future use, such as if you ever need to return or exchange the tablet.
Setting up your new Amazon tablet is an exciting process, and unboxing it is just the first step on your journey to exploring all the features and capabilities it offers.
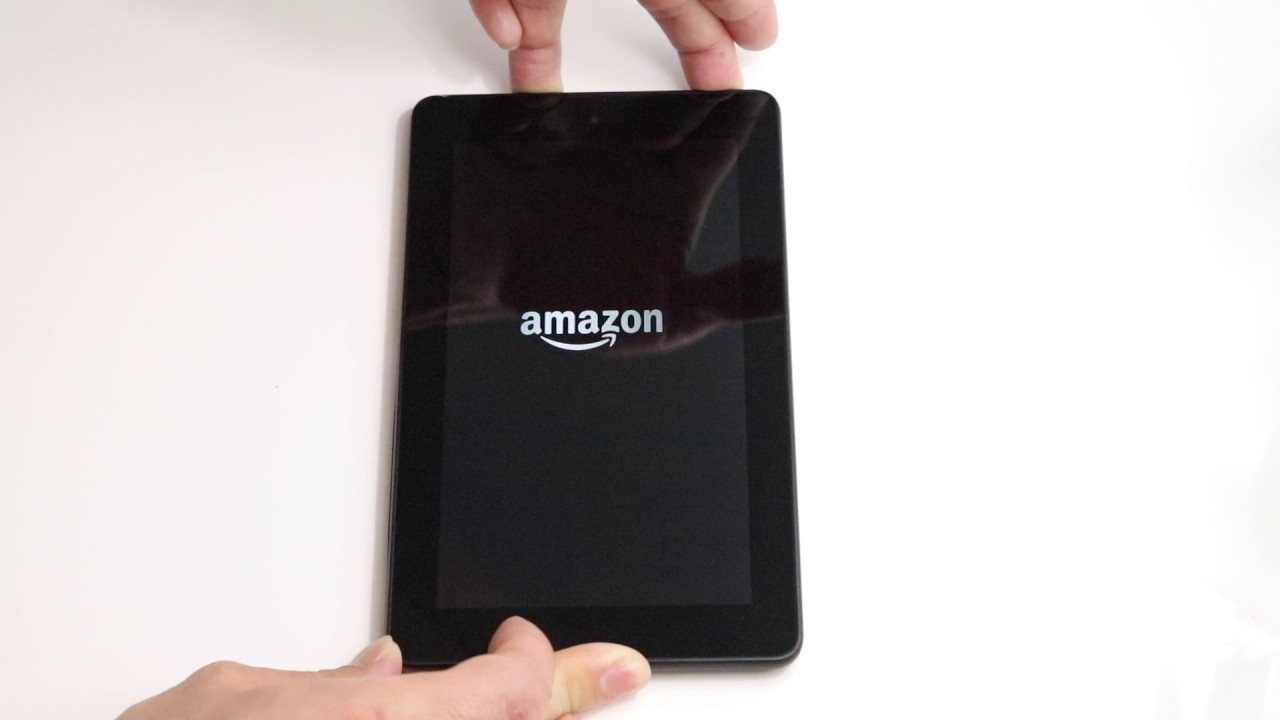
Step 2: Powering On the Device
Now that you’ve unboxed your Amazon tablet, it’s time to power it on. Follow these simple steps to get your device up and running:
- Locate the power button: Look for a small button or switch on the tablet’s edge or back panel. This is the power button.
- Press and hold the power button: Press and hold the power button for a few seconds until you see the Amazon logo or the screen lights up.
- Release the power button: Once you see the Amazon logo or the screen lights up, release the power button.
- Wait for the device to boot up: Your Amazon tablet will take a few moments to boot up and load the operating system. This process may take up to a minute, so be patient.
Once your tablet is finished booting up, you’ll be greeted with the startup screen or the lock screen, depending on your device’s settings. Now you’re ready to move on to the next step of connecting your tablet to a Wi-Fi network.
It’s important to note that if your tablet doesn’t turn on after pressing the power button, make sure it’s charged. Connect the tablet to a power source using the included USB charging cable and power adapter. Allow the tablet to charge for a while before attempting to power it on again.
Powering on your Amazon tablet is a simple and essential step in getting started with your device. Once your tablet is powered on, you can begin customizing it to your liking and exploring all the features and functionalities it has to offer.
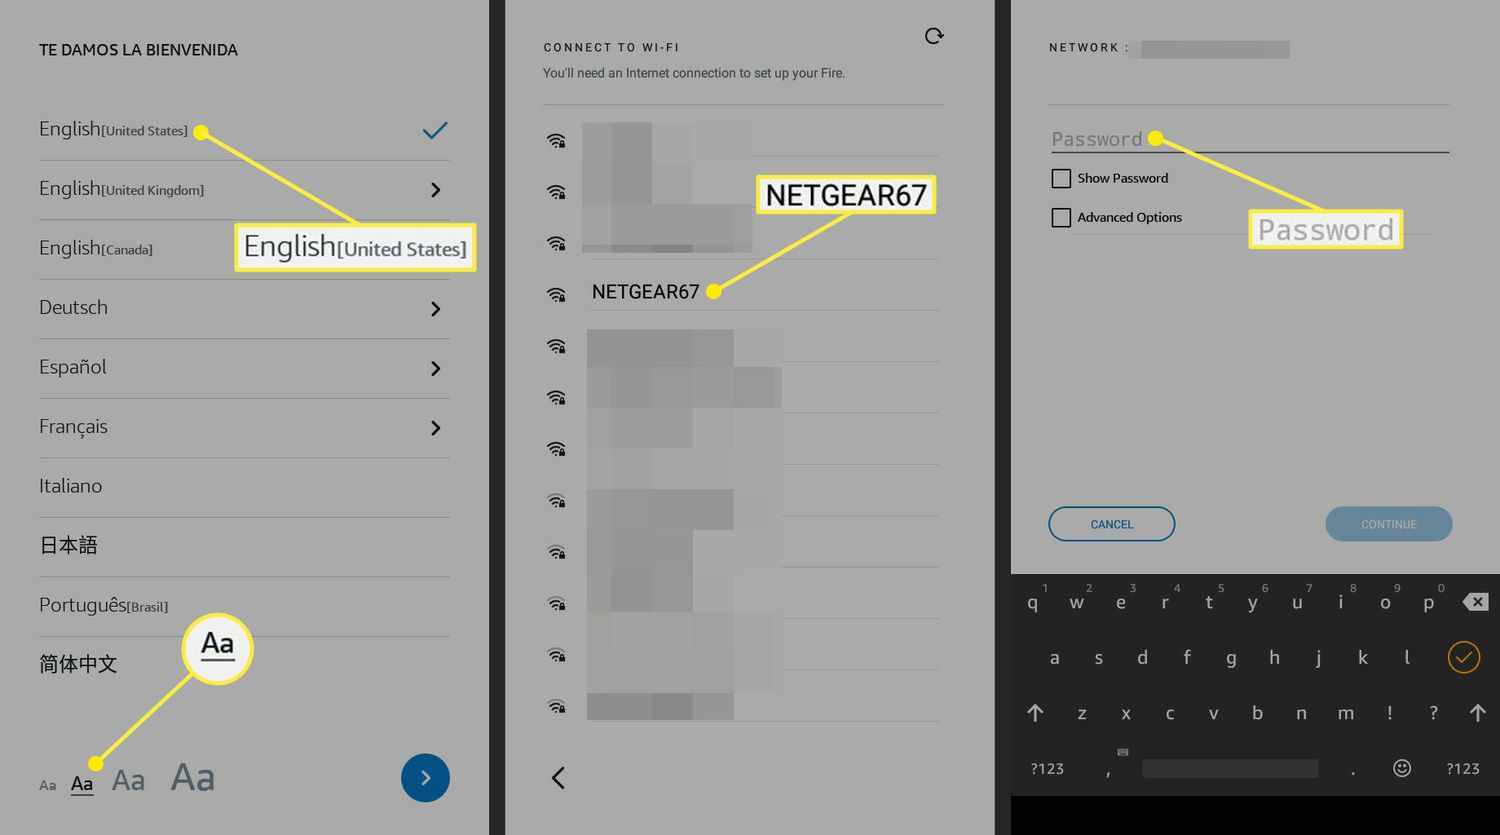
Step 3: Connecting to Wi-Fi
To unlock the full potential of your Amazon tablet, you’ll need to connect it to a Wi-Fi network. Follow these steps to establish a wireless connection:
- Access the settings menu: Swipe down from the top of the screen to open the quick settings panel. Tap on the “Settings” icon (usually represented by a gear or cogwheel).
- Select “Wi-Fi”: In the settings menu, locate and select the “Wi-Fi” option. This will open the Wi-Fi configuration screen.
- Enable Wi-Fi: If Wi-Fi is currently turned off, toggle the switch to enable it. Your device will start scanning for available Wi-Fi networks.
- Select your network: A list of available Wi-Fi networks will appear on the screen. Tap on the name of your desired network to select it.
- Enter the password: If your selected Wi-Fi network is secure, you’ll be prompted to enter its password. Use the on-screen keyboard to enter the correct password and tap “Connect.”
- Wait for connection: Your device will attempt to establish a connection to the selected Wi-Fi network. Once connected, you’ll see a solid Wi-Fi icon on the status bar.
It’s important to ensure that you have access to a stable and reliable Wi-Fi network during this step. A Wi-Fi connection allows you to download apps, browse the web, stream media, and perform various online activities on your Amazon tablet.
If you have trouble connecting to Wi-Fi, make sure you are within range of the network and the correct password is entered. If the issue persists, try restarting your device or contacting your internet service provider for assistance.
Once your Amazon tablet is successfully connected to a Wi-Fi network, you’re ready to proceed to the next step of logging into your Amazon account and accessing all the features and services available on your device.
Step 4: Logging into Your Amazon Account
To fully utilize the features and services available on your Amazon tablet, you’ll need to log into your Amazon account. Follow these steps to log in:
- Open the settings menu: Access the settings menu by swiping down from the top of the screen and tapping on the “Settings” icon.
- Select “Account & Profile”: In the settings menu, locate and select the “Account & Profile” option. This will open the account management screen.
- Select “Amazon Account”: On the account management screen, tap on the “Amazon Account” option to proceed.
- Enter your credentials: You will be prompted to enter your Amazon account email address and password. Use the on-screen keyboard to enter the correct information.
- Tap “Sign In”: Once you’ve entered your credentials, tap on the “Sign In” button to log into your Amazon account.
- Verify your account: Depending on your account settings, you may be required to verify your identity through email or phone verification. Follow the prompts to complete the verification process.
If you don’t have an Amazon account, you can create one by tapping on the “Create Account” option and following the on-screen instructions. Having an Amazon account is essential for accessing the vast range of digital content, managing your device settings, and enjoying personalized experiences on your Amazon tablet.
It’s important to ensure you enter the correct email address and password associated with your Amazon account during the login process. If you encounter any issues logging into your account, double-check your credentials and verify your internet connection.
Once you’ve successfully logged into your Amazon account, you’ll have access to your digital library, personal settings, and the wide selection of Amazon services and features that your tablet offers.
Step 5: Setting Up a Screen Lock
To ensure the security and privacy of your Amazon tablet, it’s crucial to set up a screen lock. Follow these steps to secure your device:
- Access the settings menu: Swipe down from the top of the screen and tap on the “Settings” icon to open the settings menu.
- Select “Security”: In the settings menu, find and tap on the “Security” option. This will open the security settings screen.
- Choose a screen lock option: On the security settings screen, there are several screen lock options available, such as PIN, pattern, or password. Select the lock option that best suits your preference.
- Set up your lock: Follow the on-screen instructions to set up your chosen screen lock. For instance, if you choose a PIN, enter a four or six-digit PIN code and confirm it.
- Enable your screen lock: Once you’ve created your screen lock, toggle the switch to enable it. This ensures that your device is locked when it’s idle or not in use.
A screen lock is essential because it prevents unauthorized access to your Amazon tablet and ensures that your personal data and information are safe. It adds an extra layer of security, especially if your tablet contains sensitive information or if you use it for online transactions.
It’s important to choose a screen lock option that is easy for you to remember but difficult for others to guess. Avoid using simple patterns or easily guessable passwords.
Remember to keep your screen lock information secure and not share it with anyone. In case you forget your screen lock code, Amazon provides options to recover or change it through your Amazon account.
By setting up a screen lock, you can have peace of mind knowing that your Amazon tablet is protected from unauthorized access, ensuring the safety of your personal information and preserving your privacy.
Step 6: Configuring App Permissions
When using apps on your Amazon tablet, it’s important to manage app permissions to control how apps access your device’s features and data. Follow these steps to configure app permissions:
- Access the settings menu: Swipe down from the top of the screen and tap the “Settings” icon to open the settings menu.
- Select “Apps & Notifications”: In the settings menu, locate and tap on the “Apps & Notifications” option. This will open the app management screen.
- Manage permissions: On the app management screen, you’ll see a list of installed apps. Tap on an app to view its details and permissions.
- Configure permissions: Within the app details screen, you’ll find a list of permissions that the app requests. Toggle the switches to grant or revoke permissions according to your preferences.
- Repeat for other apps: Go back to the app management screen and repeat the process for other apps, reviewing and adjusting their permissions as needed.
Configuring app permissions helps you maintain control over your privacy and data security. For example, you can choose which apps have access to your camera, microphone, contacts, location, and other device features.
It’s important to carefully review app permissions before granting or revoking access. Some apps require certain permissions to deliver their intended functionality, while others may request permissions that seem unnecessary or intrusive. Use your judgment and consider the app’s purpose and reputation before making changes to its permissions.
Regularly reviewing and managing app permissions on your Amazon tablet helps protect your privacy, minimize potential security risks, and ensure that apps only access the necessary features and data.
By taking control of app permissions, you can enhance your overall app experience and have peace of mind knowing that your device and personal information are secure.
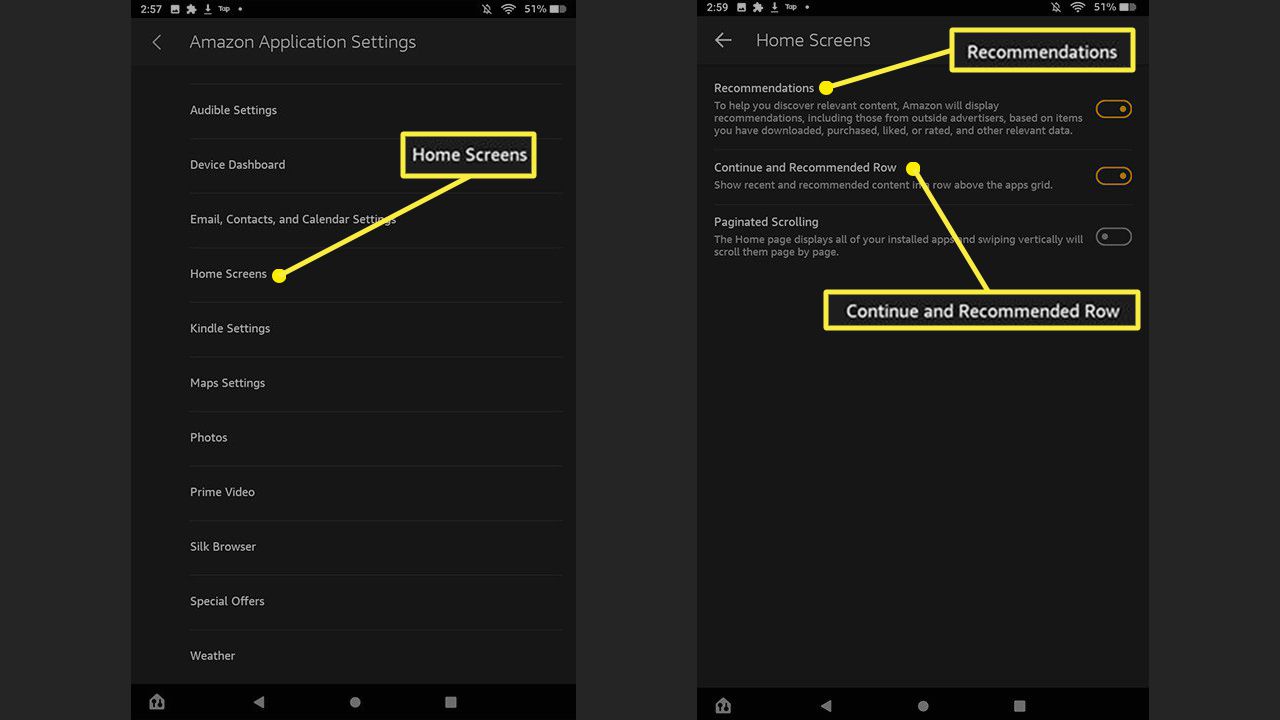
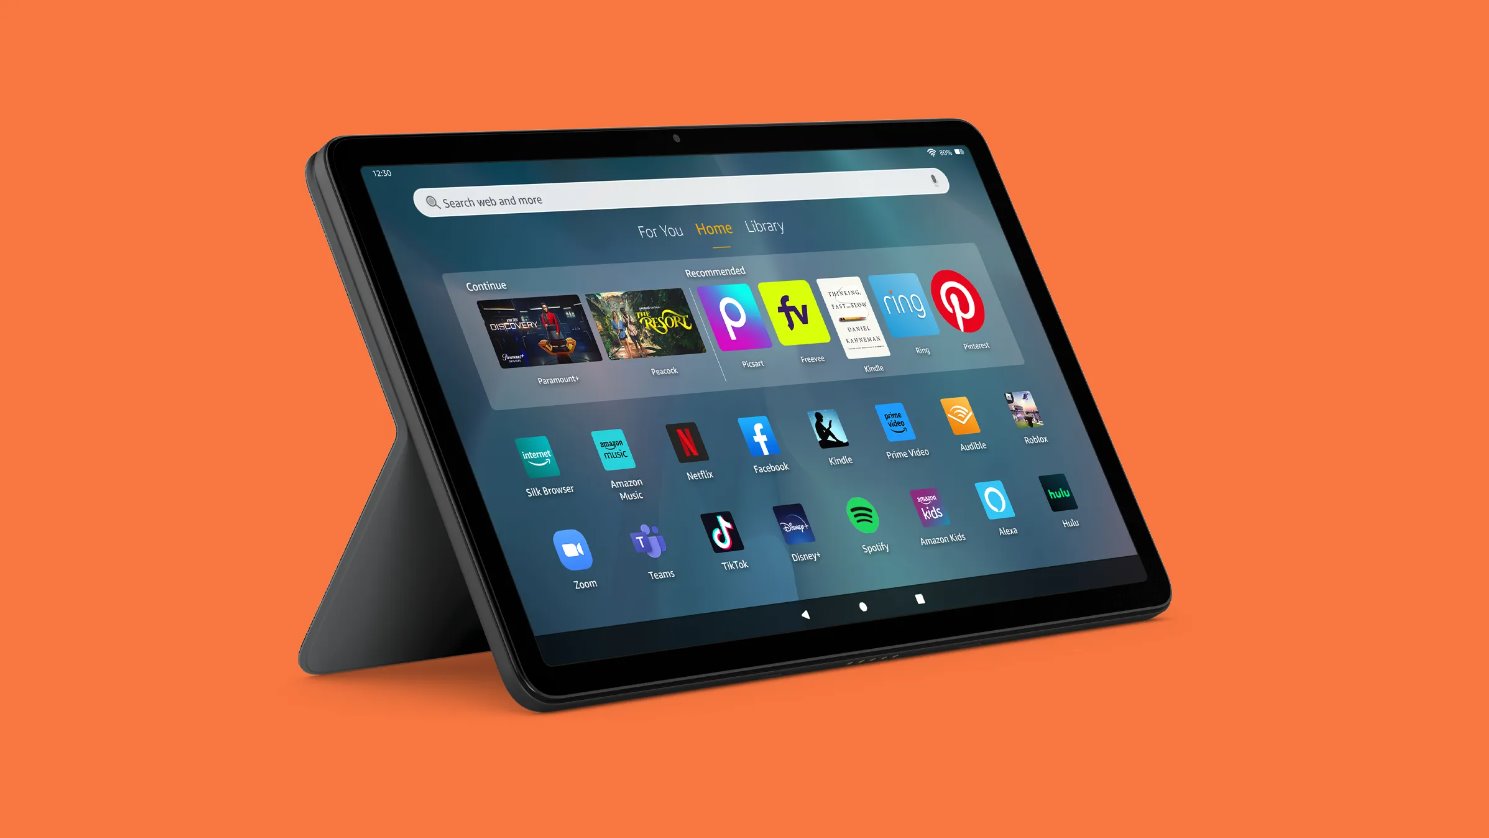
Step 7: Personalizing the Home Screen
Your Amazon tablet allows you to customize the home screen to reflect your style and preferences. Follow these steps to personalize your home screen:
- Access the settings menu: Swipe down from the top of the screen and tap on the “Settings” icon to open the settings menu.
- Select “Display”: In the settings menu, locate and tap on the “Display” option. This will open the display settings screen.
- Choose a wallpaper: On the display settings screen, select the “Wallpaper” option. You can choose pre-installed wallpapers or set your own custom image as the wallpaper.
- Adjust home screen layout: Return to the display settings screen and select the “Home Screen” option. Here, you can adjust the layout, such as enabling or disabling app suggestions, changing the icon size, or enabling grid view.
- Arrange home screen icons: Touch and hold an app icon to enter edit mode. You can then drag and drop icons to rearrange them, create folders, or remove unwanted icons.
- Add widgets: From the home screen, swipe right to access the widget view. Tap and hold a widget, then drag it to the desired location on the home screen.
- Customize app dock: The app dock is a fixed area at the bottom of your home screen. Touch and hold an icon in the app dock to replace it with a different app icon.
Personalizing the home screen allows you to create a unique and visually appealing layout that suits your preferences. You can choose wallpapers that resonate with your style, organize icons for quick access to your favorite apps, and add widgets to display relevant information or provide convenient shortcuts.
Experiment with different wallpapers, icon arrangements, and widget combinations until you find a setup that suits your needs and reflects your personality. Take advantage of the flexibility and customization options available on your Amazon tablet’s home screen to make it truly yours.
Remember that personalizing the home screen is a continuous process, and you can always revisit the settings and make further adjustments to keep your home screen fresh and aligned with your evolving preferences.
Enjoy the freedom to create a visually pleasing and personalized home screen that enhances your overall experience with your Amazon tablet.
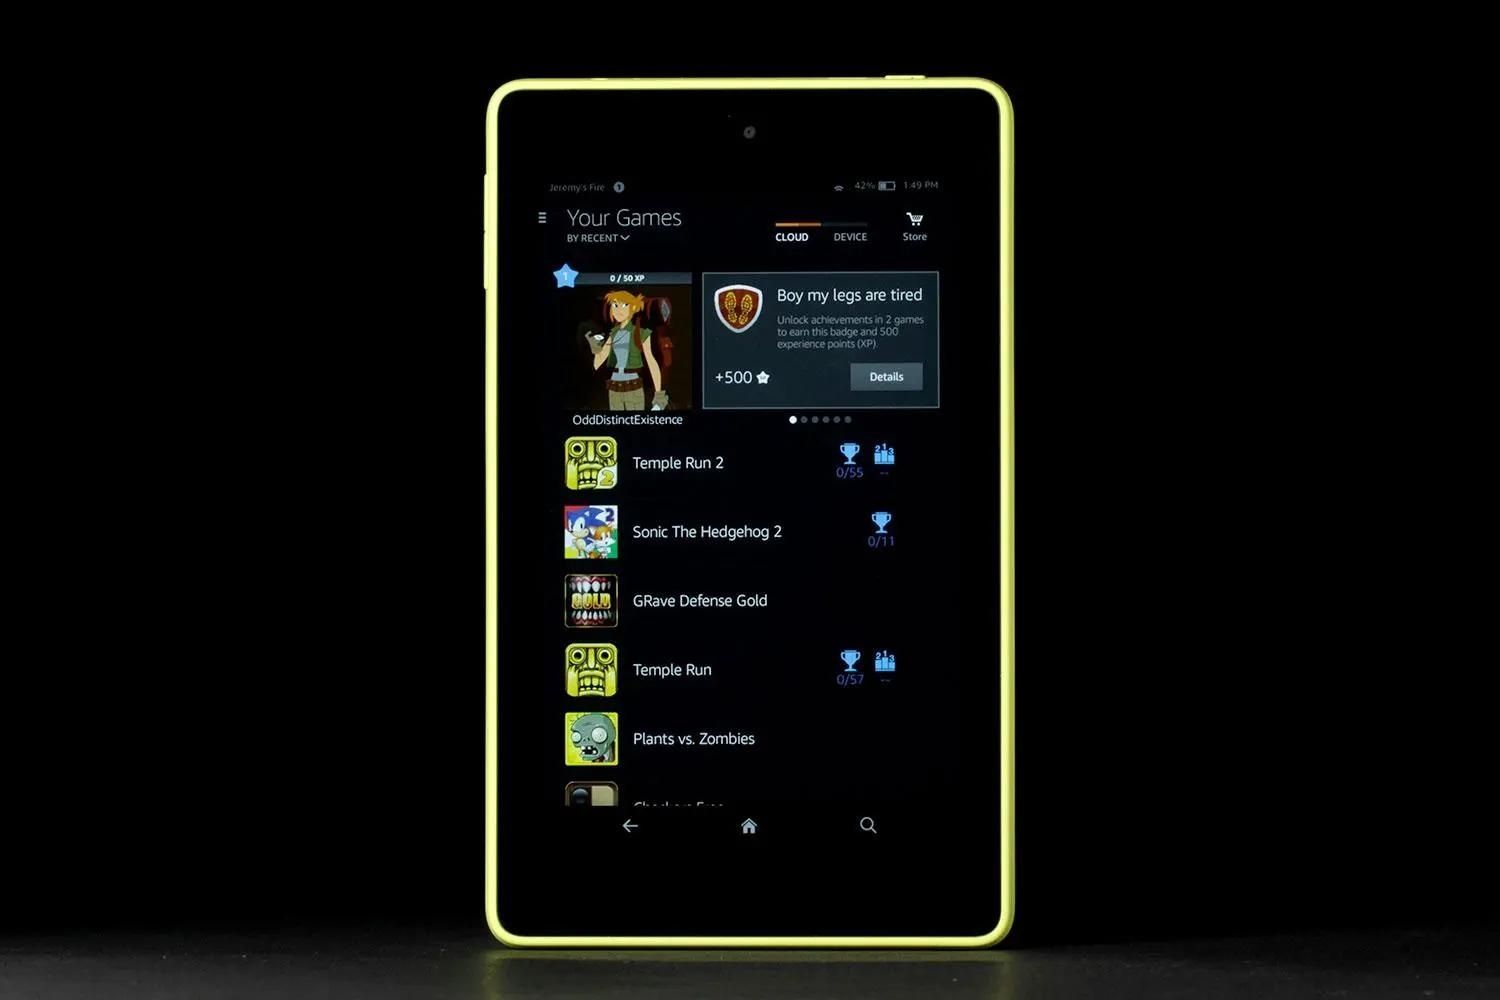
Step 8: Adding and Managing Apps
Adding and managing apps on your Amazon tablet allows you to expand its functionality and customize it according to your needs. Follow these steps to add and manage apps:
- Open the Amazon Appstore: Tap on the “Amazon Appstore” icon on your home screen or in the app drawer to open the app store.
- Browse or search for apps: Explore the featured apps, top charts, or use the search bar to find specific apps. You can also browse through different categories or check out personalized recommendations.
- Select an app: Tap on an app’s icon or name to view its details, description, screenshots, and user reviews. Consider these factors before deciding to download the app.
- Download and install an app: If you decide to download an app, tap on the “Download” or “Install” button. The app will be downloaded and installed on your Amazon tablet.
- Organize apps: After installing apps, you can organize them on your home screen or in the app drawer. Touch and hold an app icon to enter edit mode, then drag and drop icons to rearrange them or create folders.
- Manage installed apps: To manage installed apps, go to the “Apps & Notifications” section in the settings menu. Here, you can view a list of installed apps, enable or disable app notifications, clear app data, or uninstall apps.
- Update apps: It’s essential to keep your installed apps up to date to ensure their performance, security, and access to new features. You can manually update apps by going to the “Updates” tab in the Amazon Appstore.
Adding and managing apps on your Amazon tablet allows you to tailor your device’s functionality to your specific needs and interests. Whether it’s productivity apps, social media platforms, entertainment apps, or games, the Amazon Appstore offers a vast selection of options for you to choose from.
When installing apps, it’s important to download from trusted sources, such as the Amazon Appstore, to ensure the safety and security of your device. Carefully read app descriptions, user reviews, and consider the ratings and reputation of the app before installing it.
Regularly updating your installed apps is crucial, as developers frequently release updates to fix bugs, improve performance, and introduce new features. Keeping your apps up to date ensures optimal user experience and helps maintain the security of your device.
Take advantage of the wide range of apps available and organize them to suit your preferences, interests, and usage patterns. This way, you can maximize the potential of your Amazon tablet and make it a personalized tool that caters to your digital needs.
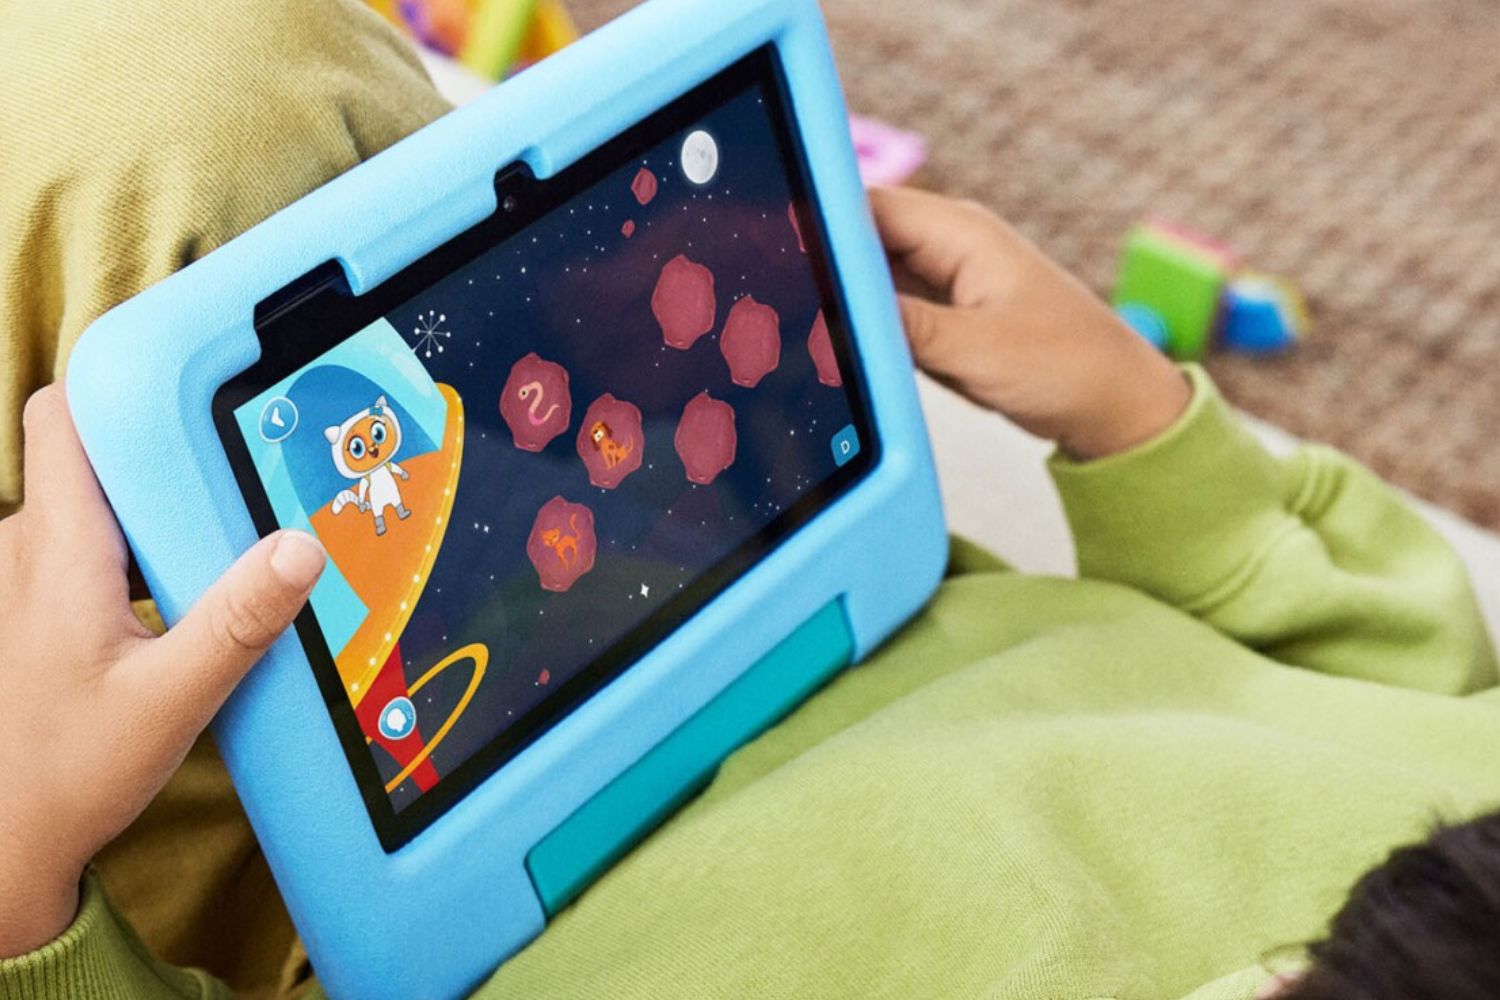
Step 9: Setting Up Parental Controls
Setting up parental controls on your Amazon tablet allows you to create a safe and age-appropriate digital environment for your children. Follow these steps to set up parental controls:
- Access the settings menu: Swipe down from the top of the screen and tap on the “Settings” icon to open the settings menu.
- Select “Parental Controls”: In the settings menu, find and tap on the “Parental Controls” option. This will open the parental controls settings screen.
- Toggle parental controls: Toggle the switch to turn on parental controls. You may be prompted to create a parental controls password for additional security.
- Set up a profile: Tap on the “Add Profile” option to create a profile for each child. Enter their name, age, and any specific restrictions or limitations you want to impose.
- Customize content filters: Customize the content filters according to your child’s age and appropriateness. You can restrict access to certain websites, apps, books, and other types of content.
- Manage time limits: Define the allowed screen time for your child by setting up daily time limits or specifying specific hours during which the tablet can be used.
- Enable child-friendly features: Explore and enable child-friendly features like Amazon FreeTime, which provides a dedicated environment for age-appropriate content and settings.
Setting up parental controls helps you create a safe and supervised digital space for your children, protecting them from accessing inappropriate content or spending excessive time with their devices.
It’s important to strike a balance between offering a controlled environment and allowing your children to explore and learn. Periodically review and adjust the parental control settings to accommodate their evolving needs and maturity level.
By utilizing parental controls, you can provide your children with a safe and controlled digital experience, allowing them to enjoy their Amazon tablet while ensuring their well-being and age-appropriate content consumption.
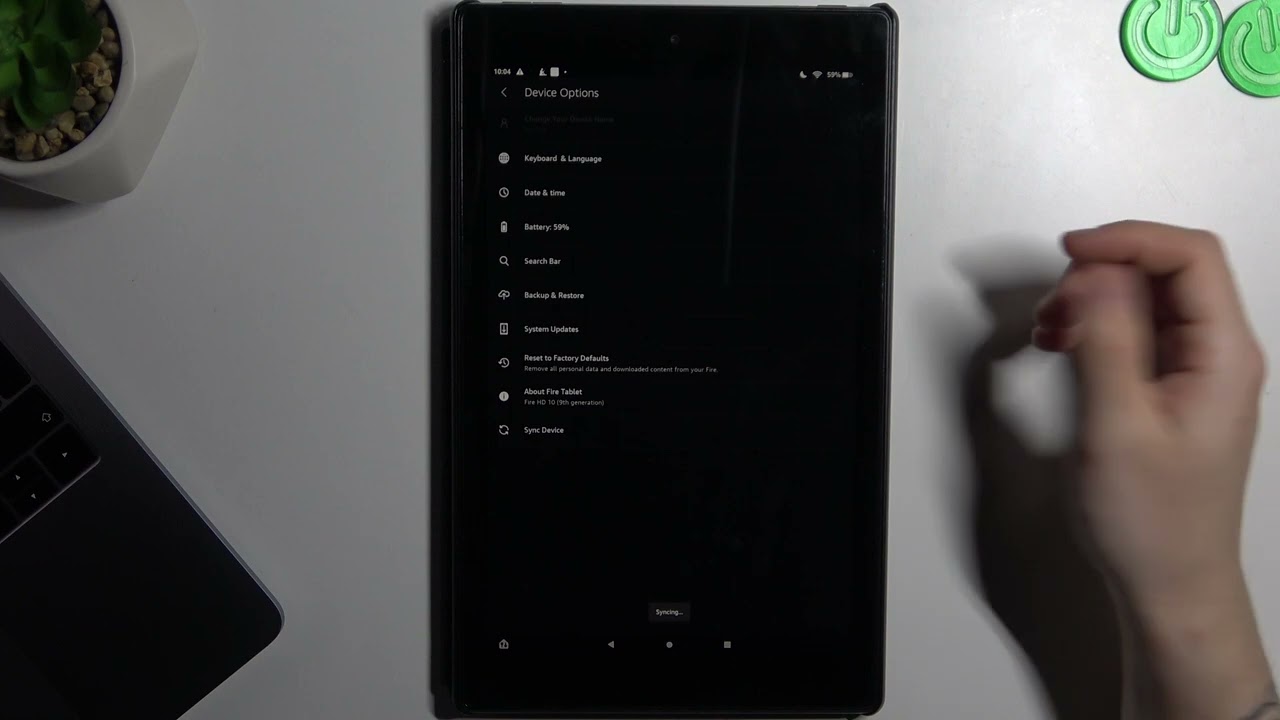
Step 10: Managing Settings
Managing the settings on your Amazon tablet allows you to fine-tune various aspects of the device to suit your preferences and optimize its performance. Follow these steps to manage your settings:
- Access the settings menu: Swipe down from the top of the screen and tap on the “Settings” icon to open the settings menu.
- Explore settings categories: In the settings menu, you’ll find various categories such as Device, Display, Sound, Battery, Storage, and more. Tap on a category to access its specific settings.
- Adjust device settings: Within each settings category, you can adjust specific settings to customize your Amazon tablet. For example, in Display settings, you can adjust brightness, screen timeout, wallpaper, and font size.
- Access advanced settings: Some settings categories have advanced options that can be accessed by tapping on a specific setting. For example, in the Sound settings, you can access advanced options for volume control and audio enhancements.
- Manage accounts: The settings menu allows you to manage accounts associated with your Amazon tablet. You can add or remove accounts, sync data, and adjust account-specific settings.
- Configure app-specific settings: Some apps have their own settings that can be accessed through the settings menu. For example, you can manage notifications, data usage, and privacy settings for individual apps.
- Reset or restore your device: In the settings menu, you’ll find options to reset your device to factory settings, perform a system update, or create a backup of your data.
Managing the settings on your Amazon tablet enables you to tailor the device to meet your specific requirements and optimize its performance. From adjusting display and sound settings to managing accounts and app-specific preferences, you have full control over how your tablet functions.
Regularly exploring the settings menu and tweaking the options allows you to keep your device up to date, personalize your user experience, and ensure optimal performance. Experiment with different settings to find the configuration that best suits your needs and preferences.
Keep in mind that while managing settings can enhance your experience, it’s important to exercise caution and make changes only if you fully understand the implications. Incorrect settings adjustments may affect the performance or functionality of your device.
By effectively managing the settings on your Amazon tablet, you can customize your device to align with your preferences, optimize its performance, and ensure a seamless and enjoyable user experience.
Conclusion
Congratulations! You have successfully set up your Amazon tablet and personalized it to your liking. By following the ten-step guide outlined in this article, you have learned how to unbox your tablet, power it on, connect to Wi-Fi, log into your Amazon account, set up a screen lock, configure app permissions, personalize the home screen, add and manage apps, set up parental controls, and manage the various settings.
With your Amazon tablet now set up and customized, you have unlocked a world of possibilities at your fingertips. Whether you use your tablet for entertainment, productivity, or educational purposes, you can take full advantage of the features, services, and apps available to enhance your digital experience.
Remember to regularly update your apps and review your settings to ensure optimal performance and security. Don’t hesitate to explore new apps, wallpapers, and settings to keep your tablet fresh and in line with your evolving needs and preferences.
Should you encounter any difficulties or have further questions, be sure to consult the Amazon support resources or reach out to their customer service for assistance. They are there to help you make the most of your Amazon tablet.
Enjoy your journey with your Amazon tablet and have fun exploring all the possibilities it offers. Make it your own, personalize it to suit your style, and let it be a powerful tool that allows you to connect, discover, and create in the ever-expanding digital world.
Wishing you endless enjoyment and productivity with your Amazon tablet!