Introduction
Welcome to the world of Vizio Smart TV! With its sleek design and advanced features, a Vizio Smart TV is a perfect addition to your home entertainment setup. Whether you’re a tech-savvy user or a beginner, setting up your Vizio Smart TV is a straightforward process.
In this guide, we will take you through the step-by-step process of setting up your Vizio Smart TV. From unboxing and connecting power to configuring picture settings and installing apps, we’ll cover everything you need to know to get your TV up and running.
Vizio Smart TVs offer a wide range of functionalities, including access to streaming services, internet browsing, and app installations. With just a few simple steps, you can enjoy high-definition content, immersive sound, and a seamless smart TV experience.
Before we dive into the setup process, it’s important to note that different models of Vizio Smart TVs may have slight variations in their setup procedure. However, the general steps remain the same, and this guide will provide you with a comprehensive overview. Additionally, ensure that you have all the necessary tools and accessories on hand, including the TV remote, power cord, and any cables required for connection.
So, without further ado, let’s get started on setting up your Vizio Smart TV and unlocking a world of entertainment possibilities.
Step 1: Unboxing and unpacking your Vizio Smart TV
The first step in setting up your Vizio Smart TV is unboxing and unpacking. Here’s what you need to do:
- Find a clear space: Start by finding a suitable location for your TV. Choose a spot where it can be easily viewed and ensure that there’s enough space for the TV and any additional accessories.
- Unbox the TV: Carefully open the box, removing any packaging materials. Set aside the TV stand, remote control, power cord, and any other included accessories.
- Attach the TV stand (if applicable): If your Vizio Smart TV comes with a stand, follow the included instructions to attach it securely. Make sure to use the provided screws, as using the wrong ones may damage the TV.
- Place the TV: With the stand attached, place the TV on a stable surface. If you’re planning to mount the TV on the wall, ensure that you have the necessary tools and hardware.
- Connect the power cord: Plug one end of the power cord into the TV’s power input and the other end into a nearby power outlet.
- Power on the TV: Locate the power button on the TV or the remote control and press it to turn on the TV. You should see a Vizio logo or an indicator light indicating that the TV is receiving power.
By following these steps, you’ll have successfully unboxed and set up your Vizio Smart TV. Now, you’re ready to move on to the next step of the setup process.
Step 2: Connecting the power cord and turning on your TV
In this step, we will guide you through the process of connecting the power cord and turning on your Vizio Smart TV.
- Locate the power cord: The power cord is typically included in the packaging of your Vizio Smart TV. It is a three-pronged cable that connects the TV to a power outlet.
- Connect the power cord: Find the power input on the back of your TV and plug one end of the power cord into it. Make sure it is securely inserted.
- Connect the other end to a power outlet: Locate a nearby power outlet and insert the other end of the power cord into it. Ensure that the outlet is functioning properly.
- Turn on the TV: Once the power cord is connected, locate the power button on either the TV or the remote control. Press the power button to turn on the TV.
- Set up the initial settings: On the screen, you will be prompted to set up the initial settings of your Vizio Smart TV. This will include selecting the language, agreeing to the terms and conditions, and connecting to a Wi-Fi network (which we will cover in the next step).
- Follow the on-screen instructions: Use the arrow buttons on the remote control or the navigation buttons on the TV to navigate through the on-screen setup wizard. Follow the instructions provided to complete the initial setup process.
Once you have completed these steps, your Vizio Smart TV will be powered on and ready for further configuration. Now that you have successfully connected the power cord and turned on your TV, let’s move on to the next step: understanding the on-screen setup wizard.
Step 3: Understanding the on-screen setup wizard
After turning on your Vizio Smart TV, you will encounter an on-screen setup wizard that will guide you through the initial configuration process. Understanding this wizard is crucial for setting up your TV correctly. Here’s what you need to know:
The setup wizard will present you with a series of prompts and options to personalize your TV settings. Follow these general steps to navigate through the setup wizard:
- Select the language: The first prompt will ask you to choose your preferred language. Use the arrow buttons on the remote control or the navigation buttons on the TV to select the desired language.
- Agree to the terms and conditions: The next prompt will display the terms and conditions of using your Vizio Smart TV. Read through the terms and conditions, and if you agree, select the “Agree” option to proceed.
- Connect to a Wi-Fi network: One of the most important steps in the setup wizard is connecting your TV to a Wi-Fi network. You will be prompted to select your network from the list of available options. Use the remote control to navigate through the list and select your network. If your network is password-protected, you will need to enter the password using the on-screen keyboard.
- Choose your location: The setup wizard may ask for your location to provide accurate local information and services. Select your location from the options provided.
- Customize the picture and sound settings: Next, the setup wizard will give you the opportunity to customize the picture and sound settings according to your preferences. You can adjust options such as brightness, contrast, sharpness, and audio settings.
It’s important to carefully follow the on-screen instructions and make the necessary selections to ensure your Vizio Smart TV is set up correctly. Taking the time to customize the settings will enhance your viewing experience.
Once you have completed the setup wizard, your Vizio Smart TV will be configured with your selected language, connected to a Wi-Fi network, and personalized with your preferred picture and sound settings. You’re now ready to proceed to the next step of setting up your Vizio Smart TV: connecting to a Wi-Fi network.
Step 4: Connecting to a Wi-Fi network
Connecting your Vizio Smart TV to a Wi-Fi network is essential for accessing online content and streaming services. Follow these steps to connect your TV to a Wi-Fi network:
- Access the network settings: From the home screen of your Vizio Smart TV, navigate to the settings menu. You can usually find the settings menu by pressing the Menu button on your remote control.
- Select the Wi-Fi option: In the settings menu, locate and select the Wi-Fi option. This will display a list of available Wi-Fi networks in your area.
- Select your Wi-Fi network: Use the arrow buttons on your remote control to navigate through the list of available Wi-Fi networks. Locate and select your network from the list. If your network is password-protected, you will be prompted to enter the password. Use the on-screen keyboard to enter the password accurately.
- Connect to the network: After entering the correct password, select the “Connect” or “Join” option to establish a connection to your Wi-Fi network.
- Wait for the connection: Your Vizio Smart TV will now attempt to connect to the selected Wi-Fi network. This process may take a few moments. Once the connection is established, you will see a confirmation message or an indicator on the screen.
It’s important to ensure that your Vizio Smart TV is connected to a stable and reliable Wi-Fi network. A strong Wi-Fi connection will ensure smooth streaming and access to online services. If you encounter any issues during the network connection process, make sure you have entered the correct network name and password. You can also try restarting your TV and router to resolve any temporary connection problems.
Once your Vizio Smart TV is successfully connected to the Wi-Fi network, you will have access to a wide range of features, including streaming services, firmware updates, and app installations. You can now proceed to the next step in the setup process: setting up your Vizio Smart TV with your smartphone or tablet.
Step 5: Setting up your Vizio Smart TV with your smartphone or tablet
Setting up your Vizio Smart TV with your smartphone or tablet allows for convenient control and additional features. Here’s how you can set it up:
- Ensure compatibility: Before proceeding, ensure that your smartphone or tablet is compatible with the Vizio SmartCast app. The app is available for both iOS and Android devices and can be downloaded from the respective app stores.
- Download and install the Vizio SmartCast app: Open the app store on your smartphone or tablet and search for “Vizio SmartCast.” Once you find the app, tap on the download or install button to begin the installation process.
- Launch the app: After the installation is complete, open the Vizio SmartCast app on your smartphone or tablet.
- Follow the on-screen instructions: The app will guide you through the process of connecting your smartphone or tablet to your Vizio Smart TV. Make sure that your smartphone or tablet and the TV are on the same Wi-Fi network.
- Pair your devices: The Vizio SmartCast app will prompt you to pair your smartphone or tablet with your Vizio Smart TV. Follow the instructions on the screen to complete the pairing process. This will establish a connection between the devices.
- Enjoy additional features: Once your devices are paired, you can use your smartphone or tablet as a remote control for your Vizio Smart TV. You can also use the app to cast content from your device to the TV, access additional settings, and explore various features.
Setting up your Vizio Smart TV with your smartphone or tablet offers a seamless and user-friendly experience. It allows you to control your TV from the convenience of your handheld device and opens up a world of possibilities in terms of content sharing and customization.
Make sure to keep the Vizio SmartCast app on your smartphone or tablet updated to access the latest features and improvements. If you encounter any issues during the setup process or when using the app, refer to the app’s documentation or Vizio’s support resources for troubleshooting guidance.
With your Vizio Smart TV successfully connected to your smartphone or tablet, you are now ready to explore the various features, apps, and content options available. The next step in the setup process involves configuring the picture and sound settings to optimize your viewing experience.
Step 6: Configuring the picture and sound settings
Configuring the picture and sound settings of your Vizio Smart TV is essential to ensure an optimal viewing and listening experience. Follow these steps to customize the settings according to your preferences:
- Access the settings menu: Using the remote control, navigate to the settings menu on your Vizio Smart TV. You can usually find the settings menu by pressing the Menu button.
- Adjust picture settings: In the settings menu, locate the picture settings option. Here, you can adjust settings such as brightness, contrast, sharpness, color, and backlight. Experiment with these settings to find the combination that suits your personal viewing preferences.
- Configure sound settings: Similarly, locate the sound settings option in the menu. Here, you can adjust settings such as volume, balance, equalizer, and sound mode. Play around with these settings to achieve the desired audio quality.
- Enable additional features: Some Vizio Smart TVs offer additional features, such as motion smoothing, noise reduction, or HDR capabilities. These options can enhance your viewing experience, so explore the settings menu to enable or adjust these features if available.
- Save and finalize settings: After customizing the picture and sound settings, make sure to save your changes. Some TVs may require you to exit the menu or press a specific button to save the settings.
- Test and fine-tune: Once you have configured the settings, test them by playing various content types, such as movies, TV shows, or games. Make note of any adjustments you may need to further fine-tune the picture and sound to your liking.
Remember that the optimal settings may vary depending on your personal preferences, the lighting conditions in your viewing environment, and the type of content being displayed. Do not hesitate to make further adjustments as needed to achieve the best possible viewing and audio experience.
If you find it challenging to configure the settings or are unsure about the optimal values, refer to the user manual of your Vizio Smart TV or visit Vizio’s support website for more detailed instructions and troubleshooting guides. Additionally, you can seek advice from online forums or professional calibration services for expert assistance.
By taking the time to configure the picture and sound settings of your Vizio Smart TV, you can enhance your viewing experience and enjoy a more immersive and enjoyable entertainment environment.
Step 7: Installing and updating apps on your Vizio Smart TV
One of the great advantages of a Vizio Smart TV is the ability to install and update apps directly on the TV. This allows you to access a wide range of streaming services, games, and other entertainment options. Follow these steps to install and update apps on your Vizio Smart TV:
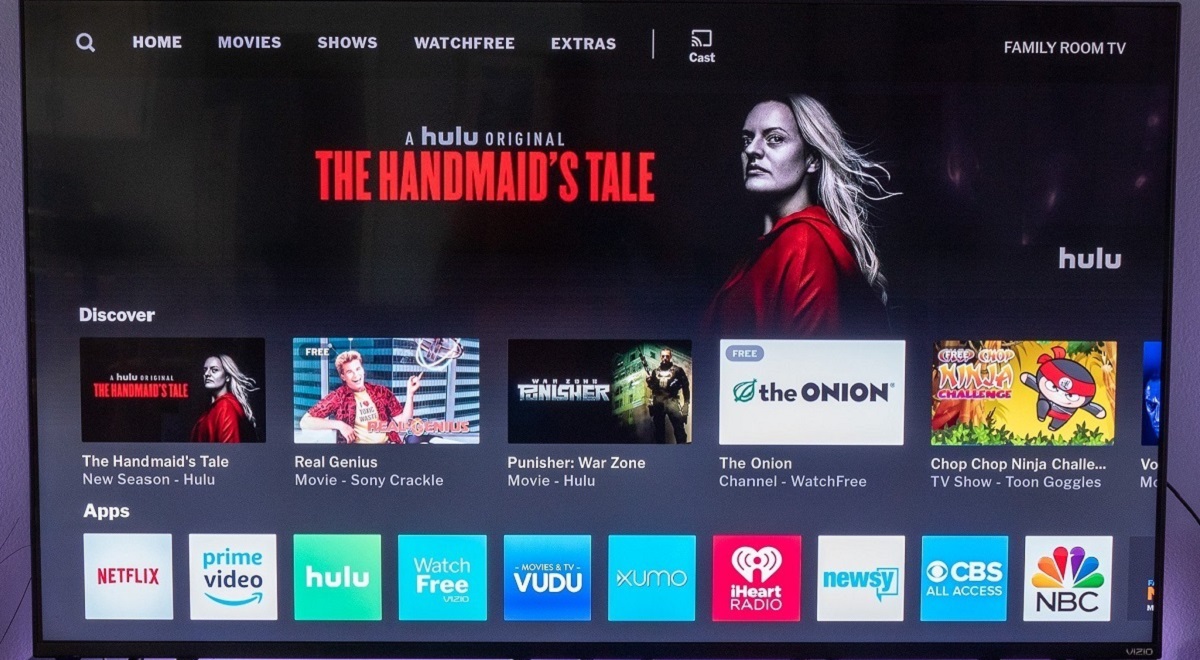
- Access the app store: On your Vizio Smart TV, navigate to the app store. The app store is usually accessible from the TV’s home screen or by pressing a dedicated button on the remote control.
- Browse or search for apps: Once in the app store, you can browse through various categories or use the search function to find the specific app you want to install. Popular apps include Netflix, Hulu, YouTube, and more.
- Select and install an app: When you have found the app you want, select it and choose the “Install” or “Download” option. The app will be downloaded and installed on your Vizio Smart TV. The time for installation may vary depending on the app size and your internet connection speed.
- Launch the installed app: After the installation is complete, navigate to the app on your TV’s home screen or open it from the app store. Follow any on-screen prompts to set up and log into the app, if necessary.
- Update apps: It is important to keep your installed apps up to date to ensure they have the latest features and bug fixes. To update apps on your Vizio Smart TV, access the app store, locate the “My Apps” or “Updates” section, and select the app updates option. Follow the instructions to update the apps to their latest versions.
Remember that some apps may require you to create an account or subscribe to a service in order to access their content. Make sure to read any terms and conditions and privacy policies associated with the app before proceeding with the installation.
Furthermore, keep in mind that not all apps available on other platforms may be available on your Vizio Smart TV. However, Vizio continues to add new apps and updates to their app store, so check back regularly for new additions.
By installing and updating apps on your Vizio Smart TV, you can expand your entertainment options and enjoy a personalized streaming experience. So go ahead and explore the extensive app library to enhance your TV viewing experience.
Step 8: Using the remote control and navigating the menu
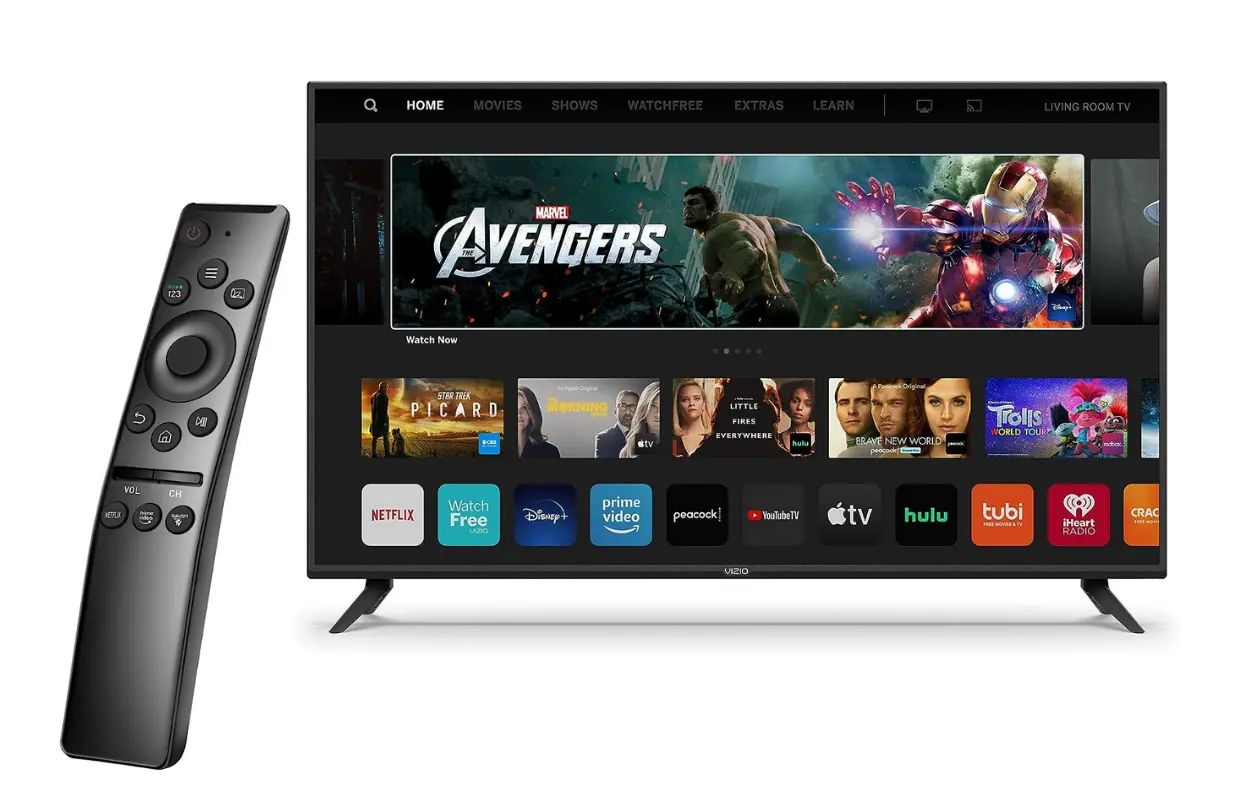
The remote control is your gateway to accessing and navigating through the menu options on your Vizio Smart TV. Understanding how to use the remote control and navigate the menu efficiently will enhance your overall TV experience. Follow these steps to use the remote control and navigate the menu effectively:
- Familiarize yourself with the remote control: Take a moment to familiarize yourself with the buttons and functions of the remote control. Typically, you will find buttons for power, volume, channel selection, input source, playback controls, and navigation.
- Navigate through the menu: Use the arrow buttons on the remote control to navigate through the menu options of your Vizio Smart TV. The up and down buttons will scroll through the available options, while the left and right buttons will allow you to select different settings within each menu.
- Select an option: Press the OK or Enter button on the remote control to select an option within the menu. This will open the selected option or initiate a command.
- Go back or exit: If you wish to go back to the previous menu or exit the current screen, locate the Back or Exit button on the remote control and press it.
- Access quick settings: Depending on your TV model, you may have quick access buttons on the remote control that allow you to change picture modes, audio settings, or access frequently used functions with just one press.
- Use shortcuts: Some Vizio Smart TVs offer shortcut buttons on the remote control that take you directly to popular streaming services or apps. These buttons can save you time by eliminating the need to navigate through menus.
- Enable voice control (if available): If your Vizio Smart TV supports voice control, you can use the microphone button on the remote control to activate voice commands. This allows you to search for content, change settings, and control the TV using voice instructions.
- Experiment and discover: Take the time to explore the various menu options and settings on your Vizio Smart TV. Adjust picture settings, audio settings, and explore additional features to customize your TV experience.
By mastering the use of the remote control and becoming familiar with the menu navigation, you can effortlessly access and control the features and settings of your Vizio Smart TV. This will help you make the most out of its capabilities and enjoy a seamless and convenient viewing experience.
Step 9: Troubleshooting common issues
While setting up and using your Vizio Smart TV, you may encounter some common issues. Understanding how to troubleshoot these issues will help you resolve them quickly. Here are some common problems and their possible solutions:
- No power or TV won’t turn on:
- Ensure that the power cord is securely plugged into both the TV and the power outlet.
- Check if the power outlet is working by plugging in another device.
- If using a power strip, make sure it is turned on.
- Try pressing the power button on both the TV and the remote control.
- If the issue persists, unplug the TV for a few minutes and then plug it back in.
- No internet connection:
- Check if your Wi-Fi network is functioning properly.
- Verify the Wi-Fi password entered is correct.
- Move your router closer to the TV or consider using a Wi-Fi extender to improve the signal strength.
- Restart your router and TV to refresh the internet connection.
- If all else fails, try connecting the TV to the internet via an ethernet cable instead of Wi-Fi.
- No sound or distorted audio:
- Ensure that the volume is turned up and not muted on both the TV and the remote control.
- Check if the correct audio output source is selected in the TV’s settings.
- Inspect the audio cables and connections for any damages or loose connections.
- Try connecting different audio devices, such as speakers or headphones, to the TV to determine if the issue is with the TV or the audio system.
- If using external speakers or soundbars, make sure they are powered on and properly connected to the TV.
- App not working or freezing:
- Restart the TV and try launching the app again.
- Check for available app updates in the TV’s app store and install them if any are available.
- Clear the app cache or data in the TV’s settings menu. This option may be under the “Apps” or “Storage” section.
- Uninstall and reinstall the app to resolve any potential software glitches.
If the above troubleshooting steps do not resolve the issue you are facing, consult the user manual of your Vizio Smart TV or visit Vizio’s support website for further assistance. They have comprehensive resources and support channels, including live chat and phone support, to help you resolve any technical issues.
By being familiar with common troubleshooting techniques, you can overcome minor problems and enjoy a smooth and uninterrupted experience with your Vizio Smart TV.
Conclusion
Congratulations! You have successfully set up your Vizio Smart TV and are now ready to enjoy a world of entertainment at your fingertips. In this guide, we have covered the step-by-step process of unboxing, connecting, and configuring your TV. From connecting the power cord and turning on the TV to installing apps and troubleshooting common issues, you have gained the knowledge to make the most out of your Vizio Smart TV.
Remember, every step of the setup process is important for ensuring a smooth and hassle-free experience. Taking the time to configure picture and sound settings, connecting to a Wi-Fi network, and exploring the available apps and features will enhance your enjoyment of the TV.
If you encounter any difficulties or have further questions during the setup or usage of your Vizio Smart TV, do not hesitate to refer to the user manual provided with your TV or visit Vizio’s support website for additional resources and assistance.
Now, sit back, relax, and immerse yourself in a world of high-definition content, streaming services, and endless entertainment possibilities with your new Vizio Smart TV!