Introduction
Welcome to the world of 3D printing! This revolutionary technology has brought about a paradigm shift in manufacturing and has opened up a whole new realm of possibilities. Whether you’re a hobbyist, a designer, or an engineer, the ability to create three-dimensional objects from digital files is truly game-changing.
However, before you can start 3D printing your creations, you need to have a digital 3D model of the object you want to create. This is where 3D scanning comes into play. 3D scanning allows you to capture the physical geometry of an object and convert it into a digital file that can be used for 3D printing.
In this article, we will take you through the process of scanning a 3D object for 3D printing. We’ll explore the different types of 3D scanning technologies available, discuss the importance of preparing the object for scanning, and guide you through the steps of scanning and post-processing the scanned data. By the end of this article, you will have a solid understanding of how to scan a 3D object and prepare it for 3D printing.
So, if you’re ready to dive into the world of 3D scanning and 3D printing, let’s get started!
What is 3D Scanning?
3D scanning is a technology that captures the shape and appearance of real-world objects and converts them into digital 3D models. It is a non-invasive process that uses various methods to capture the geometry and texture of an object, creating a highly accurate representation in a virtual space.
The scanning process involves using a scanner, which can be either a handheld device or a stationary machine, to capture data points from the surface of the object. These data points are then reconstructed to create a three-dimensional representation of the object. The resulting 3D model can be used for a variety of applications, including but not limited to 3D printing, computer-aided design (CAD), computer graphics, animation, and virtual reality.
There are several factors that make 3D scanning a valuable tool in various industries. Firstly, 3D scanning allows for the creation of highly accurate and detailed models. This level of precision is crucial in fields such as engineering, architecture, and medical imaging, where exact measurements and dimensions are essential.
Secondly, 3D scanning enables the digitization and preservation of physical objects. This is particularly useful for cultural heritage preservation, where fragile artifacts can be captured and stored digitally, ensuring their preservation for future generations.
Furthermore, 3D scanning facilitates reverse engineering, where an existing object can be scanned and a digital replica can be created. This is particularly beneficial in industries such as automotive and aerospace, where the scanning process allows for the replication and modification of existing parts or components.
Overall, 3D scanning is a powerful technology that enables the capture and digitization of real-world objects. Its applications range from industrial design and manufacturing to art and cultural preservation. With its ability to create precise and detailed digital representations of physical objects, 3D scanning has become an invaluable tool in a wide range of industries.
Why do you need to scan a 3D object?
Scanning a 3D object has become a crucial step in various industries and applications. Whether you’re a designer, engineer, or artist, understanding why you need to scan a 3D object can greatly enhance your workflow and open up new possibilities. Here are some of the reasons why 3D scanning is essential:
1. Replication: Scanning a 3D object allows you to create an exact digital replica of the physical object. This is particularly useful in fields such as manufacturing and prototyping, where existing parts or components need to be reproduced accurately.
2. Design Iteration: 3D scanning provides a way to capture physical objects and use them as a reference for designing new products. By scanning an object, you can analyze its shape, dimensions, and features and incorporate them into your design process.
3. Quality Control: When producing multiple copies of a product, ensuring consistency and quality is essential. By scanning and analyzing a 3D object, you can compare it to the original design and identify any discrepancies or deviations.
4. Archiving and Preservation: In fields such as archaeology and cultural heritage, preserving fragile objects is of utmost importance. 3D scanning allows for the creation of accurate digital replicas, ensuring that these objects can be studied, analyzed, and preserved for future generations.
5. Virtual Reality and Augmented Reality: 3D scanning is a crucial step in creating immersive virtual reality and augmented reality experiences. By scanning real-world objects, you can incorporate them into virtual environments, enhancing the level of realism and interaction.
6. Customization: In industries such as healthcare and consumer products, customization is becoming increasingly important. 3D scanning enables the capture of an individual’s specific body or object geometry, allowing for personalized and tailored products.
7. Art and Animation: In the entertainment industry, 3D scanning is widely used for character creation and animation. By scanning real-world objects or actors, highly realistic and detailed virtual representations can be created.
8. Documentation and Analysis: In fields like forensics and medicine, 3D scanning plays a vital role in documenting and analyzing various objects and structures. The detailed 3D models obtained through scanning aid in accurate measurements, analysis, and documentation of evidence or anatomical structures.
These are just a few examples of why you might need to scan a 3D object. The ability to capture physical objects and convert them into digital models opens up a wide range of possibilities in design, manufacturing, preservation, and creativity. Whether you’re looking to replicate, analyze, customize, or create virtual experiences, 3D scanning provides an invaluable tool for achieving your goals.
Types of 3D Scanning Technologies
3D scanning technologies have advanced significantly over the years, offering various methods to capture the geometry and appearance of objects. Each scanning technology has its own strengths and limitations, making it important to understand the different types available. Here are some commonly used 3D scanning technologies:
1. Laser-based Scanning: Laser scanning, also known as LIDAR (Light Detection and Ranging), uses laser beams to measure distances and create a 3D representation of an object. This technology is highly accurate and is often used in industrial applications, such as quality control and reverse engineering.
2. Structured Light Scanning: Structured light scanning projects a pattern of light onto an object and measures the deformation of the pattern to determine its shape. This method is fast and precise, making it suitable for scanning small to medium-sized objects with intricate details.
3. Photogrammetry: Photogrammetry involves capturing multiple images of an object from different angles and using computer vision algorithms to reconstruct a 3D model. This technique is widely used in fields like archaeology and cultural heritage preservation, as it can capture large objects or environments with high accuracy.
4. Contact-based Scanning: Contact-based scanning, as the name suggests, involves physically touching the object to capture its geometry. This can be done using a coordinate measuring machine (CMM) or a handheld probe. Contact-based scanning is highly accurate and is commonly used for dimensional inspection and reverse engineering.
5. X-ray Scanning: X-ray scanning is used to capture the internal structure of objects, such as in the medical and aerospace industries. It allows for non-destructive testing and inspection, providing valuable information about the object’s internal geometry and material properties.
6. Time-of-Flight: Time-of-flight scanning measures the time it takes for a light or laser pulse to travel to an object and back. This information is used to calculate the distance and create a 3D model. Time-of-flight scanners are often used in larger-scale applications, such as architecture and land surveying.
7. Ultrasonic Scanning: Ultrasonic scanning uses sound waves to capture the shape and thickness of objects. It is commonly used in industries like automotive and aerospace for detecting flaws or measuring material thickness.
These are just a few examples of the 3D scanning technologies available today. Each technology has its own advantages and is suitable for different applications. When choosing a scanning technology, consider factors such as the size and complexity of the object, required accuracy, and the specific application you are targeting.
Preparing the Object for Scanning
Before you begin the process of scanning a 3D object, it is important to ensure that the object is prepared correctly. Proper preparation can significantly improve the quality and accuracy of the resulting 3D model. Here are some essential steps to consider when preparing the object for scanning:
1. Clean the Object: Start by cleaning the object to remove any dust, debris, or fingerprints. Even small particles can interfere with the scanning process and affect the accuracy of the final model. Use a soft cloth or compressed air to carefully clean the object’s surface.
2. Remove Reflective Surfaces: If the object has reflective surfaces, such as glass or polished metal, they may cause issues during scanning by reflecting light or laser beams. Consider using a non-reflective spray or covering those areas with a matte material to minimize reflections.
3. Improve Contrast: Enhancing the contrast of the object’s surface can help scanners to capture more detailed information. If the object has a homogeneous or dark surface, consider applying a temporary coating or using a spray-on powder to add texture and improve contrast.
4. Secure the Object: Ensure that the object is securely positioned and stable during scanning. Any movement or vibrations can affect the accuracy of the scans. Use supports, clamps, or a turntable if necessary to keep the object steady throughout the scanning process.
5. Consider Markers or Targets: For more complex objects or when scanning multiple parts, using markers or targets can aid in the alignment and registration of the individual scans. These markers act as reference points for the scanning software to accurately stitch together the individual scans into a complete 3D model.
6. Optimize the Scanning Environment: Create an environment with controlled lighting conditions to minimize shadows and ensure consistent lighting across the object’s surface. Avoid direct sunlight or harsh artificial lighting that can create uneven lighting or hotspots. Opt for diffused lighting or use light tents to create a uniform lighting environment.
7. Consider the Scanning Surface: If the object is too large or has complex geometry, it may need to be placed on a rotating stage or a platform that allows for easy access to all sides. Some scanning technologies, such as structured light scanners, require the object to be placed on a flat and evenly colored surface to ensure accurate measurements.
By following these preparation steps, you can maximize the quality and accuracy of your 3D scans. Taking the time to prepare the object properly will greatly improve the results and reduce the need for post-processing adjustments.
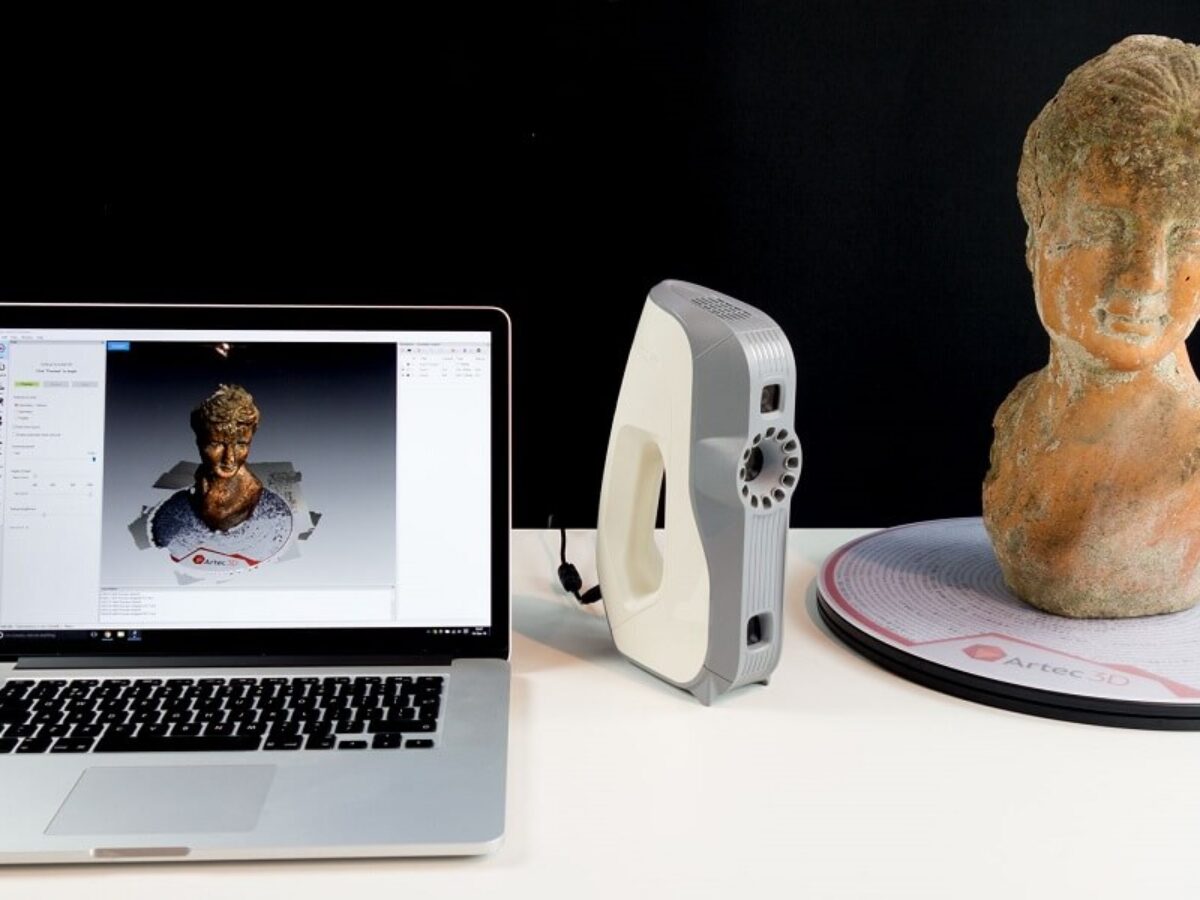
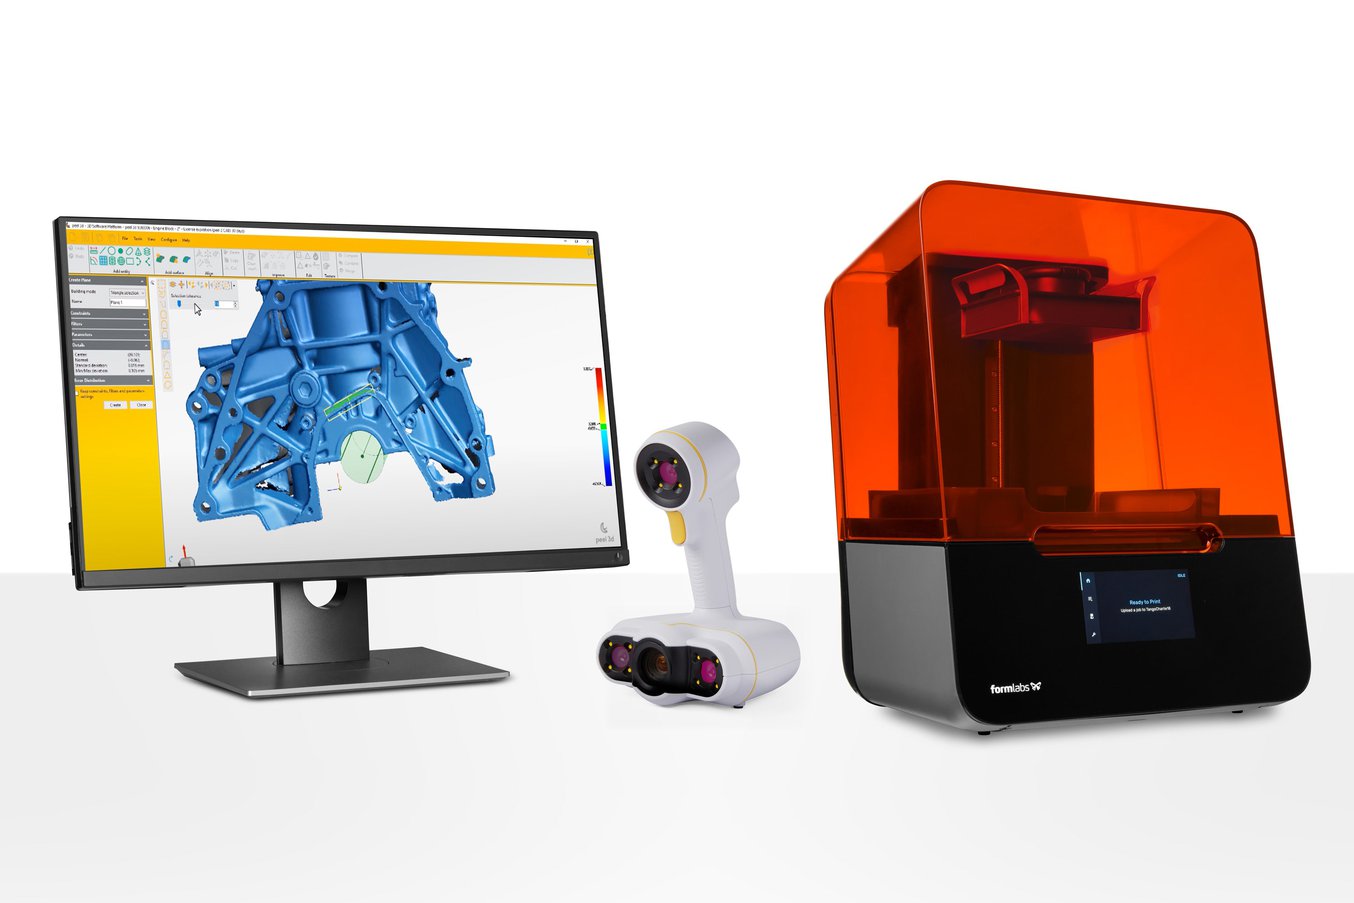
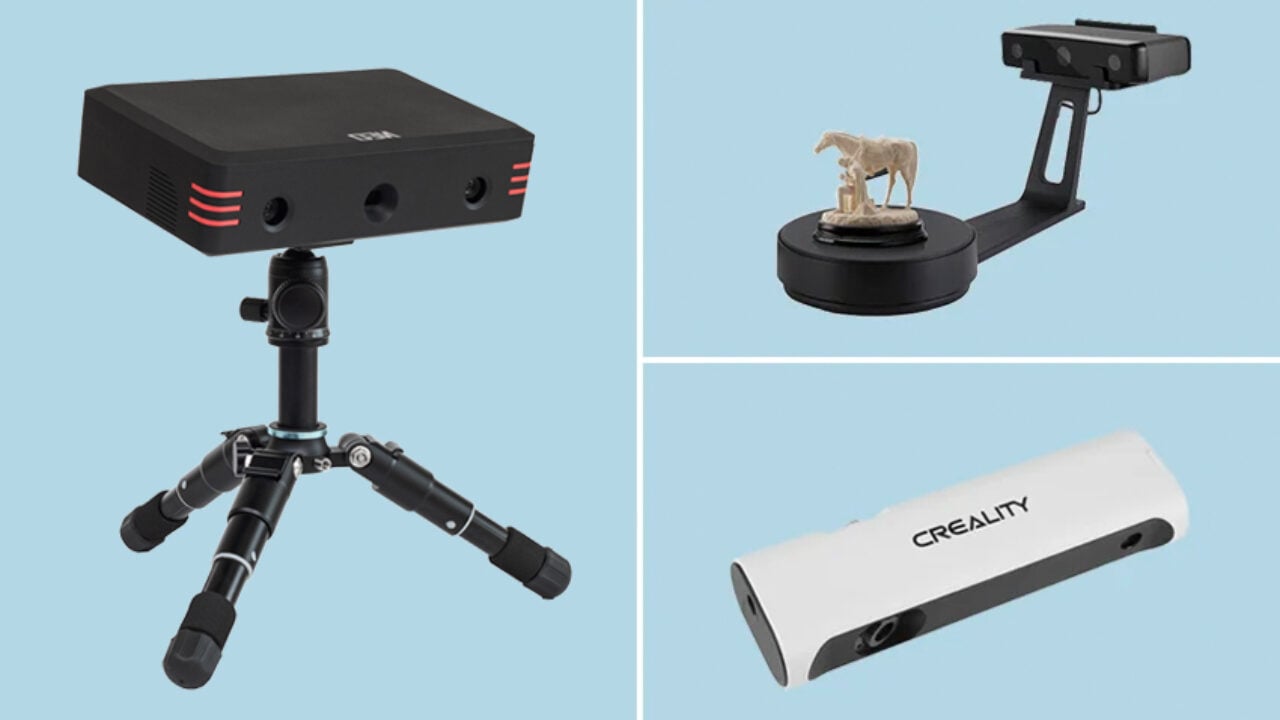
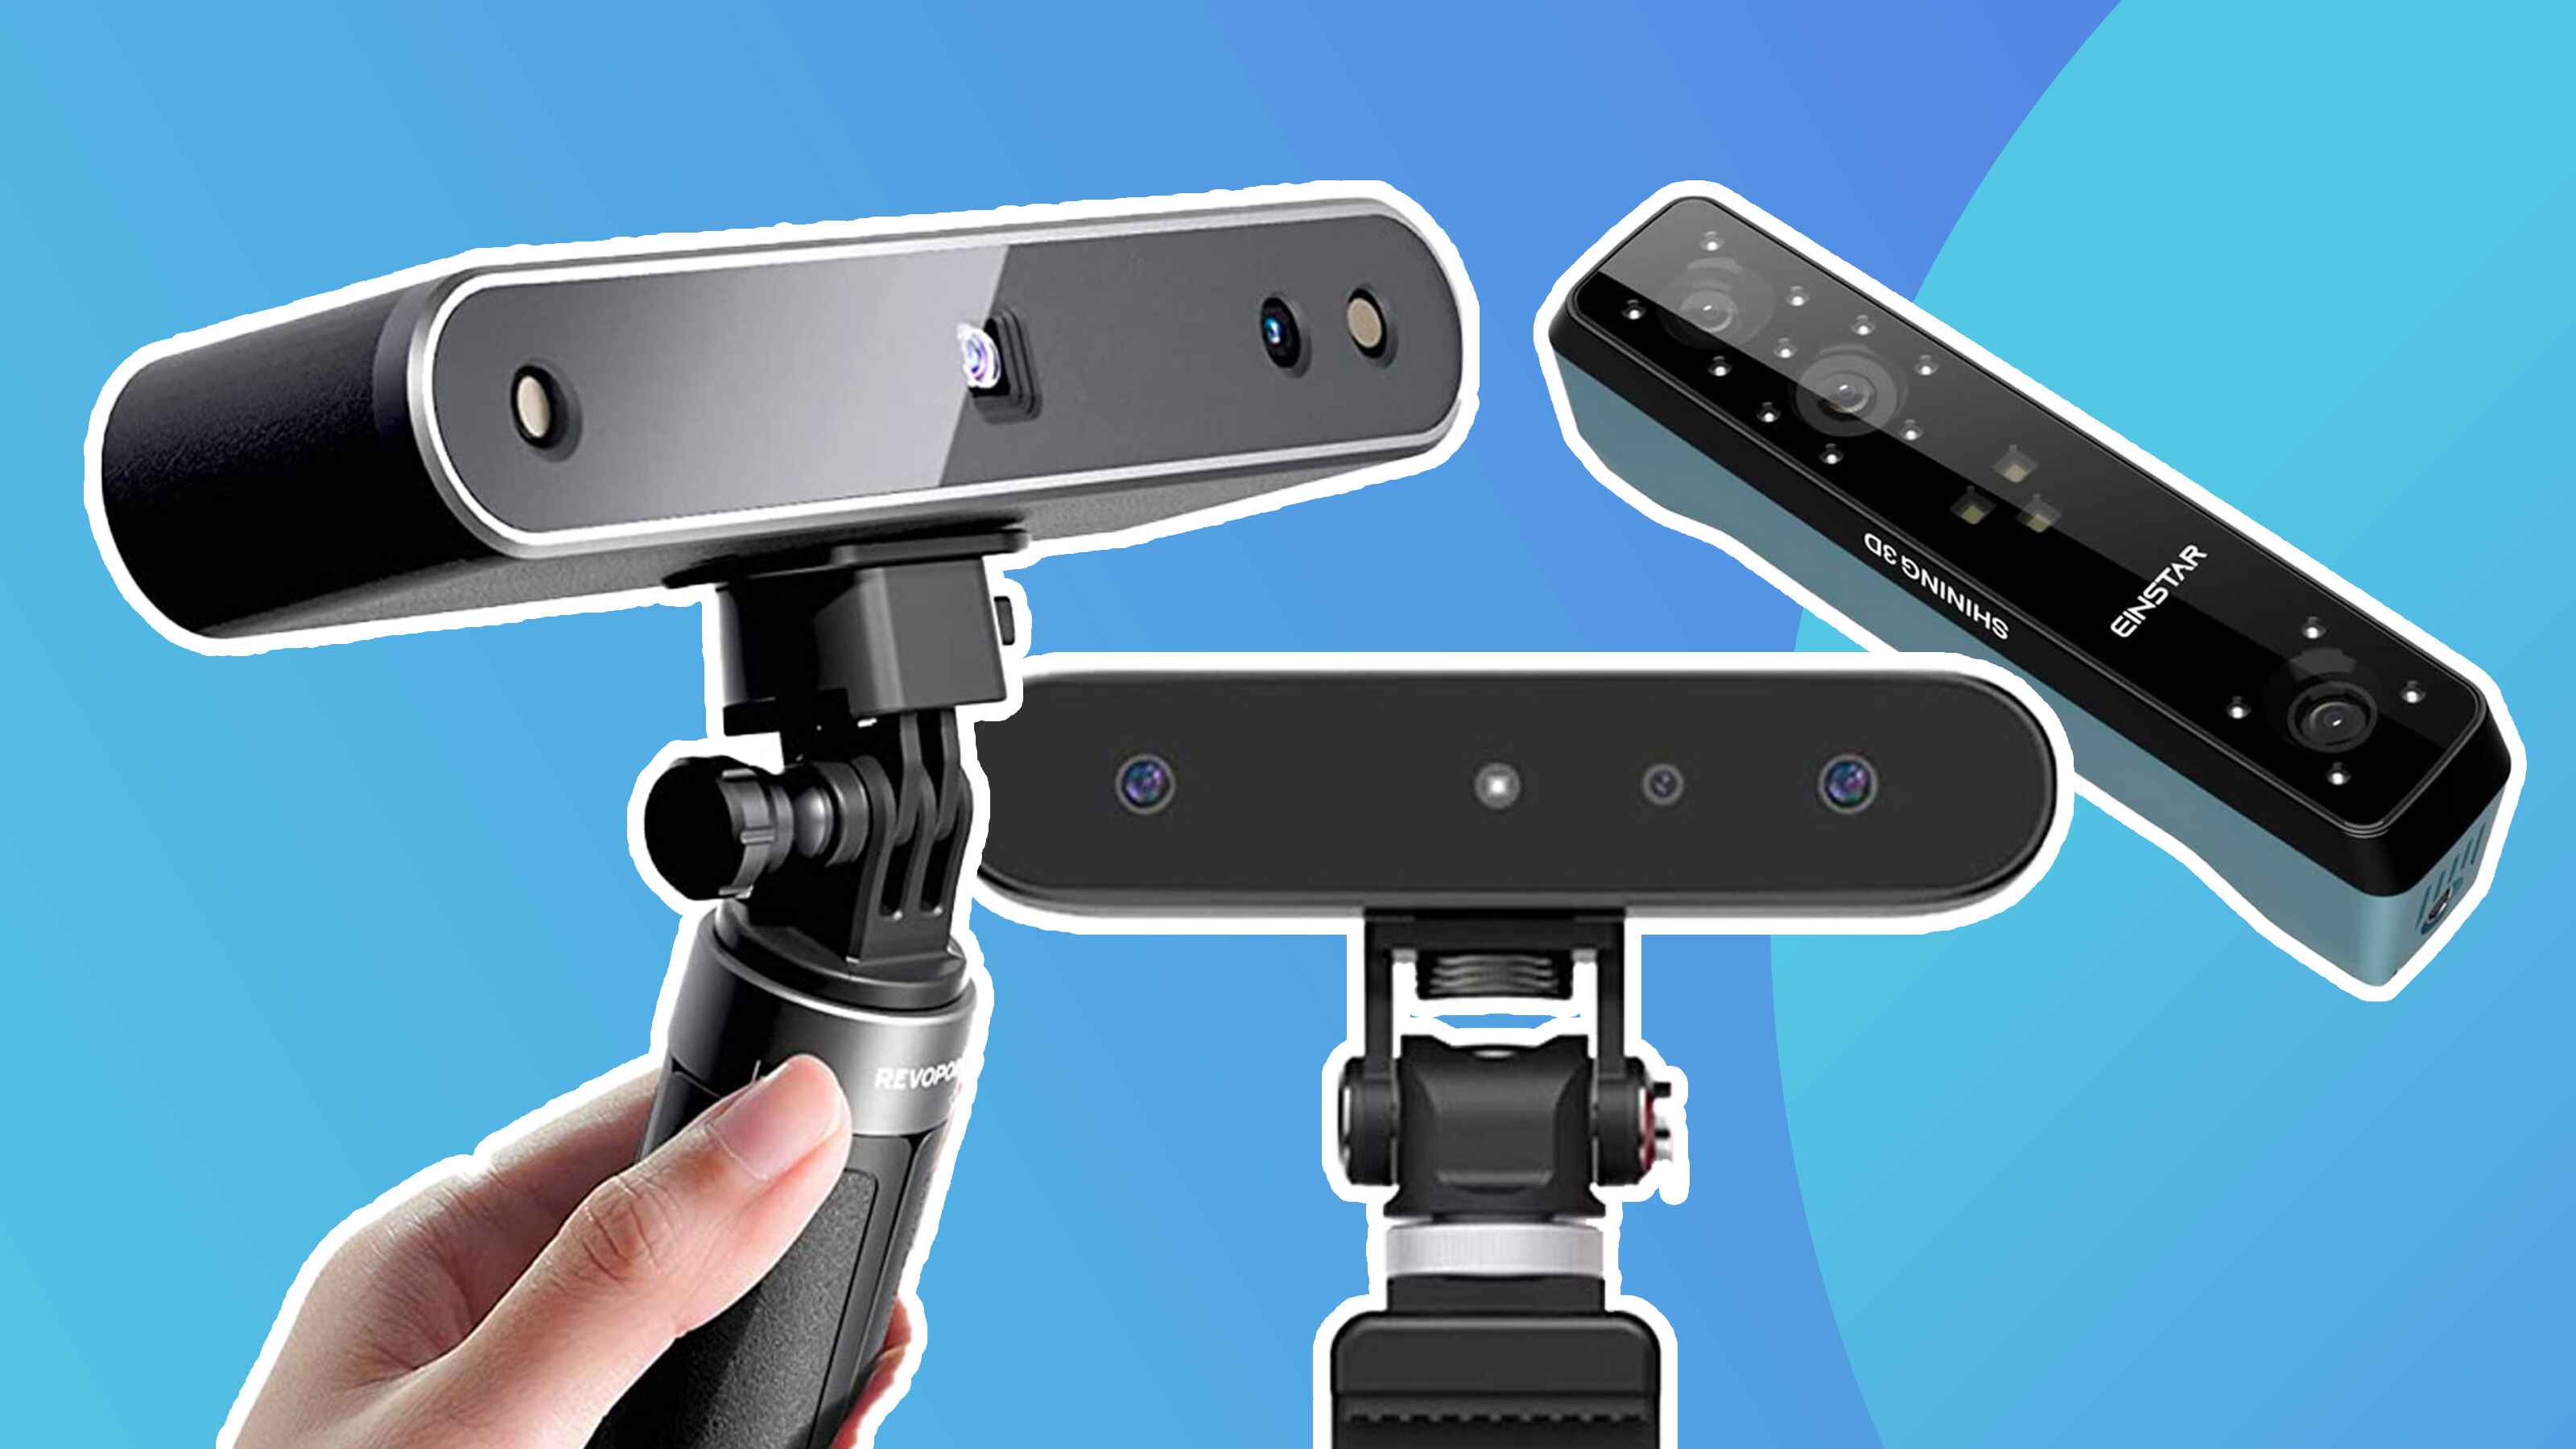
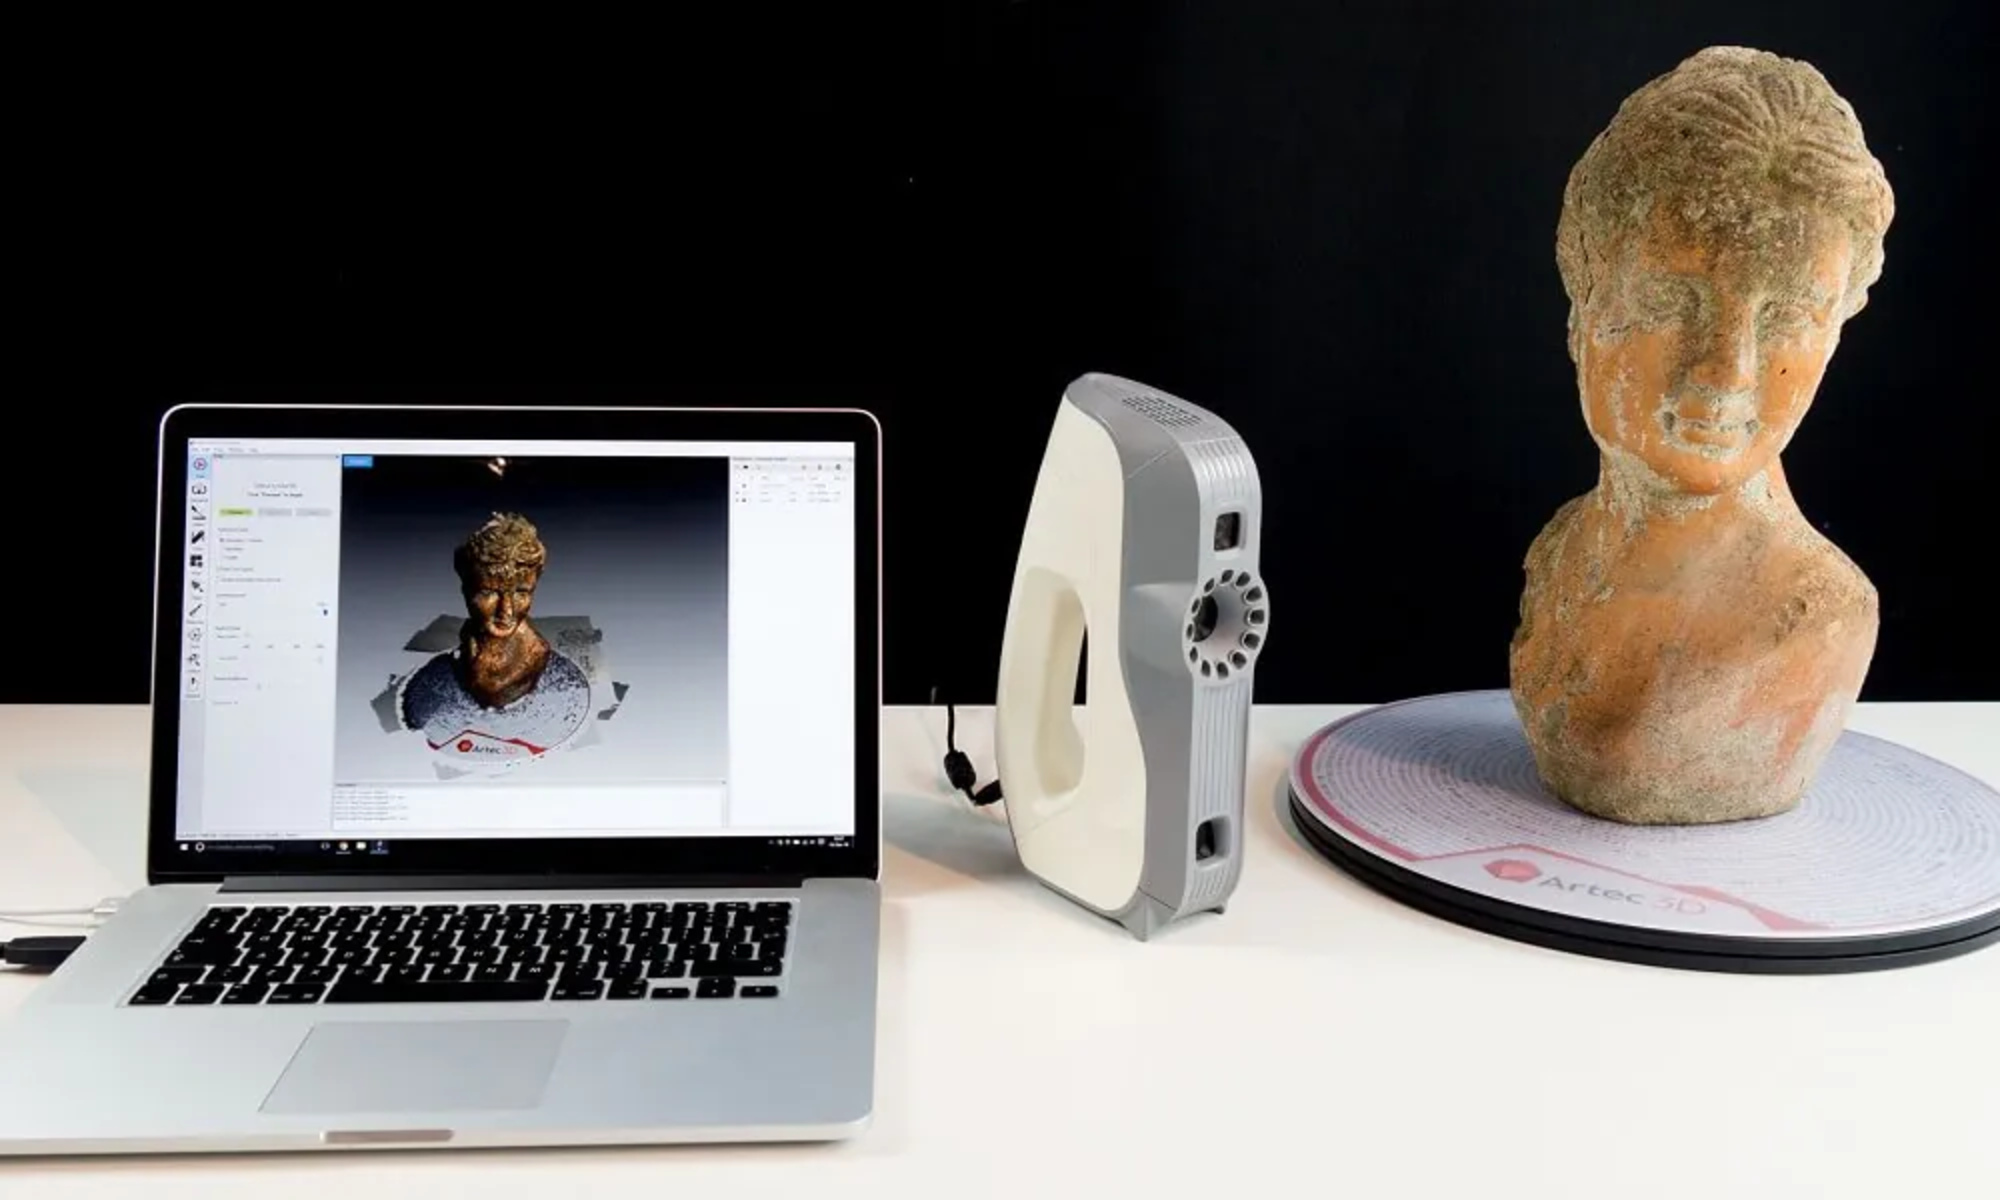
Choosing the Right Scanning Equipment
When it comes to 3D scanning, choosing the right scanning equipment is crucial to achieve accurate and detailed results. There are various factors to consider when selecting the right equipment for your scanning needs. Here are some key considerations:
1. Scanning Technology: Determine which scanning technology is best suited for your specific application and budget. Consider factors such as the size and complexity of the objects you will be scanning, the desired level of accuracy, and the intended use of the 3D models. Laser-based scanners, structured light scanners, or contact-based scanners are some of the options available.
2. Resolution and Accuracy: Look for scanners that offer high resolution and accuracy specifications. Higher resolution allows for capturing finer details, while better accuracy ensures that the scanned model closely matches the object’s geometry. Consider the minimum feature size that your scanning projects require and choose a scanner accordingly.
3. Scanning Volume: Assess the scanning volume that the equipment can handle. Depending on the size of the objects you will be scanning, you may need a scanner with a larger measurement range. Some scanners can handle small objects, while others are better suited for larger parts or even full-scale environments.
4. Ease of Use: Consider the user-friendliness of the scanning equipment. Look for scanners that come with intuitive software interfaces and provide step-by-step guidance for the scanning process. This will help streamline your workflow and minimize the learning curve.
5. Speed and Efficiency: Evaluate the scanning speed and efficiency of the equipment. Some scanners can capture data rapidly, allowing for a faster scanning process. However, keep in mind that faster scanning may come at the expense of resolution or accuracy, so find a balance that suits your needs.
6. Budget: Consider your budget and look for scanners that offer the best value for the investment. Keep in mind that cheaper scanners may have limitations in terms of resolution, accuracy, or features. Assess your requirements and budget accordingly to find the right balance.
7. Compatibility and Integration: Ensure that the scanning equipment is compatible with your existing software and hardware infrastructure. Consider the file formats that the scanner can export and whether they are compatible with your desired use or downstream applications. Also, check if the equipment can be easily integrated into your existing workflows or processes.
8. Support and Maintenance: Research the reputation and support offered by the manufacturer or supplier of the scanning equipment. Consider factors such as warranty, software updates, training resources, and customer support. Having reliable support and maintenance options can significantly enhance your experience with the equipment.
By considering these factors, you can make an informed decision when choosing the right scanning equipment for your needs. It’s important to balance your requirements, budget, and long-term goals to ensure that you invest in a scanning solution that best suits your specific application and delivers the desired results.
Setting up the Scanning Environment
Creating an optimal scanning environment is crucial to ensure accurate and high-quality 3D scans. The scanning environment includes both the physical space and the lighting conditions surrounding the object. Here are some key considerations when setting up the scanning environment:
1. Minimize Distractions: Start by ensuring that the scanning area is free from any distractions or clutter that may interfere with the scanning process. Remove unnecessary objects, furniture, or equipment that may obstruct the scanner’s line of sight or cause shadows on the object.
2. Controlled Lighting: Lighting plays a significant role in the quality of the 3D scans. Aim for even and diffused lighting to minimize shadows and reflections on the object’s surface. Avoid direct sunlight or harsh overhead lighting that can create uneven lighting conditions or hotspots. Use softbox lights, light tents, or other diffusing methods to achieve a uniform and controlled lighting environment.
3. Avoid Reflective Surfaces: If possible, set up the scanning area away from reflective surfaces such as glass, mirrors, or shiny objects. These surfaces can reflect light sources or laser beams, causing inaccuracies in the scans. If reflective surfaces cannot be avoided, consider using non-reflective coatings or coverings on those areas to reduce reflections.
4. Background and Surface: Choose a background and surface that provide optimal contrast for the object being scanned. A neutral background with a contrasting color to the object can help the scanning software differentiate between the object and the background. Additionally, a flat and texture-free surface is ideal for placing the object during scanning to ensure accurate measurements and alignment.
5. Stability and Support: Ensure that the object being scanned is well-supported and stable throughout the scanning process. Use stands, clamps, or turntables to securely hold the object in place to prevent any movement or vibrations. This helps to maintain consistency and accuracy in the scanned data.
6. Adequate Space: Make sure there is enough space around the object for the scanner to capture multiple angles and viewpoints. This is particularly important when using handheld or portable scanners that require free movement around the object. Plan the scanning area to provide adequate space for the scanner and the operator to maneuver comfortably.
7. Calibration and Reference: Follow the scanner manufacturer’s instructions for calibration and referencing procedures. Proper calibration ensures accurate measurements, while referencing helps align and stitch different scans together to create a complete 3D model. Regularly check and adjust the calibration to maintain accurate and reliable scans.
By carefully setting up the scanning environment, you can minimize potential issues and optimize the quality and accuracy of your 3D scans. Taking the time to create an ideal scanning environment will lead to better results and reduce the need for post-processing adjustments.
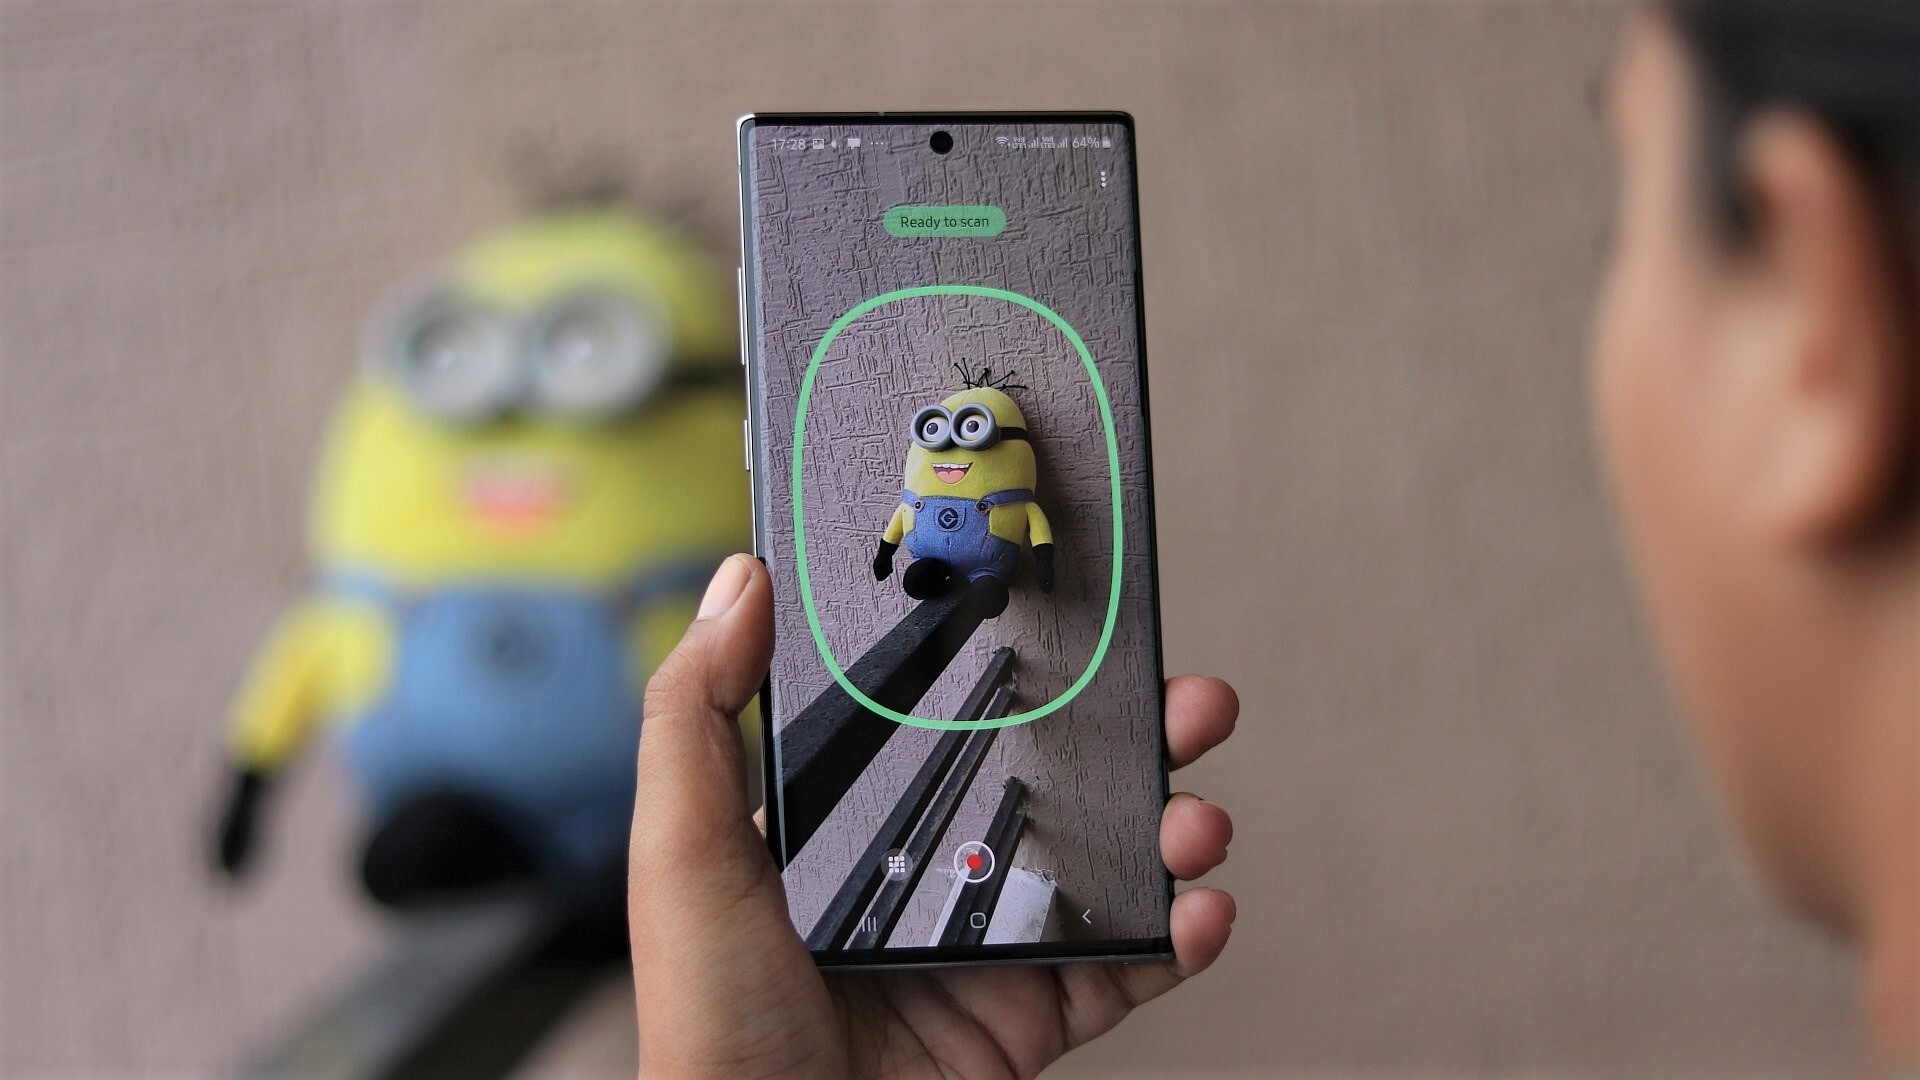
Scanning the Object Step-by-Step
Scanning a 3D object requires a systematic approach to capture accurate and detailed data. Here is a step-by-step guide to help you through the scanning process:
1. Set up the Scanning Equipment: Ensure that the scanning equipment is properly set up and calibrated according to the manufacturer’s instructions. Make sure the scanner is connected to the appropriate software or computer system.
2. Prepare the Object: Clean the object thoroughly, removing any dust or debris that may interfere with the scanning process. If needed, use markers or targets to aid in the alignment of the scans.
3. Position the Object: Place the object in the scanning area, ensuring it is properly supported and stable. Consider using a turntable or rotating stage for better access to all sides of the object, especially if it has complex geometry.
4. Define the Scanning Parameters: Set the scanning parameters, such as the desired resolution, accuracy, and scanning volume. These settings may vary depending on the specific scanner and software being used.
5. Capture the Scans: Start scanning the object, following the scanning software’s instructions. Move the scanner around the object, capturing data from multiple angles and viewpoints. Ensure that you have a sufficient overlap between scans for proper alignment later.
6. Controlled Movement: Keep your movements steady and consistent throughout the scanning process. If using a handheld scanner, maintain a smooth and continuous motion as you scan, avoiding sudden jerks or variations in speed.
7. Complete Coverage: Make sure to scan all areas of the object, including any intricate details, textures, or undercuts. Take multiple scans if necessary to capture complex or hard-to-reach areas.
8. Manage Lighting and Shadows: Monitor the lighting conditions and shadows during the scanning process. Adjust the position of the lights or use additional diffusers if needed to maintain consistent and even lighting across the object’s surface.
9. Quality Check: Periodically check the quality of the scans as you go. Use the scanning software’s preview or feedback to ensure that the scans are capturing the required details and accuracy.
10. Review and Refine: Once all scans are complete, review the data to check for any gaps or missing areas. Use the software’s alignment and registration tools to merge and stitch the scans together into a cohesive 3D model. Make any necessary adjustments to improve the overall quality and alignment.
11. Save and Export: After post-processing and refining the scans, save the final 3D model in the desired file format for further use or analysis. Consider saving backups of the raw scan data in case any further modifications or adjustments are required.
Following these step-by-step guidelines will help you in successfully scanning the object and capturing accurate and detailed 3D data. It’s important to remain patient and attentive to detail throughout the process to achieve the best possible scan results.
Post-processing the Scanned Data
Once you have completed the scanning process and obtained the raw 3D data, the next step is post-processing. Post-processing involves refining and preparing the scanned data for further use or analysis. Here are some essential steps for post-processing the scanned data:
1. Data Alignment: Use the scanning software’s alignment tools to ensure that all the individual scans are properly aligned and merged together. This involves matching common points or using registered markers to bring the scans into a single coordinate system.
2. Mesh Cleanup: Check the mesh generated from the scans for any artifacts, noise, or inconsistencies. Use the software’s mesh cleaning tools to remove any unwanted elements, such as outliers, holes, or spikes. Ensure that the mesh is clean and free from any scanning imperfections.
3. Mesh Fusion: If you have taken multiple scans from different angles, use mesh fusion techniques to create a single, complete mesh of the scanned object. This involves merging the overlapping areas and smoothing out any visible seams or boundaries between the individual scans.
4. Refinement: Employ various post-processing techniques, such as smoothing, filling holes, or reducing noise, to refine the mesh and enhance its quality. This may include using algorithms or manual tools to smooth surfaces, repair mesh imperfections, or refine small details.
5. Texture Mapping: If the scanner captures color information, or if you have applied texture or color during the scanning process, map the textures onto the 3D model. This will add visual realism and enhance the appearance of the final model.
6. Optimization and Simplification: Assess the complexity and size of the scanned mesh. If it is too large or detailed for your intended use, consider simplifying it by reducing the number of polygons or optimizing the mesh structure. This can make the file more manageable and easier to work with.
7. Exporting: Save the final processed 3D model in a compatible file format for your desired application or downstream use. Choose a file format that preserves the geometry, textures, and other relevant data. Common formats include STL, OBJ, or PLY.
8. Backup and Documentation: Create backups of the processed files and maintain a log or documentation of the post-processing steps. This will help you track the progress, revisit any changes made, and troubleshoot any issues that may arise in the future.
Post-processing is a crucial step in ensuring that the scanned data is accurate, clean, and ready for its intended use. By following these steps and utilizing the appropriate tools and techniques, you can refine the scanned data and obtain a high-quality 3D model that can be further utilized in various applications, such as 3D printing, visualization, or analysis.
Optimizing the 3D Model for 3D Printing
After scanning and post-processing the 3D model, the next important step is to optimize it specifically for 3D printing. This involves making necessary adjustments to ensure that the model is printable, structurally sound, and meets your printing requirements. Here are some key considerations when optimizing a 3D model for 3D printing:
1. Making the Model Solid: 3D printers typically require a solid, manifold, and watertight model for successful printing. Ensure that the scanned model doesn’t have any open or non-solid areas. Use 3D modeling software to repair any gaps or holes in the mesh and convert it into a solid object.
2. Adjusting Wall Thickness: Check the thickness of the walls and features in the model. Adapt the wall thickness to meet the capabilities of your 3D printer. Keep in mind the minimum printable thickness that your printer can handle and adjust the model accordingly.
3. Removing Non-Printable Features: Identify any features in the model that are not printable due to their size, complexity, or orientation. These may include fine details, overhangs, or unsupported structures. Modify or remove such features to ensure printability.
4. Bridging and Supports: Determine if your model requires any bridges or supports to maintain print quality and integrity. Use support generation tools to add supports where needed, particularly for overhanging or complex geometries. Pay attention to areas that may require manual support removal or post-print cleanup.
5. Orientation and Positioning: Experiment with different orientations and positions of the model to optimize print quality and reduce the need for supports. Consider the geometry and stability of the object during printing, ensuring that it can be printed without any structural issues or excessive use of supports.
6. Scaling and Resizing: Verify the size of the model and adjust it according to your desired print dimensions. Ensure that the final scaled model fits within the build volume of your 3D printer. Pay attention to maintaining the proper aspect ratio and proportions of the object during the scaling process.
7. File Format and Export: Save the optimized model in a suitable file format supported by your 3D printer. Common file formats include STL or OBJ. Check the file export settings to ensure the desired level of detail and resolution is preserved.
8. Testing and Iteration: Before initiating a full-scale print, consider conducting test prints or smaller-scale prints to validate the printability and quality of the optimized model. This allows for identifying and addressing any potential issues or improvements before committing to a final print.
By optimizing the 3D model for 3D printing, you can maximize the chances of a successful print with minimal issues or failures. Taking the time to make necessary adjustments and ensuring compatibility with your specific 3D printer will result in a smoother printing process and a higher-quality end product.
Conclusion
3D scanning is an invaluable tool that enables the creation of digital 3D models from real-world objects. Whether you’re a designer, engineer, or artist, understanding the process of scanning a 3D object is essential for unleashing the full potential of 3D printing and other applications.
In this article, we explored the importance of 3D scanning and the steps involved in scanning and optimizing a 3D object for printing. We learned about the various 3D scanning technologies available, including laser-based, structured light, photogrammetry, and contact-based methods. We also discussed the significance of preparing the object, choosing the right scanning equipment, setting up the scanning environment, and post-processing the scanned data.
By following these guidelines, you can ensure accurate and detailed scans, clean mesh models, and optimized models ready for 3D printing. From replicating and customizing objects to architectural design and cultural preservation, 3D scanning opens up a world of possibilities for various industries and applications.
However, it’s important to note that 3D scanning is a skill that requires practice and experience. It may take time to master the scanning techniques and optimize the models effectively. Continuous learning and experimentation will help you refine your scanning skills and consistently achieve high-quality results.
With the rise of 3D printing and the increasing demand for digitizing physical objects, mastering the art of 3D scanning is becoming increasingly valuable. So, embrace the power of 3D scanning, explore the exciting possibilities it offers, and unleash your creativity in the world of digital manufacturing!