Introduction
Welcome to this helpful guide on how to save files to an SD card on your tablet. Many tablet users face the challenge of limited storage space, especially when it comes to storing large files, such as photos, videos, and apps. Thankfully, most tablets are equipped with an SD card slot that allows you to expand the storage capacity. By utilizing an SD card, you can free up internal storage and have more space for your favorite apps, media files, and documents.
In this guide, we will walk you through the step-by-step process of saving files to an SD card on your tablet. Whether you have an Android tablet or an iPad, the instructions provided here will help you make the most of your device’s external storage capability. So, let’s get started and learn how to take advantage of the additional storage space offered by an SD card.
Before we proceed, it’s worth noting that the exact steps may vary slightly depending on the brand and model of your tablet. However, the fundamental principles remain the same, and we will provide you with general guidelines that should apply to most tablets.
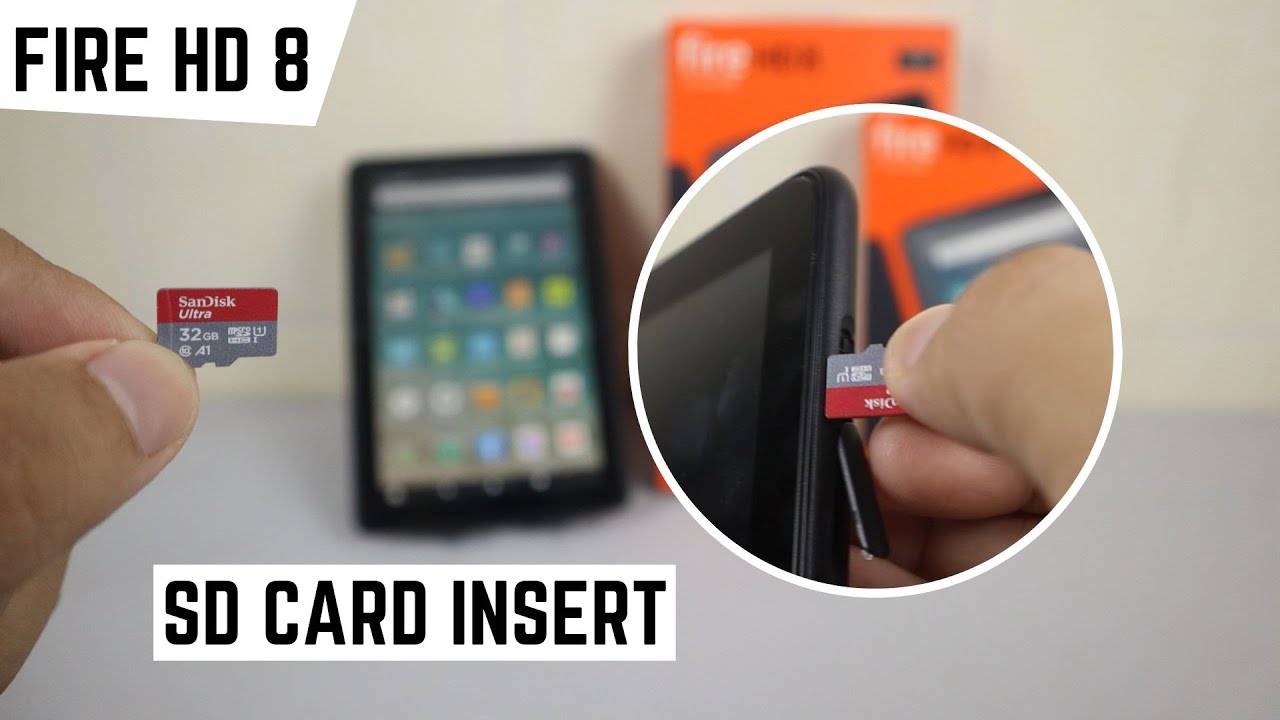
Step 1: Insert the SD card into your tablet
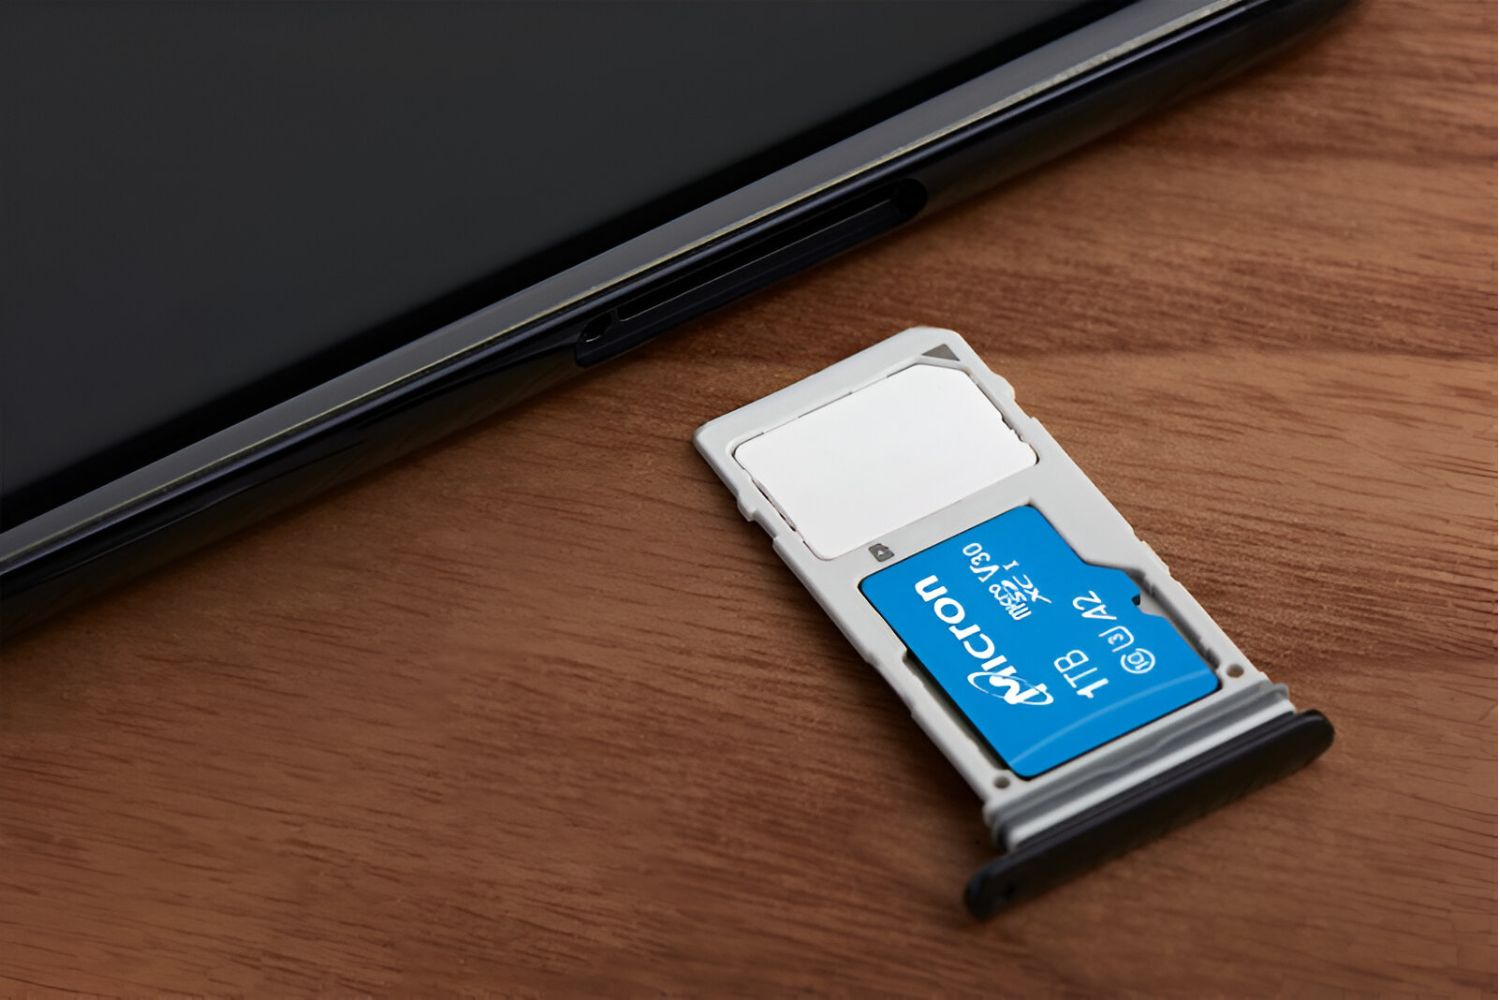
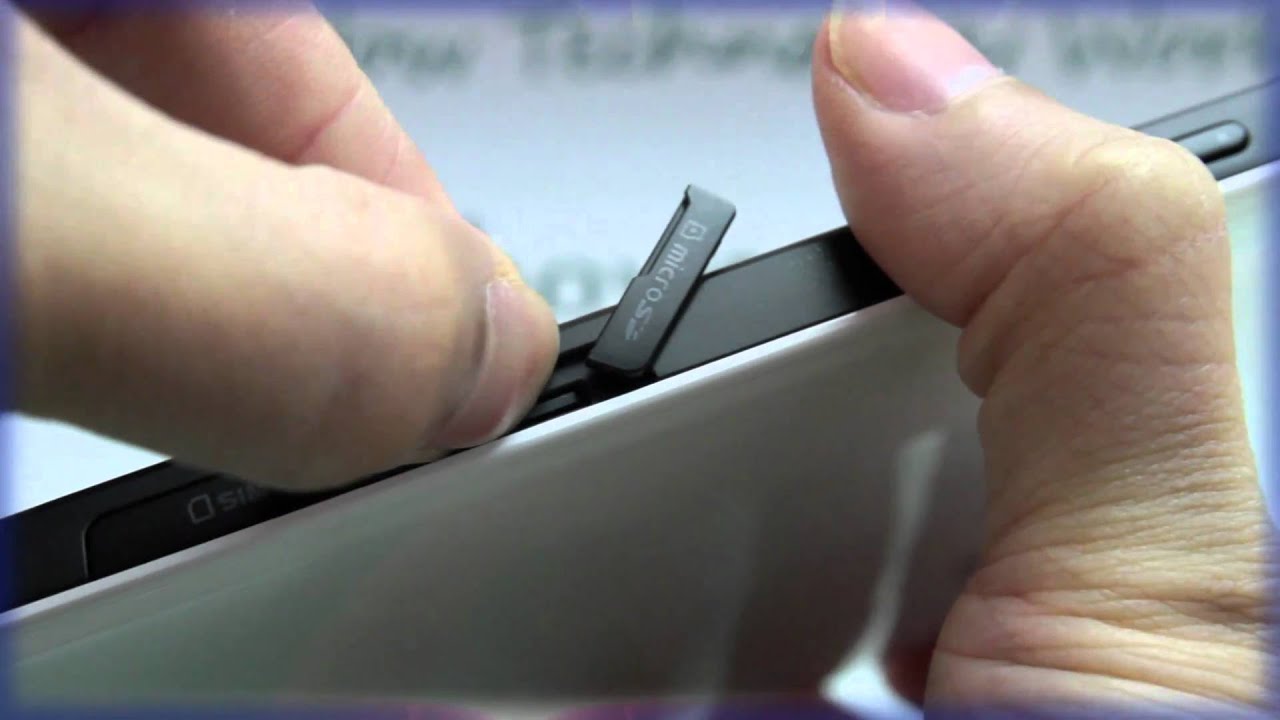
The first step in saving files to an SD card on your tablet is to insert the SD card into the device. Locate the SD card slot on your tablet, which is typically found on the side or back of the device. The slot may be labeled as “SD” or feature an icon representing an SD card.
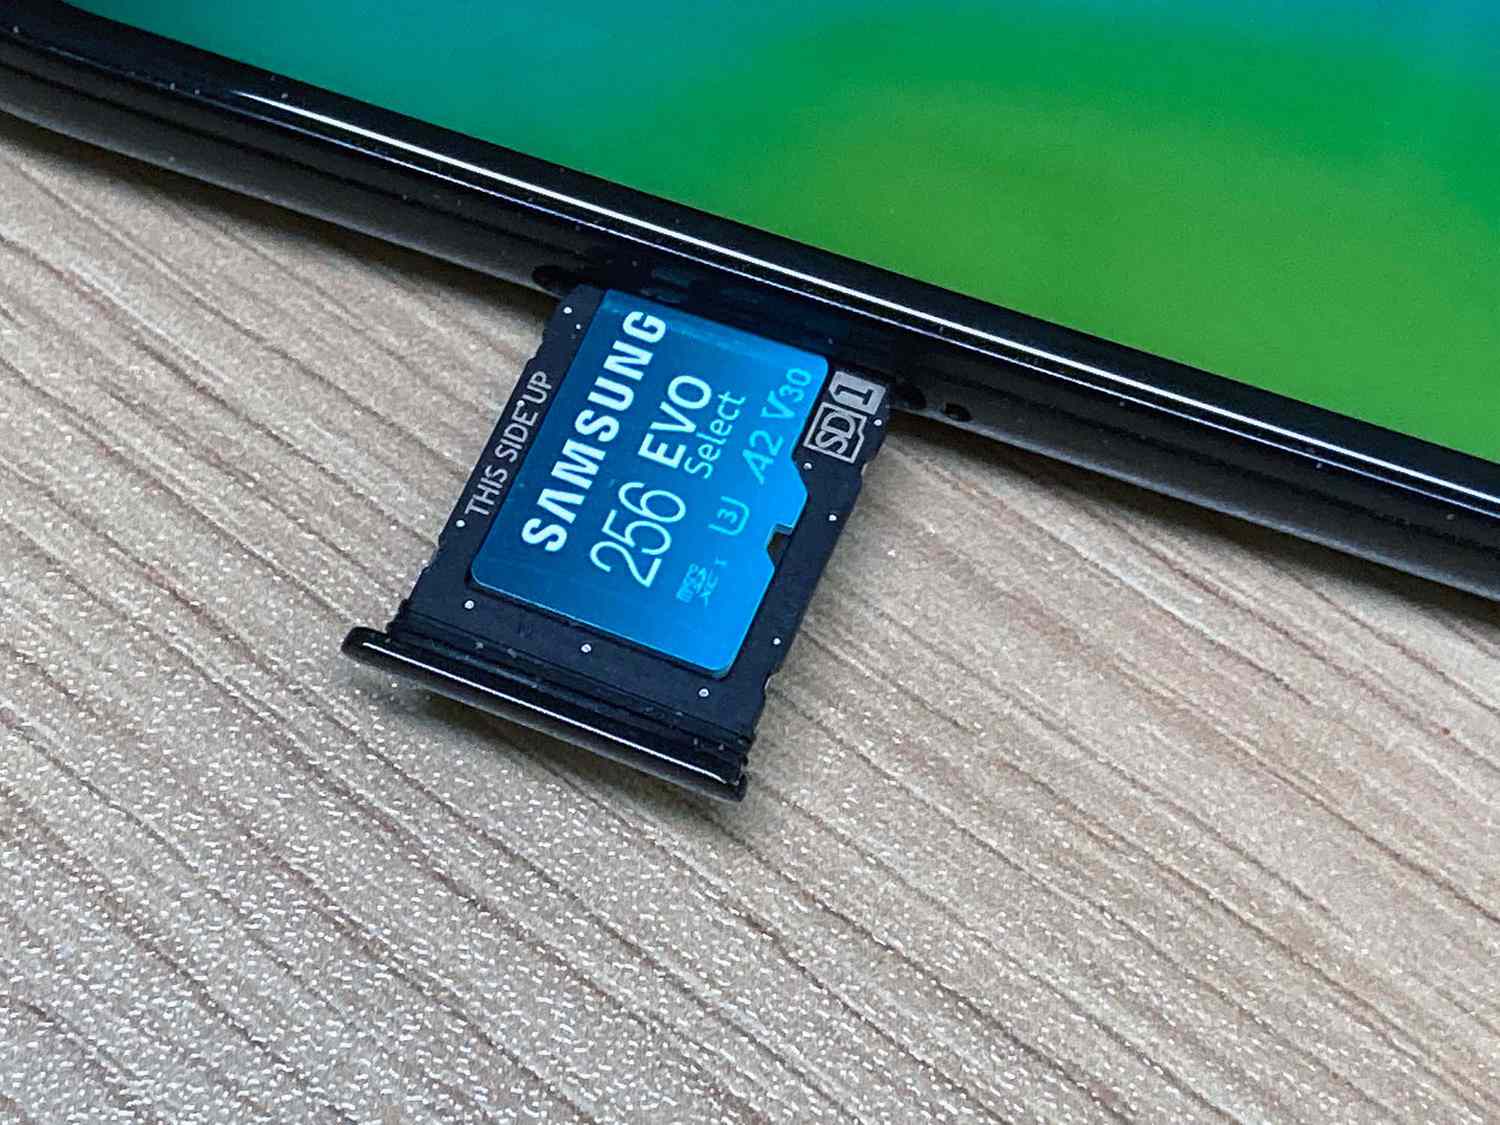
Carefully insert the SD card into the slot, ensuring that it is properly aligned with the connectors. Apply gentle pressure until you feel the card slot securely holding the SD card in place. Take note of any instructions or arrows on the tablet or SD card slot that indicate the correct orientation for inserting the card.
Once the SD card is inserted, your tablet should recognize it automatically. Depending on the operating system of your tablet, you may receive a notification indicating the successful detection of the SD card. This means you are ready to proceed to the next step and start utilizing the additional storage space.
If your tablet does not recognize the SD card, make sure it is properly inserted and try removing and reinserting it. In some cases, you may need to restart your tablet for the device to detect the newly inserted SD card. It’s also worth noting that not all tablets support external SD cards, so ensure that your tablet is compatible before attempting to insert one.
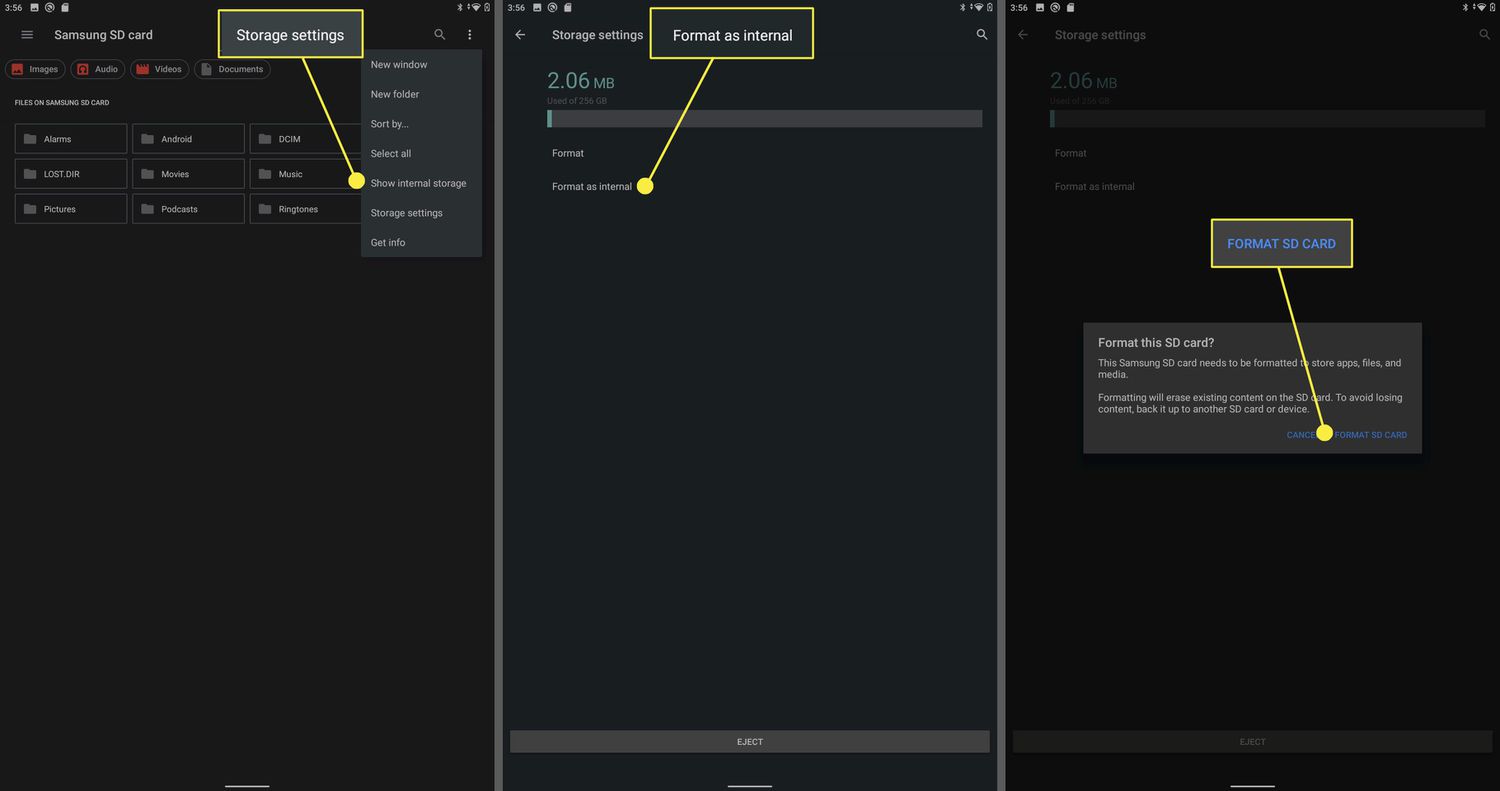
Step 2: Set your SD card as the default storage location
After inserting the SD card into your tablet, the next step is to set it as the default storage location. This will ensure that any new apps, files, or media you download or create will be automatically saved to the SD card rather than the internal storage of your tablet.
To set your SD card as the default storage location, follow these general steps:
- Open the Settings app on your tablet. The Settings app is usually represented by a gear icon and can be found in your app drawer or the quick settings panel.
- Scroll down and find the “Storage” or “Storage & USB” option. Tap on it to access the storage settings of your tablet.
- In the storage settings menu, you should see an option to change the default storage location. This option may be labeled as “Default storage” or “Storage location.” Tap on it to proceed.
- Select the SD card as the default storage location. In some cases, you may be presented with a list of available storage options, including both internal storage and the SD card. Choose the SD card to set it as the default.
- Confirm your selection and exit the settings menu.
It’s important to note that the language and exact steps may vary depending on the brand and model of your tablet and the version of the operating system it is running on. However, most modern tablets provide options to change the default storage location, and the process is typically straightforward.
Once you have set your SD card as the default storage location, any new content you download or create will be automatically stored on the SD card. This will help free up space on your tablet’s internal storage and ensure you have ample room for your files and apps.
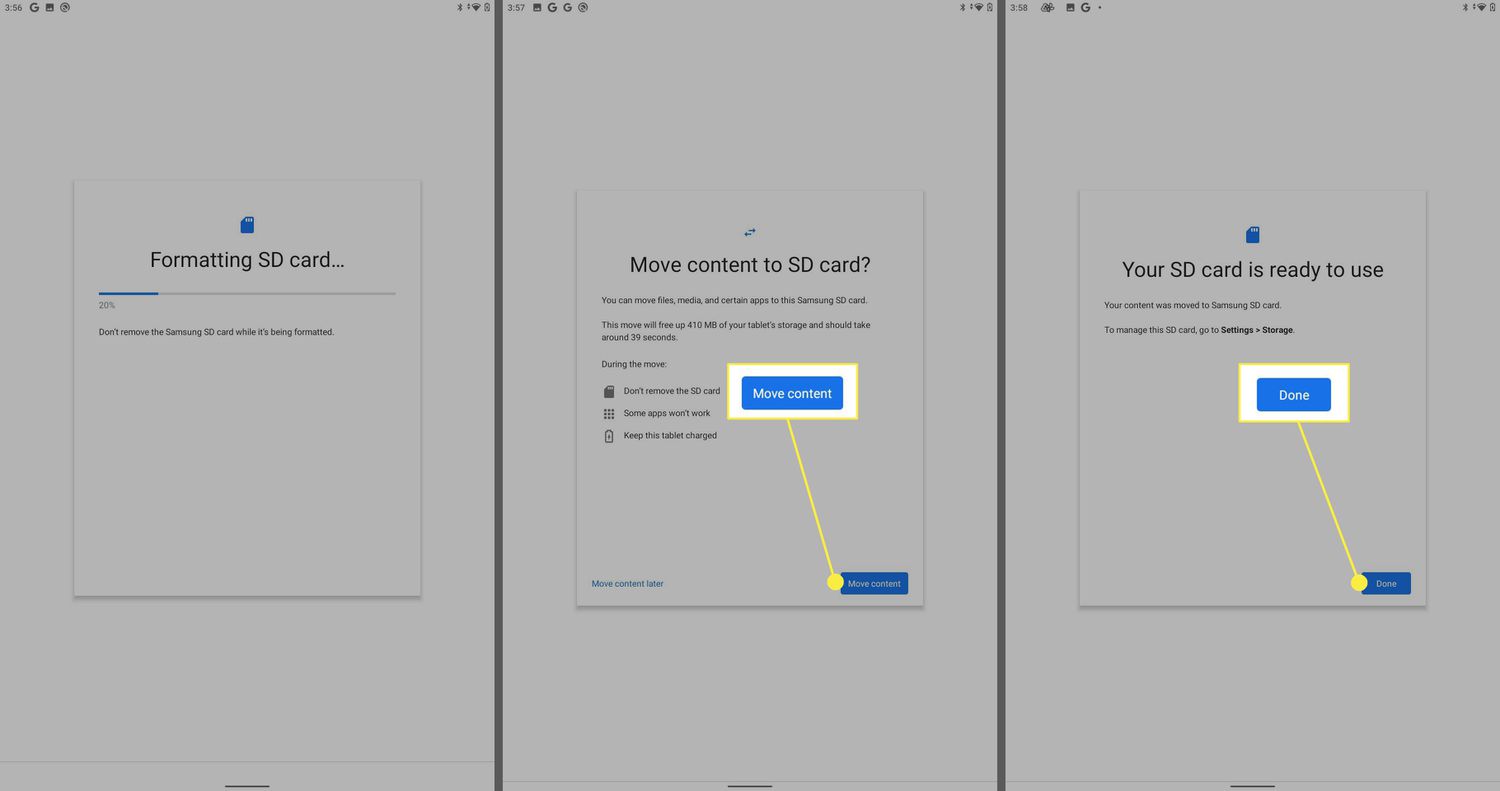
Step 3: Transfer apps and files to the SD card
Now that you have set your SD card as the default storage location, it’s time to transfer existing apps and files to the SD card. This step will further optimize your tablet’s internal storage and ensure that you have more space available for new apps and files.
Here’s how you can transfer apps and files to the SD card:
- Go to the Settings app on your tablet and look for the “Apps” or “Applications” option. Tap on it to access the app settings.
- In the apps settings menu, you should see a list of all the installed apps on your tablet. Select the app you want to transfer to the SD card.
- Look for the “Storage” or “Storage usage” option within the app settings. Tap on it to view the storage details of the selected app.
- If the app is transferable to the SD card, you will find an option to “Move to SD card” or similar wording. Tap on it to initiate the transfer process.
- Wait for the transfer to complete. The time it takes to transfer the app to the SD card may vary depending on the size of the app and the speed of your SD card.
Repeat this process for other apps you want to transfer to the SD card. Keep in mind that not all apps are transferable to the SD card, as some apps require specific storage permissions or may be system apps that cannot be moved. However, most user-installed apps can be transferred to the SD card.
When it comes to transferring files to the SD card, you can use a file manager app to easily move or copy files from your tablet’s internal storage to the SD card. Simply open the file manager app, locate the files you want to transfer, select them, and choose the option to move or copy them to the SD card location.
By transferring apps and files to the SD card, you can make the best use of the available storage space on your tablet and ensure that it remains clutter-free. This will enhance the overall performance of your device and prevent any storage-related issues in the future.
Step 4: Move existing files and apps to the SD card
In addition to transferring new apps and files to the SD card, it’s also beneficial to move existing apps and files from your tablet’s internal storage to the SD card. This will further free up space and ensure that you have sufficient room for your needs.
Here’s how you can move existing files and apps to the SD card:
Moving Files
- Open your file manager app on the tablet. If you don’t have one, you can download one from the app store.
- Navigate to the location of the files you want to move. This could be your photos, videos, documents, or any other files.
- Select the files you want to move by long-pressing on them or using the file manager’s selection feature.
- Once the files are selected, look for the option to move or cut them. This is usually represented by an icon or a menu option.
- Navigate to the SD card location by selecting it from the file manager’s directory or storage options.
- Paste the files into the desired location on the SD card.
By moving files to the SD card, you can create more space on your tablet’s internal storage for other purposes and keep your files organized in one place.
Moving Apps
- Open the Settings app on your tablet and go to the “Apps” or “Applications” section, similar to the previous step.
- Select the app you want to move from the list of installed apps.
- In the app settings, you should find an option called “Move to SD card” or a similar phrase. Tap on it to initiate the moving process.
- Wait for the process to complete. The time it takes will depend on the size of the app and the speed of your SD card.
Note that not all apps can be moved to the SD card, as it depends on the developer’s settings. However, it’s still worth checking for each app if the option is available to free up internal storage.
By moving existing files and apps to the SD card, you can optimize the storage space on your tablet and ensure that you have ample room for new content and applications.
Step 5: Safely remove the SD card from your tablet
When it comes to managing your tablet’s SD card, it’s important to know how to safely remove it to avoid any data loss or damage. Here are the steps to safely remove the SD card from your tablet:
- Before removing the SD card, ensure that no apps or files are currently being accessed from the card. Close any apps that may be using data from the SD card.
- Go to the Settings app on your tablet and navigate to the “Storage” or “Storage & USB” section, similar to the previous steps.
- Tap on the option that allows you to safely eject or unmount the SD card. This option is usually labeled as “Eject SD card” or “Unmount SD card.
- Wait for the tablet to complete the process of unmounting the SD card. You may receive a notification confirming that it is safe to remove the card.
- Carefully remove the SD card from the tablet’s SD card slot by gently pushing it in and then pulling it out.
It’s important to emphasize that you should not remove the SD card while it is still being accessed or when any apps or files are actively using the card. Doing so may result in data corruption or loss. Always ensure that you properly unmount or eject the SD card before physically removing it from your tablet.
If you plan to use the SD card on another device or to transfer data to your computer, make sure to handle it with care and avoid exposing it to extreme temperatures or water.
By following these steps, you can safely remove the SD card from your tablet without any risk of data loss and ensure its longevity for future use.
Conclusion
Congratulations! You have now successfully learned how to save files to an SD card on your tablet. By following the steps outlined in this guide, you can maximize the storage capacity of your device and ensure that you have ample space for all your apps, files, and media.
Remember, the key steps involve inserting the SD card into your tablet, setting it as the default storage location, transferring apps and files to the SD card, moving existing files and apps, and safely removing the SD card when needed.
By utilizing the external storage capability of an SD card, you can free up valuable internal storage space on your tablet, enhancing its overall performance and preventing storage-related issues in the future.
Always keep in mind that the specific steps may vary slightly depending on the brand and model of your tablet and the version of the operating system it is running on. It’s recommended to refer to the user manual or support documentation provided by the tablet manufacturer for precise instructions.
Now that you know how to save to an SD card on your tablet, you can enjoy a more spacious and organized digital experience. Whether it’s storing your favorite apps, capturing precious memories through photos and videos, or transferring files between devices, the SD card offers a convenient and versatile solution.
So, go ahead and make the most out of your tablet’s additional storage capacity with an SD card. Happy saving!