Introduction
Welcome to the world of technology, where computers and external hard drives have become essential tools for storing and accessing our valuable data. However, what do you do when your external hard drive suddenly stops working or becomes inaccessible? It can be a daunting and frustrating experience, especially if you have important files and documents stored on it.
In this article, we will explore the steps you can take to retrieve data from a broken external hard drive. Whether it’s due to physical damage or logical errors, there are various methods you can try to recover your precious files. However, it’s important to note that not all methods may be successful, and the level of complexity will depend on the extent of the damage.
Before we dive into the various steps, it’s crucial to understand that attempting data recovery on a broken external hard drive carries some risks. It’s always advisable to make a backup of your data regularly to prevent potential loss. Additionally, if the data on the drive is highly valuable or irreplaceable, it’s recommended to seek professional help from a data recovery service provider.
With that said, let’s move on to the first step in our data recovery journey: assessing the damage.
Step 1: Assess the Damage
The first step in retrieving data from a broken external hard drive is to assess the extent of the damage. This will help you understand the underlying issue and determine the appropriate course of action.
Start by examining the physical condition of the hard drive. Check for any signs of physical damage such as dents, cracks, or loose connectors. If you notice any visible damage, it’s crucial to handle the drive with extreme care to avoid further harm.
Next, listen closely to the drive when you connect it to your computer. Do you hear any unusual noises like clicking, grinding, or buzzing? These noises may indicate mechanical failure and can be a sign that the drive needs professional repair.
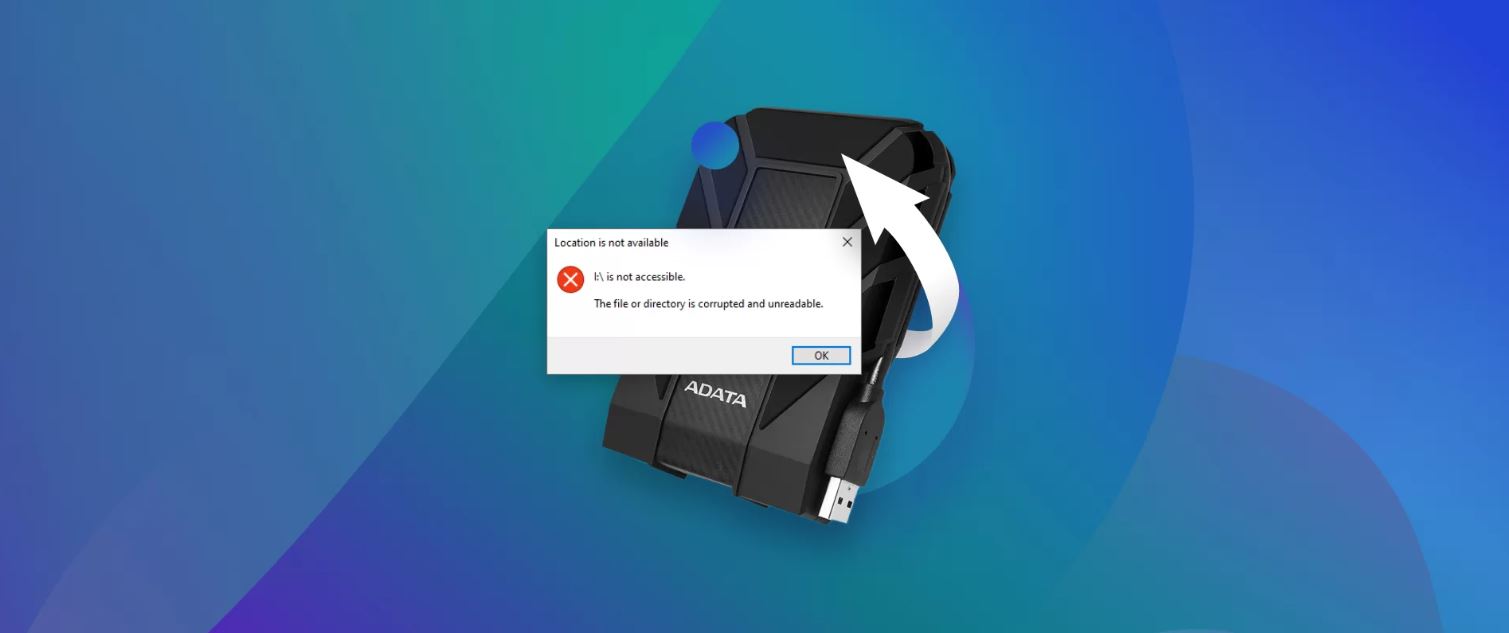
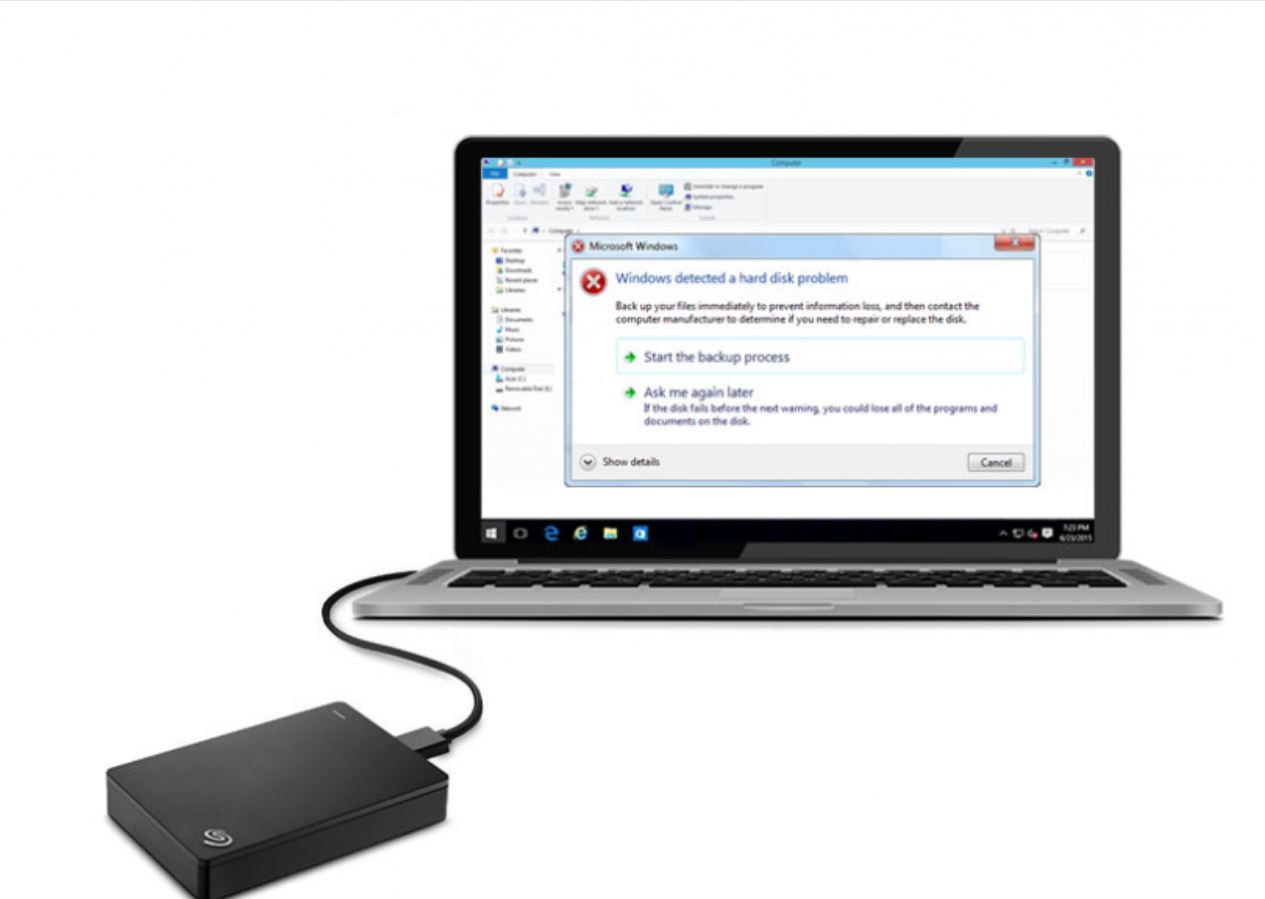
If the drive appears to be physically intact and is not making any strange noises, the issue might be due to logical errors. These errors can occur when the file system is corrupted or when the drive is not properly recognized by your computer.
To assess logical errors, connect the drive to your computer and check if it is detected. If it is detected but cannot be accessed or shows an error message, it’s likely a logical error. On the other hand, if the drive is not detected at all, it may indicate a more severe issue.
It’s also essential to consider any prior warning signs or events leading up to the drive’s failure. Did you notice any performance issues, frequent crashes, or sudden power outages? Understanding the context can provide valuable insights into the possible causes of the failure.
Assessing the damage is an important first step as it allows you to determine whether the issue can be resolved through DIY methods or if professional help is needed. Keep in mind that not all issues can be fixed at home, and attempting to do so may further damage the drive or result in permanent data loss.
In the next step, we will look at how to safely remove the hard drive from your computer or enclosure.
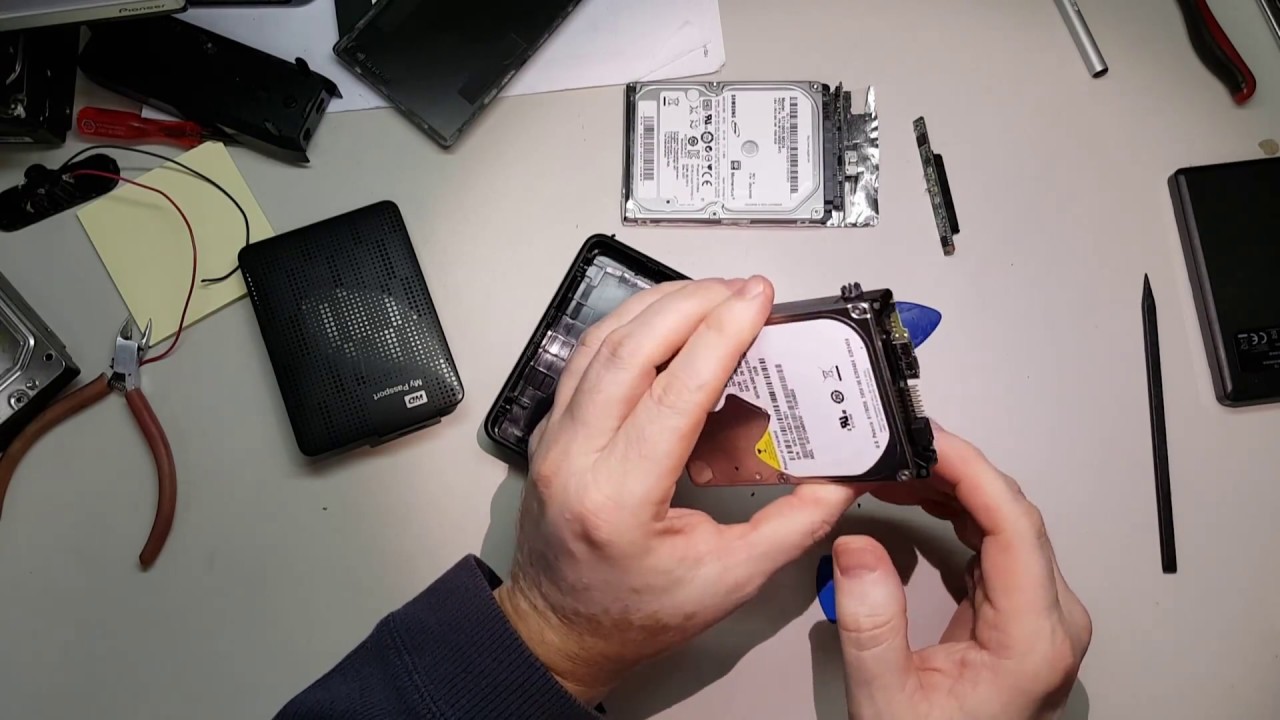
Step 2: Safely Remove the Hard Drive
Once you have assessed the damage and determined that the issue can be tackled at home, the next step is to safely remove the hard drive from your computer or its enclosure. This is an essential step to ensure the protection of both the drive and your data.
If you are dealing with an external hard drive that connects via USB, unplug it from your computer. If it is an internal hard drive, shut down your computer completely and disconnect the power source. Remember to wear an anti-static wristband or touch a grounded metal object to discharge any static electricity before handling the drive.
For external hard drives, carefully disconnect the USB cable or any other connecting cables from the drive and the computer. Avoid pulling the cables forcefully, as this can cause additional damage. If your external hard drive is enclosed in a case or housing, follow the manufacturer’s instructions on how to open it safely.
If you are dealing with an internal hard drive, open your computer case following the appropriate guidelines for your specific model. Locate the hard drive and disconnect the SATA or IDE cables, as well as the power cable. Take note of how the cables are connected, as you will need to reconnect them correctly later.
Once the hard drive is safely disconnected from the computer or enclosure, place it on an anti-static mat or a non-conductive surface. This will help prevent any static electricity from damaging the drive’s sensitive components.
Remember to handle the hard drive with care and avoid touching the exposed circuit board or delicate components. Any physical damage to these parts can further hinder the data recovery process.
With the hard drive safely removed, we can now move on to the next step: connecting the hard drive to a different computer for data recovery.
Step 3: Connect the Hard Drive to a Different Computer
After safely removing the hard drive from its original computer or enclosure, the next step is to connect it to a different computer. By doing so, we can eliminate any potential issues with the original computer and increase the chances of successfully retrieving the data.
Start by identifying a suitable computer to connect the hard drive to. It can be a desktop or a laptop, as long as it has available ports to connect the hard drive. Ideally, choose a computer with a similar operating system to ensure compatibility.
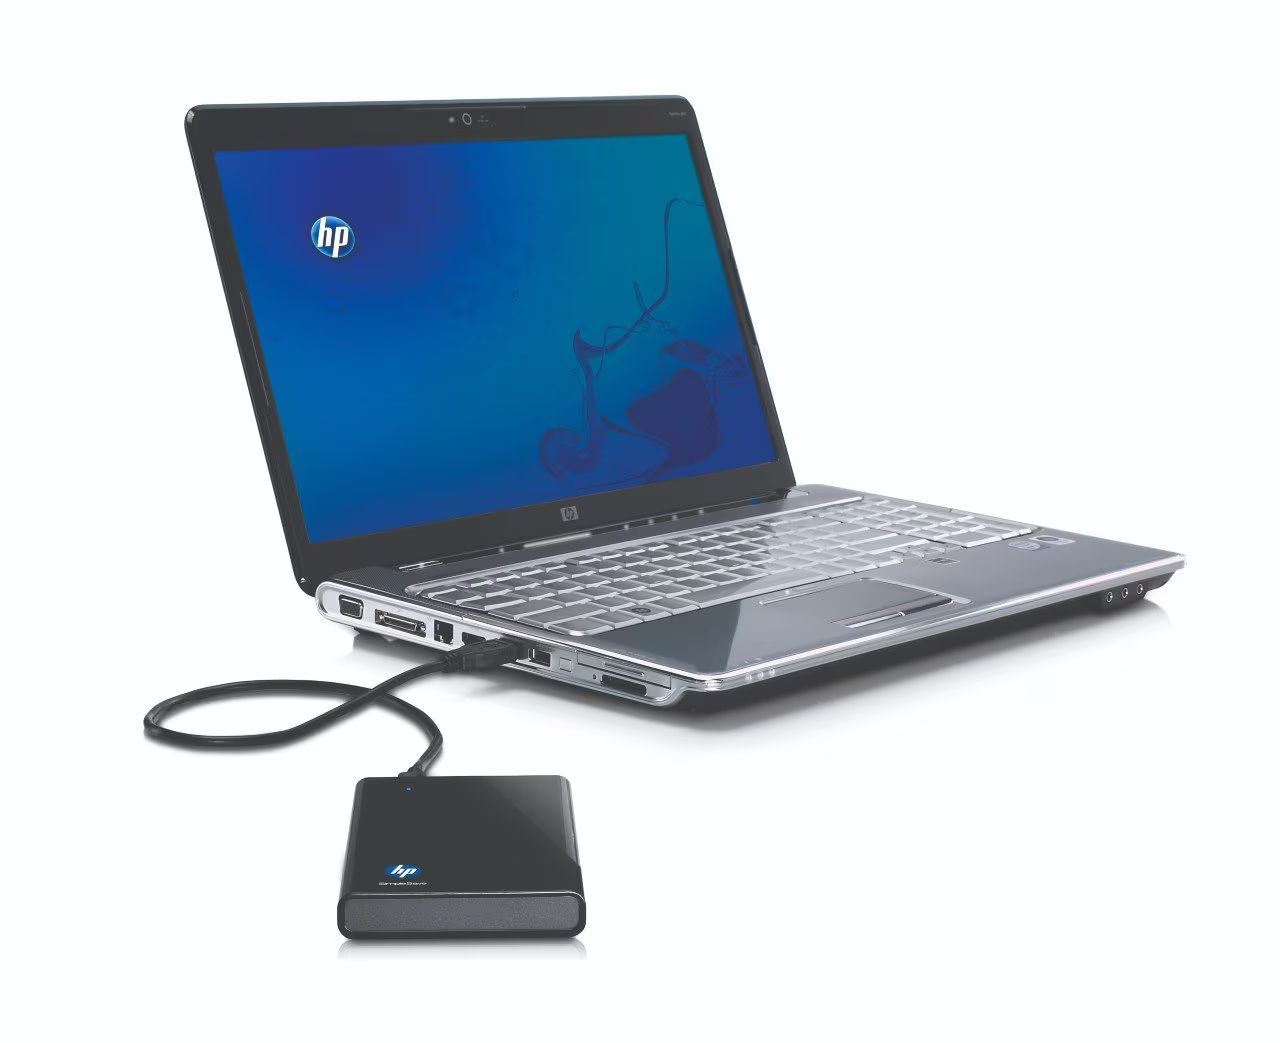
If you are working with an external hard drive, you can easily connect it to the new computer using a USB cable. Plug one end of the cable into the USB port of the computer and the other end into the port on the external hard drive. Make sure the connection is secure.
For internal hard drives, you will need to open the computer and connect the hard drive directly to the motherboard using the appropriate cables. Locate an available SATA or IDE port on the motherboard and connect one end of the respective cable to the port and the other end to the hard drive. Connect the power cable as well.
Once the hard drive is connected, turn on the computer and wait for it to boot up. Depending on the operating system, the computer should detect the newly connected hard drive and assign it a drive letter.
If the hard drive is recognized and appears in the file explorer, you can proceed with attempting to retrieve the data. However, if the drive is not recognized or shows up as unallocated or uninitialized, it may require further troubleshooting or professional assistance.
In some cases, you may need to download and install specific drivers or software to ensure proper recognition of the hard drive by the computer. Check the manufacturer’s website for any available drivers or software updates.
With the hard drive successfully connected to a different computer, we are now ready to move on to the next step: using data recovery software to retrieve the lost data.
Step 4: Use Data Recovery Software
Using data recovery software is often the next step in retrieving data from a broken external hard drive. This software is designed to scan the drive for recoverable files and help restore them to a functional state.
Start by researching and downloading reputable data recovery software. There are various options available, both free and paid. Look for software that is specifically designed for external hard drive recovery and supports the file system of your drive.
Install the data recovery software on the computer to which you have connected the broken external hard drive. Launch the software and follow the on-screen instructions to begin the data recovery process.
Most data recovery software will provide you with different scanning options. The two main types of scans are a quick scan and a deep scan. It is recommended to start with a quick scan as it is faster and may be able to recover recently deleted or less severely damaged files.
If the quick scan does not retrieve the desired files or if the drive’s condition is more critical, opt for a deep scan. This thorough scan will search the entire drive and may take longer to complete, but it has a higher chance of recovering lost or damaged files.
During the scanning process, the software will display a list of recoverable files found on the broken external hard drive. You can usually preview the files to verify their integrity before proceeding with the recovery.
Select the files you want to recover and specify a safe location on your computer where you want to save them. It is essential to choose a different drive or location other than the broken external hard drive to prevent overwriting or further data loss.
Once you have selected the desired files and recovery location, initiate the recovery process. The software will begin copying the selected files from the broken external hard drive to the specified location on your computer.
Keep in mind that the recovery process may take some time, depending on the amount and size of the files being recovered. Be patient and avoid interrupting the process to ensure successful recovery.
Once the data recovery software has completed its task, check the recovered files on your computer to verify their integrity. Make sure that all the important files are recovered and accessible.
If the data recovery software was unable to retrieve all of your desired files, it may be necessary to explore other methods or consider seeking professional help to recover the remaining data.
In the next step, we will look at attempting DIY repairs to potentially restore the functionality of the broken external hard drive.
Step 5: Attempt DIY Repairs
If data recovery software was not able to retrieve all your desired files from the broken external hard drive, you may consider attempting DIY repairs to potentially restore the functionality of the drive.
Before proceeding with any DIY repairs, it’s important to note that this step carries some risks and should only be done if you are comfortable with handling hardware components. If the data on the drive is highly valuable or irreplaceable, it’s recommended to seek professional help from a data recovery service provider.
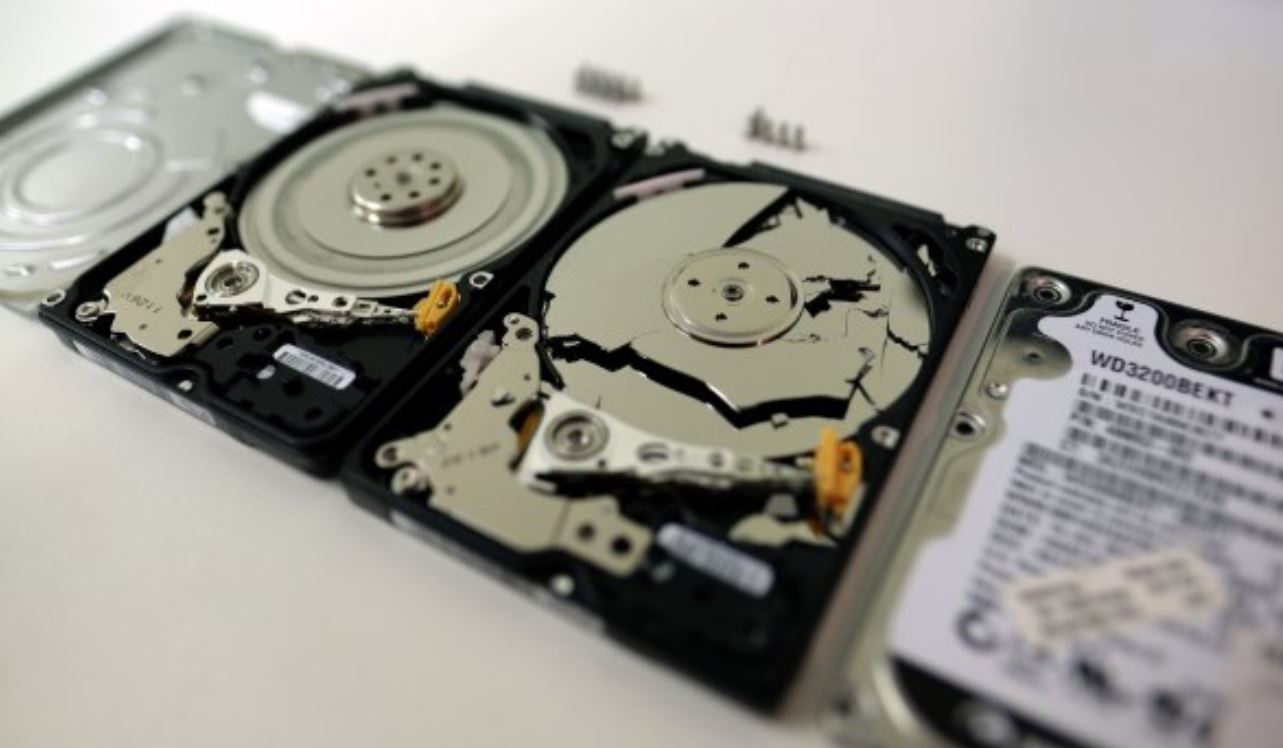
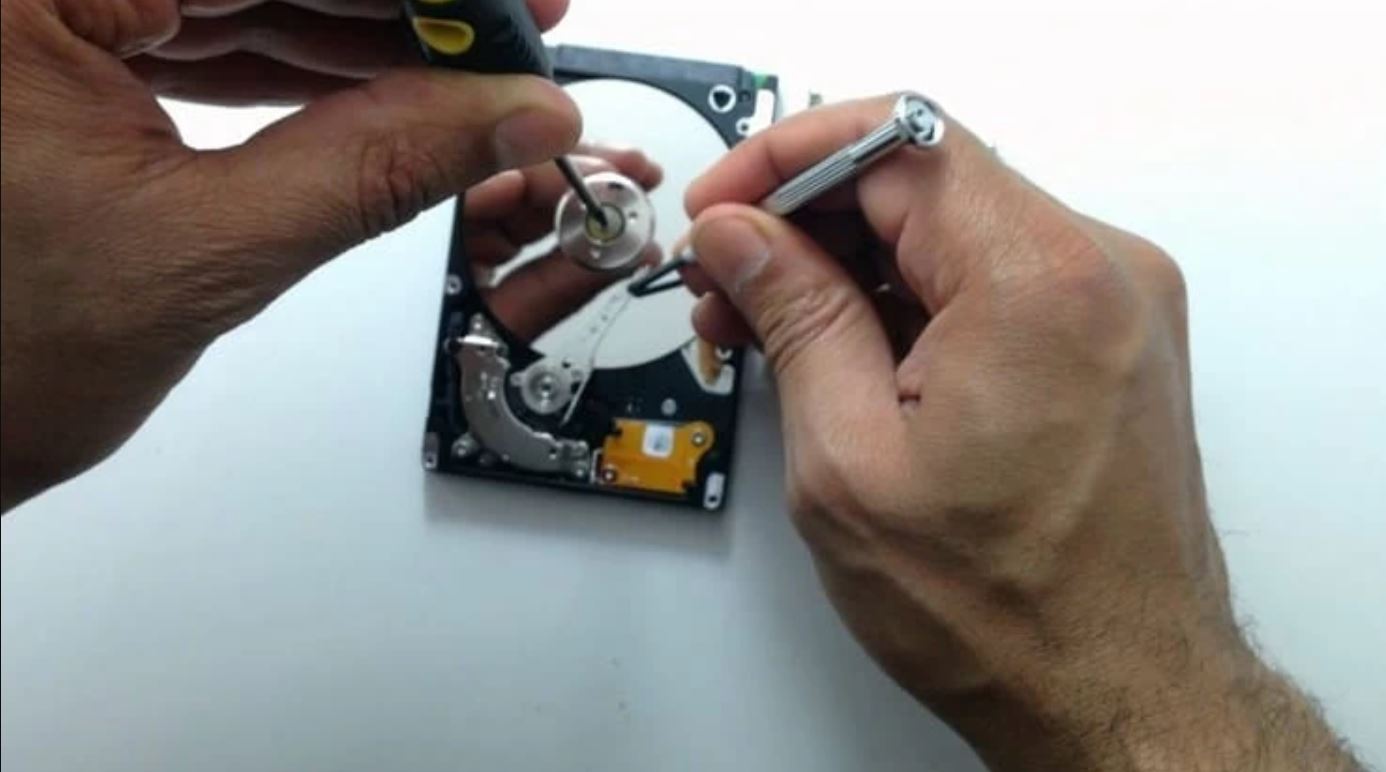
One common DIY repair method is to replace the faulty or damaged components of the hard drive, such as the PCB (Printed Circuit Board). If you have the technical knowledge and skills, you can search for a compatible replacement PCB online and carefully swap it with the original one.
It’s crucial to find an exact match for the replacement PCB, including the same firmware version, model number, and other specifications. Mismatches can lead to further damage or incompatibility issues.
Another DIY method involves opening the hard drive case and addressing mechanical issues. This should only be attempted if you have experience working with delicate components and a clean, dust-free environment.
If the issue is related to the read/write heads or the spindle motor, you can try carefully realigning or replacing these components. However, keep in mind that these repairs require precision and can be challenging even for experienced individuals.
It’s important to note that DIY repairs should not be attempted on drives with physical damages caused by impacts, water exposure, or extreme conditions. These cases often require specialized equipment and expertise that only professional data recovery services can provide.
Always weigh the risks and benefits of DIY repairs. If there is a significant chance of further damaging the drive or if the data is extremely valuable, it’s best to seek professional help.
In the next step, we will discuss when it’s appropriate to seek professional assistance for data recovery.
Step 6: Seek Professional Help
If all previous DIY attempts have been unsuccessful or if the data on your broken external hard drive is highly valuable and irreplaceable, it’s time to consider seeking professional help for data recovery.
Professional data recovery service providers have specialized tools, knowledge, and expertise to deal with a wide range of complex data recovery cases. They are equipped to handle physical damages, logical errors, and various other issues that may hinder data retrieval.
When selecting a data recovery service provider, it’s essential to research and choose a reputable and trusted company. Look for companies with a proven track record of successful data recoveries and positive customer reviews. Take note of their certifications, experience, and the technologies they utilize for data recovery.
Before sending your broken external hard drive to a data recovery company, inquire about their evaluation process. Many companies offer free evaluations where they assess the drive and provide a detailed report of the recoverable data and the estimated cost of the recovery.
Professional data recovery services use specialized equipment and techniques to recover data from physically damaged drives. They have cleanroom environments that ensure the safety and integrity of the drive during the recovery process.
If the data recovery company determines that the data on your broken external hard drive is recoverable, they will provide you with a quote for the recovery service. Costs can vary depending on the extent of the damage, the complexity of the recovery process, and the amount of data to be recovered.
Keep in mind that professional data recovery services can be costly, but their expertise and success rate may outweigh the cost, especially when dealing with critical or irreplaceable data.
Once you have selected a data recovery service provider and agreed to the terms, follow their instructions on how to safely package and ship your broken external hard drive to their facility. Take necessary precautions to ensure the drive is protected during transit, such as using proper packaging materials and selecting a reliable shipping method.
After the data recovery service provider receives your broken external hard drive, they will work diligently to retrieve the data. The time required for the recovery process will depend on the complexity of the case and the number of drives in their queue.
Once the data recovery is complete, the company will provide you with the recovered data on a suitable medium, such as a new external hard drive or through secure online file transfer. Review the recovered data to ensure its integrity and completeness.
If you are satisfied with the results, the process is complete. However, if there are any issues or concerns, communicate with the data recovery service provider to address them.
Remember, seeking professional help should be your last resort after exhausting all other DIY methods. It’s crucial to weigh the importance of the data and the potential risks involved before making a decision.
Conclusion
Dealing with a broken external hard drive and the potential loss of valuable data can be a stressful and challenging situation. However, by following the steps outlined in this guide, you can increase your chances of retrieving your data successfully.
Begin by assessing the damage to understand the extent and nature of the issue. Safely remove the hard drive from its original computer or enclosure to prevent further damage. Connect the hard drive to a different computer and use data recovery software to attempt to retrieve the lost files.
If these DIY methods are unsuccessful, you can consider attempting repairs on your own, but always weigh the risks involved, especially if the data is highly important or irreplaceable. If DIY efforts prove fruitless or if the data on the drive is critical, seeking professional help from a reputable data recovery service provider is the best course of action.
Professional data recovery services have the expertise, specialized tools, and cleanroom environments necessary to handle complex cases and recover data from physically damaged drives. Choosing a trusted and reputable data recovery company is crucial to ensure the best possible results.
Remember, prevention is always better than recovery. Regularly backup your data to prevent potential loss in the event of hardware failure or other issues with your external hard drive. It’s also important to handle your hard drive with care, avoid physical damage, and protect it from extreme conditions.
By following these steps and taking necessary precautions, you can increase the chances of retrieving your data from a broken external hard drive. While the process may be challenging and time-consuming, the potential recovery of your valuable data makes it well worth the effort.