To replace the HP Pavilion x360 battery, you will need to power down the laptop, remove the bottom cover, disconnect the old battery, install the new one, and test the system. The process is straightforward with the right tools and a careful approach, and it will restore your laptop's portability and battery life.
Before you start: Check for a battery recall on your HP Pavilion x360
Before opening your laptop, you must verify whether your specific HP Pavilion x360 model is part of a battery recall. HP may provide free replacement services for affected batteries, and the company advises against user removal for recalled internal batteries. If your battery is under recall, attempting a DIY replacement could void the official remedy or pose a safety risk. Instead, enable Battery Safety Mode via a BIOS update if HP recommends it, which allows the laptop to run safely on AC power without using the battery. This critical first step ensures you don’t waste time or money on a battery that HP will replace for free, and it keeps you safe from potential fire or overheating hazards.
Tools and materials you'll need to replace your HP Pavilion x360 battery
Having the correct tools on hand makes the job smoother and reduces the risk of damaging internal components. You will need a Phillips screwdriver, an anti-static wrist strap, a compatible replacement battery, and a clean, lint-free cloth. The Phillips screwdriver is essential for removing the screws that secure the back cover, while the anti-static wrist strap prevents static electricity from harming sensitive electronics. Choose a replacement battery that is explicitly compatible with your HP Pavilion x360 model to ensure proper fit and function. The clean cloth helps wipe away dust or debris you might encounter during the procedure, and a well-lit work surface with ample lighting is also recommended for seeing small screws and connectors clearly.
Step 1: Power off and prepare your laptop safely
Start by shutting down your laptop completely and disconnecting all power and peripherals. Save your work, close all applications, and unplug the power cord from the laptop. Remove any external devices such as USB drives, external hard drives, or a docking station to avoid accidental damage. Then, set up a safe, static-free work area on a flat, stable surface with good lighting. Wear your anti-static wrist strap and attach the grounding clip to a metal surface or grounded object. Taking regular breaks during the process is also wise, as patience and attention to detail are crucial for avoiding mistakes. These precautions protect both you and your laptop from electrical hazards and component damage.
Step 2: Remove the back cover
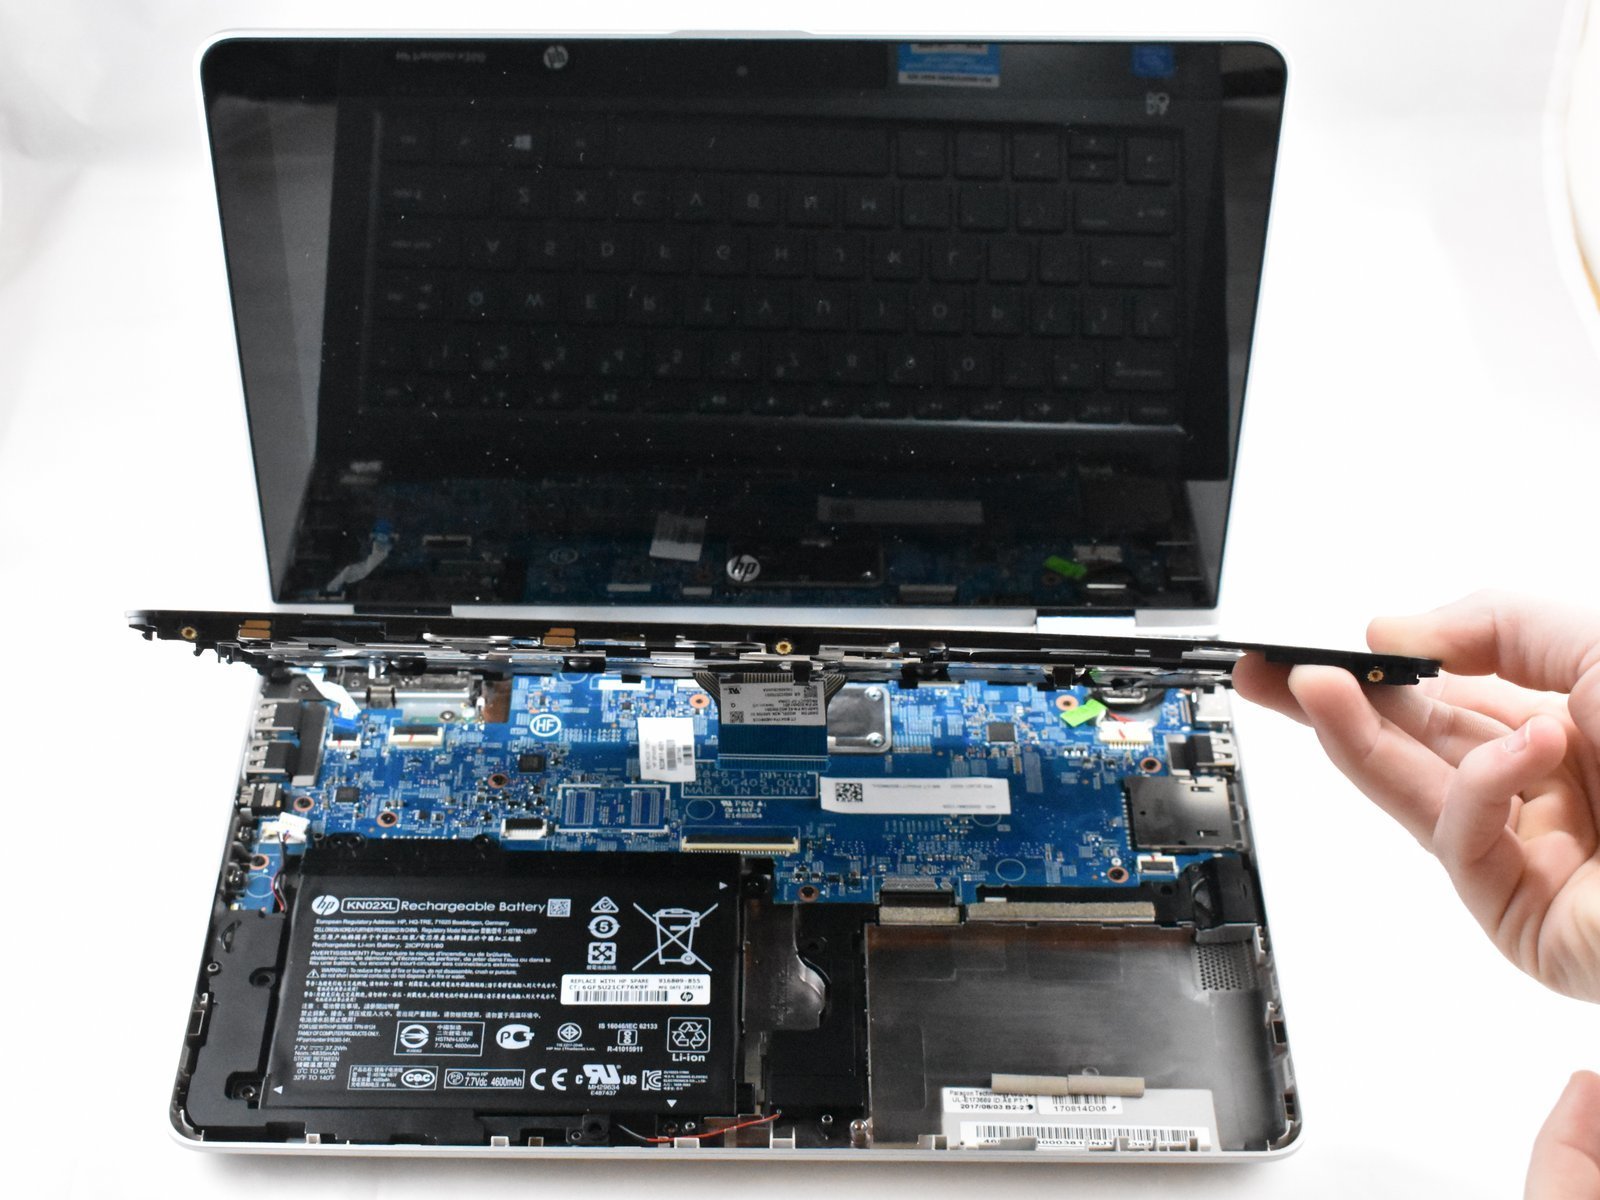
Place your powered-off laptop with the bottom side facing up on your clean, well-lit work surface. Locate the screws around the edges of the bottom cover, they may be marked with small icons, and remove them using your Phillips screwdriver. Set the screws aside in a safe place so they don’t get lost. Once all screws are removed, use a small flat tool like a plastic pry tool or a credit card to gently insert it between the back cover and the laptop’s frame. Carefully work your way around the edges, releasing the clips that secure the cover. Avoid using excessive force, as this can damage the cover or internal components. Once all clips are released, lift the back cover off and set it aside, then inspect the inside to familiarize yourself with the battery’s location.
Step 3: Remove the old battery
With the back cover removed, locate the battery pack, it is usually positioned near the center or bottom of the laptop’s frame. First, disconnect the battery cable from the motherboard by gently pulling the connector away from its port. Use your fingers or fine tweezers, but be careful not to pull on the wires or apply excessive force, as this could damage the connector or motherboard. After disconnecting, check for any securing screws or clips holding the battery in place and remove them if present. Then, gently lift the old battery out of the chassis using your fingertips. If it feels firmly attached, use gentle wiggling or sliding motions to free it. Place the old battery on a clean, non-conductive surface to prevent any accidental contact with metallic objects.
Step 4: Install the new battery
Take your new compatible replacement battery out of its packaging and position it in the battery compartment, aligning it with the connectors and screw holes. Ensure the battery is oriented correctly, the label should face up, and the connectors must match the corresponding ports on the motherboard. If there were any securing clips or screws for the old battery, use them to fasten the new battery in place, but avoid over-tightening to prevent damage. Next, carefully take the battery connector and plug it firmly into the port on the motherboard. Make sure the connection is secure and properly aligned, with no gap between the connector and the port. A solid connection is essential for reliable power flow and optimal performance of your HP Pavilion x360.
Step 5: Replace the back cover and test
With the new battery installed and connected, it’s time to close up your laptop. Position the back cover over the laptop’s frame, ensuring all edges and corners are properly aligned. Press firmly but evenly across the cover, starting from one side and working your way around, to engage all the clips and snaps. If you removed screws earlier, reinsert and tighten them with your Phillips screwdriver, but be cautious not to overtighten. Verify that the cover is flush with the frame and there are no gaps or misalignments. Then, reconnect the laptop to an external power source and press the power button to turn it on. Observe the startup process, check the battery indicator to confirm the new battery is recognized and charging, and perform a simple task like opening an application to ensure everything functions correctly. Monitor the battery life over the next few minutes to confirm it holds a charge as expected. If any issues arise, consult HP support or a professional technician for assistance.
\nRelated reading: How To Replace A Degraded VR Headset Battery, How To Remove Battery From Onn Tablet, and Shark Robot Vacuum Battery Replacement Guide.