Introduction
Are you looking to upgrade the storage capacity of your Steam Deck? The Steam Deck is a powerful handheld gaming device that allows you to play your favorite PC games on the go. While it comes with a decent amount of internal storage, you may find yourself running out of space for all your games and files. Fortunately, replacing the SSD in the Steam Deck is a relatively simple process that can give you a significant boost in storage capacity.
By replacing the SSD, you can not only increase the amount of storage available, but also potentially improve the performance of your Steam Deck. A faster and more capable SSD can reduce loading times and enhance the overall gaming experience. Whether you’re a casual gamer or a dedicated enthusiast, upgrading the SSD can greatly enhance the usability and functionality of your Steam Deck.
In this guide, we will walk you through the step-by-step process of replacing the SSD in your Steam Deck. We will cover everything you need to know, from gathering the necessary tools to reassembling the device after the upgrade. By following this guide, you can confidently upgrade the storage capacity of your Steam Deck and ensure a smooth and successful installation.
Before we dive into the procedures, it’s important to note that opening up your Steam Deck might void the warranty. Make sure to check the warranty terms and conditions before proceeding. Additionally, it’s always a good idea to backup your data and take necessary precautions to avoid any accidental damage to your device during the SSD replacement process.
Now that we’ve covered the basics, let’s gather the required tools and get started on upgrading the SSD in your Steam Deck.
Prerequisites for Replacing SSD in Steam Deck
Before you begin the process of replacing the SSD in your Steam Deck, there are a few essential prerequisites that you need to consider. These prerequisites will ensure that you have a smooth and successful SSD replacement process.
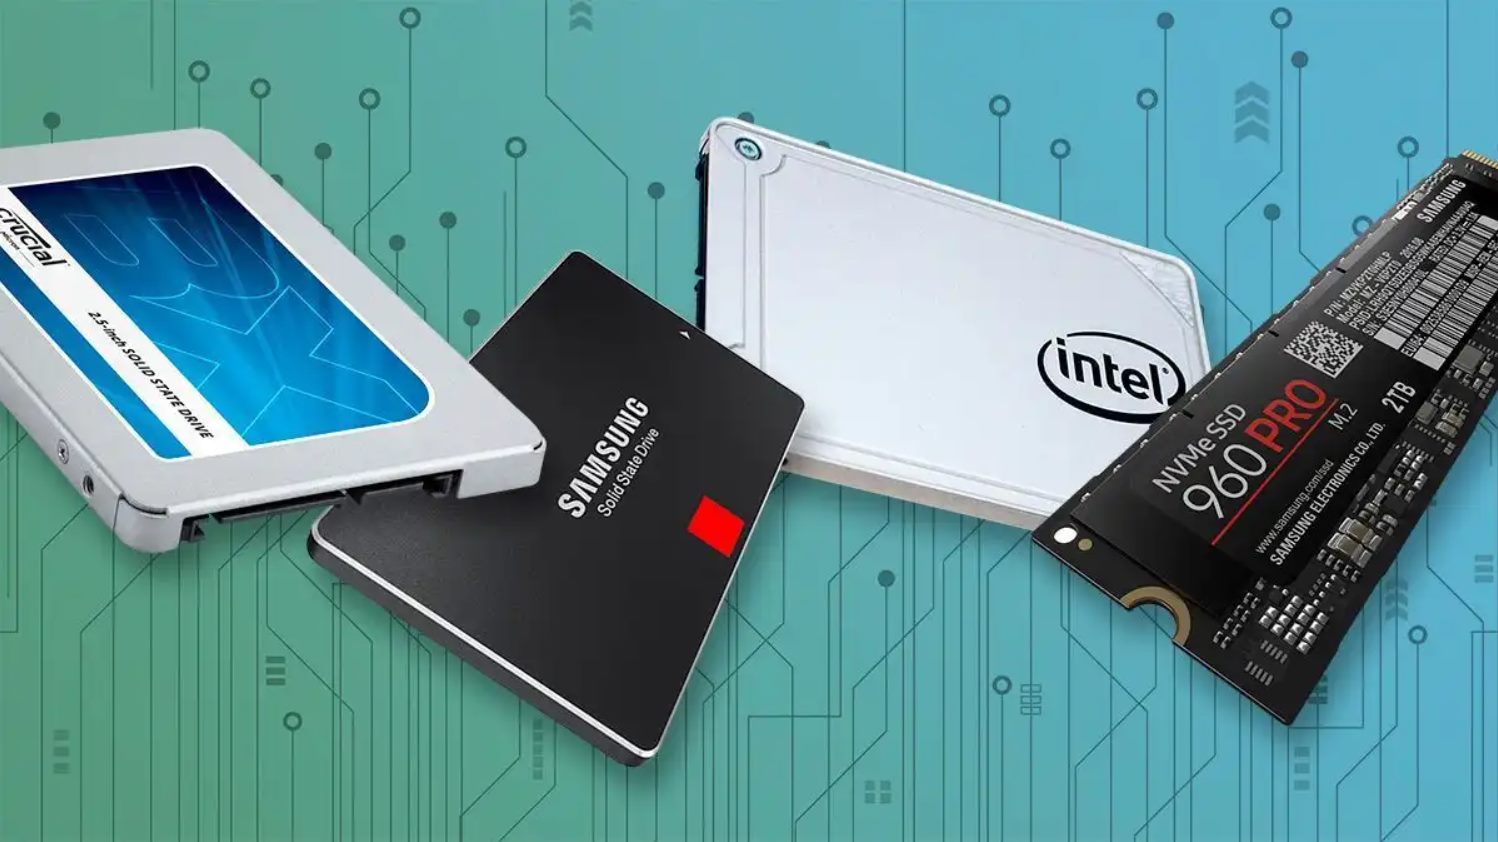
- Compatibility: Ensure that the new SSD you plan to install in your Steam Deck is compatible with the device. Check the specifications and requirements provided by the manufacturer to ensure compatibility.
- Tools: Gather the necessary tools required for the SSD replacement process. You will need a small Phillips screwdriver, an anti-static wrist strap (optional but recommended), and a clean, static-free workspace. These tools will help you safely open up the Steam Deck and perform the necessary steps.
- Backup: It’s always a good practice to backup your data before performing any hardware modifications. This ensures that your important files and game saves are safe, in case anything goes wrong during the SSD replacement process. Take the time to transfer your files to an external storage device or cloud storage solution.
- Patience: Replacing the SSD in the Steam Deck requires precision and attention to detail. It’s important to work slowly and carefully to avoid damaging any components. Take your time during each step and follow the instructions closely to ensure a successful SSD replacement.
- Warranty: Opening up your Steam Deck may void the device’s warranty. Before proceeding with the SSD replacement, it’s essential to check the warranty terms and conditions provided by the manufacturer. If your device is still under warranty and you are uncomfortable with performing the upgrade yourself, consider seeking professional assistance.
By fulfilling these prerequisites, you will be well-prepared for the SSD replacement process in your Steam Deck. Now that we have the necessary tools and knowledge, let’s move on to the step-by-step process of replacing the SSD in your Steam Deck.
Step 1: Gather the necessary tools
Before you can begin replacing the SSD in your Steam Deck, you need to gather the necessary tools. Having the right tools on hand will ensure that you can perform the upgrade efficiently and without causing any damage to your device.
Here are the tools you will need:
- Small Phillips screwdriver: You will need a small Phillips screwdriver to remove the screws securing the back panel of the Steam Deck. Make sure to use the appropriate size to ensure a snug fit and prevent any damage to the screws.
- Anti-static wrist strap: While not required, using an anti-static wrist strap is highly recommended. This will help prevent any static electricity from damaging the sensitive components of your Steam Deck. Simply strap it onto your wrist and connect the alligator clip to a grounded metal surface.
- Clean, static-free workspace: Find a clean and well-lit workspace to perform the SSD replacement. This will help you keep track of small screws and avoid any accidental damage to your device. Additionally, make sure to work on a static-free surface, such as a non-carpeted area or an anti-static mat.
By having these tools ready, you will be well-prepared to begin the SSD replacement process in your Steam Deck. Before proceeding to the next step, ensure that you have everything you need within reach. This will save you time and allow for a smoother upgrade experience.
Now that you have gathered the necessary tools, it’s time to move on to preparing your Steam Deck for disassembly. Let’s proceed to the next step and get closer to upgrading your Steam Deck’s SSD!
Step 2: Prepare the Steam Deck for disassembly
Before you can begin the process of replacing the SSD in your Steam Deck, it’s crucial to prepare the device for disassembly. This step involves ensuring a safe and organized workspace, as well as familiarizing yourself with the layout of the Steam Deck.
- Power off the Steam Deck: Before starting any hardware modifications, make sure to power off your Steam Deck completely. This will prevent any potential damage to the device or accidental data loss.
- Remove any external devices: Disconnect any external devices, such as headphones, USB cables, or charging cables, from the Steam Deck. This will prevent any interference or potential damage during the disassembly process.
- Clean your workspace: Clear your workspace to create a clean and organized environment. Remove any debris, liquids, or other objects that could pose a risk to the Steam Deck or interfere with the disassembly process.
- Take precautions for static electricity: It’s essential to discharge any static electricity from your body. You can do this by touching a grounded metal object or wearing an anti-static wrist strap. This will prevent any static discharge from damaging the sensitive components of your Steam Deck.
- Familiarize yourself with the Steam Deck: Take a close look at your Steam Deck and identify the location of the screws that secure the back panel. This will help you navigate the disassembly process with confidence, ensuring that you don’t accidentally damage any parts.
- Prepare a container for the screws: As you remove the screws, it’s essential to keep them organized and in a safe place. Prepare a small container or a magnetized tray to store the screws, ensuring that you can easily locate them when needed during reassembly.
By following these preparation steps, you will create an ideal environment for disassembling your Steam Deck and minimize the risk of damage or losing important components. Once you have completed these preparations, you can move on to the next step: opening the Steam Deck and removing the old SSD.
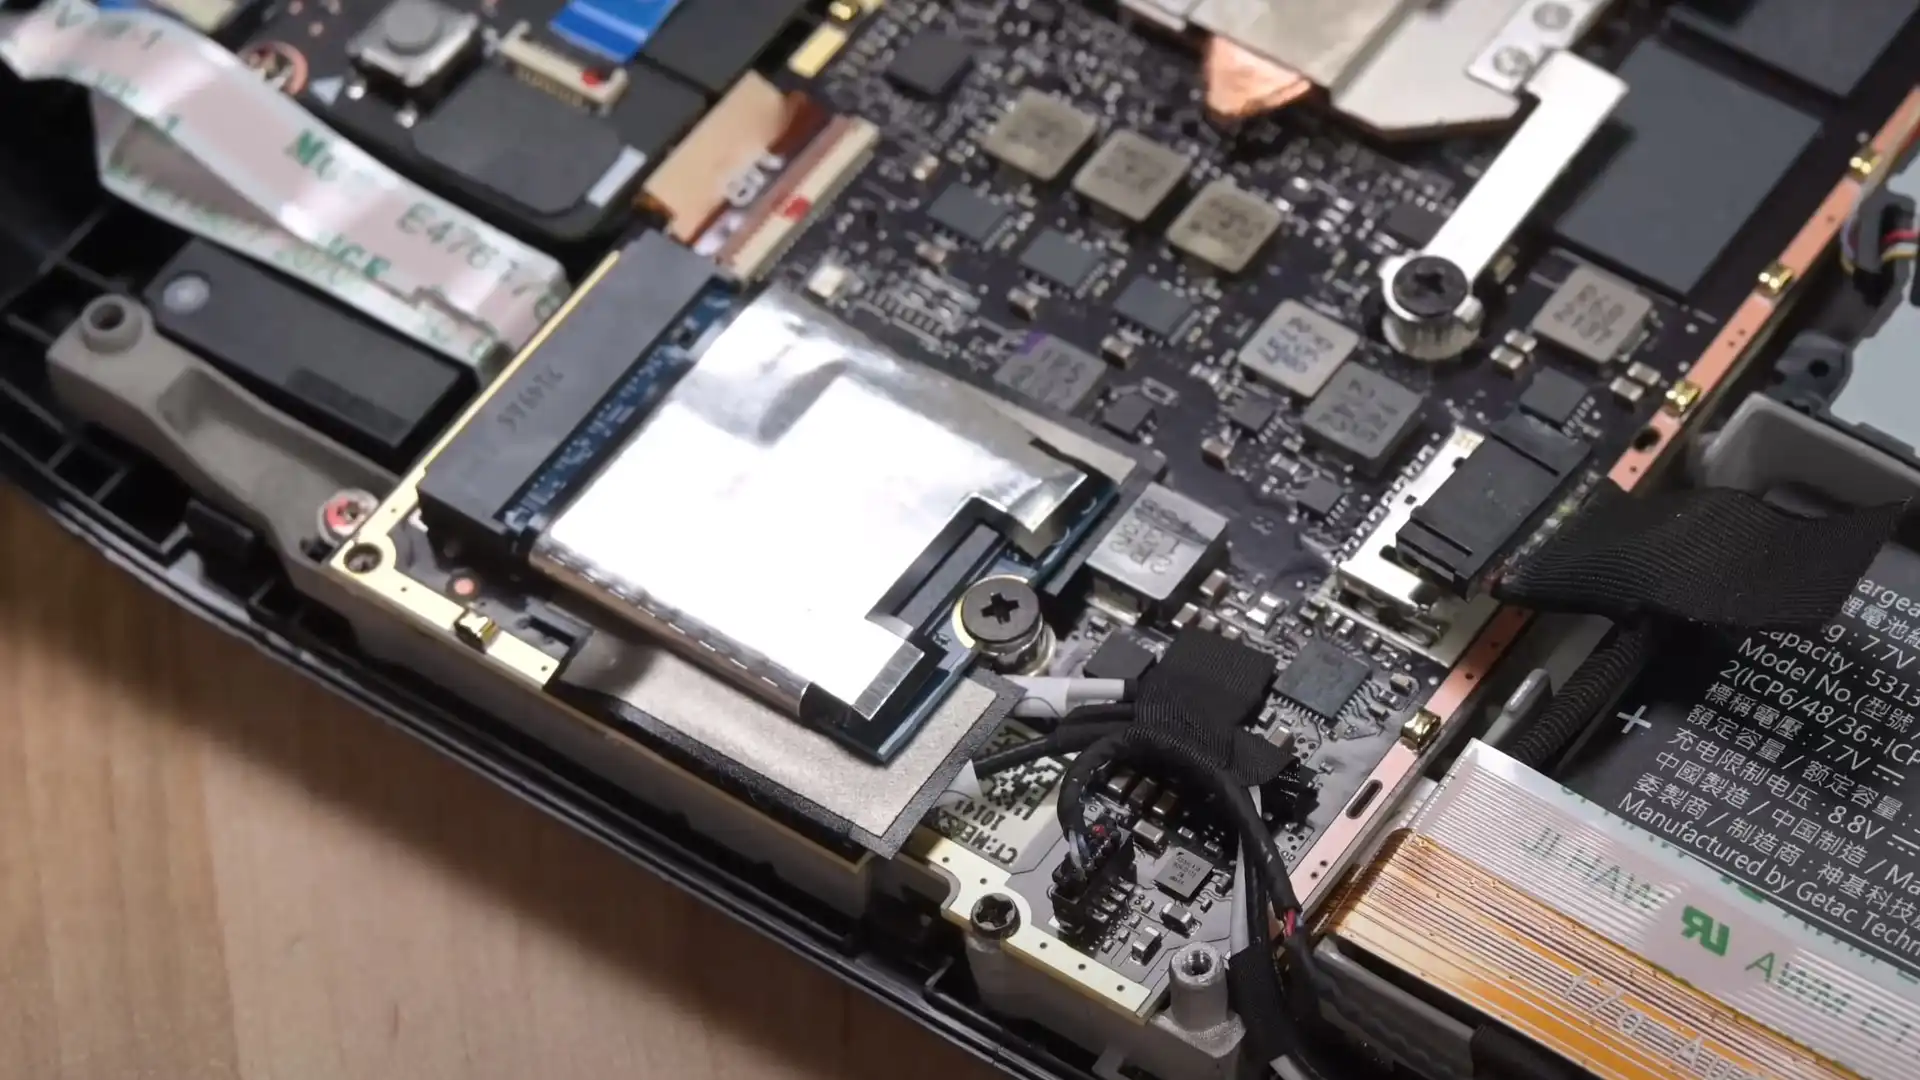
Step 3: Open the Steam Deck and remove the old SSD
Now that you have prepared your workspace and familiarized yourself with the Steam Deck, it’s time to open the device and remove the old SSD. This step requires careful handling and attention to detail to avoid any damage to the internal components.
- Flip the Steam Deck upside down: Start by flipping your Steam Deck upside down so that the back panel is facing upwards.
- Locate and remove the screws: Using the small Phillips screwdriver, carefully remove the screws that secure the back panel. Keep the screws in a safe place or the storage container you prepared earlier.
- Separate the back panel: Gently separate the back panel from the main body of the Steam Deck. Be cautious not to apply too much force as there might be connectors or cables attached inside.
- Identify the old SSD: Once the back panel is removed, you will see the old SSD located on the motherboard. Take note of its position and how it is connected to the device.
- Disconnect the cables: Carefully disconnect any cables or connectors that are attached to the old SSD. Use gentle and even pressure to avoid damaging the connectors or cables.
- Remove the old SSD: Once the cables are disconnected, gently remove the old SSD from its slot on the motherboard. Take care not to touch any sensitive components or connectors while doing so.
With the old SSD removed, you are one step closer to upgrading the storage capacity of your Steam Deck. Set the old SSD aside or safely store it while you prepare to install the new SSD in the next step. Take a moment to appreciate your progress thus far and let’s move on to the next step: installing the new SSD in your Steam Deck.
Step 4: Install the new SSD in the Steam Deck
With the old SSD successfully removed, it’s time to install the new SSD in your Steam Deck. This step involves carefully connecting the cables and securing the new SSD in its designated slot on the motherboard.
- Retrieve the new SSD: Take out the new SSD that you will be installing in your Steam Deck. Ensure that it is compatible with the device and matches the specifications required.
- Align the new SSD: Gently align the new SSD with the slot on the motherboard where the old SSD was located. Ensure that the connectors on the new SSD are properly aligned with the corresponding slots.
- Connect the cables: Carefully connect the necessary cables and connectors to the new SSD. Ensure a secure and snug fit without applying excessive force to avoid damaging the connectors or cables.
- Secure the new SSD: Once the cables are connected, gently secure the new SSD in place. Use the appropriate screws to secure the new SSD to the motherboard, ensuring that it is firmly held in position.
- Double-check the connections: Take a moment to double-check that all cables and connectors are securely attached to the new SSD. Ensure that nothing is loose or improperly connected.
- Clean the workspace: Before moving on to the next step, take a moment to clean your workspace and ensure that there are no loose screws or debris that could potentially interfere with the reassembly process.
With the new SSD successfully installed, you have taken a significant step towards upgrading the storage capacity of your Steam Deck. Now, it’s time to reassemble the device and complete the final steps of the SSD replacement process. Let’s move on to the next step and reassemble your Steam Deck!
Step 5: Reassemble the Steam Deck
After successfully installing the new SSD in your Steam Deck, it’s time to reassemble the device. This step involves carefully putting all the components back together, securing the back panel, and ensuring that everything is in its proper place.
- Reattach the back panel: Take the back panel of your Steam Deck and carefully align it with the main body. Gently press it into place until you hear or feel a click, indicating it has been securely attached.
- Secure the back panel screws: Retrieve the screws that were removed earlier to secure the back panel. Insert them into their respective holes and use the small Phillips screwdriver to tighten them. Be sure not to overtighten the screws to avoid damaging the threads or components.
- Double-check the connections: Before considering the reassembly complete, double-check that all cables and connectors are properly attached and secured. Ensure that nothing is loose or out of place.
- Power on the Steam Deck: Now that the Steam Deck is reassembled, it’s time to power it on. Press the power button, and if all went well, your Steam Deck should start up without any issues.
- Verify the new SSD: Once the Steam Deck is powered on, navigate to the system settings and verify that the new SSD is recognized by the device. Ensure that the storage capacity is accurately displayed.
- Test the Steam Deck: To ensure a successful SSD replacement, test your Steam Deck by launching games or accessing files to confirm that everything is functioning correctly. Pay attention to loading times and overall performance improvements.
By completing these final steps, you have successfully reassembled your Steam Deck and completed the SSD replacement process. Enjoy the benefits of increased storage capacity and potentially improved performance in your gaming and other activities.
Remember, it’s always a good idea to keep your Steam Deck and its components clean and well-maintained. Regularly perform maintenance tasks, such as updating firmware and software, to ensure optimal performance and longevity of your device.
Now that you have successfully replaced the SSD in your Steam Deck, you can enjoy a larger storage capacity and an enhanced gaming experience on the go. May your gaming adventures be limitless, and your storage woes a thing of the past!
Conclusion
Congratulations! You have successfully replaced the SSD in your Steam Deck. By following the step-by-step process outlined in this guide, you have expanded the storage capacity of your device and potentially improved its performance. Now you can enjoy more games, files, and multimedia on your Steam Deck without worrying about running out of space.
Remember, before attempting any hardware modifications, it’s crucial to check the warranty terms and conditions of your Steam Deck. Opening up the device may void the warranty, so proceed with caution and assess the risks involved.
Throughout this guide, we covered the necessary prerequisites for replacing the SSD in your Steam Deck, including compatibility, gathering the required tools, backing up your data, and taking necessary precautions. We then walked you through the step-by-step process, from preparing the Steam Deck for disassembly to opening the device, removing the old SSD, installing the new SSD, and finally reassembling the Steam Deck.
With your new SSD in place, be sure to take some time to test your Steam Deck, launch games, and assess its performance. You may notice faster loading times and smoother gameplay, thanks to the upgraded SSD.
Remember to keep your Steam Deck clean and well-maintained even after the SSD replacement. Regularly update firmware and software to ensure optimal performance.
Thank you for taking the time to follow this guide. We hope it has been helpful in upgrading your Steam Deck’s storage capacity. Now, go ahead and enjoy your favorite games and media on the go with increased space and a more enhanced gaming experience!