Introduction
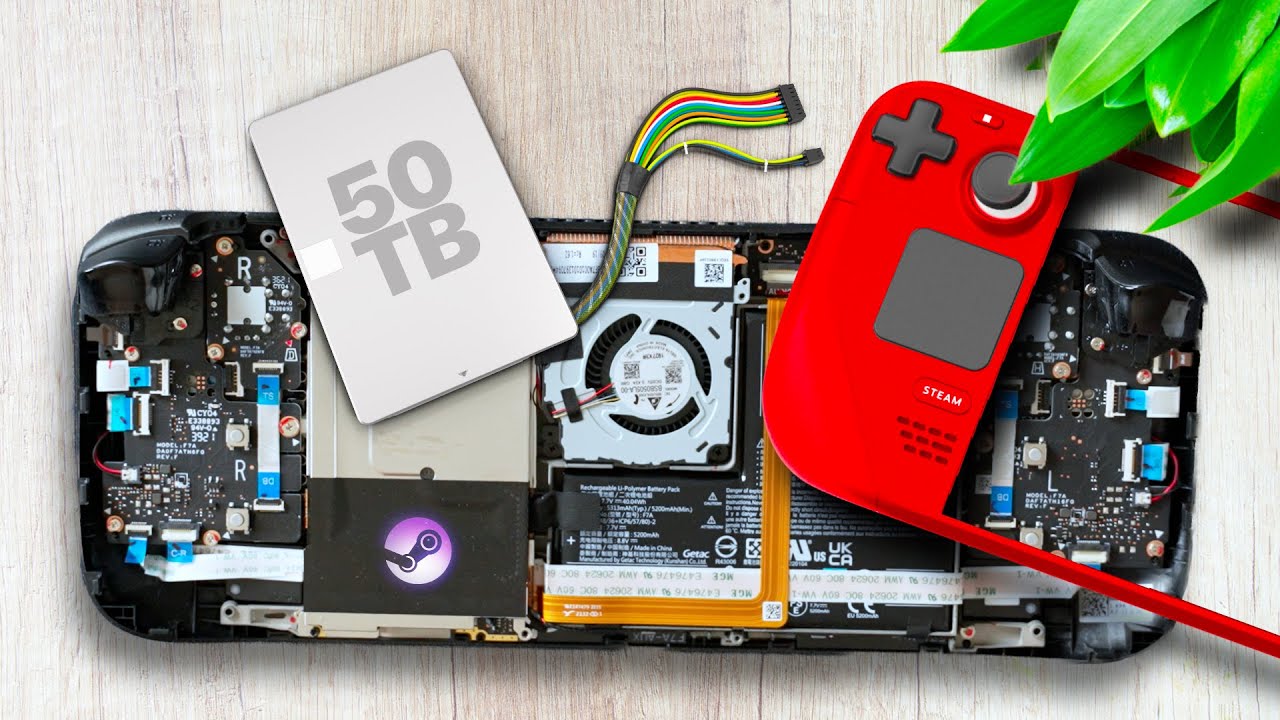
Welcome to the world of gaming, where technology is constantly evolving to provide gamers with more immersive experiences. The Steam Deck, developed by Valve Corporation, is a highly-anticipated handheld gaming device that promises to deliver PC gaming on the go. One of the key features of the Steam Deck is its ability to upgrade the SSD, giving gamers the freedom to expand their storage capacity for more games and files.
In this guide, we will walk you through the process of upgrading the SSD on your Steam Deck. Whether you’re looking to install a larger capacity SSD or replace a faulty one, this step-by-step tutorial will ensure a smooth and successful upgrade.
Before we dive into the technical details, it’s important to understand the significance of the SSD in your Steam Deck. The SSD, or Solid State Drive, is where all your games, applications, and files are stored. It plays a crucial role in the performance and responsiveness of your device, allowing for faster load times and smoother gameplay.
Upgrading the SSD can provide several benefits. Firstly, it allows you to store and play a larger library of games, giving you more options and flexibility. Secondly, a higher-capacity SSD ensures that you won’t run out of storage space anytime soon. Lastly, if you’re experiencing any issues with your current SSD, such as slow load times or frequent crashes, replacing it can help resolve these problems.
Before we begin the upgrade process, it’s essential to gather the necessary tools and equipment. Ensuring that you have everything you need will make the process more efficient and reduce the risk of damage to your Steam Deck. Once you’re ready, let’s dive into the world of SSD upgrades and enhance your gaming experience on the Steam Deck!
Understanding the Steam Deck SSD
Before we delve into the steps of upgrading the SSD on your Steam Deck, it’s crucial to gain a solid understanding of the SSD itself. The Steam Deck is equipped with a removable M.2 NVMe SSD, allowing for easy customization and expansion of storage capacity.
The SSD, which stands for Solid State Drive, is a storage device that uses flash memory to store data. Unlike traditional hard drives with spinning disks, SSDs have no moving parts, making them faster, more durable, and less prone to data loss. This makes them the ideal choice for a portable gaming device like the Steam Deck.
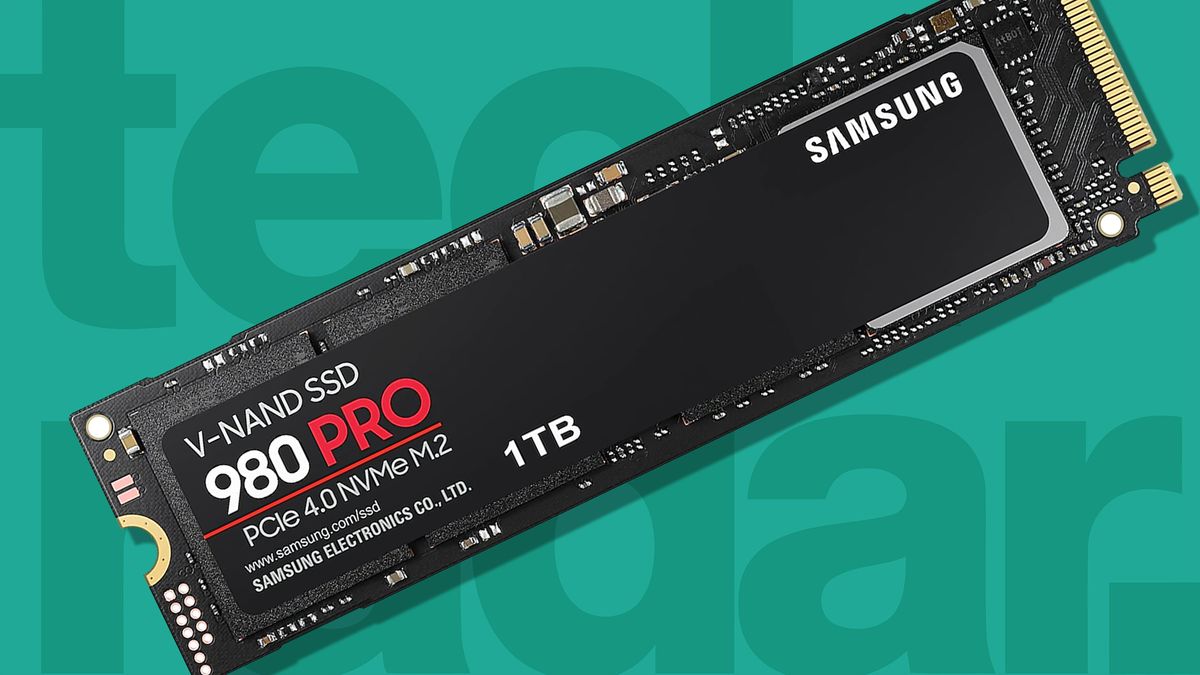
The M.2 form factor, specifically the M.2 2230 size, is the type of SSD used in the Steam Deck. This form factor refers to the physical dimensions and connector type of the SSD. The M.2 2230 size is compact and fits perfectly within the slim design of the Steam Deck.
When it comes to upgrading the SSD on your Steam Deck, it’s essential to choose the correct SSD that is compatible with the device. The Steam Deck supports PCIe Gen3 x4 NVMe SSDs, which offer excellent performance and speed. It’s important to consider both the capacity and speed of the SSD you choose, as this will directly impact your gaming experience.
The capacity of the SSD determines how many games and files you can store on your Steam Deck. It’s important to choose a capacity that suits your needs, whether you’re a casual gamer with a smaller library or a hardcore gamer with a vast collection of titles. Keep in mind that games are constantly increasing in size, so it’s wise to opt for a higher-capacity SSD if you have the budget.
In terms of speed, faster SSDs offer quicker load times, allowing you to jump into your games faster. This can greatly improve your gaming experience, reducing the waiting time and providing a smoother overall gameplay experience. Keep in mind that the Steam Deck has its limitations, and the maximum speed of the SSD may not be fully utilized.
Now that you have a good understanding of the Steam Deck SSD, it’s time to prepare for the upgrade process. This includes gathering the necessary tools and equipment and backing up your data to ensure a smooth transition to the new SSD. Let’s move on to the next section and get ready to upgrade your Steam Deck!
Before You Begin
Before you embark on the journey of upgrading the SSD on your Steam Deck, there are a few important considerations and preparations to keep in mind. Taking the time to understand these details will help ensure a smooth and successful upgrade process.
First and foremost, make sure to back up all your important data and files from your Steam Deck. Upgrading the SSD involves removing the existing drive, which will result in the loss of any data stored on it. By backing up your data, you can avoid the risk of losing important game saves, personal files, or other valuable information. You can either transfer your data to an external storage device or utilize cloud storage options to keep your files safe.
Next, it’s crucial to check the warranty status of your Steam Deck. Upgrading the SSD might void the warranty, depending on the manufacturer’s policy. If your Steam Deck is still under warranty and you’re not confident in performing the upgrade yourself, it may be best to consult the manufacturer or an authorized service center. They can guide you through the upgrade process without compromising your warranty.
Additionally, ensure that you have a clean and well-lit workspace to work on your Steam Deck. The upgrade process requires precision and attention to detail, so eliminating distractions and having adequate lighting will make the process easier and reduce the risk of damaging your device. Prepare a soft cloth or an anti-static mat to place your Steam Deck on during the upgrade to prevent scratches or static electricity damage.
Lastly, gather all the necessary tools and equipment for the upgrade. Typically, you’ll need a small screwdriver set that includes different types and sizes of screwdrivers such as Philips and Torx. It’s important to have the appropriate screwdriver sizes for the different screws used in the Steam Deck. If you’re unsure about the screw sizes, refer to the Steam Deck’s user manual or online resources for guidance.
Now that you’ve taken care of these pre-upgrade considerations and preparations, you’re ready to proceed with confidence. In the following sections, we’ll guide you through the step-by-step process of upgrading the SSD on your Steam Deck. So let’s grab our tools and embark on this exciting journey of enhancing your Steam Deck’s storage capacity!
Tools and Equipment Needed
Before diving into the SSD upgrade process, it’s essential to make sure you have all the necessary tools and equipment at hand. These tools will enable you to disassemble and reassemble your Steam Deck safely and efficiently. Here’s a list of the tools and equipment you’ll need:
- Screwdriver set: A small screwdriver set is crucial for removing the screws holding the Steam Deck together. Make sure your set includes both Philips and Torx screwdrivers, as the Steam Deck may have a combination of these two types of screws.
- Anti-static wrist strap or mat: Static electricity can damage sensitive electronic components, so it’s essential to wear an anti-static wrist strap or work on an anti-static mat during the upgrade process. This prevents the discharge of static electricity and safeguards your Steam Deck.
- Soft cloth or microfiber cloth: Having a soft cloth on hand will help protect the surface of your Steam Deck from scratches or smudges during the upgrade process. It’s recommended to use a microfiber cloth, as it is gentle and lint-free.
- Optional: Plastic spudger or opening pry tool: In some cases, you may need to gently pry apart components, such as the back cover or connector cables. A plastic spudger or opening pry tool can be helpful in these situations, as they minimize the risk of damage.
Ensure that the screwdriver set contains the appropriate sizes for the screws used in the Steam Deck. Different components may require different screw sizes, so having a variety of sizes will ensure that you can remove and replace the screws easily.
Remember to handle all tools and equipment with care and follow safety precautions throughout the upgrade process. Take your time and be patient to avoid any accidental damage to your Steam Deck. With the right tools and equipment on hand, you’ll be well-prepared to begin the SSD upgrade process on your Steam Deck.
Step 1: Prepare Your Steam Deck
Before diving into the SSD upgrade process on your Steam Deck, it’s crucial to properly prepare the device to ensure a smooth and safe upgrade. Follow these steps to get your Steam Deck ready:
- Power off your Steam Deck: Make sure your Steam Deck is completely powered off before starting the upgrade process. Press and hold the power button until the device shuts down.
- Disconnect all cables: Detach any cables or peripherals connected to your Steam Deck, including the charging cable and any external devices. This will prevent any accidental damage to the cables or interference during the upgrade.
- Find a clean and well-lit workspace: Set up a clean and well-lit area where you can comfortably work on your Steam Deck. Clear any clutter and ensure there’s enough space for the disassembly and reassembly process. A clutter-free workspace reduces the chances of losing or damaging small components.
- Use an anti-static wrist strap or mat: Wear an anti-static wrist strap or work on an anti-static mat to prevent the buildup and discharge of static electricity. This protects your Steam Deck from potential damage due to static electricity. Connect the wrist strap to a grounded object or place the anti-static mat on a grounded surface.
- Organize your tools and equipment: Have all the necessary tools and equipment within reach. Arrange them neatly on your workspace, making it easy to locate and use them during the upgrade process. This ensures efficiency and reduces the chances of misplacing or losing tools.
- Take note of the orientation and position of screws: Some screws in the Steam Deck may be of different lengths or sizes. When removing screws, pay attention to their position and orientation. You can take pictures or create diagrams to help you remember the correct placement during reassembly.
By following these steps, you’ll have your Steam Deck properly prepared for the SSD upgrade process. Proper preparation ensures a smoother and safer upgrade, decreasing the risk of damage to your device or components. With your workspace organized and your tools at the ready, you’re now ready to move on to the next step of choosing the correct SSD for your Steam Deck.
Step 2: Choose the Correct SSD
Choosing the correct SSD for your Steam Deck is a crucial step in the upgrade process. The SSD you select should be compatible with the Steam Deck and meet your storage needs. Here’s a breakdown of what you need to consider when choosing the right SSD:
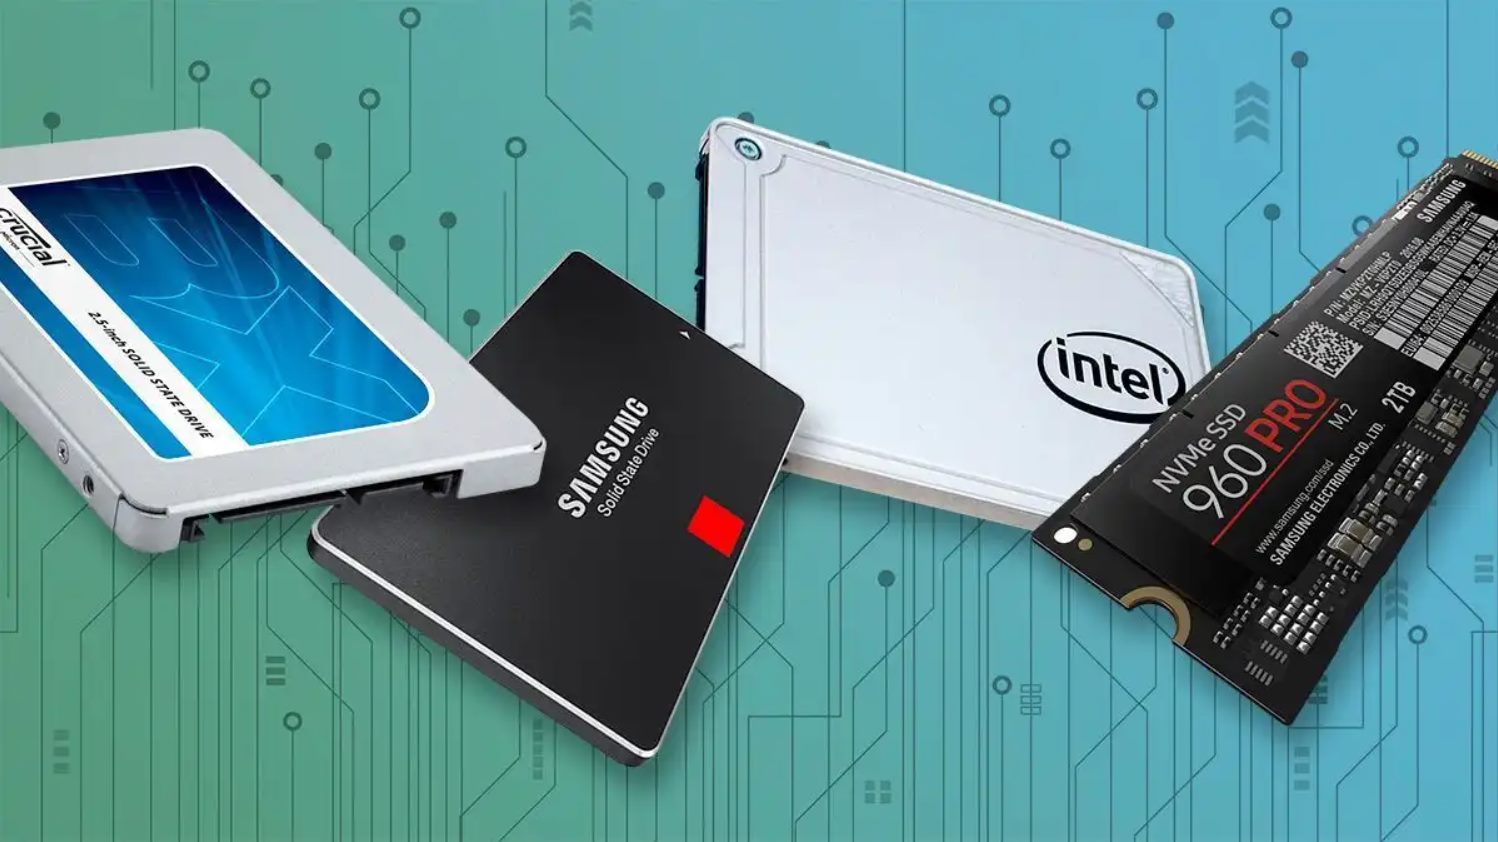
- Compatibility: The Steam Deck supports M.2 NVMe SSDs with a PCIe Gen3 x4 interface. Ensure that the SSD you choose is of this type and matches the specifications required by the Steam Deck. It’s vital to check the device’s documentation or the manufacturer’s website for the supported SSD specifications.
- Capacity: Determine the storage capacity that fits your needs. SSDs come in various sizes, ranging from 128GB to multiple terabytes. Consider the number and size of games or files you plan to store on your Steam Deck. It’s advisable to choose a higher capacity if you have an extensive game library or require plenty of storage space for other media.
- Speed: SSD speed greatly affects the loading times of games and applications. Look for an SSD with high read and write speeds to ensure faster data transfer and quicker load times. Keep in mind that the Steam Deck may have limitations on the achievable speeds, so opting for the fastest SSD might not always yield significant performance improvements.
- Brand and Reliability: Stick to reputable brands when selecting an SSD. Well-known brands often have a proven track record for reliability and performance. Research customer reviews and ratings to get an idea of the SSD’s durability and long-term reliability. A reliable SSD will give you peace of mind and ensure a stable gaming experience.
- Budget: Consider your budget when choosing an SSD. The price of SSDs can vary significantly depending on the brand, capacity, and speed. Determine a budget range and look for SSD options that fall within it. Remember, investing in a high-quality SSD may provide better performance and longevity.
Take your time to research and compare different models and brands of SSDs that meet the compatibility requirements of the Steam Deck while fitting your storage needs and budget. Look for reviews, benchmarks, and user feedback to make an informed decision. Once you’ve chosen the right SSD, you’re ready to move on to the next step: backing up your data before proceeding with the upgrade.
Step 3: Back Up Your Data
Before proceeding with the SSD upgrade on your Steam Deck, it’s essential to back up your data to prevent any potential loss. This will ensure that your games, files, and important data are safe during the upgrade process. Follow these steps to back up your data:
- Cloud Storage: Consider utilizing cloud storage services such as Steam Cloud, Google Drive, or Dropbox. These services allow you to store your saved games, settings, and other files in the cloud, enabling you to access them from any device with an internet connection. Ensure that your important data is being synchronized with the cloud before proceeding with the upgrade.
- External Storage: Use an external hard drive or USB flash drive to create a backup of your data. Connect the external storage device to your Steam Deck and manually copy the files and folders you want to back up. This includes game saves, personal files, and any other data you wish to preserve.
- Syncing Game Saves: Some games have built-in synchronization features that automatically back up your game saves to the cloud. Make sure these options are enabled for all the games you want to preserve. Check the game’s settings or options menu to ensure that syncing is active.
- Manual File Backup: For files that are not automatically backed up or synced, manually copy them to a separate storage device. This includes documents, music, videos, and any other files that you want to preserve. Create a designated backup folder and organize the files accordingly.
- Verify Backup Integrity: After backing up your data, take a moment to verify the integrity of the backup. Ensure that the files have been successfully copied and that they are accessible and readable from the backup location. This step provides reassurance that your data is securely stored before proceeding with the SSD upgrade.
It’s important to note that the backup process may take some time, depending on the size and number of files you are backing up. Be patient, and double-check that all the necessary data is safely stored before moving on to the next stage of the upgrade process.
With your data securely backed up, you can proceed with the upgrade process without the worry of losing any important files or game progress. In the next step, we will guide you through the process of opening up your Steam Deck in preparation for the SSD replacement.
Step 4: Opening the Steam Deck
Now that you have backed up your data, it’s time to open up your Steam Deck to access the internals. Follow these steps carefully to safely open your Steam Deck:
- Place your Steam Deck on a soft cloth: Lay your Steam Deck on a soft cloth or an anti-static mat to protect the device’s surface from scratches.
- Locate the screws: Look for the screws that secure the back cover of your Steam Deck. These screws are typically located on the bottom or rear of the device. Review your Steam Deck’s user manual or consult online resources if you’re unsure of the screw locations.
- Use the appropriate screwdriver: Select the correct size and type of screwdriver (Philips or Torx) that matches the screws on your Steam Deck. Proceed to unscrew each screw carefully, ensuring not to lose or strip the screws during removal.
- Gently pry open the back cover: Once all the screws are removed, use a plastic spudger or an opening pry tool to gently pry open the back cover of your Steam Deck. Start at one corner and carefully work your way around the edges, separating the back cover from the device’s body. Take your time and apply even pressure to avoid damaging any internal components.
- Set aside the back cover: Once the back cover is separated, gently lift it off and set it aside in a safe place. Be mindful of any cables connected to the back cover and be cautious not to strain or damage them.
With the back cover successfully removed, you now have access to the internal components of your Steam Deck. Take a moment to familiarize yourself with the internal layout and components before proceeding to the next step of removing the existing SSD.
Remember, opening up your Steam Deck should be done with precision and care. If you’re unsure or uncomfortable with any step, it’s recommended to seek assistance from a professional or refer to the Steam Deck’s official documentation. In the next step, we will guide you through the process of removing the existing SSD from your Steam Deck.
Step 5: Removing the Existing SSD
With the back cover of your Steam Deck safely removed, it’s time to proceed with removing the existing SSD. Follow these steps to carefully remove the SSD:
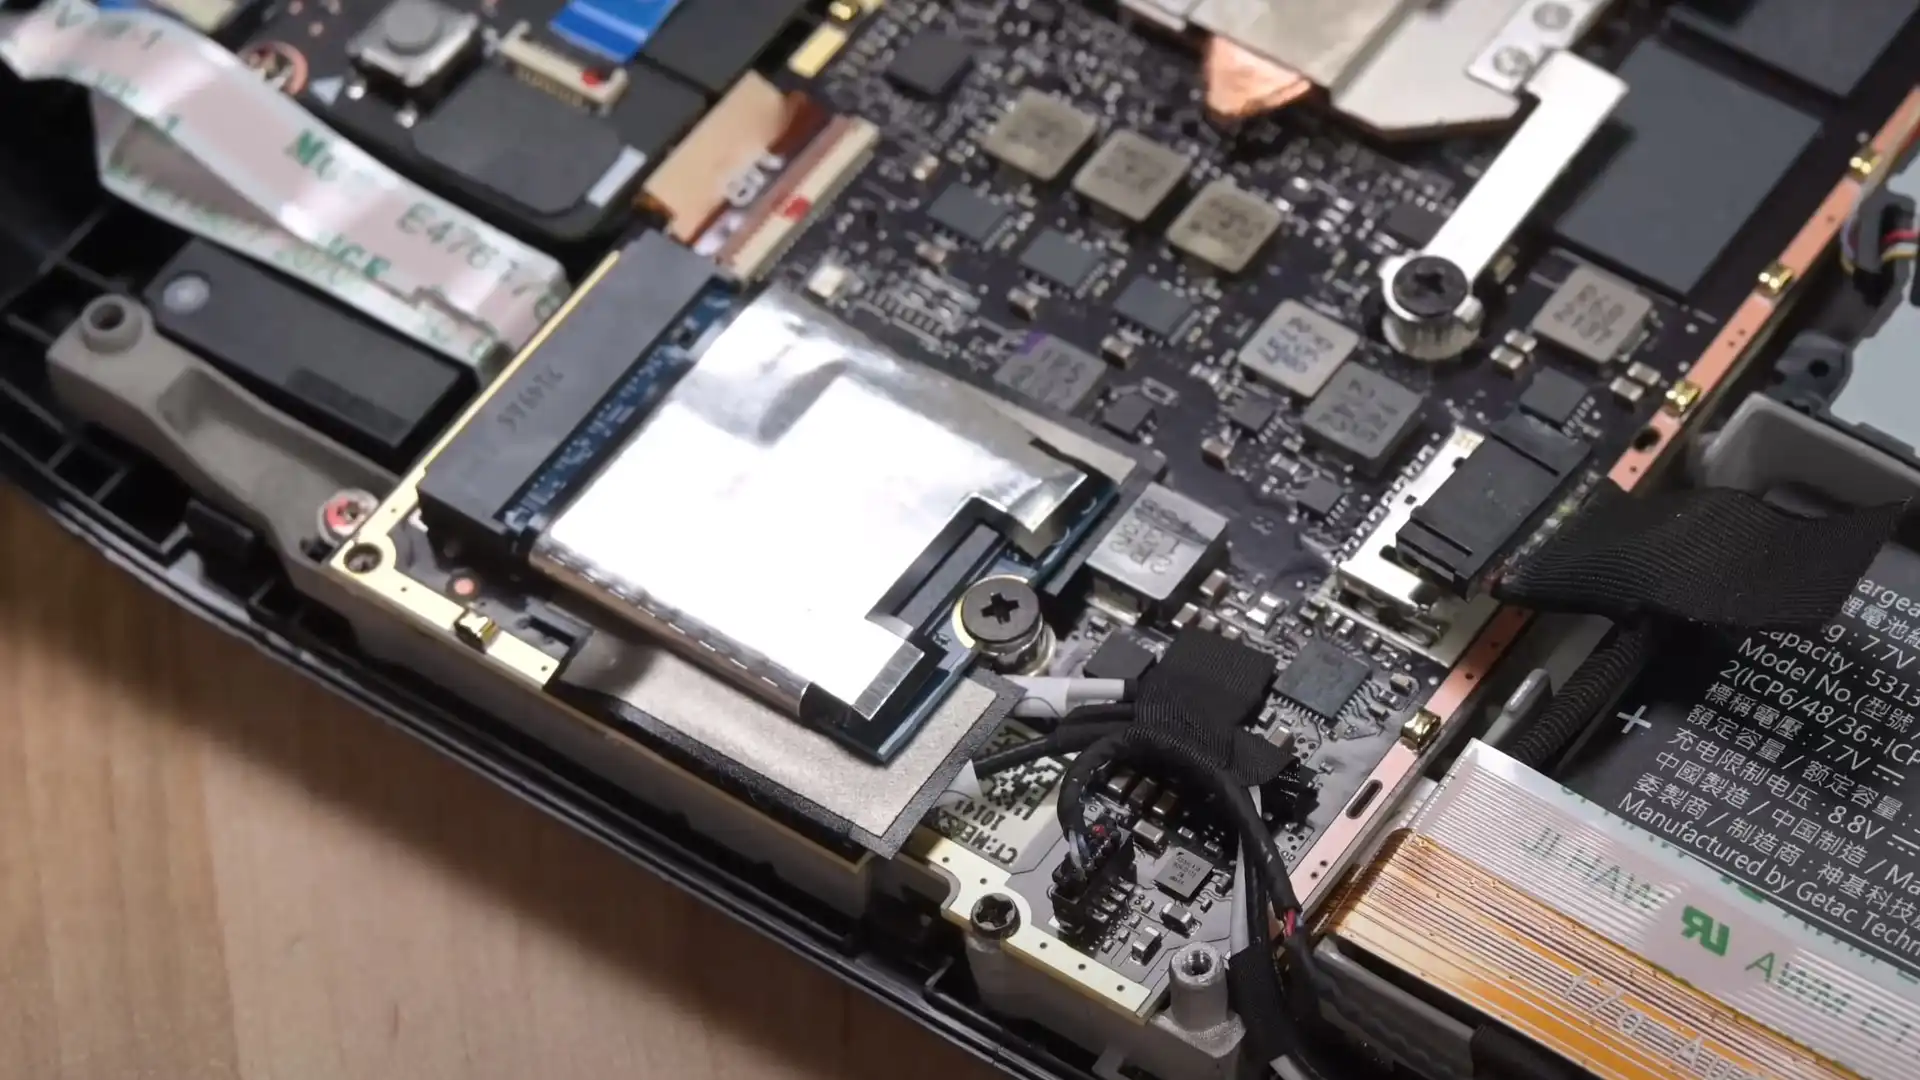
- Locate the SSD: Look for the existing SSD in your Steam Deck. It is typically located in a designated slot on the motherboard.
- Identify the SSD connector: Observe the connector that attaches the existing SSD to the motherboard. It is usually a small strip that connects the SSD to the motherboard’s M.2 slot.
- Gently disconnect the SSD connector: Hold the connector firmly and gently pull it straight up and away from the SSD. Be cautious not to put excessive pressure or bend the connector during removal, as it can damage the SSD or the motherboard.
- Remove the securing screw: In some cases, there might be a securing screw holding the SSD in place. If present, locate and unscrew this screw using the appropriate screwdriver. Remove the screw and set it aside in a safe place.
- Remove the existing SSD: Once the SSD connector is detached and any securing screw is removed, carefully lift the existing SSD from its slot. Hold it by the sides, avoiding touching the gold connectors or any sensitive components. Set aside the removed SSD safely to prevent any damage.
During this process, it’s crucial to handle the existing SSD with caution to prevent any damage. Avoid applying excessive force or twisting motions. It’s recommended to take note of the orientation and position of the SSD for future reference during the installation of the new SSD.
With the existing SSD successfully removed, you’re one step closer to upgrading your Steam Deck’s storage capacity. In the next step, we will guide you through the process of installing the new SSD into your Steam Deck.
Step 6: Installing the New SSD
Now that you’ve removed the existing SSD from your Steam Deck, it’s time to install the new SSD. Follow these steps to ensure a successful installation:
- Prepare the new SSD: Take the new SSD out of its packaging and handle it with care. Avoid touching the gold connectors or any sensitive components. Ensure that the new SSD matches the specifications and form factor required by your Steam Deck.
- Align the new SSD: Locate the M.2 slot on your Steam Deck’s motherboard. Align the new SSD with the slot, ensuring the connectors match the slots on both the SSD and the motherboard.
- Insert the new SSD: Gently slide the new SSD into the M.2 slot. Apply gentle, even pressure to ensure proper alignment and insertion. Do not force the SSD into the slot, as it should fit easily with minimal resistance.
- Secure the new SSD: If there is a securing screw for the new SSD, align it with the designated hole on the SSD and insert it. Use the appropriate screwdriver to tighten the screw, but be cautious not to overtighten, as it may damage the SSD or the slot.
- Connect the SSD connector: Locate the connector on the motherboard that corresponds to the new SSD. Align the connector with the SSD and gently press it down until it securely connects. Ensure a snug fit, but avoid applying excessive force.
Note: The specific steps and precautions may vary slightly depending on the model and manufacturer of your Steam Deck. It’s always recommended to refer to the Steam Deck’s official documentation or consult online resources for any specific instructions or recommendations that may be unique to your device.
With the new SSD successfully installed, you are now equipped with an upgraded storage capacity for your Steam Deck. In the next step, we will guide you through the process of closing up your Steam Deck and preparing it for powering on.
Step 7: Closing Up the Steam Deck
After installing the new SSD in your Steam Deck, it’s time to close up the device and ensure everything is secured in place. Follow these steps to successfully close up your Steam Deck:
- Reattach the back cover: Take the back cover that you set aside earlier and carefully position it over the device. Align the edges of the cover with the corresponding edges of the Steam Deck. Ensure that any cables or connectors are properly positioned and not pinched between the cover and the device.
- Press down to secure the back cover: Apply gentle pressure to the back cover, starting from one corner and working your way around the edges. Ensure that the cover is securely in place and snaps back into position. Be careful not to apply excessive force, which could damage the cover or the internal components.
- Insert and tighten the screws: Take the screws that you removed earlier and carefully insert them into their respective holes on the back cover. Use the appropriate screwdriver to tighten the screws, ensuring a snug fit. Be cautious not to overtighten, as it may damage the screws or the back cover.
- Double-check the alignment and closure: Inspect the edges of the back cover to ensure that it is properly aligned and evenly closed. Verify that there are no gaps or misalignments that could indicate an incomplete closure. If necessary, reposition and secure the back cover until it fits snugly and uniformly.
Take your time during the closing process to ensure everything is properly aligned and secured. It’s crucial to handle the device with care to prevent any accidental damage.
With the Steam Deck successfully closed up, you’re almost there! In the next step, we’ll guide you through the process of powering on your Steam Deck and verifying the installation of the new SSD.
Step 8: Powering On and Verifying the Installation
Now that you’ve closed up your Steam Deck after installing the new SSD, it’s time to power on the device and verify the successful installation. Follow these steps to ensure everything is functioning properly:
- Connect the power supply: Plug in the power supply to the Steam Deck and ensure it is connected securely.
- Press the power button: Press and hold the power button until the Steam Deck powers on. It may take a few seconds for the device to boot up.
- Check for the SSD: Once the Steam Deck has powered on, navigate to the settings or storage section to verify the presence of the new SSD. It should be recognized as a storage device with the correct storage capacity. If the new SSD is detected, you have successfully installed it.
- Verify disk performance: Test the performance of the new SSD by transferring files, running games, or accessing applications. Monitor the speed and responsiveness to ensure that the new SSD is functioning optimally.
- Restore data: If you backed up your data prior to the upgrade, you can now restore your games, files, and settings. Utilize your chosen method of data restoration, whether it be through cloud storage syncing or manual file transfer.
- Test games and applications: Launch your favorite games or applications stored on the Steam Deck and ensure they run smoothly. Pay attention to loading times and overall performance to gauge the improvement brought by the new SSD.
If everything is working well, congratulations! You have successfully upgraded the SSD on your Steam Deck. Enjoy the enhanced storage capacity and improved performance that the new SSD brings.
However, if you encounter any issues or challenges during the verification process, consider seeking technical support from the Steam Deck manufacturer or consulting online resources for troubleshooting steps specific to your situation.
With the SSD upgrade completed and verified, your Steam Deck is now ready to provide you with an enhanced gaming experience and ample storage capacity for all your favorite games and files.
Conclusion
Congratulations on successfully upgrading the SSD in your Steam Deck! By following the step-by-step guide in this tutorial, you have expanded your storage capacity and potentially improved the performance of your handheld gaming device.
The process of upgrading the SSD in your Steam Deck may seem daunting at first, but with the proper tools, preparation, and careful execution, it can be accomplished by anyone with a moderate level of technical skill. Remember to always refer to the Steam Deck’s official documentation or consult online resources for any specific instructions or recommendations unique to your device.
Upgrading your SSD offers numerous benefits for your Steam Deck gaming experience. You can enjoy the ability to store and play a larger library of games, faster load times, quicker file transfers, and a more responsive overall performance. Additionally, having an increased storage capacity allows you to keep up with the growing file sizes of modern games and store various media files.
Before starting the upgrade process, it’s crucial to back up your data to prevent any potential loss or damage. Take the time to organize your workspace, gather the necessary tools, and ensure you have a clean and well-lit area to work in. Proper preparation sets the stage for a smoother and safer upgrade process.
Choosing the right SSD for your Steam Deck is an important decision. Consider factors such as compatibility, capacity, speed, brand reliability, and budget to make an informed choice. Researching customer reviews and ratings can also provide valuable insights into the performance and longevity of the SSDs you are considering.
Throughout the upgrade process, handle your Steam Deck and its components with care. Take note of the orientation and position of screws and connectors to ensure proper reassembly. Once the new SSD is installed, close up the Steam Deck meticulously, double-checking alignments and screw placements to ensure a secure fit.
Finally, power on your Steam Deck, verify the successful installation of the new SSD, restore your data, and test the performance of your games and applications. If all functions properly, you can now enjoy an enhanced gaming experience with increased storage capacity and improved speed.
Remember that if you encounter any difficulties or uncertainties during the process, it’s advisable to seek assistance from professionals or consult the official documentation provided by the manufacturer.
Now that your Steam Deck is equipped with an upgraded SSD, you’re ready to dive into your favorite games and enjoy the portability and performance of this remarkable handheld gaming device!