Overview
Proxy servers are intermediary servers that act as a gateway between your computer and the internet. They can be set up to enhance security, improve network performance, or provide access to restricted content. However, there may be situations where you need to remove proxy server settings in Windows 7. This could be due to connectivity issues, a change in network configuration, or the need to troubleshoot certain applications.
Removing proxy server settings in Windows 7 is a straightforward process that can be done through the Internet Options menu. By following a few simple steps, you can disable the proxy server and restore direct access to the internet.
In this article, we will guide you through the steps needed to remove proxy server settings in Windows 7. Whether you need to resolve a network issue, improve your internet speed, or address any other proxy-related problems, this guide will help you get your system back to normal.
Without further ado, let’s delve into the process of removing proxy server settings in Windows 7.
Step 1: Accessing Internet Options
The first step to remove proxy server settings in Windows 7 is to access the Internet Options menu. This menu allows you to customize various internet settings, including proxy server configuration.
Here’s how you can access the Internet Options menu:
- Click on the Start button located at the bottom left corner of your screen.
- Open the Control Panel by clicking on it in the Start menu.
- In the Control Panel, locate and click on the Network and Internet category.
- Within the Network and Internet category, click on Internet Options. This will open a new window with various internet settings.
Alternatively, you can access Internet Options directly through the Windows search bar. Simply type “Internet Options” in the search bar, and click on the corresponding result.
Once you have accessed the Internet Options menu, you are ready to proceed to the next step where we will remove the proxy server settings.
Step 2: Removing Proxy Server Settings
Now that you have accessed the Internet Options menu, you can proceed to remove the proxy server settings in Windows 7. Follow the steps below:
- In the Internet Options window, navigate to the Connections tab located at the top of the window.
- Within the Connections tab, click on the LAN settings button. This will open the Local Area Network (LAN) Settings window.
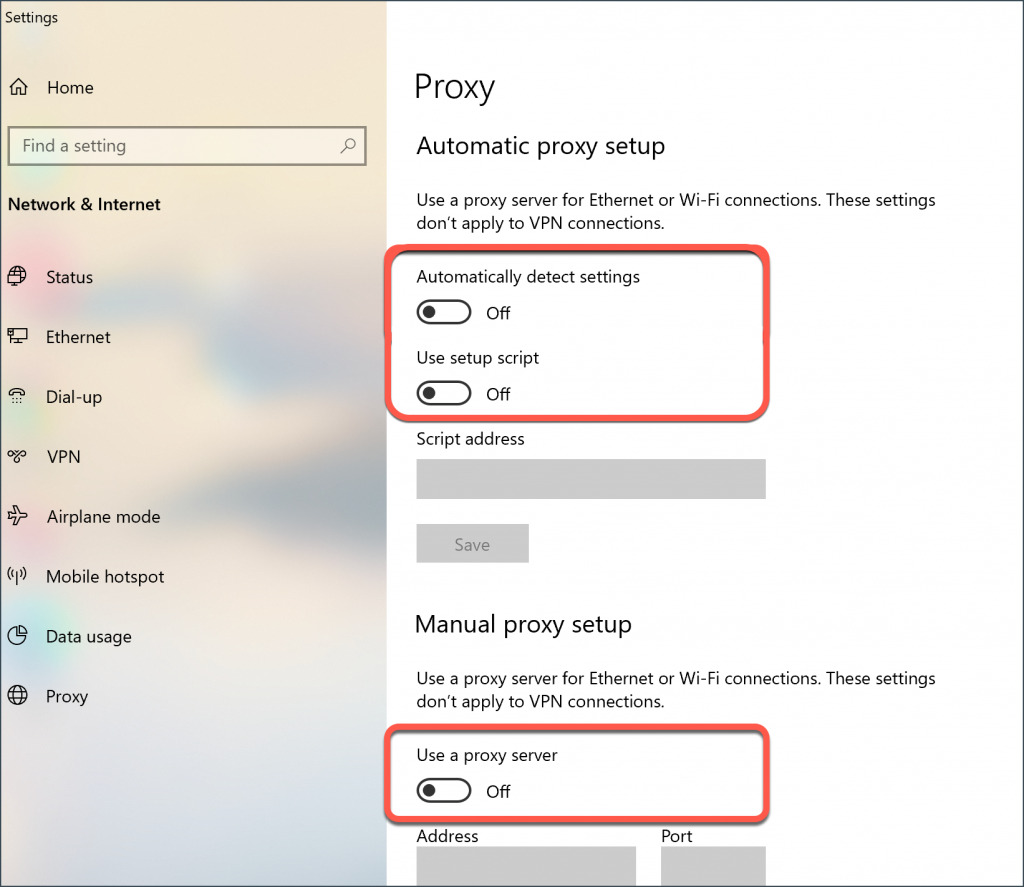
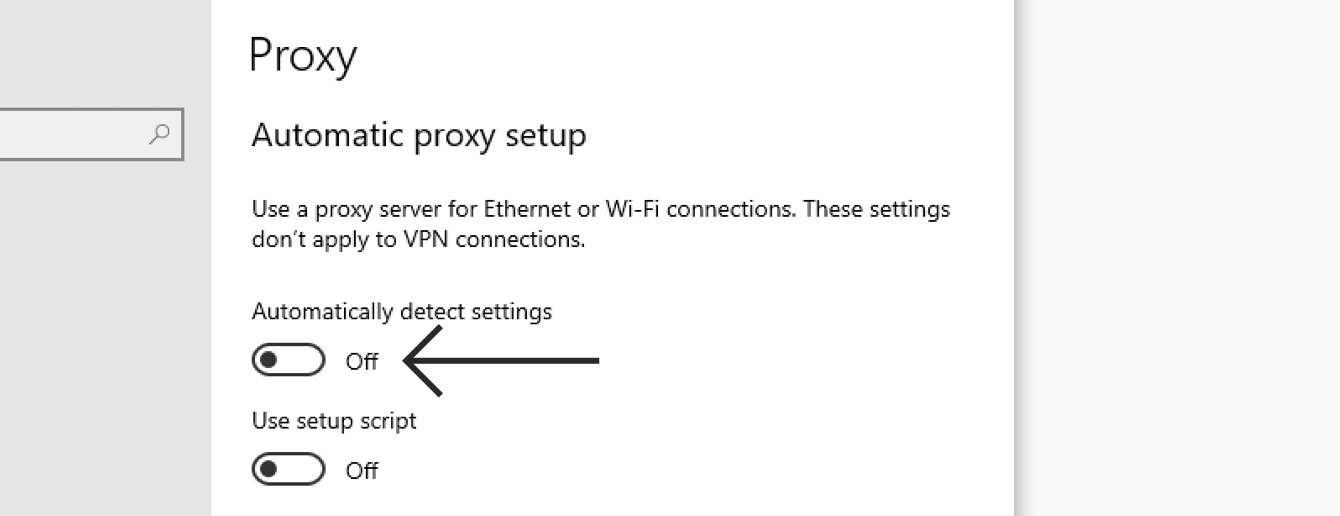
- In the LAN Settings window, ensure that the Use a proxy server for your LAN option is checked. Uncheck this option to disable the proxy server.
- Additionally, make sure that the Automatically detect settings option is checked. This allows your computer to automatically detect and configure network settings.
- Click on the OK button to save the changes and close the LAN Settings window.
- Next, click on the Apply button in the Internet Options window to apply the changes.
- Finally, click on the OK button to close the Internet Options window.
By following these steps, you have successfully removed the proxy server settings in Windows 7. Your computer will now have direct access to the internet without going through a proxy server.
However, it’s important to note that removing proxy server settings may impact your network configuration. If you are part of a network where proxy settings are required, make sure to consult with your network administrator before making any changes.
Step 3: Verifying Proxy Server Removal
After removing the proxy server settings in Windows 7, it’s essential to verify that the changes have been successfully applied. Here’s how you can do it:
- Open a web browser, such as Chrome, Firefox, or Internet Explorer.
- Visit a website that you normally have access to, ensuring that it doesn’t require a proxy connection.
- If the website loads correctly and you can browse through different pages without any issues, it indicates that the proxy server settings have been successfully removed.
- However, if you encounter any network connectivity errors or are unable to access the desired website, it could indicate that the proxy server settings are still active or that there may be other network-related issues.
- In such cases, you can repeat the steps mentioned in the previous section to ensure that the proxy server settings have been disabled correctly.
- If the problem persists even after removing the proxy server settings, you may need to troubleshoot your network connection or consult with a technical expert to resolve the issue.
Verifying the removal of proxy server settings is crucial as it confirms that your computer is no longer using a proxy server to connect to the internet. By successfully accessing websites without any proxy-related errors, you can be confident that your internet connection is now direct.
It’s worth mentioning that if you are part of a network or organization where proxy settings are required, you may need to re-enable the proxy server settings through the LAN Settings menu in the Internet Options window. Ensure that you follow the appropriate instructions given by your network administrator.
Conclusion
Removing proxy server settings in Windows 7 is a simple process that can restore direct access to the internet. Whether you’re experiencing connectivity issues, want to improve network performance, or need to troubleshoot certain applications, following these steps will help you disable the proxy server settings on your system.
In this article, we’ve explained the process of removing proxy server settings in Windows 7 in three simple steps:
- Accessing the Internet Options menu
- Removing the proxy server settings
- Verifying the proxy server removal
After completing these steps, ensure that you can access websites without any proxy-related errors to confirm the successful removal of proxy server settings.
It’s important to note that if you are part of a network or organization where proxy settings are required, you should consult with your network administrator before making any changes. They can provide specific instructions and guidance tailored to your network setup.
By removing proxy server settings, you can regain direct access to the internet, allowing for smoother browsing, faster downloads, and improved network performance. If you ever need to reconfigure or enable proxy server settings again, you can follow the same steps outlined in this article.
We hope this guide has been helpful in assisting you with removing proxy server settings in Windows 7. If you have any further questions or need additional assistance, don’t hesitate to reach out to our support team or refer to the Windows 7 documentation for more detailed instructions.