Introduction
Google Lens is a powerful visual search tool developed by Google. It allows users to search for information by using their phone camera to capture images or scan barcodes. Google Lens can recognize objects, landmarks, text, and even animals, providing instant search results and relevant information. While Google Lens can be a useful feature for many iPhone users, there may be instances where you might want to remove it from your device.
There are several reasons why you may want to remove Google Lens from your iPhone. It could be a personal preference, as you may not find yourself using the feature often and want to free up space on your device. Additionally, some users may have privacy concerns and prefer not to have Google Lens integrated into their iPhone. Whatever the reason may be, removing Google Lens is a relatively simple process that can be done in a few different ways.
In this article, we will discuss three methods to remove Google Lens from your iPhone. We will guide you through the steps needed to uninstall the Google Lens app, disable the integration in the Google app, and revoke camera access for Google Lens in your iPhone’s settings. By following these methods, you can successfully remove or disable Google Lens on your iPhone, allowing you to customize your device to your liking.
Whether you’re looking to free up storage space, address privacy concerns, or simply have no need for the feature, the following methods will help you remove Google Lens from your iPhone completely. Let’s dive into each method and learn how to remove Google Lens step by step.
What is Google Lens?
Google Lens is a powerful visual search tool developed by Google that brings augmented reality (AR) capabilities to your smartphone. By harnessing the power of machine learning and artificial intelligence, Google Lens can analyze and understand the content of images captured by your phone’s camera.
With Google Lens, you can use your iPhone camera to capture images of objects or scenes, and the tool will provide you with relevant information, suggestions, and actions based on what it recognizes in the image. Whether you want to identify a plant, translate foreign text, or learn more about a famous landmark, Google Lens can assist you with its visual search feature.
One of the key features of Google Lens is its ability to recognize and extract text from images. This can be particularly useful when you want to quickly save information from a document, menu, or even a handwritten note. Google Lens can also detect phone numbers, email addresses, and URLs in images, making it easy to save or interact with the identified information.
Furthermore, Google Lens can identify popular landmarks, artworks, plants, and even animals. Simply point your iPhone camera at a landmark, and Google Lens can provide you with historical information, facts, and other details about it. If you come across an unfamiliar plant or animal, Google Lens can help you identify the species and learn more about it.
Another handy feature of Google Lens is its ability to recognize and scan barcodes and QR codes. This can be useful when you want to quickly access product information, compare prices, or add an event to your calendar by scanning a QR code. Instead of manually typing in information, Google Lens can streamline these tasks by scanning and extracting the relevant data.
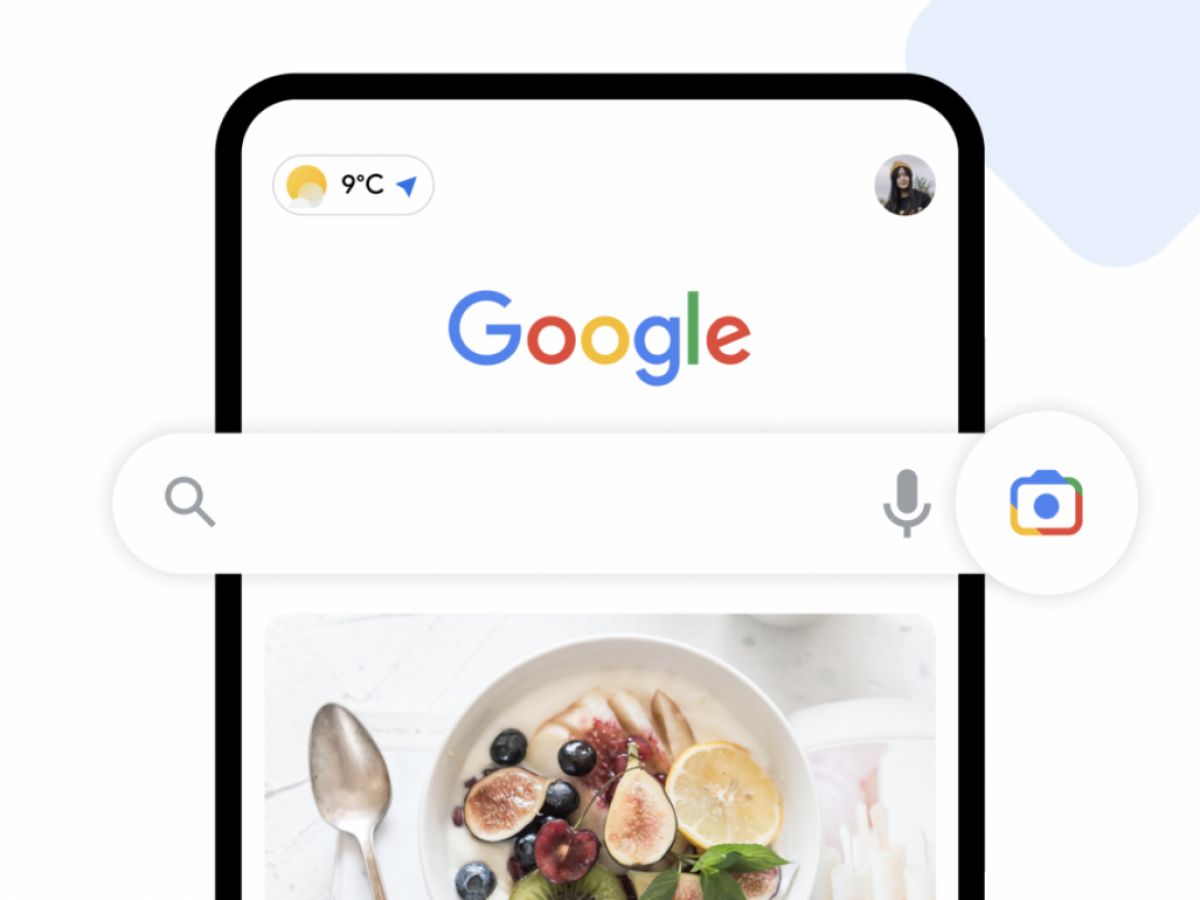
In addition to its standalone app, Google Lens is integrated into the Google app on iPhones, making it easily accessible whenever you perform a search. By tapping on the Google Lens icon in the search bar, you can activate the feature and start utilizing its visual search capabilities.
Now that you have a better understanding of what Google Lens is and its various features, let’s explore how you can remove it from your iPhone if you no longer find it necessary or if you have privacy concerns.
Why would you want to remove Google Lens from iPhone?
While Google Lens offers a range of powerful features, there are several reasons why you may want to remove it from your iPhone:
- Storage space: Google Lens is an app that takes up storage space on your iPhone. If you find that you have limited storage or you rarely use Google Lens, removing it can free up space for other apps, photos, or files.
- Privacy concerns: Some users may have privacy concerns about Google Lens. Since the tool analyzes images taken with your iPhone camera, it requires access to your device’s camera and may raise privacy questions for individuals who are cautious about sharing visual data. By removing Google Lens, you can alleviate these privacy concerns.
- Minimal usage: If you find that you rarely use Google Lens or have alternative methods for accomplishing the same tasks, removing it from your iPhone can streamline your device and remove unnecessary clutter.
- Customization preferences: Every individual has different preferences for the apps and features they want on their iPhone. If Google Lens does not align with your personal preferences or usage habits, removing it allows you to shape your device according to your needs.
- Improved performance: By removing Google Lens, you may experience improved performance on your iPhone, especially if you have an older device or limited system resources. This is because you will have more available RAM and storage space, resulting in smoother overall performance.
It’s important to note that removing Google Lens from your iPhone is a personal choice and depends on your specific requirements and preferences. If you find that you no longer need the visual search capabilities or have concerns about privacy or device performance, it may be worthwhile to remove or disable Google Lens on your iPhone.
Now that you understand some of the reasons why you might want to remove Google Lens from your iPhone, let’s explore the different methods to accomplish this task.
Method 1: Removing Google Lens from your iPhone
If you have decided to remove Google Lens from your iPhone, you can follow these steps:
- Step 1: Locate the Google Lens app on your iPhone
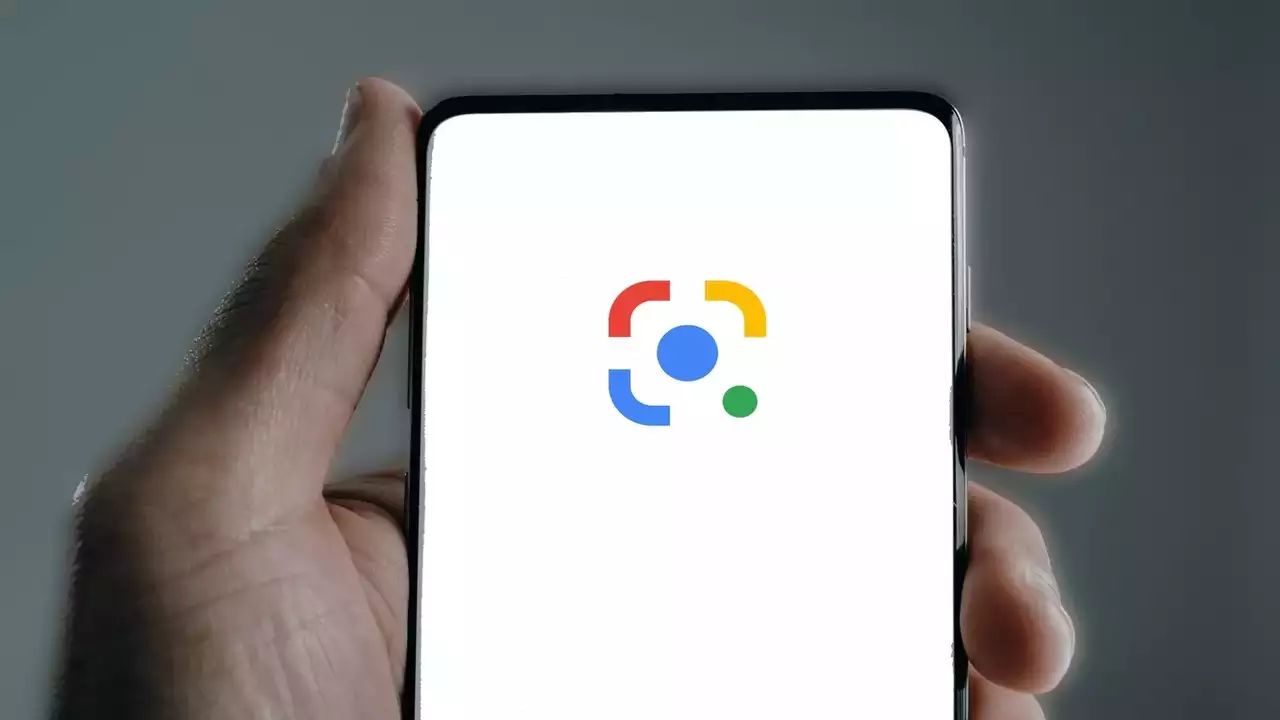
Find the Google Lens app icon on your home screen or in your app library. It is represented by a white icon with a blue, yellow, and green dot. - Step 2: Press and hold the Google Lens app icon
Tap and hold the Google Lens app icon until it starts to wiggle, and a small “x” appears at the top-left corner of the icon. - Step 3: Select the “Remove App” option
Tap the “x” button on the Google Lens app icon. A pop-up will appear, asking if you want to delete the app. Tap on the “Remove App” option. - Step 4: Confirm the removal of Google Lens
Another pop-up will appear, asking if you want to delete the app and its data. If you want to remove Google Lens completely, select the “Delete App” option. If you want to keep the app’s data for future use, choose “Delete App” and then “Keep Files.”
Once you have followed these steps, Google Lens will be removed from your iPhone, and the app icon will disappear from your home screen and app library.
It’s important to note that by removing the Google Lens app, you are uninstalling the standalone application. However, Google Lens may still be accessible through the Google app, which integrates the visual search feature. If you want to disable Google Lens completely, you can also follow the methods outlined in the next sections.
Now that you know how to remove the Google Lens app from your iPhone, let’s explore additional methods to disable its integration in the Google app and revoke its permissions for your device’s camera.
Step 1: Locate the Google Lens app on your iPhone
In order to remove Google Lens from your iPhone, you first need to locate the app on your device. Here are the steps to help you find the Google Lens app:
- Unlock your iPhone and go to your home screen. If you have multiple screens, swipe left or right to navigate through them until you find the Google Lens app icon.
- Look for the app icon that resembles a white circle with blue, yellow, and green dots forming a ‘G’ shape in the center. The icon is usually labeled “Google Lens”.
- If you cannot find the Google Lens app on your home screen, you can check the app library by swiping your finger right on the last home screen page. The app library is a feature introduced in iOS 14 that organizes all your installed apps in alphabetical order.
- Scroll through the app library until you find the Google Lens app icon. You can also use the search bar at the top of the app library to quickly find the app by typing “Google Lens”.
- Once you have located the Google Lens app icon, you are ready to proceed with the next steps to remove it from your iPhone.
It’s worth mentioning that the Google Lens app may be in a different location on your iPhone depending on how you have organized your home screen or if you have placed it in a folder. Take a moment to browse through your home screens or folders in search of the app icon.
Now that you have successfully located the Google Lens app on your iPhone, you can proceed to the next step – pressing and holding the app icon to initiate the removal process.
Step 2: Press and hold the Google Lens app icon
Once you have located the Google Lens app on your iPhone, the next step is to press and hold the app icon to initiate the removal process. Follow these instructions:
- Position your finger on the Google Lens app icon; make sure to press and hold it steadily.
- After a brief moment, you will notice that the app icon starts to wiggle and a small “x” appears at the top-left corner of the icon.
- Keep pressing the app icon while it is in the wiggling state.
This action triggers the standard editing mode for your iPhone’s home screen, allowing you to move or delete apps. The “x” button serves as a visual cue that you can remove the app from your device.
It is important to note that if you accidentally tapped the app icon instead of pressing and holding it, the apps on your home screen will enter the standard “jiggle” mode, which allows you to move and reorganize icons without the option to delete the app. To exit this mode, simply press the home button on your iPhone or swipe up from the bottom of the screen if you have an iPhone model without a physical home button.
Now that you have pressed and are holding the Google Lens app icon, you are ready to proceed to the next step: selecting the “Remove App” option.
Step 3: Select the “Remove App” option
After pressing and holding the Google Lens app icon on your iPhone, a small “x” will appear at the top-left corner of the icon. This signifies that you can now remove the app from your device. Follow these steps to select the “Remove App” option:
- While continuing to press the Google Lens app icon, drag your finger towards the “x” button at the top-left corner of the icon.
- As you drag your finger, you will notice that the app icon becomes larger and a delete confirmation message appears on the screen.
- Make sure to keep holding the app icon until it reaches the “x” button.
- Once you have dragged the app icon all the way to the “x” button, release your finger.
By following these steps, you have successfully selected the “Remove App” option. This action triggers the removal process for the Google Lens app.
If you want to cancel the deletion and keep the Google Lens app on your iPhone, you can simply tap anywhere outside the app icon or swipe left or right to move the app icon back to its original position.
Please note that removing the Google Lens app from your iPhone will uninstall the standalone application. However, Google Lens may still be accessible through the Google app, which integrates the visual search feature. If you want to fully disable Google Lens, you can follow the methods outlined in the upcoming sections.
Next, let’s move on to step 4: confirming the removal of Google Lens from your iPhone
Step 4: Confirm the removal of Google Lens
After selecting the “Remove App” option by dragging the Google Lens app icon to the “x” button, you will need to confirm the removal of the app. Follow these steps to complete the process:
- Once you release your finger from the app icon, a confirmation pop-up will appear on the screen.
- The pop-up will ask if you want to delete the app and its data.
- If you want to remove Google Lens completely from your iPhone, select the “Delete App” option.
- If you wish to keep the app’s data for future use, you can choose the “Delete App” and then “Keep Files” option.
It’s important to note that if you choose to delete the app and its data, all the information associated with Google Lens, including any saved settings or preferences, will be permanently removed from your iPhone.
Once you have selected your preferred deletion option, the Google Lens app will be uninstalled from your device. The app icon will disappear from your home screen and app library, freeing up storage space on your iPhone.
Now that you have followed all the steps and confirmed the removal of Google Lens from your iPhone, you have successfully uninstalled the app. It’s important to note that the removal of the Google Lens app does not impact the integration of Google Lens within the Google app. If you want to disable Google Lens completely, you can explore the next methods outlined in the upcoming sections.
Next, we will explore Method 2, which focuses on disabling Google Lens integration in the Google app.
Method 2: Disabling Google Lens integration in Google app
If you want to disable Google Lens integration within the Google app on your iPhone, you can follow these steps:
- Step 1: Open the Google app on your iPhone
Locate the Google app on your home screen or in your app library. It is represented by the letter “G” in colorful blocks. - Step 2: Tap on the three horizontal lines (hamburger menu)
In the bottom-right corner of the Google app, you will see three horizontal lines stacked vertically. Tap on this icon to open the menu. - Step 3: Select “Settings” from the menu
Scroll through the menu options and tap on “Settings” to access the Google app settings. - Step 4: Tap on “Google Lens”
Within the settings menu, look for the option labeled “Google Lens” and tap on it. This will open the Google Lens settings. - Step 5: Disable the “Use Lens” option
On the Google Lens settings page, you will see a toggle switch labeled “Use Lens.” Simply tap on the switch to turn it off and disable Google Lens integration within the Google app.
By following these steps, you have successfully disabled Google Lens integration in the Google app on your iPhone. This means that the visual search feature will no longer be accessible through the Google app, helping you to customize your app experience according to your preferences.
Although Google Lens is disabled within the Google app, it’s important to note that the standalone Google Lens app may still be present on your device unless you have previously uninstalled it. If you want to remove the Google Lens app entirely, you can refer back to Method 1 in this article.
Now that you have disabled Google Lens integration within the Google app, let’s move on to Method 3, which focuses on disabling Google Lens permission in your iPhone’s settings.
Step 1: Open the Google app on your iPhone
In order to disable Google Lens integration within the Google app on your iPhone, the first step is to open the Google app. Here are the instructions to follow:
- Unlock your iPhone and navigate to your home screen. Look for the app icon that represents the Google app – it features the letter “G” in colorful blocks.
- Tap on the Google app icon to open the app. The Google app will launch, presenting you with the search interface and various options.
If you can’t find the Google app on your home screen, try searching for it by swiping down on your home screen to reveal the search bar. Type “Google” in the search bar, and the app should appear in the search results. Tap on the app icon in the search results to open it.
Alternatively, you can also access the Google app through the app library. Swipe left on your home screen to navigate to the app library screen, or swipe up from the bottom of the screen if you have an iPhone model without a physical home button. Look for the Google app icon in the appropriate category or search for it using the search bar at the top of the app library.
Once you have successfully opened the Google app on your iPhone, you are ready to proceed to the next step: tapping on the three horizontal lines (hamburger menu).
Step 2: Tap on the three horizontal lines (hamburger menu)
After opening the Google app on your iPhone, the next step is to tap on the three horizontal lines, also known as the hamburger menu. This will allow you to access the menu options within the app. Follow these steps:
- Look for the three horizontal lines stacked vertically, typically located in the bottom-right corner of the Google app interface.
- Tap on the hamburger menu icon. This will open the menu and display a list of options for you to choose from.
The hamburger menu is a common user interface element that is utilized by many apps to provide easy access to additional features and settings. Tapping on it expands the menu, offering various navigation or configuration options.
If you’re having trouble finding the hamburger menu in the Google app, double-check that you’re using the latest version of the app. You may need to update the app from the App Store to access the most recent features and improvements.
Now that you have successfully tapped on the hamburger menu icon, you can proceed to the next step, which is accessing the “Settings” option within the Google app.
Step 3: Select “Settings” from the menu
After tapping on the hamburger menu icon in the Google app, the next step is to select the “Settings” option. Follow these instructions:
- Once the menu expands, look for the option labeled “Settings”. It is usually located towards the bottom of the menu.
- Tap on the “Settings” option to access the settings menu for the Google app.
By selecting the “Settings” option, you will be able to customize various aspects of the Google app, including features, privacy preferences, search history, and more.
If you don’t see the “Settings” option in the expanded menu, it’s possible that the menu structure may have changed in a recent update. In such cases, look for options like “Preferences” or “App Settings” that can lead you to the settings menu.
It’s worth noting that the exact appearance and organization of the menu options may vary depending on the version of the Google app you have installed on your iPhone.
Now that you have selected the “Settings” option within the Google app, you are ready to proceed to step 4, which involves tapping on “Google Lens” to access its settings.
Step 4: Tap on “Google Lens”
After accessing the settings menu in the Google app on your iPhone, the next step is to locate and tap on the “Google Lens” option. Follow these steps to proceed:
- Within the settings menu, scroll through the options until you find “Google Lens”. It may be located in the “Search” or “Assistant” section of the settings menu.
- Once you have found “Google Lens”, tap on it to access the Google Lens settings.
The “Google Lens” option allows you to manage the settings specifically related to the visual search feature within the Google app.
If you are having difficulty finding the “Google Lens” option within the settings menu, you can try using the search bar at the top of the settings menu. Type “Google Lens” in the search bar, and the relevant option should appear in the search results. Tap on the searched option to access the Google Lens settings directly.
It’s worth noting that the exact organization and placement of options within the settings menu may vary depending on the version of the Google app installed on your iPhone.
Now that you have successfully tapped on the “Google Lens” option, you are ready to proceed to the final step of Method 2 – disabling the “Use Lens” option within the Google app settings.
Step 5: Disable the “Use Lens” option
After accessing the Google Lens settings within the Google app on your iPhone, the final step is to disable the “Use Lens” option. Here are the steps to follow:
- Within the Google Lens settings page, locate the toggle switch labeled “Use Lens”.
- Tap on the switch to turn it off and disable the Google Lens integration within the Google app.
Disabling the “Use Lens” option will prevent the Google app from utilizing the visual search feature of Google Lens. This means that the visual search capabilities and features provided by Google Lens will no longer be accessible through the Google app on your iPhone.
If you ever want to re-enable the Google Lens integration within the Google app, simply go back to the Google Lens settings and toggle the “Use Lens” option back on.
It’s important to note that disabling the “Use Lens” option within the Google app settings only affects the integration of Google Lens within the app itself. If you want to completely remove Google Lens from your iPhone, you can refer back to Method 1 in this article.
Now that you have successfully disabled the “Use Lens” option within the Google app settings, you have completed Method 2. This method allows you to customize the integration of Google Lens according to your preferences and usage habits.
Next, we will explore Method 3, which focuses on disabling Google Lens permission in your iPhone’s settings to restrict access to your device’s camera.
Method 3: Disabling Google Lens permission in iPhone settings
If you want to restrict Google Lens from accessing your iPhone’s camera entirely, you can disable its permission in your device’s settings. Here’s how to do it:
- Step 1: Open the iPhone Settings app
Locate the Settings app on your iPhone’s home screen. It can be identified by a gray gear icon. - Step 2: Scroll down and tap on “Privacy”
In the Settings app, scroll down until you find the “Privacy” option. Tap on it to access the privacy settings. - Step 3: Select “Camera” from the privacy settings
Within the Privacy settings, find and tap on the “Camera” option. This will display a list of apps that have permission to access your iPhone’s camera. - Step 4: Locate the Google app in the list of apps with access to your camera
Scroll through the list of apps that have camera access until you find the Google app. The apps are listed in alphabetical order. - Step 5: Toggle off the switch next to the Google app
Once you have located the Google app, tap on the switch next to it to disable camera access for the app. The switch will turn grey when turned off.
By following these steps, you have successfully disabled Google Lens’s permission to access your iPhone’s camera. This effectively restricts Google Lens from utilizing the camera function on your device.
Please keep in mind that disabling camera access for the Google app not only affects Google Lens but also other camera-related features within the app. If you want to re-enable camera access for the Google app in the future, simply toggle the switch back on in the Privacy settings.
Now that you have disabled Google Lens permission in your iPhone’s settings, you have successfully completed Method 3. This method provides an additional layer of control over the camera access granted to the Google app and Google Lens.
In the next section, we will summarize the methods discussed and conclude the article.
Step 1: Open the iPhone Settings app
To disable Google Lens permission in your iPhone settings, the first step is to open the Settings app on your device. Follow these instructions to locate and access the Settings app:
- Unlock your iPhone and locate the Settings app on your home screen. The app icon resembles a gray gear.
- Tap on the Settings app icon to open the app. This will launch the main settings interface for your iPhone.
The Settings app is a central hub where you can manage and customize various aspects of your iPhone, including privacy settings, system configurations, network preferences, and more.
If you can’t find the Settings app on your home screen, it’s possible that it may be located in a different folder. Swipe left or right to navigate through your home screens or use the search bar by swiping down on the home screen to quickly search for the app icon.
If you’re using an older version of iOS, the Settings app icon may have a slightly different appearance. Nevertheless, it should still resemble a gear icon and provide access to the same set of settings and configurations.
Now that you have successfully opened the iPhone Settings app, you are ready to proceed to the next step and navigate to the Privacy settings.
Step 2: Scroll down and tap on “Privacy”
After opening the iPhone Settings app, the next step is to scroll down and locate the “Privacy” option. Here’s how you can do it:
- Within the Settings app, scroll through the list of available options until you find “Privacy”. It is typically located between “Control Center” and “Siri & Search”.
- Once you have located the “Privacy” option, tap on it to access the privacy settings for your iPhone.
The Privacy settings provide you with the ability to control and manage the permissions granted to various apps and features on your iPhone. By adjusting these settings, you can have more control over the privacy and security of your personal information.
If you’re having trouble locating the “Privacy” option, you can use the search bar at the top of the Settings app. Simply swipe down on the screen to reveal the search bar, type “Privacy” in the search field, and the option should appear in the search results. Tap on it to access the Privacy settings directly.
Please note that the appearance and organization of the settings may vary slightly depending on the version of iOS installed on your iPhone. However, the option to access the Privacy settings should still be available.
Now that you have successfully tapped on the “Privacy” option, you can proceed to step 3, which involves selecting the “Camera” option within the Privacy settings.
Step 3: Select “Camera” from the privacy settings
After accessing the Privacy settings in the iPhone Settings app, the next step is to locate and select the “Camera” option. Here’s how you can do it:
- Scroll through the list of available privacy options until you find “Camera”. It is typically located towards the top of the Privacy settings menu.
- Tap on the “Camera” option to access the camera permissions for various apps on your iPhone.
The “Camera” option allows you to manage and control which apps have access to your iPhone’s camera. By adjusting the camera permissions, you can ensure that apps can only use the camera when you explicitly grant them permission.
It’s worth noting that when you tap on the “Camera” option, a list of installed apps that have requested camera access will be displayed.
If you’re having trouble finding the “Camera” option, you can use the search bar at the top of the Settings app. Simply swipe down on the screen to reveal the search bar, type “Camera” in the search field, and the option should appear in the search results. Tap on it to access the Camera settings directly.
Now that you have successfully selected the “Camera” option within the Privacy settings, you are ready to proceed to the next step – locating the Google app in the list of apps with access to your camera.
Step 4: Locate the Google app in the list of apps with access to your camera
After selecting the “Camera” option within the Privacy settings in the iPhone Settings app, the next step is to locate the Google app in the list of apps that have access to your camera. Here are the steps:
- Scroll through the list of apps displayed under the “ALLOW ACCESS TO CAMERA” section.
- Look for the Google app in the list of apps. The apps on the list are arranged in alphabetical order, making it easier to locate.
The Google app is typically labeled as “Google” in the list of apps. It may have the Google logo as its icon or may have a blue background with a white “G” at the center.
If you cannot find the Google app in the initial view, continue scrolling through the list until you locate it. In some cases, if you have many apps installed on your iPhone, you may need to swipe down within the app list to reveal additional apps.
It’s worth noting that the list may also contain other Google-related apps, such as “Google Maps” or “Google Drive”. Ensure that you select the corresponding “Google” app for managing the camera permissions for Google Lens.
Once you have identified the Google app in the list, you’re ready to proceed to the final step of Method 3 – toggling off the camera access for the Google app.
Now that you have successfully located the Google app in the list of apps with camera access, you can proceed to the next step and disable the camera permission for the app.
Step 5: Toggle off the switch next to the Google app
After locating the Google app in the list of apps with camera access within the Privacy settings, the final step is to toggle off the switch next to the Google app to disable its camera permission. Follow these steps:
- Find the Google app in the list of apps with camera access.
- Next to the Google app, you will see a switch or toggle button.
- Tap on the switch to toggle it off. When the switch is turned off, it will no longer be green or active.
Disabling the camera permission for the Google app restricts its access to your iPhone’s camera. Consequently, Google Lens within the Google app will not have the ability to utilize the camera function on your device.
Please keep in mind that disabling camera access for the Google app via these privacy settings affects all camera-related features within the app, not just Google Lens. If you ever wish to grant camera permission to the Google app again, you can revisit these settings and toggle the switch back on.
It’s important to note that disabling the camera permission does not remove the Google app or Google Lens from your iPhone. If you want to completely remove the Google app, you can follow Method 1 in this article.
Congratulations! You have successfully disabled the camera permission for the Google app in your iPhone’s settings. This completes Method 3, allowing you to maintain greater control over the camera access granted to Google Lens and the Google app.
In the next section, we will summarize the methods discussed in this article, providing you with a comprehensive understanding of how to remove or disable Google Lens from your iPhone.
Conclusion
In this article, we explored various methods to remove or disable Google Lens from your iPhone. Here’s a summary of the methods discussed:
- Method 1: Removing Google Lens from your iPhone – This method involves uninstalling the standalone Google Lens app from your device by long-pressing its app icon on the home screen, selecting “Remove App,” and confirming the removal.
- Method 2: Disabling Google Lens integration in the Google app – This method focuses on disabling the visual search feature within the Google app. By accessing the app, tapping on the hamburger menu, selecting “Settings,” navigating to “Google Lens,” and disabling the “Use Lens” option, you can turn off Google Lens integration.
- Method 3: Disabling Google Lens permission in iPhone settings – This method allows you to restrict camera access for the Google app entirely. By opening the iPhone Settings app, locating “Privacy,” selecting “Camera,” finding the Google app in the list, and toggling off the camera permission, you can disable camera access for Google Lens and other features within the Google app.
It’s important to note that the methods discussed in this article give you flexibility in removing or disabling Google Lens according to your preferences and needs. Whether it’s to free up storage space, address privacy concerns, or customize your device, you now have the tools to make the desired changes.
Remember, removing or disabling Google Lens does not affect other features and capabilities of your iPhone or the Google app itself. You can always reinstall the Google Lens app or re-enable its integration if you change your mind in the future.
By following the steps outlined in this article, you can confidently remove or disable Google Lens from your iPhone, tailoring your device to suit your unique requirements.
Thank you for reading, and we hope this article has helped you in managing Google Lens on your iPhone!