Introduction
Welcome to this step-by-step guide on how to open a Toshiba Ultrabook! Whether you need to replace a faulty component or simply want to perform some maintenance, opening the Ultrabook will give you access to its internal components. Before we begin, please note that opening your Ultrabook may void your warranty, so proceed at your own risk.
In this guide, we will walk you through the process of opening the casing, removing the keyboard, detaching the battery, and accessing the internal components. We will also provide tips and precautions to ensure a smooth and successful procedure. By following these instructions carefully, you can effectively open your Toshiba Ultrabook without causing any damage.
Before you start, it’s important to gather the necessary tools. You will need a small Phillips-head screwdriver, a plastic pry tool or a credit card, and a plastic container to keep track of the screws. Additionally, make sure you are working in a clean and well-lit area, preferably on a static-free surface to minimize the risk of electrostatic discharge.
Now, without further ado, let’s begin the process of opening your Toshiba Ultrabook!
Tools Required
Before you embark on the journey of opening your Toshiba Ultrabook, it’s important to gather the necessary tools. Having the right tools on hand will make the process smoother and help prevent any accidental damage. Here are the tools you’ll need:
- Phillips-head screwdriver: You’ll need a small Phillips-head screwdriver to remove the screws holding the casing of your Ultrabook together. Make sure to choose one that fits the screws snugly to prevent stripping them.
- Plastic pry tool or credit card: A plastic pry tool or a credit card can be used to gently pry open the casing without scratching or damaging it. These tools are especially useful for popping off the keyboard or opening any clips or latches.
- Plastic container: It’s crucial to have a plastic container or a designated workspace to keep track of the screws you’ll be removing. This will prevent them from getting lost or mixed up during the disassembly process.
- Clean, static-free workspace: Find a clean and well-lit area to work on your Ultrabook. Ensure that the surface is static-free to minimize the risk of electrostatic discharge, which can damage sensitive electronic components.
By having these tools at your disposal, you’ll be well-prepared to open your Toshiba Ultrabook and proceed with the disassembly process. Remember to handle the tools with care and take your time during the process to avoid causing any unintended damage.
Removing the Screws
Before you can open the casing of your Toshiba Ultrabook, you’ll need to remove the screws that hold it together. Follow these steps to remove the screws:
- Shut down your Ultrabook and unplug it from the power source. This will ensure your safety and prevent any electrical mishaps.
- Flip your Ultrabook over so that the bottom side is facing up.
- Locate the screws that secure the bottom cover. These screws are usually indicated by small icons or labels.
- Using your Phillips-head screwdriver, carefully loosen and remove each screw one at a time. Note that some screws may be different sizes or have different lengths, so it’s important to keep track of where each screw goes.
- As you remove each screw, place it into a plastic container or keep it organized in a designated area. This will prevent the screws from getting lost or mixed up.
Once you have successfully removed all the screws, you are now ready to proceed to the next step of opening the casing of your Toshiba Ultrabook. Remember to handle the screws and screwdriver with care to avoid stripping the screws or causing any damage to the screw holes.
Keep the screws in a safe location, as you will need them for reassembling your Ultrabook later. With the screws removed, you are one step closer to accessing the internal components and performing the necessary maintenance or repairs on your Toshiba Ultrabook.
Opening the Casing
With the screws removed, it’s time to open the casing of your Toshiba Ultrabook. Follow these steps carefully to avoid causing any damage:
- Take your plastic pry tool or credit card and gently insert it into the small gap between the bottom cover and the main body of the Ultrabook. Be cautious and apply even pressure to avoid cracking or breaking the casing.
- Slide the plastic pry tool along the edge of the Ultrabook, releasing any clips or latches that secure the casing in place. Be patient and gentle, as some clips may require a bit of persuasion to release.
- Continue moving along the edges of the Ultrabook until you have loosened all the clips or latches holding the casing together. Take your time and be mindful of any resistance or tension.
- Once all the clips or latches have been released, carefully lift the bottom cover away from the main body of the Ultrabook. The casing should now be partially open, revealing the internal components.
It’s important to note that some Ultrabooks may have additional latches or screws holding the casing in place. If you encounter any resistance while attempting to open the casing, double-check for any hidden screws or clips that you may have missed.
As you open the casing, be mindful of any ribbon cables or connectors that may still be attached to the motherboard. These cables and connectors should be gently disconnected to avoid any strain or damage.
With the casing partially open, you are now ready to proceed to the next step of removing the keyboard from your Toshiba Ultrabook. This will provide you with further access to the internal components and allow you to perform the necessary maintenance or repairs.
Removing the Keyboard
Once you have successfully opened the casing of your Toshiba Ultrabook, the next step is to remove the keyboard. Follow these steps carefully to ensure a smooth removal:
- Locate the ribbon cable connecting the keyboard to the motherboard. This ribbon cable is usually situated near the top of the keyboard area.
- Gently lift the plastic latch securing the ribbon cable in place. This latch is usually located at the base of the connector and can be flipped up to release the cable.
- Once the latch is lifted, carefully pull the ribbon cable out of the connector. Make sure to grip the cable itself and not the connector to avoid any damage.
- With the ribbon cable disconnected, the keyboard should now be free from any attachments. Lift the keyboard from the bottom and gently tilt it towards the screen to remove it from the Ultrabook.
- Place the keyboard aside in a safe location to prevent any damage.
When removing the keyboard, it’s essential to be gentle and take your time to avoid causing any unnecessary damage to the connectors or keyboard itself. If you encounter any resistance while removing the keyboard, double-check for any additional attachments or screws that may be holding it in place.
With the keyboard successfully removed, you now have greater access to the internal components of your Toshiba Ultrabook. This will allow you to perform any necessary repairs or maintenance, such as replacing a faulty keyboard or cleaning the area beneath it.
Detaching the Battery
As you continue to disassemble your Toshiba Ultrabook, the next step is to detach the battery. Here’s how you can do it safely and effectively:
- Locate the battery inside the Ultrabook. It is typically positioned near the center or bottom area of the device.
- Inspect the battery connector and identify the retaining clip or latch that secures it in place.
- Gently lift or slide the retaining clip or latch to release the battery connector.
- Once the connector is released, carefully pull the battery connector out of its socket. Be sure to grip the connector itself and avoid applying excessive force to prevent any damage.
- With the battery connector detached, you can now safely lift the battery out of the Ultrabook.
It’s important to handle the battery with care during this process. Avoid bending or puncturing the battery, as it contains sensitive components that must be handled properly.
If you encounter any difficulty detaching the battery, double-check for any additional latches or connectors that may be securing it. Some devices may have additional safety mechanisms to ensure the battery remains firmly in place.
With the battery successfully detached, you now have greater access to the internal components of your Toshiba Ultrabook. This will enable you to perform any necessary repairs or maintenance, such as replacing a faulty battery or troubleshooting power-related issues.
Accessing the Internal Components
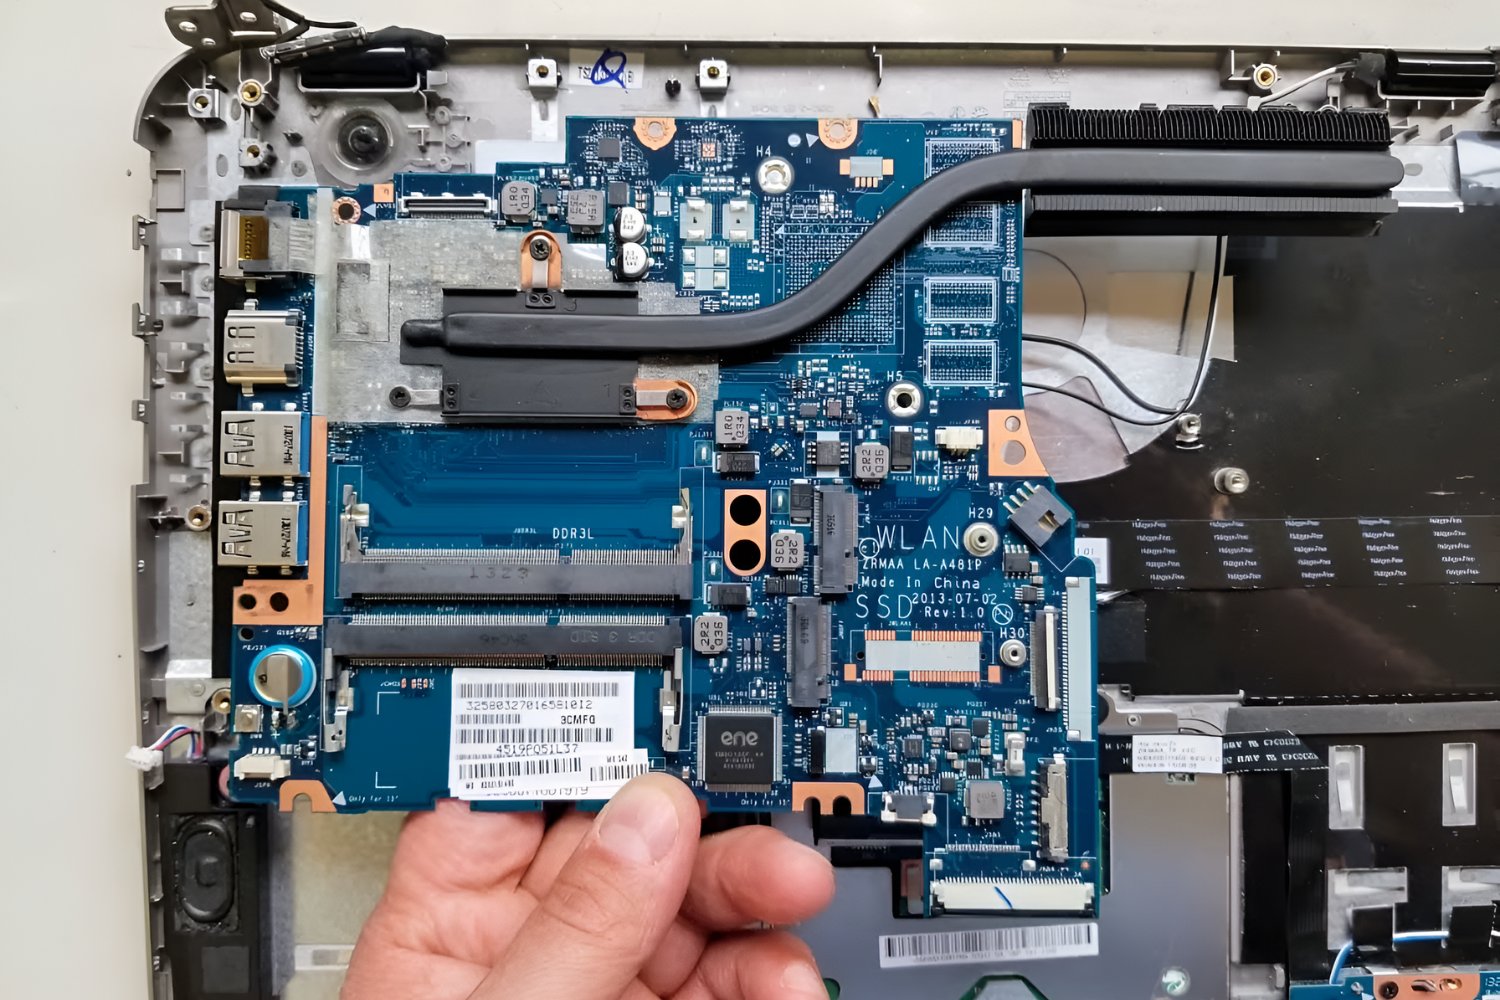
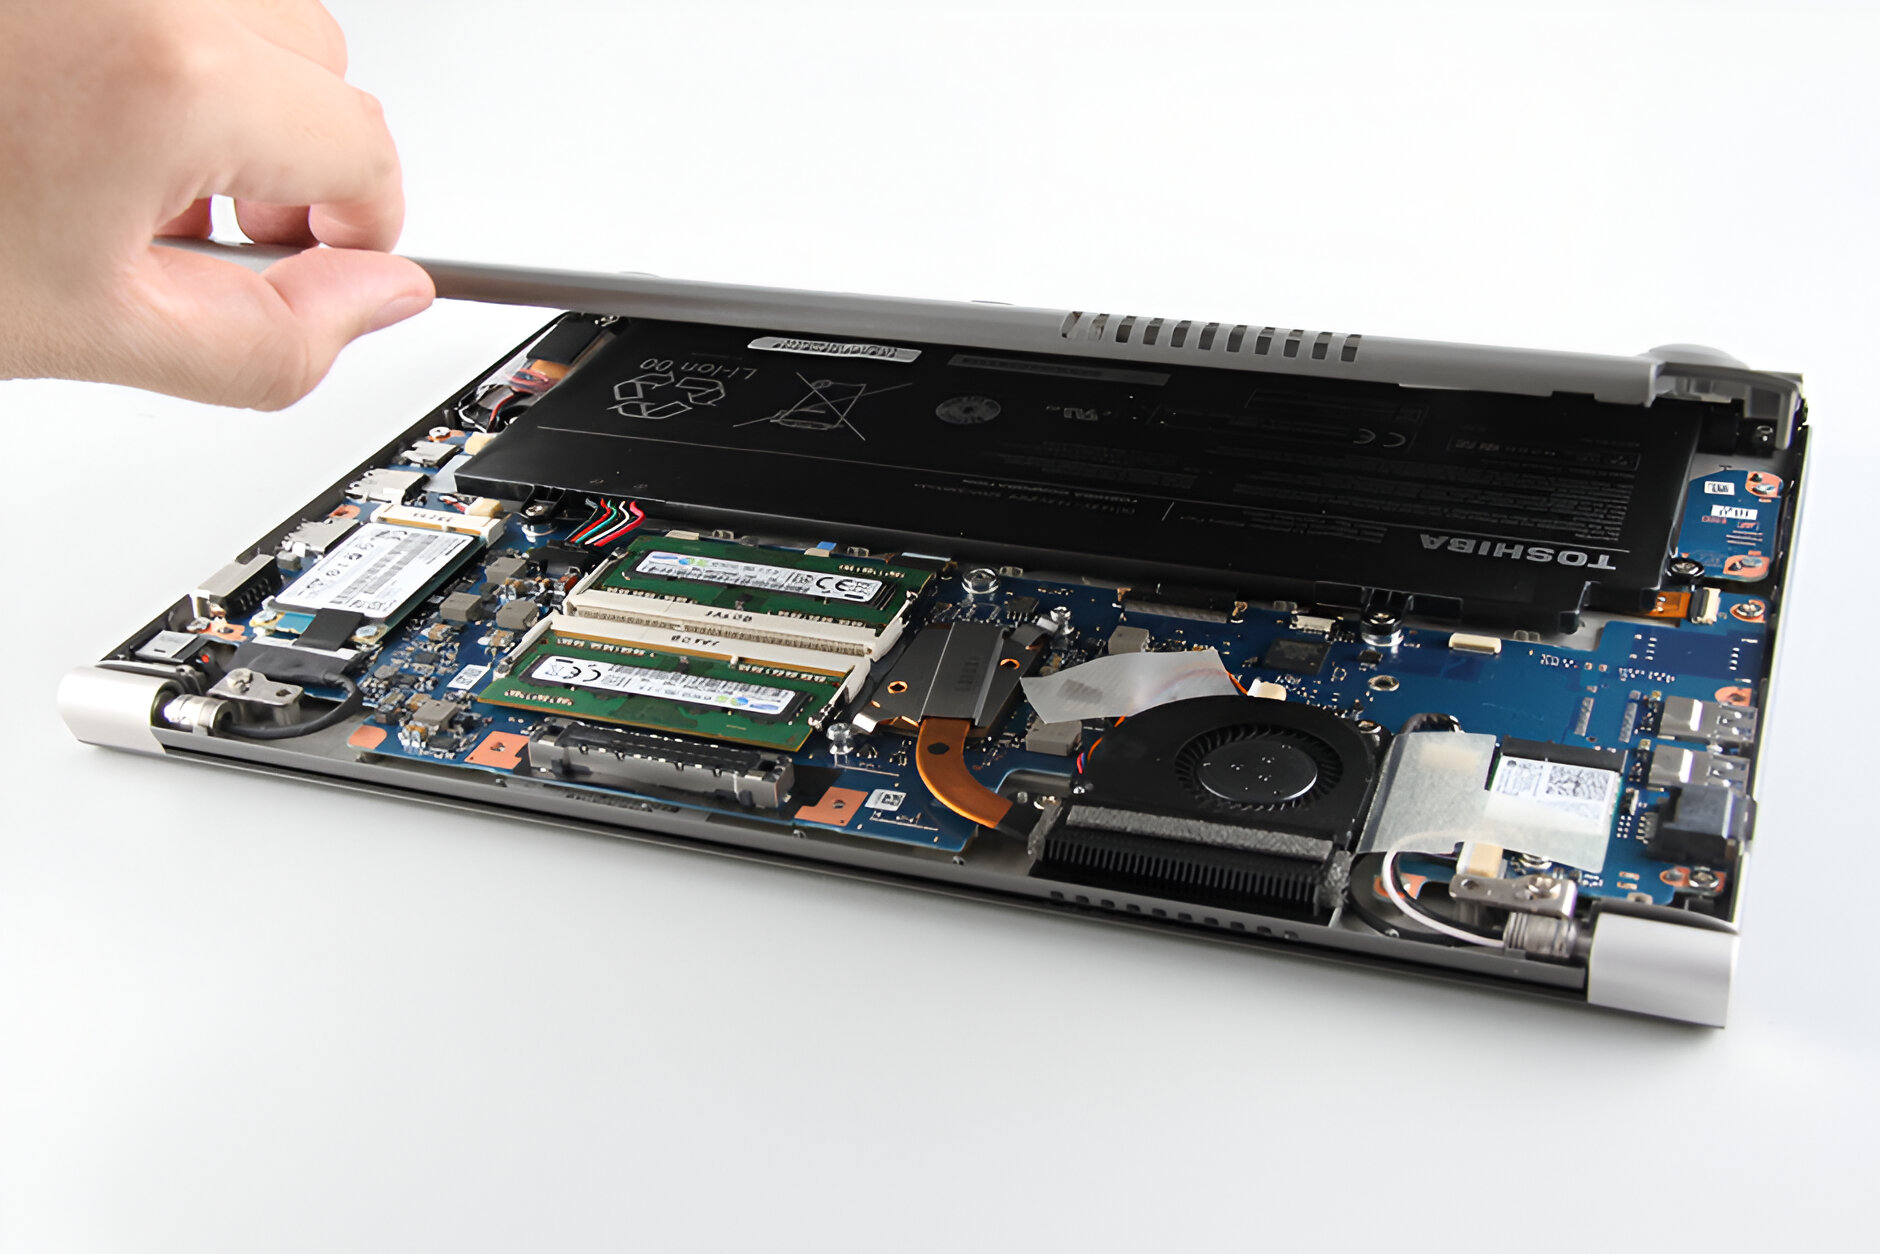
With the casing opened, the keyboard removed, and the battery detached, you are now ready to access the internal components of your Toshiba Ultrabook. Follow these steps carefully to ensure a successful access:
- Take a moment to familiarize yourself with the layout of the internal components. Identify the key parts, such as the hard drive, RAM slots, and any other components you may need to access.
- Depending on your specific model, you may need to remove additional screws or connectors to gain full access to the internal components. Take note of any screws or connectors holding these parts in place.
- Use your Phillips-head screwdriver to remove any screws securing the components you need to access. Keep the screws organized in a plastic container to prevent loss or confusion.
- If necessary, gently disconnect any ribbon cables or connectors that are attached to the components. Take care not to apply excessive force to prevent damaging the cables or connectors.
- Once the screws and connectors are removed or detached, carefully lift or slide out the desired component. Be mindful of any surrounding parts or cables to prevent accidental damage.
As you access the internal components, exercise caution and patience. Take note of how each component is positioned before removing it, as this will help when reassembling your Ultrabook later.
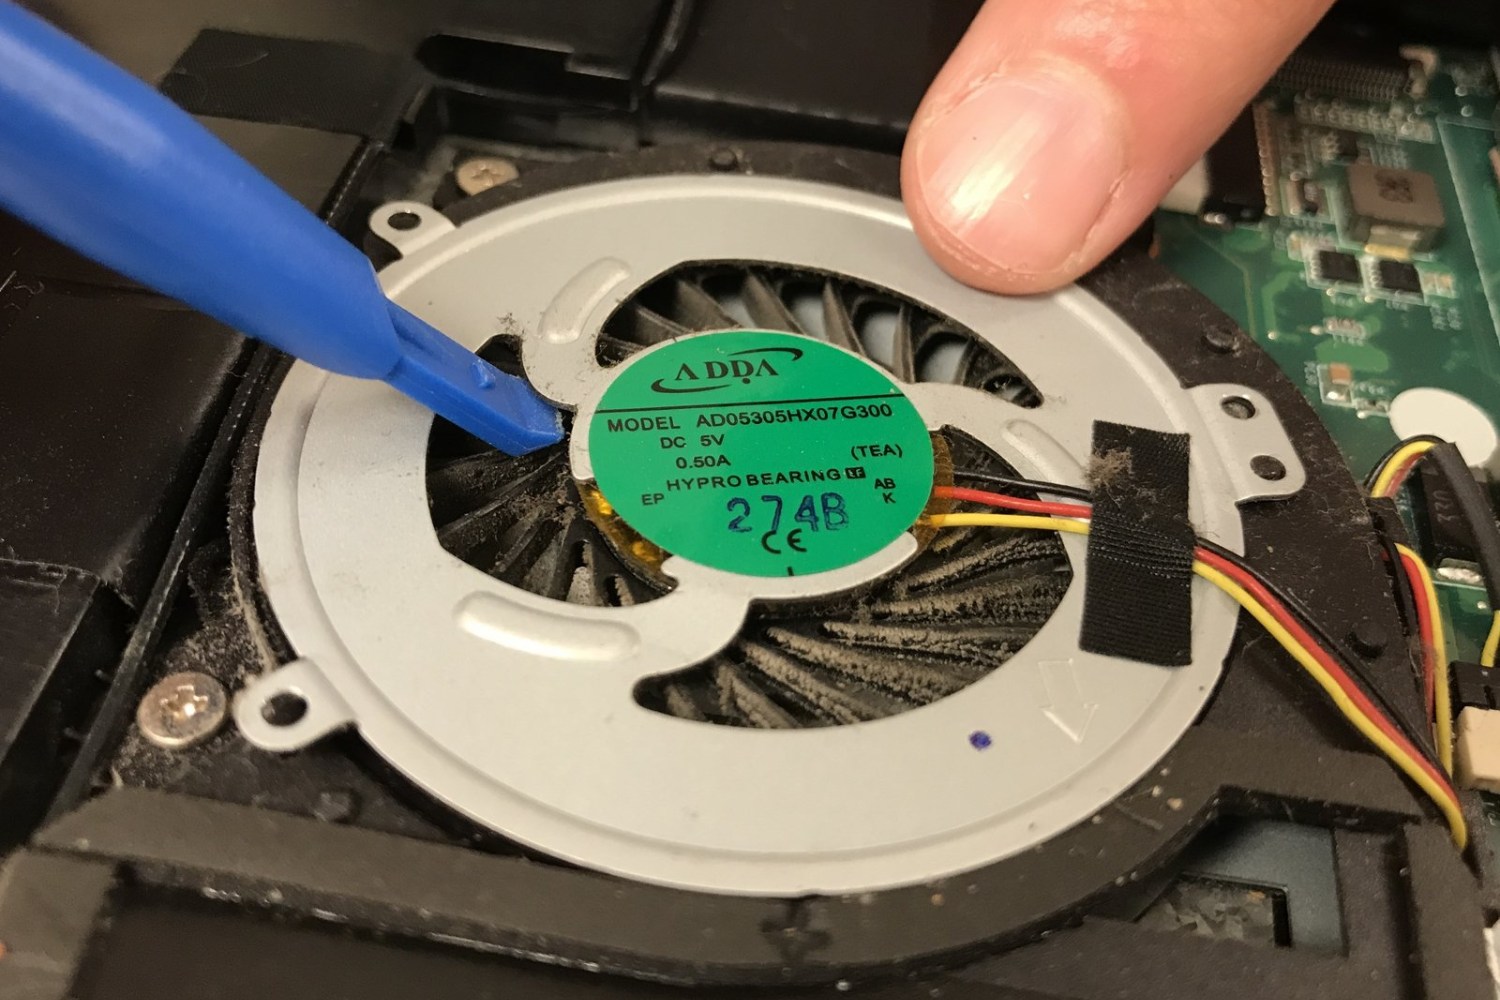
If you encounter any resistance or difficulty when accessing the internal components, double-check for any additional screws, latches, or connectors that may be securing them. Some components may have additional layers or covers that need to be removed first.
With the internal components accessed, you can now proceed with any necessary repairs, upgrades, or maintenance tasks. Take your time and refer to the appropriate documentation or guides for specific instructions on working with each component.
Closing the Casing
After you have completed the necessary repairs, upgrades, or maintenance on your Toshiba Ultrabook’s internal components, it’s time to close the casing and reassemble the device. Follow these steps carefully to ensure a secure and proper closure:
- Begin by aligning the bottom cover with the main body of the Ultrabook.
- Gently press the edges of the casing together, ensuring that all clips or latches engage properly.
- With the casing aligned, start securing it by inserting and tightening the screws that were previously removed. Make sure to use the correct screw size and location.
- Work your way around the Ultrabook, tightening the screws gradually in a diagonal or crisscross pattern. This will help maintain an even and secure closure.
- Double-check that all screws are securely fastened and tightened, but be careful not to overtighten them as it can damage the casing or the screw threads.
As you close the casing, ensure that there are no gaps or misalignments between the bottom cover and the main body. The casing should fit snugly and evenly, with all edges flush.
If you encounter any difficulty closing the casing, double-check for any debris or cables obstructing the closure. Also, check if any clips or latches were not properly engaged during the process.
Once the casing is securely closed, take a moment to visually inspect the Ultrabook for any signs of damage or abnormalities. Ensure that all ports, buttons, and features are easily accessible.
With the casing closed, you have successfully reassembled your Toshiba Ultrabook. You are now ready to power it on and enjoy the benefits of your repairs or upgrades.
Reassembling the Keyboard
Now that you have completed the necessary repairs or upgrades on your Toshiba Ultrabook’s internal components, it’s time to reassemble the keyboard. Follow these steps carefully to ensure proper reassembly:
- Take the keyboard and gently align it with the designated area on the main body of the Ultrabook. Make sure the keyboard sits flat and is properly positioned.
- Slide the ribbon cable connector into the corresponding slot on the motherboard. Ensure that the connectors align properly and insert it straight to avoid bending any pins.
- Once the connector is inserted, press down firmly but gently on the connector latch to secure the ribbon cable in place. This will ensure a stable and reliable connection.
- Gently press down on all areas of the keyboard to ensure that it is evenly seated and properly attached to the Ultrabook.
Take extra care when reassembling the keyboard, as applying too much force can damage the connectors or the keyboard itself. Make sure all the keys are aligned and sit flat on the surface before proceeding.
Once the keyboard is reassembled, power on your Toshiba Ultrabook and test the keys to ensure they are responsive and functioning correctly. Check for any keys that may be sticking or not registering properly.
If you encounter any issues with the keyboard after reassembly, double-check the ribbon cable connection and ensure that it is properly secured and seated in the connector. Also, verify that all keys are clean and free of any debris or obstructions.
With the keyboard successfully reassembled, you have completed the process of opening, repairing, and reassembling your Toshiba Ultrabook. Enjoy the functionality and improved performance of your device!
Conclusion
Congratulations! You have successfully learned how to open a Toshiba Ultrabook and access its internal components. By following the step-by-step instructions provided in this guide, you can confidently perform maintenance, repairs, or upgrades on your device. Remember to proceed with caution and take your time throughout the process to avoid any damage.
Opening a Toshiba Ultrabook requires the use of the right tools, such as a Phillips-head screwdriver and a plastic pry tool or credit card. It’s important to work in a clean and static-free environment to minimize the risk of damage from electrostatic discharge.
We walked you through the process of removing the screws, opening the casing, removing the keyboard, detaching the battery, and accessing the internal components. Each step was accompanied by detailed instructions to ensure a smooth and successful disassembly.
After performing any necessary repairs or upgrades, it’s crucial to reassemble the Ultrabook correctly. This includes aligning and securing the casing, reattaching the keyboard, and verifying that all connections are stable.
Remember, opening your Toshiba Ultrabook may void the warranty, so it’s important to be aware of the potential risks and proceed at your own discretion. If you are uncomfortable performing the disassembly yourself, it’s always best to seek professional assistance.
By gaining the knowledge and skills to open and access the internal components of your Toshiba Ultrabook, you are empowered to take control of its maintenance and potentially extend its lifespan. So go ahead, confidently tackle any necessary repairs or upgrades, and continue to enjoy the optimal performance of your Toshiba Ultrabook.