Introduction
Welcome to our guide on how to move photos from Google Photos to an SD card! Google Photos is a popular cloud-based storage service that allows users to back up and access their photos from any device with an internet connection. However, there may be times when you want to transfer your photos from Google Photos to an SD card for various reasons, such as creating a physical backup or freeing up storage space on your device.
In this article, we will take you through a step-by-step process on how to move your photos from Google Photos to an SD card. Whether you’re using an Android device or an iPhone, the method to transfer the photos remains quite similar. So, let’s get started!
Please note that the process may vary depending on the device you are using and the version of Google Photos. However, the general steps provided in this guide should work for most devices and versions of Google Photos. If you encounter any difficulties or notice any differences, consult your device’s user manual or seek assistance from the Google Photos support team.
Before we begin, ensure that you have an SD card inserted into your device. The photos will be transferred directly to the SD card, so make sure it has enough storage space to accommodate the photos you want to move. Additionally, it’s always a good idea to back up your photos before proceeding with any transfer process to ensure that you don’t lose any precious memories.
Step 1: Insert the SD Card
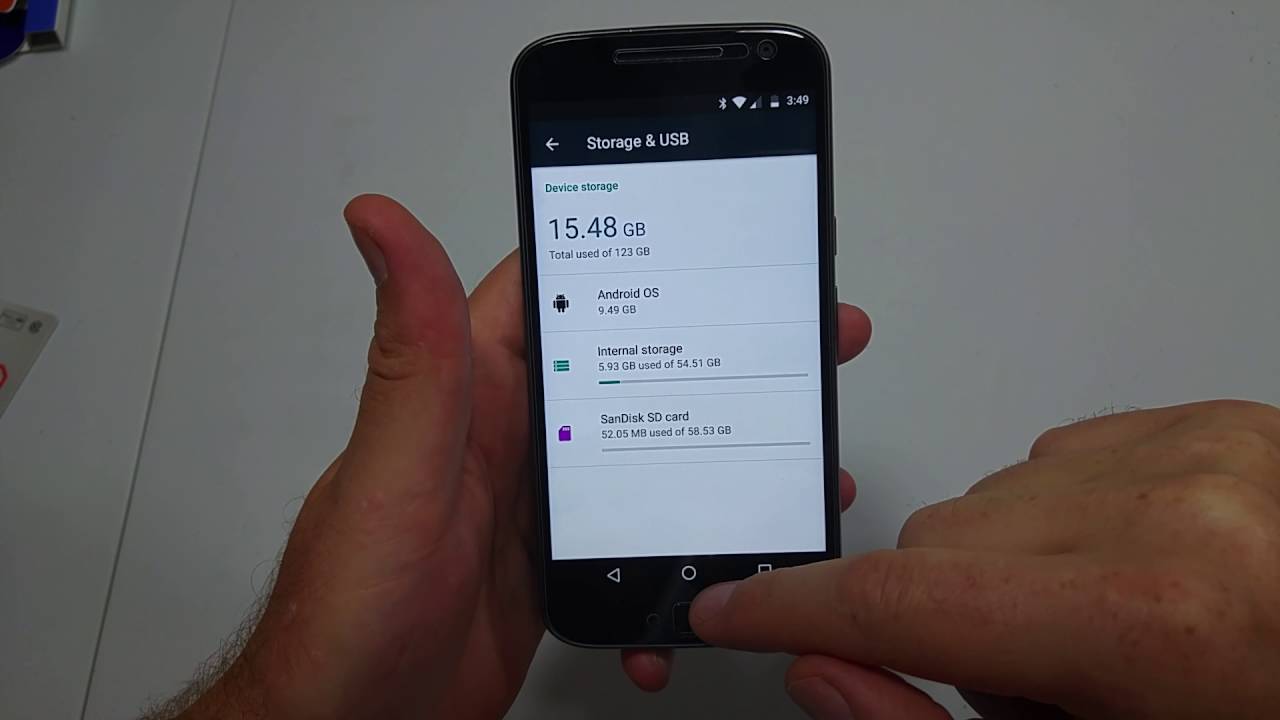
The first step in moving photos from Google Photos to an SD card is to ensure that the SD card is properly inserted into your device. Depending on the device you are using, the location of the SD card slot may vary. Generally, it can be found on the side or back of smartphones or tablets, or on the front or side of laptops and computers.
If you are unsure about the location of the SD card slot on your device, refer to the device’s user manual or do a quick internet search for your specific device model. Once you have located the SD card slot, follow the manufacturer’s instructions to insert the SD card correctly.
Inserting the SD card properly is crucial as it ensures that the photos are transferred to the right destination and can be accessed later without any issues. Once the SD card is securely inserted, you’re ready to proceed to the next step.
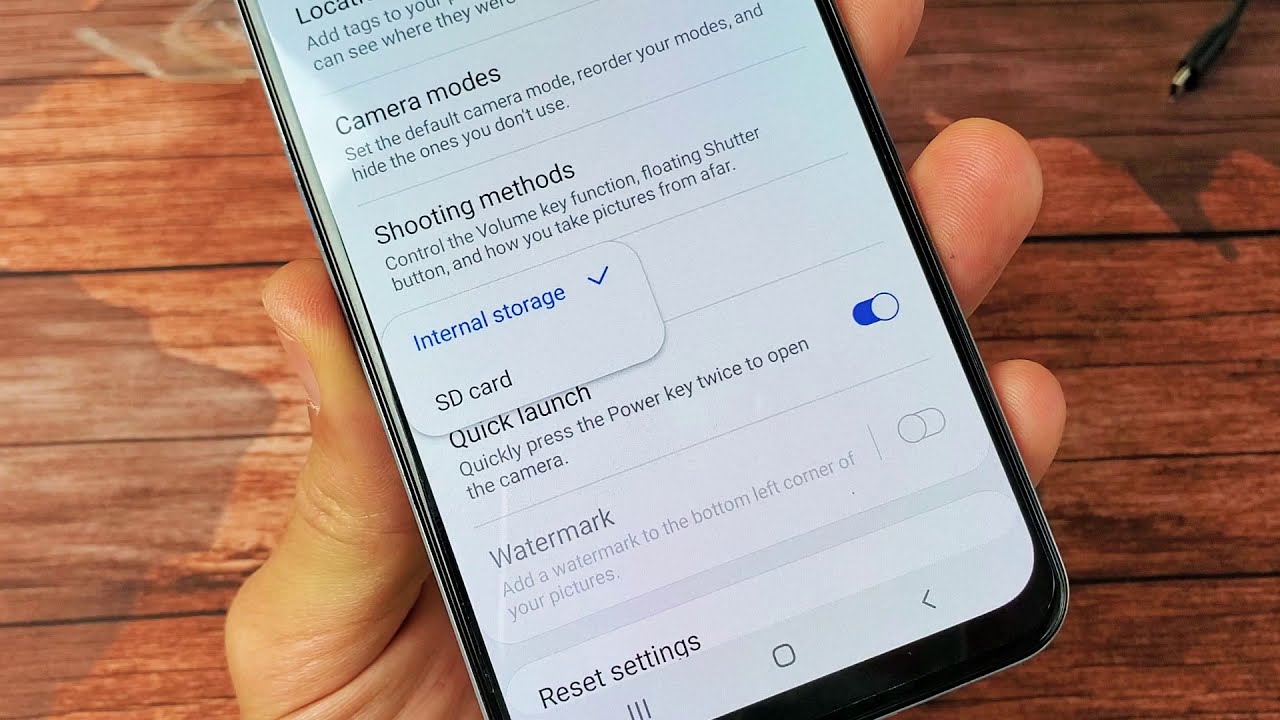
It’s worth noting that some devices may require you to format the SD card before you can use it. Formatting will erase any existing data on the SD card, so make sure you have backed up any important files before proceeding. To format the SD card, go to the device settings, find the “Storage” or “SD card” section, and look for the option to format the SD card. Follow the on-screen instructions to complete the formatting process.
With the SD card inserted and ready to use, we can now move on to the next step of transferring the photos from Google Photos to the SD card.
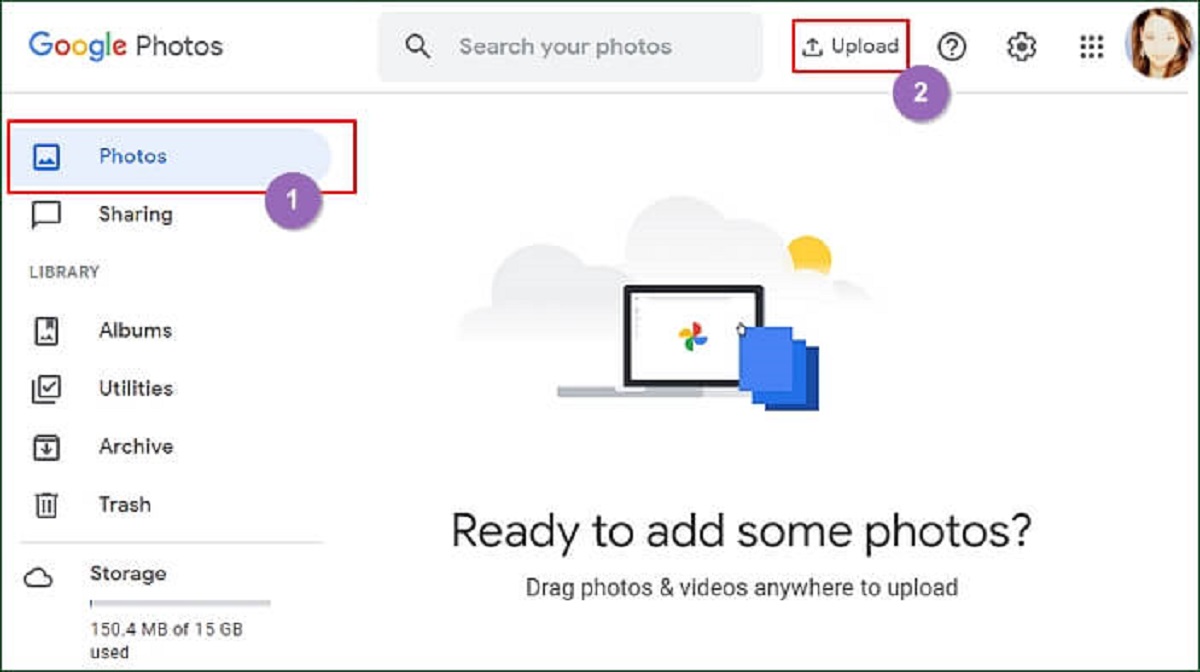
Step 2: Open Google Photos
Now that you have inserted the SD card into your device, it’s time to open the Google Photos app. Google Photos is available for both Android and iOS devices, and it provides a seamless way to access and manage your photo library.
If you haven’t already installed the Google Photos app on your device, you can download it from the Google Play Store (for Android) or the App Store (for iOS). Once you have installed the app, open it by tapping on the Google Photos icon on your home screen.
After opening the Google Photos app, you will be prompted to sign in to your Google account. Enter your credentials and sign in to access your Google Photos library.
Once you are signed in, you will see the main screen of the Google Photos app displaying your photo library. Google Photos organizes your photos by date, making it easy to navigate and locate specific pictures.
At this point, you’re ready to start selecting the photos you want to transfer to the SD card. Proceed to the next step to learn how to select the desired photos in Google Photos.
Step 3: Select the Photos
After opening the Google Photos app on your device, it’s time to start selecting the photos you want to transfer to the SD card. Google Photos provides intuitive ways to select multiple photos, making the process quick and efficient.
To select a single photo, simply tap on it. This will highlight the photo and show a checkmark on it. To select multiple photos, swipe your finger across the screen or tap and hold on a photo, then drag your finger to select the desired photos. Google Photos will display a count at the top of the screen, indicating the number of selected photos.
If you want to select all the photos in a specific album or folder, tap on the three-dot menu icon at the top of the screen while viewing the album or folder, and then select the “Select all” option. This will automatically select all the photos in that particular album or folder.
You can also use the search feature in Google Photos to filter photos based on specific criteria, such as location, people, or recognized objects. Once you have applied the desired filters, you can select the photos that match your search criteria.
Take your time to go through your photo library and choose the photos you wish to transfer to the SD card. It’s important to only select the photos you truly want to transfer to avoid cluttering your SD card with unnecessary files.
Once you have selected the photos, move on to the next step to learn how to download them from Google Photos.
Step 4: Download the Photos
After selecting the photos you want to transfer to the SD card in the previous step, the next step is to download these photos from Google Photos to your device. This will allow you to have a local copy of the selected photos that can be easily transferred to the SD card.
To download the photos, tap on the share icon (usually represented by an arrow pointing upwards or a square with an arrow) located at the top or bottom of the screen. This will bring up a menu with various sharing options.
From the sharing options, select the “Download” or “Save to device” option. Google Photos will then start downloading the selected photos to your device’s internal storage.
The download time will depend on the number and size of the selected photos, as well as the speed of your internet connection. You can monitor the progress of the download in the notification panel or within the Google Photos app.
Once the photos are successfully downloaded to your device, you have completed this step. The downloaded photos can now be accessed offline and are ready to be transferred to the SD card in the next step.
It’s worth noting that downloading the photos to your device’s internal storage might consume a significant amount of space, so make sure you have enough free space available before proceeding with the download. If necessary, consider freeing up space by deleting unnecessary files or apps.
Now that you have downloaded the selected photos from Google Photos to your device, let’s proceed to the next step to learn how to transfer these photos to the SD card.
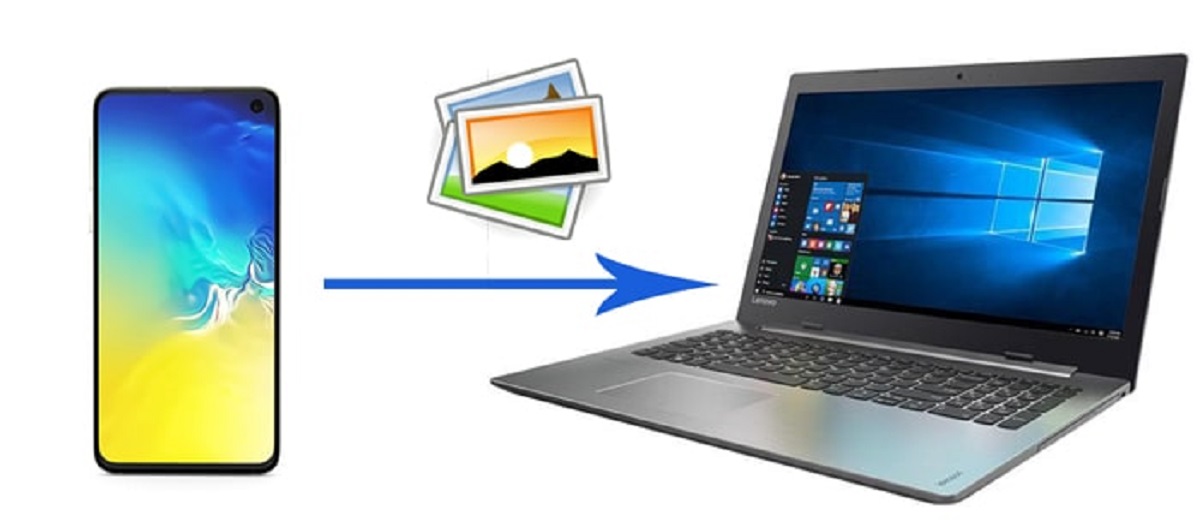
Step 5: Transfer the Photos to SD Card
With the downloaded photos now stored on your device, it’s time to transfer them to the SD card. This step involves using the file manager or a file transfer app on your device to move the photos from the internal storage to the SD card.
On most devices, you can access the file manager by opening the app drawer and selecting the “Files” or “File Manager” app. If you don’t have a built-in file manager, you can download one from the Google Play Store (for Android) or the App Store (for iOS).
Once you have opened the file manager, navigate to the location where the downloaded photos are stored. This is usually in the “Downloads” folder or a folder named after the Google Photos app.
Next, locate the destination folder on the SD card where you want to transfer the photos. This can be an existing folder or a new one that you create specifically for this purpose. To create a new folder, select the option to create a new folder within the file manager and give it a relevant name.
With both the source and destination folders ready, you can now select the downloaded photos and move or copy them to the SD card folder. To do this, tap and hold on a photo to initiate the selection mode, then select the desired photos by tapping on them. Once selected, look for the option to move or copy the photos and choose the SD card folder as the destination.
The transfer process may take some time, depending on the number and size of the photos. You can monitor the progress within the file manager or using the on-screen notification.
Once the transfer is complete, you have successfully transferred the photos from your device’s internal storage to the SD card. You can now safely remove the SD card and use it in another compatible device to access your photos.
Keep in mind that moving the photos to the SD card doesn’t delete them from your device’s internal storage. If you want to free up space on your device, you can delete the downloaded photos from the internal storage after ensuring that the transfer to the SD card was successful.
Now that you have successfully transferred the photos to the SD card, let’s proceed to the final step to learn how to safely remove the SD card from your device.
Step 6: Safely Remove the SD Card
Once you have transferred the photos from your device’s internal storage to the SD card, it’s important to safely remove the SD card to avoid any potential data loss or damage.
Safely removing the SD card ensures that all the data on the card is properly saved and prevents any corruption or loss that could occur if the card is removed while it is still being accessed by the device.
To safely remove the SD card, follow these steps:
- Ensure that all the file transfer processes or applications accessing the SD card have been closed or completed.
- If you are using an Android device, swipe down from the top of the screen to access the notification panel. Look for the option to “Eject” or “Unmount” the SD card. Tap on it and wait for the device to confirm that it is safe to remove the card.
- If you are using a computer or laptop, find the SD card icon on the desktop or in the file explorer. Right-click on the icon and select the “Eject” or “Safely Remove” option. Once the computer indicates that it is safe to remove the card, gently push the SD card inwards to release it from the slot.
- If you are using an iPhone or iPad with a built-in SD card slot, go to the “Settings” app, select “Photos,” then tap on “Download and Keep Originals” to ensure that the original photos remain on your device. Once done, gently push the SD card inwards to release it from the slot.
Once the SD card is successfully ejected or unmounted, you can safely remove it from your device. Be sure to handle the SD card carefully and avoid touching the metal connectors to prevent any damage.
Now you have safely removed the SD card from your device, and it’s ready to be used in another compatible device. The transferred photos will be readily accessible from the SD card, allowing you to view and enjoy your memories on various devices.
Remember to store the SD card in a safe place to avoid loss or damage. If you plan to reuse the SD card, make sure to properly format it before using it again, as the previous photos might still be stored on the card.
Congratulations! You have successfully completed the process of moving photos from Google Photos to an SD card. This provides you with a convenient way to have your photos accessible even when an internet connection is not available and helps to free up storage space on your device.
Conclusion
Transferring photos from Google Photos to an SD card can be a valuable process for creating backups, freeing up storage space, or simply having physical copies of your precious memories. By following the step-by-step guide outlined in this article, you can easily move your photos from Google Photos to an SD card and enjoy the benefits of offline access to your pictures.
Remember to insert the SD card properly into your device before starting the process, and ensure that you have enough storage space on the SD card to accommodate the photos you want to transfer. It’s always a good idea to back up your photos before proceeding with any transfer process to avoid losing any valuable images.
Throughout the steps, we covered opening the Google Photos app, selecting the desired photos, downloading them to your device, transferring them to the SD card using a file manager or transfer app, and safely removing the SD card from your device.
Once you have successfully transferred the photos to the SD card, you can safely use it in other compatible devices to access and share your photos with ease. Just be cautious when handling the SD card and remember to format it properly if you plan to reuse it or store it for future use.
By moving your photos from Google Photos to an SD card, you can have peace of mind knowing that your precious memories are not solely reliant on an internet connection and can be accessed anytime, anywhere. Moreover, this process helps you declutter your device’s internal storage, making way for new memories.
We hope this guide has provided you with the necessary steps and information to successfully transfer your photos from Google Photos to an SD card. Enjoy your photos and make lasting memories!