Introduction
Welcome to the world of technology where computers have become an integral part of our daily lives. Whether you use a computer for work, school, or entertainment, having sufficient RAM (Random Access Memory) is essential for optimal performance. RAM plays a crucial role in storing and accessing data that your computer needs to run various applications and processes efficiently.
However, you may have noticed that as you use your computer, its performance may start to slow down. This can be due to a variety of factors, but one common reason is insufficient RAM. In this article, we will explore various ways to maximize your RAM and enhance your computer’s performance.
Before we dive into the solutions, it’s important to understand how to assess your current RAM usage. On Windows, you can open the Task Manager by pressing Ctrl+Shift+Esc or right-clicking on the taskbar and selecting “Task Manager.” On macOS, you can use the Activity Monitor, which can be found in the Utilities folder within the Applications folder.
Once you have opened the Task Manager or Activity Monitor, look for the “Memory” or “RAM” section. It will provide you with information about the current RAM usage, including the total amount of RAM installed, the amount being used, and the amount available. This will give you an idea of whether your RAM is being fully utilized or if there is room for improvement.
Now that you have a better understanding of your RAM usage, let’s explore several techniques to maximize your RAM and optimize your computer’s performance. By implementing these strategies, you can ensure that your computer runs smoothly, allowing you to work or play without any frustrating lag or slowdowns.
Check Your RAM Usage
Before you start optimizing your RAM, it is crucial to determine how much RAM your system is currently using. This will help you identify if your computer is running low on memory and needs to be optimized. Here are some steps to check your RAM usage:
- Windows: Press Ctrl+Shift+Esc to open the Task Manager. Then, go to the “Performance” tab and select “Memory” on the left. You will see a graph indicating the current RAM usage, as well as details such as the total RAM installed, in use, and available.
- macOS: Open the Activity Monitor, which can be found in the Utilities folder within the Applications folder. Once the Activity Monitor is open, click on the “Memory” tab. Here, you can see the current RAM usage and other relevant information.
By checking your RAM usage, you can get an overview of how your computer is utilizing memory. If you notice that the available memory is consistently low or that your system is using a significant amount of virtual memory (often referred to as “paging” or “swap space”), it is an indication that your computer could benefit from optimizations to improve performance.
Keep in mind that different tasks and applications require varying amounts of RAM. For example, running resource-intensive programs like video editing software or virtual machines will consume more memory than casual web browsing. Understanding your typical usage patterns will allow you to gauge whether additional RAM is needed or if there are optimizations that can be made to better utilize the existing memory.
Knowing your RAM usage is the first step toward maximizing it. It provides you with valuable insights that help you make informed decisions about optimizing your system’s performance. In the following sections, we will explore various techniques to free up RAM, reduce memory usage, and enhance your computer’s efficiency.
Close Unnecessary Background Programs
One common reason for high RAM usage is having too many unnecessary programs running in the background. These programs consume valuable system resources, including memory, even if they are not actively being used. To maximize your RAM, it’s important to close any unnecessary background programs. Here’s how:
- Task Manager (Windows): Press Ctrl+Shift+Esc to open the Task Manager. Go to the “Processes” tab, where you will find a list of all running programs. Look for programs that you don’t need at the moment or those that are using a significant amount of memory. Right-click on the program and select “End Task” to close it.
- Activity Monitor (macOS): Open the Activity Monitor from the Utilities folder within the Applications folder. In the “CPU” or “Memory” tab, you can see a list of active processes. Identify the programs that are consuming a substantial amount of memory and click the “X” button in the upper-left corner of the window to quit those programs.
By closing unnecessary background programs, you can free up valuable memory for the tasks you are actively working on. This can significantly improve your computer’s performance and prevent it from running out of RAM.
It’s worth noting that some programs may automatically relaunch after closing them. To prevent this, you can adjust the settings within the program itself or navigate to the “Startup” or “Login Items” tab in the System Preferences (macOS) or Task Manager (Windows) to disable programs from launching at startup.
Remember to only close programs that you are confident are not essential for your current tasks. Be cautious with system processes or programs related to security, drivers, or other critical functions. Closing these programs could potentially impact the stability and functionality of your computer.
By closing unnecessary background programs, you can reclaim valuable RAM that will be better utilized by the applications and processes you need. This simple practice can go a long way in optimizing your computer’s performance and ensuring smoother multitasking.
Manage Startup Programs
When you start your computer, several programs automatically launch and run in the background. These startup programs can consume valuable system resources, including RAM, and can slow down your computer’s boot time. By managing your startup programs effectively, you can optimize your RAM usage and improve your overall system performance. Here’s how:
- Windows: Press Ctrl+Shift+Esc to open the Task Manager. Go to the “Startup” tab, which displays a list of programs that launch at startup. Review the list and identify programs that you don’t need to start automatically. Right-click on those programs and select “Disable.” Disabling unnecessary startup programs will prevent them from using up valuable memory and speed up your computer’s boot time.
- macOS: Click on the Apple menu and select “System Preferences.” Then, click on “Users & Groups” or “Users & Accounts” and select your user account. In the “Login Items” tab, you will see a list of programs that open automatically when you log in. Highlight the programs that you want to prevent from launching at startup and click the “-” button to remove them.
It’s important to exercise caution when disabling startup programs. Some programs may be essential for the proper functioning of your computer or required for specific tasks. Before disabling a program, ensure that you are familiar with its purpose and impact. If you’re uncertain, it’s best to leave it enabled or seek guidance from a trusted source or IT professional.
By managing your startup programs, you can significantly reduce the amount of RAM being utilized when your computer boots up. This will allow more memory to be available for the applications and tasks you actively use, resulting in improved performance and faster response times.
Regularly reviewing and fine-tuning your startup programs is a good practice to maximize your available RAM and optimize your computer’s overall performance. By taking a proactive approach, you ensure that only essential programs run at startup, preserving system resources for the tasks that matter most to you.
Increase Virtual Memory
Virtual memory is a feature that allows your computer to use a portion of the hard drive as an extension of RAM. When your physical RAM is running low, the operating system can move less frequently used data from RAM to the virtual memory on the hard drive. By increasing the virtual memory allocation, you can provide additional space for data storage and potentially improve system performance. Here’s how you can increase virtual memory:
- Windows: Open the Control Panel and navigate to “System and Security” or “System.” Click on “Advanced system settings” or “System.” In the System Properties window, go to the “Advanced” tab and click on the “Settings” button under the Performance section. In the Performance Options window, go to the “Advanced” tab and click on the “Change” button under the Virtual memory section. Uncheck the “Automatically manage paging file size for all drives” option. Select the drive you want to modify (usually C:) and choose the “Custom size” option. Enter a larger value for the initial and maximum size of the paging file, preferably based on the recommended size indicated by the system.
- macOS: Click on the Apple menu and select “System Preferences.” Then, click on “Energy Saver” and go to the “Power Adapter” tab. Click on the “Options” button next to “Put hard disks to sleep when possible.” In the new window that opens, check the box that says “Disable virtual memory swap files.” Note that macOS manages virtual memory automatically, so manual adjustments are not typically necessary.
When adjusting virtual memory, it’s important to consider the available space on your hard drive. If you allocate too much virtual memory, it may stress your hard drive and potentially slow down your computer. Conversely, allocating too little virtual memory may lead to performance issues when your physical RAM is fully utilized.
Increasing the virtual memory can provide additional breathing room for your system, allowing it to handle more demanding tasks without running out of memory. However, it’s worth noting that virtual memory is considerably slower than physical RAM, so relying too heavily on virtual memory may still impact overall performance.
Remember to restart your computer after modifying the virtual memory settings for the changes to take effect. Regularly monitor your system’s performance to ensure that the adjustments you made are beneficial and not causing any adverse consequences.
By increasing the virtual memory, you can provide your computer with additional “backup” memory, helping to prevent sudden slowdowns or crashes when your physical RAM is under pressure. It is a useful strategy to optimize your system’s performance and ensure a smooth computing experience.
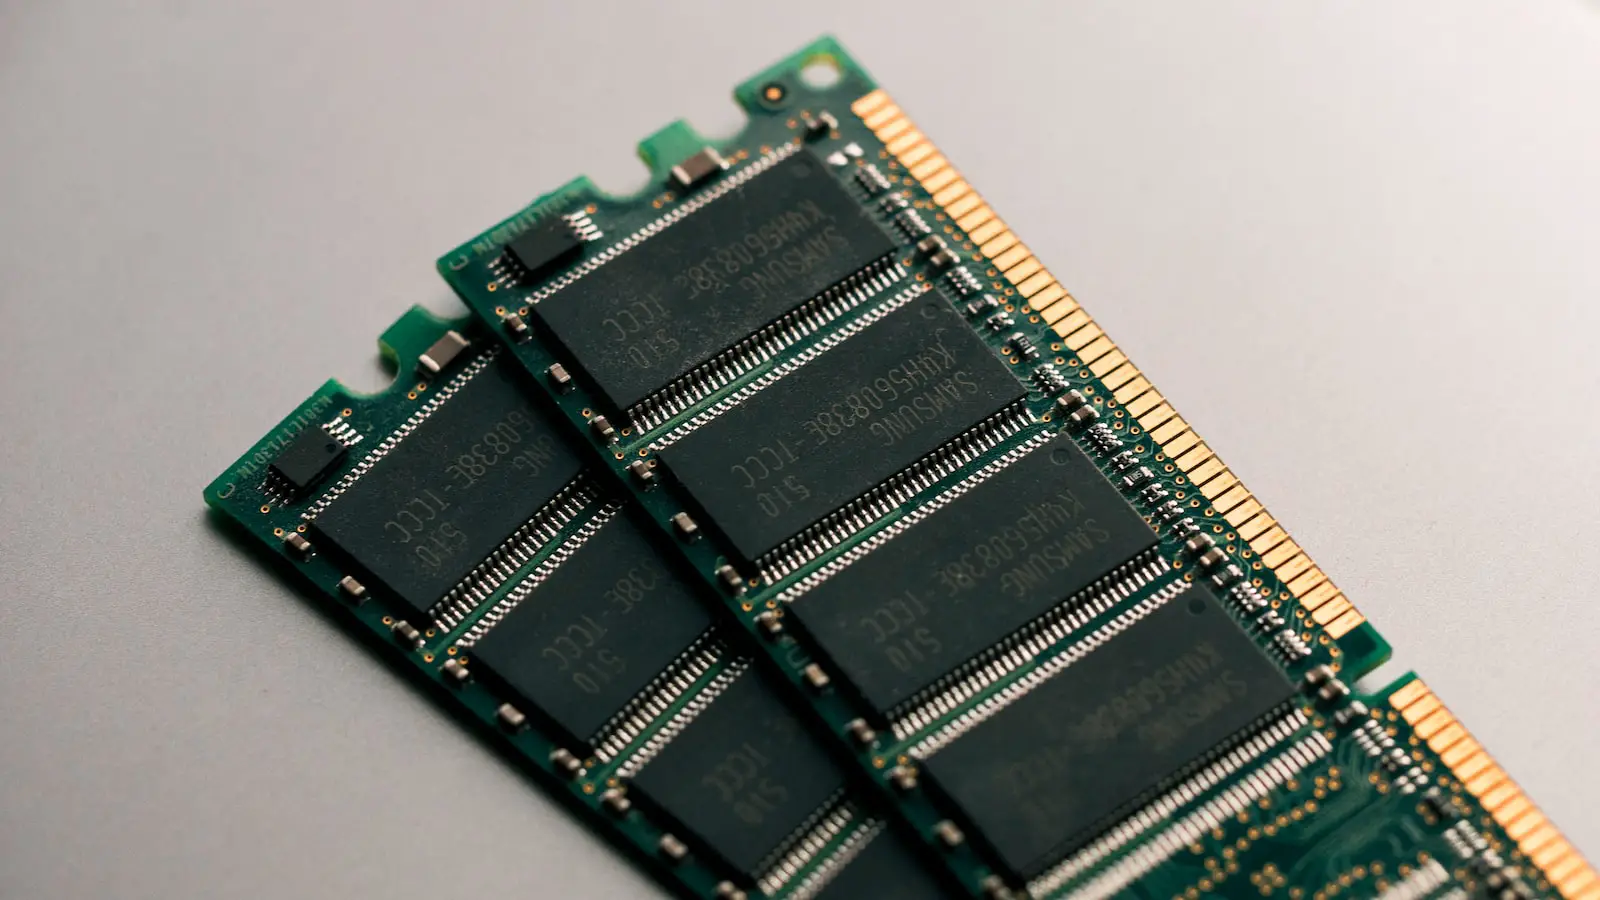
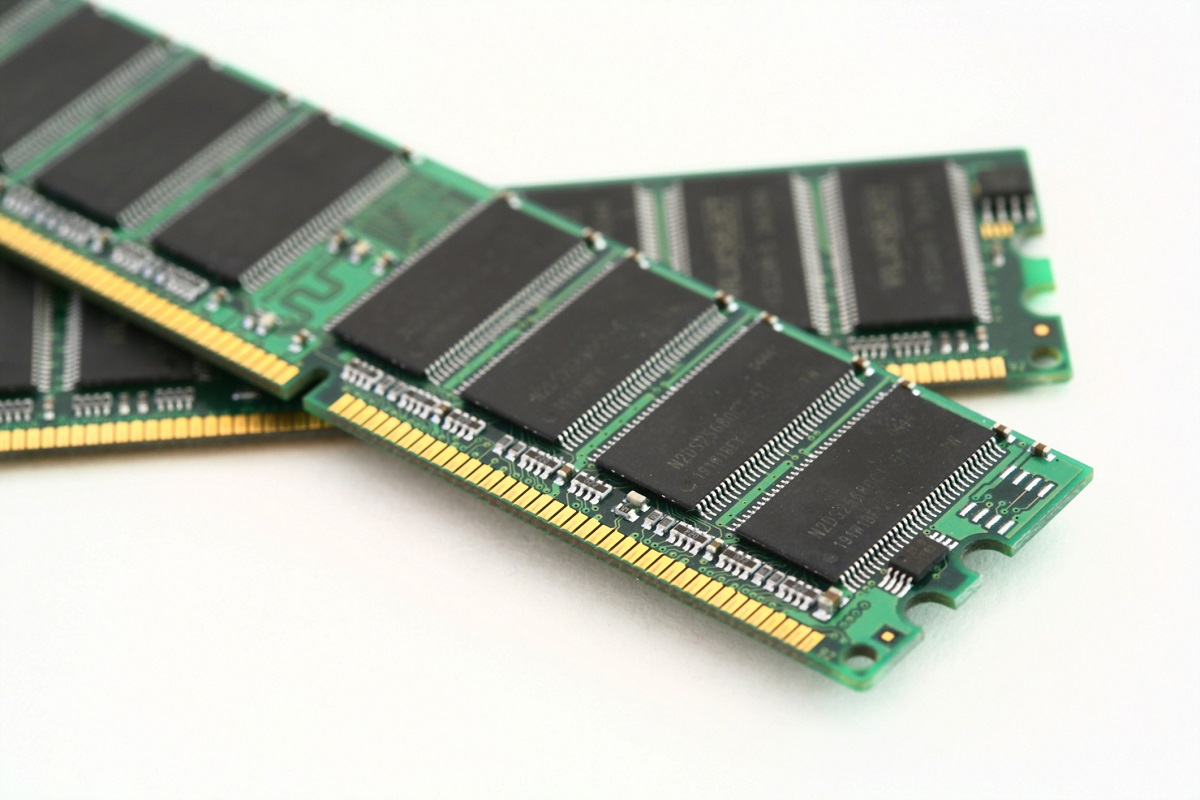
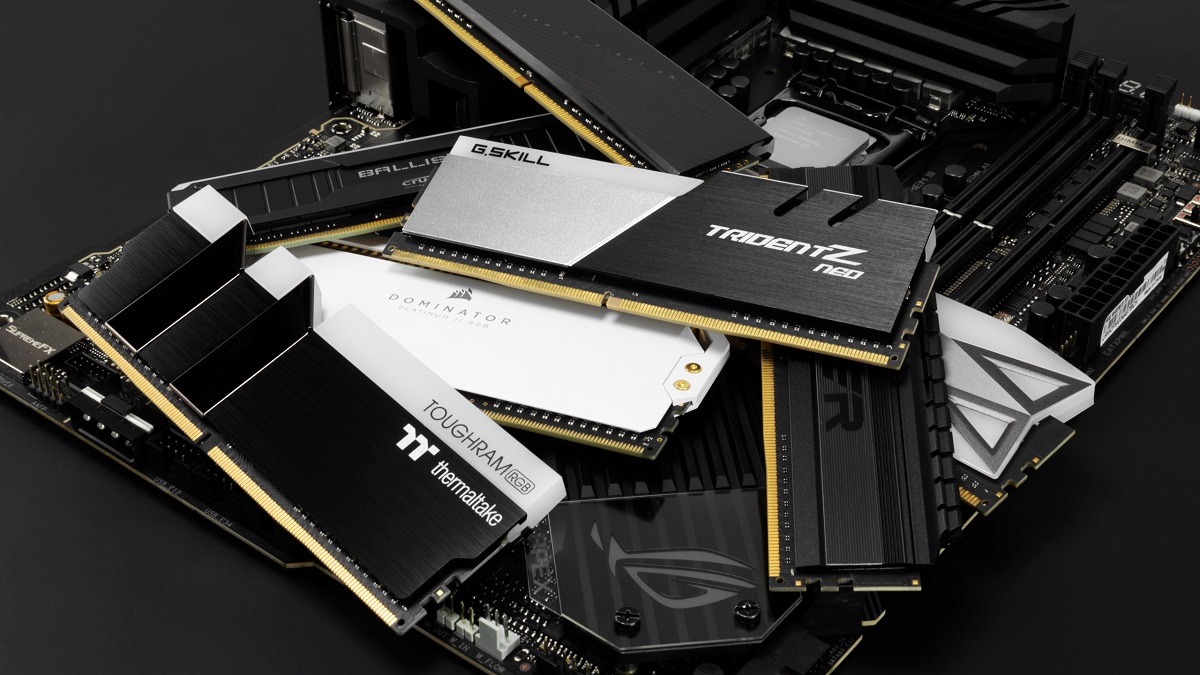
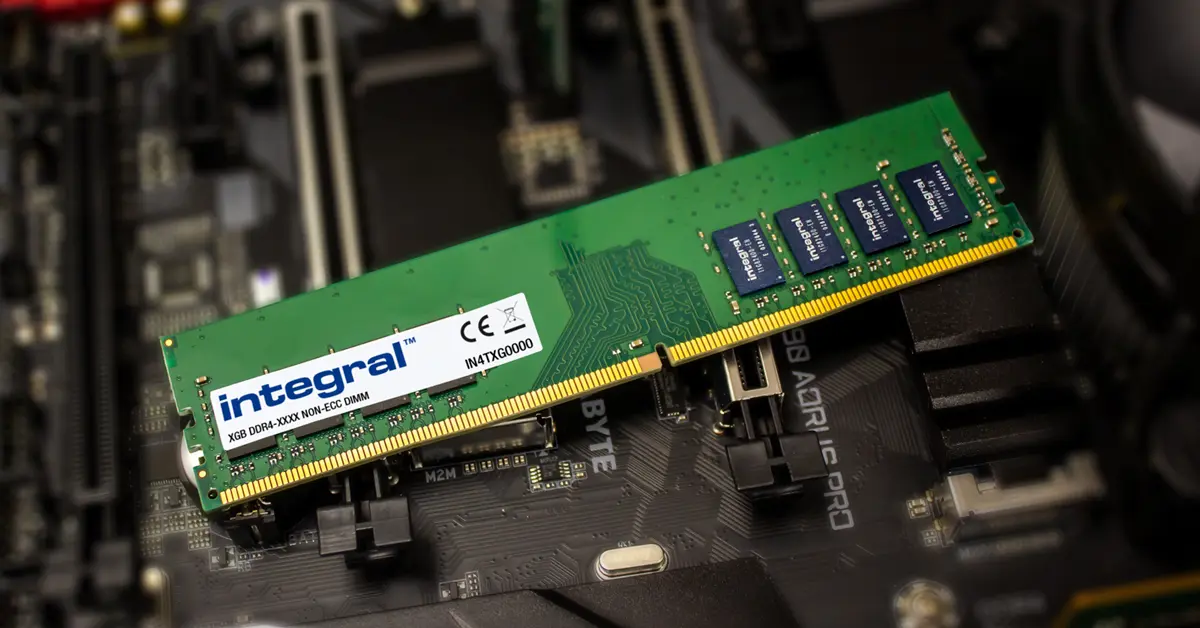
Upgrade Your RAM
If your computer is consistently running out of memory or you find yourself frequently working with memory-intensive applications, it may be time to consider upgrading your RAM. Adding more RAM to your system can significantly improve its performance and allow for smoother multitasking. Here’s what you need to know about upgrading your RAM:
1. Determine compatibility: First, find out the type and maximum capacity of RAM supported by your computer. Consult your computer’s manual or visit the manufacturer’s website for this information. It is important to ensure that the new RAM you purchase is compatible with your computer’s specifications.
2. Purchase the right RAM: Once you know the type and capacity of RAM your computer supports, you can shop for the appropriate RAM modules. Consider reputable brands and choose modules with good reviews to ensure reliability and compatibility.
3. Install the new RAM: Before installing the new RAM, make sure to power off your computer and disconnect the power cord. Locate the RAM slots on your motherboard and open them by pressing down on the retaining clips. Insert the new RAM module firmly and evenly into the slot until it locks in place. Repeat the process for any additional RAM modules you are adding. Finally, close the RAM slot clips and reconnect the power cord.
4. Test and verify: Once the new RAM is installed, power on your computer and check if it recognizes the upgraded memory. You can do this by accessing the Task Manager (Windows) or Activity Monitor (macOS) and checking the updated RAM size. If the new RAM is detected, congratulations! Your computer’s memory capacity has been increased.
Upgrading your RAM can have a significant impact on your computer’s performance. It allows for smoother multitasking, faster data processing, and better responsiveness when using memory-intensive applications. With additional RAM, your computer will be able to handle more tasks simultaneously, reducing the risk of slowdowns and system crashes due to memory constraints.
Before upgrading your RAM, it is worth considering your computing needs and the requirements of the tasks you regularly perform. If your computer is primarily used for basic tasks like web browsing, word processing, and email, a slight increase in RAM may suffice. However, if you are a professional running resource-intensive software like video editing or 3D rendering applications, a more substantial RAM upgrade may be necessary.
Keep in mind that upgrading RAM may void your computer’s warranty, so it’s a good idea to consult with the manufacturer or a professional if you are unsure or uncomfortable with performing the upgrade yourself.
By upgrading your RAM, you are investing in the overall performance and efficiency of your computer. It is a worthwhile investment for users who require enhanced multitasking capabilities and demand optimal performance from their systems.
Optimize Your Computer’s Performance Settings
Adjusting your computer’s performance settings can be an effective way to squeeze out additional performance and maximize the efficiency of your system. By fine-tuning the settings, you can allocate resources more effectively and optimize the usage of RAM. Here are some key settings to consider:
1. Power Settings: Adjusting your power settings can help optimize performance based on your specific needs. On Windows, navigate to the Control Panel and select “Power Options.” Choose a plan that prioritizes performance, such as the High Performance or Balanced (with performance settings adjusted) option. On macOS, go to “System Preferences” and select “Energy Saver.” Adjust the settings to maintain high performance while balancing energy consumption.
2. Visual Effects: Reducing or disabling unnecessary visual effects can free up system resources, including RAM. On Windows, open the Control Panel, search for “Performance” in the search bar, and select “Adjust the appearance and performance of Windows.” Choose the “Adjust for best performance” option or manually select specific visual effects to disable. On macOS, go to “System Preferences,” select “Dock & Menu Bar,” and uncheck the options for “Magnification” and “Animate opening applications.”
3. Disk Cleanup: Freeing up disk space can improve overall system performance. On Windows, search for “Disk Cleanup” in the search bar, select the drive you want to clean up, and choose the files to delete. On macOS, open Finder, select “Go” in the menu, click on “Utilities,” and open “Disk Utility.” Select your disk, click on the “First Aid” tab, and click “Run” to clean up the disk.
4. Software Updates: Keeping your operating system and drivers up to date can optimize performance and ensure compatibility with the latest software. Regularly check for updates through the Windows Update (Windows) or System Preferences (macOS) and install the recommended updates.
5. Antivirus Software: Use lightweight and reputable antivirus software to minimize the impact on system performance. Avoid using multiple antivirus programs simultaneously, as they can consume unnecessary resources.
6. Background Processes: Limit unnecessary background processes and applications that consume valuable system resources. Close any unused applications and disable unnecessary startup programs, as mentioned in previous sections, to free up memory and enhance performance.
By optimizing your computer’s performance settings, you can fine-tune resource allocation and ensure that your computer operates at its full potential. It’s important to strike a balance between performance and energy efficiency, as adjusting the settings heavily towards performance may increase energy consumption.
Remember to periodically review and adjust these settings as your computing needs change. Monitor the impact of these adjustments on system performance and make further tweaks if necessary./p>
By optimizing your computer’s performance settings, you can ensure that your system is running efficiently and making the most of your available RAM. Implementing these optimizations can result in a faster, more responsive computing experience.
Use a RAM Cleaner
A RAM cleaner, also known as a memory optimizer, is a software tool designed to free up unused RAM and improve system performance. These tools work by identifying and closing unnecessary processes and clearing out cached data to free up memory resources. While the effectiveness of RAM cleaners can vary, they can be a useful tool for optimizing your computer’s RAM usage. Here’s what you need to know:
1. Research and Choose a Reliable RAM Cleaner: There are numerous RAM cleaner tools available, both free and paid. It’s important to choose a reputable and well-reviewed tool to ensure its effectiveness and avoid potential security risks. Research and read user reviews to find a reliable RAM cleaner that suits your needs.
2. Install and Run the RAM Cleaner: Once you have selected a RAM cleaner, download and install it on your computer. Follow the installation instructions provided by the software. After installation, launch the RAM cleaner application and run a scan to identify memory-hogging processes and unnecessary data that can be cleared.
3. Customize and Configure the RAM Cleaner: RAM cleaners often come with customization options that allow you to tailor their performance to your specific preferences. Take the time to explore the settings and configure the RAM cleaner according to your needs. Adjusting settings such as automatic scans, process exclusions, and scheduling can provide a more personalized experience.
4. Review the Scan Results: After the RAM cleaner completes its scan, it will present you with a list of identified processes and data that can be optimized. Take a close look at the scan results and review the processes and data that are marked for optimization. Exercise caution when deciding which processes to close or clean, as some may be crucial for the functioning of your computer or currently in use.
5. Optimize and Clean: Once you have reviewed the scan results, proceed with the optimization and cleaning process. This typically involves closing unnecessary processes, clearing cached data, and freeing up memory resources. It’s wise to perform a backup or create a system restore point before proceeding, as a RAM cleaner can have unintended consequences if misused.
6. Regularly Perform Maintenance: To keep your computer running smoothly, it’s essential to incorporate regular maintenance with the RAM cleaner. Set a schedule to run scans and optimizations periodically, based on your usage patterns. This will help keep your RAM usage optimized and ensure that your computer continues to perform at its best.
While RAM cleaners can be beneficial, it’s important to note that modern operating systems are designed to manage memory automatically. They already employ methods such as caching and managing active processes to optimize RAM usage effectively. Therefore, the gains provided by a RAM cleaner may vary, and it’s prudent to use it as a supplementary tool rather than relying solely on it to manage your computer’s memory.
By using a RAM cleaner responsibly and in conjunction with other optimization techniques, you can maximize your RAM’s performance and maintain an efficient computing experience.
Reduce the Number of Browser Tabs
Having multiple browser tabs open simultaneously is a common practice for many users, allowing for easy access to various websites and online resources. However, having too many tabs open can consume a significant amount of memory, resulting in slower browsing speeds and reduced system performance. To optimize your RAM usage, it’s important to reduce the number of browser tabs. Here’s why and how:
The Impact of Multiple Tabs: Each open tab in your browser consumes system resources, including RAM. This is because each tab requires memory to store the web page content, scripts, and other browser processes. With a large number of open tabs, the amount of memory being utilized can quickly add up, causing your computer to slow down and potentially run out of available memory.
Identify and Close Unnecessary Tabs: Start by examining the tabs you currently have open and assess which ones you actively need. Often, we open tabs for reference or bookmarking purposes and forget to close them when they are no longer needed. Close tabs that you are finished with or save them as bookmarks for future reference. This simple practice can free up significant amounts of RAM and improve your browser’s performance.
Use Tab Management Extensions or Features: Many browsers offer tab management features that can help you reduce clutter and improve efficiency. For example, you can use browser extensions that allow you to suspend tabs, saving their state but freeing up memory. These extensions can automatically suspend inactive tabs after a certain period of inactivity, reducing their impact on system resources. Additionally, some browsers have built-in features like tab grouping or tab stacking, enabling you to organize and access related tabs more efficiently.
Utilize Bookmarks and Reading Lists: Instead of keeping multiple tabs open for long-term reference or reading purposes, utilize bookmarks or reading lists to save those web pages. By bookmarking or adding pages to your reading list, you can access them with just a click when needed, rather than keeping them open in a tab. This not only reduces memory usage but also helps keep your browser interface clean and organized.
Consider Using Multiple Browser Windows: If you frequently find yourself with a large number of open tabs for different purposes, consider using multiple browser windows. By separating tabs into different windows, you can distribute the memory usage across multiple instances of the browser, reducing the impact on any single window and improving overall performance.
Prioritize Active Tabs: If closing tabs entirely is not an option, consider prioritizing the active tabs that you actually need to access frequently. This way, you can ensure that the essential tabs have priority in terms of memory allocation, while less frequently accessed or background tabs can be closed or suspended to conserve memory.
Reducing the number of browser tabs is a simple yet effective way to optimize your computer’s RAM usage and enhance browser performance. By practicing tab management and utilizing browser features or extensions, you can maintain a streamlined browsing experience and prevent unnecessary memory consumption.
Clear Cache and Temporary Files
Over time, web browsers accumulate cache and temporary files, which can take up a significant amount of storage space and impact your computer’s performance. Clearing these files regularly is essential for maintaining optimal system performance and freeing up valuable memory. Here’s how you can clear the cache and temporary files:
1. Chrome: In Chrome, click on the three-dot menu in the top-right corner and go to “More tools” > “Clear browsing data.” Select the time range for which you want to clear the data and make sure the “Cached images and files” and “Cookies and other site data” options are checked. Then, click “Clear data” to remove the selected files from your browser’s cache.
2. Firefox: In Firefox, click on the three-line menu in the top-right corner and go to “Options” > “Privacy & Security.” Under the “Cookies and Site Data” section, click on “Clear Data.” Ensure that the “Cache” option is checked and click on “Clear” to remove the cached files from your browser.
3. Safari: On macOS, open Safari and click on “Safari” in the top menu. Then, click on “Preferences” > “Privacy” > “Manage Website Data.” In the window that appears, click on “Remove All” to clear your browser’s cache and temporary files. Alternatively, you can also click on the “Remove All Website Data” button in the “Privacy” tab to remove all stored data from websites you have visited.
4. Edge: In Microsoft Edge, click on the three-dot menu in the top-right corner and go to “Settings” > “Privacy, search, and services.” Under the “Clear browsing data” section, click on “Choose what to clear.” Select the options for “Cached images and files” and “Cookies and other site data” and click “Clear” to remove the selected data from your browser’s cache.
5. Internet Explorer: In Internet Explorer, click on the gear icon in the top-right corner and go to “Safety” > “Delete browsing history.” Ensure that the “Temporary Internet files and website files” option is selected and click on “Delete” to clear the cache and temporary files from your browser.
Clearing the cache and temporary files not only helps free up storage space, but it can also resolve issues with slow page loading, browser crashes, or incorrect page behavior. Additionally, clearing these files can improve your privacy by removing potentially sensitive information stored in the cache.
It’s important to note that clearing the cache and temporary files will remove saved website data and may require you to re-enter login credentials for some websites. However, the process is generally safe and does not delete essential files or personal data stored on your computer.
By regularly clearing the cache and temporary files in your web browser, you can optimize your computer’s performance, enhance browsing speed, and ensure a smoother online experience.
Avoid Running Memory-Intensive Tasks Simultaneously
Running multiple memory-intensive tasks simultaneously can quickly deplete your computer’s available memory and lead to performance issues. When you have limited RAM, it’s essential to prioritize and allocate resources wisely to ensure smooth multitasking. Here are some strategies to avoid running memory-intensive tasks simultaneously:
1. Prioritize and Limit Resource-Intensive Applications: Identify which applications or tasks require the most memory and prioritize them. If possible, avoid running multiple memory-intensive applications simultaneously. For example, tasks such as video editing, gaming, or running virtual machines consume substantial amounts of RAM. Close unnecessary applications to free up memory for the tasks that demand it the most.
2. Plan Your Workflow and Task Management: Organize your workflow to minimize the number of memory-intensive tasks running at once. Space out these tasks to avoid overwhelming your system. Instead of attempting to render a video while editing another or running multiple virtual machines simultaneously, schedule these tasks one at a time or on different days to ensure each task has sufficient resources.
3. Use Task Manager or Activity Monitor to Monitor Resource Usage: Keep an eye on your system’s resource usage using the Task Manager (Windows) or Activity Monitor (macOS). It allows you to monitor the memory consumption of each running application in real-time. By observing the resource usage, you can identify memory-intensive tasks and adjust your workflow accordingly.
4. Close Unused Programs and Background Processes: Be proactive in closing unused programs and terminating unnecessary background processes. Many programs continue to run in the background even when you’re not actively using them, consuming valuable memory resources. Close them to free up RAM for more crucial tasks.
5. Use Virtual Desktops or Multiple Displays: Employing virtual desktops or using multiple displays can help you better organize your workflow and allocate memory to different tasks. It allows you to switch between tasks more efficiently and dedicate specific displays or desktops to memory-intensive applications, preventing unnecessary memory usage on other screens.
6. Optimize Resource Usage within Applications: Some applications have settings or configurations that allow you to optimize resource usage. For example, video editing software often provides options to adjust preview quality or limit background rendering to conserve memory. Explore these settings to strike a balance between performance and memory usage.
7. Consider Upgrading Your RAM: Upgrading your RAM is a long-term solution if memory-intensive tasks are a regular part of your workflow. Increasing the amount of RAM installed in your computer allows for more simultaneous memory-intensive tasks without sacrificing performance. Consult your computer’s specifications or seek assistance from a professional to determine the feasibility and compatibility of a RAM upgrade.
By avoiding running memory-intensive tasks simultaneously and prioritizing your system’s resources, you can prevent unnecessary strain on your computer’s memory and ensure smoother multitasking. It’s essential to make conscious decisions when allocating memory to different applications, balancing performance and efficiency for an optimal computing experience.
Limit Unnecessary Animations and Visual Effects
While animations and visual effects can enhance the user experience, they can also consume valuable system resources, including RAM. By limiting unnecessary animations and visual effects, you can reduce the strain on your computer’s memory and improve overall system performance. Here’s how you can achieve this:
1. Windows: On Windows, you can adjust visual effects settings by following these steps: Right-click on the “Start” button and select “System.” In the System window, click on “Advanced system settings” on the left-hand side. In the Performance section, click on the “Settings” button. In the Performance Options window, select either the “Adjust for best performance” option to disable all visual effects or choose the “Custom” option to manually enable or disable specific effects according to your preference.
2. macOS: On macOS, you can modify visual effects settings by going to “System Preferences” and selecting “Accessibility.” In the Accessibility window, click on “Display” in the left-hand menu and check the box next to “Reduce motion” to limit animations. You can also navigate to “System Preferences” > “Dock & Menu Bar” and uncheck the options for “Magnification” and “Animate opening applications” to reduce visual effects.
3. Web Browsers: Many web browsers offer options to disable or limit animations and visual effects within the browser itself. For example, in Google Chrome, you can go to “Settings” > “Advanced” > “Accessibility” and enable the “Prefer reduced motion” option. In Firefox, you can type “about:config” in the address bar, search for “animations” and set the relevant animation-related preferences to false.
4. Disable Desktop Background Animations: Animated desktop backgrounds can contribute to memory usage and potential performance issues. Consider using static backgrounds instead of animated ones to reduce the strain on your system’s resources. To change your desktop background on Windows, right-click on the desktop and select “Personalize,” then choose a static image. On macOS, go to “System Preferences” > “Desktop & Screensaver” and select a static image or solid color as your background.
5. Minimize Window and Menu Animations: Window and menu animations can also impact system performance. To reduce these effects on Windows, right-click on the “Start” button and select “System.” In the System window, click on “Advanced system settings” on the left-hand side. In the Performance section, click on the “Settings” button. In the Performance Options window, under the “Visual Effects” tab, choose the “Adjust for best performance” option or manually uncheck specific effects. On macOS, follow the steps mentioned in point 1 to reduce motion.
6. Disable Transitions in Office Applications: Programs like Microsoft Office may have visual effects and transitions enabled by default, which can consume memory. You can disable these effects within the program settings. In Microsoft Word, for example, go to “File” > “Options” > “Advanced” and uncheck the “Use animations” option under the “Display” section.
By limiting unnecessary animations and visual effects, you can conserve system resources, particularly RAM, and improve the overall performance of your computer. Remember to strike a balance between aesthetics and system efficiency when adjusting these settings, ensuring that key functionality and your user experience are not compromised.
Remove Unnecessary Browser Extensions
Browser extensions can enhance your browsing experience by adding useful functionalities and customization options. However, having too many unnecessary browser extensions installed can negatively impact your computer’s performance and memory usage. By removing unnecessary extensions, you can optimize your browser’s performance and free up valuable system resources. Here’s how:
1. Evaluate Your Installed Extensions: Take a moment to review the extensions you have installed in your browser. Consider each extension’s usefulness and frequency of use. Identify any extensions that you no longer need or rarely use.
2. Disable or Remove Unnecessary Extensions: Once you have identified unnecessary extensions, you can choose to either disable or completely remove them. Disabling an extension temporarily deactivates it, allowing you to re-enable it later if needed. Removing an extension permanently deletes it from your browser.
3. Disabling Extensions: To disable extensions in Google Chrome, go to “Settings” > “Extensions. Toggle off the switch next to the extensions you want to disable. In Mozilla Firefox, click on the three-line menu > “Add-ons”. Locate the extensions you want to disable and click on the “Disable” button. Other browsers have similar menus where you can manage and disable extensions.
4. Removing Extensions: To remove extensions in Google Chrome, go to “Settings” > “Extensions”. Click on the trash bin icon next to the extensions you want to remove. Confirm the removal by clicking “Remove” in the pop-up dialog. In Mozilla Firefox, click on the three-line menu > “Add-ons”. Locate the extensions you want to remove and click on the “Remove” button.
5. Regularly Review Extensions: Make it a habit to review your installed extensions periodically. Assess their usefulness and remove any extensions that are no longer needed. This practice will help keep your browser streamlined and prevent unnecessary memory usage.
6. Consider the Impact of Extensions: Before installing new extensions, consider the potential impact on system performance and memory usage. Be cautious about installing too many extensions that perform similar tasks or add excessive functionalities. Prioritize the extensions that provide meaningful value and uninstall the ones that are redundant or seldom used.
7. Beware of Malicious Extensions: While rare, some browser extensions can be malicious or compromise your privacy. It’s crucial to only install extensions from trusted sources, such as reputable browser marketplaces. Regularly review and remove any suspicious or unknown extensions to ensure the security of your browsing experience.
Removing unnecessary browser extensions can significantly improve your browser’s performance and reduce memory usage. It also minimizes the risk of conflicts between extensions and ensures a more streamlined and efficient browsing experience.
Remember to periodically review your installed extensions and assess their usefulness. By maintaining a clean and concise collection of extensions, you can optimize your browser’s performance and prevent unnecessary strain on your computer’s resources.
Use a Lightweight Antivirus Program
Antivirus software is an essential tool for protecting your computer from malware and other security threats. However, some antivirus programs can be resource-heavy, consuming a significant amount of RAM and impacting system performance. To optimize your computer’s memory usage, it is recommended to use a lightweight antivirus program. Here are some reasons why and how:
1. Reduce System Resource Usage: Lightweight antivirus programs are specifically designed to minimize their impact on system resources, including RAM usage. Unlike more robust antivirus suites, lightweight programs consume fewer system resources, allowing your computer to perform optimally even during virus scans or real-time protection.
2. Faster Scans and Real-Time Protection: Lightweight antivirus programs are typically quicker in performing virus scans and providing real-time protection. They focus on essential security features, allowing for faster scans without compromising the level of protection. This ensures that your computer remains secure while minimizing the performance impact.
3. Choose a Reliable Lightweight Antivirus Program: There are several lightweight antivirus options available, each with its own strengths and features. Conduct research to find reputable lightweight antivirus programs that have a proven track record of effectiveness and positive user reviews.
4. Consider Cloud-Based Antivirus Solutions: Cloud-based antivirus solutions offload a significant amount of the scanning and threat detection processes to remote servers, reducing the workload on your computer’s resources. These programs rely on real-time internet connectivity to analyze files and identify threats, resulting in a lighter performance footprint on your system.
5. Regularly Update and Maintain Antivirus Software: Regardless of the antivirus program you choose, it’s essential to keep it up to date. Regular updates ensure that your antivirus program remains effective in detecting and neutralizing the latest threats. Additionally, make sure to schedule regular scans and maintain the recommended security settings to maximize protection without compromising performance.
6. Avoid Running Multiple Antivirus Programs: Running multiple antivirus programs simultaneously can lead to conflicts and significantly impact system performance. Choose a lightweight antivirus program that meets your security needs and avoid using it in conjunction with another security suite.
7. Practice Safe Browsing Habits: While using a lightweight antivirus program is important, it’s equally crucial to adopt safe browsing habits. Be cautious when downloading files or clicking on suspicious links. Regularly update your web browser and other software to address security vulnerabilities. By combining a lightweight antivirus program with safe browsing practices, you can maximize your computer’s security and performance.
By using a lightweight antivirus program, you can ensure that your computer remains protected from malware and other security threats while minimizing the impact on system resources. It’s important to strike a balance between effective security measures and optimizing your computer’s performance by choosing a reliable lightweight antivirus solution.
Disable Unnecessary System Services
System services are background processes that run automatically on your computer to support various functions and applications. However, having unnecessary services running in the background can consume system resources, including memory (RAM) and processing power, leading to decreased performance. By identifying and disabling unnecessary system services, you can optimize your computer’s performance and free up valuable resources. Here’s how you can achieve this:
1. Identify Unnecessary System Services: Start by identifying which system services you can safely disable. It’s essential to exercise caution and avoid disabling critical services that are vital for your computer’s functionality. Research each service or consult reliable sources to understand its purpose before making any changes.
2. Utilize the System Configuration (msconfig) Utility: On Windows, you can use the System Configuration utility (msconfig) to manage system services. Press the Windows key + R, type “msconfig,” and hit Enter. In the System Configuration window, go to the “Services” tab. Here, you can see a list of services with checkboxes next to each one. Be cautious when disabling services – only deselect those that you are certain are unnecessary for your regular computer usage.
3. Disable Services in the Task Manager: On Windows, you can also disable services directly in the Task Manager. Press Ctrl+Shift+Esc, or right-click on the taskbar and select “Task Manager.” In the Task Manager window, go to the “Services” tab. Right-click on a service and choose “Open Services” to access the Services console. In the Services console, find the service you want to disable, right-click on it, and select “Properties.” In the properties window, choose “Disabled” from the “Startup type” drop-down menu and click “Apply” and “OK” to save the changes.
4. Use macOS Activity Monitor: On macOS, you can use the Activity Monitor to manage system services. Open the Activity Monitor from the Utilities folder within the Applications folder. In the Activity Monitor window, go to the “CPU” or “Memory” tabs to identify resource-consuming processes. Be cautious when dealing with processes, as some may be critical to the functioning of your computer. If you are unsure about a particular service, it’s best to leave it enabled.
5. Regularly Review and Update Service Disabling: It’s important to periodically review and update the list of disabled services to ensure that your system operates optimally. Some services may become necessary due to new software installations or system updates. Stay vigilant and re-enable any services that are later identified as essential for your specific requirements.
6. Restart Your Computer: After disabling or modifying system services, it’s crucial to restart your computer for the changes to take effect. Restarting ensures that the disabled services are properly applied and any potential conflicts or errors are resolved.
By selectively disabling unnecessary system services, you can reduce the strain on system resources and improve your computer’s performance. However, it’s important to tread carefully and avoid disabling critical services that are necessary for the proper functioning of your operating system and installed applications. Always research and understand the purpose of each service before making any changes.
Restart Your Computer Regularly
Restarting your computer regularly is a simple yet effective way to optimize performance, resolve software glitches, and improve overall system stability. While it may seem like a basic step, restarting your computer can have a significant impact on memory usage and overall performance. Here’s why you should restart your computer regularly:
Memory Management: Restarting your computer clears the active memory (RAM) and helps to free up any memory leaks or accumulated fragments. This ensures that your computer starts fresh, with maximum available memory for optimal performance. By doing so, you may notice improved responsiveness and faster application launch times.
Updates and Software Installations: Restarting your computer is often necessary after installing updates or new software. Many updates and software installations require a restart to complete the installation process and properly configure the system. Failing to restart after making significant changes to your computer may result in unstable or inconsistent performance.
System Refresh: Restarting your computer regularly provides a “refresh” to your system. It clears temporary files, resets processes, and helps to eliminate any lingering issues that may be affecting performance. It can also help resolve minor glitches or freezes that may occur during prolonged sessions of computer usage.
Memory Release: Certain programs and processes can consume memory over time, even after they have been closed. Restarting your computer releases this trapped memory, ensuring that all resources are available for new tasks and applications. This can help prevent memory-related slowdowns or crashes that may occur when memory usage reaches its limit.
Time for Updates to Take Effect: Restarting your computer is important to allow updates to take effect. Some updates, especially those related to system security, drivers, or core components, may require a restart to fully implement the changes and ensure the necessary services are running optimally.
It’s not just about performance: Regular restarts also help in avoiding potential security risks. Many security updates and patches are released to address vulnerabilities that could be exploited by cyber threats. By restarting your computer, you ensure that these security updates are active, providing an additional layer of protection against potential threats.
It’s recommended to restart your computer at least once a week, or more frequently if you consistently perform memory-intensive tasks or notice a degradation in performance. However, every user’s needs may vary, so adjust the frequency based on your specific usage patterns and requirements.
Remember to save your work and close any open applications before restarting your computer. This ensures that no unsaved data is lost and that all applications start fresh when the computer boots up again.
By restarting your computer regularly, you can optimize performance, improve system stability, and ensure that important updates take effect. It’s a simple yet effective practice that can greatly contribute to a smoother and more efficient computing experience.
Conclusion
Maximizing your computer’s RAM is essential for achieving optimal performance and productivity. By implementing the techniques discussed in this article, you can optimize your RAM usage and enhance your computer’s overall efficiency. Remember that each computer system is unique, and the effectiveness of these strategies may vary based on factors such as hardware configuration and specific usage patterns.
By regularly checking your RAM usage, closing unnecessary background programs, managing startup programs, increasing virtual memory, upgrading your RAM, optimizing performance settings, using a RAM cleaner, reducing the number of browser tabs, clearing cache and temporary files, avoiding running memory-intensive tasks simultaneously, limiting unnecessary animations and visual effects, removing unnecessary browser extensions, using a lightweight antivirus program, disabling unnecessary system services, and restarting your computer regularly, you can significantly improve your computer’s performance and ensure a smoother, more responsive user experience.
Remember to strike a balance between optimizing your RAM and ensuring that essential programs and services are running efficiently. It’s also recommended to keep your operating system, drivers, and software up to date to maintain compatibility and security.
Regular maintenance and optimization of your computer’s RAM will not only improve performance but also extend the lifespan of your system. Embrace these strategies and make them a part of your computing routine to enjoy a faster, more efficient, and more enjoyable experience on your computer.