Introduction
Are you craving a refreshing and healthy dessert but don’t have an ice cream maker? Fear not! With a few simple steps, you can easily make delicious sorbet right in your own kitchen, without the hassle of special equipment.
Sorbet is a frozen dessert made from fruit, sugar, and water. Unlike ice cream, sorbet is dairy-free and usually has a lighter texture. It is a popular choice for those who are lactose intolerant or following a vegan diet. Plus, with the abundance of fresh fruits available during various seasons, making homemade sorbet allows you to enjoy the natural flavors without any artificial additives or preservatives.
One of the great things about making sorbet without an ice cream maker is the flexibility it offers. You can experiment with various fruit combinations, adjust the sweetness level to your liking, and even add in some herbs or spices to elevate the flavor profile. So, let’s dive into the world of homemade sorbet and learn how to create a delectable frozen treat in no time!
Choosing the Right Fruit
The key to making delicious sorbet lies in selecting the right fruit. While virtually any fruit can be used to make sorbet, some fruits work better than others due to their natural sweetness, acidity, and texture.
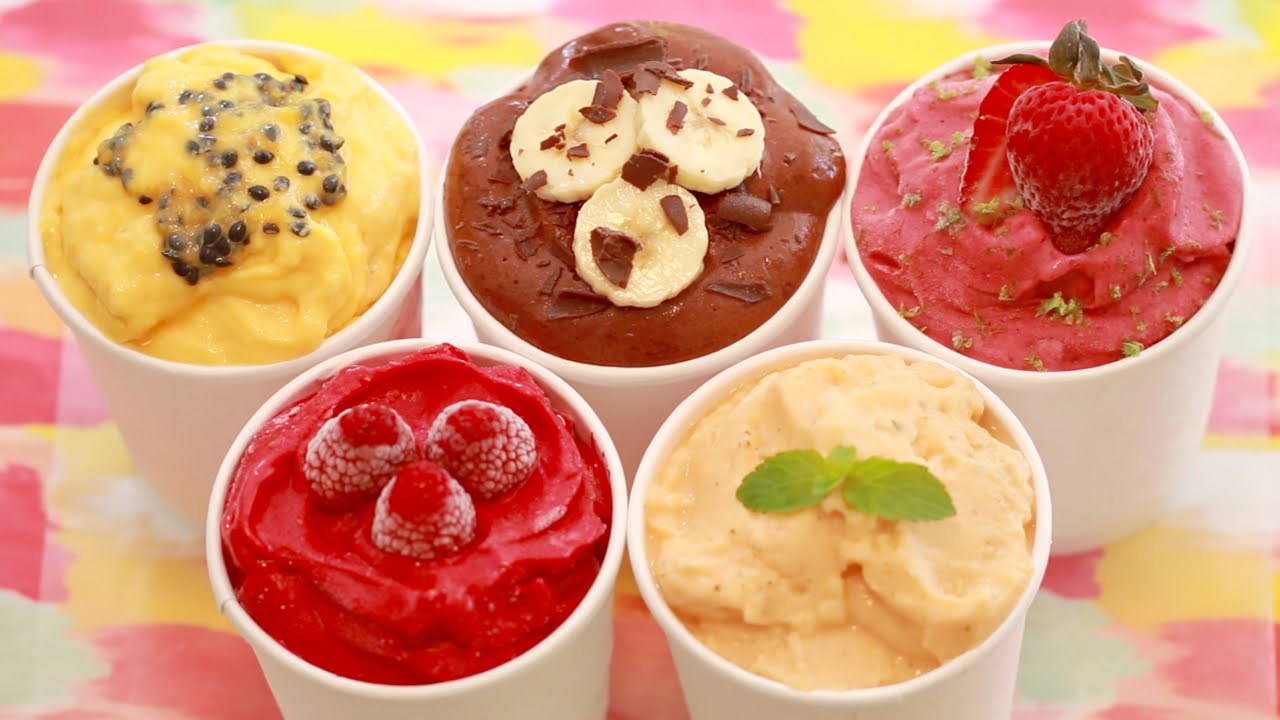
Firstly, consider the flavor you want to achieve. Citrus fruits like lemons, limes, oranges, and grapefruits lend a refreshing tanginess to sorbet, while berries such as strawberries, raspberries, and blackberries offer a sweet and vibrant taste. Tropical fruits like mangoes, pineapples, and passion fruit can bring a tropical twist to your sorbet.
Secondly, take note of the fruit’s acidity level. Fruits with higher acidity, like lemons and limes, can help balance the sweetness and prevent the sorbet from becoming too cloying. On the other hand, sweeter fruits like peaches and cherries can create a naturally sweet sorbet without the need for excessive sugar.
Consider the texture of the fruit as well. For a smooth and velvety sorbet, opt for fruits that are naturally juicy and pulpy, such as watermelon or mangoes. Avoid fruits that are too fibrous, like kiwis or strawberries, as they can result in a gritty texture.
Lastly, keep in mind the availability and seasonality of the fruit. Using fresh, ripe fruit at its peak will ensure the best flavors in your sorbet. If fresh fruit isn’t available, you can also use frozen fruit, which is convenient and often just as delicious. Just make sure to thaw the fruit before using it to ensure a smoother blending process.
Remember, there are numerous possible fruit combinations to explore, allowing you to get creative and customize your sorbet to suit your preferences. Whether you choose a classic strawberry sorbet or venture into more unique combinations like mango basil or lemon lavender, the choice of fruit is a crucial step in creating a delicious homemade sorbet.
Preparing the Fruit
Once you have chosen the perfect fruit for your sorbet, it’s time to prepare it for blending and freezing. Properly preparing the fruit will ensure a smooth and flavorful sorbet.
Start by washing the fruit thoroughly under cold running water to remove any dirt or pesticide residues. If you are using citrus fruits, you can also zest the outer skin before juicing them. The zest adds an extra burst of flavor to the sorbet.
If your chosen fruit has any tough or inedible parts such as stems, seeds, or peels, make sure to remove them. For example, with berries, remove any stems or small leaves, and with stone fruits like peaches or apricots, cut them in half, remove the pit, and peel off the skin.
Pro tip: To easily peel fruits like peaches or tomatoes, blanch them in boiling water for a minute or two, then transfer them into an ice water bath. The skins will then easily slide off.
After prepping the fruit, chop it into smaller pieces to aid in the blending process. This step is especially important if you are working with larger fruits like watermelon or pineapple. Smaller pieces will ensure more efficient blending and a smoother consistency in the final sorbet.
For fruits with seeds, such as raspberries or blackberries, you can strain the puree after blending to remove any seeds. This step is optional, depending on your preference. Some people enjoy the added texture and visual appeal of the seeds in their sorbet.
Important: At this stage, it is crucial to taste the fruit to determine its sweetness and acidity. If the fruit is not as sweet as desired, you can add a touch of sweetener later on. However, it is recommended to rely on the natural sweetness of the fruit as much as possible, as excessive sugar can overpower the fruit’s flavors.
With the fruit properly prepared, you are now ready to move on to creating a simple syrup, which will help sweeten the sorbet and prevent it from forming ice crystals.
Creating a Simple Syrup
A simple syrup is a key ingredient in sorbet that adds sweetness and helps maintain a smooth texture. It is made by dissolving sugar in water to create a liquid sweetener that will enhance the flavor of the fruit and prevent the sorbet from freezing into a solid block of ice.
To create a simple syrup, you will need equal parts of water and sugar. The most common ratio is 1:1, but you can adjust it according to your taste preferences. For a lighter sweetness, use less sugar, and for a sweeter sorbet, increase the amount of sugar used.
Begin by combining the water and sugar in a saucepan over medium heat. Stir continuously until the sugar is completely dissolved. This process should only take a few minutes. Avoid bringing the mixture to a boil; you just need to heat it enough to dissolve the sugar.
Once the sugar has dissolved, remove the saucepan from the heat and let the simple syrup cool to room temperature. This step is important because adding hot syrup to the fruit can affect the texture and potentially cook the fruit, altering its flavors.
Pro tip: If you want to infuse your sorbet with herbs or spices, like mint or ginger, you can add them to the simple syrup during the heating process. Allow the syrup to steep for a few minutes before straining out the herbs or spices.
Once the simple syrup has cooled, you can move on to the next step of combining the fruit with the syrup and blending them together.
With the simple syrup prepared, you are now ready to blend the fruit with the syrup to create a flavorful base for your sorbet.
Blending the Fruit and Syrup
Now that you have prepared both the fruit and the simple syrup, it’s time to bring them together and create the base for your sorbet.
Start by adding the prepared fruit to a blender or food processor. Blend the fruit until it reaches a smooth and homogeneous consistency. Depending on the fruit you are using, you may need to blend it for a longer time or add a small amount of water to aid in the blending process.
Once the fruit is blended, gradually add the simple syrup to the fruit puree. Start with a small amount and taste as you go, adjusting the sweetness level according to your preference. Remember, you can always add more syrup, but it’s difficult to remove excess sweetness, so tread cautiously.
Continue blending the fruit and syrup together until well combined. Take a moment to taste the mixture and make any necessary adjustments. If you are satisfied with the flavor and consistency, you are ready to move on to the next step of freezing the sorbet.
Pro tip: If you want to add any additional flavors or textures to your sorbet, such as a swirl of chocolate or chopped nuts, you can fold them in at this stage. Simply stir them into the blended fruit and syrup mixture until evenly distributed.
Once the fruit and syrup are blended, it’s time to freeze the mixture and transform it into a delightful sorbet.
Freezing the Sorbet
With the fruit and syrup mixture ready, it’s time to freeze it and transform it into a luscious sorbet. Freezing the sorbet properly will ensure a smooth and creamy texture.
First, transfer the fruit and syrup mixture into a shallow, freezer-safe container. A container with a lid is ideal for easy storage and protection from freezer odors.
Before placing the container in the freezer, cover it with plastic wrap or a lid to prevent ice crystals from forming on the surface of the sorbet. This step will help maintain the smooth texture of the sorbet as it freezes.
Place the container in the freezer and let it freeze until solid. This process can take anywhere from 4 to 6 hours, depending on your freezer temperature.
During the freezing process, it’s important to check on the sorbet occasionally and give it a gentle stir. This will help prevent large ice crystals from forming and ensure a creamy texture. Be sure not to overmix, as this can introduce too much air into the sorbet and make it icy.
If you prefer a sorbet with a lighter and fluffier texture, you can also opt to churn the sorbet in an ice cream maker according to the manufacturer’s instructions. Churning introduces more air into the mixture, resulting in a smoother consistency.
Once the sorbet is fully frozen, it is ready to be enjoyed! However, before serving, it’s important to give it a final mix to break up any ice crystals that may have formed during freezing.
Now that you have successfully frozen the sorbet, you can move on to the final steps of mixing and churning the sorbet before it is ready to be served.
Mixing and Churning the Sorbet
Once the sorbet is fully frozen, it’s time to bring it out of the freezer and give it a final mix to enhance its texture and consistency.
Begin by removing the container of frozen sorbet from the freezer and let it sit at room temperature for a few minutes to soften slightly. This will make it easier to work with.
Using a spoon or spatula, vigorously mix or stir the sorbet to break up any large ice crystals and create a smoother texture. Make sure to reach the bottom of the container to incorporate any frozen bits that may have settled.
If you prefer a sorbet with a fluffier texture, you can transfer the partially softened sorbet into a mixing bowl and use an electric mixer or a stand mixer on low speed to beat the sorbet for a few minutes. This step will help introduce more air into the mixture, giving it a lighter consistency.
Another option is to use an ice cream maker to churn the sorbet. Follow the manufacturer’s instructions on how to use your specific machine. Churning the sorbet in an ice cream maker will result in a smoother and creamier texture.
Once the sorbet is mixed or churned to your desired consistency, transfer it back into the freezer container. Smooth the surface with a spatula or the back of a spoon to create an even layer.
Cover the container with plastic wrap or a lid to prevent freezer burn and return it to the freezer for at least an additional 2 to 4 hours, or until fully firm.
The sorbet is now ready to be served and enjoyed! But before you dive in, let’s discuss the proper storage and serving of the sorbet.
Please note: Some homemade sorbets may freeze harder than commercially produced ones due to the absence of stabilizers and emulsifiers. Allow the sorbet to soften slightly at room temperature before scooping and serving.
Storing and Serving the Sorbet
After you have prepared and frozen the sorbet, it’s important to store it properly to maintain its freshness and flavor. Additionally, knowing the best way to serve sorbet will ensure you enjoy its delightful taste to the fullest.
To store the sorbet, keep it in a tightly sealed, freezer-safe container to prevent freezer burn and absorption of any unwanted odors. Make sure the container is well-covered and placed in the coldest part of your freezer.
The sorbet can be stored for up to 2-3 months. However, for the best quality, it’s recommended to consume it within the first month. If kept for longer, sorbet may develop a slightly icy texture.
When it’s time to serve the sorbet, remove it from the freezer and let it sit at room temperature for a few minutes to soften slightly. This will make scooping easier and allow the flavors to develop more fully.
Scoop the sorbet into individual serving dishes or cones using an ice cream scoop or a spoon. For a fancier presentation, you can also use a melon baller to create small sorbet balls.
You can garnish the sorbet with fresh fruit slices, a sprig of mint, or a drizzle of chocolate syrup for added visual appeal. It’s also common to serve sorbet alongside other dessert elements like cookies or cake slices, offering a delightful contrast in flavors and textures.
Remember that sorbet melts quickly due to its low-fat content, so serve it immediately after scooping. If you’re serving sorbet outdoors or in a warm environment, consider pre-chilling the dishes or glasses to help keep the sorbet cool for a bit longer.
If you have leftover sorbet, you can return it to the freezer for later enjoyment. However, keep in mind that sorbet may become slightly harder after refreezing, so it’s best to let it soften for a few minutes before serving again.
Now that you know how to store and serve sorbet properly, you’re ready to enjoy the refreshing and healthy treat you’ve created with your own hands!
Conclusion
Congratulations! You have learned how to make delicious and healthy sorbet without the need for an ice cream maker. By choosing the right fruit, preparing it properly, creating a simple syrup, and blending the fruit and syrup together, you have created a flavorful base for your sorbet. Freezing and mixing the sorbet have helped achieve a smooth and creamy texture, while storing and serving it properly ensure its freshness and delightful taste.
Making homemade sorbet allows you to enjoy the natural flavors of fresh fruit while avoiding artificial additives and preservatives. Additionally, it provides a wonderful opportunity to get creative with flavor combinations and tailor the sweetness to your preference.
Whether you prefer classic flavors like strawberry or lemon, or experiment with unique combinations like mango basil or raspberry lime, making sorbet at home allows you to indulge in a refreshing and guilt-free dessert that is perfect for hot summer days or any time you’re craving a sweet treat.
Now that you have the skills to create your own homemade sorbet, the possibilities are endless. So go ahead and let your creativity soar as you experiment with different fruits, flavors, and toppings to create your own signature sorbet recipes.
Enjoy the process of making sorbet and savor the delicious results. Share your homemade sorbet with family and friends, and watch as they marvel at your culinary skills. So, why wait? Get started on your sorbet-making adventure today and treat yourself to a delightful frozen dessert that’s both refreshing and healthy.