Introduction
Welcome to the world of electric pressure cooking, where delicious and nutritious meals can be prepared in a fraction of the time compared to traditional cooking methods. In this article, we will guide you through the process of making dal in an electric pressure cooker. Dal, a staple dish in Indian cuisine, is made from lentils and packed with protein, fiber, and essential nutrients.
Using an electric pressure cooker not only saves time and energy but also helps to retain the flavors and nutritional value of the ingredients. Whether you’re a beginner or an experienced cook, this step-by-step guide will help you achieve perfectly cooked and flavorful dal every time.
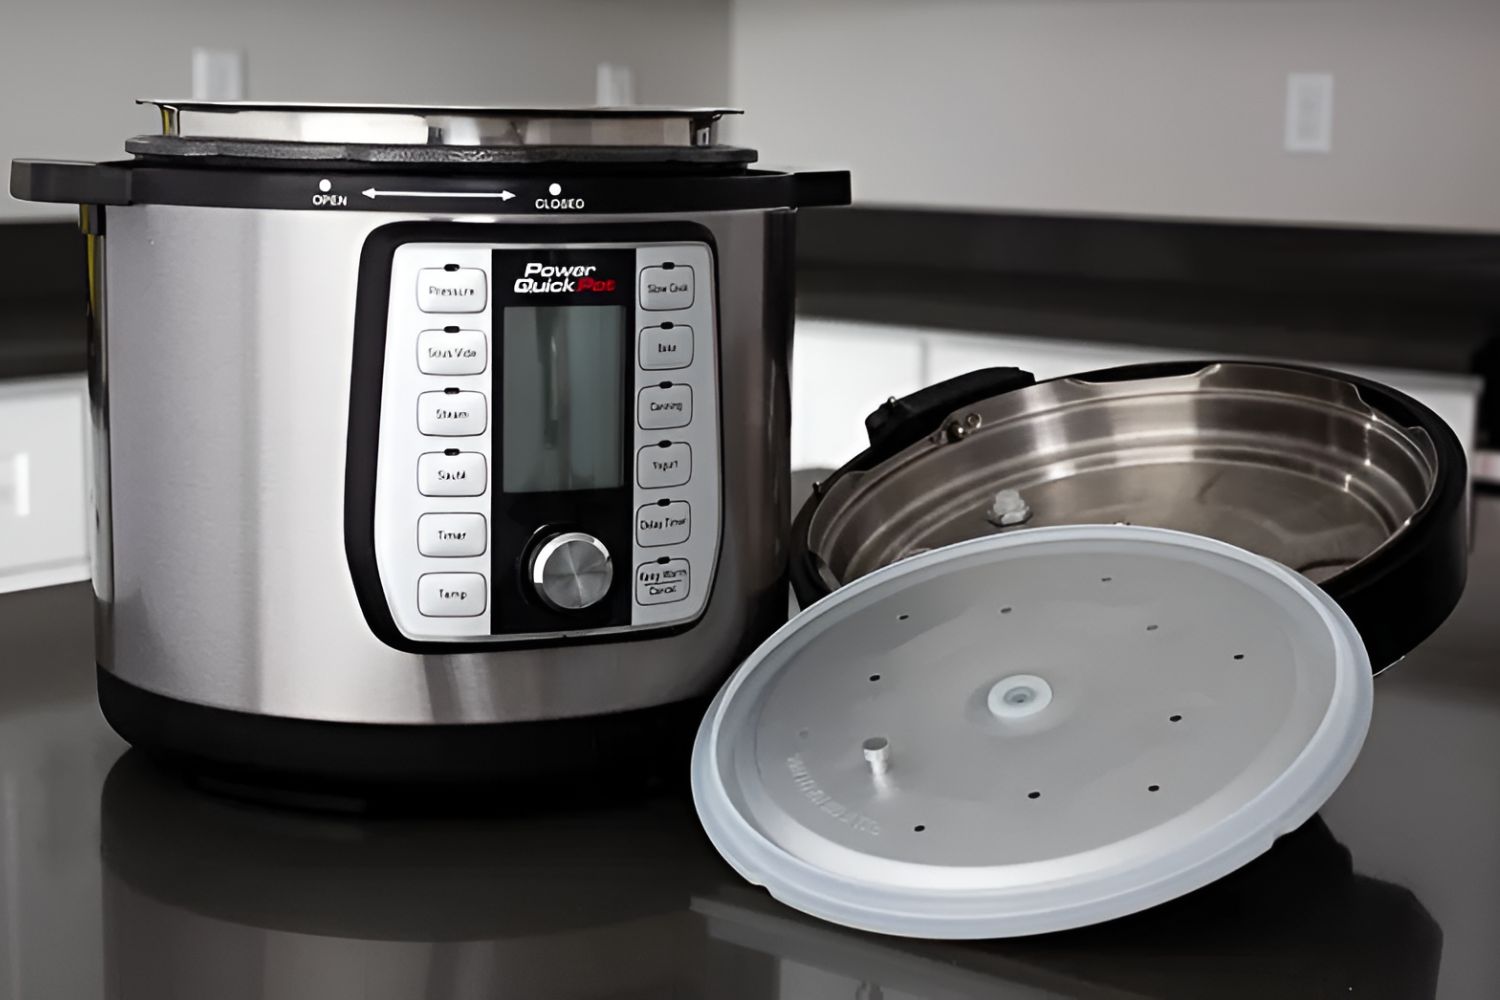
Before we dive into the recipe, let’s talk about the equipment you’ll need. You’ll require an electric pressure cooker, also known as an Instant Pot or a multicooker. These appliances are versatile and offer various cooking functions, including pressure cooking, sautéing, and slow cooking. Additionally, you’ll need a set of measuring cups and spoons, a chopping board, a knife, and a ladle.
Now that we’ve covered the basics let’s move on to the ingredients you’ll need to make delicious dal. The main ingredient, of course, is lentils. There are different types of lentils available, such as split red lentils (masoor dal), split pigeon peas (toor dal), or yellow split peas (chana dal), each imparting its unique flavor to the dish.
Additionally, you’ll need spices and aromatics like turmeric powder, cumin seeds, mustard seeds, ginger-garlic paste, green chili, and curry leaves to enhance the flavor profile of the dal. A pinch of asafoetida (hing) adds a delightful aroma, and salt to taste brings all the flavors together.
Equipment Needed
To make dal in an electric pressure cooker, you’ll need the following equipment:
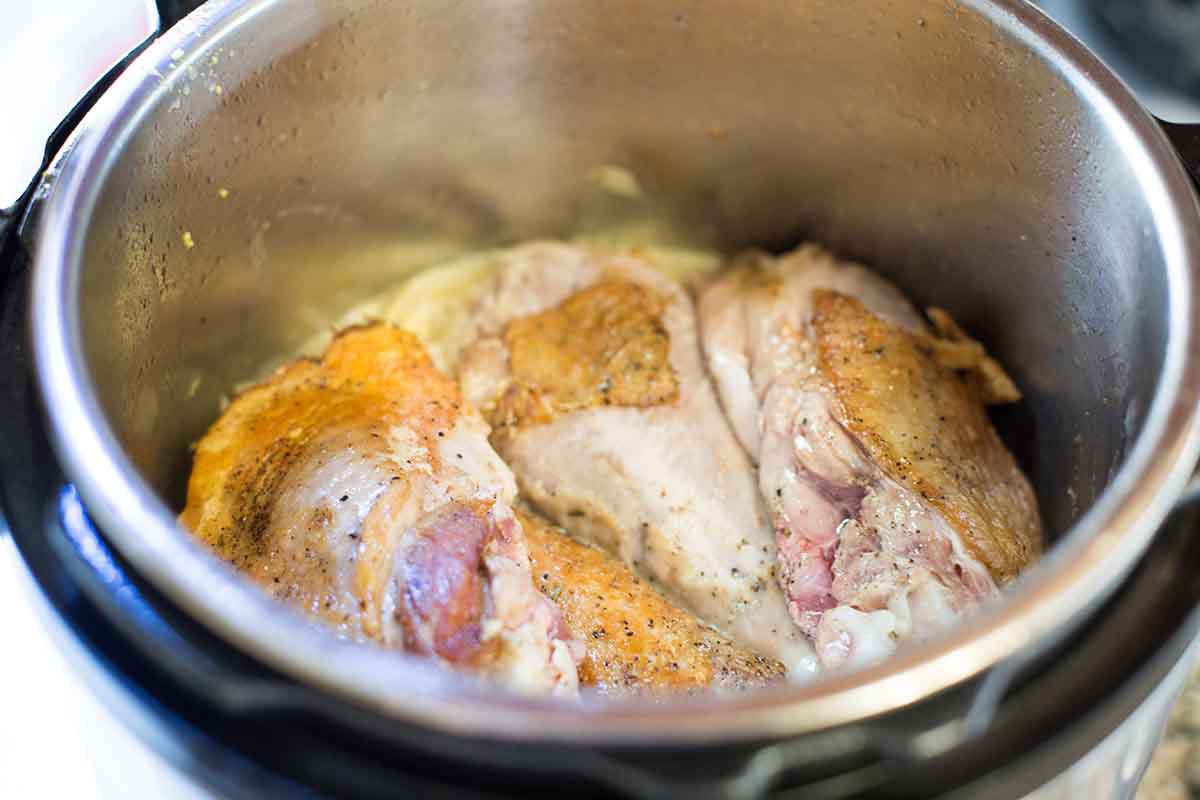
- Electric pressure cooker: Also known as an Instant Pot or a multicooker, this appliance is the heart of your dal-making process. It allows for quick and efficient cooking under pressure, ensuring tender and flavorful lentils.
- Measuring cups and spoons: Accurate measurements are key to achieving the perfect balance of flavors in your dal. Use measuring cups and spoons to portion out the lentils, water, and spices.
- Chopping board and knife: You’ll need a chopping board and knife to prepare the aromatics and spices. Chop the onions, ginger, garlic, green chili, and curry leaves to release their aromatic oils and infuse the dal with rich flavors.
- Ladle: A ladle will come in handy when transferring the dal from the pressure cooker to serving bowls. It ensures that each serving is filled with a generous portion of dal and prevents any spillage.
- Optional: Strainer: If you prefer a smoother texture for your dal, you can use a strainer to remove any solid particles or chunks. This step is particularly helpful if you’re using whole lentils instead of split lentils.
By having these essential tools at your disposal, you’ll be well-equipped to make delicious dal in no time. Before you start cooking, ensure that your electric pressure cooker is clean and functioning properly. Familiarize yourself with the cooker’s settings, including the pressure cooking function, as this will be crucial in achieving the desired consistency and tenderness of your dal.
Ingredients
To make flavorful and aromatic dal in an electric pressure cooker, gather the following ingredients:
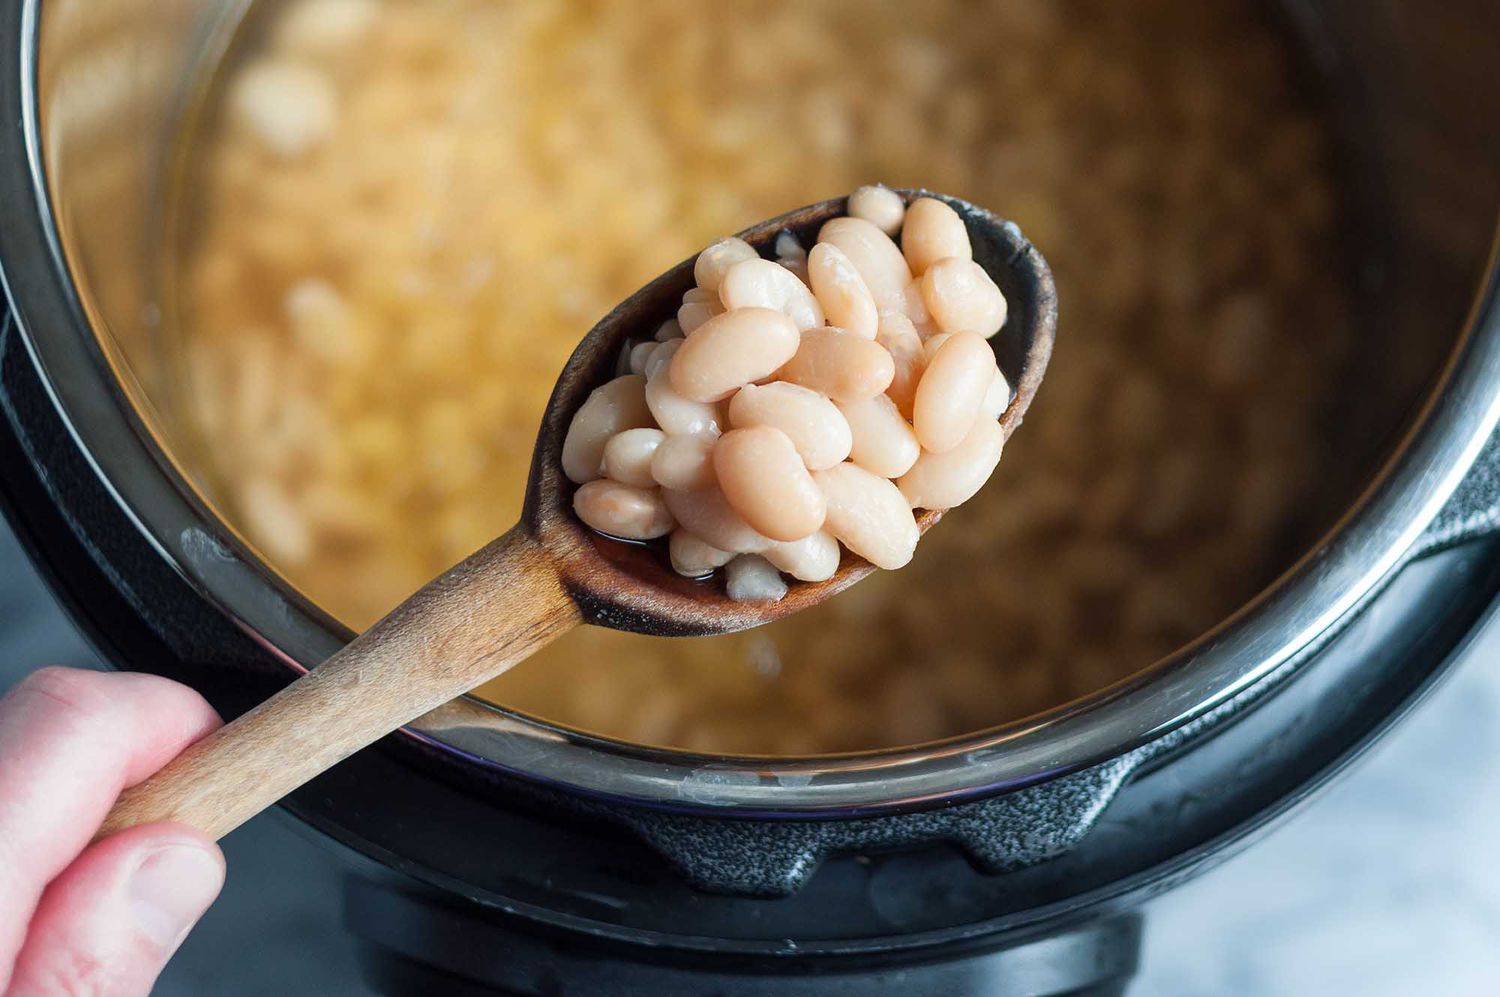
- Lentils: Choose from a variety of lentils, such as split red lentils (masoor dal), split pigeon peas (toor dal), or yellow split peas (chana dal). Lentils are packed with protein and fiber, making them a nutritious base for your dal.
- Aromatics: Enhance the flavors of your dal with aromatics like onions, ginger, garlic, green chili, and curry leaves. These ingredients add depth and a delightful aroma to your dish.
- Spices: Spice up your dal with turmeric powder, cumin seeds, mustard seeds, and a pinch of asafoetida (hing). These spices not only add a burst of flavor but also offer numerous health benefits.
- Oil or ghee: Use cooking oil or ghee (clarified butter) to sauté the aromatics and spices. This step helps to release their flavors and infuse the dal with a rich taste.
- Water or vegetable broth: To cook the lentils to perfection, you’ll need water or vegetable broth. The amount of liquid required depends on the desired consistency of your dal.
- Salt: Add salt to taste to bring out the flavors of the lentils and spices. Start with a small amount and adjust as needed.
Feel free to customize your dal by adding additional spices or ingredients according to your preference. You can experiment with ingredients like tomatoes, coconut milk, or fresh herbs to create unique variations of dal.
With these ingredients on hand, you’re ready to embark on a flavorful dal-making journey in your electric pressure cooker. Let’s move on to the step-by-step process of making delicious dal.
Step 1: Soaking the Lentils
Before cooking the lentils, it’s important to soak them to enhance their texture and reduce the cooking time. Follow these steps to properly soak the lentils:
- Select your lentils: Choose the type of lentils you prefer, such as split red lentils (masoor dal), split pigeon peas (toor dal), or yellow split peas (chana dal). Rinse the lentils under cold water to remove any impurities.
- Measure the lentils: Depending on the number of servings you plan to make, measure out the desired quantity of lentils using a measuring cup.
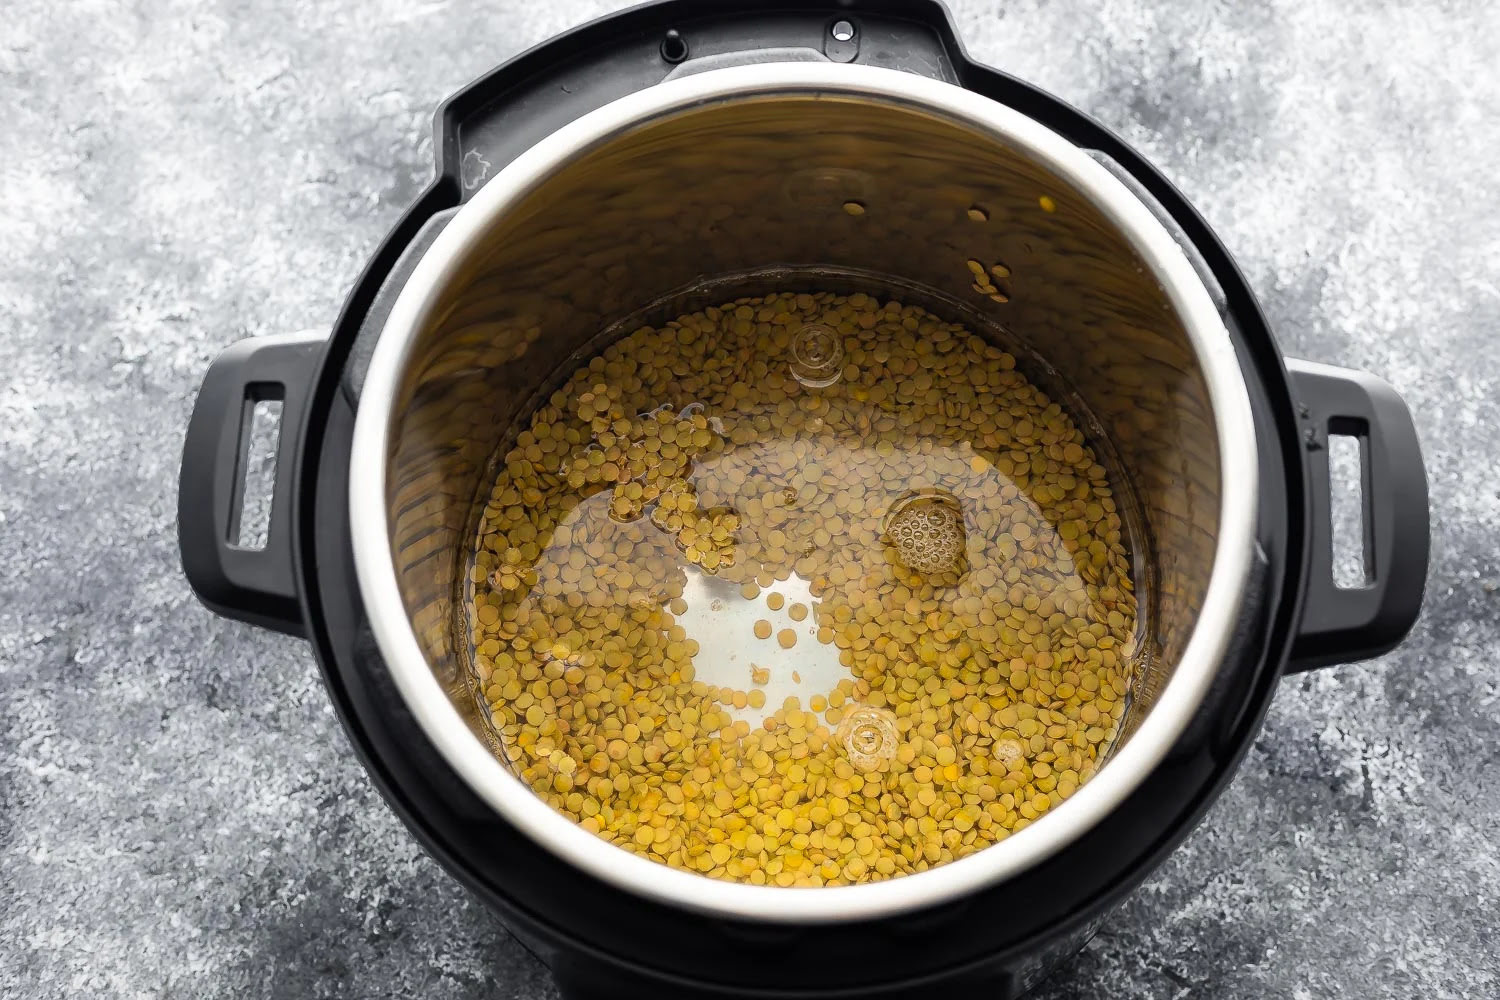
- Place the lentils in a bowl: Transfer the lentils to a large bowl and cover them with enough water. Make sure the water level is at least an inch above the lentils, as they will absorb some water while soaking.
- Soak the lentils: Allow the lentils to soak for at least 30 minutes or up to a few hours. Soaking helps to soften the lentils and reduce their cooking time.
- Drain the lentils: After the soaking time is complete, drain the water from the lentils using a strainer or by carefully tilting the bowl while holding back the lentils with your hand. Rinse the lentils once more under running water to remove any remaining starch or residue.
Soaking the lentils not only helps in achieving a better texture but also aids in digestion. It is an essential step in preparing dal, especially when using split lentils.
Now that the lentils are soaked and ready, let’s move on to the next step: preparing the tempering.
Step 2: Preparing the Tempering
The tempering, also known as tadka or chaunk, is a crucial step in making flavorful dal. It involves sautéing spices and aromatics in oil or ghee to release their aromatic flavors. Follow these steps to prepare the tempering:
- Gather your spices and aromatics: Measure out the required spices, including cumin seeds, mustard seeds, and a pinch of asafoetida (hing). Finely chop the onions, ginger, garlic, green chili, and curry leaves.
- Heat oil or ghee: Place your electric pressure cooker on sauté mode and add oil or ghee to the inner pot. Allow it to heat up for a moment.
- Add cumin seeds and mustard seeds: Once the oil or ghee is hot, add the cumin seeds and mustard seeds. These seeds will sizzle and release a pleasant aroma as they pop.
- Sauté the aromatics: Add the chopped onions, ginger, garlic, green chili, and curry leaves to the pot. Sauté them until the onions turn golden brown and the aromatics become fragrant.
- Add asafoetida: Sprinkle a pinch of asafoetida (hing) into the pot. Asafoetida adds a unique and slightly pungent flavor to the tempering.
The tempering creates a flavorful base for your dal, infusing the oil or ghee with the aromatics and spices. This step is important for enhancing the overall taste and aroma of the dish.
Now that the tempering is prepared, it’s time to move on to the next step: adding the lentils and water to the pressure cooker.
Step 3: Adding Lentils and Water
Once the tempering is ready, it’s time to add the soaked lentils and water to the electric pressure cooker. Follow these steps to properly incorporate the lentils and liquid:
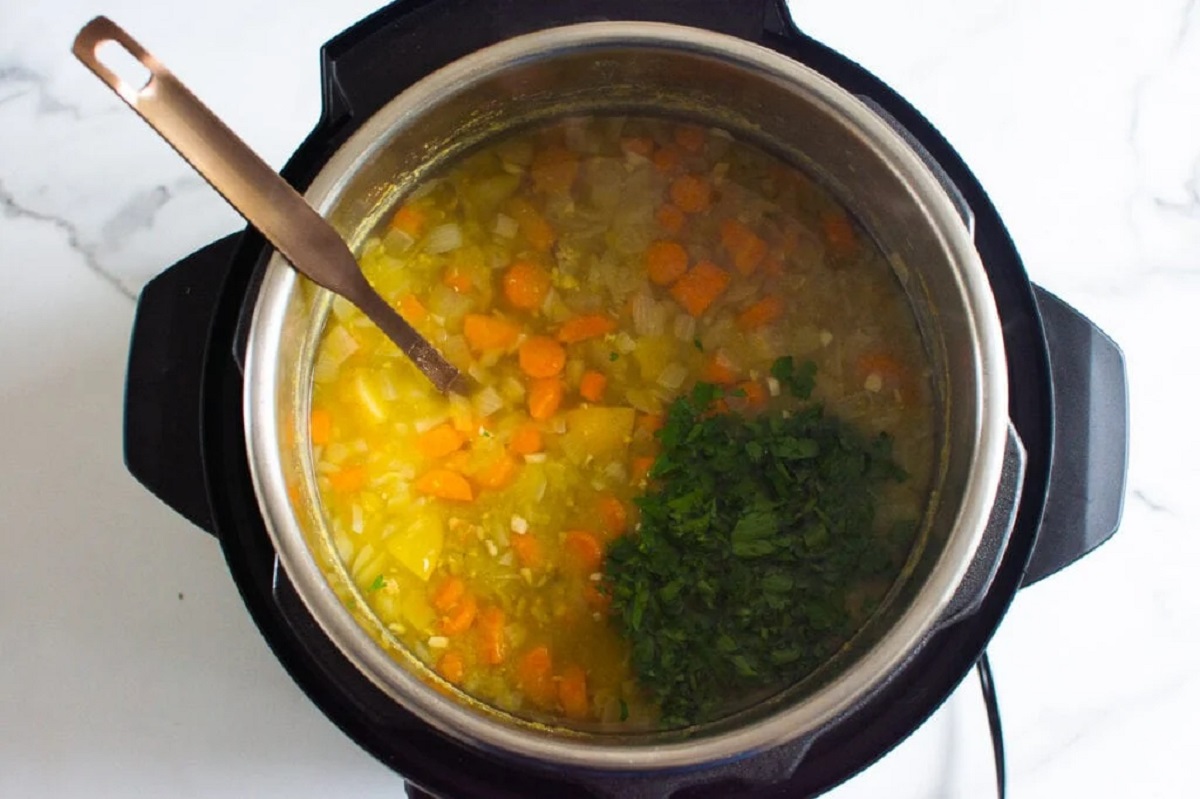
- Add the soaked lentils: Carefully pour the drained and rinsed lentils into the electric pressure cooker’s inner pot. Spread them evenly to ensure even cooking.
- Measure the water: Depending on the desired consistency of your dal, measure the appropriate amount of water using a measuring cup. As a general guideline, use 2 cups of water for every cup of lentils.
- Add the water to the pot: Pour the measured water into the electric pressure cooker, making sure it covers the lentils entirely. Use a spatula or ladle to gently stir the lentils and water together.
- Season with salt: Add salt to taste to the pot, stirring it into the lentils and water mixture. The salt will enhance the flavors of the dal as it cooks.
Ensuring the lentils are fully submerged in water is important to achieve properly cooked and tender dal. The water will penetrate the lentils, allowing them to soften and absorb the flavors of the spices and aromatics.
Now that the lentils and water are added, it’s time to move on to the next step: pressure cooking the dal.
Step 4: Pressure Cooking the Dal
With the lentils and water added to the electric pressure cooker, it’s time to cook the dal under pressure. Follow these steps to ensure perfectly cooked and flavorful dal:
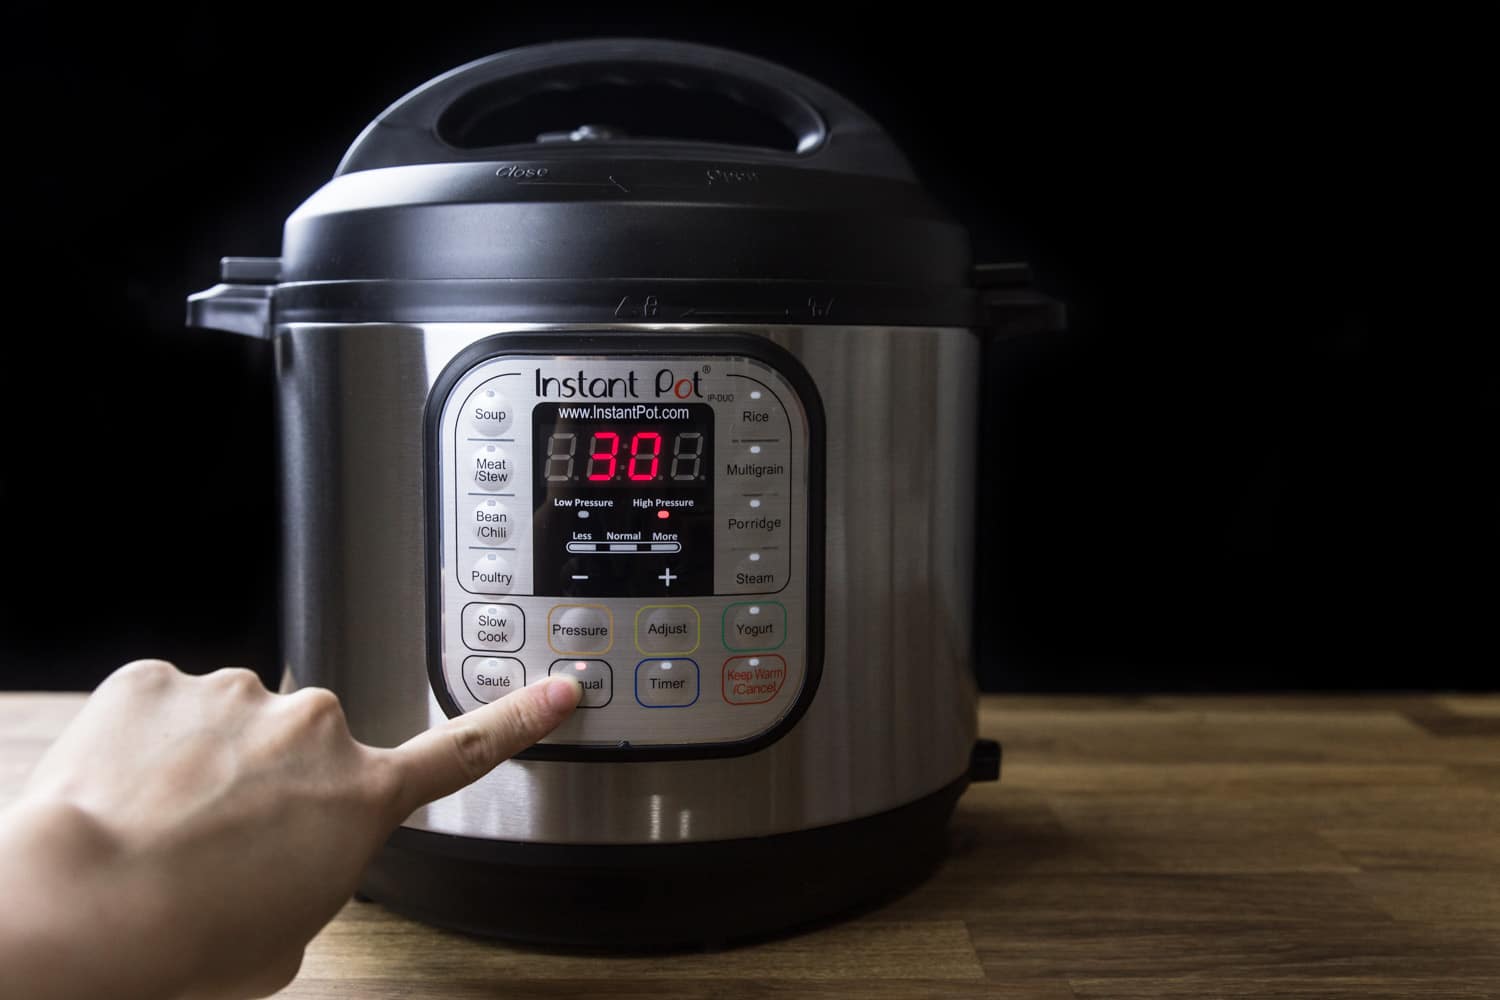
- Secure the lid: Place the lid on the electric pressure cooker, ensuring it is properly sealed. This is important for creating a pressurized environment for cooking the dal.
- Select the pressure cooking function: Set your electric pressure cooker to the pressure cooking function. The cooking time will vary based on the type of lentils used. As a general guideline, pressure cook split red lentils (masoor dal) for 5-6 minutes, split pigeon peas (toor dal) for 8-10 minutes, and yellow split peas (chana dal) for 10-12 minutes.
- Start the pressure cooking process: Once you’ve selected the appropriate cooking time, press the start button on your electric pressure cooker. The cooking process will begin, and the cooker will build up pressure.
- Allow for natural release of pressure: After the initial cooking time is complete, allow the pressure to release naturally. This can take anywhere from 10-15 minutes. It’s important to be patient and let the pressure release on its own to avoid any accidents or spillover.
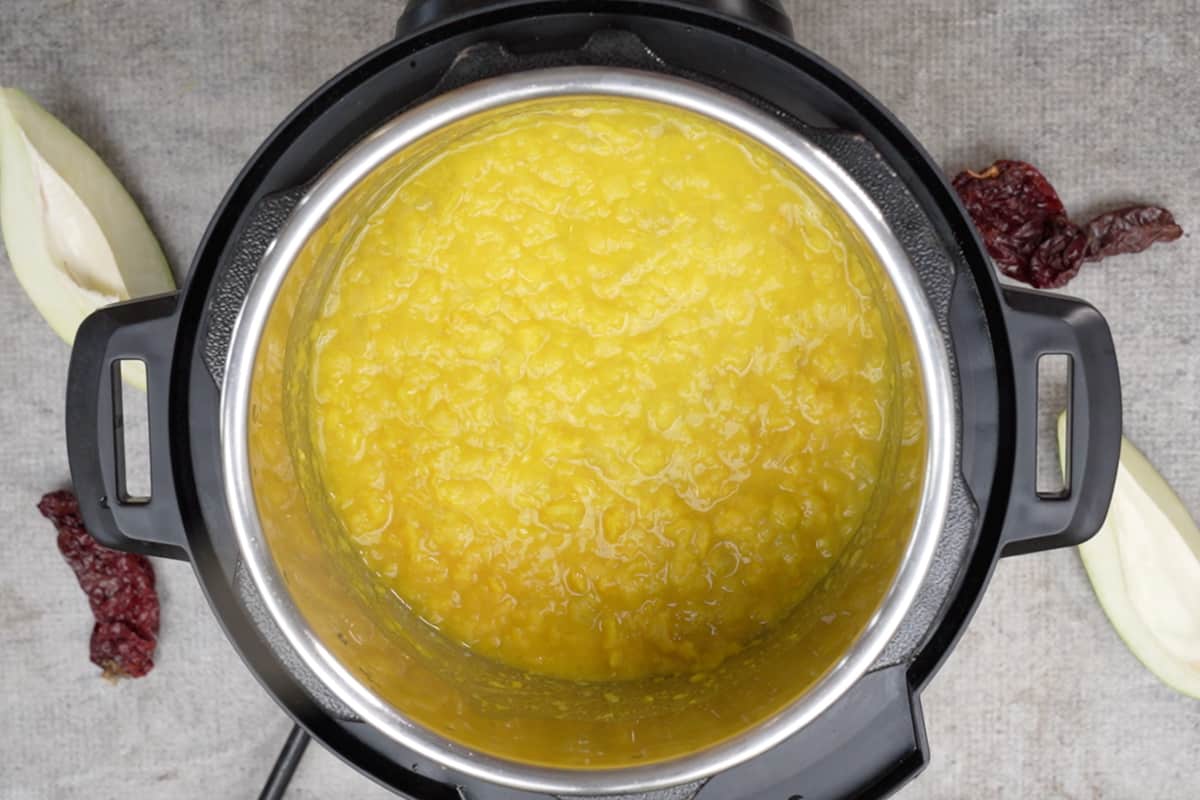
- Check the dal: Once the pressure has released, carefully open the lid of the electric pressure cooker. Give the dal a gentle stir to ensure it is cooked to your desired consistency. The lentils should be soft and tender, with a creamy texture.
Pressure cooking the dal allows the flavors to meld together while thoroughly cooking the lentils. The high pressure and steam created inside the electric pressure cooker result in a faster cooking time, making it convenient for busy schedules.
Now that the dal is perfectly cooked, it’s time to move on to the next step: releasing the pressure.
Step 5: Releasing the Pressure
After pressure cooking the dal, it’s important to release the pressure safely before continuing with the next steps. Follow these steps to properly release the pressure:
- Natural Release: Allow the pressure to release naturally by letting the electric pressure cooker sit undisturbed for 10-15 minutes after the cooking time is complete. During this time, the pressure will slowly decrease.
- Quick Release: If you’re short on time and need to release the pressure immediately, you can use the quick-release method. Carefully move the pressure release valve from the sealing to the venting position. Be cautious as hot steam will escape from the valve.
- Wait for the pressure to release: Once the pressure has been released, the floating valve will drop, indicating that the pressure has been fully released. You can now safely open the lid of the electric pressure cooker.
- Stir the dal: Give the dal a gentle stir to ensure it’s evenly cooked and mixed. The lentils should be soft and well-incorporated with the water, resulting in a creamy and flavorful consistency.
Releasing the pressure is a crucial step in the electric pressure cooker cooking process. It allows the dal to settle and ensures that it’s safe to open the cooker without the risk of hot steam escaping.
With the pressure released, you’re now ready to move on to the next step: adjusting the consistency of the dal.
Step 6: Adjusting the Consistency
Now that the pressure has been released and you’ve checked the cooked dal, it’s time to adjust its consistency to your liking. Follow these steps to achieve the desired thickness or thinness of the dal:
- Assess the dal: Take a look at the cooked dal to determine its current consistency. It should have a smooth and creamy texture.
- Thickening the dal: If you prefer a thicker dal, continue cooking the dal for a few more minutes on the sauté mode, stirring occasionally. This will help to evaporate some of the excess liquid and thicken the dal.
- Thinning the dal: If you find the dal to be too thick for your liking, you can add a small amount of hot water or vegetable broth to the pot. Start with a tablespoon at a time and stir well, assessing the consistency after each addition. Repeat until you achieve your desired consistency.
- Continuing the cooking process: If you have made adjustments to the consistency of the dal, allow it to cook for a few more minutes on the sauté mode to incorporate the added liquid and ensure its flavors are well blended.
Adjusting the consistency of the dal allows you to tailor it to your preferences. Whether you prefer a thicker dal to scoop up with bread or a thinner dal to serve over rice, this step allows you to customize the dish to suit your taste.
With the consistency adjusted, it’s time to move on to the next step: adding the Tadka/Tempering.
Step 7: Adding Tadka/Tempering
The addition of tadka, also known as tempering or seasoning, adds a burst of flavor and aromatic richness to the dal. Follow these steps to add the tadka to your dal:
- Heat oil or ghee: In a separate small pan or saucepan, heat oil or ghee over medium heat. Allow it to get hot but not smoking.
- Add the spices: Once the oil or ghee is hot, add a pinch of cumin seeds and allow them to sizzle for a few seconds. You can also add other aromatic spices like mustard seeds or dry red chili for an extra kick of flavor.
- Sauté the aromatics: Add finely chopped garlic and ginger to the pan and sauté until they turn golden brown and release their flavors. This step will infuse the tadka with a delightful aroma.
- Finish the tadka: Finally, sprinkle some red chili powder or turmeric powder into the pan and immediately remove it from the heat. The residual heat will continue to cook the spices and release their flavors into the oil or ghee.
- Add the tadka to the dal: Carefully pour the prepared tadka into the cooked dal in the electric pressure cooker. Stir well to combine all the flavors and ensure the tadka is evenly distributed throughout the dal.
The addition of tadka elevates the taste and aroma of the dal, adding complexity and depth to the dish. The combination of spices and aromatics in the tadka complements the flavors of the dal, making it even more delicious.
With the tadka added, it’s time to move on to the final step: serving and enjoying the flavorful dal.
Step 8: Serving and Enjoying
After all the hard work of preparing and cooking the dal, it’s finally time to savor the flavors and enjoy your delicious creation. Follow these steps to serve and savor the dal:
- Prepare serving bowls: Get your serving bowls ready to plate the dal. You can use individual bowls or a larger serving dish, depending on your preference.
- Ladle the dal: Using a ladle, scoop the cooked dal from the electric pressure cooker and carefully transfer it to the serving bowls. Make sure to include a generous amount of lentils and the flavorful liquid.
- Garnish with fresh herbs: Sprinkle some freshly chopped cilantro or parsley on top of the dal to add freshness and a pop of color. This step is optional, but it can enhance the visual appeal of the dish.
- Serve with accompaniments: Dal is often enjoyed with steamed rice, naan bread, or roti. You can serve the dal as a main dish or as a side dish alongside other Indian delicacies like vegetable curries or raita.
- Enjoy your dal: Sit back, take a moment to appreciate the flavors and aromas, and enjoy the dal. The combination of tender lentils, aromatic spices, and the richness of the tadka will tantalize your taste buds.
Whether you’re enjoying the dal as a comforting meal on its own or as part of a larger spread, take the time to savor each bite and appreciate the effort you put into making this wholesome and flavorful dish.
Now that you’ve followed each step and have your hot and delicious dal ready, it’s time to dig in and relish the wonderful flavors and textures of your homemade creation. Enjoy!