Why Cook Lentils in an Electric Pressure Cooker?
Electric pressure cookers have become popular kitchen appliances due to their ability to quickly and efficiently cook a wide variety of ingredients. When it comes to cooking lentils, using an electric pressure cooker offers several advantages that make it a top choice for many home cooks.
First and foremost, cooking lentils in an electric pressure cooker significantly reduces the cooking time compared to traditional stovetop methods. Lentils have a reputation for being time-consuming to cook, often requiring hours of simmering. However, with an electric pressure cooker, you can have perfectly cooked lentils in a fraction of the time, saving you valuable hours in the kitchen.
Not only do electric pressure cookers save time, but they also help to retain the nutritional value of lentils. The high-pressure environment created by the cooker locks in the vitamins, minerals, and antioxidants present in lentils, ensuring you get the maximum health benefits from your meal. Additionally, the sealed environment of the pressure cooker prevents nutrients from evaporating during the cooking process.
Another advantage of using an electric pressure cooker for lentils is that it requires less monitoring and hands-on attention. Unlike traditional stovetop cooking, where you need to keep an eye on the pot and adjust the heat, the pressure cooker takes care of the cooking process for you. Once you set the cooking time, you can simply walk away and let the pressure cooker do its job. This makes it a convenient option for busy individuals who want to enjoy a hearty and nutritious meal without spending too much time in the kitchen.
Besides the time-saving and convenience factors, electric pressure cookers also excel at achieving perfectly cooked lentils consistently. The controlled and precise cooking environment of the pressure cooker ensures that your lentils are evenly cooked from the outside to the center. No more worrying about mushy or undercooked lentils; with an electric pressure cooker, you can achieve the ideal texture every time.
Overall, cooking lentils in an electric pressure cooker is a game-changer for many home cooks. It saves time, preserves the nutritional value, requires less monitoring, and ensures consistently delicious results. Whether you are a busy professional, someone looking to embrace healthier cooking, or simply a lentil lover, investing in an electric pressure cooker will revolutionize your lentil cooking experience.
Choosing the Right Lentils
Lentils are a versatile and nutritious ingredient that can be used in a variety of dishes, from soups and salads to stews and curries. However, with different types of lentils available in the market, it’s important to choose the right ones for your recipe. Here are some considerations to keep in mind when selecting lentils:
Green Lentils: Also known as French lentils, green lentils are small and tend to hold their shape well during cooking. They have a slightly peppery flavor and a firm texture, making them an excellent choice for salads and side dishes.
Red Lentils: These lentils are orange-red in color and have a sweet, nutty flavor. They cook quickly and tend to become mushy when cooked, making them perfect for making soups, stews, and Indian dals.
Brown Lentils: Brown lentils are the most common variety available and are often referred to as regular lentils. They have a mild and earthy flavor and hold their shape moderately well after cooking. Brown lentils are versatile and can be used in salads, soups, and stews.
Black Lentils: Also known as beluga lentils due to their resemblance to caviar, black lentils have a rich, earthy flavor and a firm texture. They retain their shape even after cooking, making them ideal for salads, grain bowls, and hearty side dishes.
Puy Lentils: Puy lentils come from the region of Le Puy in France and are known for their dark green color and robust, nutty flavor. They hold their shape well and are perfect for salads, side dishes, and mixed vegetable dishes.
When choosing lentils, consider the texture and flavor you desire for your recipe. If you want lentils that hold their shape, opt for green, brown, or black lentils. For dishes that require a creamy consistency, red lentils are the way to go. Additionally, be sure to read the packaging instructions or ask your local grocer for cooking recommendations specific to the lentil variety you choose.
Remember, each type of lentil has its own unique characteristics, so don’t be afraid to experiment and try different lentils in your recipes. By selecting the right lentils for your dish, you can enhance the flavors and textures, taking your lentil-based meals to a whole new level of deliciousness.
Soaking Lentils: To Soak or Not to Soak?
The topic of whether or not to soak lentils before cooking is a debated one among home cooks. While soaking lentils is a common practice for some, others argue that it is unnecessary. So, let’s explore the benefits and considerations of soaking lentils to help you make an informed decision.
Reducing Cooking Time: One of the main reasons people choose to soak lentils is to reduce the cooking time. Soaking can help soften the lentils, which then require less time to cook. This can be especially helpful if you’re short on time or prefer your lentils to be cooked quickly.
Enhancing Digestibility: Lentils, like other legumes, contain phytic acid and enzyme inhibitors that can hinder digestion. Soaking lentils helps in reducing these compounds, making the lentils more digestible. This can be particularly helpful for individuals with sensitive digestive systems.
Reducing Gas-Inducing Compounds: Some people find that soaking lentils helps to reduce the gas-inducing compounds, such as oligosaccharides, present in lentils. Soaking can break down these complex sugars, potentially minimizing digestive discomfort for those who are prone to gas or bloating after consuming lentils.
However, it’s important to note that not all lentils require soaking. Some lentil varieties, such as red lentils, cook relatively quickly and do not necessarily need to be soaked beforehand. Additionally, if you’re short on time or simply prefer not to soak your lentils, you can still achieve delicious results by cooking them without soaking.
When deciding whether to soak lentils, it ultimately comes down to personal preference and the time you have available. If you have the time and prefer lentils with a shorter cooking time and enhanced digestibility, soaking can be beneficial. On the other hand, if you’re short on time or don’t experience any digestive issues with lentils, you can skip the soaking step and still enjoy perfectly cooked lentils.
Regardless of whether you choose to soak or not, it’s important to rinse lentils thoroughly before cooking to remove any debris or impurities. Additionally, always follow the cooking instructions specific to the lentil variety you’ve chosen to ensure optimal results.
So, the decision of whether to soak or not to soak lentils ultimately rests with you. Experiment with both methods and see which one works best for your cooking style and preferences. Either way, you’ll be able to enjoy the versatility and nutritional benefits of lentils in your meals.
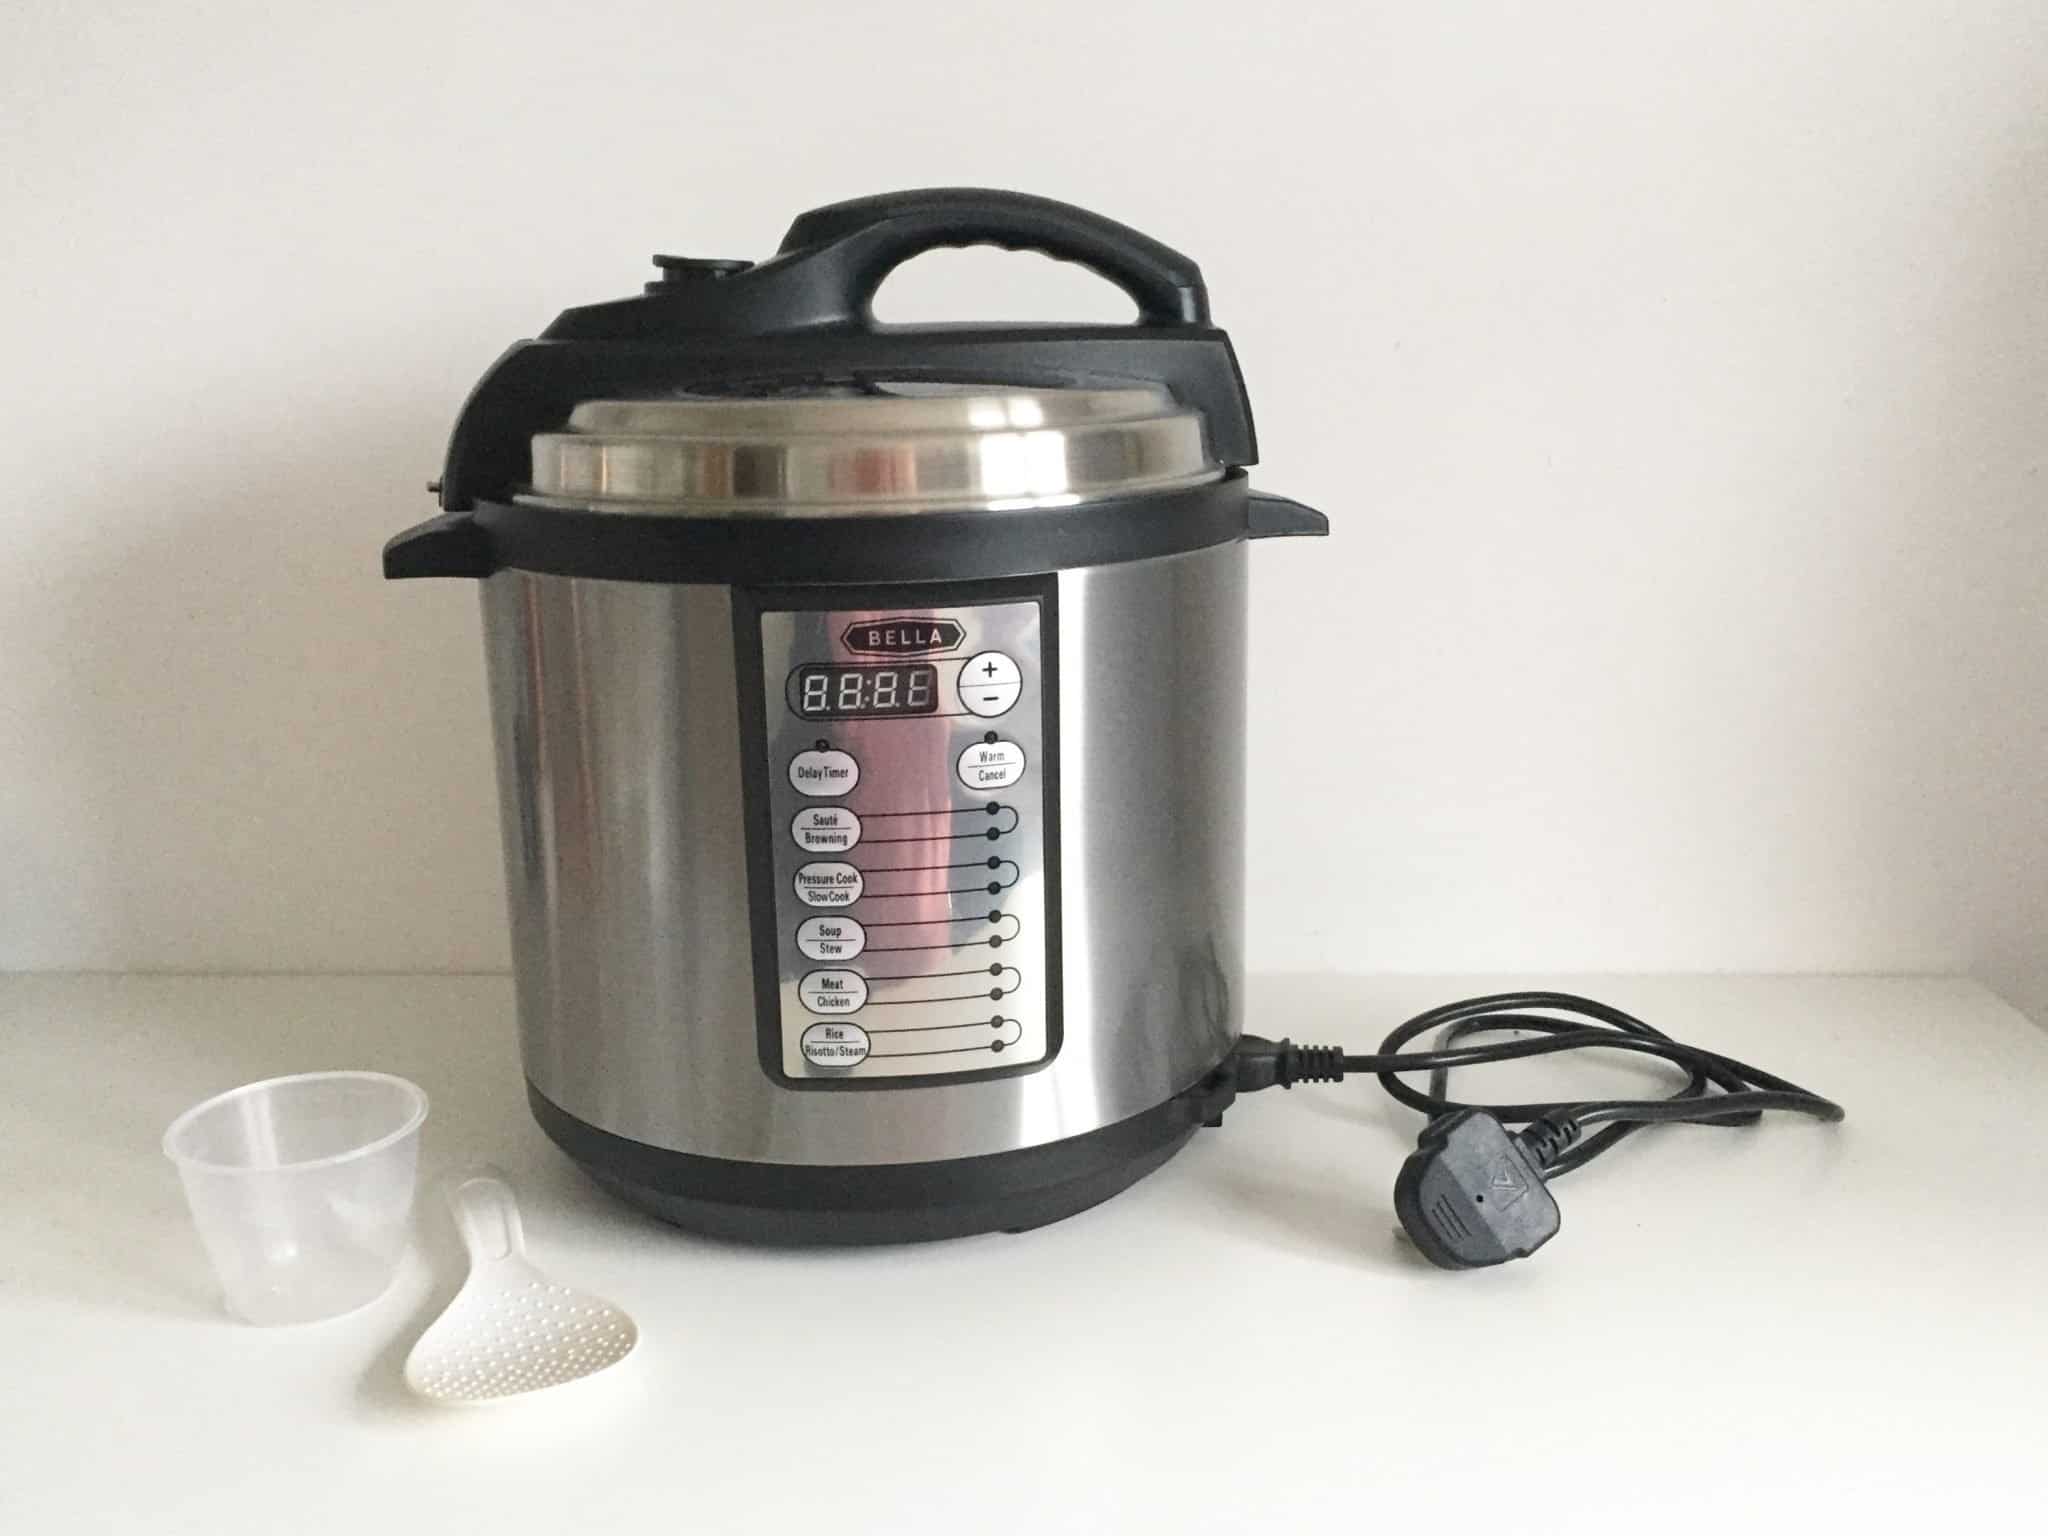
Prepping Your Electric Pressure Cooker
Before you start cooking lentils in your electric pressure cooker, it’s important to properly prepare the cooker to ensure safe and efficient cooking. Here are some essential steps to follow when prepping your electric pressure cooker:
Read the Instruction Manual: Every electric pressure cooker comes with an instruction manual that provides specific guidelines for its use. Take the time to read the manual thoroughly to familiarize yourself with the functions, settings, and safety precautions of your particular cooker. This will help you understand how to operate it correctly and minimize the risk of accidents or damage.
Check the Sealing Ring: The sealing ring is a silicone gasket that creates an airtight seal within the pressure cooker. Before using your electric pressure cooker, check the sealing ring to make sure it’s clean, properly positioned, and free from any damage or wear. A compromised sealing ring can affect the pressure cooking process and may result in leaks or incomplete cooking.
Ensure Proper Venting: Electric pressure cookers have a pressure release valve or a venting knob that allows steam to escape. Before cooking lentils, ensure that the venting knob is set to the “Sealing” position or that the pressure release valve is closed. This is crucial to build up the pressure inside the cooker and cook the lentils effectively.
Add Liquid: Most lentil recipes require the addition of liquid, such as water or broth, to cook the lentils. Refer to your recipe for the specific amount of liquid needed. In general, a 1:2 ratio of lentils to liquid is a good guideline. Adding sufficient liquid is critical for creating the necessary steam pressure that cooks the lentils to perfection.
Be Mindful of Maximum Capacity: Electric pressure cookers have a maximum fill line that indicates the maximum amount of food or liquid that can be placed in the cooker. Avoid exceeding this limit to prevent any potential safety hazards and ensure optimal cooking results. It’s better to cook lentils in smaller batches than to overload the cooker.
Clean the Pot: Before using your electric pressure cooker, ensure that the cooking pot is clean and free from any food residues or debris. Wash it thoroughly with warm water and mild detergent. Also, wipe the exterior of the cooker to remove any dirt or fingerprints. Keeping your electric pressure cooker clean not only promotes food safety but also extends its lifespan.
By following these steps, you can properly prep your electric pressure cooker for cooking lentils. Taking the time to familiarize yourself with the cooker’s functions and ensuring its proper operation will result in safe and efficient cooking. Now that your cooker is prepped and ready to go, it’s time to start cooking delicious lentil recipes!
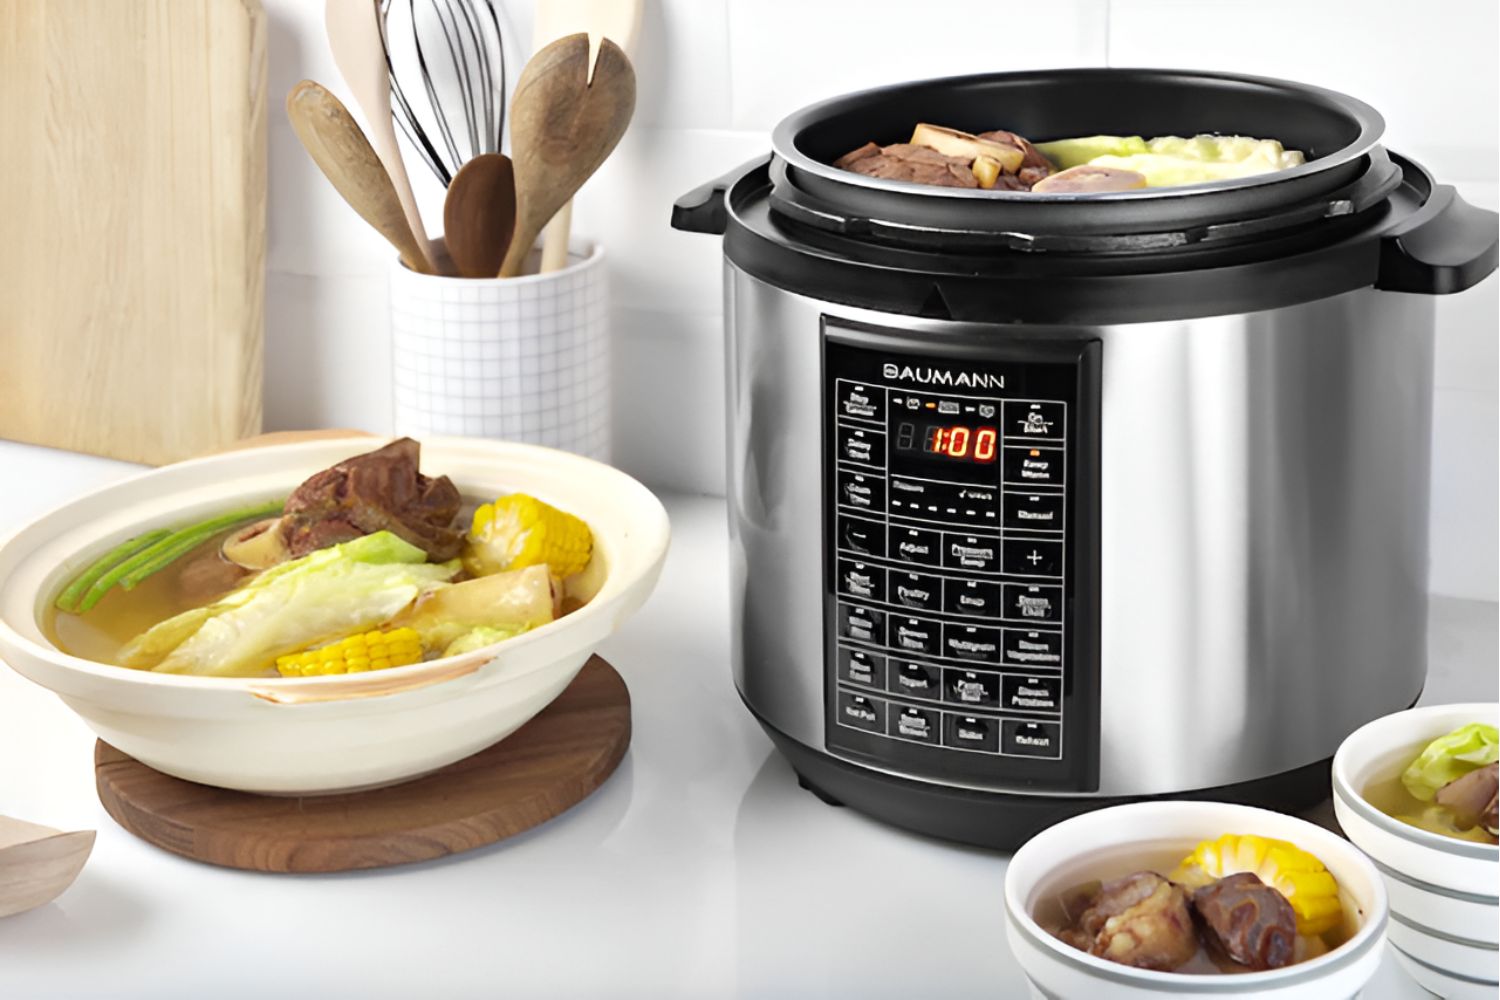
Cooking Lentils in an Electric Pressure Cooker
Cooking lentils in an electric pressure cooker is a quick and efficient way to prepare this nutritious ingredient. The high-pressure environment of the cooker allows for faster cooking times and helps to lock in the flavors and nutrients of the lentils. Here’s how to cook lentils in an electric pressure cooker:
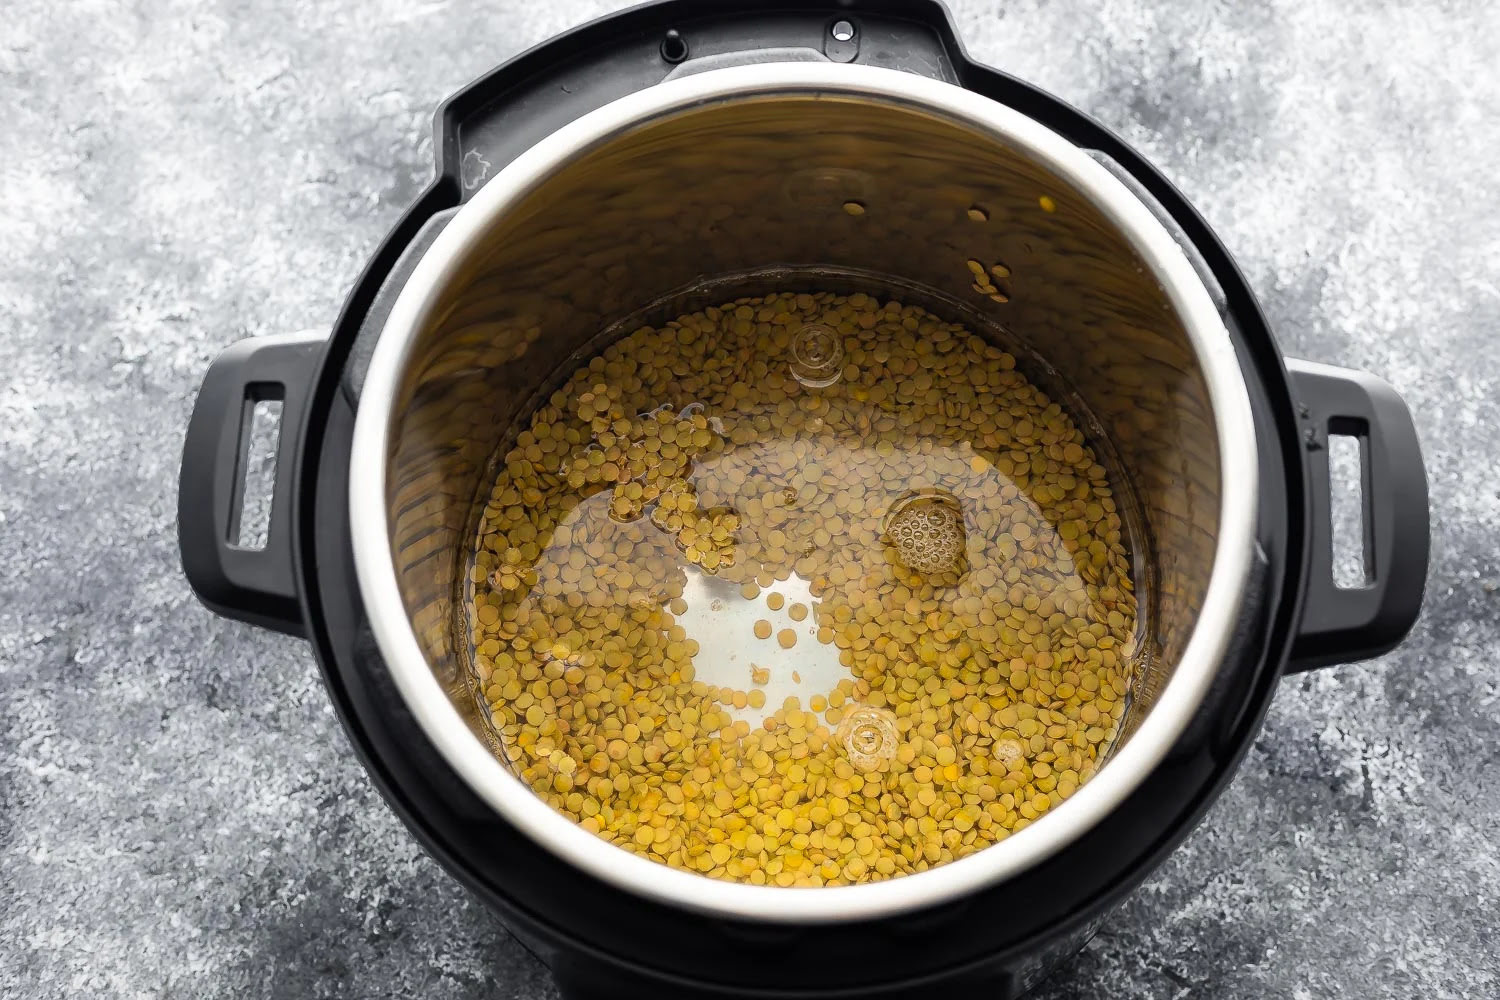
Rinse the Lentils: Start by rinsing the lentils thoroughly under cold water to remove any dirt or debris. This step is essential to ensure clean and flavorful lentils.
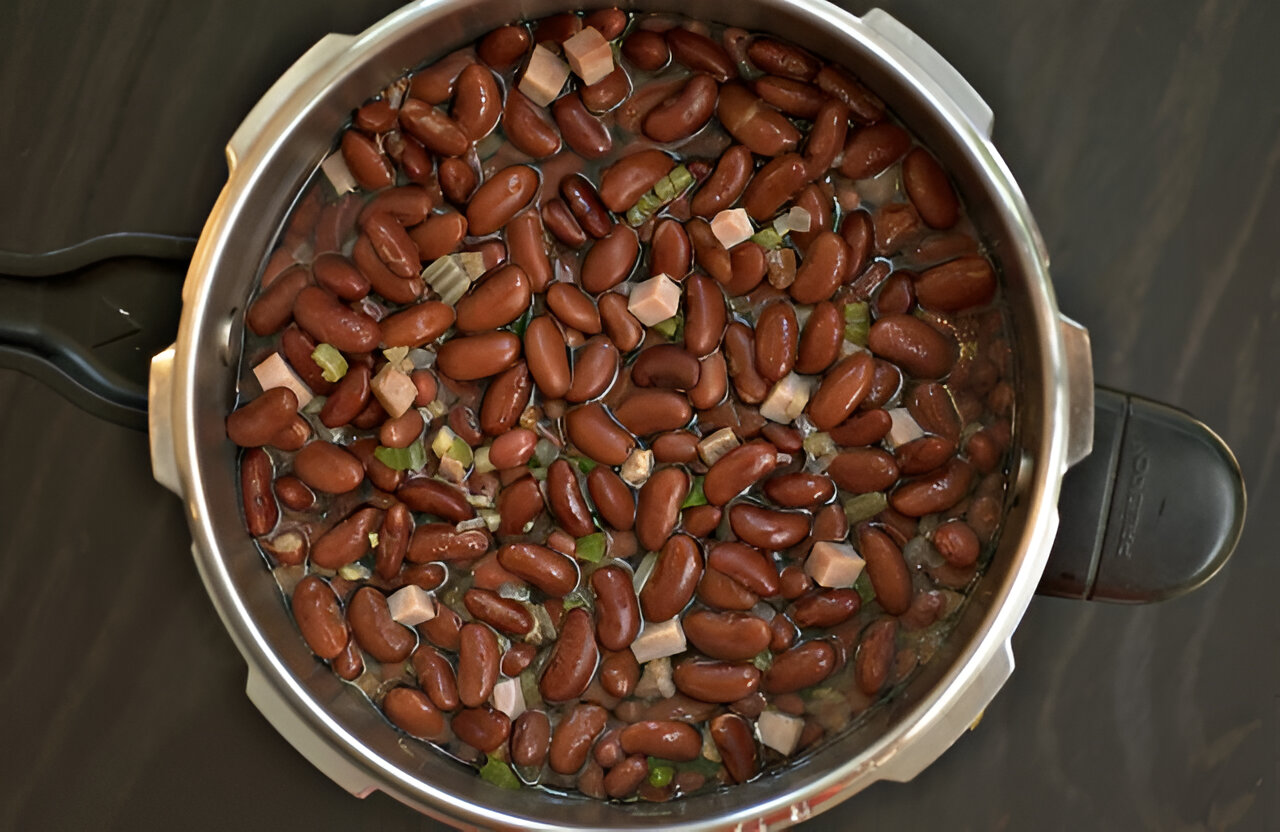
Add Lentils and Liquid: Place the rinsed lentils into the cooking pot of your electric pressure cooker. Add the appropriate amount of liquid, such as water, broth, or a combination, according to your recipe. The liquid should be enough to cover the lentils by at least 1 inch.
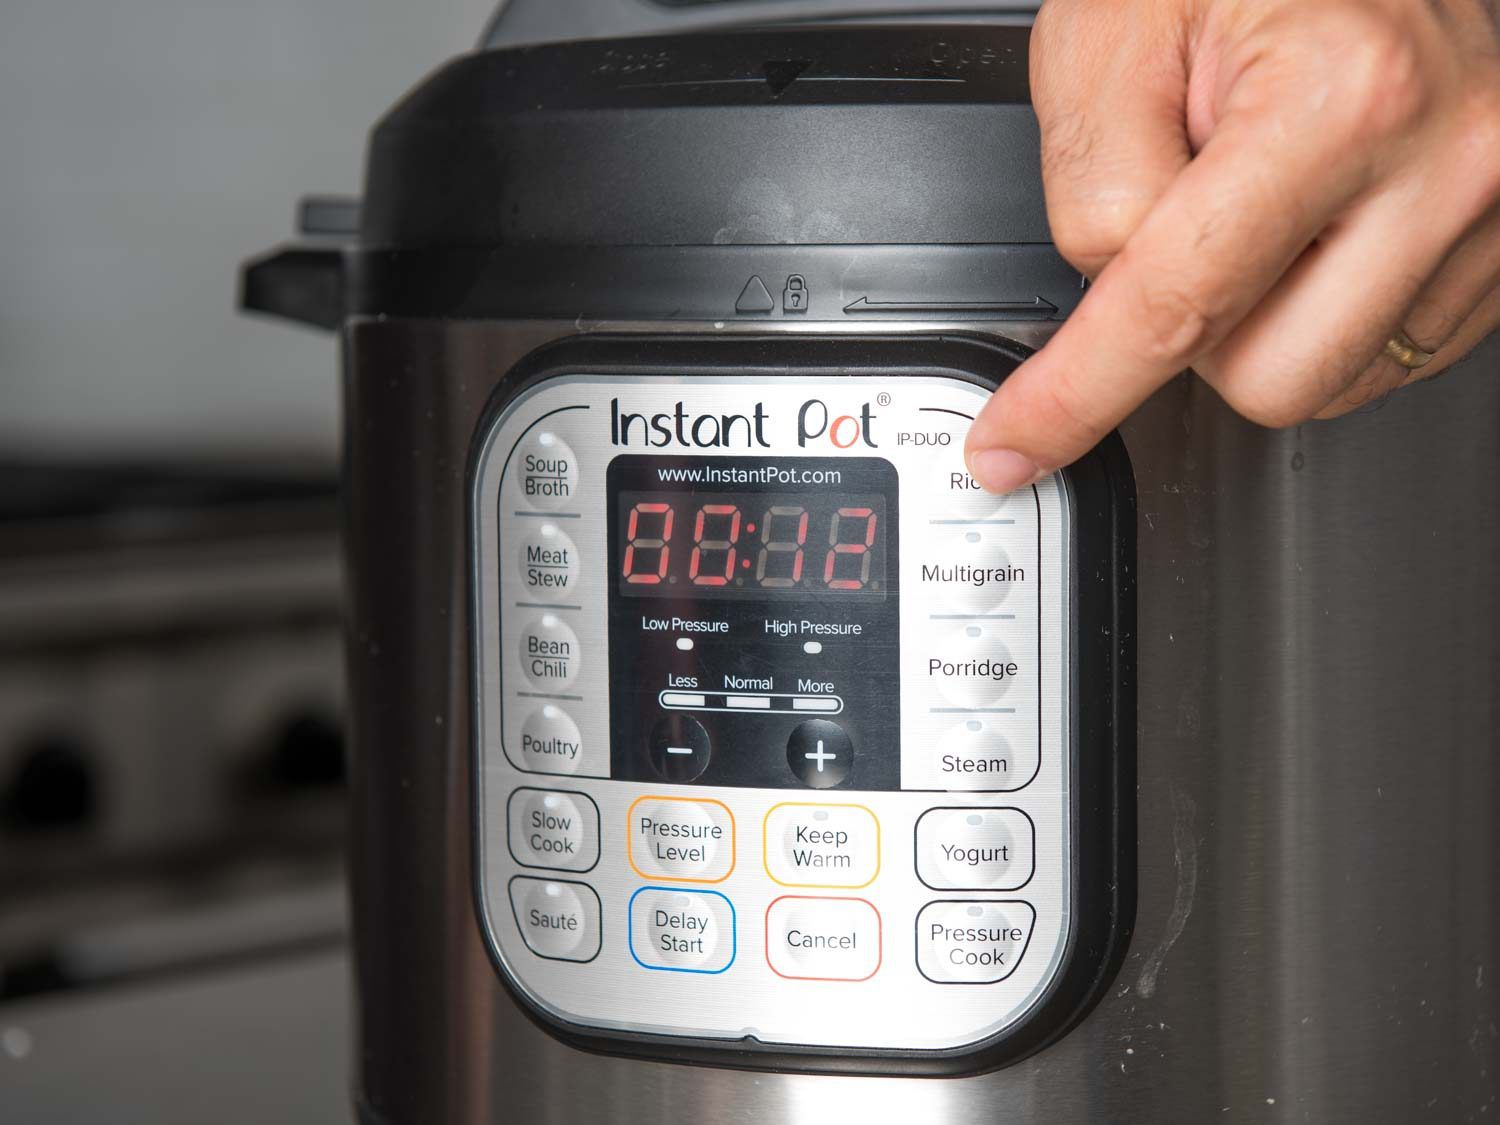
Seal the Pressure Cooker: Securely close the lid of the electric pressure cooker, making sure it is properly aligned. Refer to your specific cooker’s instructions for locking and sealing the lid correctly.
Select the Cooking Time: Set the cooking time on your electric pressure cooker according to the type and quantity of lentils you’re using. Consult the recipe or follow general guidelines for lentil cooking times. Typically, lentils cook within 5 to 15 minutes under high pressure, depending on the variety.
Start Cooking: Once you have set the cooking time, start the pressure cooking process. The cooker will take some time to build up pressure before the cooking timer begins. Be patient and wait until the pressure indicator shows that the cooker has reached the desired pressure level.
Cook Under Pressure: Once the pressure cooker has reached the desired pressure level, the cooking time will begin. The lentils will cook under high pressure, and you won’t need to monitor the process. The cooker will automatically regulate the temperature and pressure to ensure even and thorough cooking.
Release the Pressure: After the cooking time is complete, release the pressure from the cooker following the recommended method for your specific model. There are two common methods: quick release and natural release. If the recipe calls for preserving the texture, opt for natural release, allowing the pressure to release naturally over time. If you’re short on time or the recipe doesn’t require a specific texture, do a quick release by carefully turning the pressure release valve or knob to vent the steam.
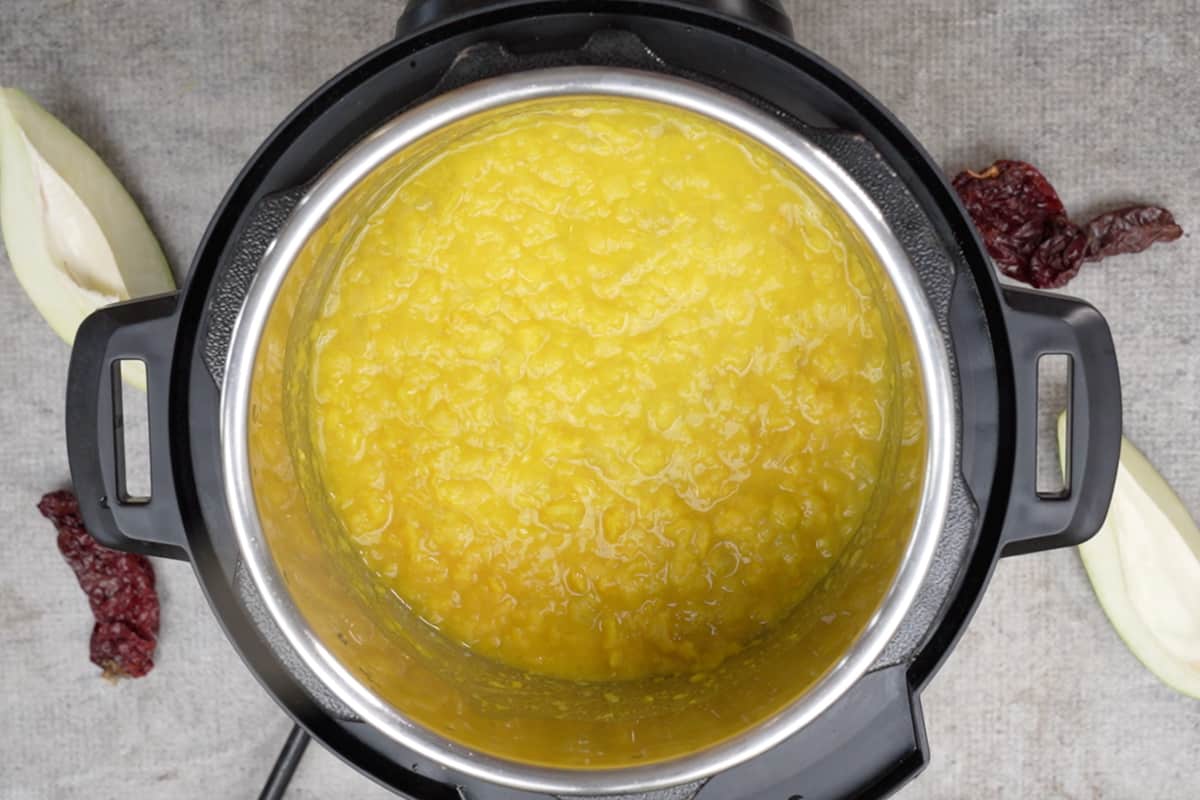
Open the Lid: Once the pressure has been fully released, it is safe to open the lid of the electric pressure cooker. Use caution while opening to avoid any residual steam. Give the lentils a gentle stir to ensure they are evenly cooked and check for the desired tenderness.
Enjoy! Your perfectly cooked lentils are now ready to be enjoyed in your favorite recipes. Season them with additional spices, herbs, or dressings according to your taste preferences. Use them as a base for soups, stews, salads, or as a flavorful side dish to complement your main course.
Cooking lentils in an electric pressure cooker not only saves time but also produces delicious and tender results. Experiment with different lentil varieties, cooking times, and seasonings to discover your favorite lentil dishes. With the convenience and efficiency of an electric pressure cooker, you’ll be able to whip up tasty, nutrient-packed meals in no time.
Cooking Times for Different Types of Lentils
When cooking lentils in an electric pressure cooker, it’s important to be mindful of the different cooking times required for each type of lentil. Properly timing the cooking process ensures that your lentils are cooked to your desired tenderness and texture. Here are the approximate cooking times for common types of lentils:
Green Lentils: Green lentils, also known as French lentils, have a firm texture and hold their shape well when cooked. They generally require around 15 minutes of cooking time under high pressure in an electric pressure cooker. However, if you prefer a softer texture, you can increase the cooking time to 20-25 minutes.
Red Lentils: Red lentils cook relatively quickly and have a tendency to become mushy. They require around 5-8 minutes of cooking time under high pressure. This makes red lentils an excellent choice for soups, stews, and Indian dal recipes that call for a smooth and creamy consistency.
Brown Lentils: Brown lentils are the most common variety of lentils and have a mild, earthy flavor. They take slightly longer to cook compared to green lentils, typically requiring around 12-15 minutes of cooking time under high pressure. They retain a slight firmness even after cooking, making them versatile for various dishes.
Black Lentils: Black lentils, also known as beluga lentils, have a rich, earthy flavor and a firm texture that holds up well when cooked. They require approximately 15-18 minutes of cooking time under high pressure to achieve a tender yet slightly firm texture.
Puy Lentils: Puy lentils, originating from the Le Puy region in France, are known for their dark green color and robust flavor. They have a firm texture and hold their shape when cooked. Puy lentils generally require around 15-18 minutes of cooking time under high pressure.
These cooking times are general guidelines, and the actual cooking time may vary based on factors such as the age of lentils, the altitude at which you are cooking, and your personal preference for tenderness. It’s always a good idea to refer to the instruction manual of your specific electric pressure cooker for more precise cooking time recommendations.
It’s important to note that if you are cooking lentils in a recipe that includes other ingredients like vegetables or meat, you may need to adjust the cooking time accordingly. In such cases, it’s best to follow the cooking time guidelines provided in the recipe or consult a trusted source for specific instructions.
By paying attention to the recommended cooking times and adjusting them based on your desired texture, you can ensure that your lentils are perfectly cooked and retain their ideal taste and consistency. Experiment with different cooking times and lentil varieties to find your preferred cooking method, and enjoy the versatility and nutritious benefits that lentils have to offer.
Quick Release vs. Natural Release
When cooking lentils in an electric pressure cooker, the release of pressure after cooking is an important step that can impact the final texture and consistency of your lentils. There are two common methods for releasing pressure in an electric pressure cooker: quick release and natural release. Let’s explore each method and when to use them:
Quick Release: Quick release, also known as manual release or rapid release, involves manually releasing the pressure from the cooker immediately after the cooking time is complete. To quick release, carefully turn the pressure release valve or knob to the “Venting” position. This allows the steam to escape quickly, and within a few minutes, the pressure inside the cooker will drop, and it will be safe to open the lid.
Quick release is best suited for recipes that require a specific texture or need to be immediately cooled down after cooking. It is ideal for preventing overcooking and achieving a firmer texture in lentils. However, keep in mind that quick release can result in some liquid splattering or foaming, so take precautions to avoid burns or damage.
Natural Release: Natural release involves allowing the pressure to gradually decrease on its own without intervention. After the cooking time is complete, simply leave the pressure cooker untouched and let the pressure release naturally. Depending on the recipe and the amount of pressure built up in the cooker, natural release may take anywhere from 10 to 20 minutes or more.
Natural release is well-suited for recipes that require a more tender and soft texture, like soups, stews, or lentils that are meant to be creamy. It allows for a gentle and gradual reduction in pressure, which helps to prevent the lentils from braking apart or turning mushy. This method also eliminates the risk of any sudden splatters or foaming.
It’s important to follow the recommended release method specified in your recipe. However, if the recipe doesn’t provide specific instructions, you can choose the release method based on your desired texture and cooking preferences. Quick release is suitable if you prefer firmer lentils or need to stop the cooking process quickly, while natural release is ideal for achieving a softer texture and allowing flavors to meld.
Regardless of the release method you choose, always exercise caution when handling the pressure cooker. Use pot holders or oven mitts to protect your hands, and position your body away from the steam when releasing pressure.
Understanding the differences between quick release and natural release can help you achieve the desired texture and consistency in your cooked lentils. Experiment with both methods to find which one works best for your favorite lentil recipes. By mastering the art of pressure release, you’ll be able to enjoy perfectly cooked lentils every time.
Flavoring Your Lentils
Lentils are incredibly versatile and can be transformed into a delicious and flavorful dish with the right combination of spices, herbs, and seasonings. While lentils have a mild earthy flavor on their own, adding additional flavors enhances their taste and takes them to the next level. Here are some ideas for flavoring your lentils:
Onion and Garlic: Sautéing chopped onions and minced garlic in oil or butter before adding the lentils can add a savory and aromatic base to your dish. The caramelized onions and garlic infuse the lentils with richness and depth of flavor.
Aromatics and Spices: Enhance the flavor of your lentils by incorporating various spices and herbs. Common spices like cumin, coriander, paprika, turmeric, and garam masala can add warmth, complexity, and a touch of heat. Fresh or dried herbs like thyme, rosemary, parsley, or cilantro can provide a refreshing and aromatic touch.
Citrus Fruits: Squeeze some fresh lemon, lime, or orange juice over cooked lentils to brighten the flavors. The citrus juice adds a tangy and refreshing element that balances the earthy taste of lentils. You can also add some grated zest for an extra burst of citrus flavor.
Vinegar and Sauces: Adding a splash of vinegar, such as balsamic, apple cider, or red wine vinegar, can add acidity and complexity to your lentils. Alternatively, you can incorporate sauces like soy sauce, Worcestershire sauce, hot sauce, or coconut aminos to create unique flavor profiles.
Stocks and Broths: Instead of using plain water to cook your lentils, consider using vegetable, chicken, or beef broth. The lentils will absorb the flavors of the broth, resulting in a more flavorful and seasoned dish. You can also add a bouillon cube or stock concentrate to amp up the taste.
Chilies and Peppers: Adding chopped chilies or peppers to your lentils can bring a touch of heat to the dish. Whether you prefer fresh chili peppers or dried chili flakes, the spiciness adds a kick of flavor and a hint of smokiness.
Tomato Products: Incorporating tomato paste, diced tomatoes, or tomato sauce can add richness and tanginess to your lentil recipes. The acidity of tomatoes complements the earthy flavors of lentils and creates a more robust and savory dish.
Salt and Pepper: Don’t forget to season your lentils with salt and pepper throughout the cooking process. Taste the lentils as they cook and adjust the seasoning to your preference. Salt helps to enhance the overall flavors, while pepper adds a subtle hint of spiciness.
Remember, the key to flavoring your lentils is to experiment and find combinations that you enjoy. Start with small amounts of spices and seasonings, and gradually build up the flavors until you reach the desired taste. Don’t be afraid to get creative by combining different herbs, spices, and ingredients to create your signature lentil dish.
By mastering the art of flavoring, you can turn a simple pot of lentils into an appetizing and satisfying meal. Get adventurous, try new combinations, and embrace the endless possibilities of flavoring your lentils!
A Variety of Delicious Lentil Recipes
Lentils are not only nutritious but also incredibly versatile, making them a perfect ingredient for a wide range of delicious recipes. Whether you’re a fan of soups, salads, stews, or even patties, there’s a lentil recipe to suit every palate. Here are a few mouthwatering lentil recipes to inspire your culinary adventures:
1. Lentil Soup: A comforting and hearty bowl of lentil soup is perfect for cold winter days. Sauté onions, carrots, and celery in a pot, then add lentils, vegetable or chicken broth, herbs, and seasonings. Let it simmer until the lentils are tender. Serve hot with a side of crusty bread for a satisfying meal.
2. Lentil Salad: For a refreshing and nutritious salad, combine cooked lentils with fresh vegetables like cherry tomatoes, cucumbers, bell peppers, and red onions. Toss with a tangy vinaigrette made from lemon juice, olive oil, Dijon mustard, and herbs. Top it off with crumbled feta or goat cheese for added creaminess.
3. Lentil Curry: Lentils are a staple in many Indian curries. Sauté onions, garlic, and ginger in a pan, then add spices like turmeric, cumin, coriander, and garam masala. Stir in lentils, coconut milk, and vegetable broth. Let it simmer until the lentils are fully cooked and the flavors have melded together. Serve with steamed rice or naan bread.
4. Lentil Burgers: Lentil burgers are a delicious plant-based alternative to traditional burgers. Mash cooked lentils with breadcrumbs, grated vegetables, eggs, and seasonings. Form into patties and pan-fry until golden brown. Serve on a bun with your favorite toppings and enjoy a hearty and protein-packed meal.
5. Lentil and Spinach Curry: This flavorful dish combines the goodness of lentils with the freshness of spinach. Sauté onions, garlic, and spices in a pan, then add lentils, vegetable broth, and canned tomatoes. Let it simmer until the lentils are tender. Add in fresh spinach and cook until wilted. Serve over rice or with naan bread for a nutritious and satisfying meal.
6. Lentil and Vegetable Stir-Fry: Stir-fried lentils with an assortment of vegetables create a vibrant and nutritious dish. Sauté a medley of vegetables like bell peppers, broccoli, carrots, and snap peas in a hot pan. Add cooked lentils and a sauce made from soy sauce, garlic, ginger, and honey. Toss until everything is well-coated and heated through. Serve over rice or noodles.
7. Lentil Shepherd’s Pie: Lentils can also be the star of a comforting and vegetarian version of Shepherd’s Pie. Simmer cooked lentils with carrots, onions, garlic, and vegetable broth. Transfer the lentil mixture to a baking dish and top with mashed potatoes. Bake until golden and bubbly. Serve as a filling and satisfying main dish.
These are just a few examples of the delicious lentil recipes you can try. Don’t be afraid to experiment with different flavor profiles, spices, and ingredients to create your own unique lentil dishes. Lentils are versatile and adaptable, allowing you to unleash your creativity in the kitchen while enjoying the nourishing benefits they provide.
So, roll up your sleeves, gather your ingredients, and get ready to savor the scrumptious flavors of lentils in these delightful recipes!
Storing and Freezing Cooked Lentils
After cooking a batch of lentils, you may find yourself with leftovers or want to prepare ahead for future meals. Proper storage and freezing techniques are key to preserving the flavor and texture of cooked lentils. Here’s how to store and freeze cooked lentils:
Storing Cooked Lentils: Allow the cooked lentils to cool completely before storing. Place the lentils in an airtight container or a sealable plastic bag. Store them in the refrigerator, where they can stay fresh for up to 4 to 5 days. Make sure to label the container with the date to keep track of their freshness.
Freezing Cooked Lentils: Freezing is an excellent option for extending the shelf life of cooked lentils. To freeze, portion out the desired amount of cooked lentils into freezer-safe containers, leaving some headspace to allow for expansion. Alternatively, you can freeze them in ice cube trays and transfer the frozen lentil cubes to a freezer bag for easy portioning later on. Properly stored, cooked lentils can be frozen for up to 3 months.
Thawing and Reheating Cooked Lentils: When ready to use the frozen lentils, transfer them to the refrigerator and allow them to thaw overnight. Once thawed, lentils can be reheated on the stovetop or in the microwave. If reheating on the stovetop, add a splash of water or broth to prevent sticking and heat over medium-low heat until warmed through. In the microwave, cover the lentils with a microwave-safe lid or a damp paper towel and heat them in short intervals, stirring in between, until heated to your desired temperature.
Tips for Freezing and Thawing Lentils:
- Try to freeze lentils in single-serving or meal-sized portions for easier portion control.
- Consider adding a bit of extra liquid, such as broth or tomato sauce, to the lentils before freezing to help retain moisture during reheating.
- Label your containers with the date and contents to easily identify and keep track of your frozen lentils.
- If you plan to use frozen lentils in a soup or stew, you can add them directly to the dish without thawing.
- Once thawed, avoid refreezing lentils as it can affect their texture and quality.
Properly stored and handled, cooked lentils can be a convenient and time-saving ingredient for future meals. Whether you want to meal prep, have leftovers, or simply love having cooked lentils on hand, storing and freezing them properly will ensure that they taste just as delicious when you’re ready to use them.
So, the next time you cook lentils, don’t fret about having too much. Store or freeze your cooked lentils using these guidelines, and enjoy the convenience of having this nutritious ingredient ready to go whenever inspiration strikes!
Tips for Perfectly Cooked Lentils Every Time
Cooking lentils to perfection may seem like a simple task, but there are a few tips and tricks that can help you achieve consistently delicious results. Here are some tips for cooking lentils perfectly every time:
Rinse Lentils: Before cooking, always rinse your lentils under cold water to remove any dirt or debris. This step ensures cleaner lentils and improves the overall taste of the dish.
Use the Right Ratio: Follow the recommended lentil-to-liquid ratio for your specific lentil variety. As a general rule, use a 1:2 ratio of lentils to liquid. For example, if you’re cooking 1 cup of lentils, add 2 cups of liquid.
Choose the Right Pot Size: Select a pot that is large enough to accommodate the lentils and liquid comfortably. Lentils tend to expand while cooking, so using a pot with enough room helps prevent overflow during the cooking process.
Soak if Desired: Although not necessary for all lentil varieties, soaking lentils can help reduce cooking time and enhance digestibility. If you choose to soak, cover the lentils with water and let them sit for 1-2 hours before cooking. Drain and rinse before adding them to the pot.
Don’t Overcook: Be mindful of the cooking time for your specific lentil variety. Overcooking can result in mushy lentils, while undercooking can lead to toughness. Check the cooking time recommendations and closely monitor the lentils to achieve the desired texture.
Use Low Sodium Broth or Stock: If using broth or stock to cook your lentils, opt for low-sodium options. This allows you to have better control over the saltiness of the final dish and prevents it from becoming overly seasoned.
Control the Heat: When cooking lentils on the stovetop, start by bringing them to a boil over high heat, then reduce the heat to low and let them simmer gently. This helps prevent rapid boiling, which can cause lentils to break apart or become mushy.
Add Salt Towards the End: Avoid adding salt to the lentils at the beginning of the cooking process. Salt can toughen the texture of lentils if added too early. Instead, add salt or other seasonings towards the end of cooking or after the lentils are fully cooked.
Taste and Adjust: Before removing the lentils from the heat, taste them to ensure they are cooked to your desired tenderness. If needed, you can continue cooking for a few more minutes or add additional seasoning to enhance the flavor.
Rest and Absorb: After cooking, let the lentils sit off the heat for a few minutes. This allows them to absorb any remaining liquid and develop a more cohesive texture and flavor.
By incorporating these tips into your lentil cooking routine, you’ll be able to consistently achieve perfectly cooked lentils with optimal texture and flavor. Whether you’re making soups, salads, or main courses, these simple tricks will help elevate your lentil dishes to new heights.
So, don’t be afraid to experiment, adjust cooking times, and seasonings according to your taste preferences. With practice and attention to detail, you’ll master the art of cooking lentils and savor the wholesome and satisfying goodness they bring to your meals.
Frequently Asked Questions
Here are some frequently asked questions about cooking lentils in an electric pressure cooker:
1. Can I cook different types of lentils together in an electric pressure cooker?
It is generally not recommended to cook different types of lentils together in an electric pressure cooker. Different lentil varieties have varying cooking times and textures, so cooking them together may result in unevenly cooked lentils. To ensure the best results, it’s best to cook each type of lentil separately.
2. Do I need to pre-soak lentils before cooking them in an electric pressure cooker?
Pre-soaking lentils is not required for all varieties, but it can help reduce cooking time and enhance digestibility. While some lentils, like red lentils, don’t require soaking, other types, such as green or brown lentils, benefit from a pre-soaking of 1-2 hours. Soaking also helps to remove any phytic acid and enzyme inhibitors, making lentils easier to digest.
3. Can I use canned lentils instead of cooking them from scratch?
Yes, you can use canned lentils as a convenient shortcut. Canned lentils are pre-cooked and ready to eat, so you can simply drain and rinse them before using them in your recipes. However, keep in mind that the texture and flavor of canned lentils may differ slightly from freshly cooked ones.
4. Can I freeze cooked lentils?
Absolutely! Cooked lentils freeze well and can be stored for future use. Allow the cooked lentils to cool completely, then transfer them to a freezer-safe container or bag. Label and date the container, and they can be frozen for up to 3 months. Thaw the lentils in the refrigerator before reheating.
5. How can I prevent lentils from sticking to the bottom of the pressure cooker?
To prevent lentils from sticking to the bottom of the pressure cooker, make sure to thoroughly rinse them before cooking. Additionally, add enough liquid to cover the lentils and avoid using excessive heat. If needed, you can also stir the lentils occasionally as they cook to ensure even heat distribution.
6. What do I do if my lentils are undercooked or overcooked?
If your lentils are undercooked, you can simply return them to the pressure cooker and cook for a few more minutes until they reach the desired tenderness. On the other hand, if your lentils are overcooked and too soft, you can use them in soups or purees where the texture is less noticeable. Alternatively, you can use overcooked lentils as a thickening agent or incorporate them into dishes like veggie burgers or patties.
7. Can I add salt and seasoning at the beginning of cooking lentils?
It is generally recommended to add salt and seasoning towards the end of cooking lentils. Adding salt at the beginning can result in firmer lentils, while adding it towards the end allows you to have better control over the seasoning. However, if you prefer to add seasoning at the beginning, be mindful of the lentil variety and your personal taste preferences.
With these frequently asked questions answered, you’re now equipped with the knowledge to confidently cook lentils in an electric pressure cooker. Enjoy exploring the vast array of lentil recipes and experimenting with different lentil varieties to create delicious and wholesome meals.