Introduction
Creating a chatting website is an exciting project that allows people to communicate and connect with each other in real-time. With the continuous growth of online communication, having a platform where users can chat, share information, and engage in discussions is becoming increasingly important. If you’re looking to develop your own chatting website, this guide will walk you through the steps using PHP programming language.
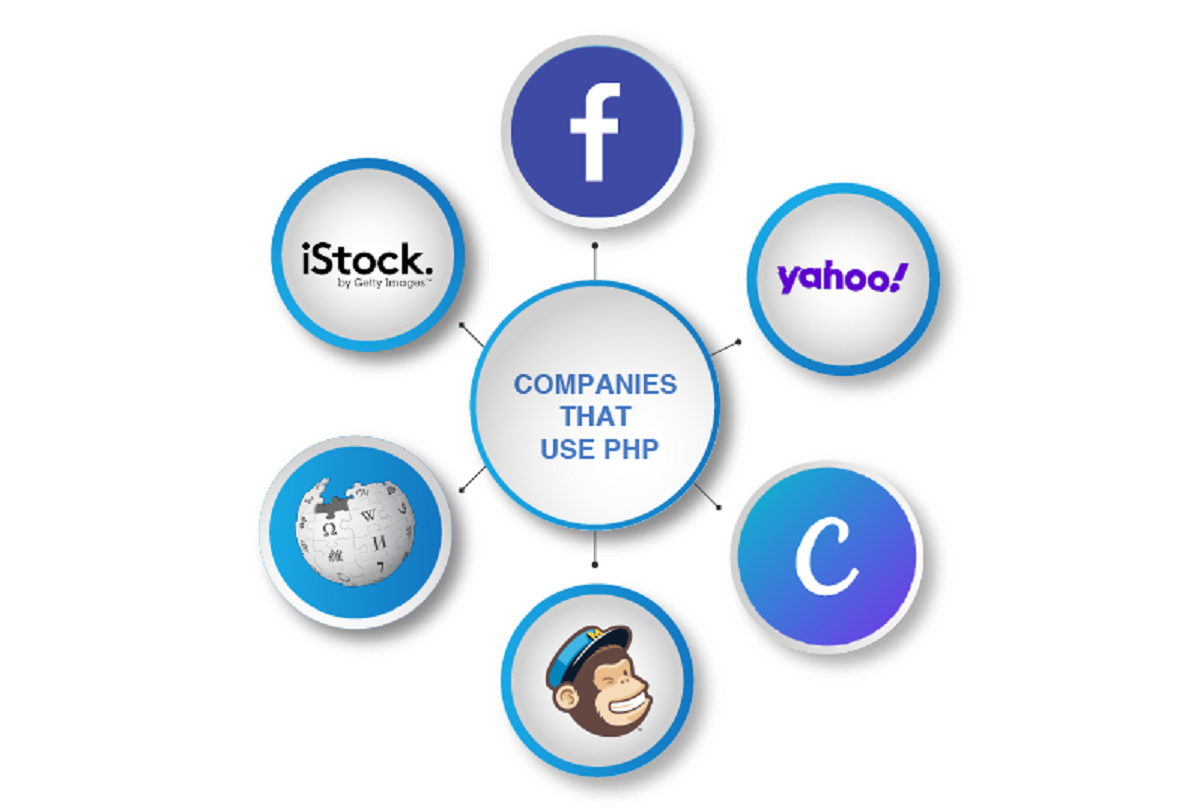
PHP, which stands for Hypertext Preprocessor, is a popular scripting language that is widely used for web development. It offers a powerful and flexible environment for building dynamic websites and applications. By utilizing PHP, you can create a robust backend system that can handle user registrations, database management, and real-time messaging.
In this tutorial, we will cover the complete process of creating a chatting website using PHP, HTML, CSS, and JavaScript. We will start by setting up the development environment, including installing the necessary tools such as a web server (like Apache), PHP interpreter, and a database management system (like MySQL). Once the development environment is set up, we will proceed to create the necessary components of the website, including the database, HTML layout, CSS styling, PHP functions, and JavaScript functions.
Throughout this tutorial, we will follow best practices for creating a secure and efficient chatting website. This includes implementing user authentication, data validation, and protection against common security vulnerabilities such as SQL injection and cross-site scripting (XSS) attacks. Additionally, we will optimize the website for performance by minimizing database queries, optimizing code, and utilizing caching techniques.
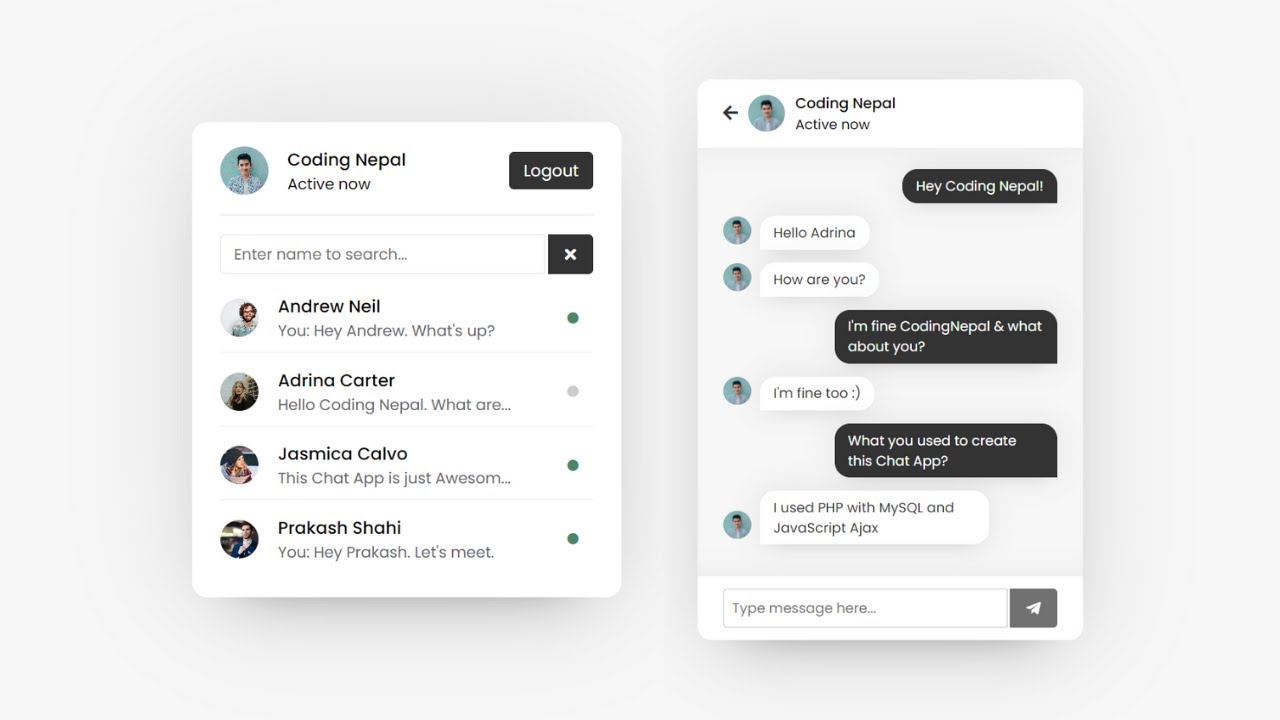
By the end of this tutorial, you will have a fully functional chatting website that allows users to create accounts, log in, send messages, view message history, and interact with other users in real-time. Whether you’re a beginner or an experienced developer, this tutorial will provide you with the knowledge and skills to create your own chatting website using PHP.
Setting Up Development Environment
Before we can start developing our chatting website using PHP, we need to set up the development environment. This involves installing the necessary tools and configuring them to work together seamlessly. Here are the steps to set up the development environment:
- Install a Web Server: To run PHP code, we need a web server. One popular option is Apache, which you can install on your local machine or use a remote server. Ensure that the web server is properly configured and running.
- Install PHP: Download and install the PHP interpreter on your machine. Make sure to choose a version compatible with your web server. After installation, configure the PHP settings, such as error reporting and extensions, as per your requirements.
- Install a Database Management System: Choose a database management system to store and retrieve data for your chatting website. MySQL is commonly used with PHP, but you can opt for other options such as PostgreSQL or SQLite. Install the database management system and configure it with appropriate credentials.
- Test the Setup: Verify that the web server, PHP, and the database management system are working correctly. Create a test PHP file with a simple “Hello World” message and run it in the browser. If you see the output, it means the setup is successful.
- Set Up a Code Editor: Choose a code editor to write your PHP code. Many popular options like Visual Studio Code, Sublime Text, or PhpStorm provide features like code highlighting, debugging, and version control integration. Set up the code editor according to your preferences.
- Create a Project Directory: Set up a dedicated directory on your machine to store all the files related to your chatting website. This will help keep your project organized and make it easier to manage and deploy in the future.
Once you have completed these steps, your development environment will be ready to start building your chatting website. Make sure to regularly backup your project files and database to prevent any potential data loss or code corruption. Now that we have our development environment set up, let’s move on to the next steps of creating the database and table for our website.
Creating Database and Table
Now that we have our development environment set up, the next step in creating our chatting website is to create the necessary database and table. The database will store all the user information, messages, and other relevant data for our website. Follow these steps to create the database and table:
- Choose a Database Name: Start by deciding on a name for your database. Select a name that is descriptive and related to your project to ensure clarity and organization.
- Create the Database: Use a database management tool such as phpMyAdmin or the command line to create the database. Connect to your database management system and execute the necessary SQL query to create the database with the chosen name.
- Select the Database: Once the database is created, connect to it in your PHP code using the appropriate database connectivity functions. This will allow you to interact with the database and perform operations such as fetching data or inserting records.
- Create the Table: Now it’s time to create the table that will hold the relevant data for your chatting website. Determine the fields needed for your website, such as user ID, username, password, message content, timestamp, etc. Create a SQL query to define the table structure with these fields, their data types, and any constraints or indexes.
- Execute the SQL Query: Execute the SQL query to create the table in the database. This can be done through your database management tool’s interface or programmatically using PHP code. Verify that the table is successfully created by checking for any errors or warnings.
It’s important to design your database schema carefully, ensuring that it meets the requirements of your chatting website while maintaining data integrity. Consider using normalization techniques to organize your data efficiently. Also, make sure to implement appropriate constraints and indexes to improve query performance and prevent data inconsistencies.
Congratulations! You have now created the database and table for your chatting website. In the next sections, we will move on to creating the HTML layout and CSS styling, followed by implementing the PHP and JavaScript functions for our website.
Creating HTML Layout
Now that we have our database and table set up, it’s time to create the HTML layout for our chatting website. The HTML layout will define the structure and components of our website, providing a user-friendly interface for interacting with the chat features. Follow these steps to create the HTML layout:
- Plan the Layout: Start by planning the overall layout of your chatting website. Determine the sections and components you want to include, such as the header, navigation bar, chat window, user list, input form, etc. Sketch out a wireframe to visualize the structure and arrangement of these elements.
-
Create the HTML File: Open your preferred code editor and create a new HTML file. Begin by adding the necessary document structure, including the doctype declaration, opening and closing
<html>tags, and the<head>section. -
Add the Title and Meta Tags: Within the
<head>section, add the<title>tag to specify the title of your website. Also, include any relevant meta tags for search engine optimization (SEO) and favicon declaration. -
Build the Body: Inside the
<body>tag, start building the structure of your chat website. Add the header section, navigation bar, and main content area using appropriate HTML elements like<header>,<nav>, and<main>. -
Design the Chat Window: Within the main content area, create the chat window where the messages will be displayed. Use HTML elements like
<div>or<ul>to structure the chat messages and apply CSS styles to give it an appealing look. -
Include User List: Next, create the user list section where the online users will be displayed. Use an appropriate HTML element, such as
<ul>or<div>, and apply CSS styles to distinguish each user and indicate their online status. -
Create Input Form: Add an input form at the bottom of the chat window to allow users to type and send messages. Use
<form>and<input>elements to create the form and customize it with CSS styles.
Remember to utilize CSS classes and IDs to apply styles and ensure proper structure and hierarchy in your HTML code. This will make it easier to maintain and update the website in the future. Additionally, consider using responsive design techniques to make your chatting website accessible on different devices and screen sizes.
Congratulations! You have now created the HTML layout for your chatting website. In the next section, we will move on to creating the CSS styling to enhance the visual appearance of our website and make it more engaging for users.
Creating CSS Styling
With the HTML layout of our chatting website in place, it’s time to add CSS styling to make it visually appealing and user-friendly. CSS (Cascading Style Sheets) allows us to customize the appearance of our website, including colors, fonts, layout, and more. Follow these steps to create the CSS styling for your chatting website:
-
Create a CSS File: Open your preferred code editor and create a new CSS file. Save it with an appropriate name, such as “style.css”, and link it to your HTML file using the
<link>tag inside the<head>section. -
Target HTML Elements: Use CSS selectors to target specific HTML elements and apply styles to them. You can target elements by their tag name, class, or ID. For example, to style the chat window, select the relevant
<div>or<ul>element. - Apply Styles: Use CSS properties and values to apply the desired styles to the targeted HTML elements. Specify properties such as color, font-family, background-color, padding, margin, etc. Experiment with different values to achieve the desired visual effects.
- Use CSS Frameworks: Consider using CSS frameworks like Bootstrap or Bulma to speed up the styling process. These frameworks provide pre-designed components and responsive grid systems that you can easily customize to fit your chatting website’s design requirements.
- Responsive Design: Implement responsive design techniques to ensure that your chatting website looks great on different devices and screen sizes. Use media queries to define styles for specific screen widths and adapt the layout to provide an optimal viewing experience for users.
- Test and Refine: Regularly test your CSS styles in different browsers to ensure cross-browser compatibility. Make adjustments as needed and refine your styling until you achieve the desired visual appearance and user experience.
Remember to keep your CSS code organized and modular by using classes and IDs effectively. This will make it easier to manage and update your styling in the future. Additionally, consider using CSS preprocessors like Sass or Less, which offer advanced features such as variables, mixins, and nesting, to streamline your styling workflow.
Congratulations! You have now created the CSS styling for your chatting website. In the next section, we will move on to creating the PHP functions to handle user registration, login, and messaging functionalities for our website.
Creating PHP Functions
Now that we have the HTML layout and CSS styling in place, it’s time to implement the PHP functions that will handle the core functionalities of our chatting website. PHP will help us manage user registration, login, message retrieval, and sending messages in real-time. Follow these steps to create the PHP functions for your chatting website:
-
Connect to the Database: Use PHP’s database connectivity functions, such as
mysqli_connect()or PDO, to establish a connection to your database. Provide the necessary credentials and select the appropriate database. - Implement User Registration: Create a PHP function to handle user registration. This function will receive input from the registration form, validate the data, and store it in the database. Implement functionality to check for duplicate usernames or emails and securely hash user passwords.
- Implement User Login: Create a PHP function to handle user login. This function will receive the login credentials, validate them against the stored user data in the database, and create a session for the user. Implement functionality to securely store and retrieve session data.
- Retrieve Chat Messages: Create a PHP function to retrieve chat messages from the database. This function will query the database to fetch the latest messages and format them appropriately for display in the chat window. Implement pagination or infinite scrolling functionality to handle a large number of messages.
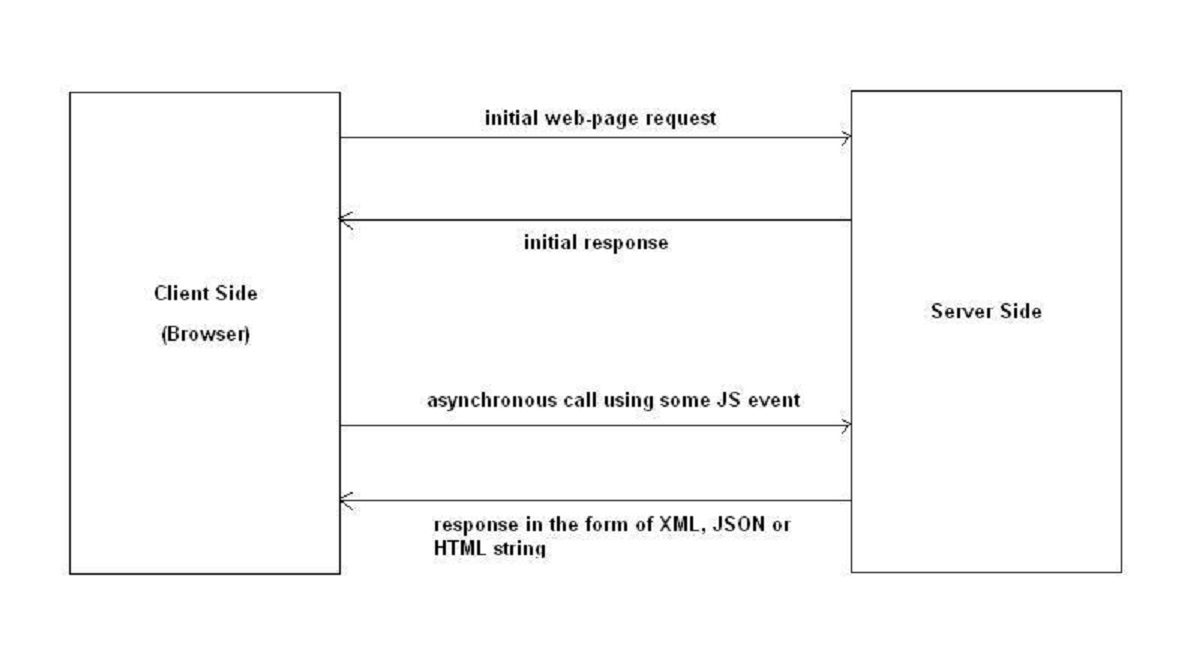
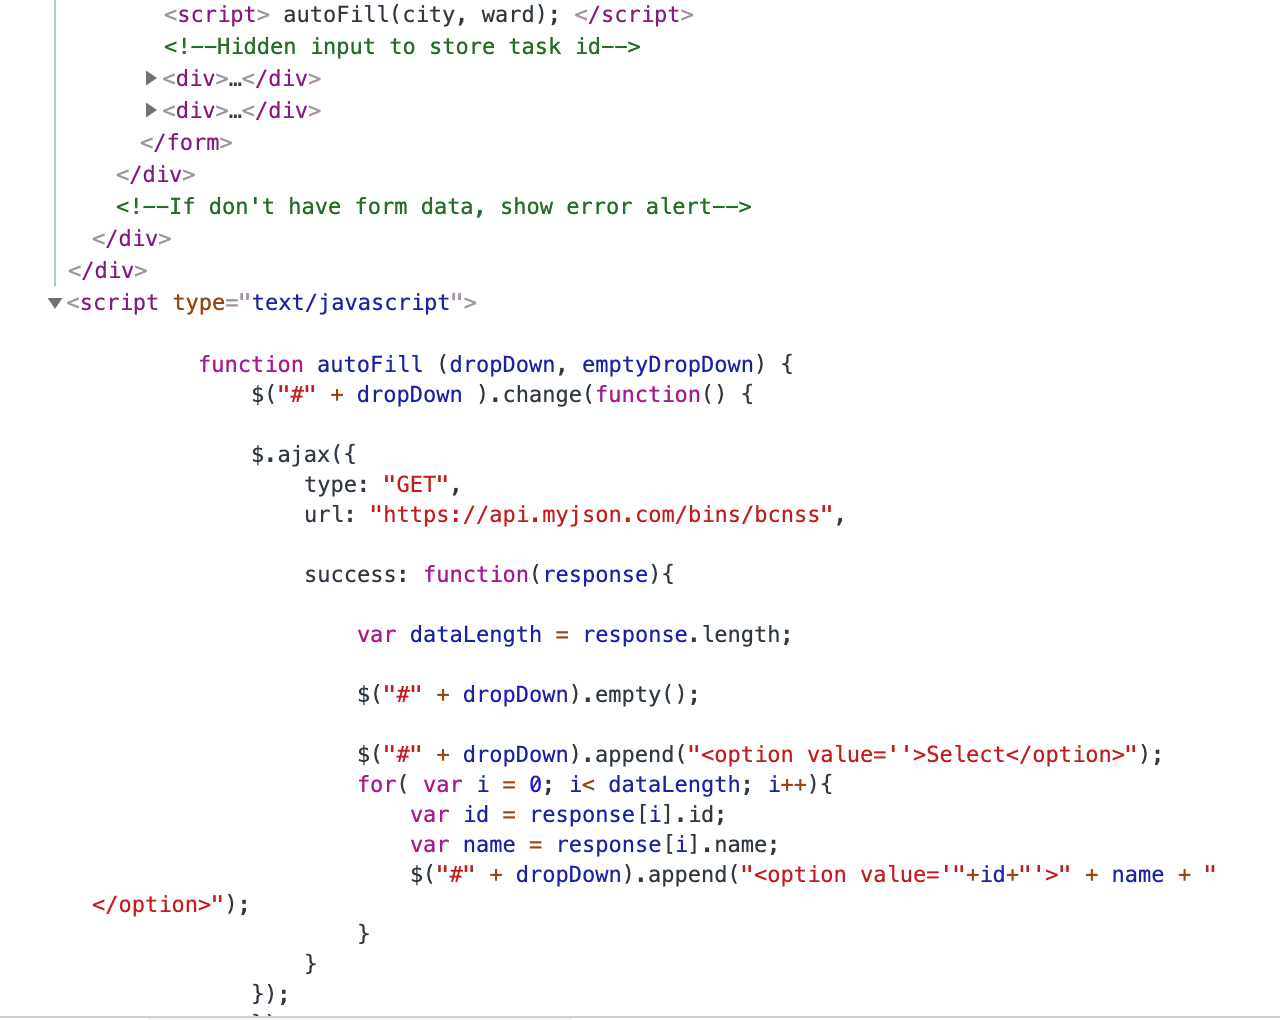
- Send Chat Messages: Create a PHP function to handle sending chat messages. This function will receive the message content, validate it, and store it in the database along with the user’s ID and timestamp. Implement real-time update functionality using AJAX or WebSocket to immediately display the new message to users without refreshing the page.
- Implement User Logout: Create a PHP function to handle user logout. This function will destroy the session and redirect the user to the login page or homepage. Provide a secure logout mechanism to prevent session hijacking.
Always sanitize and validate user input to prevent SQL injection and XSS attacks. Use prepared statements or parameterized queries to protect against SQL injection. Additionally, ensure that sensitive information, such as user passwords, is stored securely by using encryption and hashing techniques.
Congratulations! You have now created the PHP functions for your chatting website. In the next section, we will move on to creating the JavaScript functions to enhance the interactivity and real-time messaging capabilities of our website.
Creating JavaScript Functions
With the PHP functions implemented, we can now focus on creating the JavaScript functions that will enhance the interactivity and real-time messaging capabilities of our chatting website. JavaScript will allow us to dynamically update the chat window, handle user actions, and provide a smooth user experience. Follow these steps to create the JavaScript functions for your chatting website:
- Handle User Actions: Write JavaScript functions to handle user actions, such as submitting the chat message form, clicking on user profiles, or scrolling through the chat history. Use event listeners to capture these actions and trigger the appropriate functionality.
- Fetch Chat Messages: Implement JavaScript functions to retrieve chat messages from the server using AJAX or WebSocket. These functions will send requests to the server and update the chat window with the latest messages received. Implement pagination or infinite scrolling to handle large chat histories.
- Send Chat Messages: Create JavaScript functions to send chat messages to the server in real-time. These functions will capture the message content, send it to the server using AJAX or WebSocket, and update the chat window immediately to display the sent message to the user.
- Update Online User List: Implement JavaScript functions to update the list of online users in real-time. These functions will receive updates from the server whenever a user logs in or logs out and dynamically update the user list on the webpage.
- Implement Real-time Notifications: Create JavaScript functions to display real-time notifications for new messages or user activities. These functions will trigger notifications when the user receives a new message or when other users perform actions that require attention.
- Validate User Input: Implement JavaScript functions to validate user input on the client-side before sending it to the server. This can include checking for empty fields, validating email addresses, or ensuring the message content is within the character limit.
Consider using JavaScript libraries such as jQuery, Vue.js, or React.js to simplify and enhance the development of JavaScript functions. These libraries provide helpful features like DOM manipulation, AJAX requests, and component-based development that can speed up the development process.
Remember to optimize your JavaScript code by minimizing HTTP requests, reducing unnecessary DOM manipulations, and utilizing caching techniques. Regularly test your JavaScript functions on different browsers to ensure cross-browser compatibility and consistent behavior.
Congratulations! You have now created the JavaScript functions for your chatting website. In the next section, we will cover testing and troubleshooting your website to ensure it functions as expected.
Testing and Troubleshooting
After completing the development of your chatting website, it is crucial to thoroughly test and troubleshoot the functionality to ensure that it works as expected. Testing will help identify and fix any bugs or issues that may affect the user experience. Follow these steps to effectively test and troubleshoot your chatting website:
- Functional Testing: Test each individual feature of your website to ensure they are working correctly. This includes user registration, login, sending and receiving messages, updating the user list, and any other functionalities. Verify that each feature functions as intended, with appropriate validations and error handling.
- Cross-Browser Compatibility: Test your website on multiple browsers and different versions to ensure compatibility. Check for any rendering or functionality issues that may arise on specific browsers, and make necessary adjustments to ensure a consistent experience across platforms.
- Responsiveness: Test your website on various devices with different screen sizes, including smartphones and tablets, to ensure it is responsive. Verify that the layout and functionality adapt correctly to different screen sizes and orientations.
- Security Testing: Conduct thorough security testing to identify any vulnerabilities in your website. Test for common security risks such as SQL injection, cross-site scripting (XSS), cross-site request forgery (CSRF), and session management vulnerabilities. Implement necessary measures, such as input validation and using secure coding practices, to mitigate these risks.
- Error Handling: Test your website for error scenarios and ensure that appropriate error messages are displayed to the user in a clear and user-friendly manner. Implement proper error handling and logging mechanisms to assist in identifying and resolving any issues that may occur.
- Performance Testing: Measure the performance of your website by testing its load time, response time, and scalability. Optimize your code, minimize external requests, and implement caching techniques to improve performance. Monitor the website’s performance under different traffic loads to identify any bottlenecks.
- User Testing: Get feedback from real users by conducting user testing. Have individuals from your target audience use your website and provide feedback on its usability, functionality, and overall experience. Incorporate their suggestions and address any usability issues that arise.
- Troubleshooting: If any issues or bugs are identified during testing, troubleshoot them systematically. Identify the root cause of the problem and implement appropriate fixes. Use debugging tools, error logs, and relevant resources to assist in troubleshooting and resolving issues effectively.
Remember to test your website on different environments, such as the development server and the production server, to ensure that it functions consistently in each environment. Regularly update your website with security patches and bug fixes to maintain its performance and security over time.
By thoroughly testing and troubleshooting your chatting website, you can ensure a smooth user experience and a reliable platform for communication. Once you have addressed any issues, your website will be ready to launch and connect users from around the world.
Conclusion
Congratulations! You have successfully completed the development of your chatting website using PHP, HTML, CSS, and JavaScript. Throughout this guide, we covered the steps required to set up the development environment, create the necessary database and table, design the HTML layout, apply CSS styling, implement PHP functions, and create JavaScript functions to enhance interactivity and real-time messaging capabilities.
By following best practices and incorporating security measures, you have created a secure and efficient chatting website. You learned how to connect to the database, handle user registration and login, retrieve and send chat messages, update the online user list, and implement real-time notifications. Additionally, you gained knowledge about testing and troubleshooting your website to ensure that it functions as intended.
Remember, this guide provides you with a solid foundation for creating a chatting website. There are always ways to further enhance and customize your website based on your specific requirements and preferences. Continuously seek opportunities to improve your website by gathering user feedback, monitoring performance, and keeping up with the latest web development trends and technologies.
Building a chatting website can be a challenging but rewarding experience. It provides a platform for people to connect, communicate, and share ideas. By harnessing PHP, HTML, CSS, and JavaScript, you have the power to create an engaging and interactive environment that brings people together. Embrace creativity, strive for user-friendly design, and continue to enhance your website as you gain more experience and insights in web development.
Now, it’s time to launch your chatting website and witness the connections it brings. Happy chatting!