Introduction
Welcome to the world of live video streaming! With the rapid growth of technology and the increasing demand for interactive online experiences, creating a live video streaming website has become a popular venture. Whether you want to launch a platform for gamers, host live events, or provide educational content, having the ability to stream video in real time can offer countless opportunities to engage with your audience.
In this article, we will guide you through the process of creating a live video streaming website using PHP. We will cover everything from understanding the concept of live video streaming to setting up the development environment, integrating the necessary APIs, and building the user interface. By the end of this tutorial, you will have a solid foundation for launching your own live video streaming platform.
Live video streaming refers to the transmission of real-time video content over the internet. Unlike pre-recorded videos that can be uploaded and watched at any time, live streaming allows users to broadcast and view videos simultaneously, creating an interactive and immersive experience. Whether it’s a live sports event, a concert, a cooking show, or a tutorial, live streaming brings people together and allows them to connect in real time.
To create a live video streaming website, you will need a robust development environment that includes a web server, a database, and a programming language. In this tutorial, we will be using the PHP programming language, which is widely supported and offers a range of libraries and frameworks to simplify the development process.
Additionally, to stream live video, we will integrate an API that handles the video encoding, decoding, and streaming processes. There are several APIs available that specialize in live video streaming, and we will choose one that best suits our needs.
Building a user interface that is intuitive and visually appealing is crucial for the success of your live video streaming website. We will guide you through the process of designing and developing a user interface that provides seamless navigation and an immersive viewing experience for your users.
Once the website is ready, we will configure and test it to ensure that everything is working as intended. This includes setting up user authentication, testing the live streaming functionality, and performing any necessary optimizations to improve performance and user experience.
So, let’s embark on this exciting journey of creating a live video streaming website! By the end of this tutorial, you will have the necessary skills and knowledge to launch your own platform and start streaming live video content to your audience.
Understanding Live Video Streaming
Live video streaming is a technology that allows users to transmit and view real-time video content over the internet. Unlike traditional video sharing platforms where videos are pre-recorded and uploaded, live streaming enables users to broadcast and watch videos simultaneously. This creates an interactive experience and fosters a sense of immediacy and connection.
Live video streaming can be used for a variety of purposes, including but not limited to:
- Live Events: Broadcasting concerts, sports events, conferences, and other live shows to a global audience.
- Webinars and Workshops: Conducting online educational sessions, workshops, and training programs in real time.
- Product Launches: Showcasing new products and services to potential customers in an engaging and interactive way.
- Gaming: Live streaming gameplay sessions, allowing viewers to follow along and interact with the streamer.
- Social Media: Platforms like Facebook Live, Instagram Live, and YouTube Live have popularized the concept of live streaming, enabling users to share their experiences and connect with their audience in real time.
Live streaming has gained immense popularity due to its ability to create a sense of authenticity and spontaneity. It allows content creators to interact with their audience in real time by responding to comments, answering questions, and even receiving live feedback. This level of engagement helps build a loyal and active community around the content.
When it comes to implementing live video streaming on your website, there are a few key components to consider:
- Encoding: The video content needs to be converted into a suitable format for streaming over the internet. This involves compressing the video file and encoding it into a compatible format that can be easily transmitted.
- Decoding: On the viewer’s end, the streamed video needs to be decoded and displayed in real time. This requires the viewer’s device to have the necessary software and hardware capabilities.
- Streaming Server: A streaming server or content delivery network (CDN) is responsible for transmitting the live video content to viewers. It ensures a smooth and uninterrupted streaming experience by efficiently distributing the video data across different network nodes.
- Playback: Viewers need a compatible media player to play the live stream. This can be a web-based player or a dedicated video player application.
Understanding these components will help us in the development process as we integrate the necessary APIs and tools to create a seamless live video streaming experience for our users.
In our next section, we will discuss how to set up the development environment and start building our live video streaming website.
Setting Up the Development Environment
Before we start building our live video streaming website, we need to set up a suitable development environment. This includes configuring a web server, installing the necessary software, and preparing our development environment for PHP programming.
Here are the steps to follow in order to set up your development environment:
- Choose a Web Server: There are several web servers to choose from, such as Apache, Nginx, and Microsoft IIS. Select the one that best suits your needs and install it on your development machine.
- Install PHP: PHP is a server-side scripting language that will be used to develop our live video streaming website. Install the latest version of PHP on your system. You can download it from the official PHP website and refer to the installation instructions provided.
- Set up a Database: If your website will require a database to store user information, streaming data, or other relevant data, decide on the database management system (DBMS) you will use. Popular choices include MySQL, PostgreSQL, and SQLite. Install the DBMS of your choice and create a new database for your project.
- Editor and Development Tools: Choose a suitable code editor for PHP development. Popular options include Visual Studio Code, Sublime Text, and PHPStorm. Install any necessary plugins or extensions for PHP development. Additionally, set up Git or another version control system to track changes in your code.
- Install Dependencies: Depending on the framework or libraries you choose to use, you may need to install additional dependencies. For example, if you’re using a PHP framework like Laravel or Symfony, you’ll need to install their specific dependencies. Use a package manager like Composer to handle dependency management.
Once you have set up your development environment, you’re ready to start building your live video streaming website. Make sure you have a clear understanding of the requirements and functionality you want to implement. Plan your development process and create a project roadmap to keep track of your progress.
It’s also recommended to create a development sandbox or a local testing environment, where you can work on your live video streaming website without affecting your production environment. This will allow you to test new features, debug code, and ensure the stability and security of your website.
In the next section, we will discuss how to create a database and implement a user authentication system for our live video streaming website.
Creating a Database and User Authentication System
When building a live video streaming website, it is essential to have a database to store user information, stream data, and other relevant data. Additionally, implementing a user authentication system is crucial to ensure that only authorized users can access and interact with the website’s features.
Here are the steps to creating a database and user authentication system:
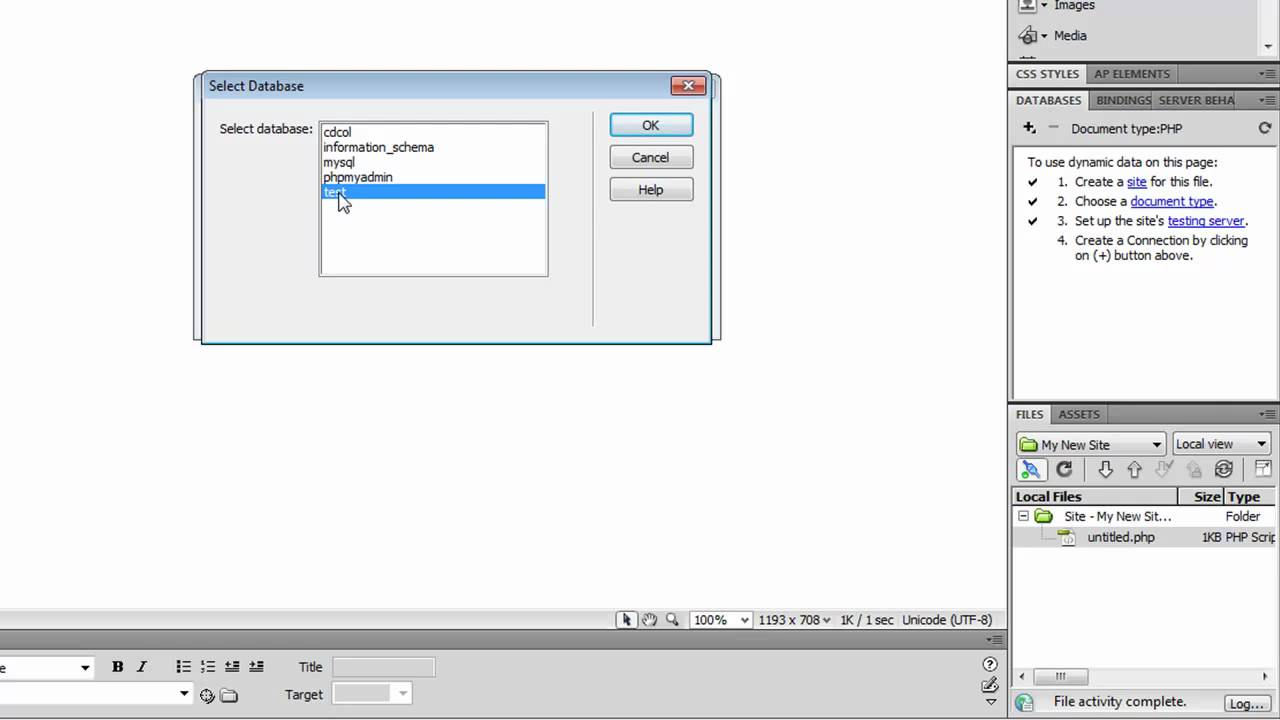
- Select a Database Management System: Choose a database management system (DBMS) that best suits your project’s requirements. Common options include MySQL, PostgreSQL, and SQLite. Install the DBMS on your server or local development environment.
- Create a New Database: Using the chosen DBMS, create a new database specifically for your live video streaming website. This will serve as the central repository for storing data related to users, live streams, and other website functionalities.
- Design the Database Schema: Plan and design the structure of your database by defining the tables, relationships, and attributes required. This includes tables for user information, live streams, comments, and any other relevant entities.
- Implement User Authentication: Using your preferred programming language, develop a user authentication system that allows users to create accounts, log in, and manage their profile. This may involve features such as user registration, login forms, password hashing, and user role management.
- Handle User Sessions: Implement a session management system to keep track of user activity and maintain session information for logged-in users. This will ensure a secure and seamless user experience throughout their interaction with the live video streaming website.
- Secure User Input: Apply proper input validation and sanitization techniques to protect your website from common security vulnerabilities such as SQL injection and cross-site scripting (XSS) attacks. Properly escaping user input and using parameterized queries can help mitigate these risks.
By creating a well-designed database schema and implementing a secure user authentication system, you can effectively manage user accounts and ensure that only authenticated users can access the features and functionalities of your live video streaming website.
Once the database and user authentication system are in place, you can move on to integrating the necessary APIs for video streaming in the next section of our tutorial.
Integrating the Video Streaming API
One of the key components of building a live video streaming website is integrating a video streaming API. This API will handle the encoding, decoding, and streaming of the live video content, ensuring a seamless streaming experience for your users. Choosing the right video streaming API is crucial for the success of your website.
Here are the steps to integrate a video streaming API into your live video streaming website:
- Select a Video Streaming API: Research and choose a video streaming API that aligns with your project’s requirements and goals. Consider factors such as pricing, scalability, video quality, and available features. Popular video streaming APIs include Wowza Streaming Engine, Vimeo Livestream, and DaCast.
- Obtain API Credentials: Sign up for an account and acquire the necessary API credentials from the video streaming API provider. This typically includes API keys or tokens that will be used to authenticate your website’s requests to the API.
- Integrate the API SDK: Follow the documentation and guidelines provided by the video streaming API provider to integrate their API SDK into your PHP application. This may involve installing dependencies, configuring API settings, and making use of the available functions and methods provided by the SDK.
- Handle Streaming Workflow: Implement the necessary functions and logic to handle the streaming workflow, including starting and stopping live streams, managing stream settings and configurations, monitoring stream health, and handling any error scenarios that may arise during the streaming process.
- Implement Stream Embedding: Create the necessary HTML and JavaScript code to embed the live video stream player into your website’s user interface. This may involve customizing the player’s appearance, controlling playback options, and providing a seamless viewing experience for your users.
- Test and Optimize: Perform thorough testing of the integrated video streaming API functionality to ensure that live video streams are properly encoded, streamed, and displayed. Optimize the streaming performance and user experience by monitoring and adjusting video quality settings, buffering behavior, and latency.
Integrating a reliable and efficient video streaming API into your live video streaming website will be a key factor in delivering high-quality live video content to your users. Make sure to closely follow the API documentation and explore the available features and customization options to enhance the overall streaming experience.
In the next section, we will discuss how to build the user interface for your live video streaming website, making it visually appealing and user-friendly.
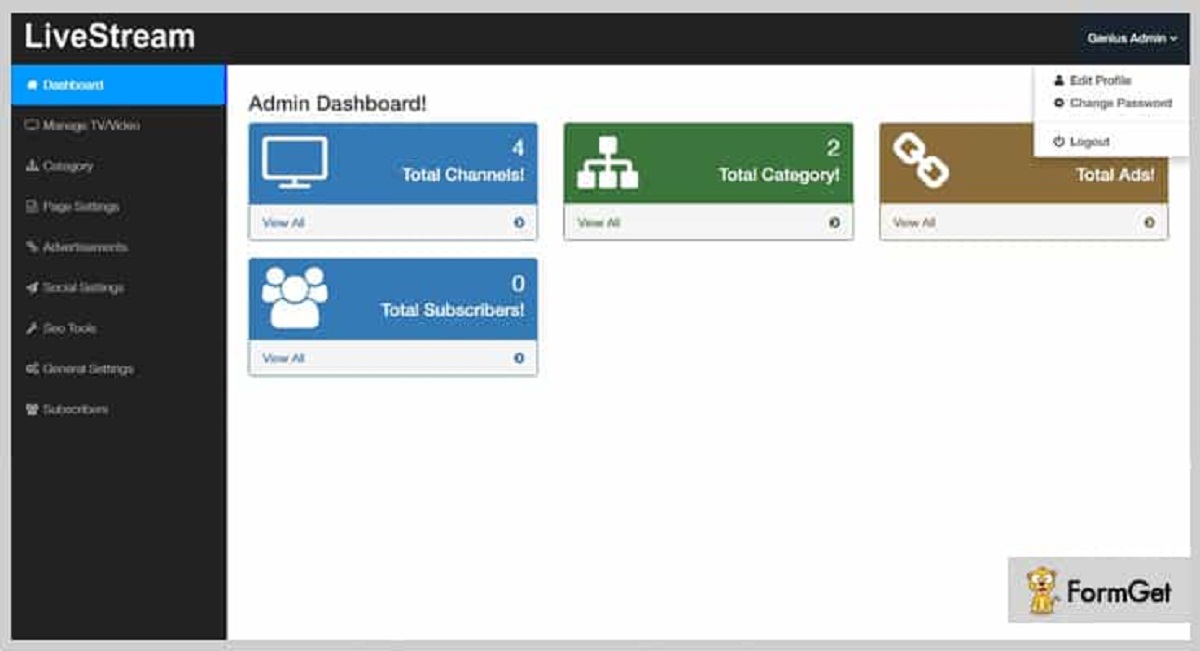
Building the User Interface
When it comes to the success of a live video streaming website, the user interface is a critical component. The design and layout of your website will greatly influence the user experience and engagement of your audience. Building a visually appealing, intuitive, and user-friendly interface is essential for attracting and retaining users.
Here are some key factors to consider when building the user interface for your live video streaming website:
- Responsive Design: Ensure that your website is responsive and compatible with different screen sizes and devices. This will allow users to access your live video streams from desktops, laptops, tablets, and mobile devices, providing a seamless viewing experience across all platforms.
- Clear Navigation: Design a navigation menu that is easy to understand and allows users to navigate between different sections of your website effortlessly. Place important links and buttons prominently to guide users towards the desired actions.
- Engaging Visuals: Use visually appealing graphics, images, and videos to captivate your users and create an immersive experience. Incorporate branding elements, color schemes, and typography that align with your website’s theme and target audience.
- Video Player Integration: Integrate the video streaming API’s player within your user interface. Customize its appearance to match your website’s design and ensure that it provides a straightforward and intuitive playback experience for users.
- Chat and Interaction Features: Implement chat functionality that allows users to interact with each other and engage with the live video stream. Enable features such as sending messages, emojis, and reactions to foster a sense of community and real-time participation.
- Live Stream Listings: Display a clear and organized list of live streams currently available on your website. Include information such as stream title, thumbnail, and streamer details to help users discover and choose the streams they are interested in.
- Profile Management: Provide users with the ability to create and manage their profiles. Allow them to customize their profile information, upload avatars or profile pictures, and view their streaming history or saved streams.
- Social Media Integration: Integrate social media sharing buttons to facilitate easy sharing of live streams on platforms like Facebook, Twitter, and Instagram. This will help expand your reach and attract new viewers to your website.
Remember to prioritize user experience when designing the user interface. Conduct usability tests and gather feedback from users to make continuous improvements to your interface’s design and functionality.
With an appealing and well-designed user interface, your live video streaming website will attract and engage users, enhancing their viewing experience and satisfaction.
In the next section, we will delve into the implementation of live streaming functionality on your website, allowing users to broadcast their own live video streams.
Implementing Live Streaming Functionality
Implementing live streaming functionality is a crucial aspect of building a live video streaming website. This feature allows users to broadcast their own live video streams and interact with their audience in real time. Here are the steps to implement live streaming functionality:
- Stream Key Generation: Generate unique stream keys for each user who wants to live stream on your website. These stream keys will be used to authenticate and authorize users’ streaming requests.
- Stream Configuration: Create a user interface that allows authenticated users to configure their live stream settings. This may include options such as stream title, description, privacy settings, and quality settings.
- Stream Recording: Implement the ability to record live streams so that users can view them later or share the recorded streams with others. This can be achieved by using a streaming server that supports DVR functionality.
- Stream Capture and Encoding: Use appropriate technologies and libraries to capture the live video feed from the user’s device, encode it into a compatible format for streaming, and transmit it to the streaming server.
- Stream Delivery: Set up a streaming server or content delivery network (CDN) to deliver the live video streams to the viewers. This ensures efficient and reliable delivery of the streams, minimizing buffering and latency issues.
- Stream Embedding: Provide users with an embed code or URL that they can share to allow others to view their live stream. Embedding the live stream player on other websites or social media platforms can help increase the reach and visibility of the live streams.
- Chat and Interaction: Enable real-time chat functionality alongside the live stream, allowing viewers to interact with the streamer and other viewers. This can create a more engaging and interactive experience for everyone involved.
- Stream Analytics: Implement analytics and tracking mechanisms to gather data on live stream viewership, engagement, and other relevant metrics. This information can be used to improve the streaming experience and make data-driven decisions for optimizing the website.
- Monitoring and Moderation: Set up monitoring tools and implement moderation features to ensure compliance with community guidelines and prevent misuse of the live streaming functionality. This may involve content moderation, user reporting mechanisms, and automated filters.
By implementing live streaming functionality, users on your website can share their experiences, connect with others, and engage in real-time conversations. It provides an interactive and immersive platform for users to express themselves and build a dedicated community around their live streams.
As you implement live streaming functionality on your website, ensure that you thoroughly test and monitor the performance and stability of the streaming process. Continuously optimize and refine the streaming workflow to deliver the best possible experience to your users.
In the next section, we will cover the configuration and testing of your live video streaming website to ensure that everything is functioning as expected.
Configuring and Testing the Website
Once you have built the core functionalities of your live video streaming website, it is important to properly configure and thoroughly test the website to ensure smooth and reliable operation. This involves setting up various components, verifying the functionality, and optimizing the performance for the best possible user experience.
Here are the steps to configure and test your live video streaming website:
- Server Configuration: Fine-tune the server settings to optimize performance, security, and scalability. Configure factors such as caching, server timeouts, and maximum concurrent connections to match the expected traffic load of your website.
- SSL Certificate: Implement an SSL certificate to enable HTTPS encryption on your website. This enhances security and trust, particularly when dealing with sensitive user information such as login credentials.
- Content Delivery Network (CDN): Consider using a CDN to cache and distribute static assets and live video streams. This can significantly improve the load times and stream quality for users located in different geographical regions.
- User Authentication Testing: Verify the user authentication system by registering test user accounts, logging in, and validating the various user-related functionalities. Ensure that account creation, login, and password reset processes are functioning as intended.
- Live Streaming Testing: Test the live streaming functionality by streaming test content and validating its quality, stability, and compatibility across different devices and internet connections. Perform stress tests to evaluate the streaming server’s capacity and responsiveness under heavy concurrent streaming loads.
- User Interaction Testing: Validate the chat and interaction features of your website by simulating user interactions, sending messages, and verifying their real-time display. Ensure that viewers can interact with each other and with the streamer seamlessly.
- Responsive Design Testing: Test the responsiveness of your website across various devices and screen sizes. Ensure that the user interface adapts properly and remains usable on desktops, laptops, tablets, and mobile devices.
- Browser Compatibility Testing: Test your website on different web browsers, including popular options such as Chrome, Firefox, Safari, and Edge. Verify that the website displays correctly and functions as expected across these browsers.
- Error Handling and Logging: Implement robust error handling mechanisms and ensure that meaningful error messages are displayed to users when issues occur. Monitor and log errors to facilitate troubleshooting and continuous improvement of the website.
- Website Performance Optimization: Conduct performance tests to identify bottlenecks and optimize the website’s speed and efficiency. Optimize the loading time of web pages, minimize file sizes, and implement caching mechanisms to improve overall performance.
Thoroughly testing your live video streaming website in various scenarios and configurations will help identify any potential issues and ensure a seamless user experience. Continuously monitor and analyze website metrics, user feedback, and performance indicators to make necessary improvements and updates.
In the next section, we will conclude our guide and summarize the key steps covered in building a live video streaming website using PHP.
Conclusion
Congratulations on completing the journey of building a live video streaming website using PHP! Throughout this tutorial, we have covered various important aspects of creating a successful live video streaming platform.
We started by understanding the concept of live video streaming and its use cases. Then, we proceeded to set up the development environment, including configuring a web server, installing PHP, and setting up the database management system. We also implemented a user authentication system to ensure secure access to the website’s features.
Next, we integrated a video streaming API to handle the encoding, decoding, and streaming of live video content. This allowed users to broadcast and share their live streams with others in real time. We focused on designing and building a user interface that was visually appealing, intuitive, and user-friendly. By implementing features like chat and interaction, we enhanced the overall user experience and engagement.
Afterwards, we discussed the importance of configuring and testing the website to ensure smooth operation and optimal performance. This included server configuration, SSL implementation, CDN integration, and extensive testing of user authentication, live streaming, user interaction, and website responsiveness.
Building a live video streaming website requires continuous monitoring, improvement, and adaptation to meet the evolving needs of your users. User feedback and analytics play a crucial role in understanding user behavior and shaping the future development of your website.
Remember, as technology advances, there are always new features and functionalities to explore. Consider expanding your website’s capabilities with features like recording and playback of live streams, monetization options, and enhanced analytics.
We hope that this tutorial has provided you with a solid foundation for creating your own live video streaming website. Remember to stay updated with current trends and technologies in the field of live streaming to ensure that your website remains innovative and competitive.
Now, it’s time to unleash your creativity, put your skills to work, and launch your live video streaming website. Good luck, and may your website bring joy, engagement, and outstanding live streaming experiences to users around the world!